It’s time to announce the four lucky winners of the Product Release Blog Hop posts HERE and HERE. I’m so thrilled that you enjoyed the wonderful inspiration and this release. Here are the lucky winners…
Ladies, email me within 7 days and I’ll send over the gift certificates so you can shop!
For those waiting on items to be restocked, they have all been reordered and I’ll be updating once they arrive. Thank you to everyone who left comments on the blog hop and for the special guests and designers who shared their beautiful inspiration using our new release!
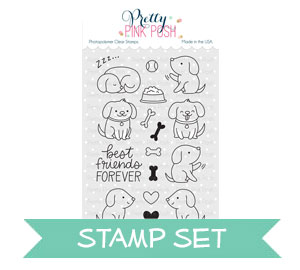
I hope by now all of you Pretty Pink Posh lovers have seen their newest product release. What is your favorite product? My favorite stamp set is definitely the Playful Puppiesas I am a big time dog lover and have two (Maltipoo and Cockapoo). I have two cards using this set to share with you today. I have another three on my blog, so come visit to see my “one stamp, five ways” blog post.
I used the very first Storybook 1 die for this card and it still remains my favorite of them all. The sentiment in the Playful Puppies set fits perfectly in one of the windows. I die-cut it from white cardstock and attached two of the three inside pieces to my card base. I stamped the sentiment with red embossing powder in the other opening.
I stamped all of my images with a natural color of ink and then colored them in with Copic Markers. I added details and shading with colored pencils. I love layering different coloring mediums. I also like to outline my images with colored pencils so they have a soft colored outline. I colored the background of each of the openings with blue Copic markers and used a warm gray for the ground. I then attached the die-cut images over the background. I added some of my new favorite jewels in Sparkling Clear. I also added some red Tonic Nuvo Drops.
Next I made a shaker card using the Stitched Pieces die. I watercolored some purple and pink stripes on watercolor paper to use behind the openings. I added foam tape behind the front of the card so each of the openings is a separate pocket. I filled the top pocket with stamped hearts from the Playful Puppies set. I filled the bottom opening with Jewels in Pearl White, Watermelon, and Pansy Purple.
I stamped the puppies on white cardstock with a natural ink and then colored them in with Copics and colored pencils again. I attached them over the bottom pocket with another heart. I stamped the sentiment in the center opening with white embossing powder.
Thanks for visiting the PPP blog today. I hope you are leaving inspired to use this Playful Puppies stamp set!
We are excited to announce the winners of the 2018 Mega Sponsor Spring Blog Hop. Thank you to all who participated! We are so happy that you joined in on the fun.
The lucky winner of the $30 Pretty Pink Posh gift certificate is: Linda K Kahn
We had so much fun participating in this blog hop- thank you for all the lovely comments. Watch for future Mega Sponsor giveaways!
Hi, there! It’s Marge here with you and I’m sharing two shaker cards featuring the new Hugs Shaker Die from Pretty Pink Posh. I’m so glad to share these as I really had fun playing with the shaker die along with other new products from the May 2018 Release.
I started my cards by diecutting Hugs Shaker Die out of heavyweight white card stock . I also cut lovely pastel colored pattern papers to use as front panels of the cards. Then I adhered acetate film on the back of front panel, and then adhered Hugs Shaker Die cut onto the front surface of acetate film.
Now I finished my two cards. As Pretty Pink Posh provides us all colors of beautiful sequins, jewels, and seed beads, I always enjoy making my own assortment according to the color schemes of my cards.
PRIZES: be sure to leave comments on each stop. I’m giving away 4 $25 gift certificates to four random comments (2 winners each day) left before May 14, 2018 at 11:59 PM PDT. I’ll be announcing the winners next week, so be sure to return and see if you are one of the winners!
We hope that you enjoyed the blog hop these last two days. Be sure to leave comments on all the stops- we’ll be randomly picking comments to win gift certificates.
Hello, Gemma here today to share a card for the May blog hop. When I think of fuchsias, I think of the classic pink and purple flowers so I chose this colour scheme for my card today.
Next, I blended on some distress oxide inks in Picked Raspberry and Seedless Preserves on the right hand side of a white card base. I flicked it with water for distress details. I then used a Scallop Border die to trim down another panel of white card, which will sit on top of the card base and allow the pop of colour to show at the edge.
I planned out my layout of flowers and leaves to help me figure out the best placement for my sentiment. I then chose a sentiment from the Everyday Greetings stamp set, stamping it in black versafine ink and heat embossing with sparkle embossing powder.
I added the panel to the card base with some foam sheet behind, which adds some nice dimension. I then adhered the flowers and leaves on top, using a mix of liquid adhesive and foam squares.
I finished the card with a scattering of Pansy Purple jewels, which fit the colour scheme perfectly.
Ready to hop along and see LOTS more fabulous inspiration with this new release?
PRIZES: be sure to leave comments on each stop. I’m giving away 4 $25 gift certificates to four random comments (2 winners each day) left before May 14, 2018 at 11:59 PM PDT. I’ll be announcing the winners next week, so be sure to return and see if you are one of the winners!
There is so much amazing inspiration today, I hope you enjoy it all! Be sure to leave comments on all the stops- we’ll be randomly picking comments to win gift certificates. See you tomorrow!
Rina here for a tutorial on a get well easel card. I wanted to create a fun card for someone who is not feeling so well in fun spring colors, with fun, playful images. Easel cards are great because they are great to display and they can stand up by themselves, so the recipient can see and enjoy them! A message can be written on the inside or in back of the easel card. What is also great is these cards can also lay flat and be put inside an envelope.
For inspiration I imagined that all my Pretty Pink Posh stamp sets were just one giant stamp set. I picked and chose the images that I wanted to achieve the look I was going for. Here is what I decided to use:
The images were colored in Copic Markers, here is what I used:
Blue Green – BG10, BG11, BG32
Yellow – Y00, Y13
Pinks – R11, R21, R22, R24, R32, R14
Blacks – C1, C3, C5, C7
The background was created using Distress Oxide Inks in Fossilized Amber, Broken China, Cracked Pistachio and Worn Lipstick. A distress sprayer can be used for a soft distressed look. I used the Picket Fence die to ground the bears. For small images, I used the Zots Bling Glue Dots to adhere them to the background.
Here is how I constructed the Easel Card:
Start with an A2 card base, fold the front in, mountain fold style
On the bottom of the mountain fold adhere a 4 ¼ x 5 ½ inch decorated card front (only the bottom of the fold)
On the inside of the card base, figure out where you want the card front to rest
Apply an embellishment or a sentiment on a piece of paper and double foam tape it on the inside card base to allow the card front to rest on
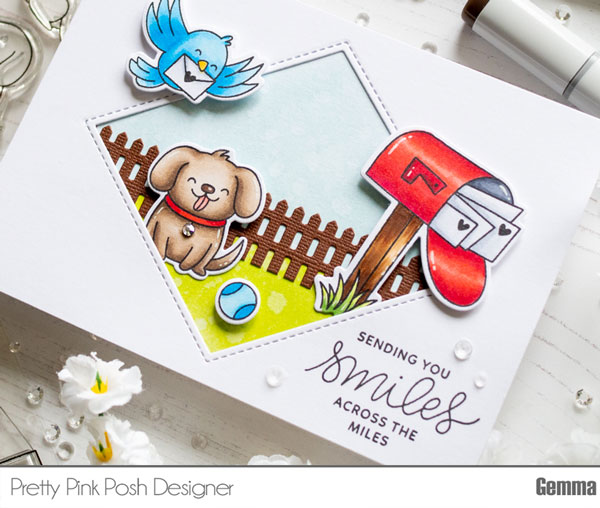
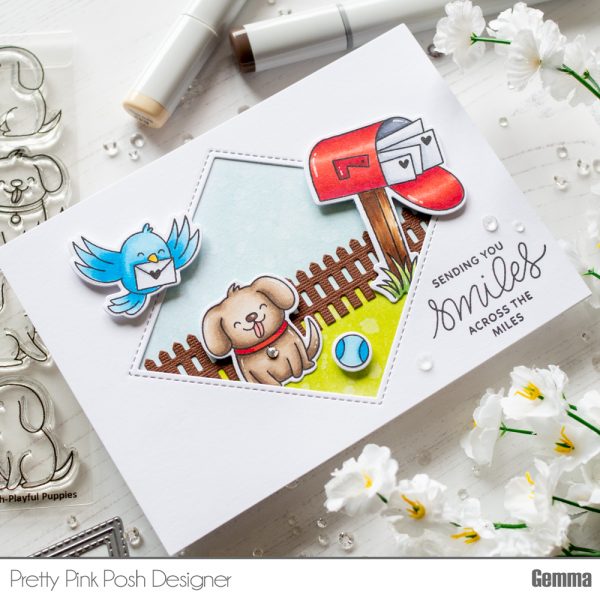
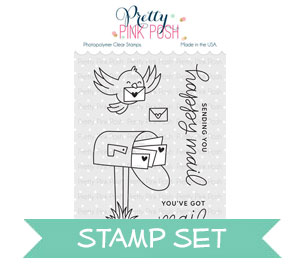
Hello, Gemma here today sharing a card using the new Playful Puppies set. It teams up so well with the Happy Mail set, I decided to make a scene card featuring them both.
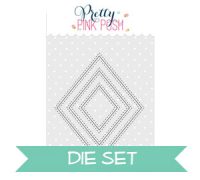
On a piece of white card, cut to the same size as my card base, I die cut a simple stitched diamond to create a window opening. On the card base, I blended on a light layer of blue and greens ink, for the sky and grass of the scene. I flicked them with some water for droplet details.
To help build the scene, I die cut a Picket Fence from brown card stock. I adhered this to the card base, then added the card panel over the top. I found a lovely sentiment from the Encouraging Greetings stamp set, which fit the scene and the space perfectly.
Next, I stamped lots of the images from the Playful Puppies and Happy Mail stamp sets, and coloured them with copic markers. I then die cut them with the coordinating dies.
I tucked the mailbox and the dog under the edge of the diamond window (using the Stitched Diamonds die set), then added some foam squares at the top of each image for some dimension. Then I added the bird flying down towards the scene and the ball next to the dog, both with foam tape. I love the look of the images breaking out of the window scene.
Finally, I added some of the gorgeous new jewels to the card. A few of the Sparkling Clear jewels around the sentiment, and a Metallic Silver jewel is the perfect finishing touch on the dog’s collar tag.
The May 2018 Release is now available in the Pretty Pink Posh Shop and select retailers that carry our products. If you missed our post yesterday, we revealed all of the products in picture form, but if you would like to see them in a video, Eloise has you covered!
It’s Marge here with you today. Are you enjoying our new May Release Collection? Today I’m sharing a warm greeting card for your friends or family who are not feeling good. I hope this card will make the recipients feel better and know that we are always caring and praying for them.
Next, I trimmed Bristol paper into A2 size (4.25 x 5.5inch), then ink blended it with Distress Inks: Worn Lipstick and Tattered Rose with splatters of water and dark ink on it. I diecut Get Well Soon Script Die from Copic friendly paper three times, glued the pieces top on top, then I colored them using copic markers : W10-W8-W6.
Next, I adhered pieces of flowers and leaves on the left side of the panel as shown in the picture using a glue and thin double sided foam tapes. I also glued the sentiment on the right side . Then I adhered the panel onto A2 card base with double sided adhesives.
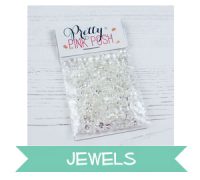
I’m excited to reveal all of the individual products that are part of this May 5th release. First up is JEWELS! Each package includes four sizes (3mm, 4mm, 5mm, 6mm)! This release I went with classics and they’re going to be stunning on all your projects!
Based upon the popularity of the last jewels, I have a bundle for these six new jewel colors. Plus, if you purchase the bundle, you’ll save 10%!
Here’s a look at the five new stamp sets that will be available for purchase: Butterfly Friends, Flourishing Fuchsias, Happy Mail, Playful Puppies and Simple Sayings: Life.
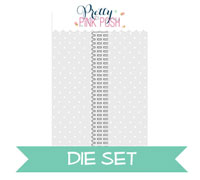
Here are the three new individual die sets that will be available: Get Well Soon Script, Hugs Shaker and Lovely Script.
I have a limited amount of bundles available where you can buy the whole collection in one easy click. As usual, you’ll save 10% if you purchase this bundle.
We will see you tomorrow as we show you the new products in a video, the individual products go live in the shop and we’ll have a card sharing some of the new products!
Jeanne here today and I can’t tell you how excited I am to be sharing in the sneak peeks of the Pretty Pink Posh May Release! You know I love dies and I bet you do too! I’ve got some new ones to show you today!!
The new Get Well Soon Script Die makes a big impression! For this card I inked up a background of clouds and then die cut the panel with the sentiment. What I love about this die (beyond the beautiful handwritten font) is that the three words are together on one die (they’re not meant to be cut apart) so you do an inlay technique they’re perfectly positioned with one run through your die cut machine. These three aren’t going to fall apart after you use them a few times like others I’ve had.
I chose the Playful Puppies for this get well card because no one misses me more when I’m down than my dog. She’s always ready to play or go for a walk, and if I’m under the weather there are two of us that aren’t happy!
I love making scenes with dies! The Scallop Borders 1 make a wonderful grassy yard, and the Picket Fence make it more like home!
I paired the Hugs Shaker die with the new Happy Mail stamp set. I filled it with my own mix of sequins from the store including Lemon Drop, Lemon Meringue, Sunshine Glow. If you look close, there’s another new surprise….Metallic Gold Jewels. They’re gorgeous! They look like diamonds dipped in gold!
Again I started this card with a distress inked sky. This time I cut a Stitched Borders 1 grassy hill for the Happy Mail mailbox. I stamped a sentiment on the green cardstock and attached it to the cloudy panel.
The Summer Flower sequins are the prefect embellishment for adding flowers to scenes. The size of the flowers is in proportion with the stamped images. It’s going to be a nice day!
I put yellow card stock behind the Hugs Shaker die so it looks like a sun in the blue sky! Everybody loves a little happy mail!
I hope you enjoyed today’s cards and look at some of the new dies. Join us tomorrow as we reveal the whole May 5th release!


 To finish off the card, I added some


