Hi everyone it’s Ardyth and today is my very first time on the Pretty Pink Posh blog and YouTube channel! I have a video tutorial to share using the new Pinata Party set.
I used the Pinata Party set to make a fun shaker card with a special feature! The Pinata is hanging on some twine, so he can swing inside the shaker among all the fun jewels and sequins!
I started by stamping the background – I used one the Let’s Party sentiments from the set and created a grid by stamping it, turning the stamp and then stamping again. I added some colourful stamped confetti to the background, so that when all the jewels and sequins settle, there are still bright happy colours all over the card!
I built my shaker frame with 6 layers of the large Scallop Square die cut. This seemed to work fine, but I still think that next time, I’ll use 7 to give my shaker fillers a bit more room. I put acetate behind the top layer of the shaker frame, and I glued the silver twine to the second layer of the frame, so that the pinata could swing from that. I used some anti-static powder on the acetate so he could swing freely without getting stuck on the acetate.
Then I used some of the new Party Mix jewels and Sparkling Clear Confetti Mix as my shaker filler. I stamped another sentiment and some confetti on the inside of the card as well. I love how it looks like the pinata has already exploded, and the party is ready to start!
Thank you so much for stopping by today, I hope you enjoyed the card and video.
Hey there everyone, it’s Lindsay! I’m sure you all are really enjoying the new release! I’m loving all the birthday and celebration themed items since I’m always running low on birthday cards. For today’s card, I paired the Crocus Flowers stamp set and coordinating die set with the Celebrate Shaker Die to make a festive shaker card.
I wanted the shaker element to be an embellishment on its own and really pop. So I started with cutting out 3 of the Celebrate Shaker Die pieces and gluing them together. I then added an acetate sheet behind all 3 layers of the Celebrate Shaker Die. To that, I put foam tape around all the edges of the shaker piece and added in lots of confetti from the Sugar Plum Confetti Mix. I then cut out a rectangle piece just perfect to fit behind the shaker die and adhered that to the foam tape.
Hi friends, Angelica here and today I’m sharing a fun shaker card using new products from the Pretty Pink Posh January release. I am so in love with the new Cupcake Critters stamp set, and the images pair perfectly with the new Celebrate Shaker die.
My first step was coloring the cupcake critter. I stamped the image onto white card stock with Copic-friendly ink. I then colored the image with Copic Markers. I started with the bunny: W5, W3, W1, W00, R00. For the frosting, I used V00, V01, V12, V15. I colored the frosting with V00, did a little shading with V01, then did little dots of colors to finish the rest of shading, and to add texture. For the wrapper, I used Y21, Y23, Y26, Colorless Blender, and V91 for the drop-shade under the frosting. Lastly, the cherry I colored with R24, R27, R29, and R59. I used each marker to draw a line, leaving white space around the stem.
My next step was inking the card front. I used Scattered Straw and Wilted Violet Distress Oxide Inks to blend onto Neenah Solar White 80 lb card stock. I started at the top with the Scattered Straw, blending ink down towards the middle of the card front. I blended the same with the Wilted Violet, blending the ink up towards the middle. I didn’t want the inks touching too much. When I was finished, I tapped shimmer water all over the paper. I let the water sit for about 15 seconds, then dabbed the water up with a paper towel. This left shimmery drops all over paper.
To make the shaker element, I ran the card front through my die-cut machine with the Celebrate Shaker die. I then closed the window from the backside with a piece of acetate and 1/8 inch Scor Tape. I die-cut Celebrate again out of white card stock that I had added Stick It Adhesive to on the backside. This made it really easy to attach the die cut to the front of the shaker window. I flipped the card front around to the backside and added Darice Double-sided Adhesive Strips to all four sides of the window. I filled the window with Sugar Plum Jewels and Sugar Plum Confetti, then closed the window with another piece of acetate. I added foam tape to the rest of the back and attached the card front to an A2 size card base. I used thin adhesive squares to add the Cupcake Critter, then used W3 and W1 Copic markers to draw a quick shadow under the cupcake. My final touch was adding a few Sugar Plum Jewels using Ranger Multi Media Matte.
No party would be complete without guests, gifts and a party favor, right? During the celebration, save 10% off your order using the coupon code provided below.
For the celebration, I brought along some very special guests to celebrate with us. Be sure to leave them lots of comments on their blogs and check out their amazing projects!
We have lots of amazing designers in today’s blog hop sharing new inspiration. Be sure to leave them lots of love- I’ll be giving away prizes to some comments left on their blogs!
PRIZES: We’ll be giving away 3 $25 gift certificates to random comments left on the different stops every day! That’s right, we’re giving away a total of NINE $25 gift certificates over the three days! Comments must be left before January 17th at 11:59 PM PST. I’ll be announcing the winners next week, so be sure to return and see if you are one of the winners!
Thank you for celebrating with me. I’m looking forward to the upcoming year and bringing you new products and inspiration. Have a great weekend!
Hello and welcome to Day 2 of the Pretty Pink Posh 5th birthday celebration! If you missed Day 1, click here.
Gemma here and today I’m sharing a card using the new Pinata Party stamp set. I absolutely love this set!! The images are so much fun and the sentiments are perfect!
I began by working on the background. I stamped the solid pennant image with dye inks, choosing colours to match the new Party Jewels Mix. I stamped two per colour, die cut them out with the Pinata Partycoordinating die, then used foam tape to create vertical borders on both edges of my card base.
Next, I stamped and copic coloured the unicorn pinata image and die cut it with the coordinating die. I used a clear glitter pen all over it for lots of sparkle.
I cut a piece of gold thread to add to the back of the pinata, then used foam tape to add the unicorn to the white card panel. I tucked the end of the gold thread behind the panel, then added it to the card base with lots of foam tape.
Using the same ink colours as I used for the pennant images, I stamped some confetti images around the unicorn. I then finished with some jewels from the new Party Jewels Mix, adding them around the unicorn and also to the center of the pennants.
No party would be complete without guests, gifts and a party favor, right? During the celebration, save 10% off your order using the coupon code provided below.
For the celebration, I brought along some very special guests to celebrate with us. Be sure to leave them lots of comments on their blogs and check out their amazing projects!
PRIZES: We’ll be giving away 3 $25 gift certificates to random comments left on the different stops every day! That’s right, we’re giving away a total of NINE $25 gift certificates over the three days! Comments must be left before January 17th at 11:59 PM PST. I’ll be announcing the winners next week, so be sure to return and see if you are one of the winners!
Thank you for celebrating with me today and for all the love! I’ll see you bright and early tomorrow for day #3 of the birthday celebration. I hope you have a fabulous day!
Hi everyone, it’s Marge here and I’m so happy to share my card featuring the brand new January Release with you. I made a window scene card using Decorative Tag 2 Dies from the New Release.
I used Stitched Borders 1 Dies to make a roof and a wall for my tag. Then I scored down vertically along wavy borders on each die cut to give patterns to the walls.
I cut another window using Mini Storybook 1 Dies out of pastel pink pattern paper which will be main background for my tag and then I assembled those pieces using foam adhesives. Next, I added floral images around the Decorative Tag 2 using Micro Glue Dots. Sentiment was chosen from Floral Hearts stamp set and was heat embossed in white on red card stock. Now, what would expect to see inside the door?
Lastly, here are copic marker numbers I used. Leaves (G29-G28-G07-YG03 ), Purple (BV08-V17-V15-V12), Red (R59-R46-R43-R20), Orange (YR07-YR04-Y38), Yellow (Y38-Y17-Y15), Bunny (E13-E11-E00-E000), Cupcake (E18-E15-E13, BG18-BG15-BG13, R46-R43-R20)
No party would be complete without guests, gifts and a party favor, right? During the celebration, save 10% off your order using the coupon code provided below.
For the celebration, I brought along some very special guests to celebrate with us. Be sure to leave them lots of comments on their blogs and check out their amazing projects!
PRIZES: We’ll be giving away 3 $25 gift certificates to random comments left on the different stops every day! That’s right, we’re giving away a total of NINE $25 gift certificates over the three days! Comments must be left before January 17th at 11:59 PM PST. I’ll be announcing the winners next week, so be sure to return and see if you are one of the winners!
Thank you for celebrating with me and being so incredibly supportive. Go hop on over to the other stops, be inspired by the design team and special guests and be sure to share this with your friends. I’ll see you bright and early tomorrow for day #2 of the birthday celebration.
The January 2019 Release is now available in the Pretty Pink Posh Shop and select retailers that carry our products. If you missed our post yesterday, we revealed all of the products in picture form, but if you would like to see them in a video, we have that for you today!
Hello, Gemma here today to share a card using the beautiful new floral set, Crocus Flowers, which is part of the January release. I love crocuses and the images in this set are just perfect for colouring.
I began by stamping the images on white card, then colouring them with my copic markers. I used V17, V15, and V12, with some YR15 for the centres. For the leaves, I used G17, G14 and G12. I then die cut them with the coordinating dies.
From a piece of white card, I die cut the Stitched Pieces die. I placed it so it die cut off centre, towards the bottom right side. On my card base, I added some colour with milled lavender and seedless preserves distress oxide inks, concentrating the colour at the bottom and fading towards the top. I then adhered the white panel over the top.
Next, I tucked in the Crocus Flower images to the windows on the panel, popping some of the images up with foam squares. To keep the focus on the flowers, I stamped a small sentiment from the new Floral Hearts stamp set with black ink, following the vertical edge of the top stitched window.
To finish, I adhered some jewels from the Sugar Plum Mix around the card.
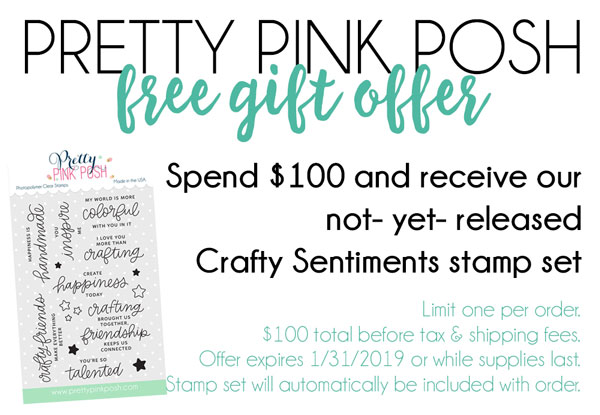
This month we are celebrating Pretty Pink Posh turning five years old! We have a coupon code, along with a free gift with purchases over $100. This is the perfect time to get new and old items and a chance to get a stamp set that hasn’t be released yet!
Enjoy browsing the Pretty Pink Posh Shop full of the new products. There will be more inspiration with the new release and later in the week, we’ll have a three day blog hop filled with even more inspiration!
I hope that you have enjoyed all the sneak peeks leading up to the January 8th release. Today we’re revealing all the individual products that will be available and for those who want to order the bundles, those are available for purchase.
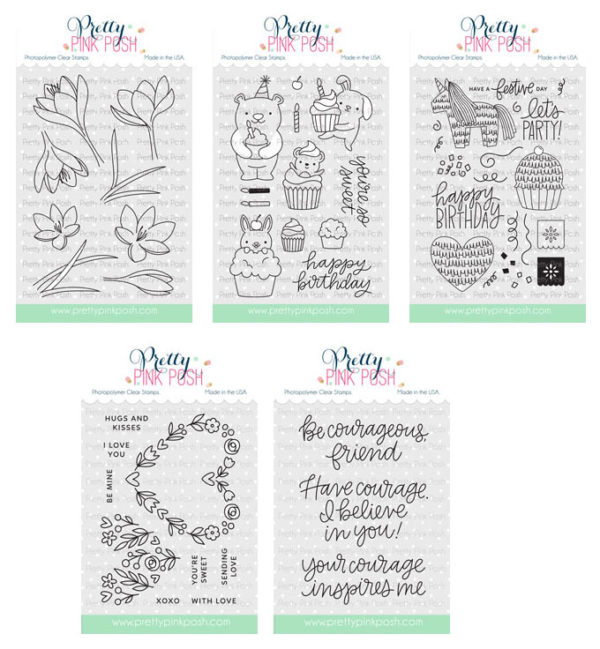
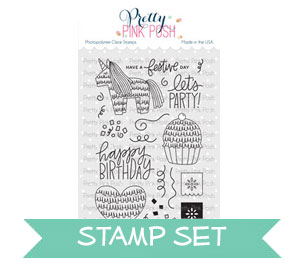
Here’s a look at the five new stamp sets that will be available for purchase: Crocus Flowers, Cupcake Critters, Pinata Party,Floral Hearts, and Simple Sayings: Courage.
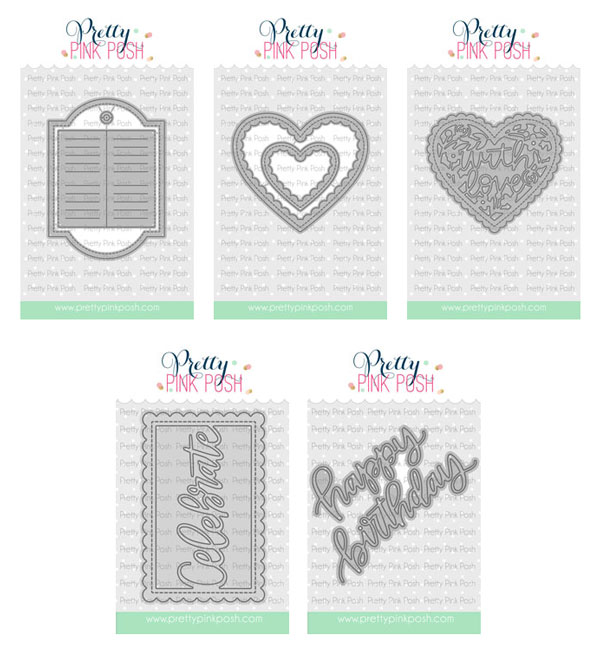
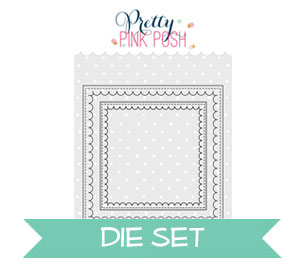
Here are the five new individual dies that will be available: Decorative Tag 2, Scallop Hearts, With Love Shaker, Celebrate Shaker and Happy Birthday Script.
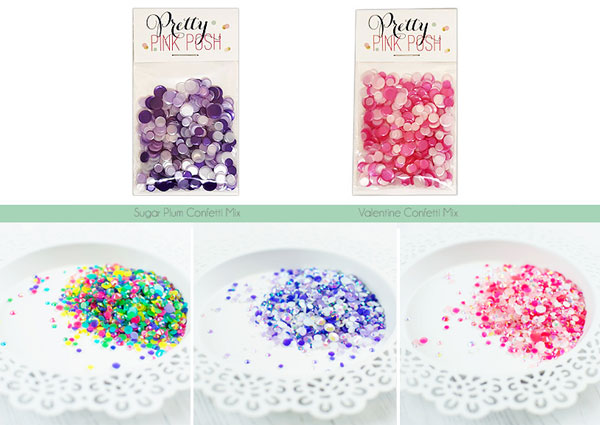
Lastly, we have two new confetti mixes and three jewel mixes! Each package comes with a variety of colors and sizes, which makes it ideal for those who want to try out our embellishments, or if you create shaker cards, these are all mixed for you already! The names of the mixes are: Sugar Plum Confetti Mix, Valentine Confetti Mix, Party Jewel Mix, Sugar Plum Jewel Mix and Valentine Jewel Mix.
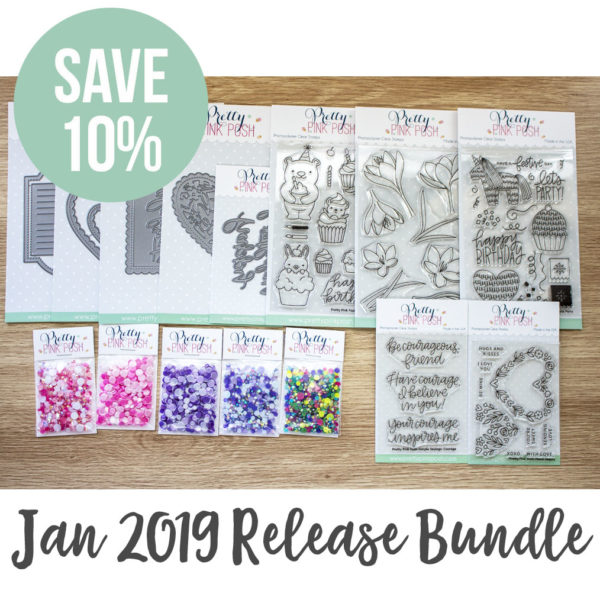
I have a limited amount of bundles available where you can buy the whole collection in one easy click. Plus, you’ll get 10% off and the free gift from this month automatically!
Lastly, here’s a look at the free gift that will be included with orders starting today, January 7th. Remember, these are while supplies last (I did order quite a bit, but cannot guarantee they will last through the end of the month).
We will see you tomorrow as we show you the new products in a video, the individual products go live in the shop and we’ll have a card sharing some of the new products!
Hi friends, Angelica here excited to share with you a sneak peek of the upcoming January release. We are celebrating Pretty Pink Posh’s 5th birthday, which means this release is full of birthday bliss! Today I will be focusing on a couple new dies that are in the release.
For my first card, I used the new Happy Birthday Script Die. I die-cut it 3 times out of white card stock, then one time out of white card stock that I had blended Peacock Feathers Distress Oxide ink onto. I glued and stacked the words together with Ranger Multi Media Matte.
Next I die-cut the large heart from the new Scallop Hearts die set out of white card stock. I blended Worn Lipstick Distress Oxide ink onto another piece of white card stock, then die cut with the heart again. I used the center of the inked heart for my card front.
To assemble the card front, I pieced the heart together, then fit it back into the die-cut frame. I mounted the card front onto a piece of craft foam, then attached it to an A2 size card base. I glued the words on, and added a little cupcake bear from the new Cupcake Critters stamp set that I had previously stamped and colored. My final touch was adding a few Sea Glass Jewels.
I started with a soft base of color first, then went back and added shading. Once the coloring was finished, I assembled the shaker element. I used the new Sugar Plum Confetti Mix, as well as the Sugar Plum Jewel Mix for inside the window. I closed the window with a piece of pink card stock.
I attached the card front to an A2 size card base, and added jewels from the new Party Jewels Mix to the middle of the yellow flowers.
That’s all I have for today. Thanks for stopping by, and be sure to check back tomorrow to buy the new release bundle and see the reveal of all the new products!
Hello stamping friends! Suzy here and I’m so excited to get to share with you one of the brand new Pretty Pink Posh stamp and dies sets called Cupcake Critters. This one was my favorite from the January 8th release and it goes so well with many of the other new birthday stamps and dies! Today I have two cards to share with you that focus on these cute birthday critters, but also use some of the other new products (which might be a sneak peek for you today!).
If you are familiar with my card style, you have probably seen me make cards with this technique before. I actually try to make one with each new stamp set because I love the look of random stamping so much! For this card, I stamped all of the images in the Cupcake Critters stamp set on white cardstock with a natural color of ink for no-line coloring. I like the images to go topsy turvy and curve all different directions. I think my love for making puzzles makes this technique really fun for me! (Note: Use a Misti tool to make this much easier!).
I colored all the images with colored pencils. I use both Prismacolors and Polychromos as I love them both for different reasons. I’ve gone into these details on some of my past blog posts on my blog if you want to read about them. I added shadows behind each image with a gray Copic Marker (N2) to make them look like they are dimensional on the paper.
For the sentiment, I used the new Happy Birthday Script Dies die-cut from white cardstock twice. I glued the two together so they would be more dimensional. I colored them with colored pencils to match my card front, but I think it would be much easier to color them with Copics or even use colored cardstock! I then used Glossy Accents over them and covered it in fine white glitter. I used some of the new Party Jewels Mix around the sentiment and as the dot on the I.
This card is my other favorite type of card to make – a shaker card. The PPP products lend themselves so well for shakers too! I started by stamping all of the images on white cardstock with a natural color of ink so I would have no-line coloring. I colored them in with colored pencils again, but this time I decided I wanted them to have outlines, so I used a fine tip black marker to add them. I used Glossy Accents to add some glitter to the cupcakes.
I used the largest Stitched Hexagon Die to create a shaker window. I then watercolored a piece of watercolor paper with three colors – orange, yellow, and green that fit behind the window. I used several sequins and jewels inside the window including 3mm Sparkling Clear Sequins, the new Party Jewels Mix, and the new Valentines Jewel Mix. I also stamped all of the confetti stamps from the new Pinata Party Stamp Set to include in the shaker window (I stamped them with a light color of ink and colored them with colored pencils, but you could just stamp them with colored ink).
I attached the colored critters to the front of the card overlapping the shaker window. I stamped the sentiment from the set (I had to cut it apart to use it horizontally) with a light color of ink and then drew over the letters with colored pencils. I used several shades of green and blue so it would look multi-colored.
Thanks for visiting today and don’t forget to stop by each day this week to see all of the new products! I love the birthday theme as birthday cards are the ones I need the most! I was covered with glitter on New Years Day after making these cards which you would think meant I had a great New Years Eve, but unfortunately it didn’t! (in bed by 9 haha). Have a great NEW YEAR friends and happy stamping!
Welcome to another day of Pretty Pink Posh January 2019 Product Release Sneak Peeks. Alix here showing you a beautiful set of stamp called Floral Hearts that you could fulfill your needs all year around.
It is a small set (3 x 4) with coordinating dies. I made two cards for different occasions to demonstrate how you could utilize this gem.
To begin with both of my cards, I stamped all images from Floral Hearts on a piece of 80lbs white card stock paper with Memento Tuxedo Black ink and colored them with my Copic markers. I die cut them with Floral Heart coordinating dies and set aside.
I ink blended background of A2 sized watercolor paper using Tim Holtz Distress Oxide ink in Tumbled Glass and Picked Raspberry. Then I splattered water drops over the background and blotted excess water with a piece of paper towel to create some texture. A dreamy background is done!
I used the outer heart shaped die cut from the coordinating dies to cut the upper center open in order to create a window. I attached a piece of acetate paper underneath the window and poured Valentine Confetti Mix to the background heart. In the end, I closed this shaker window using some foam strips and added already colored wreath on the top.
I stamped the sentiment “Have Courage. I believe in you!” using Versamark embossing ink and embossed with Metallic gold embossing powder. To bring the focus to the center, I added white frame cut to the card background using Scallop Frames Dies. I arranged a few Valentine Mix Jewels to finish this Not-So -Traditional Valentine’s card.
Now here comes a very traditional heart to heart Valentine’s Card. I ink blended background of A2 sized watercolor paper using Tim Holtz Distress Oxide ink in Worn Lipstick and Mustard Seed. I Again splattered water drops over the background and blotted excess water with a piece of paper towel to create some texture. As you could see, this technique comes in very handy.
I assembled some colored and cut images on the top of prepped background using Multi Medium Matte and Foam tapes. In order to have my sentiment piece to pop, I inked the inner piece of heart with Worn Lipstick oxide ink. I stamped one of small sentiment that comes with the Floral Heart Stamp set onto a piece of black card stock using Versamark embossing ink and embossed with White embossing powder. I hand cut the sentiment with scissors into a rectangle strip and attached it to the center of heart with Foam tape.At last, I embellished the card using my all time favorite 4mm Sparkling Clear Sequins and Jewels in Valentine Mix.
I hope you already fell in love with this set of stamp and dies after these two cards I made. Be sure to come back to check out more great products we have in our first release of 2019!


 I then had my