Easy Masking Hack for Your Next Card
Hi friends, it’s Carly here today. Do you use masking techniques in your cardmaking? I LOVE masking because it feels like magic but it’s actually so simple!
Watch the video above I Watch the video in HD on YouTube
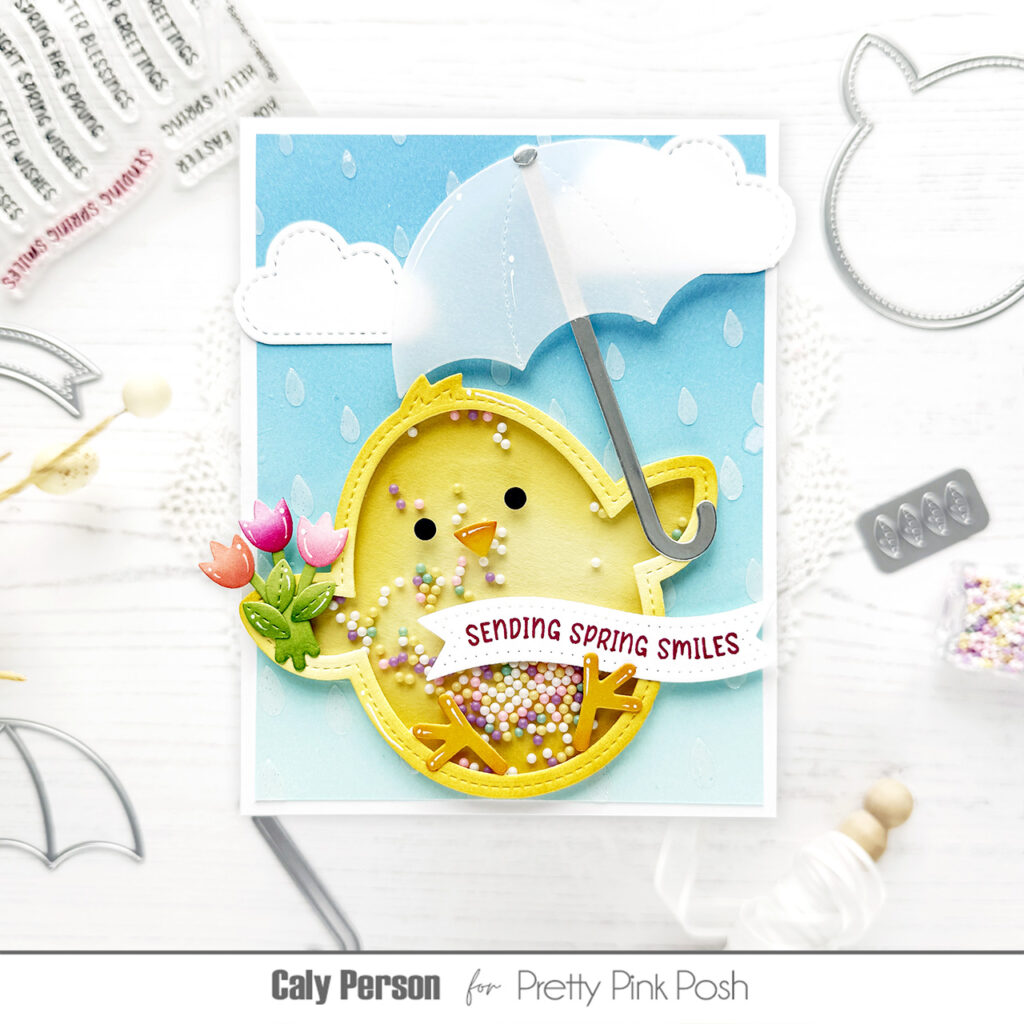
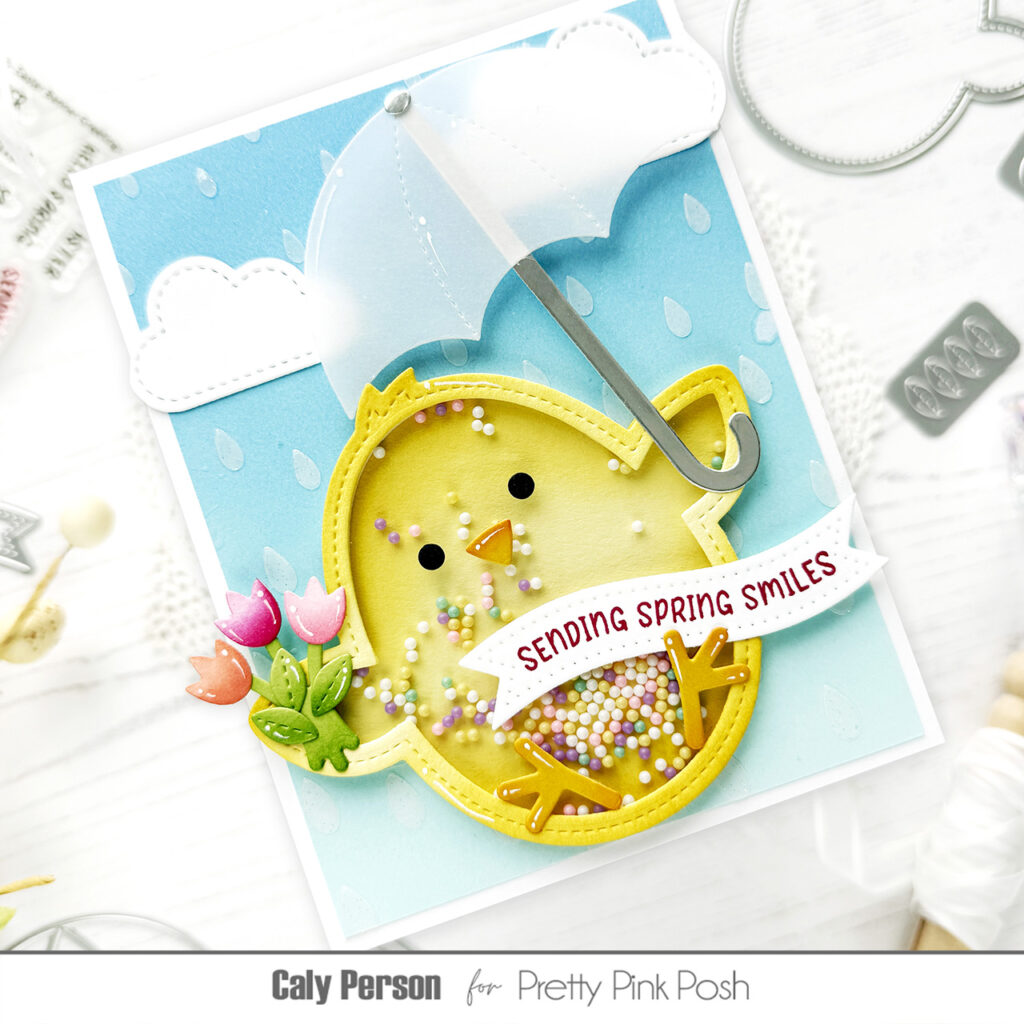
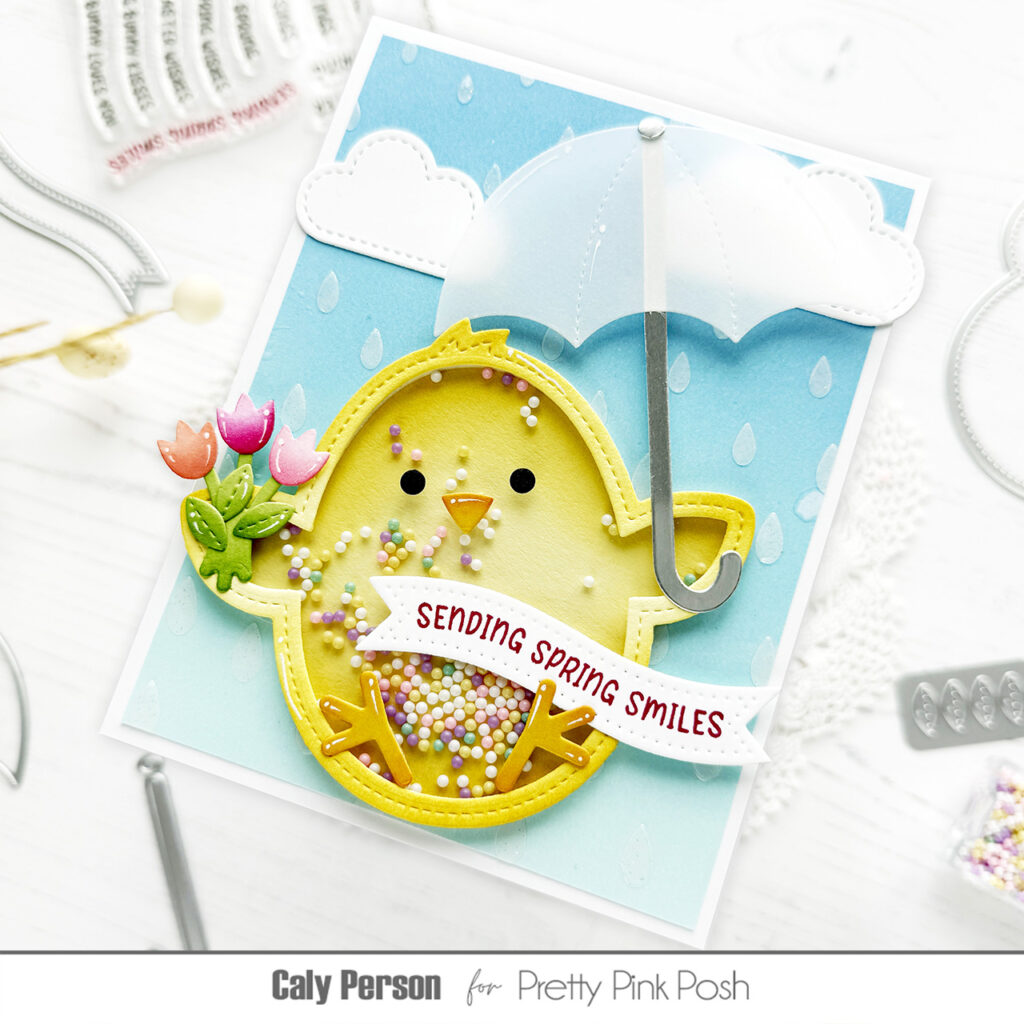
To create this rainy stenciled background, all I needed was a little low-tack masking tape and the Raindrops stencil. So easy peasy!
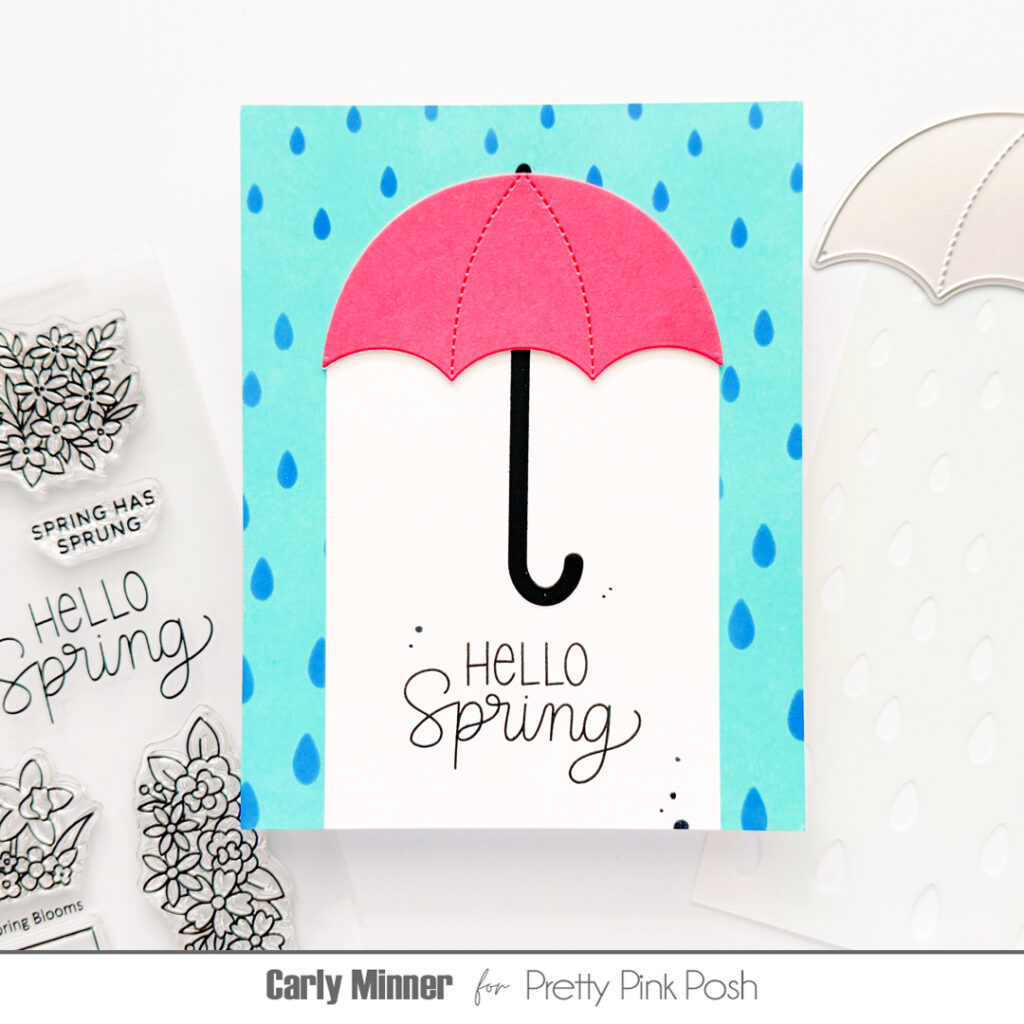
I placed tape on a white cardstock panel to create a U shape. Then I applied Distress Oxide Salvaged Patina ink with a blending tool. Next I used the Raindrops stencil with Distress Oxide Blueprint Sketch ink to add the raindrops.
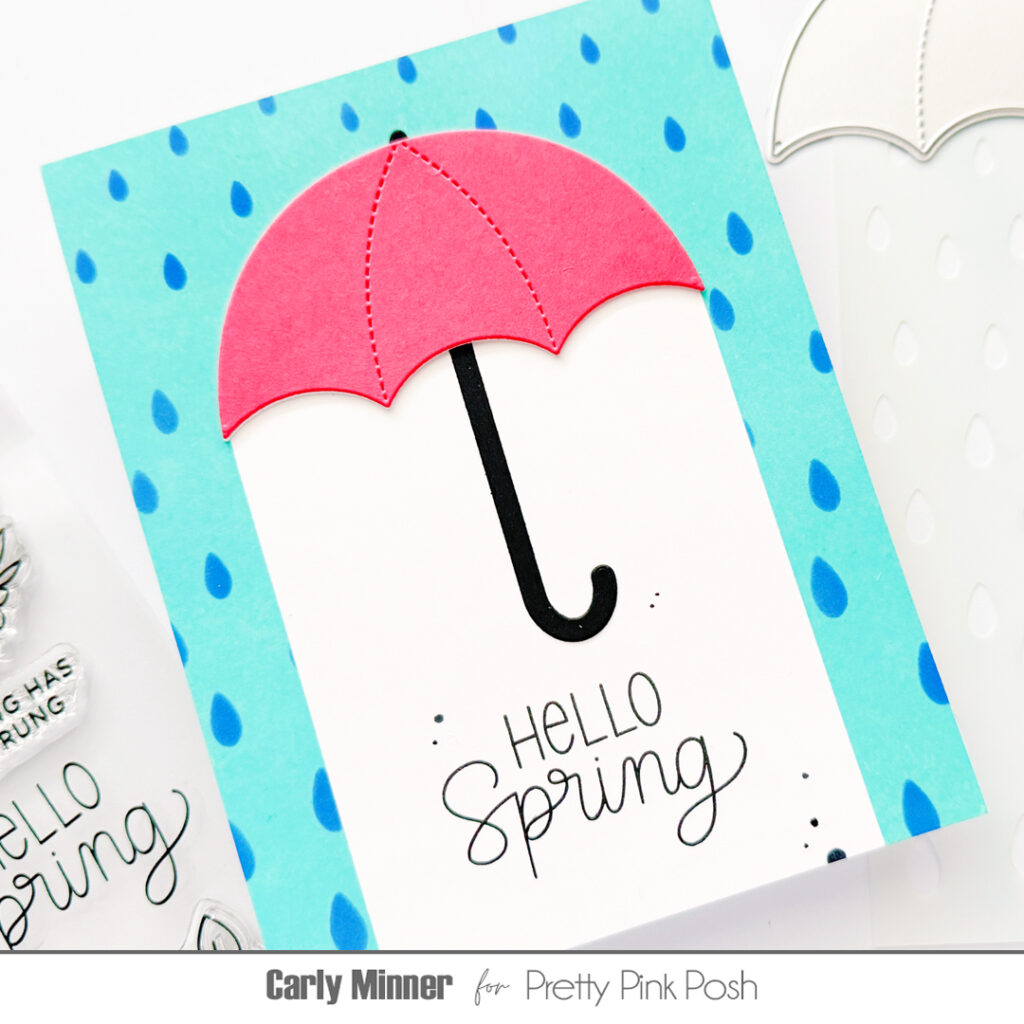
After removing the masking tape, I stamped the sentiment from the Spring Blooms set and then adhere the umbrella handle and umbrella (from the Springtime Holder Additions) to the card.
I hope you were inspired by this and video. Thanks so much for stopping by!