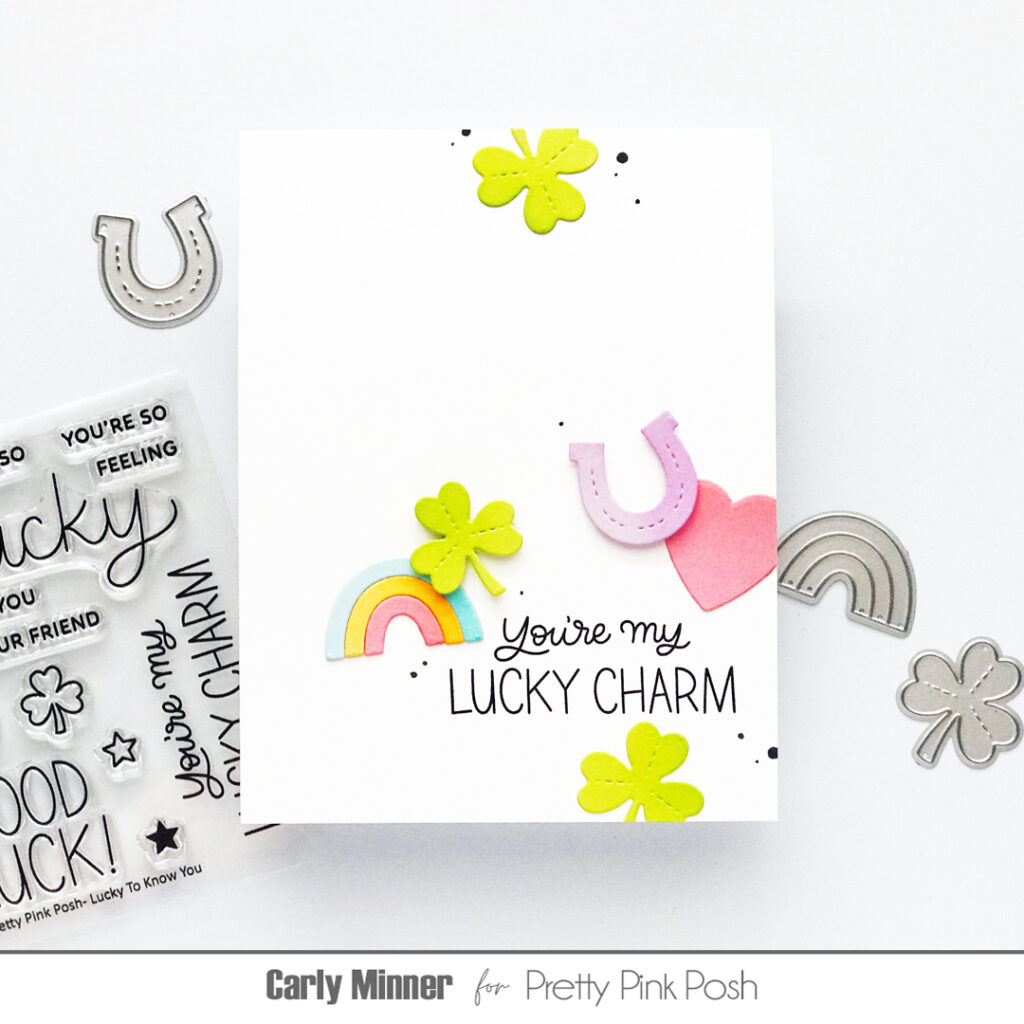
Hi friends, it’s Carly. Are your cardstock scraps piling up? Mine too, always, LOL! But I think I have a solution for using them and it’s so easy… It’s all about simple repetition! Repeated color palettes, repeated die cutting of the same shapes, and cards with easy patterns!
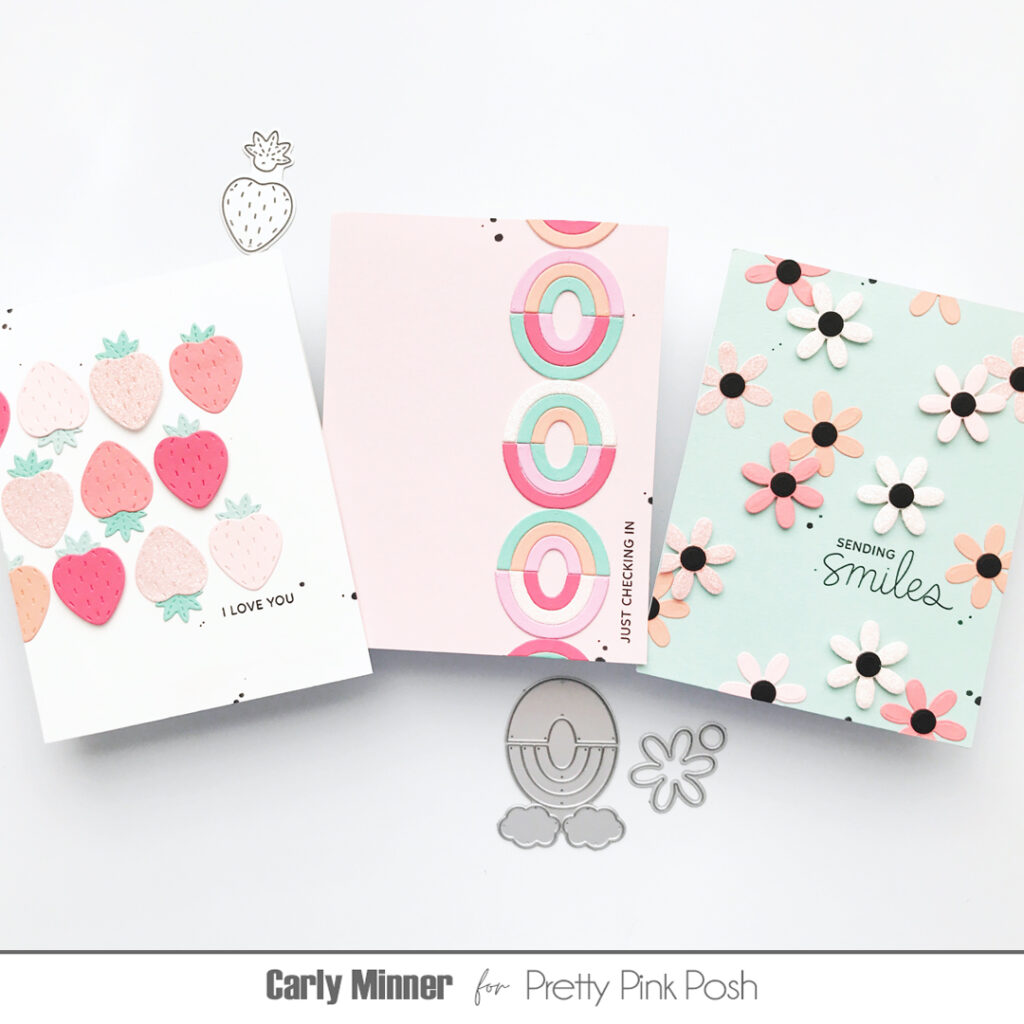
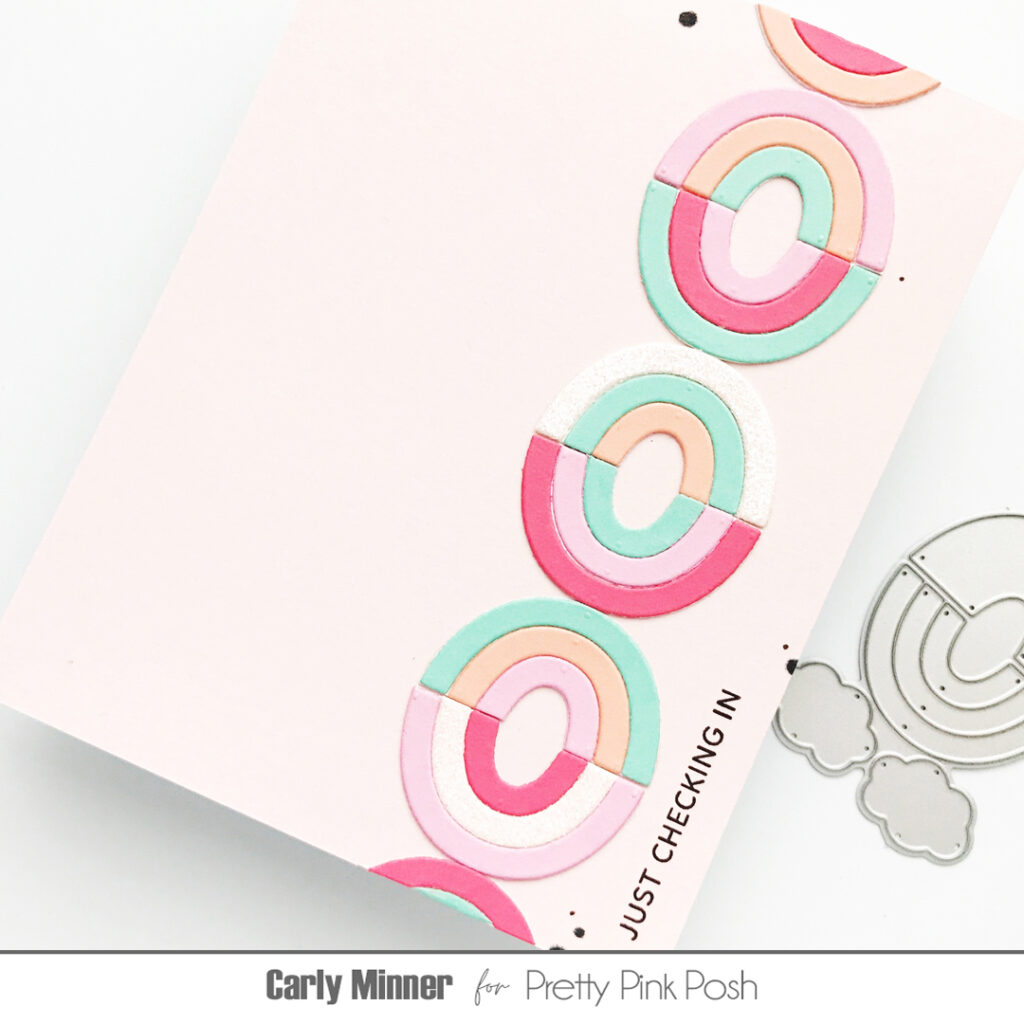
Step #1: Go through your stash of Pretty Pink Posh dies (or treat yourself to a few new ones) and find some of your favorite small shapes. For these cards I used the strawberry from Big Celebration Cupcake, the rainbow from Get Well Mug Additions and a flower from Easter Bucket Additions.
Step #2: Raid your scraps for a color palette that makes you smile.
Step #3: Put on your favorite show, podcast or playlist and die cut!!! Bonus points if you get yourself a snack first.
Step #4: Use easy card designs to create cards with the die cuts. I really like these ones, an offset grid, a column and a bit of “confetti”!
Thanks for stopping by! I hope you enjoyed today’s tutorial.
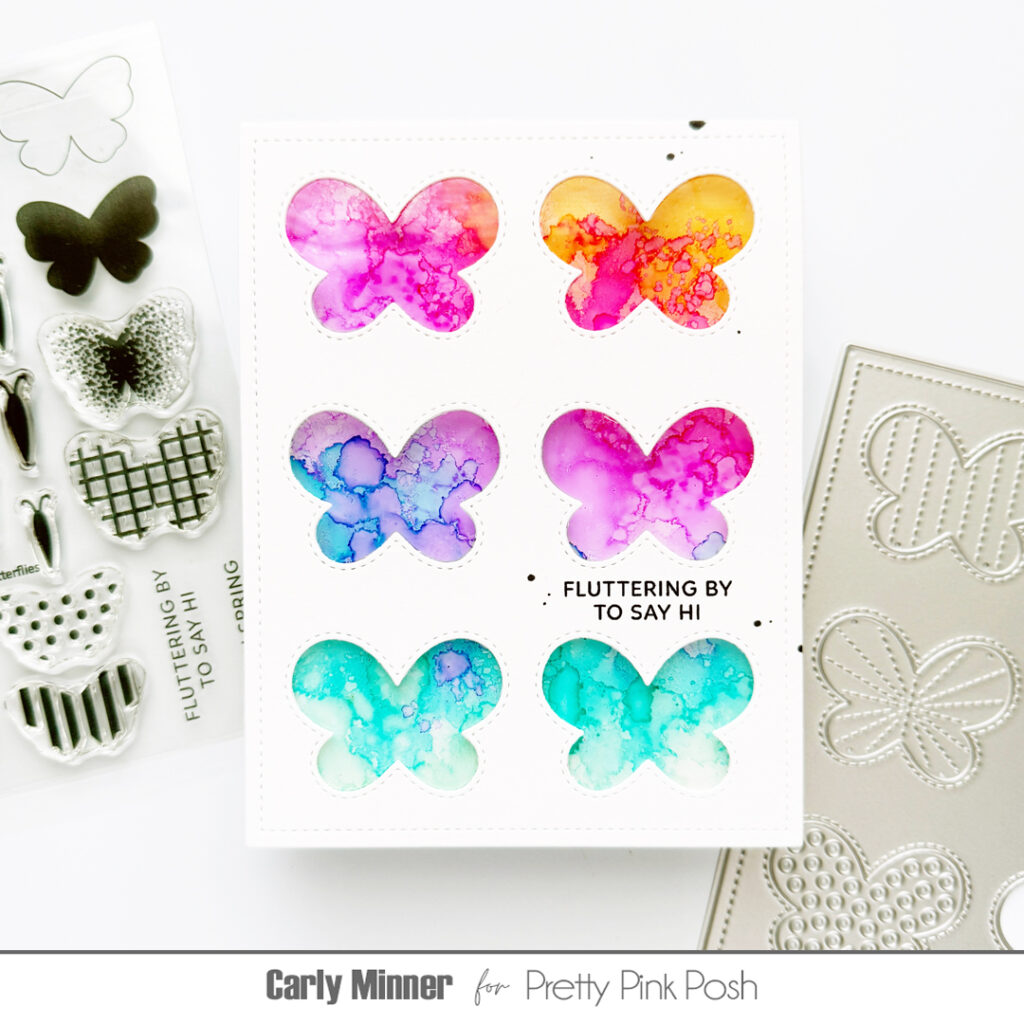
Are you looking for a colorful card idea to try today? I think I can help! Pretty Pink Posh has some over the BEST cover plates ever that feature repeating shapes and I love using them for shaker cards! But they also just make amazing colorful windows!
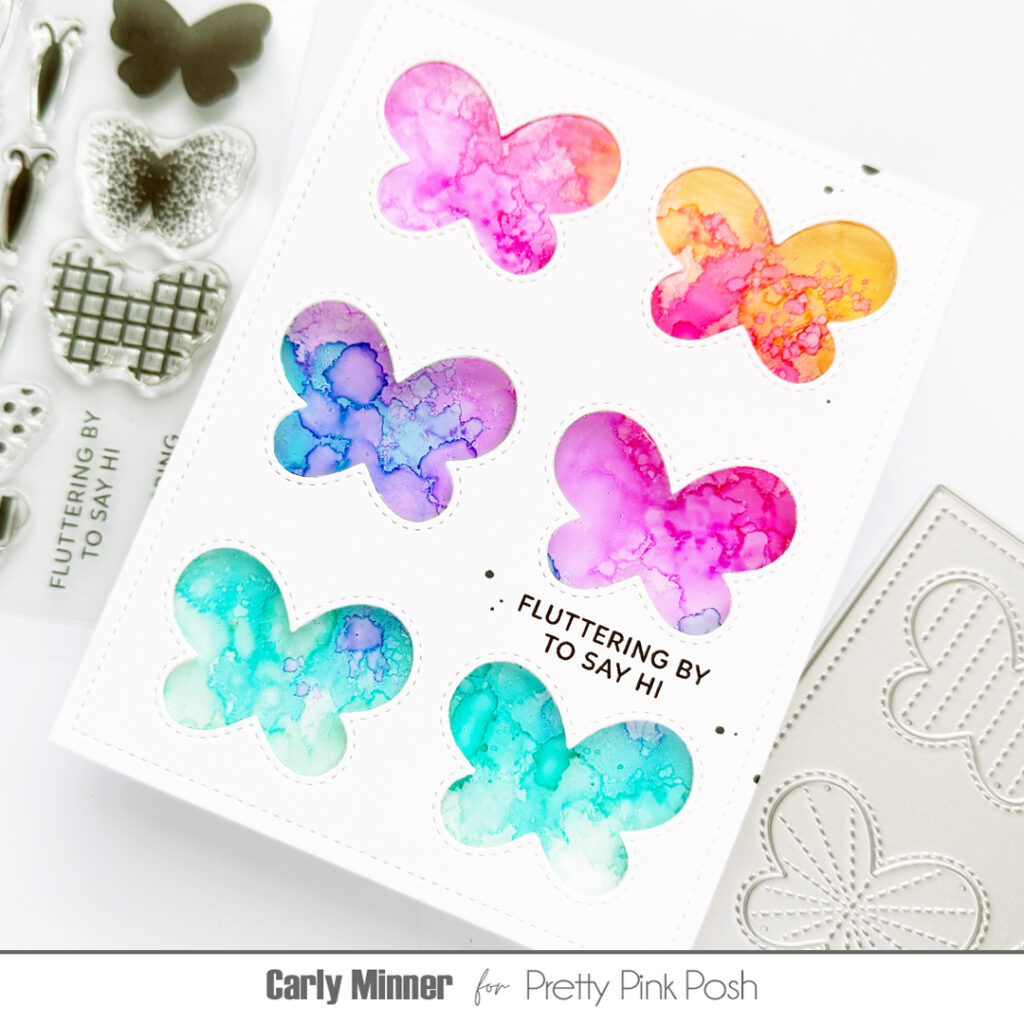
It is so easy to create a really cute & colorful card by sandwiching a piece of acetate colored with alcohol inks between two panels cut with the Butterfly Cover Plate. And I can’t wait to make a holiday version with the Tree Cover Plate!
Here’s a list of the alcohol inks that I used for this card. You can create so many beautiful backgrounds based on the colors that you have!
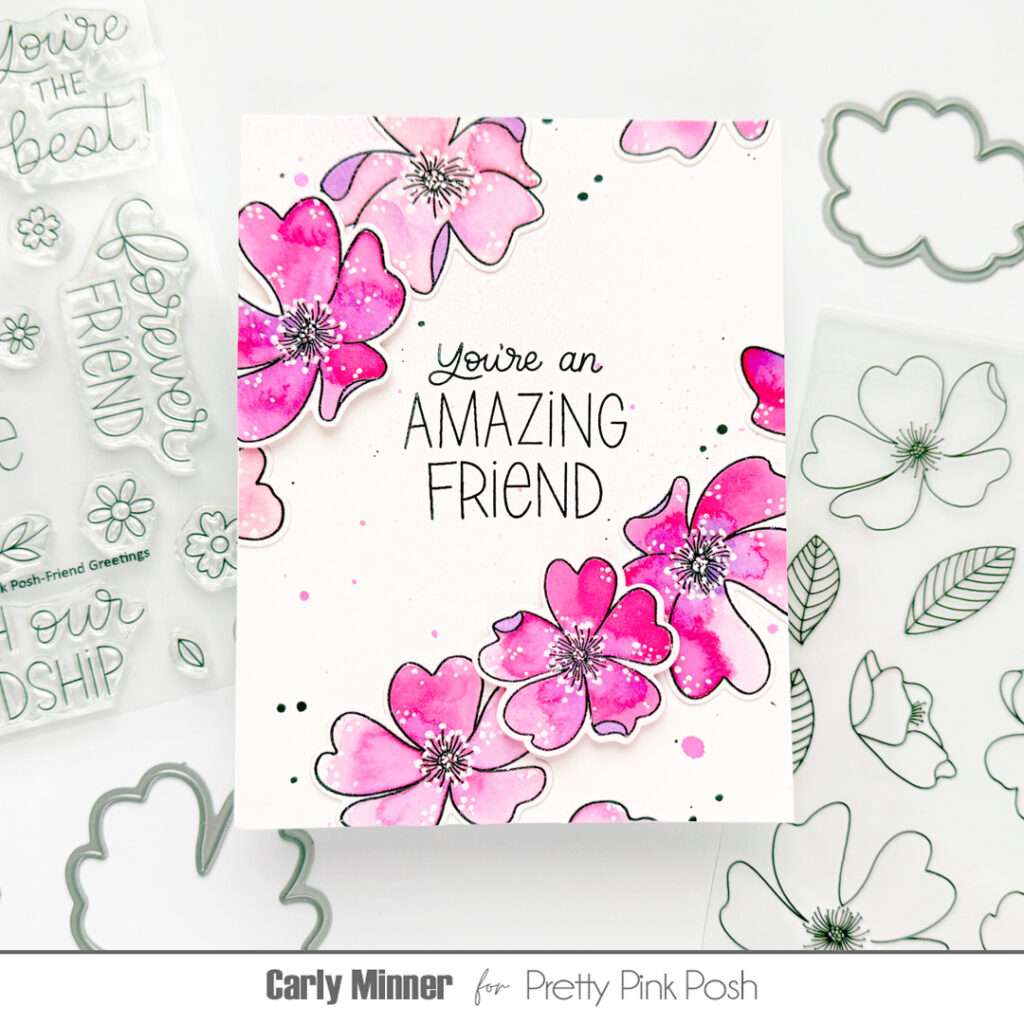
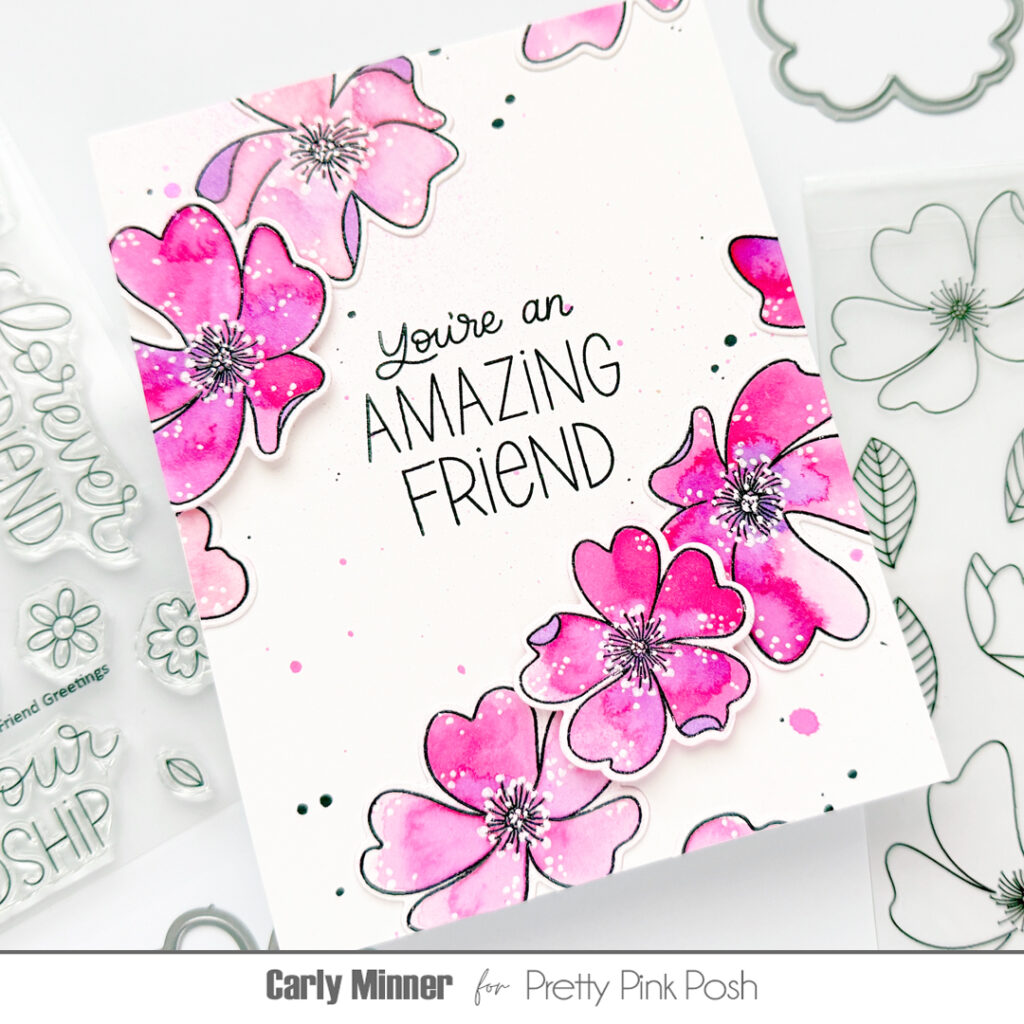
Hi Crafty Friends, it’s Carly! Do you like to watercolor stamped images? Sometimes I forget how much I love it!!! It’s so easy and so relaxing! Let me share my tips for having fun and making something pretty!
use watercolor cardstock that can stand up to water without too much warping & piling.
stamp using a permanent ink that won’t bleed when water is added. Adding embossing powder & heat setting is optional but I highly recommend it because it creates a “wall” of sorts to contain the watercolor.
die cut stamped images and use low-tack tape to put on an acrylic block or clipboard that can be moved around easily.
use water based inks to paint with (dye reinkers are fabulous!)
smoosh the ink pads (or drop reinkers) onto a non-porous surface such as an acrylic block or plate to create a palette.
use more water to dilute color or less for a bold vibrant result, and experiment with adding more water and/or paint to wet layers to see how it moves and interacts.
physically move the block or clipboard to direct paint flow.
cover mistakes on white cardstock with a white pen.
I hope you were inspired by this tutorial. Thanks for stopping by!
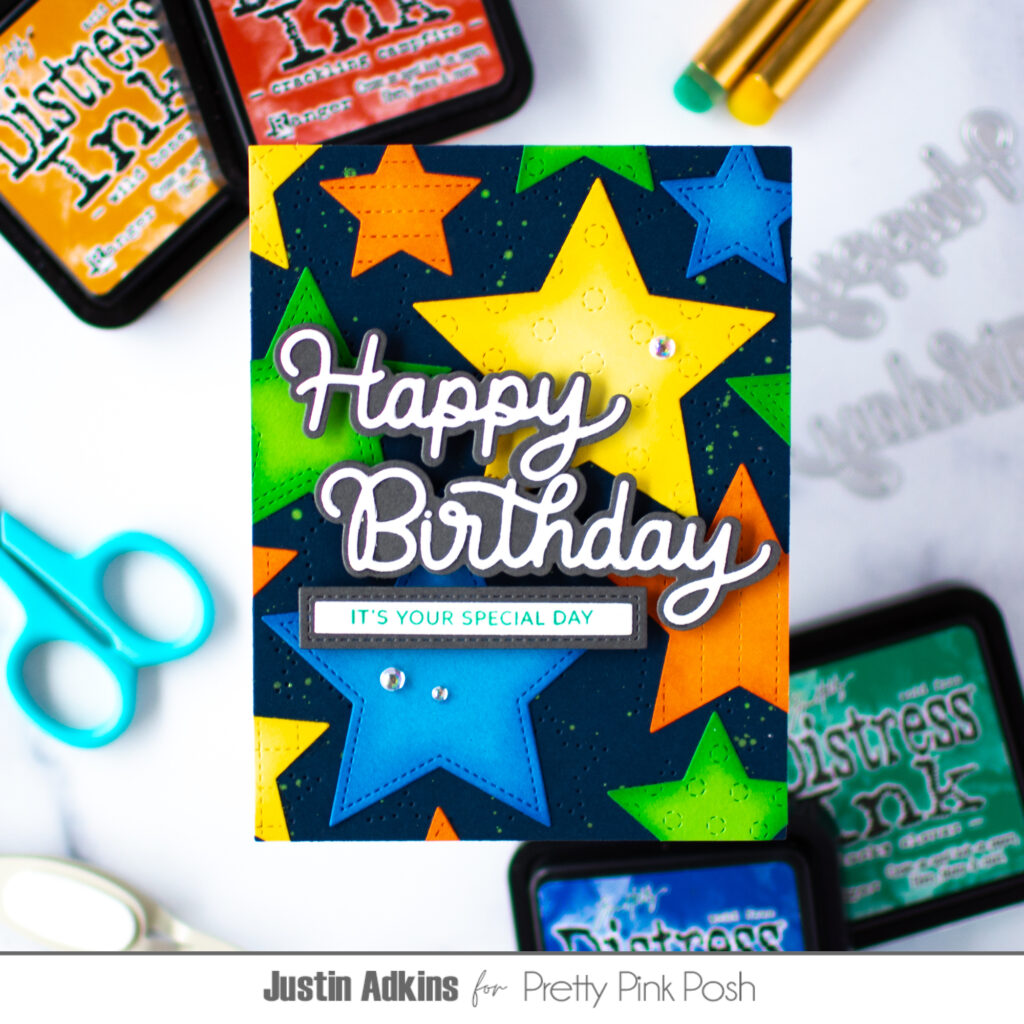
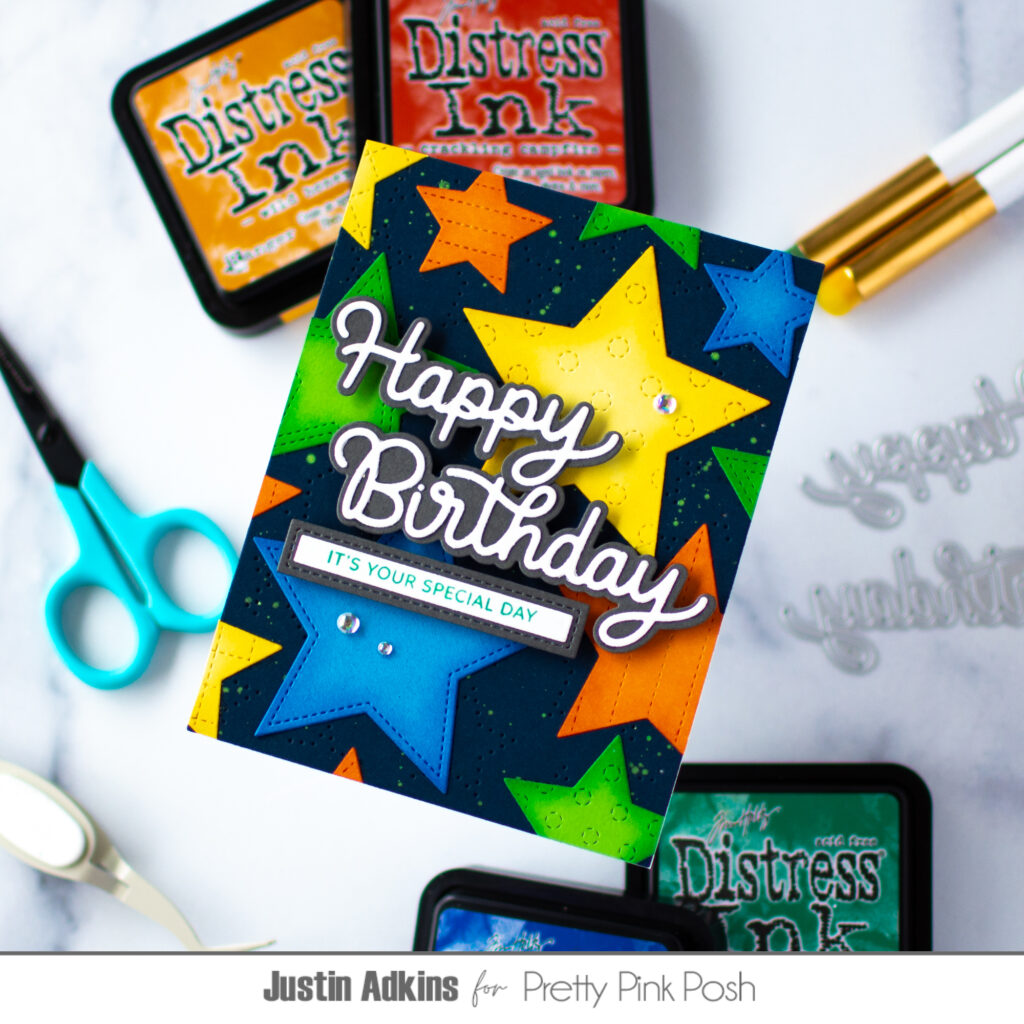
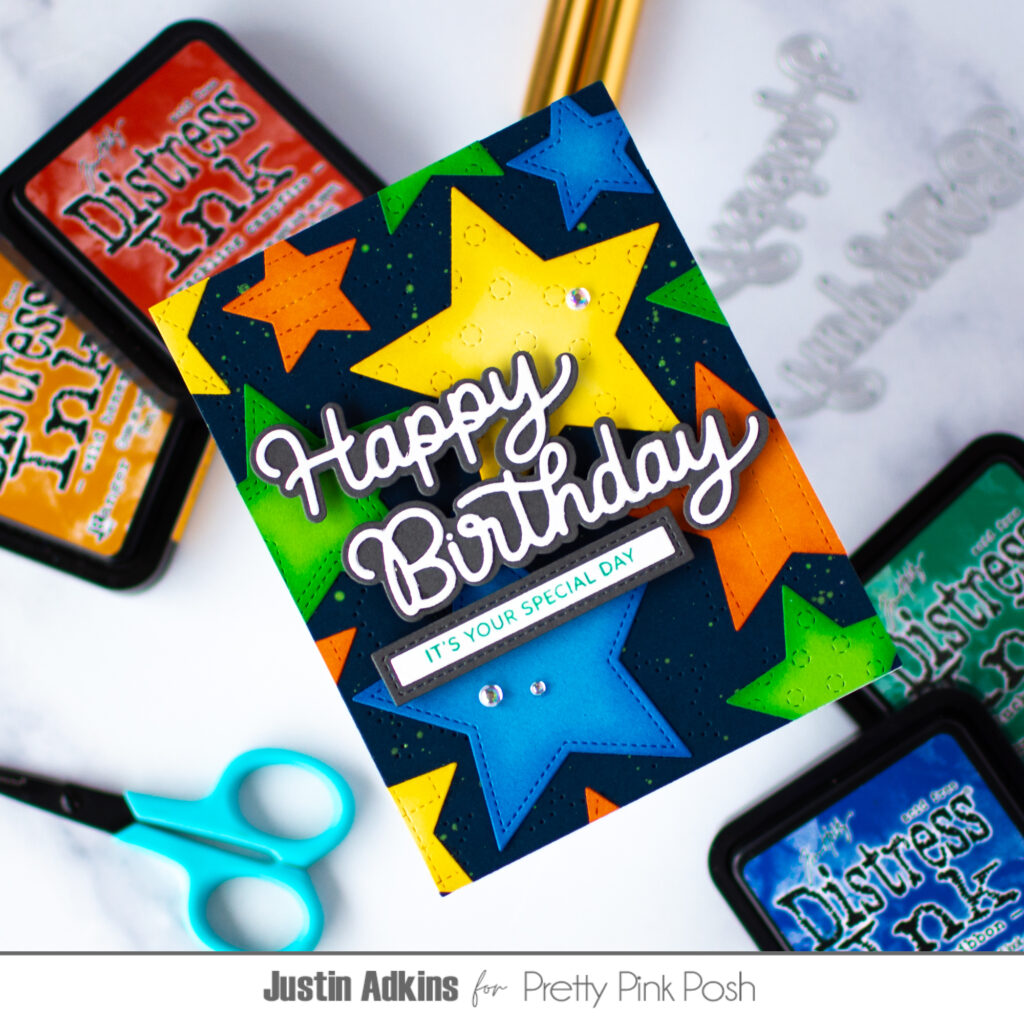
Hello, friends! Justin here, and, today, I’m sharing a bright and bold birthday card that is full of color, texture, and layered dimension. If you enjoy creating vibrant cards that really stand out, this design is a fun one to try. I’m also sharing a full step-by-step tutorial over on the Pretty Pink Posh YouTube Channel so you can see exactly how this card came together.
The background of this card starts with the Pierced Star Cover Plate Die, which creates a subtle but detailed texture across the entire panel. This pierced pattern adds interest while still allowing the larger die cut elements to take center stage.
To build the colorful star arrangement, I used theStitched Stars Die Set to cut several stars from cardstock. Each star was then ink blended using Distress Inks to add shading and depth. Ink blending around the edges of the stars gives them a finished, dimensional look and helps the colors transition smoothly toward the center.
Once the stars were blended, I arranged them across the background panel to create a lively and energetic layout. The mix of bright colors against the darker background helps the stars really stand out.
To enhance the background even further, I added a bit of Lime Rickey Paper Splatter. The splatter adds a playful, celebratory feel that is perfect for a birthday card and helps tie the design together.
Adding a Bold Birthday Sentiment
To finish the card, I used the Happy Birthday Shadow Diesto create a large focal sentiment. Layering this die cut and adhering it with foam tape gives the greeting extra dimension so it really pops off the card front.
Underneath the main sentiment, I added a stamped phrase from the Sentiment Strips: Birthday Stamp Set and cut it out with the Sentiment Strip Die Set. This small accent sentiment helps complete the message while balancing the bold script greeting above it.
The combination of layered stars, vibrant color, and dimensional sentiment creates a birthday card that feels festive, energetic, and perfect for celebrating someone’s special day.
Don’t forget to follow me on Instagram and YouTube at @justanotebyjustin for even more crafting inspiration!
Thank you so much for stopping by the blog today! Happy crafting!
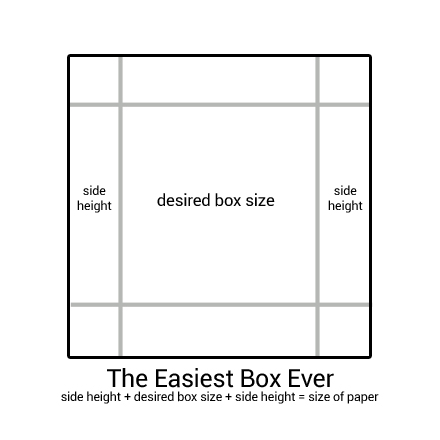
Hi friends, it’s Carly here today. Is there someone in your life who would like a little Easter treat? Well, I’ve got an idea for you and it’s super easy!
By scoring, folding and cutting a few lines on a square of cardstock, you can create the easiest little treat box! And then you can use your favorite PPP Easter dies to decorate!
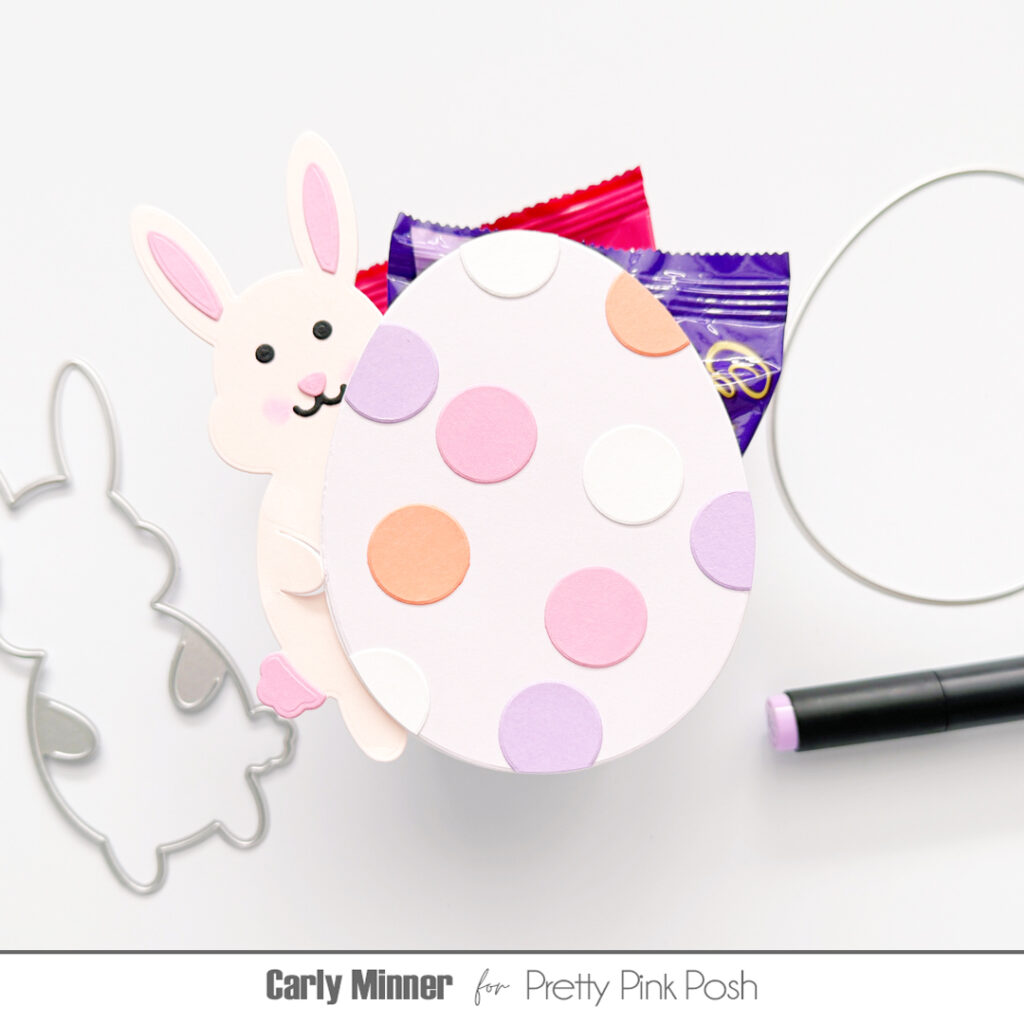
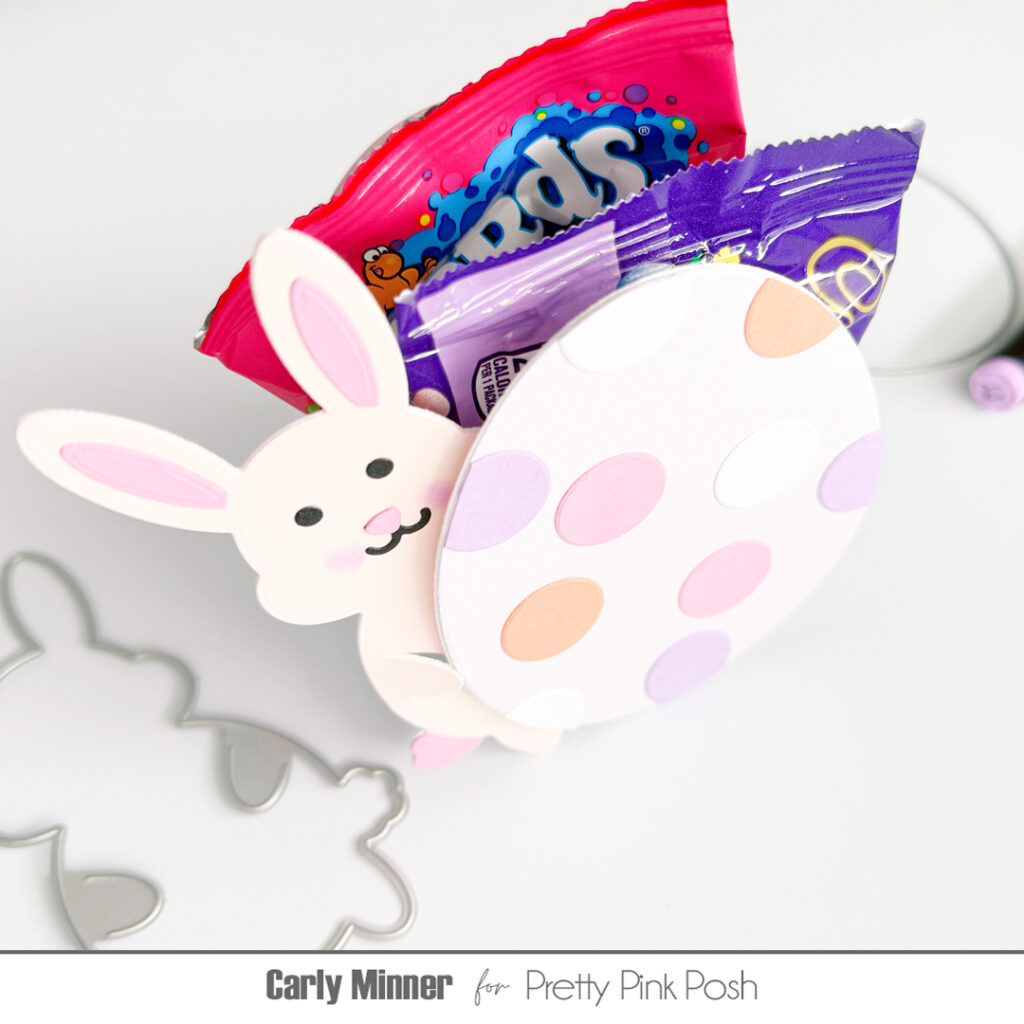
I used the solid layer of the Decorative Easter Egg to turn my little treat box into an oversized egg and then added a pink bunny cut with the Bunny Holder to keep it from rolling.
Add some Cadbury Mini Eggs & Nerds Gummy Clusters and you have an adorable treat to give!
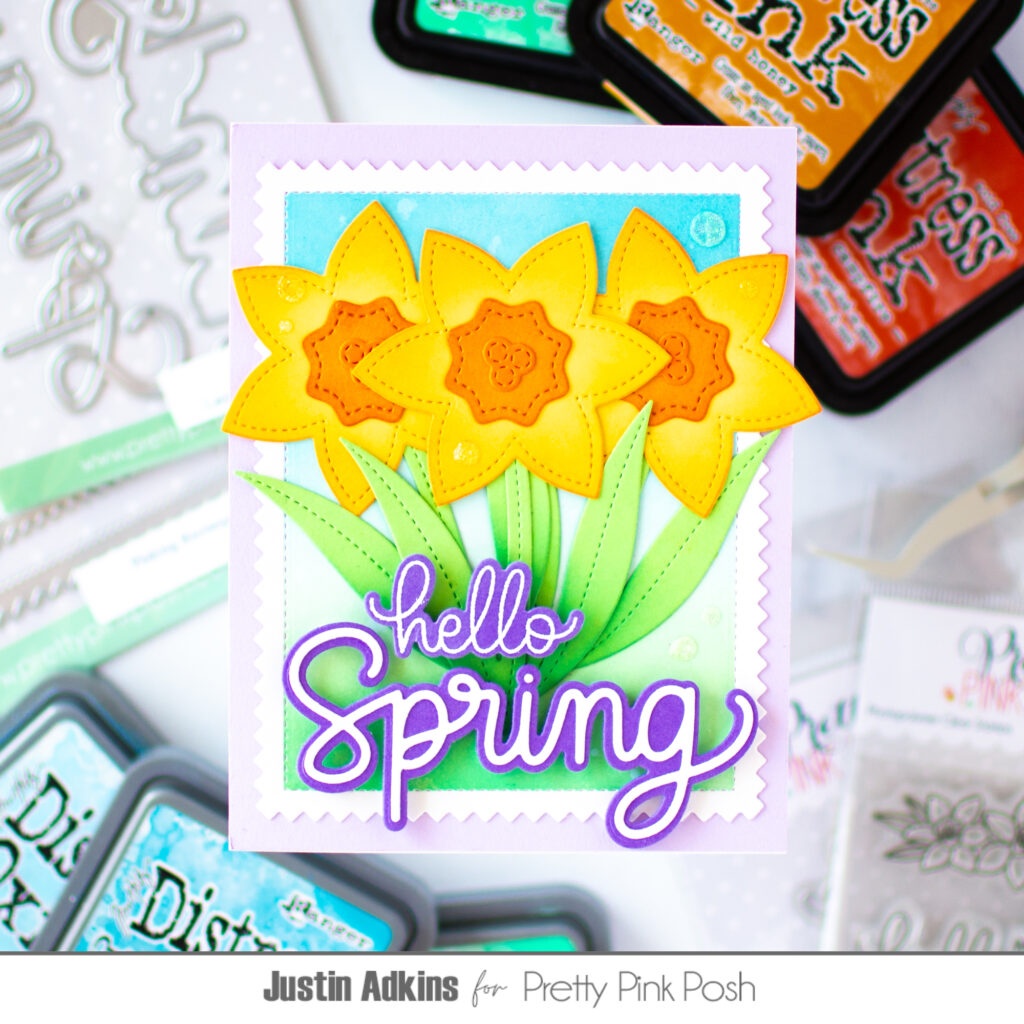
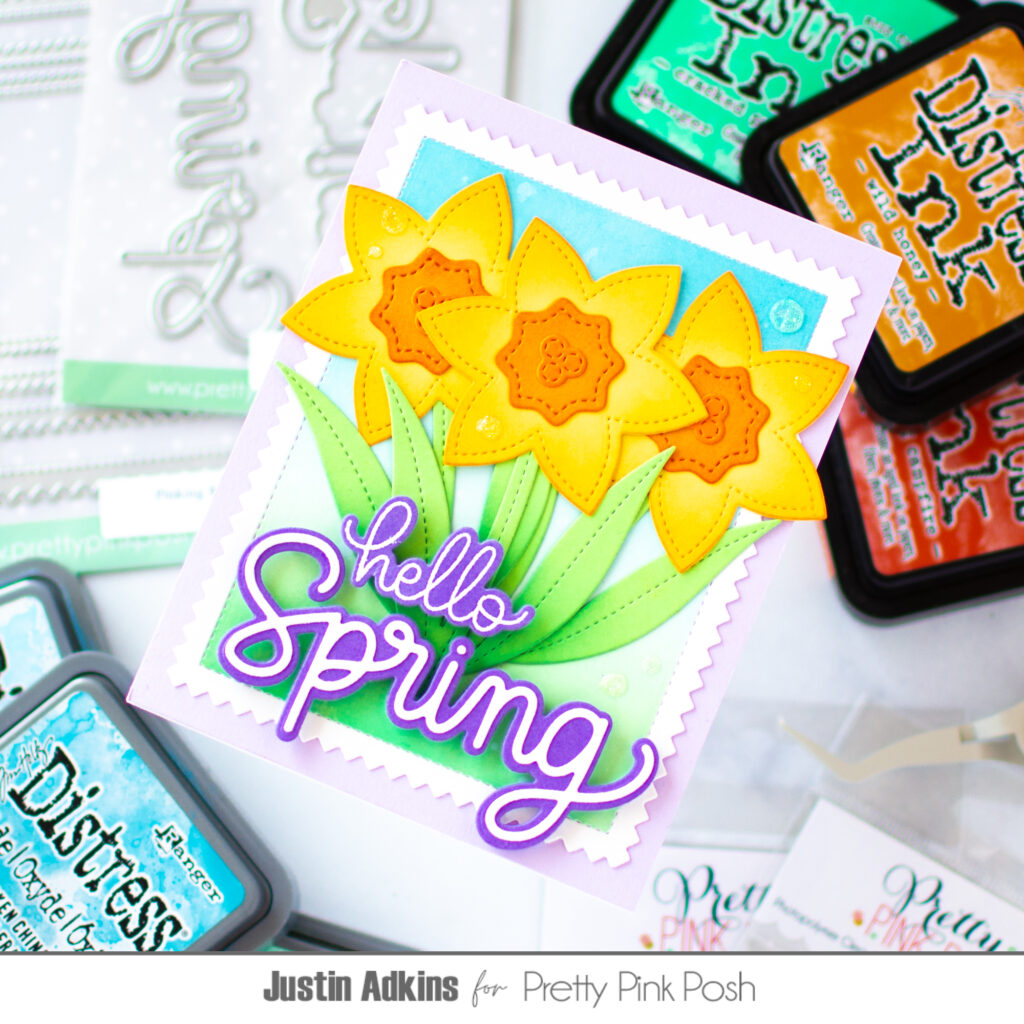
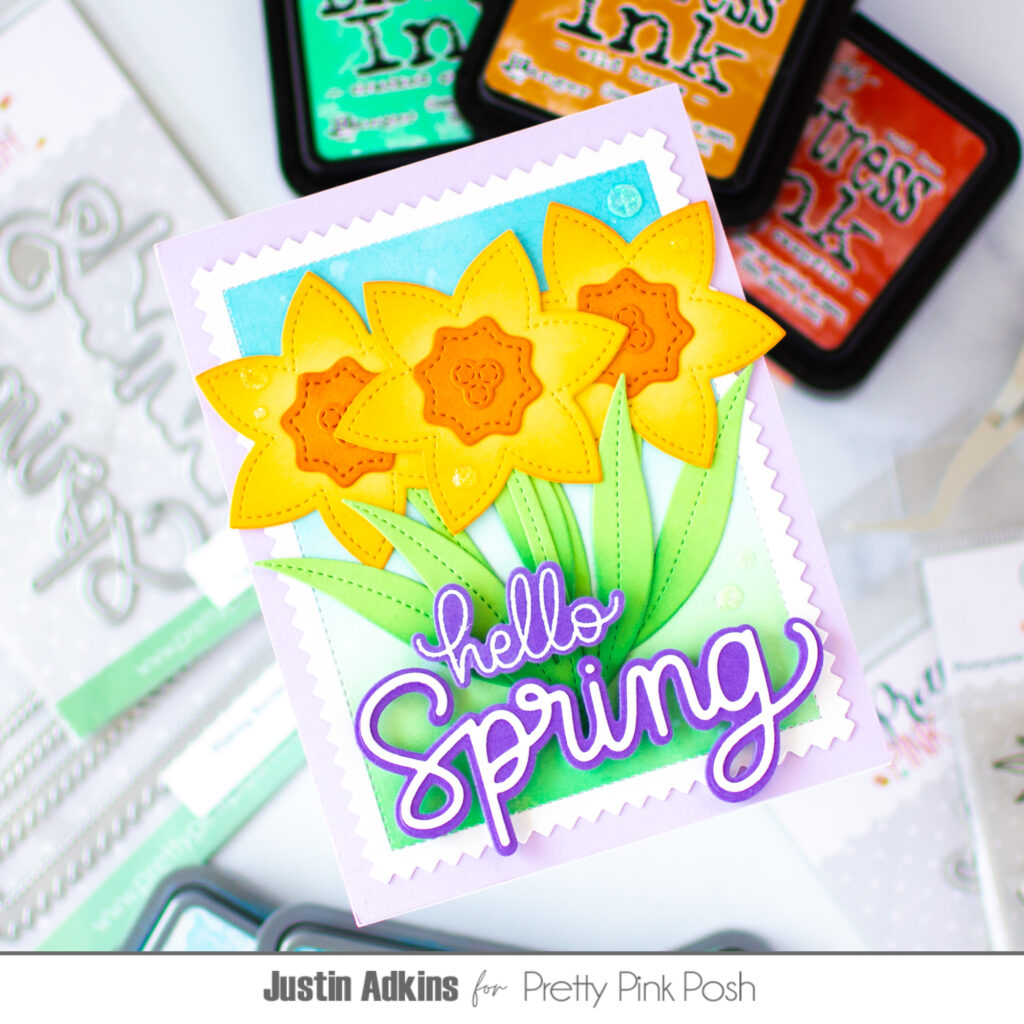
Hello, friends! Justin here and today I have crafted up some floral Spring inspiration to share with you! The Daffodil Shaker Dies are so perfect for putting big and bold florals on your project, and I’m going even bigger by using 3!
I think that one of the best ways to make your daffodil die cuts pop is by cutting the shapes from colored cardstock and ink blending the edges with dye inks. For this card, I am using various Distress Inks to blend up our daffodils, and they coordinated so perfectly with the color of our blends!
I also have a deep love for the Pinking Rectangles Die Set. First, I love the jagged edges, which really lends a fun personality to your project. I also love that there is a stitching that outlines an interior rectangle. I like to use this stitching as a guide to mask off the edges with tape, and then ink blend the center rectangle of the dies. This, in turn, gives a framed look to the die cut! For this card, I take white paper, mask the edges, and blend a grassy and blue sky background that will serve as the perfect scene for our daffodils!
Lastly, big bold sentiments are going to definitely help send the feel of this card over the top! The Large Spring Shadow Diesis the perfect addition to the word sentiment die collection, and I just love how much space it takes up on the card! Adding the smaller hello from thePotted Daffodils stamp set above the word spring just makes the card even more fun!
Don’t forget to follow me on Instagram and YouTube at @justanotebyjustin for even more crafting inspiration!
Thank you so much for stopping by the blog today! Happy crafting!
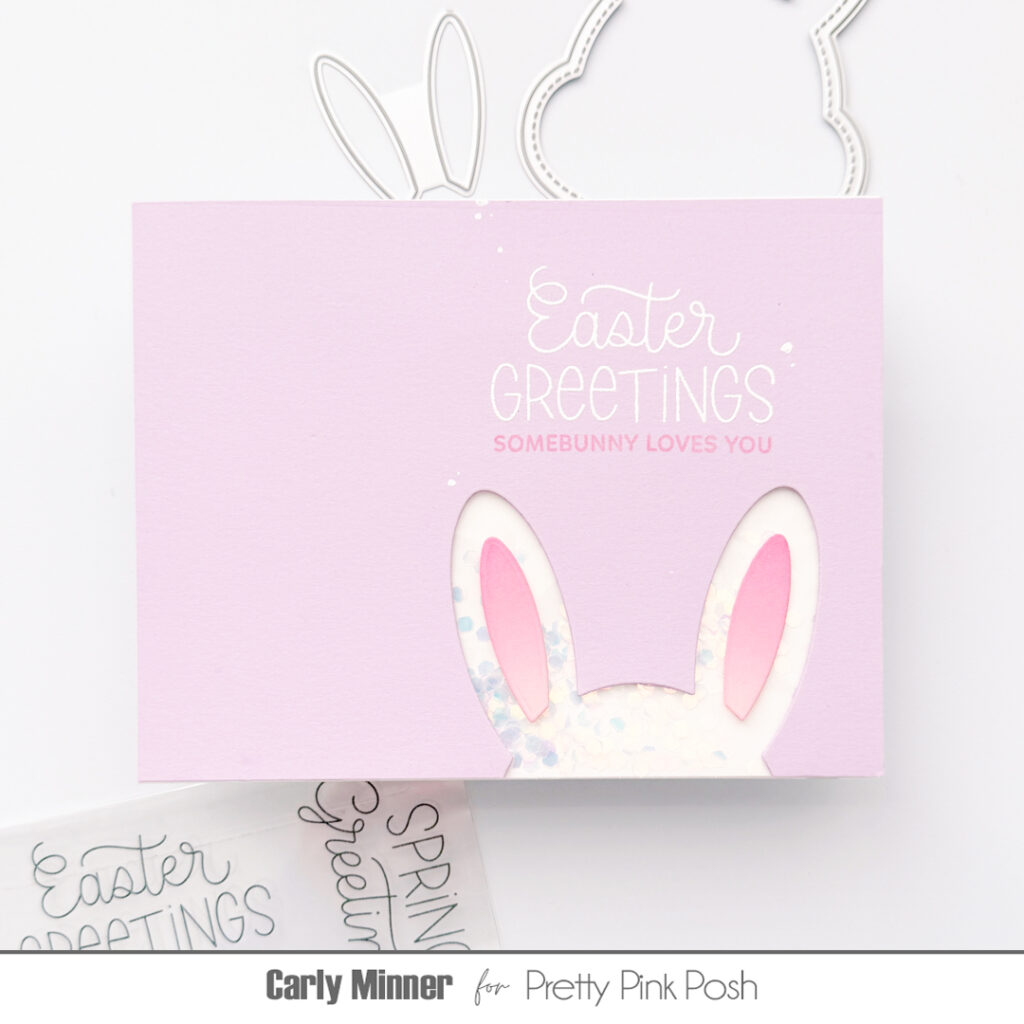
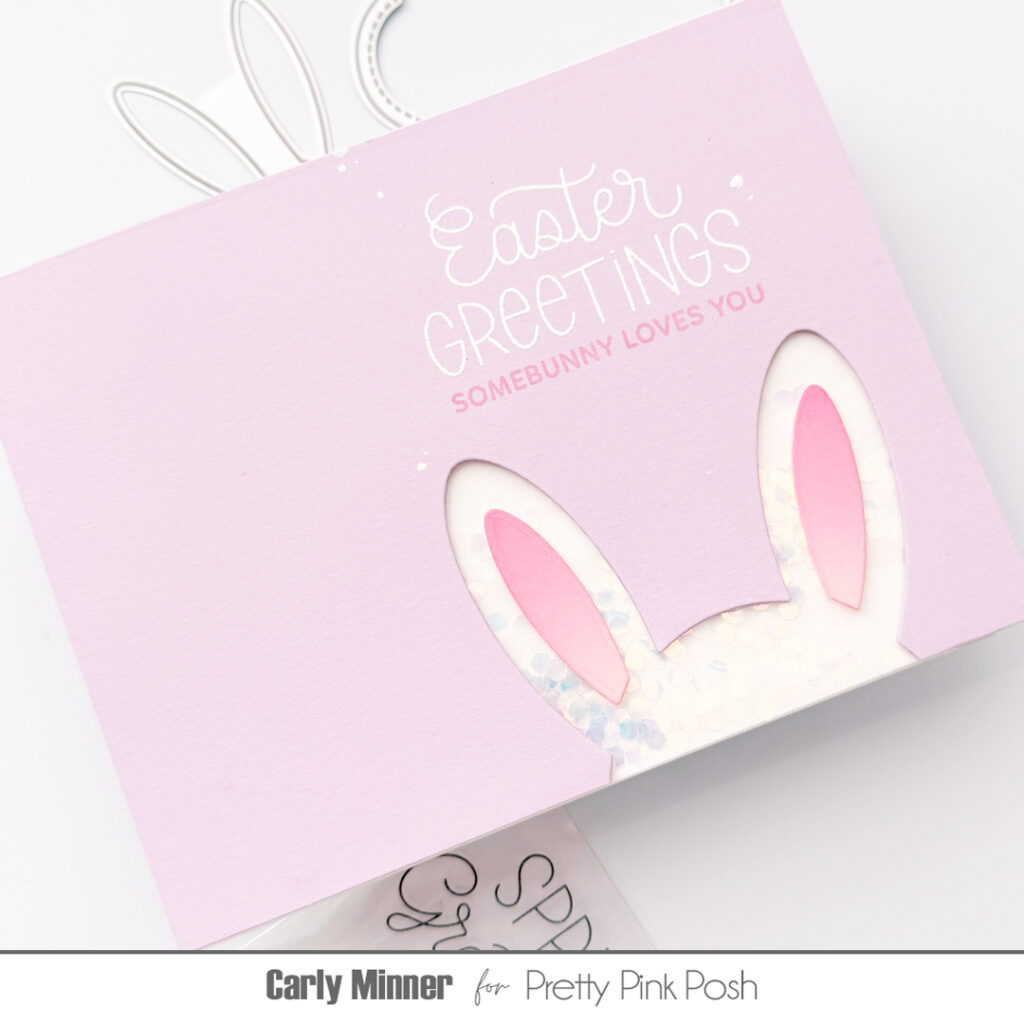
Hi friends, it’s Carly. I hope you’ve been enjoying Easter Theme Week so far! Are you looking for an extra special Easter card idea? I think I have one for you…it has bunny ears and glitter!!!
The Bunny Face Shaker is already so versatile (and adorable), whether you use it as a shaker or just a sweet bunny face. But I would argue that it’s even cuter when you just use the ears, LOL! Using just part of a die is one of my favorite ways to stretch my supplies and I love “off the edge” shakers!
The card is super simple to make! Partially die cutting the Bunny Face from colored cardstock creates the shaker window. Then a little scrap plastic wraps around a white cardstock panel to create the shaker pocket. After adding a stamped sentiment or two and adhering everything together, you’ve got a sweet & sparkly Easter card!
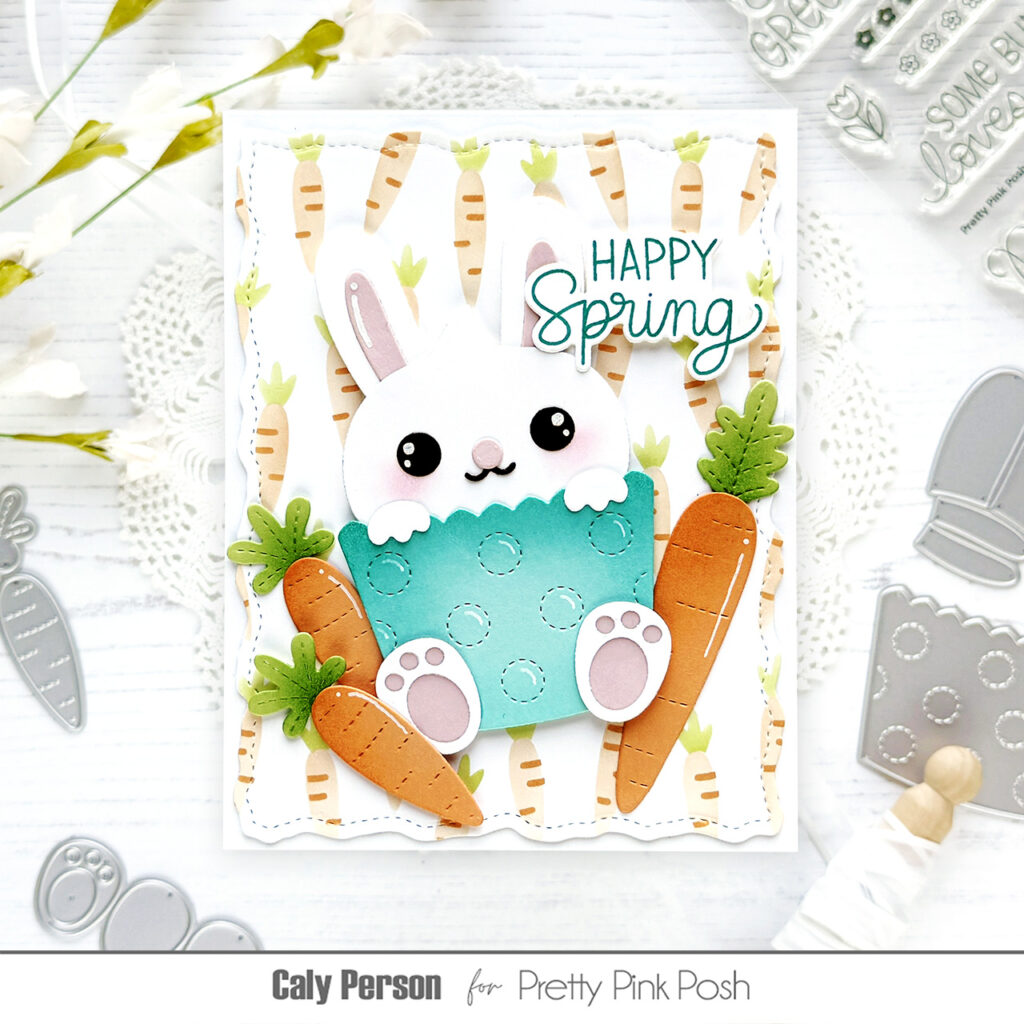
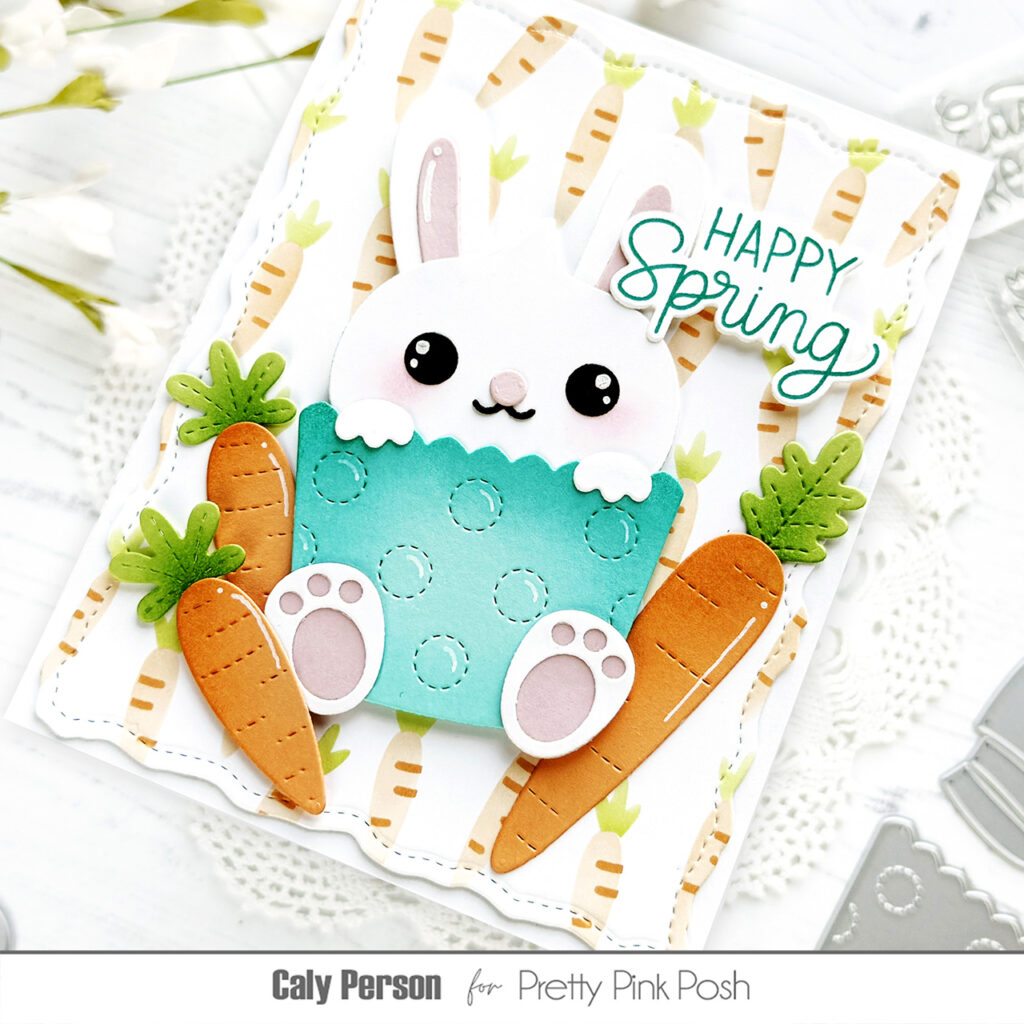
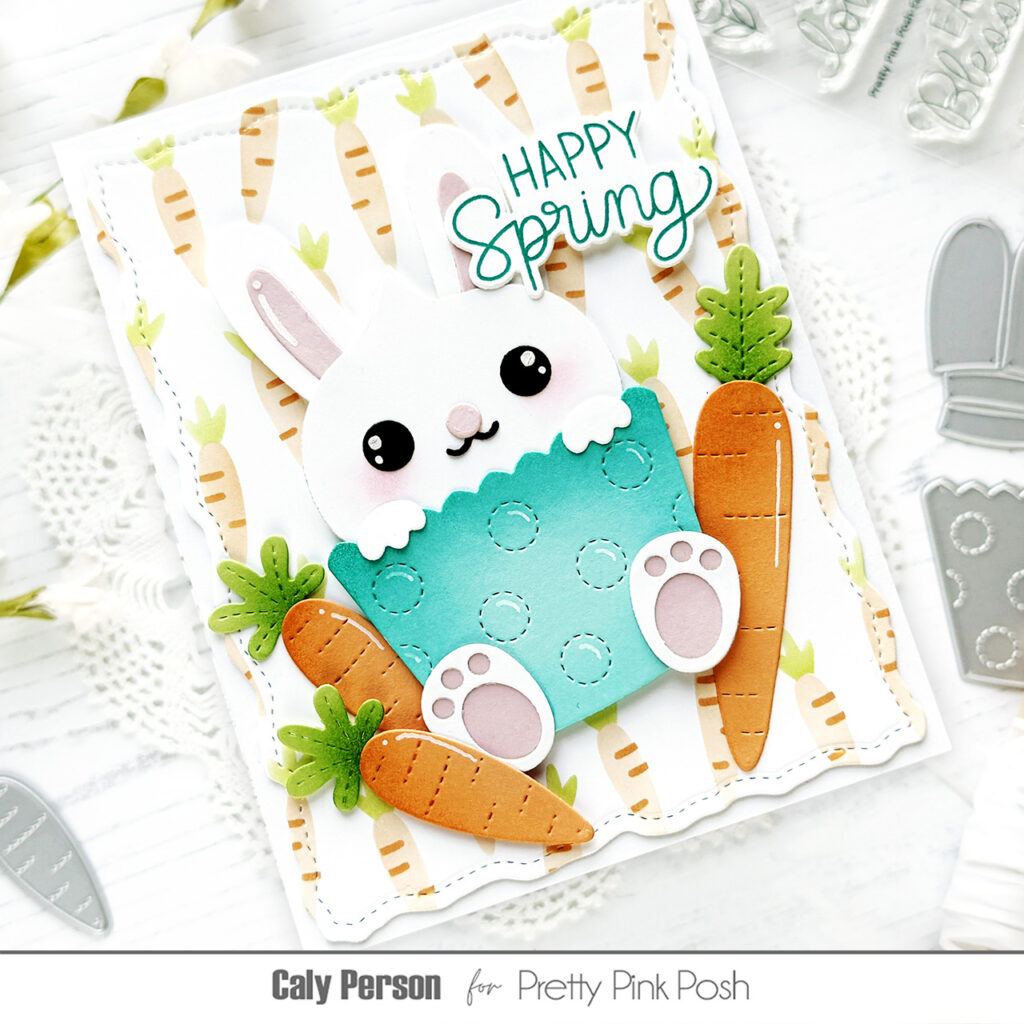
Hi friends! It’s Caly with you today and I am so excited to share this bunny cupcake card with you using some previously released products from Pretty Pink Posh. I bet some of you already have these awesome die sets in your stash and can easily make a card like this one!
Between the two die sets mentioned above, I was able to create the bunny cupcake with ears, little hands, and feet! I just love that this bunny is wearing a cupcake. Yes, you can have a cupcake AND eat it, too!
I used the Stitched Torn Rectangles Dies to die-cut a decorative border for the background panel before attaching everything together. To finish, I stamped a sentiment using the Easter Greetingsset.
I hope you enjoyed this card! I had so much fun making it! Happy Spring!
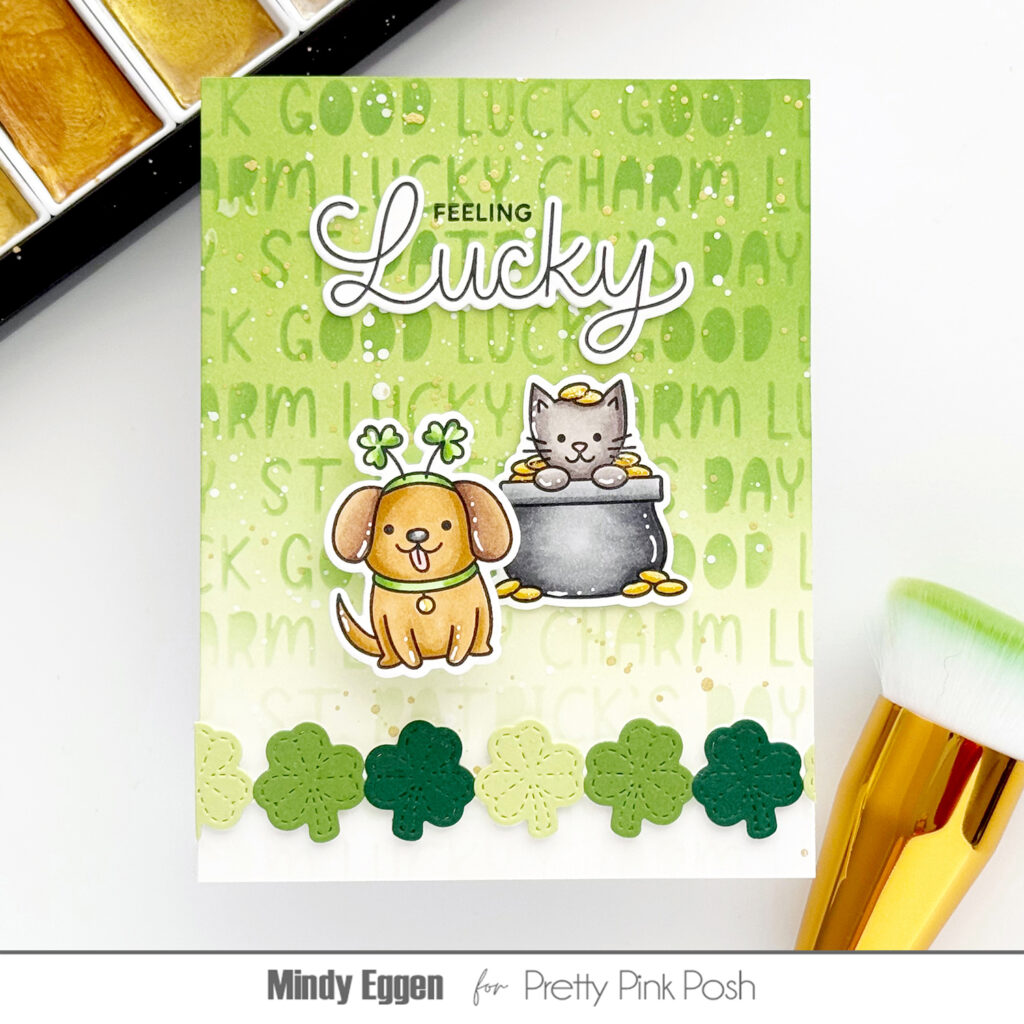
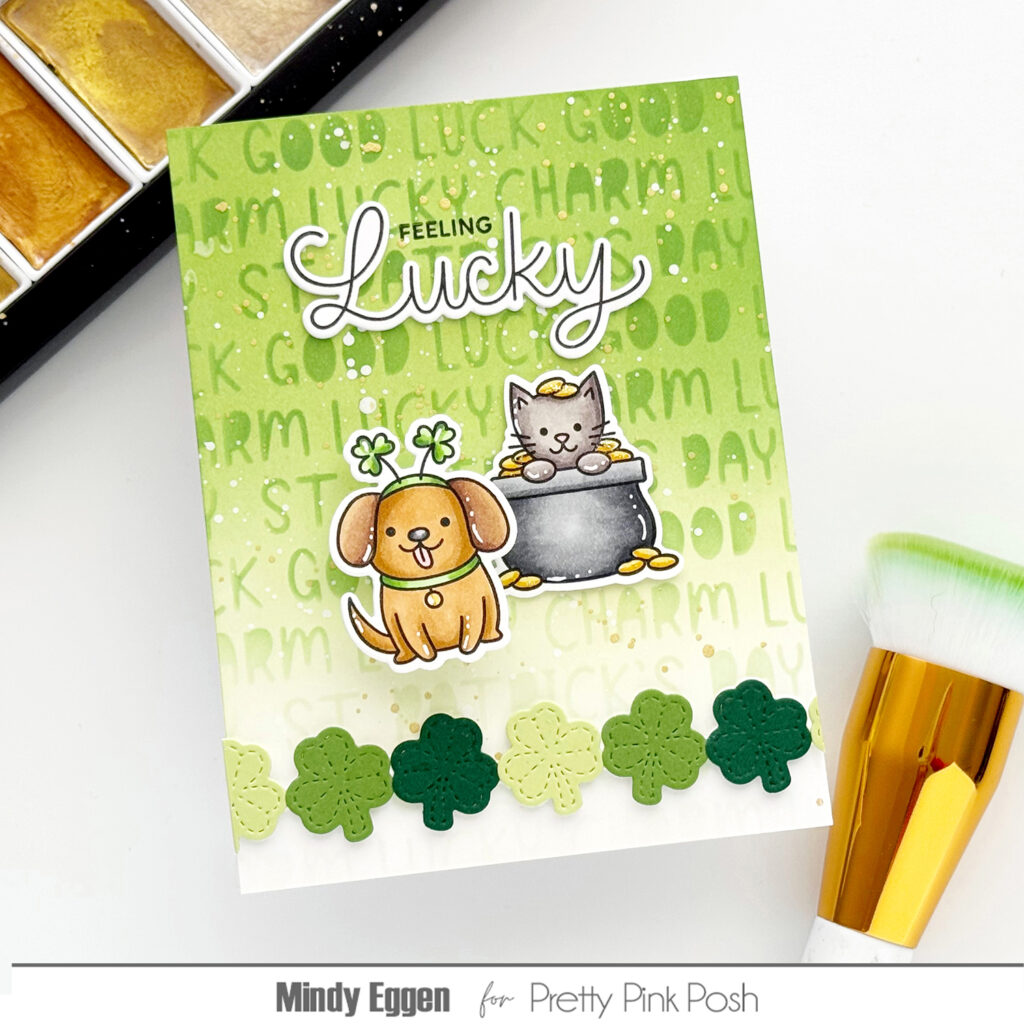
I created a lucky-themed design featuring adorable critters, layered greens, and an action wobbler that makes the puppy image wiggle right on the front of the card.
I started by blending Sprout and Parsley ink to create a soft green background. Then I layered the Lucky Words stencil over the top using the same colors for a subtle tone-on-tone effect. To finish, I added splatters of white acrylic paint and gold metallic ink for extra texture and sparkle.
Using the Shamrock Border die, I cut three shades of green cardstock and alternated the colors to create a playful layered border that enhances the lucky theme.
For assembly, I started with the sentiment at the top, followed by the critters, and finished with the shamrock border along the bottom. Thin foam squares add dimension behind the kitty, while an action wobbler behind the puppy brings movement and interactive fun to the design.
Adding interactive elements like action wobblers is an easy way to make your cards more engaging and memorable. This lucky-themed design combines layered textures, bright coloring, and movement for a playful finished card.
I hope you were inspired by this video. Thanks for spending time with me!
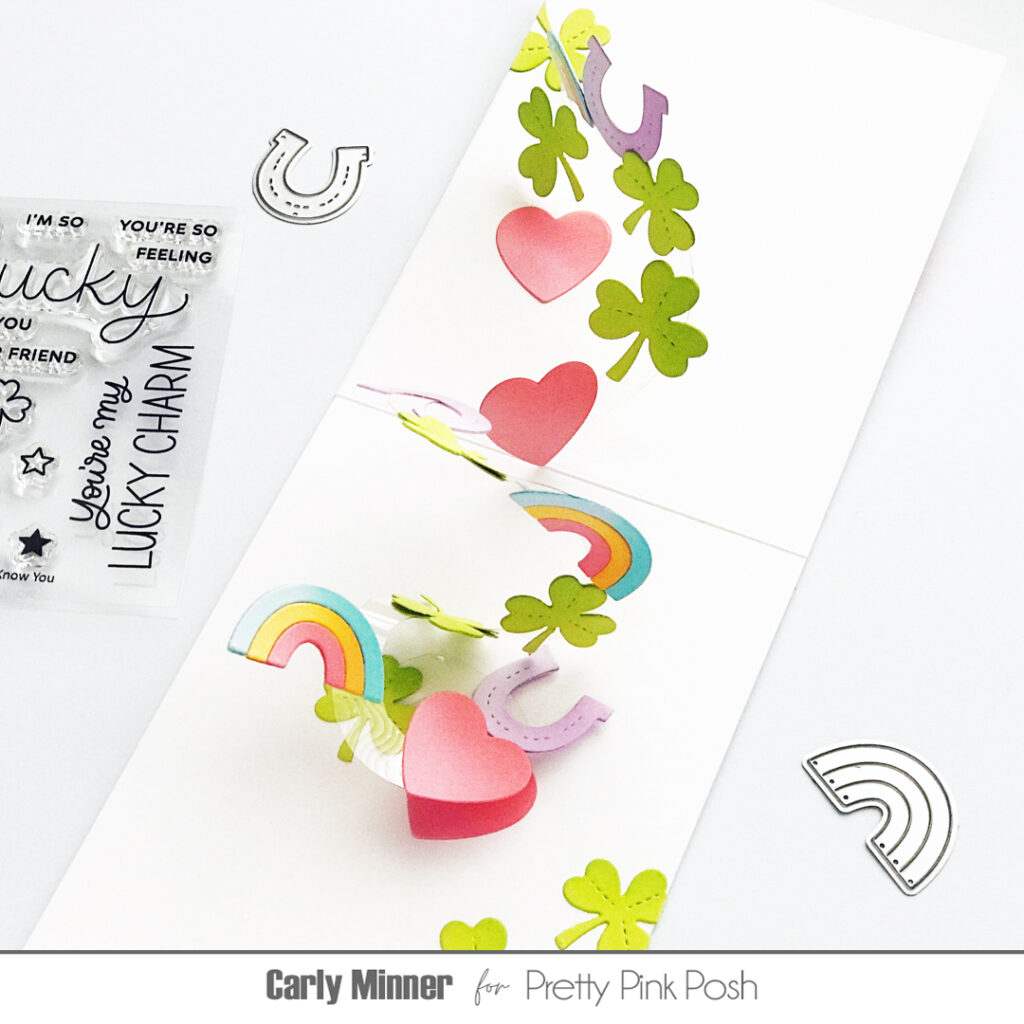
Hi Friends! Carly here and I have a super easy interactive card design to share with you! It’s my first time creating a pop-up card like this so I would love & appreciate your thoughts!