The August 2025 Release is now available in the Pretty Pink Posh Shop and select retailers that carry our products. If you missed our post yesterday, we revealed all of the products in picture form, but if you would like to see them in a video, Mindy has that for you today!
Join us at 7am PDT tomorrow morning as we kick off our very first video hop on the Pretty Pink Posh YouTube channel. There are twelve different designers joining us with a variety of tutorials that are sure to inspire you!
Hi Crafty Friends! Carly here and it’s that time of year again where I start thinking about building my card stash for birthdays, Christmas and beyond!
I think one of the best ways to do that is to make more than one card with the supplies I already have out. For example the Dog Holderis one of my favorites and is perfect for so many cards! Just change the sentiment and the additions, and a birthday card can be a holiday card!
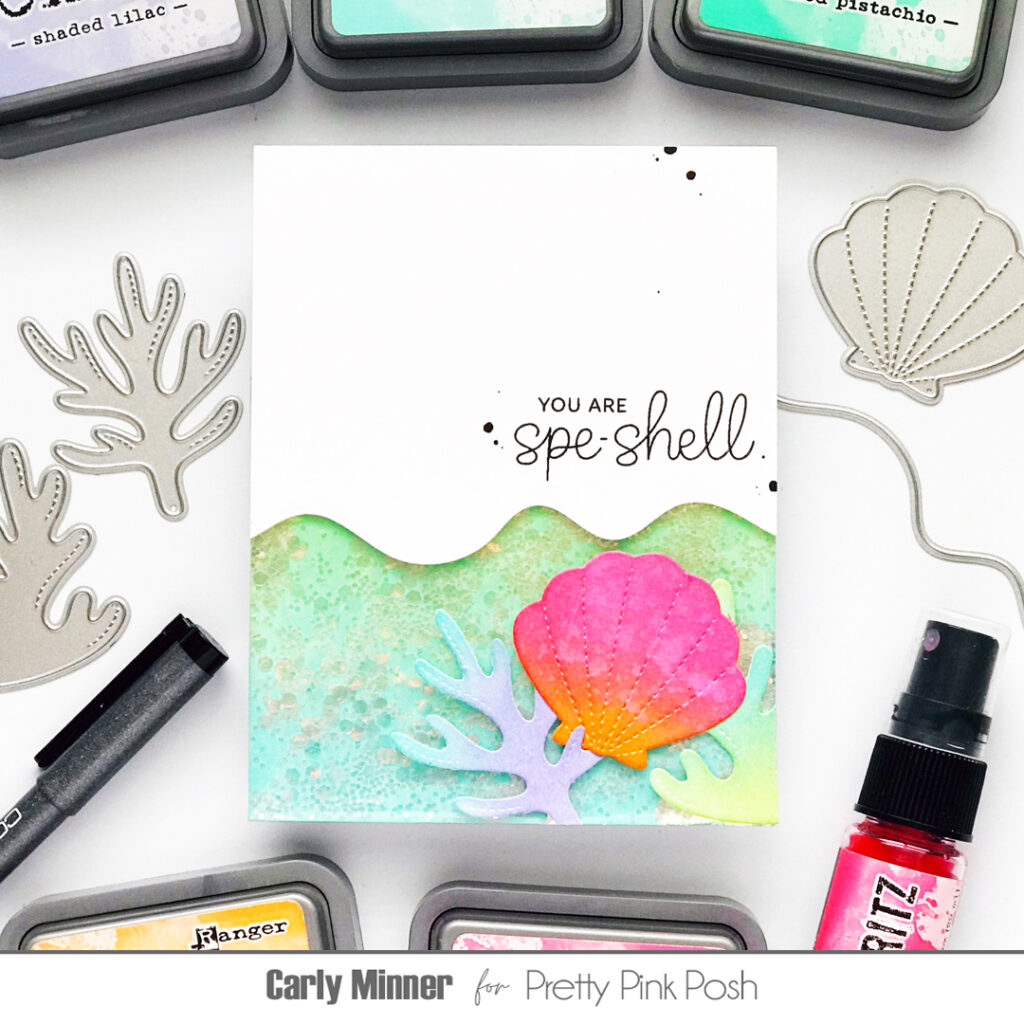
Hi Crafty Friends, Carly here and don’t you love versatile stamps, ones that can be used for hellos or birthdays, with color and without? Me too! And the Seashell Wreath is one of those gorgeous, versatile sets!
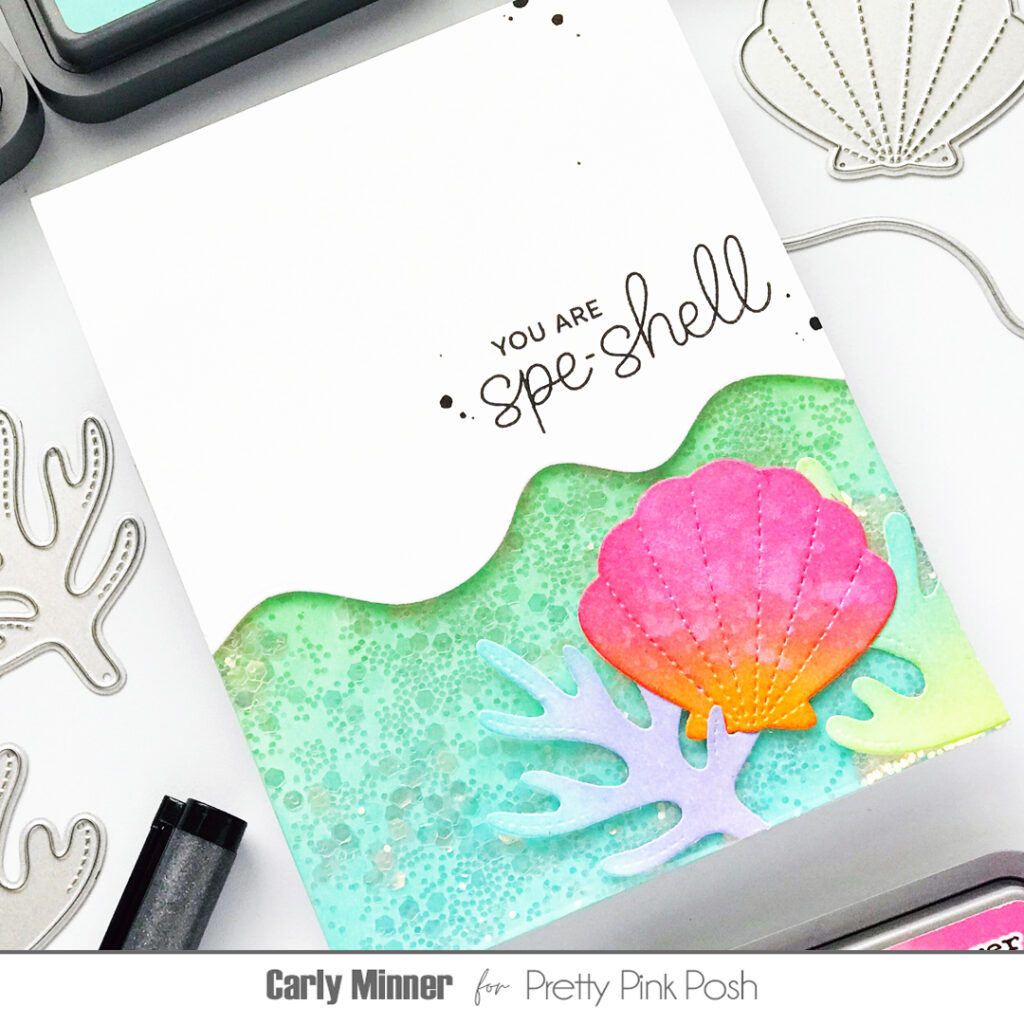
Today I’ve got two Seashell Wreath card ideas to share with you! One is super quick with minimal coloring. The sentiment could easily be changed to almost anything!
And the second one is a shaker because I can never resist a chance to make a shaker!
I hope you are inspired to create with the Seashell Wreath or one of the other adorable Pretty Pink Posh wreaths!
Hey crafty friends! I’m Rebecca Keppel and summertime is shimmer time in cardmaking! But we’ve all got places to be during the summer so shimmer techniques need to be quick and easy so we can spend more time in the pool!
Start with your background. I love plate dies like the Chevron Pierced Plate Die to create a background in one pass of the die cut machine. To add shimmer I start with something like Solar Spray because it doesn’t really change the color of the cardstock I chose.
To create shimmery die cuts I like to add shine and color all in one quick spritz, so Distress Spritz sprayed on white cardstock makes a nice soft shimmery color. Then use the Stitched Seashells Dies and Stitched Coral Dies to cut out some shimmery shapes. The added bonus of spritzing first is that running them through the die cut machine helps to flatten out the paper.
One final way to add some extra shine is to use a shimmer watercolor pan. Simply wet the watercolor paint and brush a paint brush through it and then tap on the handle over the project.
I hope you grab some Pretty Pink Posh summer dies and shimmer them up with these easy techniques so you can create a pretty card in a snap and get back to your sun and fun!
Hey friends, it’s Mindy! If you’re a fan of beachy vibes and serene color palettes, this project is right up your alley! Using a (mostly) monochromatic color scheme, I created a calming ocean-inspired card that captures the beauty of the shore with just one color family — beautiful shades of teal.
For this card, I worked with the delightful Beach Fun stamp set, stamping images onto smooth 80lb white cardstock and coloring them with alcohol markers for rich, blendable shading. To complement the stamped elements, I used the Layered Seashells stencil on a base of Seaside cardstock, blending Sea Glass and Turquoise Sea ink pads with a soft brush to create a textured, layered seashell background.
This limited color palette really helps unify the design while evoking the peaceful feeling of the ocean. The soft layering through the stencil combined with the detailed coloring on the stamped images brings dimension and interest without overwhelming the senses.
Whether you’re a beginner or an experienced card maker, I hope this inspires you to experiment with monochromatic schemes in your own beach-themed projects.
Happy crafting and may your creativity always feel as refreshing as a day at the beach!
I’ll tell you a secret…as a clean & simple cardmaker, I used to struggle with actually using my stencils. I loved them so much but I also loved white space and plain backgrounds. What was I do to?!
One solution was for me to make the stencil the primary star of the card instead of a background and this design is one of my favorites!
You need a little masking tape, your favorite inks to blend with, sentiment strips stamps and any of their gorgeous stencils (but don’t sleep on the Seashell Background for summer!)
Hi, friends! Lauren Taylor here and today I’m sharing a handmade card I created featuring some of the spring products! This project truly captures the essence of spring with its cheerful floral design and a playful shaker element that’s bound to bring joy.
I began by die-cutting various elements using the Tulip Shaker Dies and the Grass Border Die. From green cardstock, I cut out the grass border as well as the stems and leaves for the tulips. For the tulip tops and their frames, I chose a lovely rose pink cardstock, and for the shaker portion of the tulip, I die-cut the flower bud shape from acetate, using a helpful trick of placing printer paper underneath to ensure a clean cut. Assembling the tulips involved adhering the pink tops to the green stems and leaves. The shaker tulip required attaching the acetate to the frame using adhesive.
The real magic happens with the shaker element! I used thin foam strips to build a little container within the tulip frame and then filled it with the vibrant Sugar Pop Shaker Beads. To seal the shaker, I attached one of the solid tulips to the back of the frame, creating a delightful interactive element. For the background, I opted for a soft, blended look using the Watercolor Oval Mask Stencil and Distress Inks in shades of Squeezed Lemonade, Dried Marigold, and Tumbled Glass, aiming for a sunny, sky-like feel. A touch of black splatter added a bit of whimsy.
After adhering this background to an A2 card base, I arranged the die-cut tulips and grass border across the front. Finally, I added the Large Celebrate Shadow Diesentiment, die-cutting the word and its shadow from white and pink cardstock respectively, and attaching it with foam strips for added dimension. This card, with its celebratory sentiment and fun shaker, is perfect for so many occasions!
I hope you were inspired by this shaker card. Thanks for stopping by!
Hi friends! It’s Sophie and I am back today to share a fun card I made featuring some of the new June release items. Let’s check it out!
For my card I wanted to feature some fun and vibrant colors that summer at the beach is known for. I actually rarely use purple so this really helped me stretch my creative energy!
To start, I stenciled a background using the newLayered Coral Stencils in three shades of purple, pink, and aqua over white cardstock. I overlapped the colors to create a more seamless blend. Once finished, I actually just took the blending brushes and used whatever ink was left over to do a light wash over the whole paper so that the background was not as stark white.
Then, I spent some time die cutting the Stitched Coral Dies out of various coordinating colors of cardstock. I also cut an Eyelet Circleout of Vellum for a place to ground my images. I also cut a little bank of sand using the same Eyelet Circle as well as the new Shoreline Borders. I really like this border set because the waves are really unique and can be used for non-ocean/beach themed cards as well. I think they would make great snowbanks or just abstract borders for scenes on cards!
I hope this was inspiring for you! I’d love to know below if you’ve ever been scuba diving/snorkeling – this card makes me want to go to the ocean for sure! :)
Hey crafty friends! I’m Rebecca Keppel and when it comes to three dimensional or interactive cards, I am hopeless if I need to do any measuring at all! That’s why I love Pretty Pink Posh’s die sets like the Shadow Box Dies. There is no measuring required! You die cut all the pieces that you need (which are all included in this set) and adhere everything together. That includes both sides of the box as well as decorative rectangles for the window and decorative edges for the “shelves” or layers of the shadow box.
It is so quick and easy to create the shadow box that you can spend more time decorating it! I added some of the Stitched Humingbird Dies. Cutting them out of colorful cardstock really popped off the greens and blues I used for my shadow box.