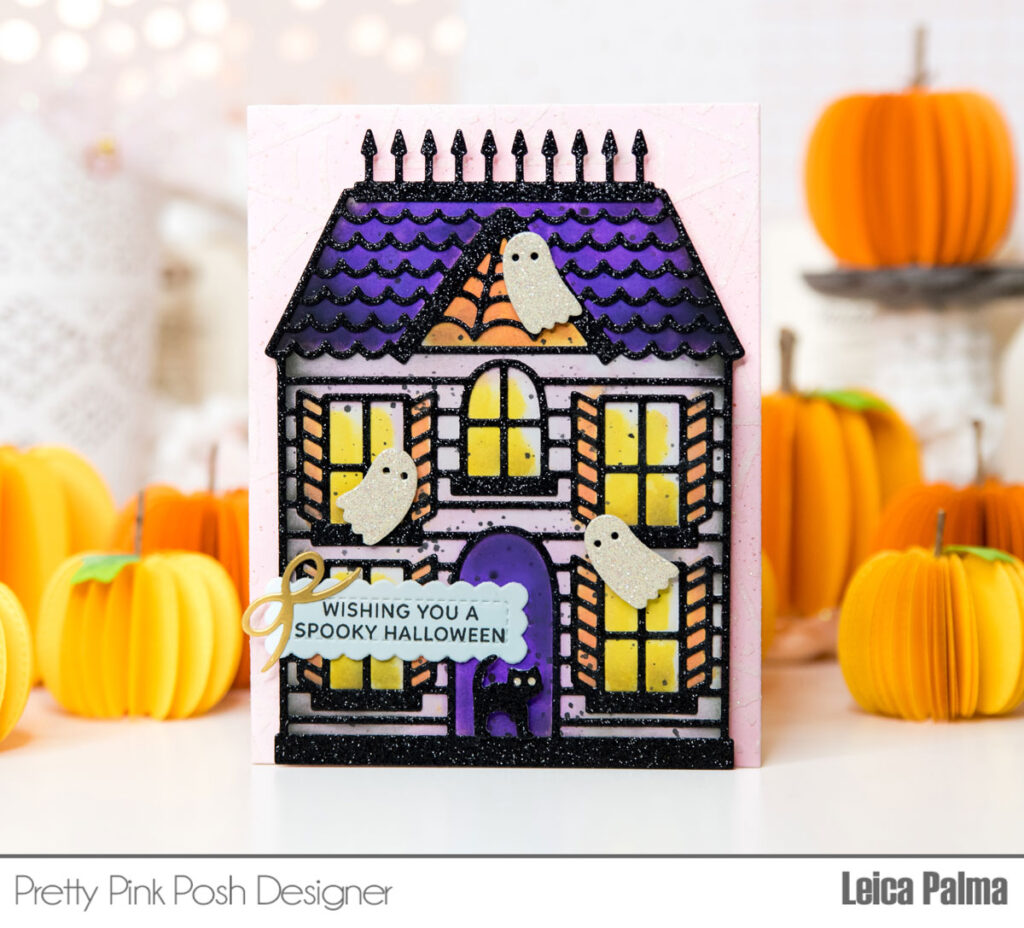
Hey, friends! Leica here and today I’m excited to share a cute Halloween card using the awesome Halloween House die. It was a breeze to put together, and that’s what I adore about this new die from the August 2023 release.
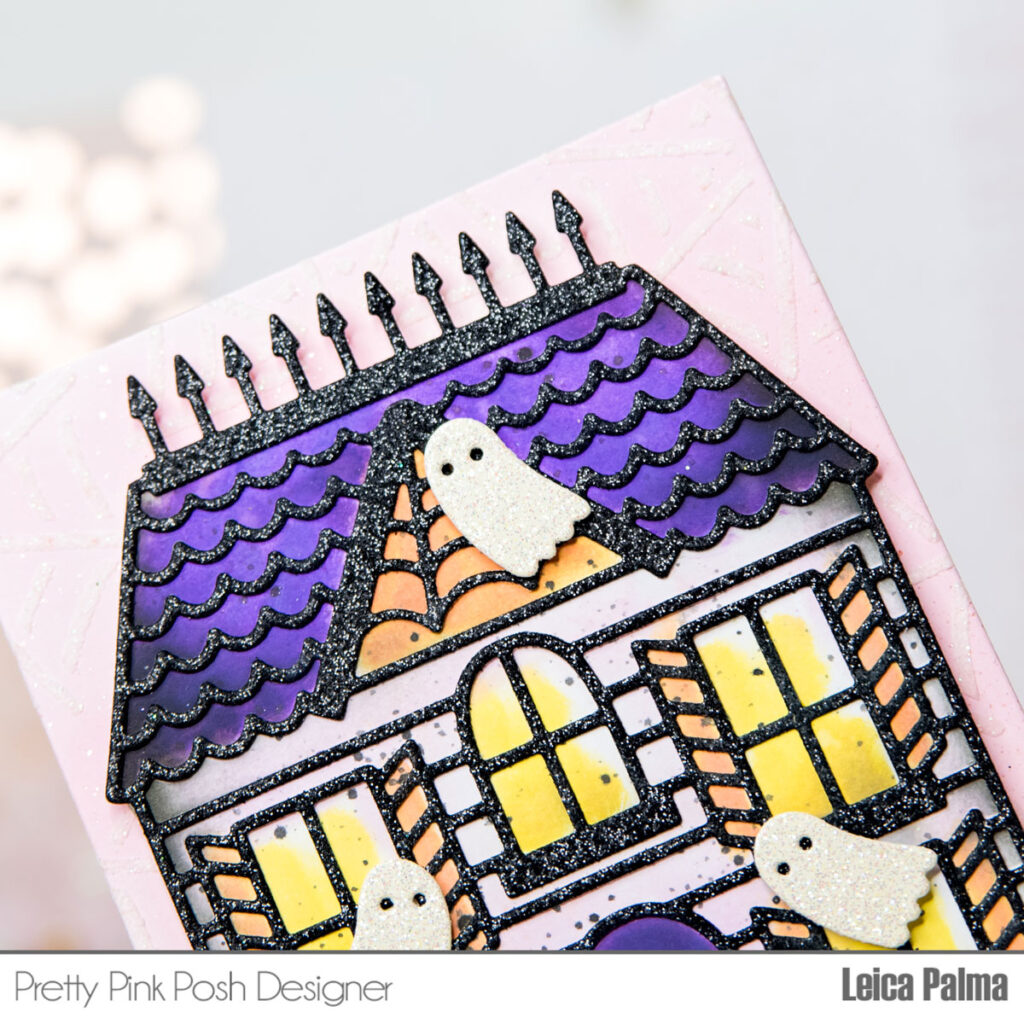
To start, I cut the Halloween House twice – once in black glitter cardstock and another in white heavy weight cardstock. I used the white one as a stencil and inked through it on a white card panel. Using Distress Oxide Inks in Black Soot, Milled Lavender, Spiced Marmalade, Squeezed Lemonade, and Wilted Violet, I created a fantastic background. After tracing around the Halloween House die, I cut it to size and foam mounted it onto the card panel.
For the main card panel, I blended Spun Sugar Distress Ink on an A2-sized white cardstock and added a textured spider web background using Finnabair Snowflake Paste through the Layered Spider Webs Stencil. To make it even cooler, I splattered some rose gold ink on it.
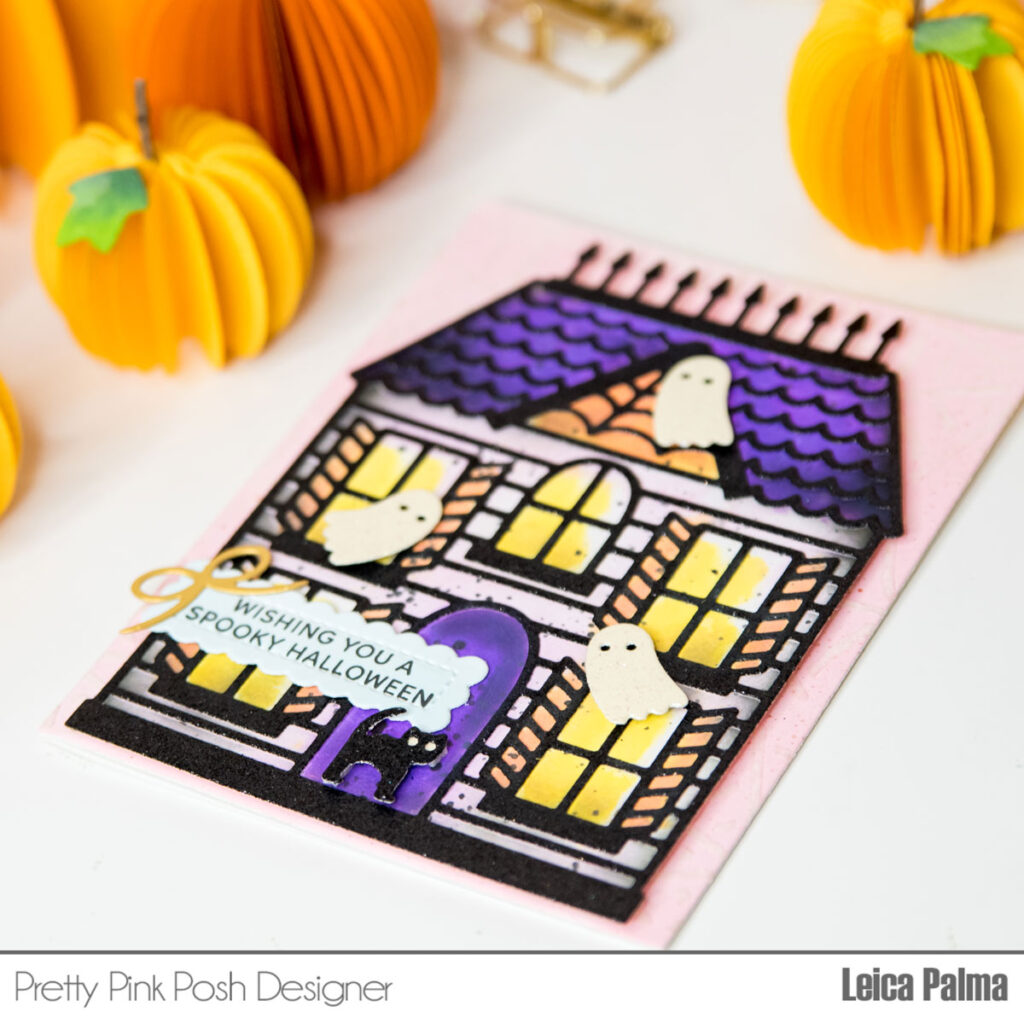
Next, I added a few cute ghosts cut from white glitter cardstock and the adorable cat from black glitter cardstock. For the sentiment, I stamped one from the Sentiment Strips: Halloween stamp set and cut it with a rectangle scallop die from the Sentiment Stripsdies. To give it a cute touch, I added a gold ribbon. Finally, I glued the card panel onto an A2-sized white card base.
That’s all for my card, featuring the Halloween House die. This die is so much fun to use since it takes up most of the card panel and is super easy to work with.
I hope I’ve inspired you to create your own Halloween card. Happy crafting!
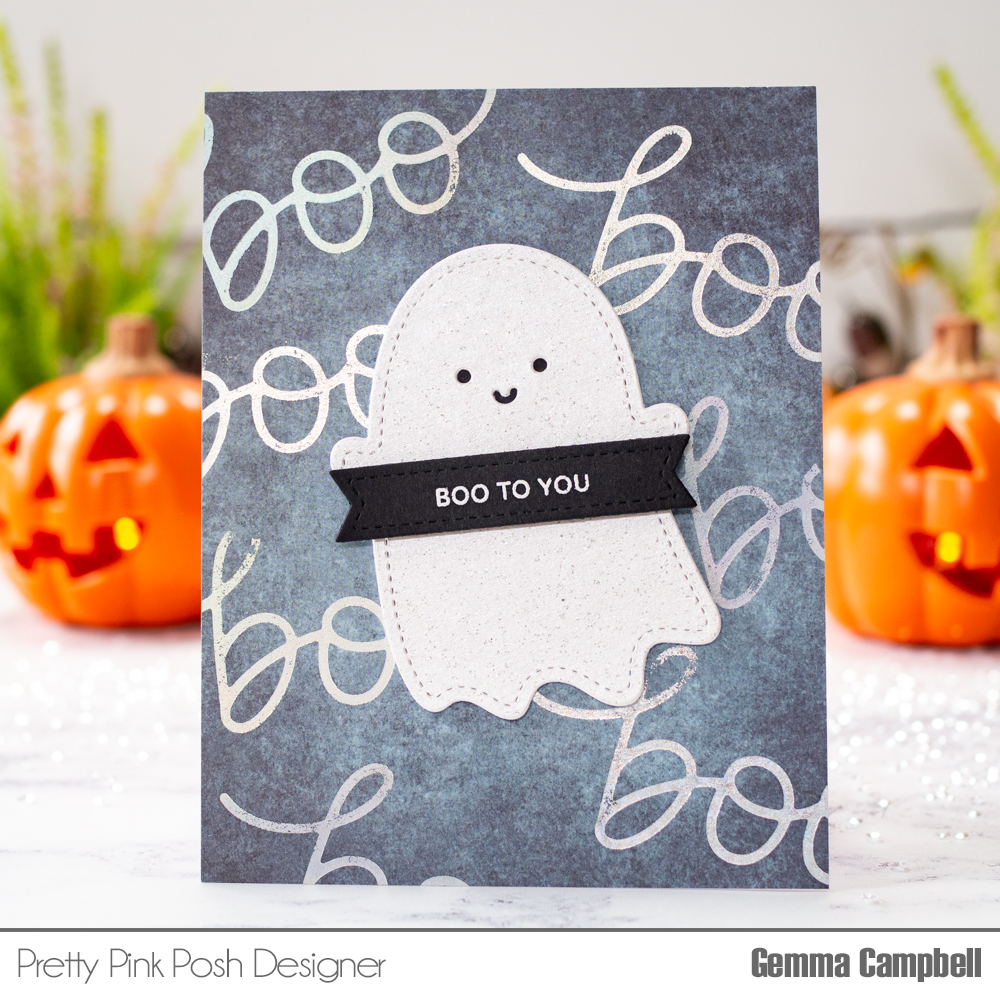
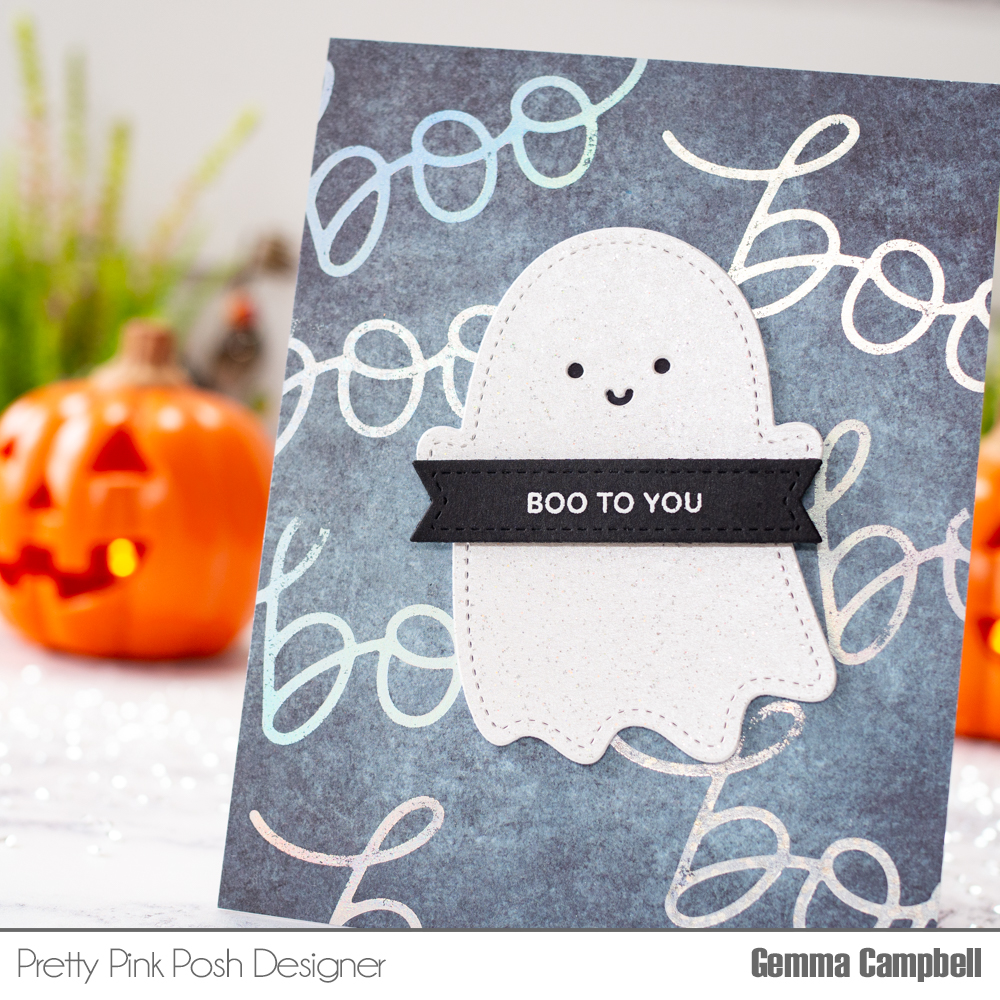
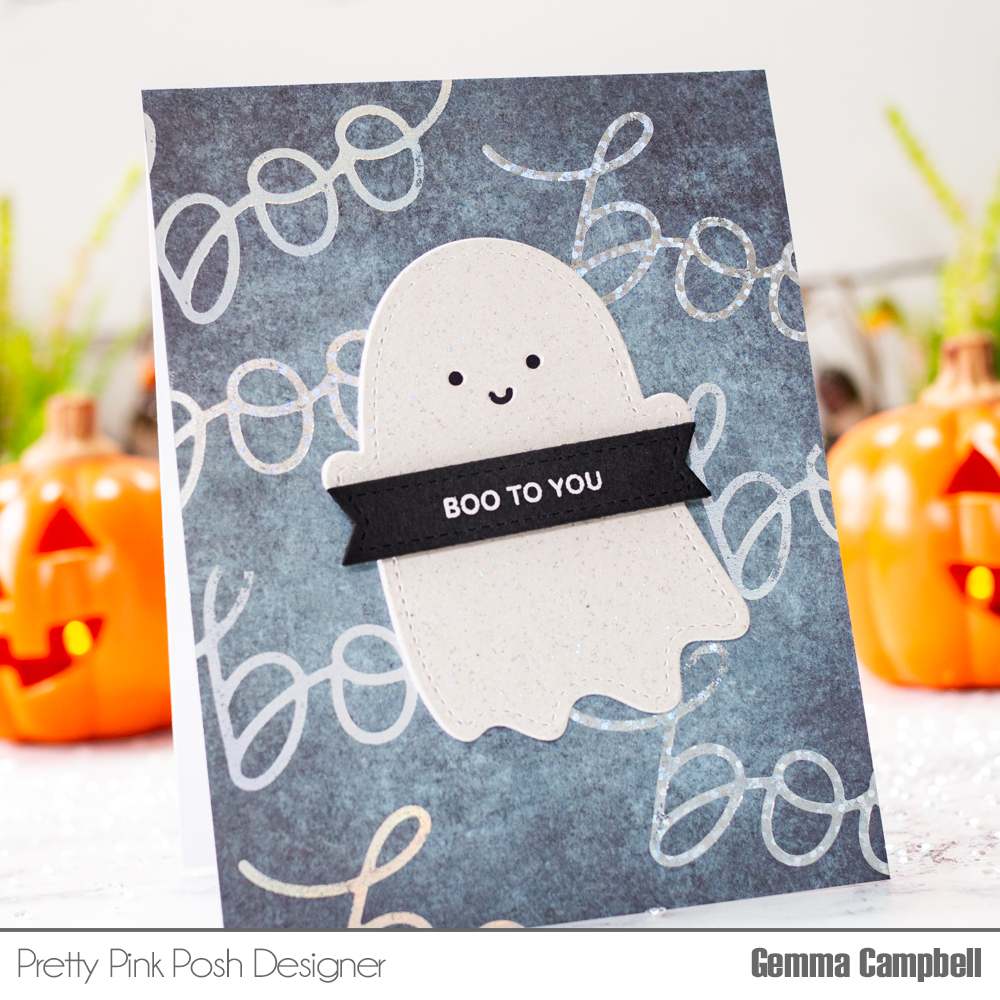
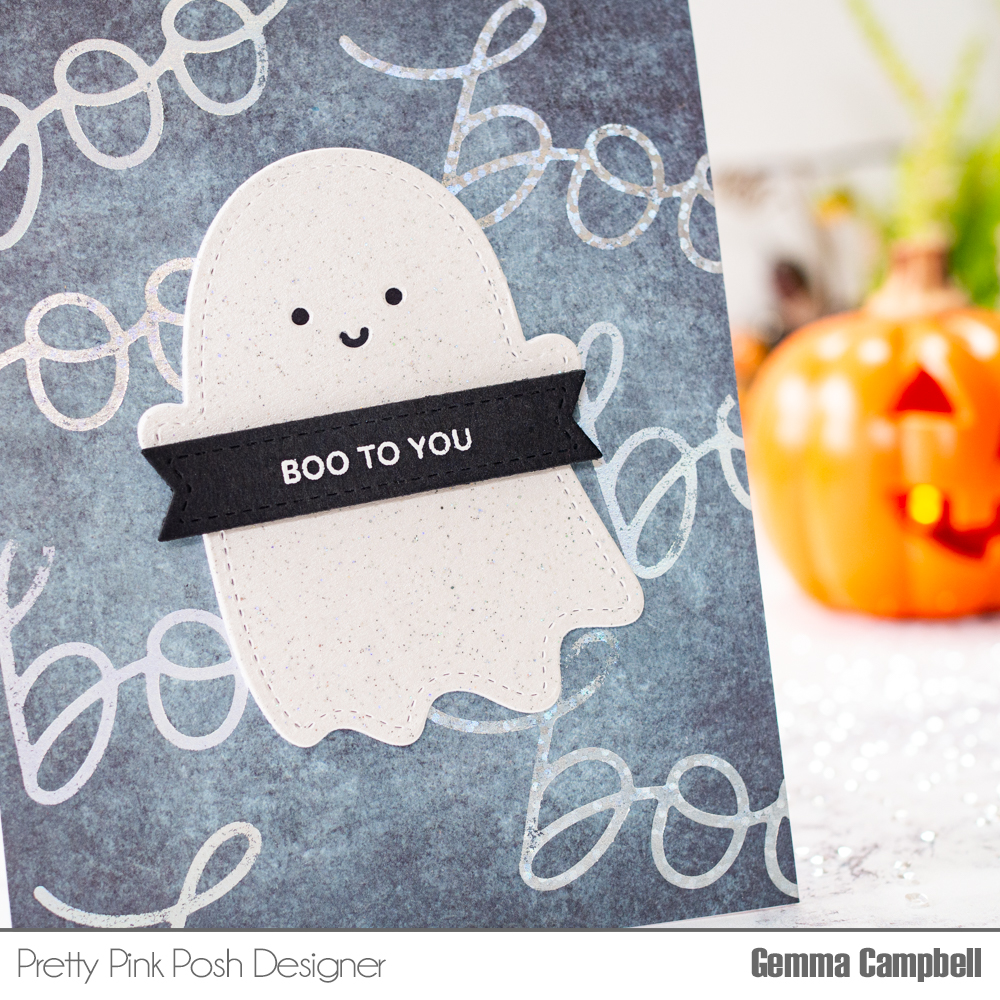
Hello, Gemma here today with a spooky cute Halloween card to share using the brand new release.
I began with the background. I used the new Hot Foil Large BooScript to foil multiple times on a piece of patterned paper. I foiled with prism and speckled prism glimmer foils, and didn’t worry if the foiling wasn’t perfect, as this time I wanted a more distressed look.
Next, I die cut the new Ghost Shaker – twice from white card and once from pearl white sparkle card for the top layer. I also added a face to the top layer, using a die from the Ghost Shaker set. I coloured on the layer beneath with a black copic marker, so it shows through the face. I then adhered the layers together for dimension.
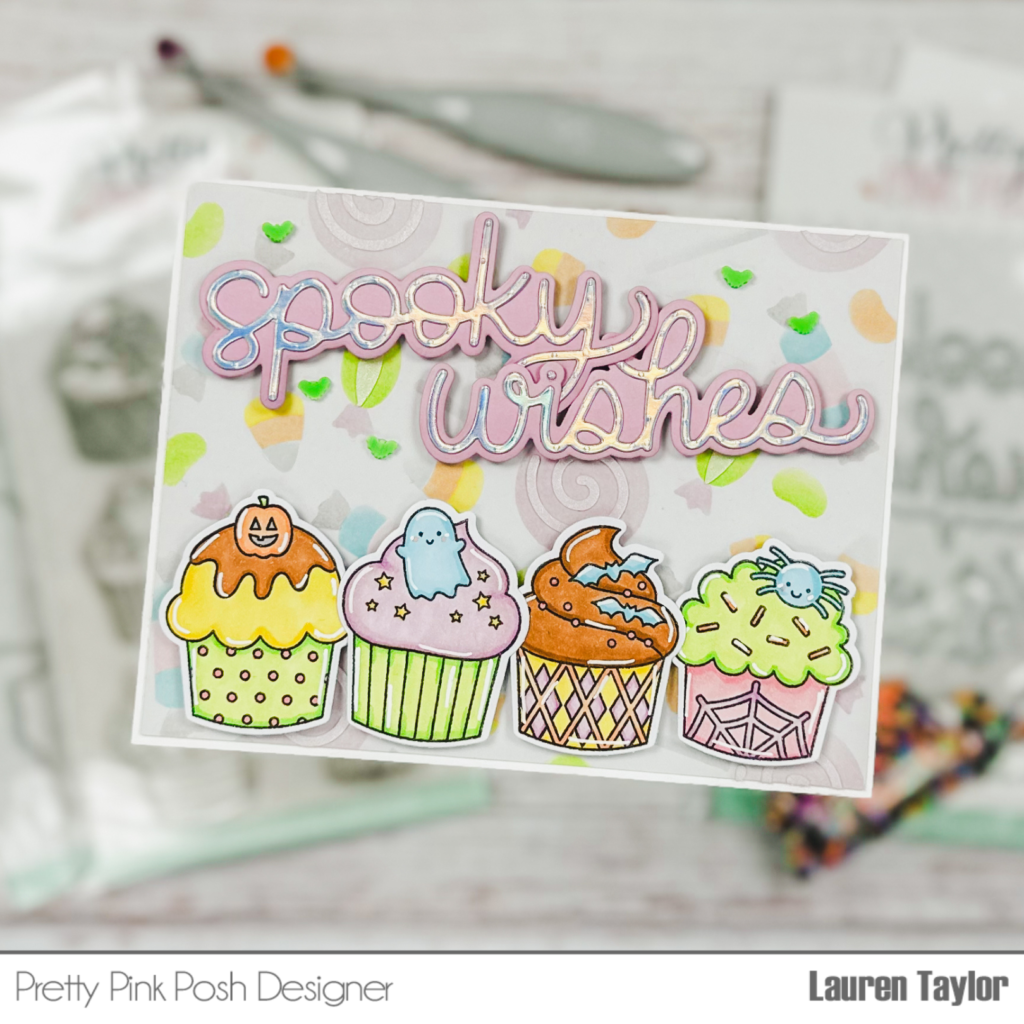
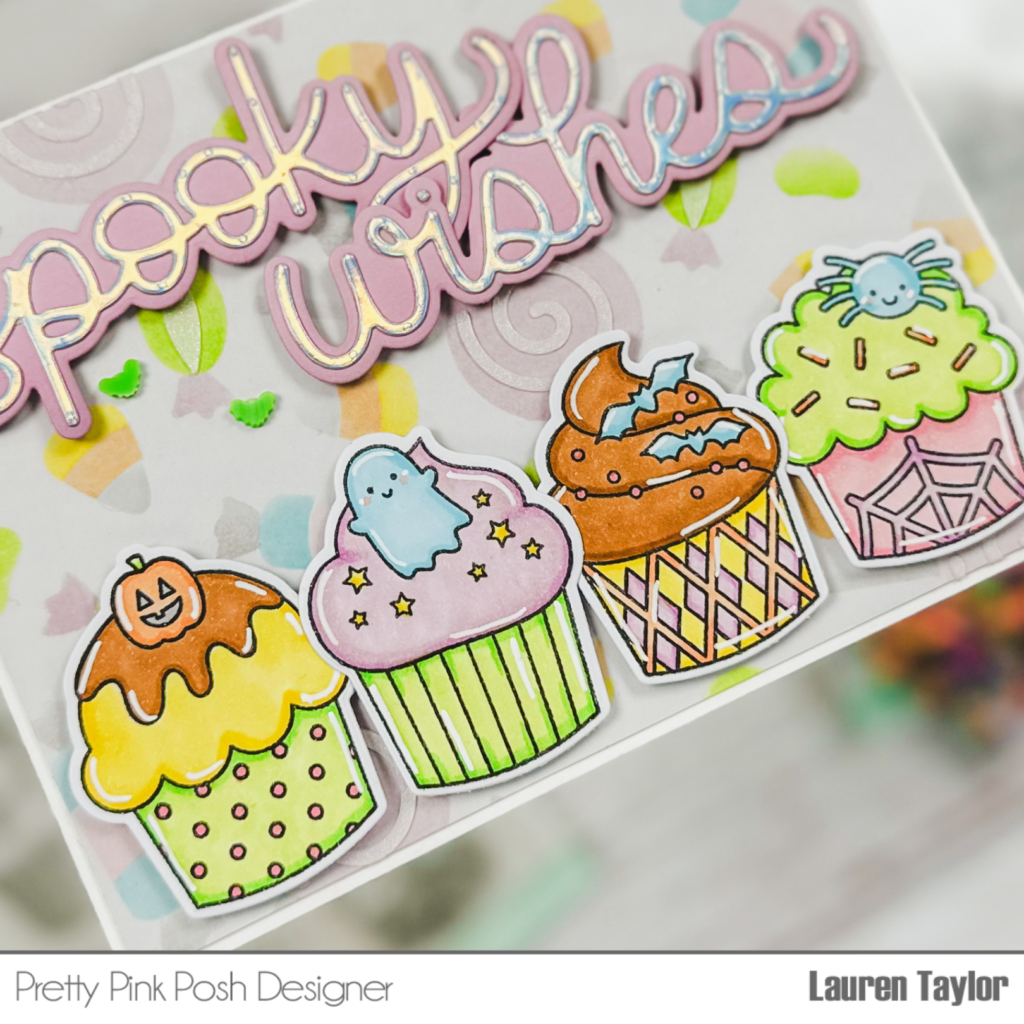
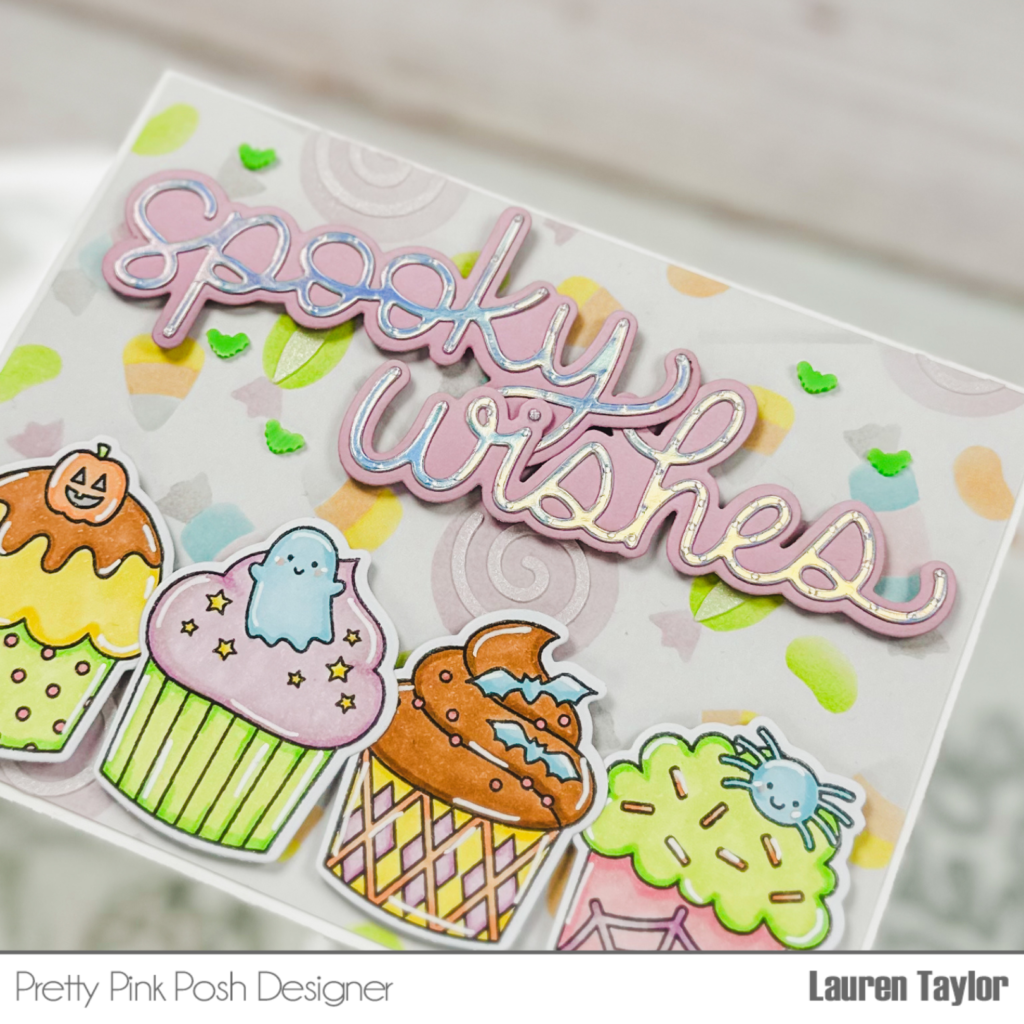
Hi, friends! It’s Lauren and I am back with a new video featuring some of the new Halloween themed products from the newest release! Halloween is my favorite holiday and I’m just so excited to have the new products for the upcoming holiday and to share some inspiration with you.
To make sure it has enough time to dry, we’re going to start with the stenciled background. I cut a piece of light grey cardstock slightly smaller than A2, 4-1/8 x 5-3/8″. Using Distress Inks, I stenciled different colors through the layers of the cute candies from theLayered Candy Treats Stencils; the different colors were Spun Sugar, Dried Marigold, Squeezed Lemonade, Twisted Citron, Salvaged Patina, Milled Lavender and Lost Shadow. For the areas that layered on top of other colors of the candies, I used some Pearl White Stardust Butter stencil paste to add some shine and dimension.
Before putting my inks away, I used the Milled Lavender to ink the purple Spooky Wishes Shadowdie cut pieces so they have a bit of an ombre look to them. I then layered the word die cut pieces with liquid adhesive to finish off my sentiment. Next I colored in my images with Ohuhu Art Honolulu Markers and added some white gel pen accents for highlights on the images.
To assemble the card, I glued the grey, stenciled cardstock to the center of an A2 card base and layered on the sentiment and cupcakes to the card with foam adhesive. I just love how fun the candies look and the soft colors – pastel Halloween is just my favorite combination.
I hope this card brings a smile to your face today!
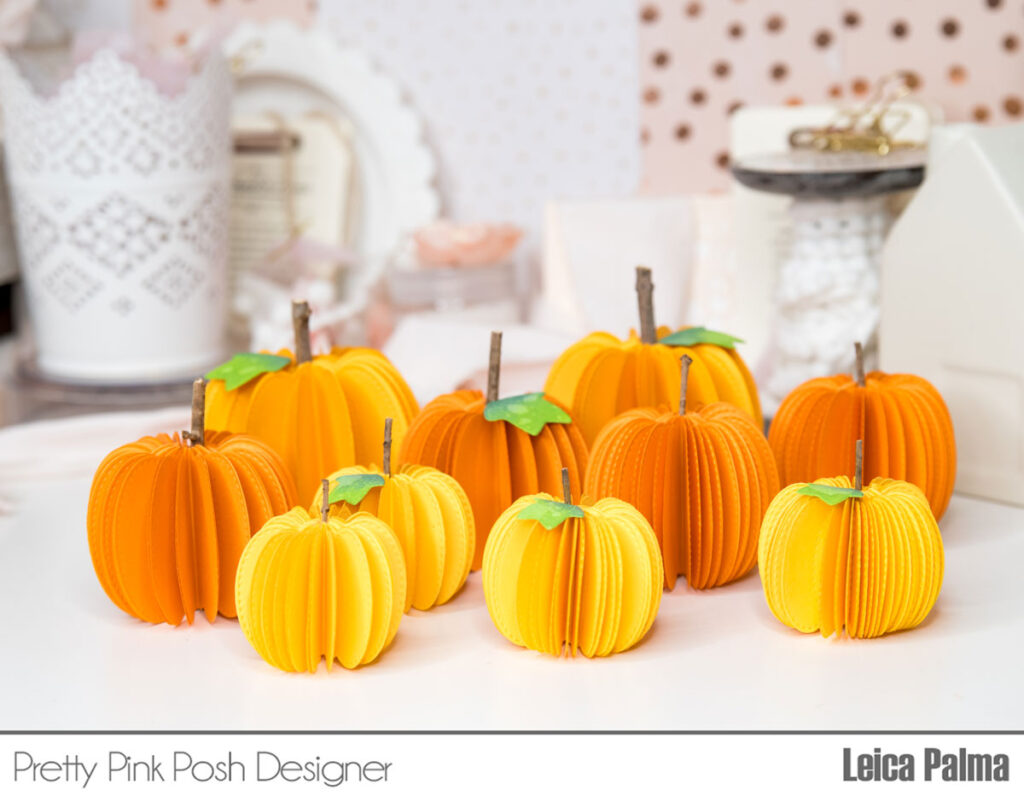
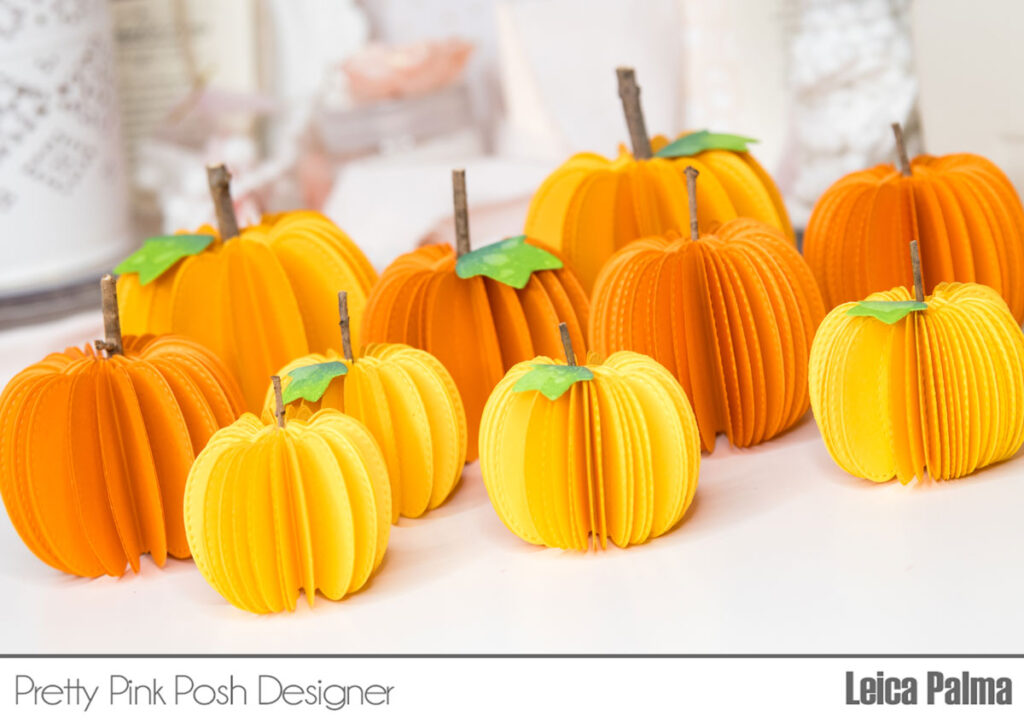
Hello, everyone! It’s Leica here. Today I want to share a fun 3D project using the Stitched Pumpkins dies from Pretty Pink Posh. This set comes with three pumpkin sizes that create adorable 3D pumpkins. They’re perfect for place card holders or as a festive centerpiece for Halloween and Thanksgiving.
For this project, I used 29 lb cardstock from Michaels and I cut 4 sheets at once, which saves a lot of time since we need many pieces. The more pieces you cut, the fuller the pumpkins will look.
The process is straightforward, though it may take some time to assemble. You can cut just four pieces to make a stand-alone pumpkin. You can experiment with heavyweight cardstock or colored and patterned paper too.
Once you have all the pieces, fold them in half and use a binder clip to hold them together. Apply glue to the spine of the pumpkins and let them dry. Then, attach the stem using the die provided or find something suitable in your garden. I used Helmar glue to adhere the stem to the center of the pumpkins.
For the leaf, I cut the die in green cardstock and added some interest with Mowed Lawn and Rustic Wilderness Distress Oxide Ink.
I made several pumpkins in different sizes to use as centerpieces for Thanksgiving. However, you can also use these dies for cards, not just 3D projects. They’d make beautiful focal pieces for cards too.
I hope my 3D pumpkin projects have inspired you to create your own. It’s a fun activity suitable for everyone. Both grown-ups and children can do this project together. Include the kids and create many 3D pumpkins.
PRIZES: be sure to leave comments on each stop. We are giving away 3 $30 gift certificates to three random comments (1 winner each day) left before August 15, 2023 at 11:59 PM PST. I’ll be announcing the winners next week, so be sure to return and see if you are one of the winners.
Hello! It’s Lindsey here today I have had so much fun creating with the August Release! I shared a few projects earlier during the sneak peeks and am excited to share more with you today.
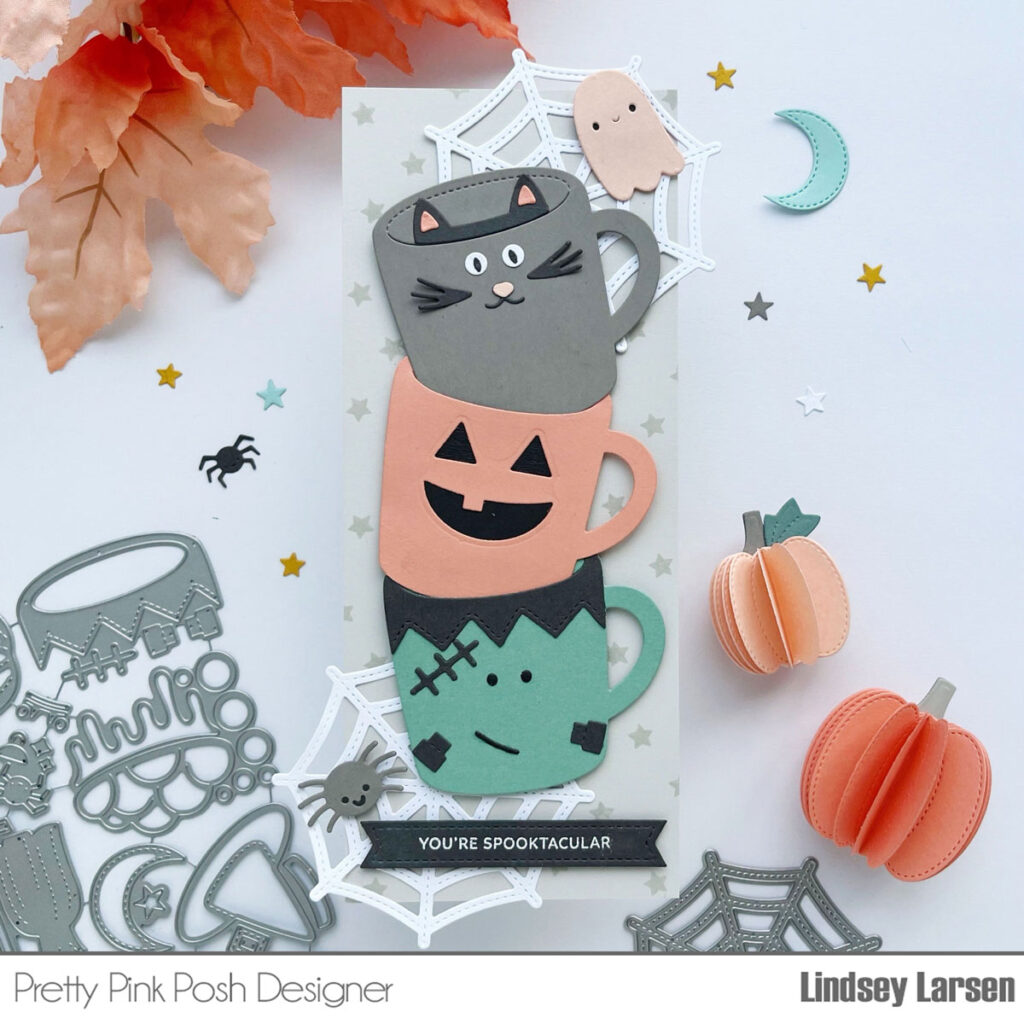
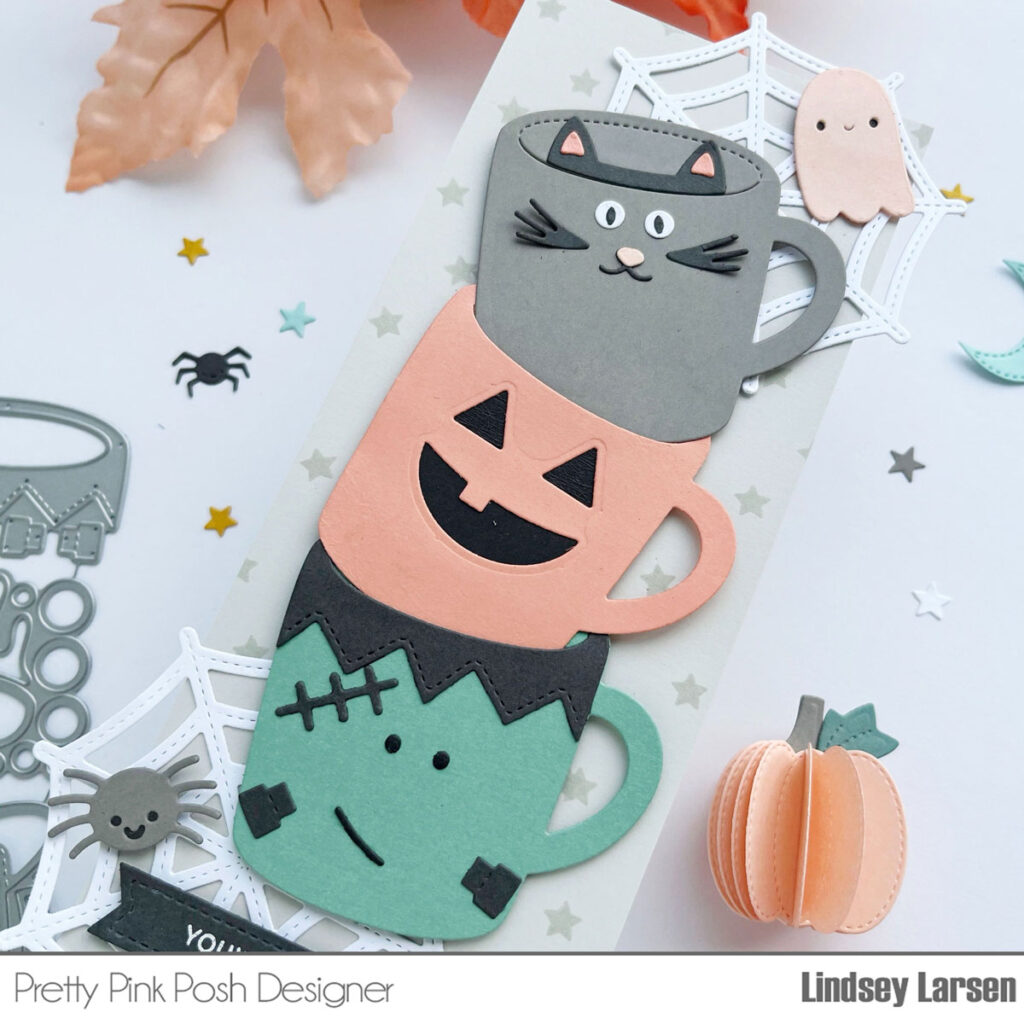
I’m a big fan of Halloween but only the cute Halloween stuff, so this release is right up my alley. The new Halloween Mug Additions definitely fit the cute bill, so I used them to create a fun stack of mugs.
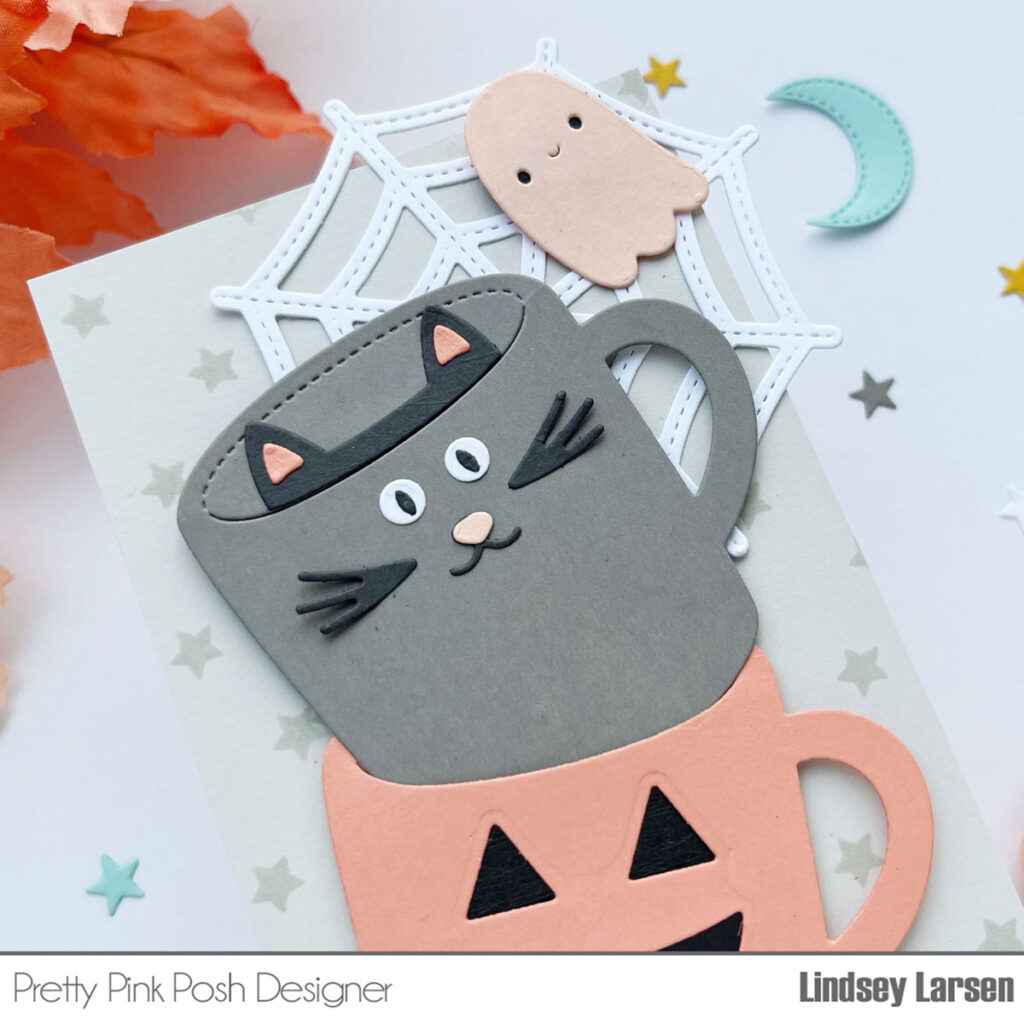
Let’s start at the top. Do you remember the original Winter Mug die set? Not only did it include the mug that we’ve all grown to love, but it also had some fun extras including the cute little ghost I used on my card.
The new Halloween Mug Additionshave so many creative options, and I started with the cat. Next, I made the pumpkin mug. There is a jack-o-lantern face in this die set, but I wanted a really big smile, so I used the largest jack-o-lantern face from the Stitched Pumpkins Dies.
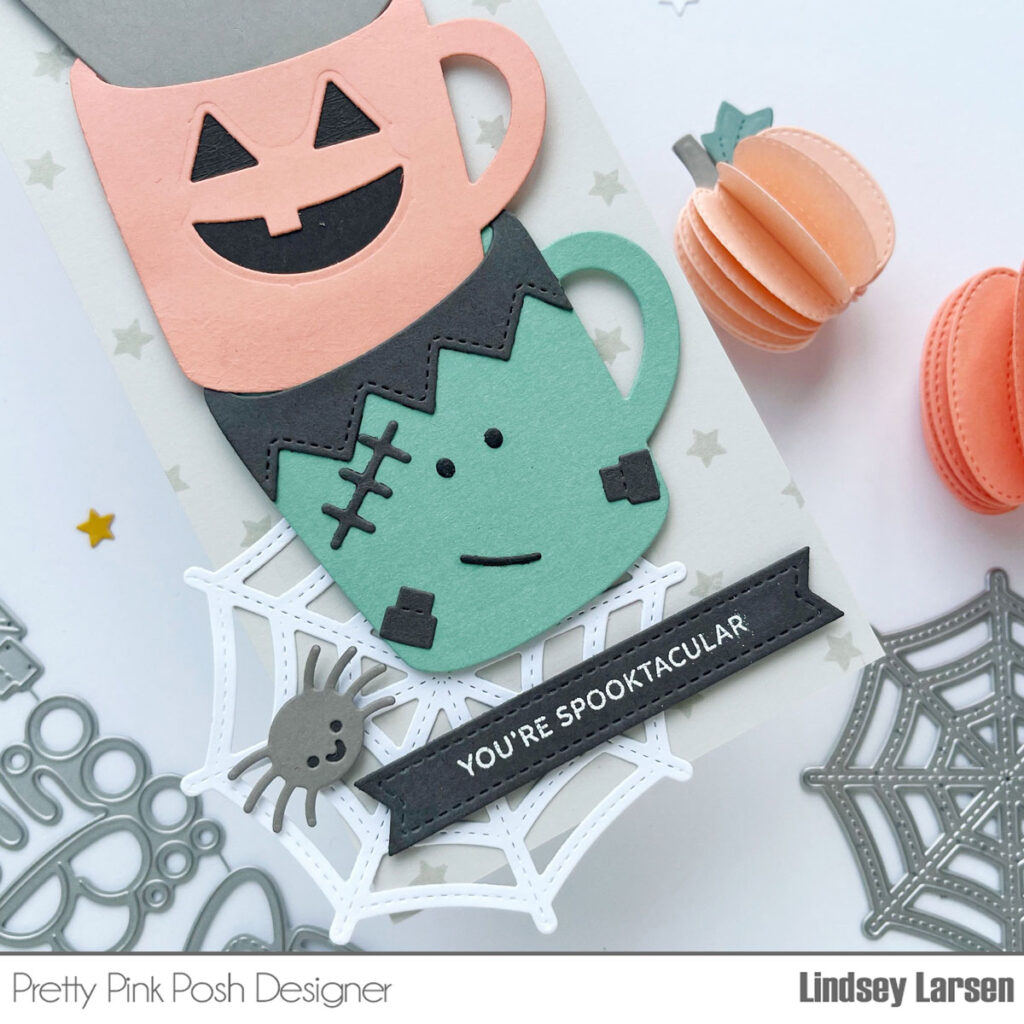
Finally, I created a Frankenstein mug. He’s my favorite. :) You can create a surprising amount of expressions for him. He can look more stern/grumpy/scary or cute and happy like I did here depending on how you position his mouth.
The sentiment was created with the Sentiment Strips: Halloween Stamps and the Sentiment Strips Dies. Love, love, LOVE!!! The Sentiment Strip Dies are an amazing addition to your crafty supplies. They work with pretty much every Pretty Pink Posh stamp set and are so versatile. They immediately jumped to my list of all time favorite products!
PRIZES: be sure to leave comments on each stop. We are giving away 3 $30 gift certificates to three random comments (1 winner each day) left before August 15, 2023 at 11:59 PM PST. I’ll be announcing the winners next week, so be sure to return and see if you are one of the winners.
The August 2023 Release is now available in the Pretty Pink Posh Shop and select retailers that carry our products. If you missed our post yesterday, we revealed all of the products in picture form, but if you would like to see them in a video, Mindy has that for you today!
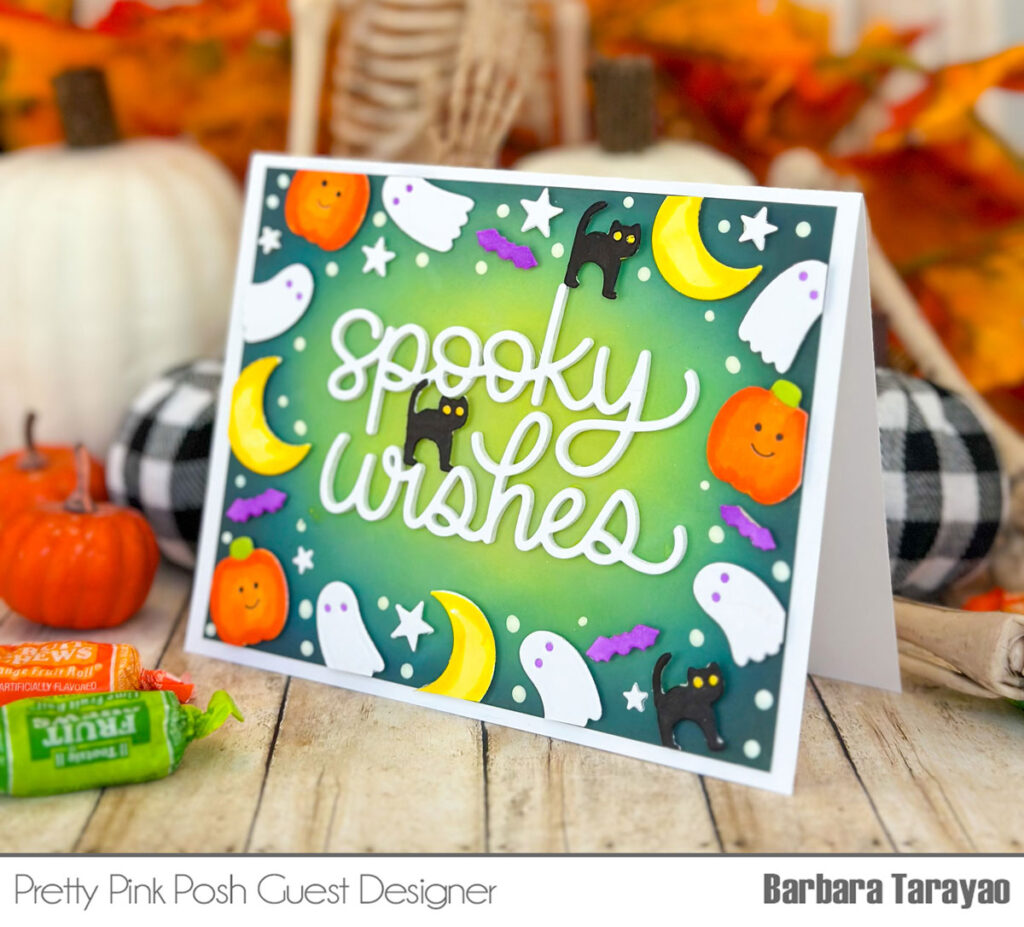
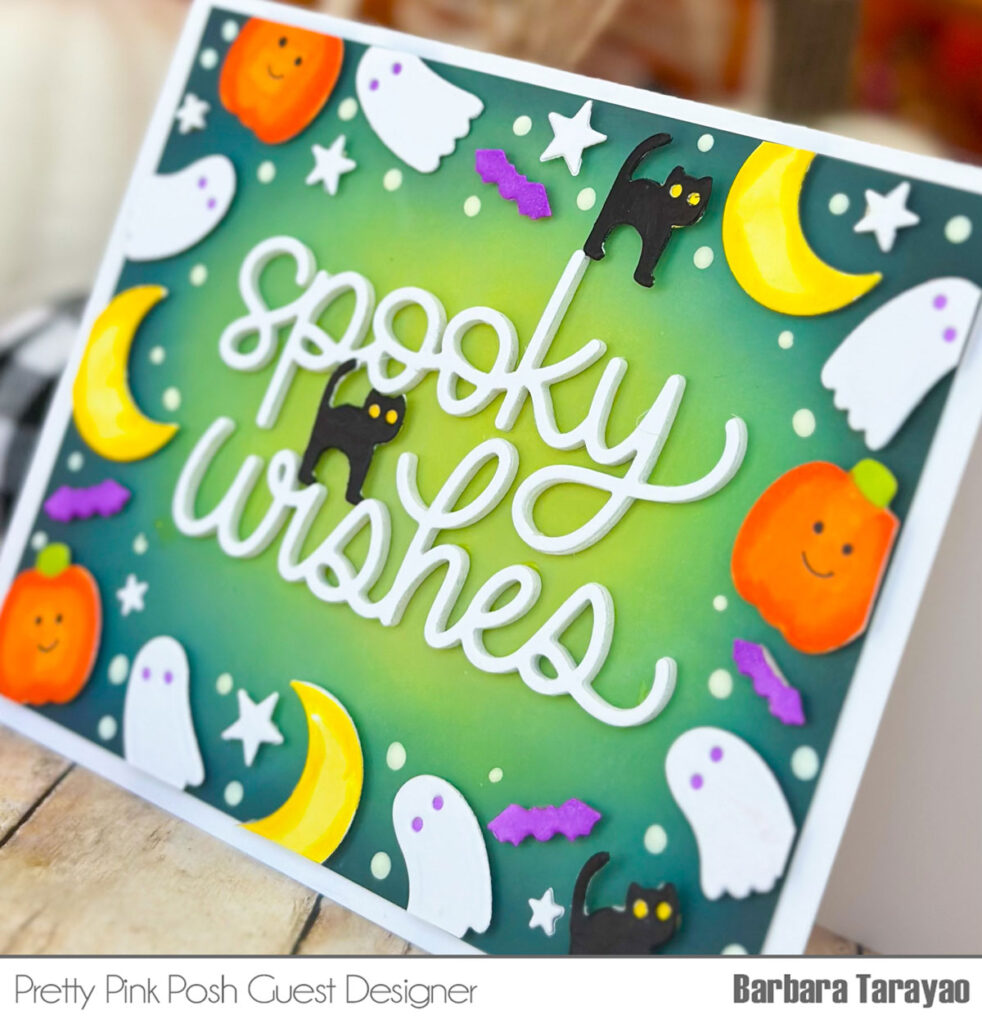
Hello, it’s Barbara here and I’m happy to be sharing a card using the new release. I love guesting for Pretty Pink Posh! If you want to see more of my guest designer projects, visit me on Instagram!
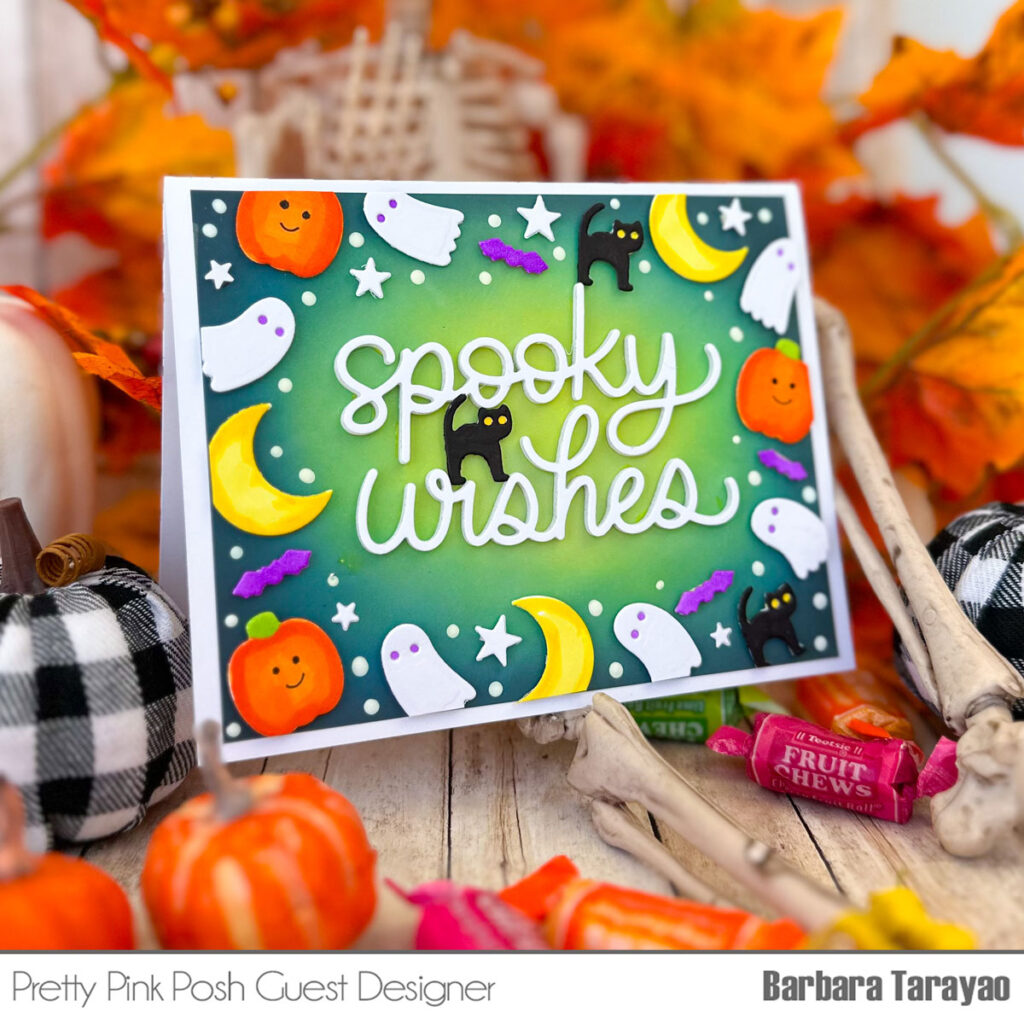
I began with an A2 size card base made from smooth white cardstock. I then trimmed down another piece of white cardstock to leave a bit of a border to create my background panel. Using distress oxides inks I created a spooky night sky starting with the lightest color in the center of panel and then blended darker ink from the corners to towards the center.
I die cut the Spooky Wishes Shadow out 110lb white cardstock and fun foam for dimension. I used liquid glue to add to the center of the ink blended panel.
Copies used: Y08, Y15, YR04, YR07, V04, YG23 and 100 black Distress Oxide inks: Twisted Citron, Mowed Lawn, Uncharted Mariner, Black Soot
I then die cut the ghost, pumpkin, bat, cat, star and moon images from the Halloween House die set out of white cardstock. I colored the images using copic markers. I arrange them all around the Spooky Wishes Shadow. I added a few more stars and some white dots with acrylic paint and a stylus.
PRIZES: be sure to leave comments on each stop. We are giving away 3 $30 gift certificates to three random comments (1 winner each day) left before August 15, 2023 at 11:59 PM PST. I’ll be announcing the winners next week, so be sure to return and see if you are one of the winners.
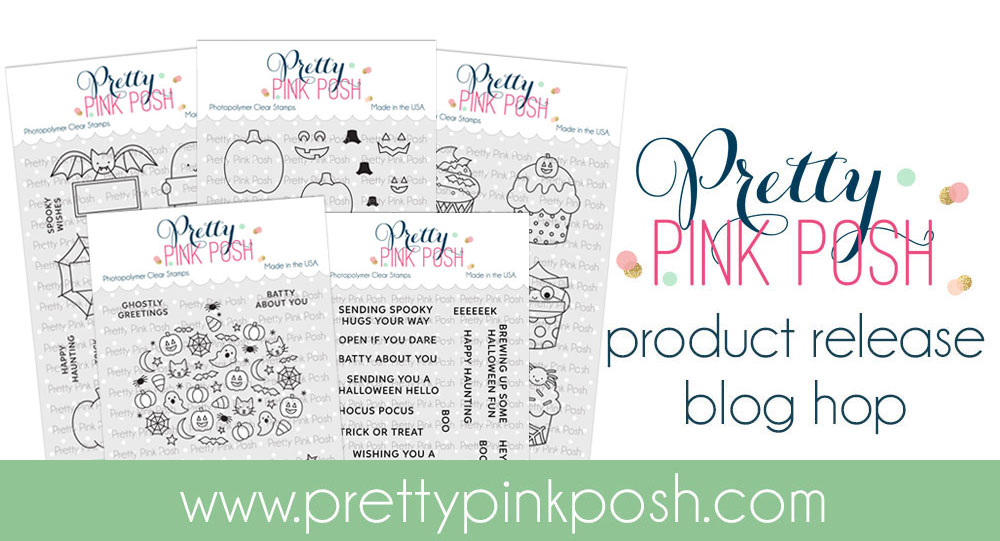
Hello friends! It’s time to reveal all of the products that are part of the August 7th release.
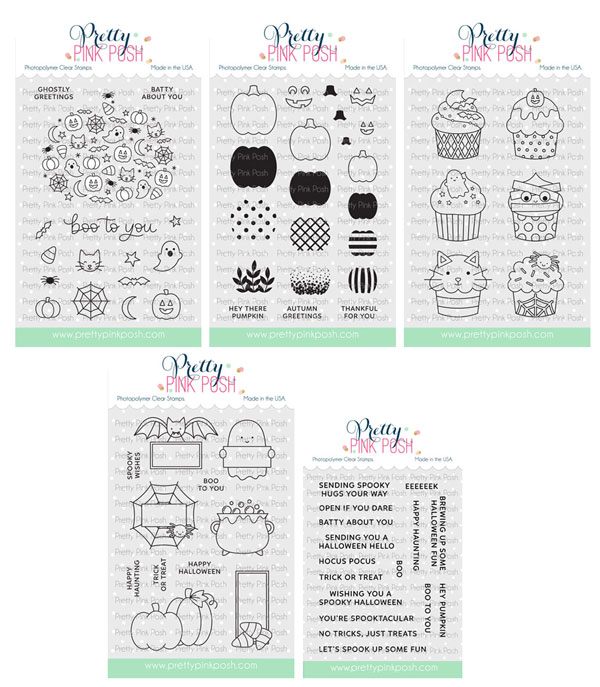
Here’s a look at the five new stamp sets that will be available for purchase: Boo to You, Decorative Pumpkins, Halloween Cupcakes, Halloween Signs, and Sentiment Strips: Halloween.
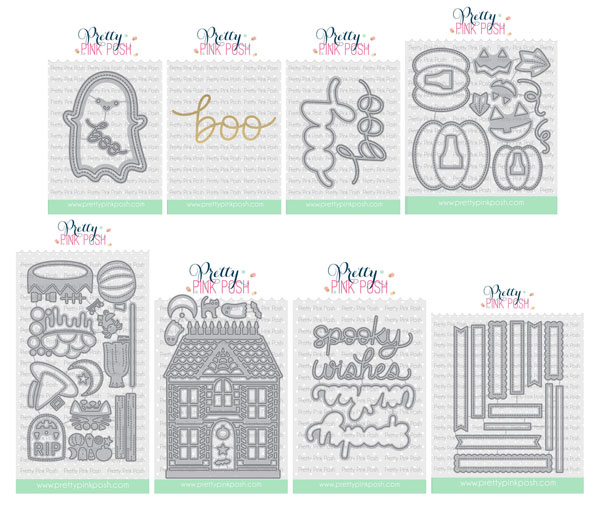
Here are the individual die sets that will be available: Ghost Shaker, Hot Foil- Large Boo Script*, Large Boo Shadow, Stitched Pumpkins, Halloween Mug Additions (designed to be used with the popular Winter Mug dies), Halloween House, Spooky Wishes Shadow and Sentiment Strips.
*The shadow dies work individually, or you can use them in conjunction with the hot foil plate!
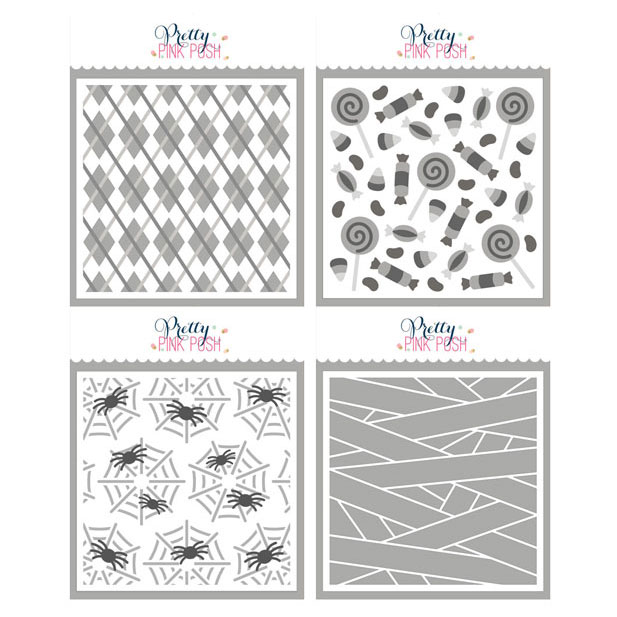
This month we have four new stencils: Layered Argyle (3 layer), Layered Candy Treats (4 layer), Layered Spider Webs (2 layer)and Mummy Wrap.
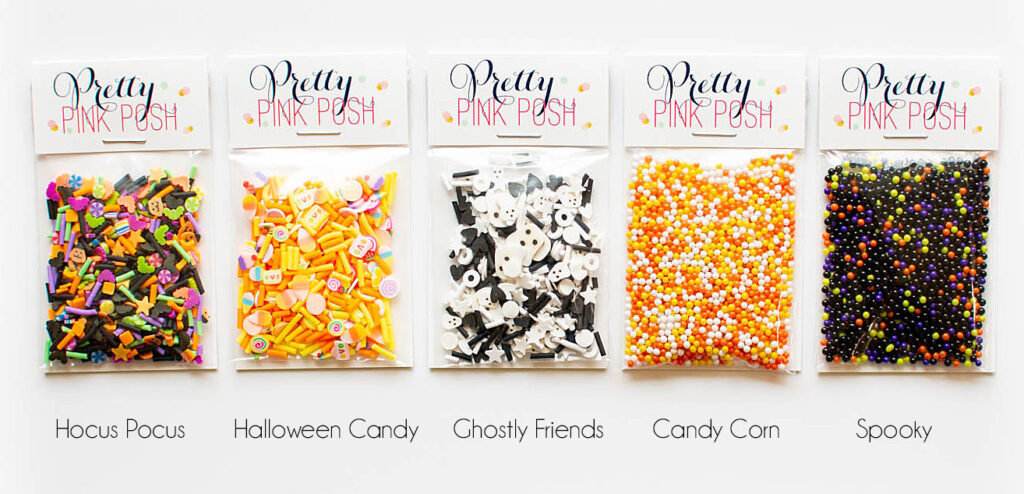
There are five new embellishments this month: Hocus Pocus, Halloween Candy, Ghostly Friends, Candy Corn shaker beads and Spooky shaker beads.
We have a limited amount of bundles available where you can buy this release in one easy click. Plus, you’ll save 15% off when you buy it all together.
Due to not everyone owning a hot foil machine, we did NOT include the hot foil plate in this bundle.
We will see you tomorrow as we show you the new products in a video and the products go live individually. Plus, we will be kicking off our three day blog hop!
Good morning! It’s Lindsey here today, and I’m giving you a sneak peek of some of the fun, new dies releasing this month. You are going to love them!
New release will be available August 7th
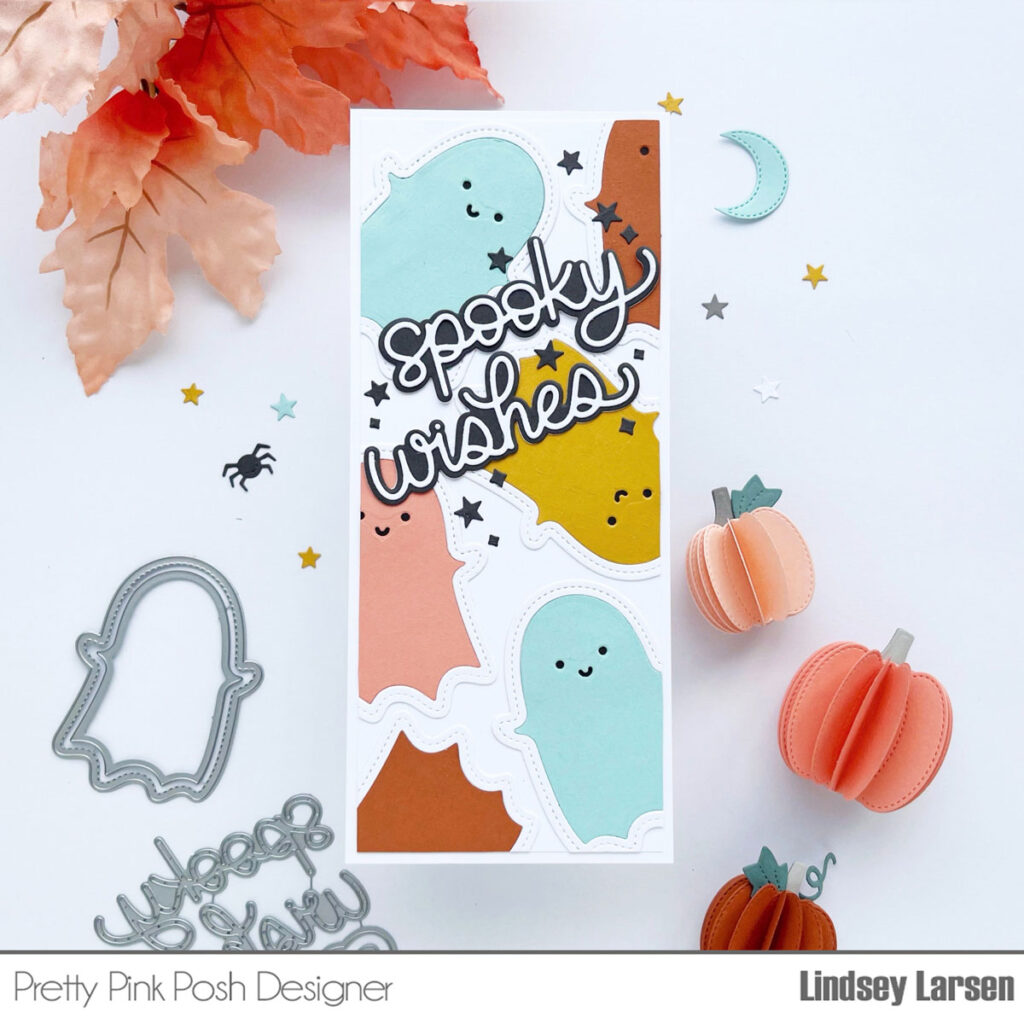
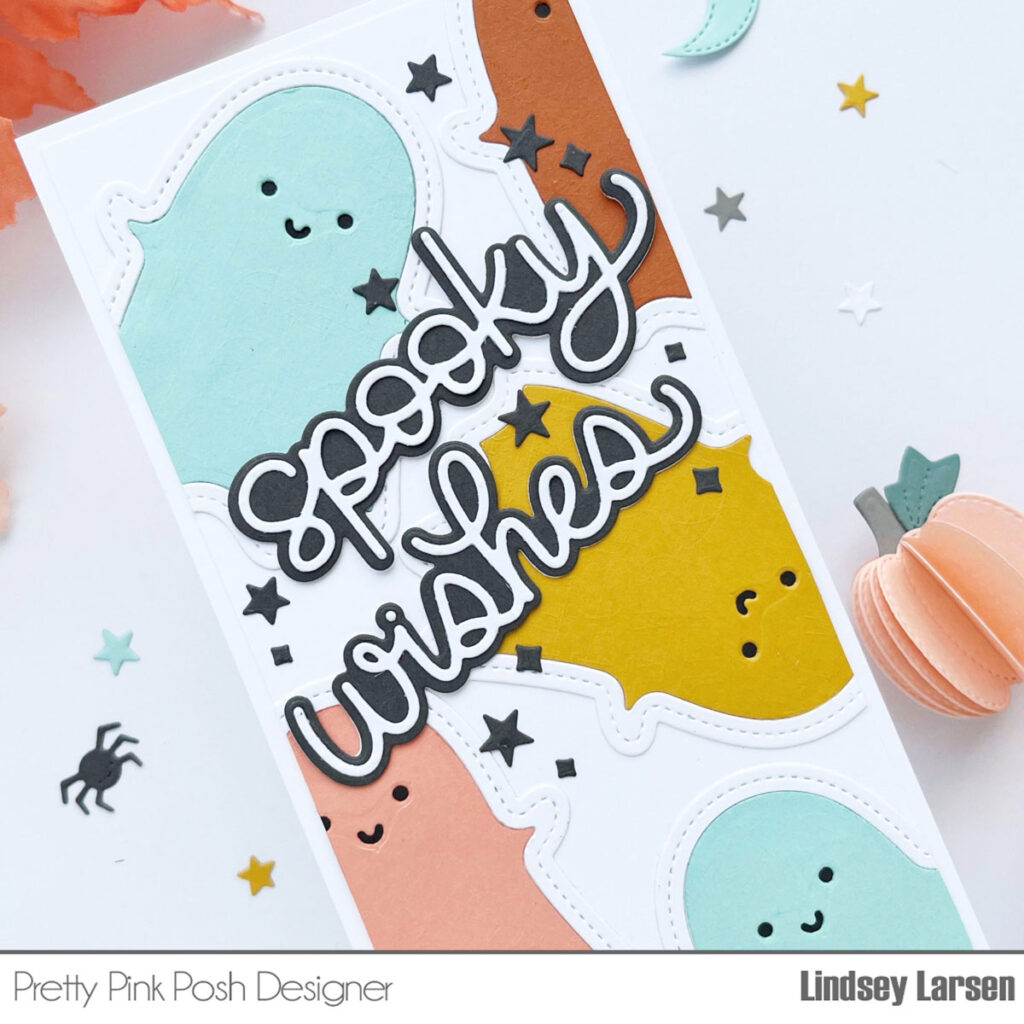
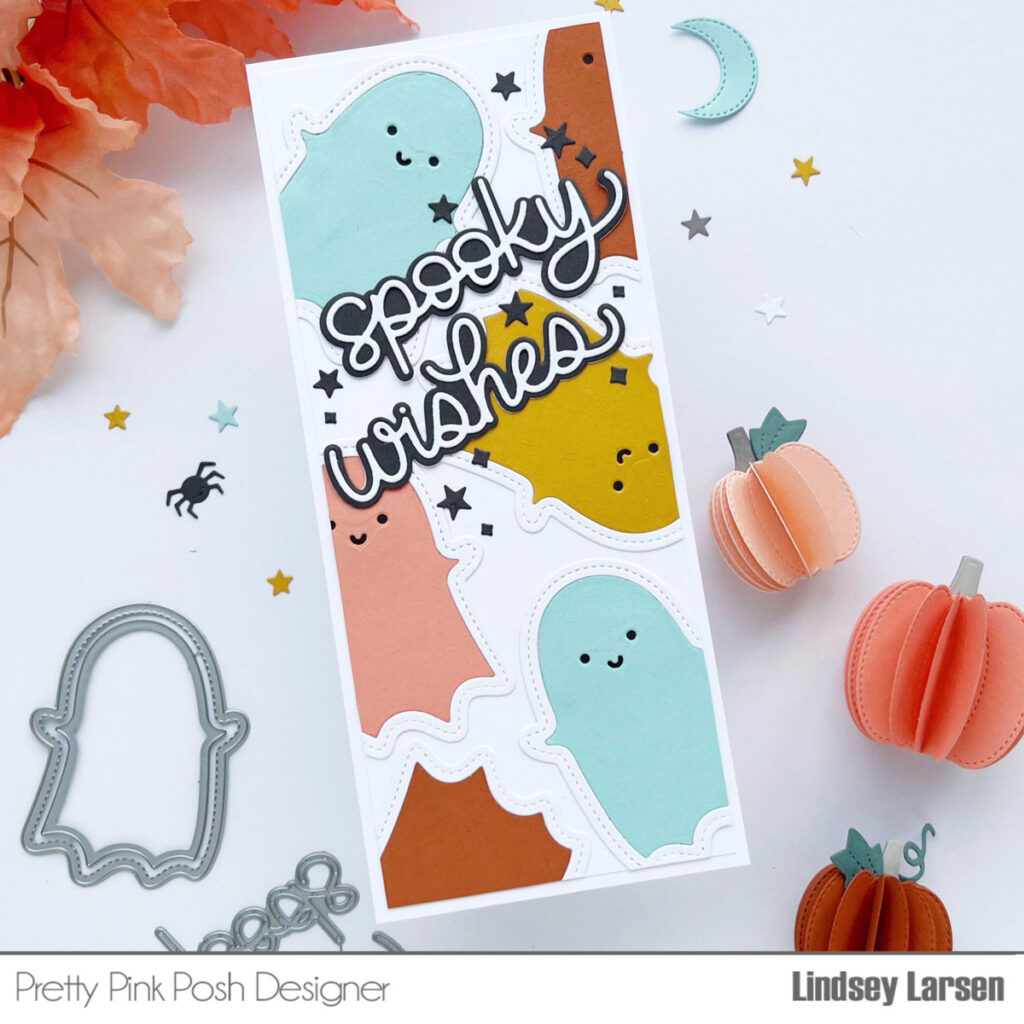
First up is a spooky cute card that was inspired by a blanket I saw. I loved the colorful ghosts, so I recreated it using the new Ghost Shaker Dies.
This fabulous sentiment is the Spooky Wishes Shadow Dies. I adore the size and scale of the shadow dies and was happy to see this one added to the lineup. For a little extra magic, I added various stars and diamonds from the new Halloween Mug Additions.
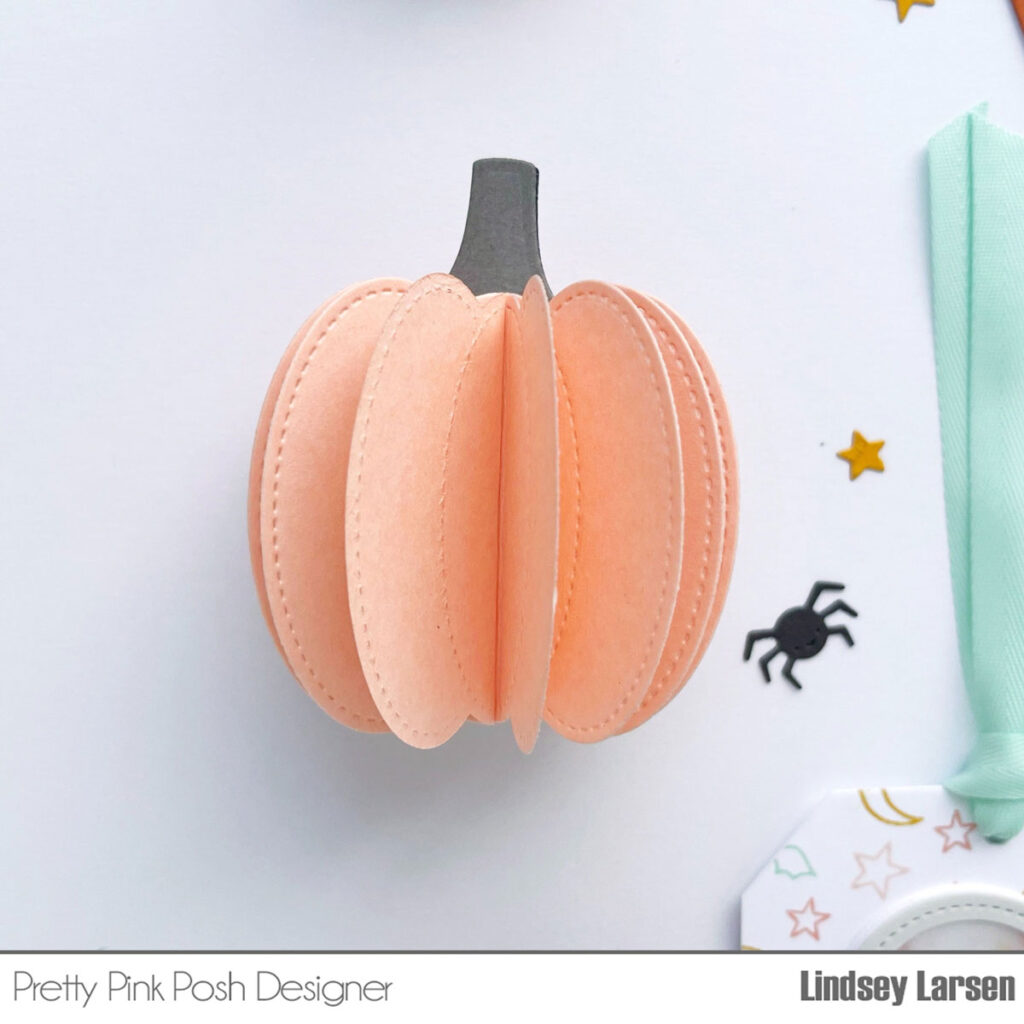
Did you notice the little pumpkins in the photographs? That’s actually another peek. I created those using the new Stitched Pumpkins Dies. It’s a set full of creative possibilities! They look cute as is or in 3D like I did here.
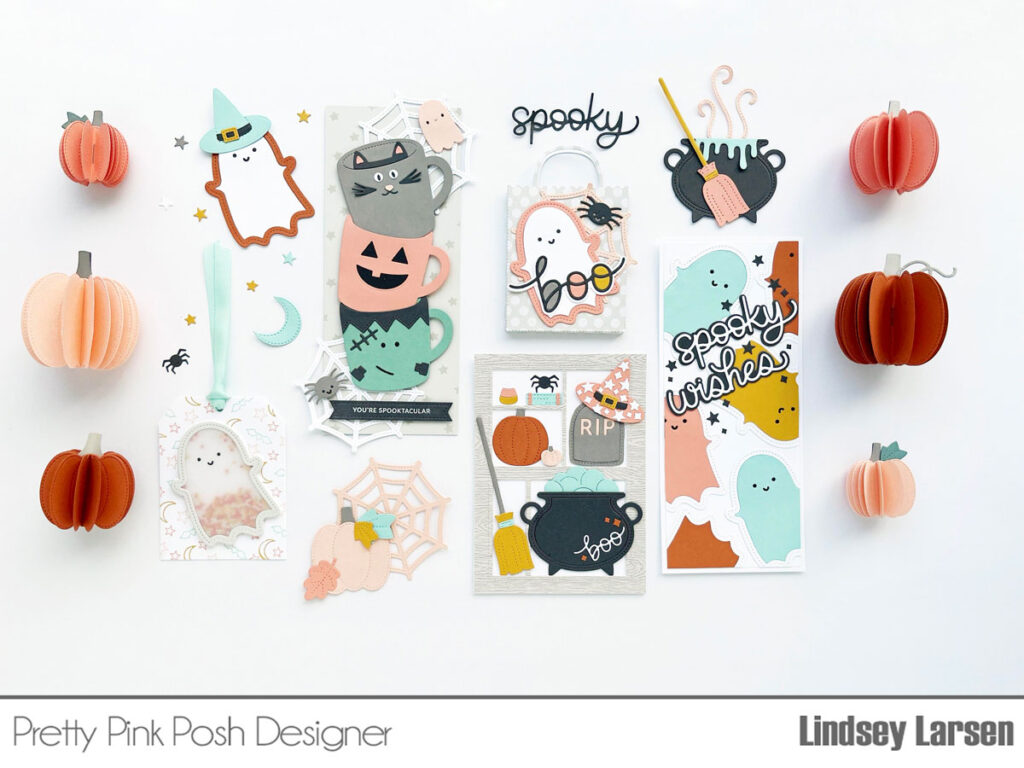
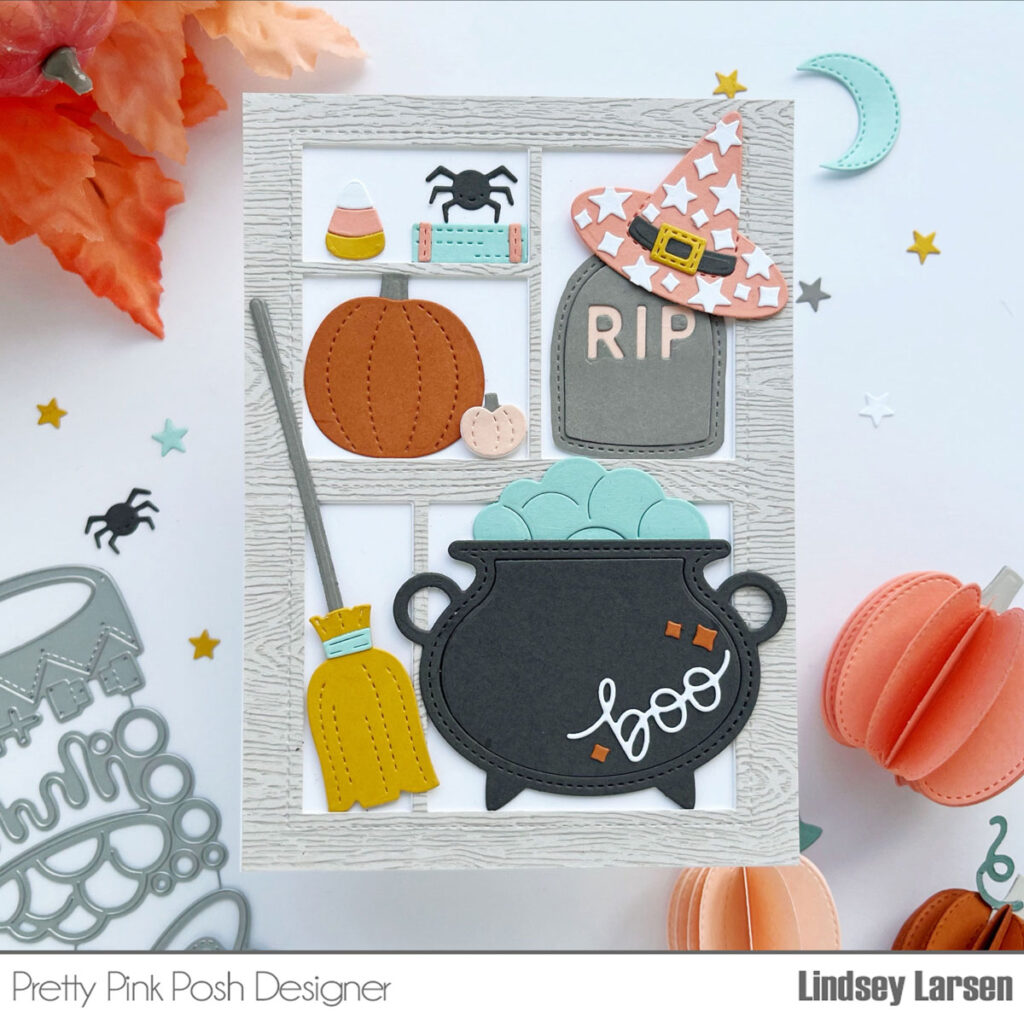
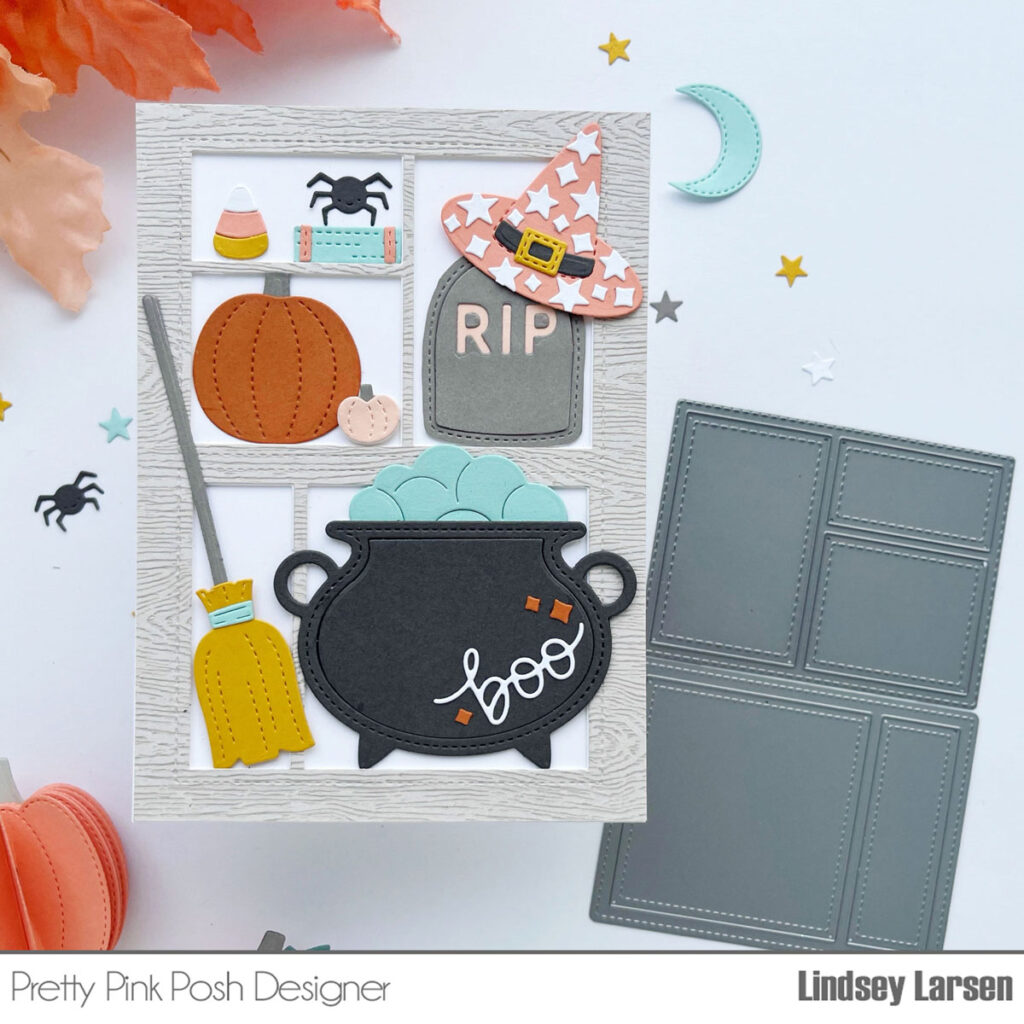
I’ve created lots of cards for this release, and this next one is a favorite of mine. It’s an A6 card (4.5″x6.25″), so it’s a little bit larger in size, which I’m really enjoying lately. There are so many cute things that I need more space to fit them all in!
My children have old letterpress (typeset) drawers hanging on the walls in their rooms. They fill the little cubbies with all their tiny treasures. When I saw the cute dies in the Halloween Mug Additions, I immediately thought of those shelves and knew they would make the perfect fillers.
To create the little shelves/cubbies, I stacked theStorybook 1 and Storybook 5 dies on top of each other. I taped them together, so I could run them through the die cut machine several times. Layering 3 pieces of 110 lb. cardstock gave the shelves some depth. For the top layer I used woodgrain paper that I have had in my stash for a few years just waiting for the perfect project to use it on. This was it!
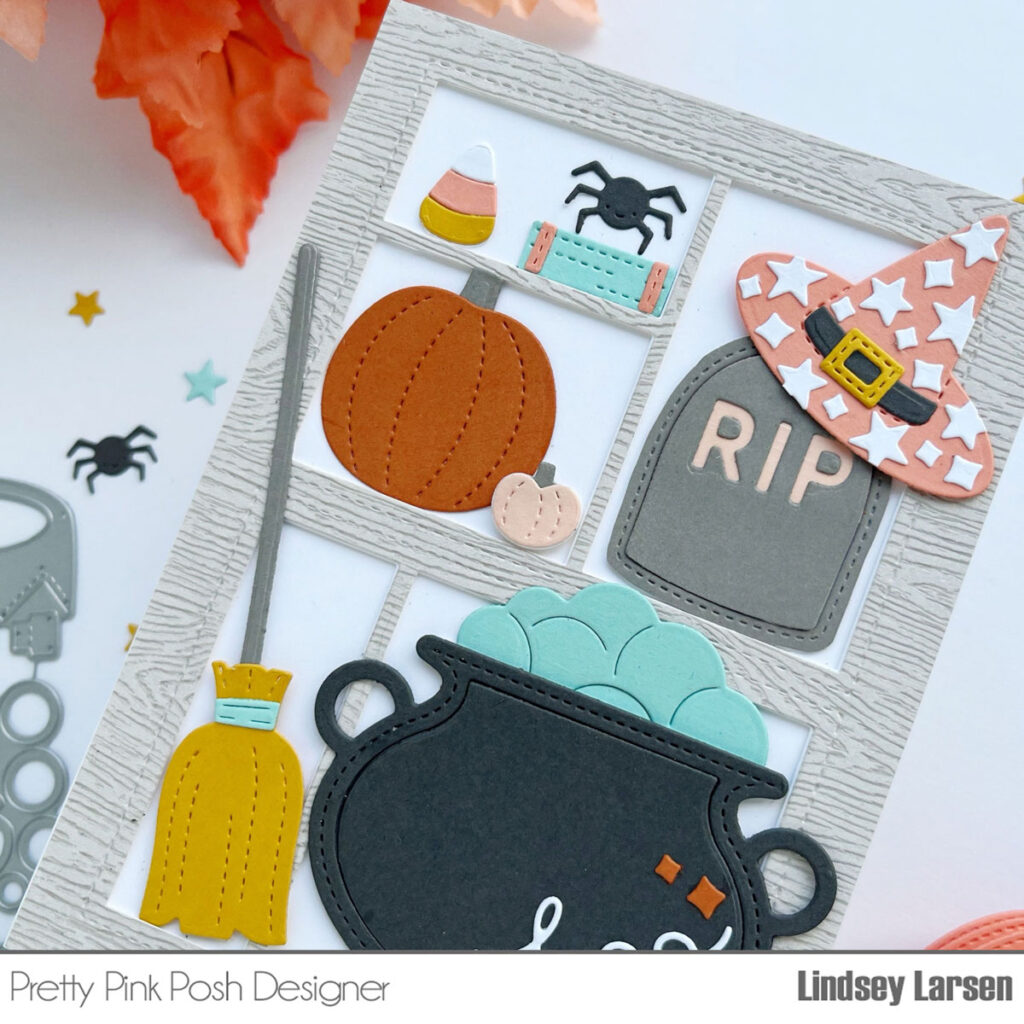
Then I got to work filling the shelves with Halloween cuteness! First up is the witch hat. I die cut all the pieces from the Halloween Mug Additions included the stars and diamonds that I used to adorn it. I set it on top of the tombstone. The tombstone die is designed to create a window in your mug, so the stitching is on the outside. I ended up fussy cutting it out, though, and layering a few of the center tombstone shapes on top of each other for added dimension.
I filled a second shelf with the two pumpkins included in the set, although I opted for a chunkier stem on the larger pumpkin, which I found in the Stitched Pumpkins Die set.
The upper shelf is filled with a candy corn from the previously released Candy Treats dies. Next, I trimmed down one of the stitched rectangles in the Halloween Mug Additions(they can be used for mummy wrap…) and made it into a book. The little coral strips on the book were trimmed from the buckle die and the spider on top is also included in the Halloween Mug Additions.
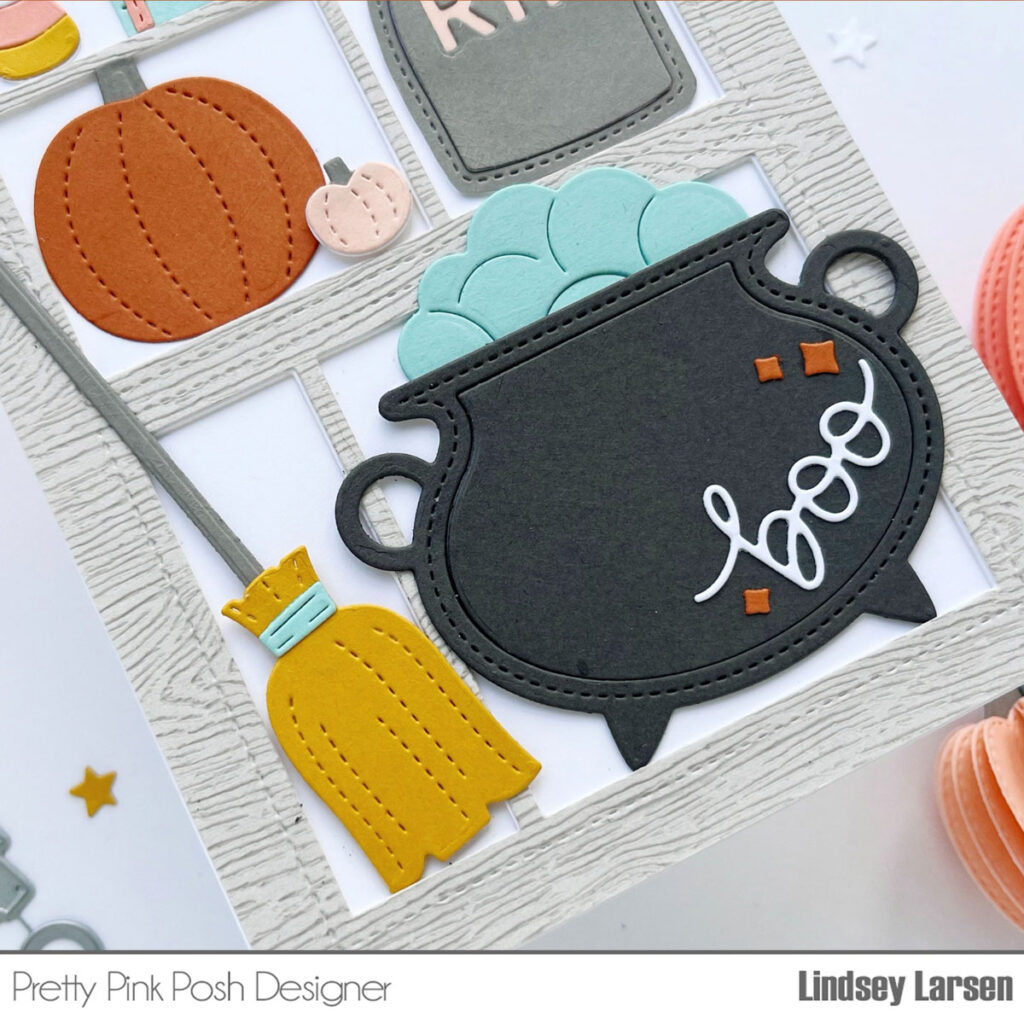
Now for the bottom row – a darling broom and a bubbling cauldron. I was delighted to see that the new bubbles fit perfectly in the previously releasedCauldron Shaker! I wanted to dress the cauldron up a bit more, so I added “boo” from the Ghost Shaker dies and a few diamonds. If you couldn’t tell, I was really enjoying adding those to all the things.
Thanks so much for joining me today. Join us tomorrow as we reveal the release in picture form, so you can start to get your wish lists together and/ or purchase your release bundles!
Hi friends! It’s Dana here today and I am excited to be back to share a sneak peek of two of the new stencils coming to Pretty Pink Posh. The new release is packed full of fun new products for Halloween and so much more. Let’s get started…
New release will be available August 7th
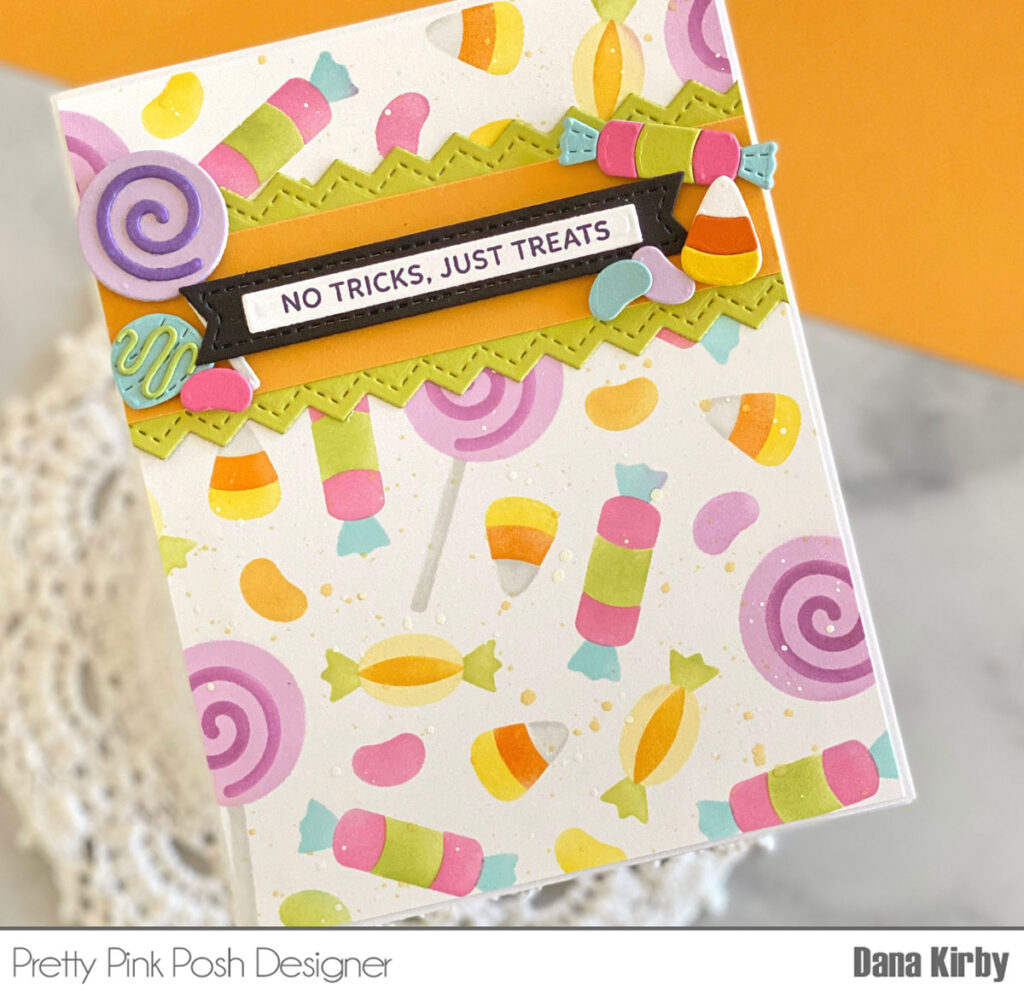
My first card uses the Layered Candy Treats stencil set. This is a four pack of stencils that layer together to create a fun candy background. I used finger daubers and dye ink for my blending. I then added a few yellow splatters to my panel for a little added detail. Such an adorable candy background! I love that this stencil can be used for Halloween and beyond.
Next, I create my sentiment with the new Sentiment Strips: Halloween stamp set and Sentiment Strips dies. I mounted the banner on a strip of cardstock that I created with the zigzag die from the Stitched Borders 1 die set. I then use theCandy Treats dies set to make a few coordinating candy pieces to finish my card.
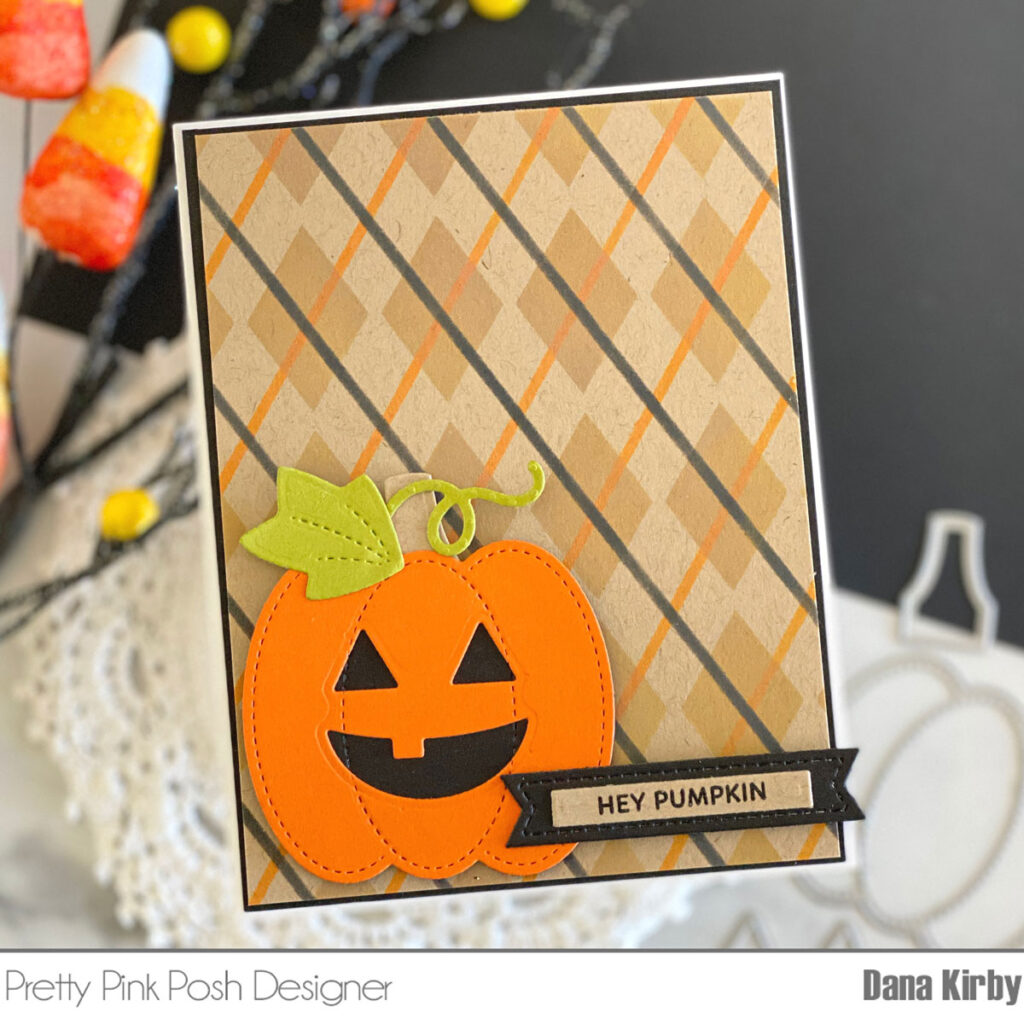
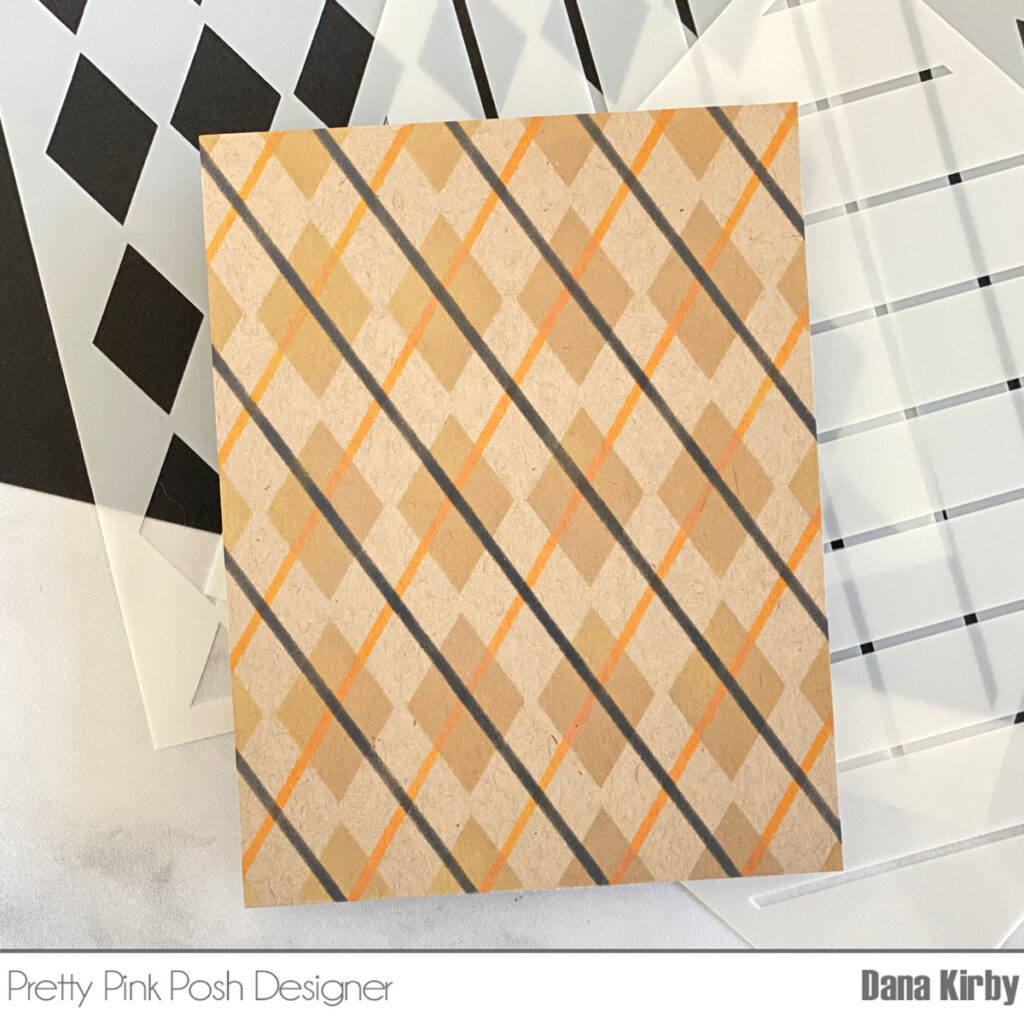
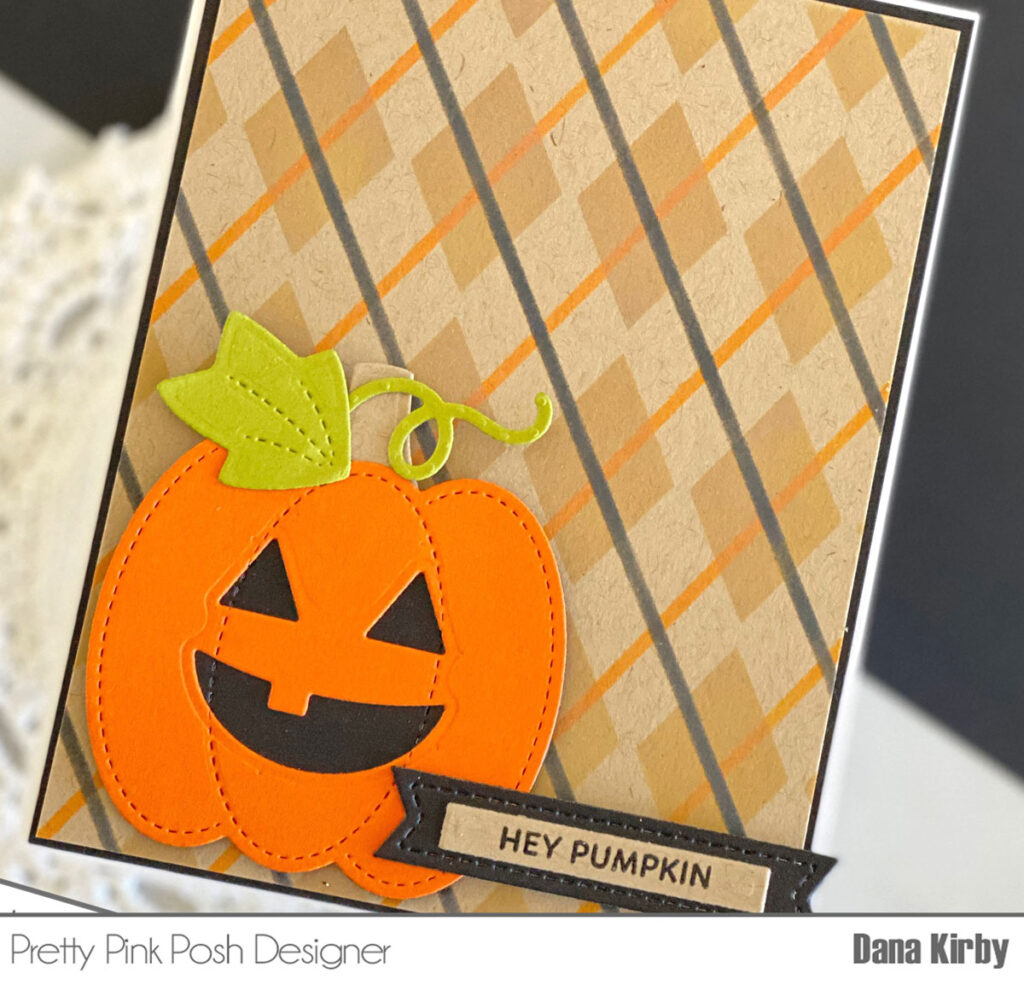
For my next card, I used the Layered Argyle stencil set to create a more “traditional” Halloween card.
I started my card by using the Layered Argyle stencil set to create my card panel. This is a set of three stencils that layer together to create a fun argyle pattern. I used Distress Oxide Ink in: Brushed Corduroy, Carved Pumpkin and Black Soot for my blending. The color possibilities with this stencil are endless. I can’t wait to use it for Christmas!
Next, I used the Stitched Pumpkins die set to create my cute little jack o’ lantern from colored cardstock. Lastly, I used the Sentiment Strips: Halloween stamp set and Sentiment Strips dies for my sentiment.
Thanks for joining me today! I know you will love these amazing new stencils and I can’t wait to see what you create with them!!
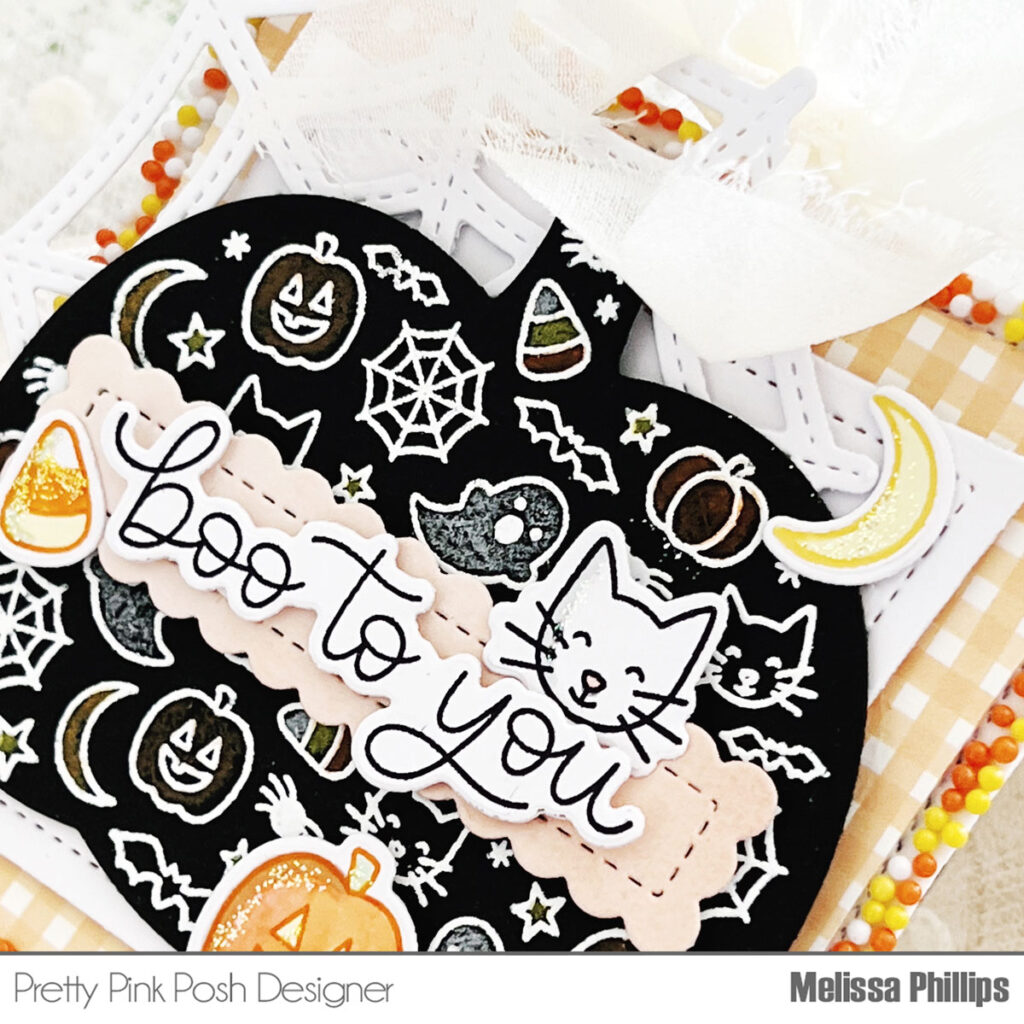
Hello, everyone! Melissa Phillips here and I am so very happy to be with you sharing a sneak peek of the August Release!
New release will be available August 7th
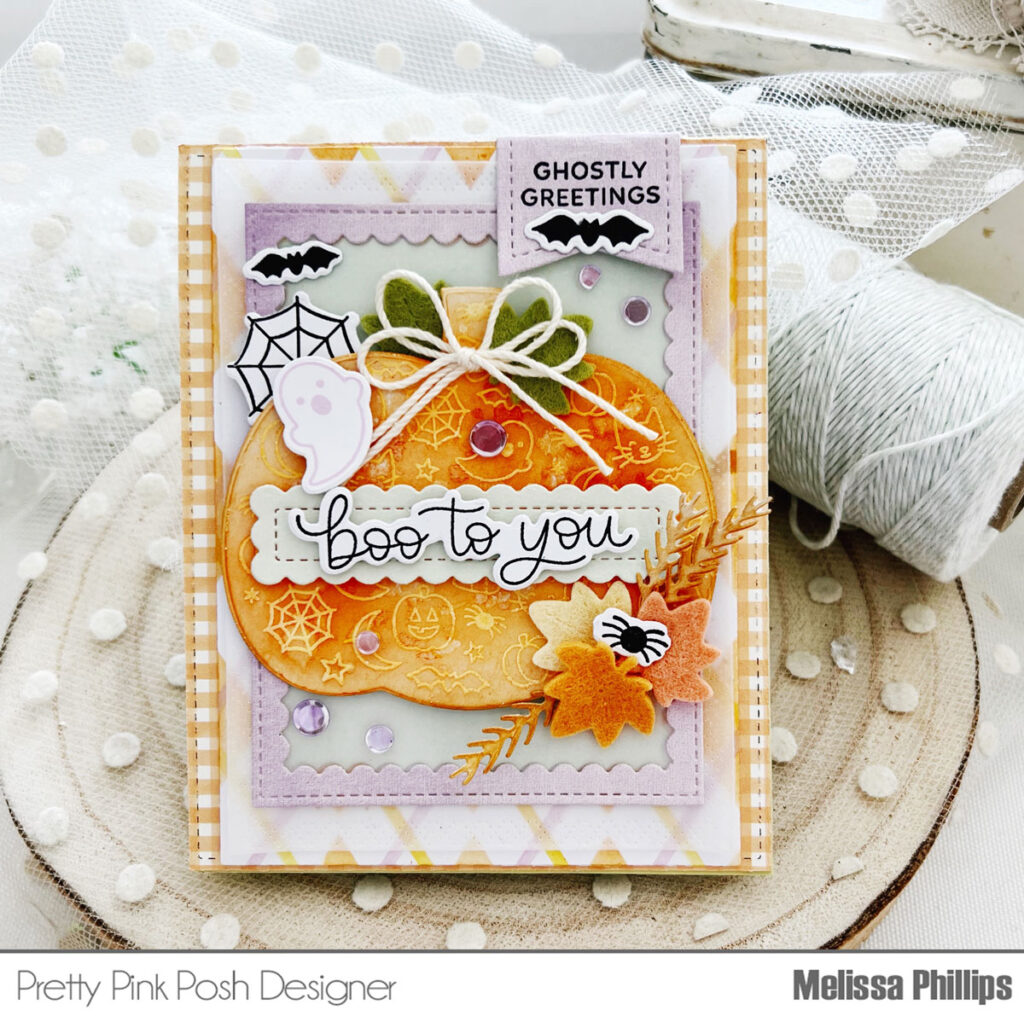
I’m sharing a card and tag created with the new Boo to You stamp set and coordinating dies. It’s so fun to be diving into all things fall and Halloween. I love this time of year and had so much fun using these new products.
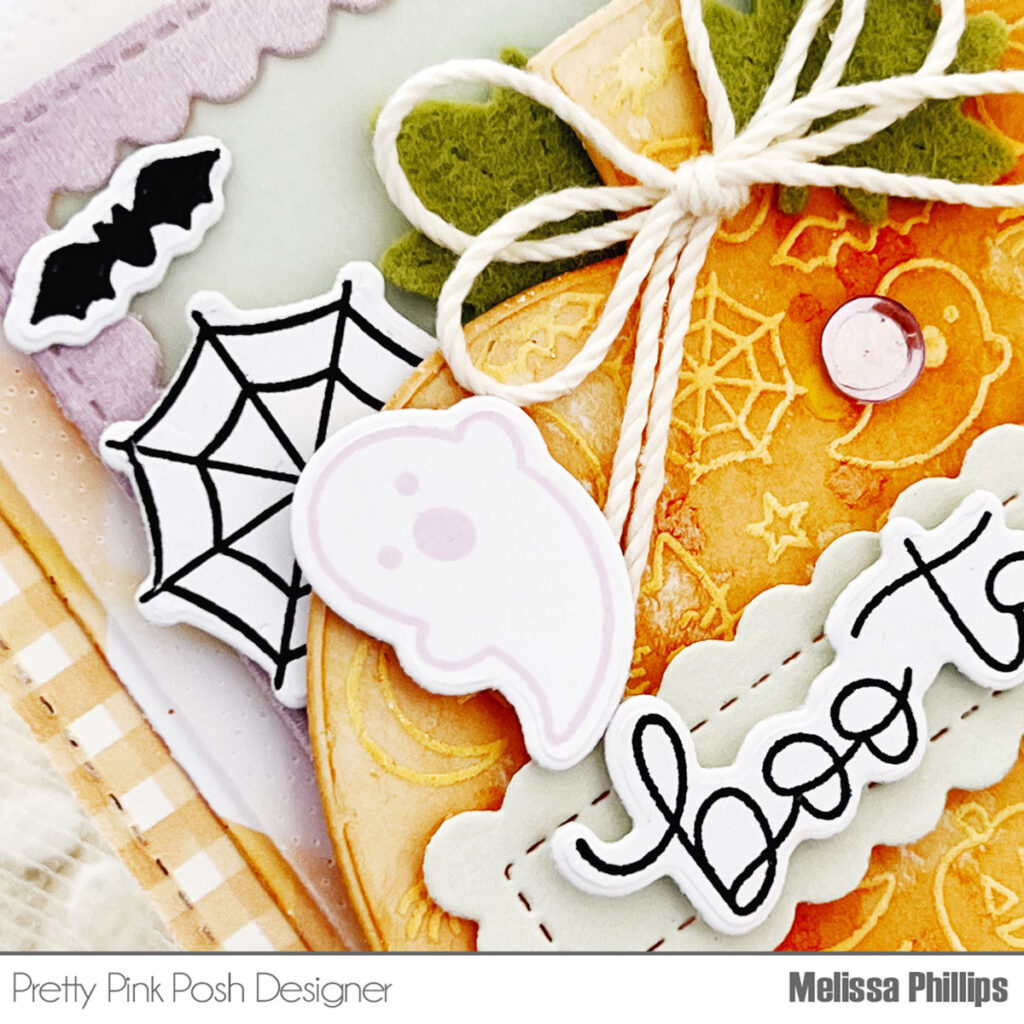
I die cut my Boo to You pumpkin from white cardstock and then stamped the details with the Boo To You stamp set using watermark ink. I coated my pumpkin with white embossing powder and used my heat gun to set the powder. I then sponged ink over my embossed area and this allowed the details to show through very subtly.
My sentiments are from the Boo to You stamp set and coordinating dies as well as the cute and not too creepy spider web, ghost, bats, and spider. I layered my main sentiment over a die cut Sentiment Strip…don’t you love the scallops? My upper sentiment was stamped on a die cut Mini Tag…the perfect size to fold over the top of my card.
At the top and bottom of my pumpkin, I used leaves and wheat stalks from the Fall Basket die collection, cutting some from felt and some from paper. They make the perfect finishing accents. Behind my scene, I used the darling, new Layered Argyle stencils to create my background. The Scallop Frames dies framed everything in perfectly.
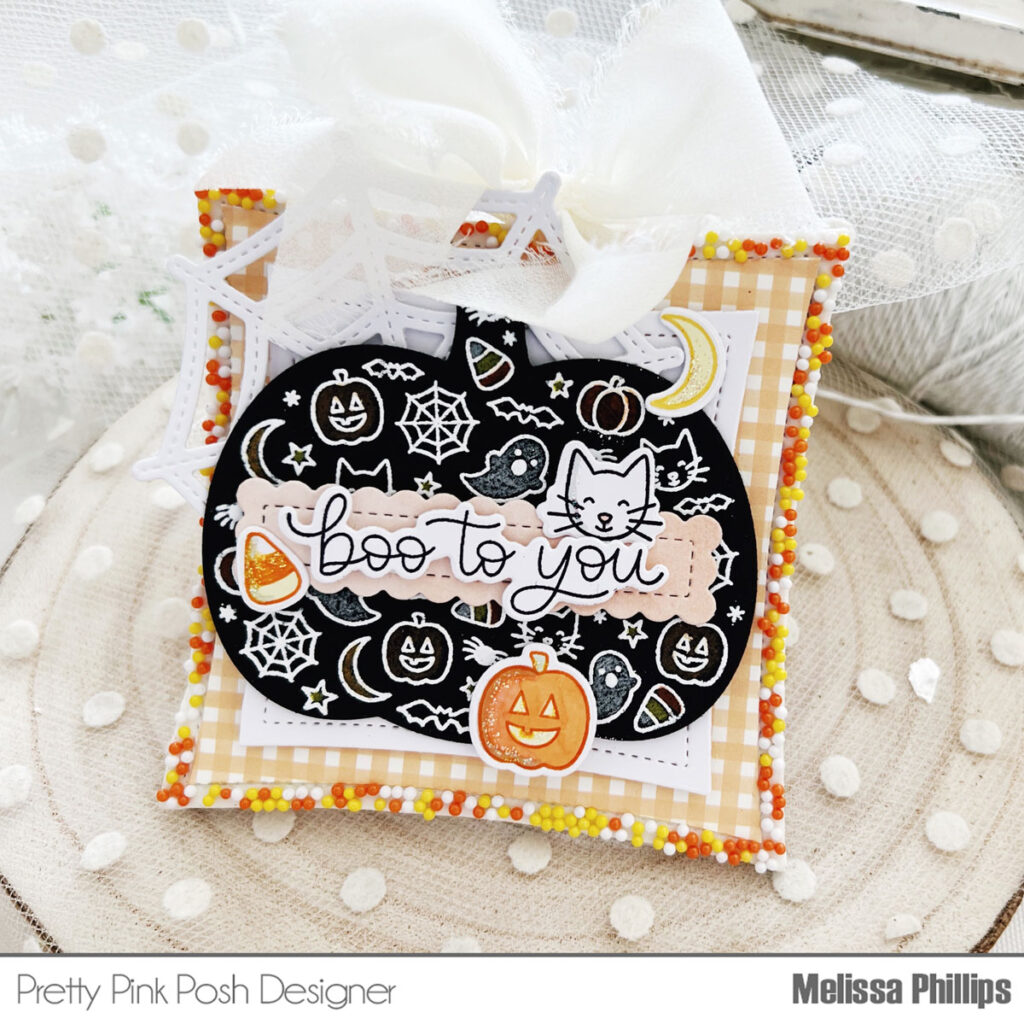
My next projects is a tag created using the Wonky Stitched Squaresas my tag base. I added some fun Halloween sprinkles around the outside of my square and layered on my Boo to You die cut and stamped pumpkin to the center.
I die cut it from black cardstock and then heat embossed the detailed images in white embossing powder. My colored pencils brought in a bit of color to the images inside my pumpkin.
I added a die cut spider web, cut using the Spider Web die. Lastly, I added in tiny stamped accents from the Boo to You stamp set…all that’s left is to attach it to my package of Halloween goodies. I can’t wait for fall to arrive!
Join us tomorrow for another look at the August 7th release. Thanks for stopping by!