Birthday Dog Holder + Video
Hi, friends! Lauren Taylor here and today I’m thrilled to share a delightful birthday card creation featuring a mix of products! In this YouTube video, I walk you through the entire process, showcasing how to combine newer releases like the Dog Holder Dies, Birthday Holder Additions Dies, Streamer Dies, and Cascading Stars Stencil with previously released products such as the Sentiment Strips Dies and Sentiment Strips: Birthday Stamp Set. I also incorporated the Stitched Torn Rectangles and Wonky Stitched Rectangle Dies for added texture and visual interest. Get ready to be inspired by a tone-on-tone design perfect for any celebration!
Watch the video above I Watch the video in HD on YouTube
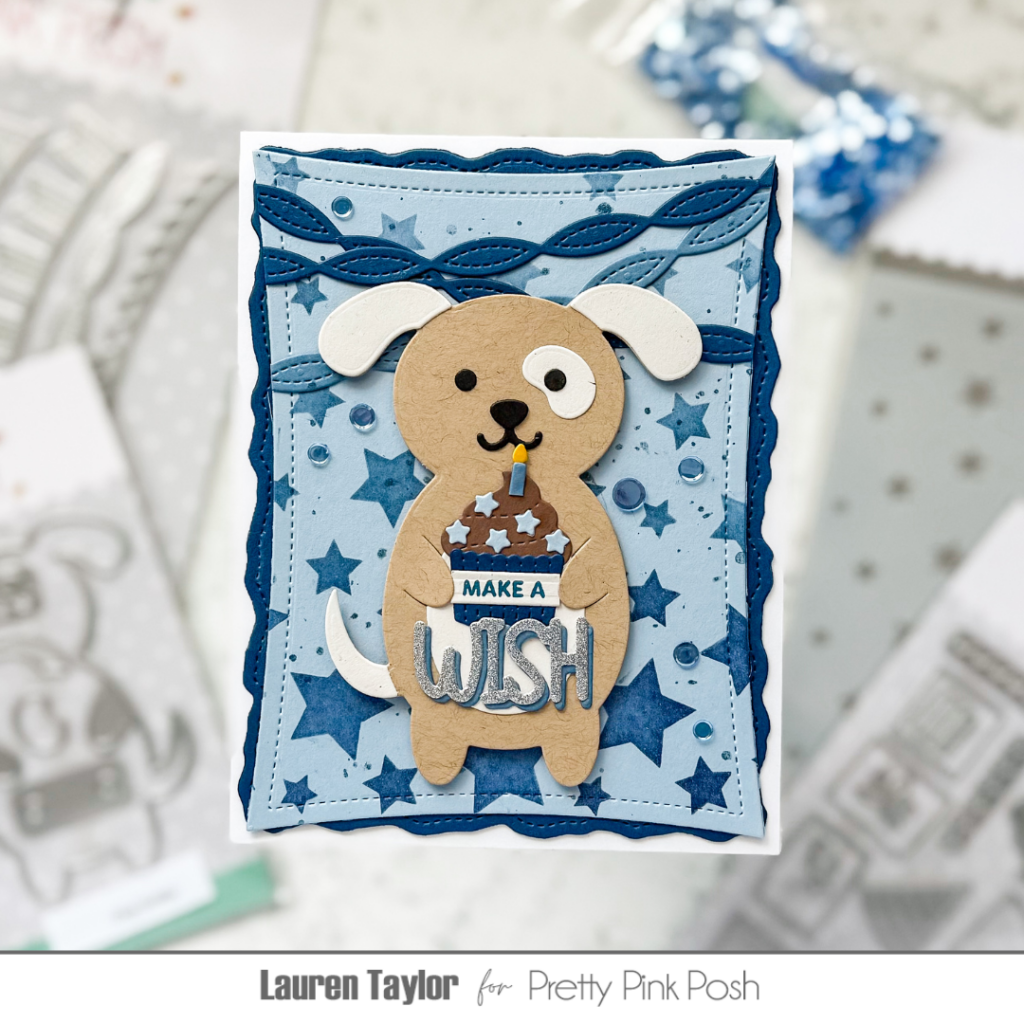
To create this card, I began by die-cutting various elements from blue and neutral craft cardstock. The background was stenciled using the Cascading Stars Stencil and Distress Inks in Stormy Sky, Faded Jeans, and Chipped Sapphire, creating a stunning gradient effect. I assembled an adorable dog using the Dog Holder Dies. The Birthday Holder Additions Dies contributed a charming cupcake and candle, while the Streamer Dies added a party flair. The “wish” sentiment was die-cut from sparkly silver cardstock with a blue drop shadow, and “make a” was stamped onto a sentiment strip.
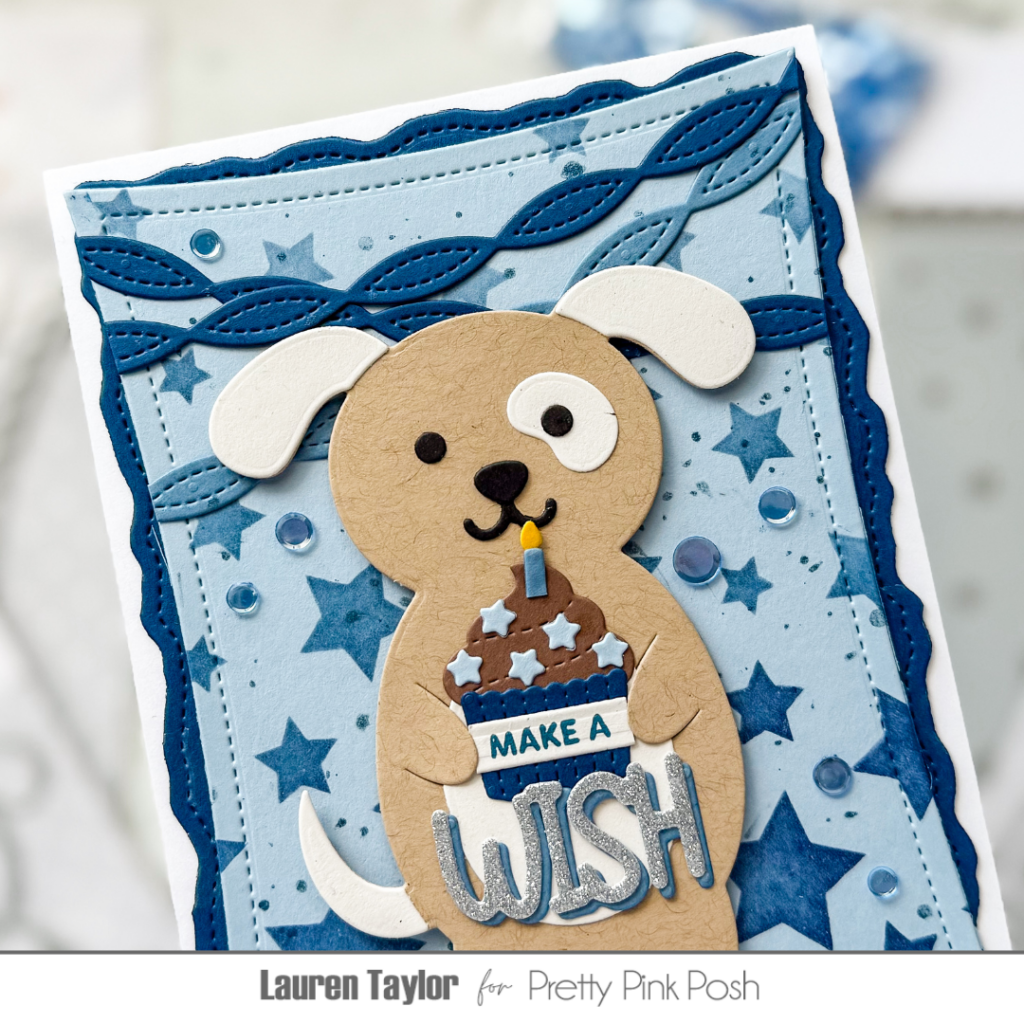
Layering was key to this design. I adhered the stenciled background to a dark blue stitched torn rectangle, then added the streamers, ensuring they aligned with the wonky stitched rectangle. To add a touch of shine, I splattered Faded Jeans Distress Spritz onto the background. The dog and cupcake were popped up with foam adhesive for dimension. I adorned the card with Blue Shimmer Confetti, strategically placed to cover any accidental smudges.

I’m absolutely in love with the tone-on-tone look and the playful pup that takes center stage! If you’re eager to see all the details and follow along step-by-step, be sure to watch the YouTube video. You’ll witness the magic of these Pretty Pink Posh products and discover how to create a card that’s sure to bring joy. Happy crafting!