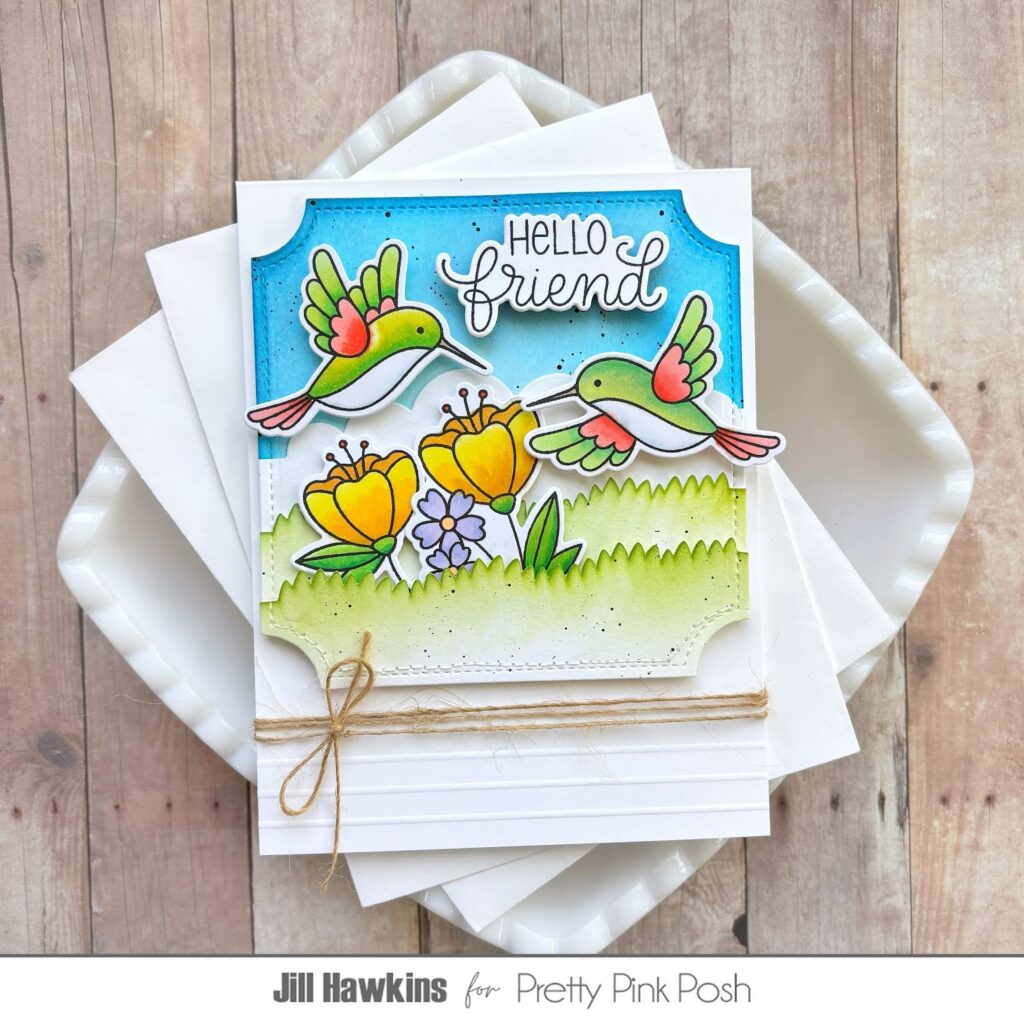
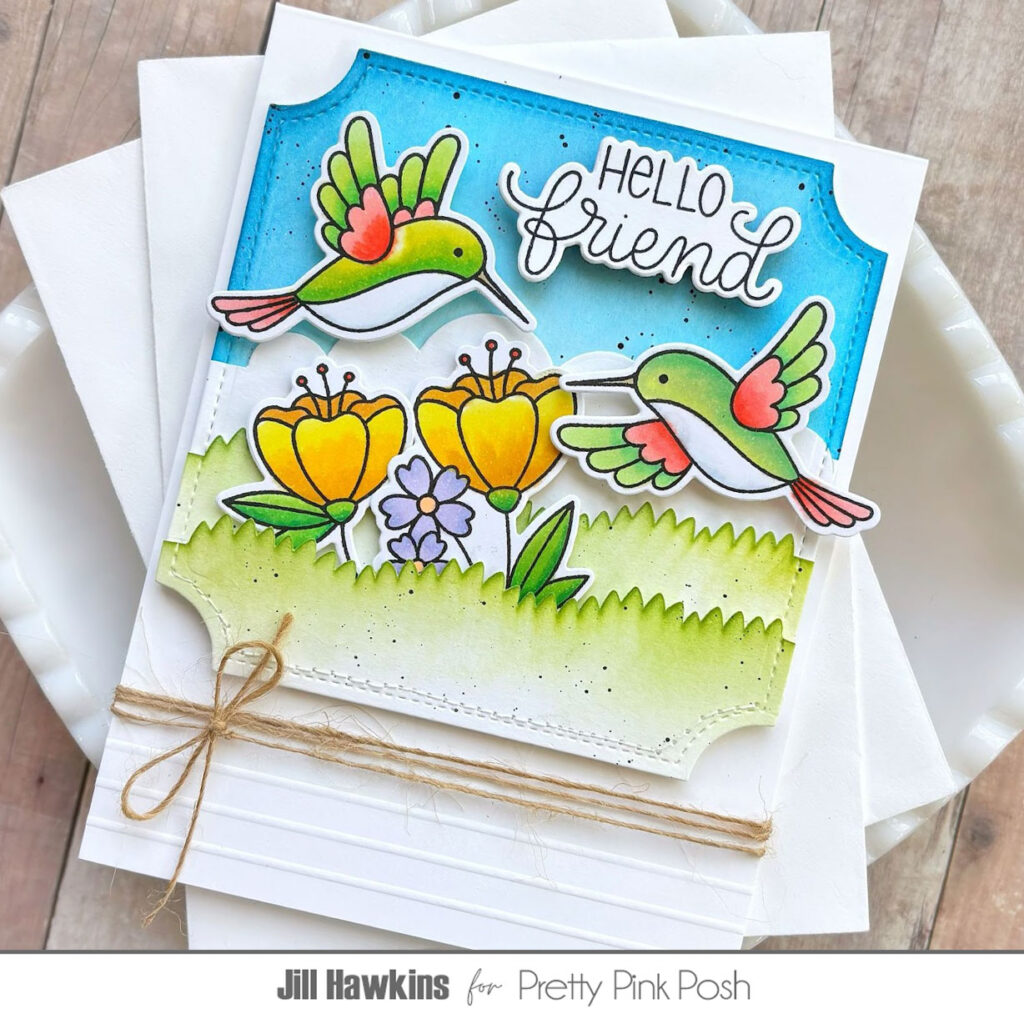
Happy Crafty Day to you all! Jill here today to share this sweet hummingbird card I created with the new Hummingbird Floral set and a few other fun new things!.
Hummingbirds are tiny yet fierce creatures, known for their agility, endurance, and ability to find sweetness even in the most challenging environments. Across cultures, they symbolize joy, resilience, and lightness of being. I love seeing their itty bitty nests in the summer–amazing one bird can fit, let alone a little chick!
I colored the Hummingbirds and Flowers in the set with OLO Markers which blend like butter, making it easy for even those of us that are not experts to be able to blend colors easily.
I built this little scene using the new Shadow Box Dies along with the Notched Squares dies. I did some ink blending over the various layers and then used dimensional foam adhesive to give each layer a little oomph!
I chose a sentiment to use from the new Friend Greetings set and layered the whole scene on a card base with foam adhesive. I finished off this sweet card with a bit of twine to tie it all together–wink wink. ☺️
I thought I’d close out with a couple quick little fun facts about hummingbirds:
A hummingbird’s heart can beat over 1,200 times per minute during flight!
Hummingbirds are the only birds that can hover in place and fly in reverse due to their unique ball-and-socket shoulder joints.
So there you have it–some crafty how-to and some fun facts to share with your friends on your next hike!
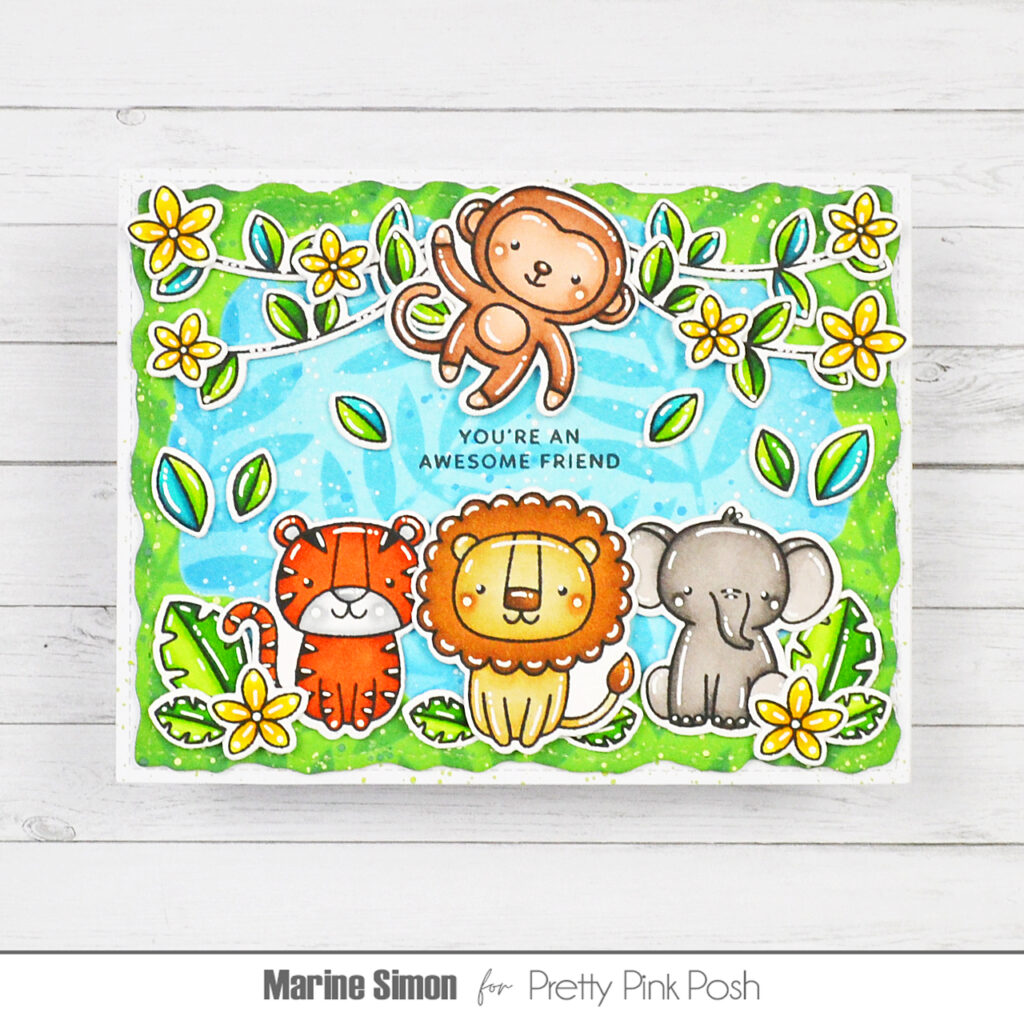
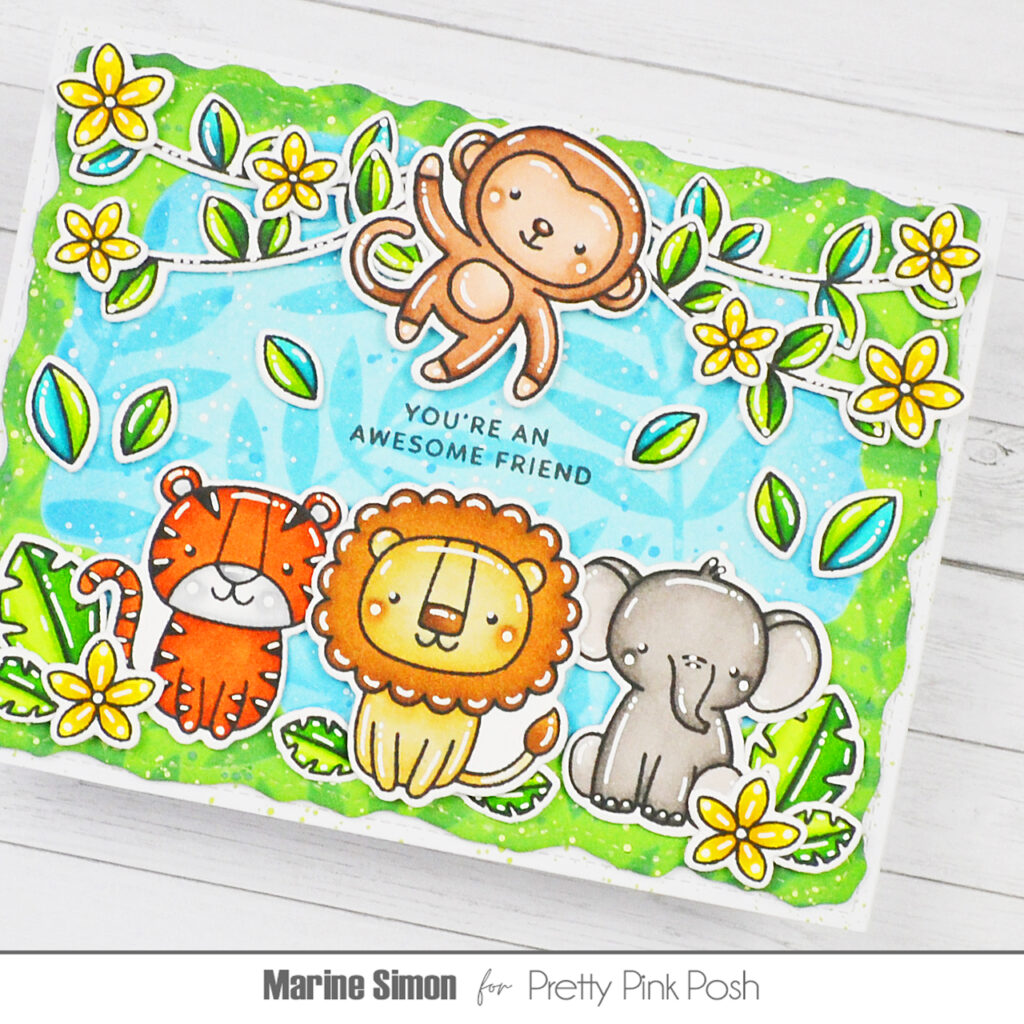
Hello crafty friends, Marine here with you today, I’m happy to be back with this lovely tropical themed card featuring the Watercolor Oval stencil set, which I really enjoyed working with, as well as a little group of friends, all gathered to cheer on someone they love very much.
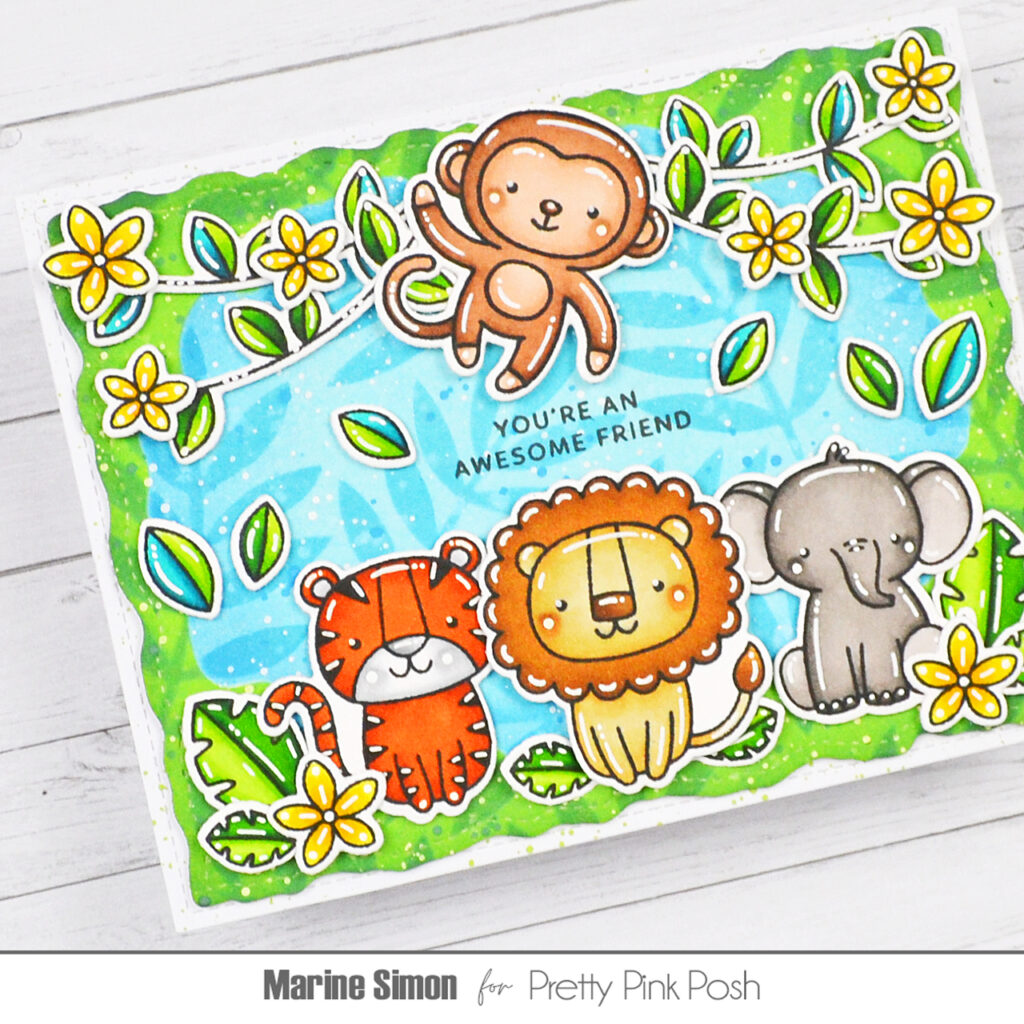
I started off by creating the background and cut a large Stitched Torn Rectangle panel out of Strathmore bristol smooth cardstock. I temporarily stuck the middle part of the Watercolor Oval stencil set to my panel using pieces of rolled-up washi tape at the back of the stencil, and worked on the outside section of my panel, applying mowed lawn oxide ink first, and then a little bit of rustic wilderness oxide ink to the edges to darken the green a little bit more.
Next I placed one of the Layered Leaves & Flowers stencil (the one with just the leaves) on top of my panel and used rustic wilderness oxide ink again to add a leafy pattern to the edges of my Stitched Torn Rectangle panel. I removed the leafy stencil, splattered water and dried the panel with a paper towel, mixed some rustic wilderness oxide ink with water and used a slim brush to add more splatters, and then I did the same with copic opaque white ink mixed with a bit of water.
I removed the middle part of the Watercolor Oval stencil set, and once the inks were all dry, I temporarily taped the frame part of the Watercolor Oval stencil set to my panel, covering and protecting the green leafy edges, and then worked on the middle part of my panel. I first applied tumbled glass oxide ink all over that section, and then broken china oxide ink to the edges to darken the blue and bring more depth.
I wanted to add a leafy pattern to the middle section of my panel as well, and I wanted those leaves to be continuous with the green leaves but I couldn’t see well through the frame part of the Watercolor Oval stencil set, so I removed that stencil, aligned the leafy stencil with the green leaves and temporarily taped it to my panel, put the frame stencil back in place, and then added leaves to the middle section of my panel using broken china oxide ink. To add texture to that section, I removed the frame stencil and the leafy stencil, put the frame stencil back in place, splattered water all over the blue leafy section, and dried the panel with a paper towel. I mixed some broken china oxide ink with water and used a slim brush to add more splatters, and then I did the same with copic opaque white ink mixed with a bit of water.
And the background was done, so I set it aside to dry, and stamped my images on 110lb Neenah solar white cardstock using an alcohol marker friendly black ink. I cut them all with the matching dies, and colored everything using my Ohuhu markers and my Graph’it brush markers. As always, here is a list of the stamp sets I used: • Jungle Friends – lion, tiger, vines, leaves, flowers • Elephant Friends – elephant • Monkey Friends – monkey.
I added highlights and details to the images using a white gel pen, attached them all to my jungle themed panel using 1mm and 2mm foam squares, leaving enough space in the center for my “You’re an awesome friend” greeting from Hedgehog Friends. I attached the panel to a 5,5 x 4,25 inches pattern paper panel using 1mm foam tape, and then the whole thing to a white card base to totally finish the card.
And that’s it! Tropical/jungle themed cards are some of my favorites to make, and I’m glad I was able to create and share this one with you. Thanks so much for stopping by, and see you next time!
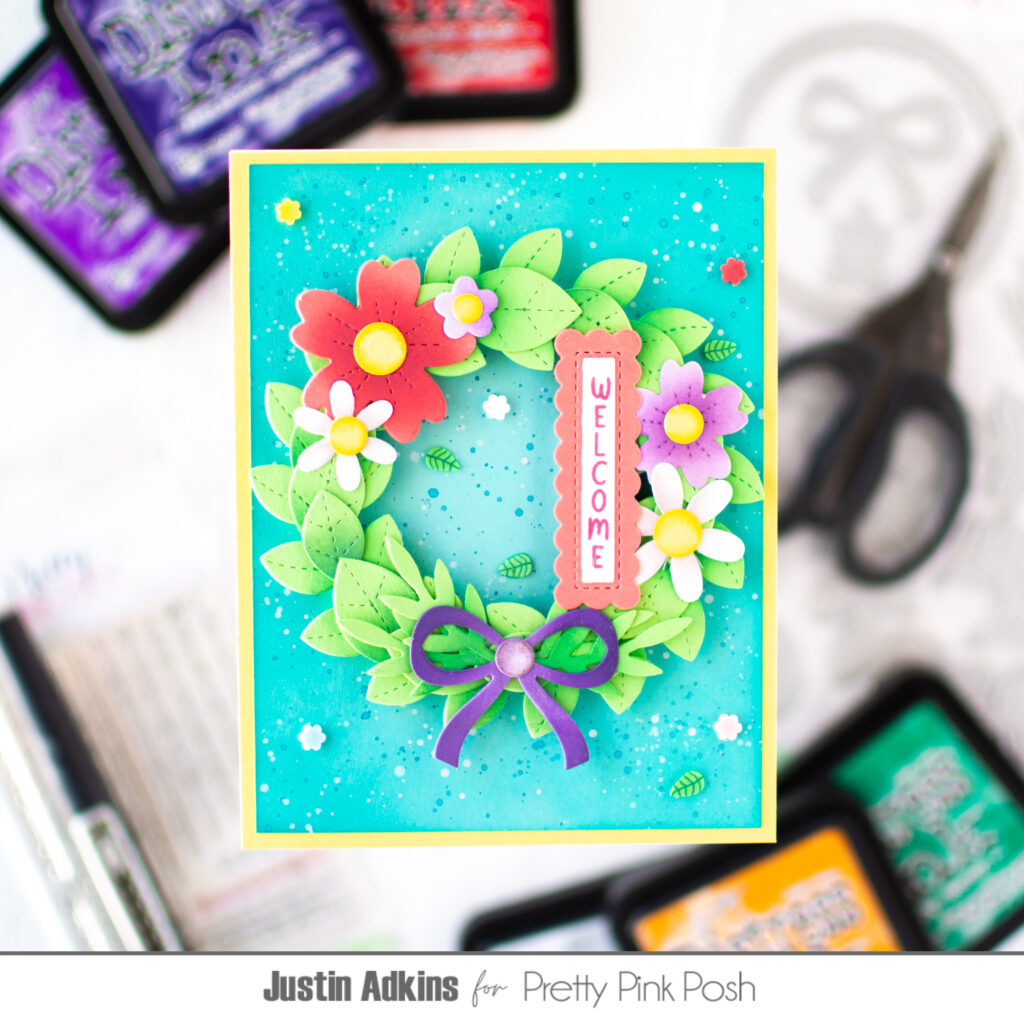
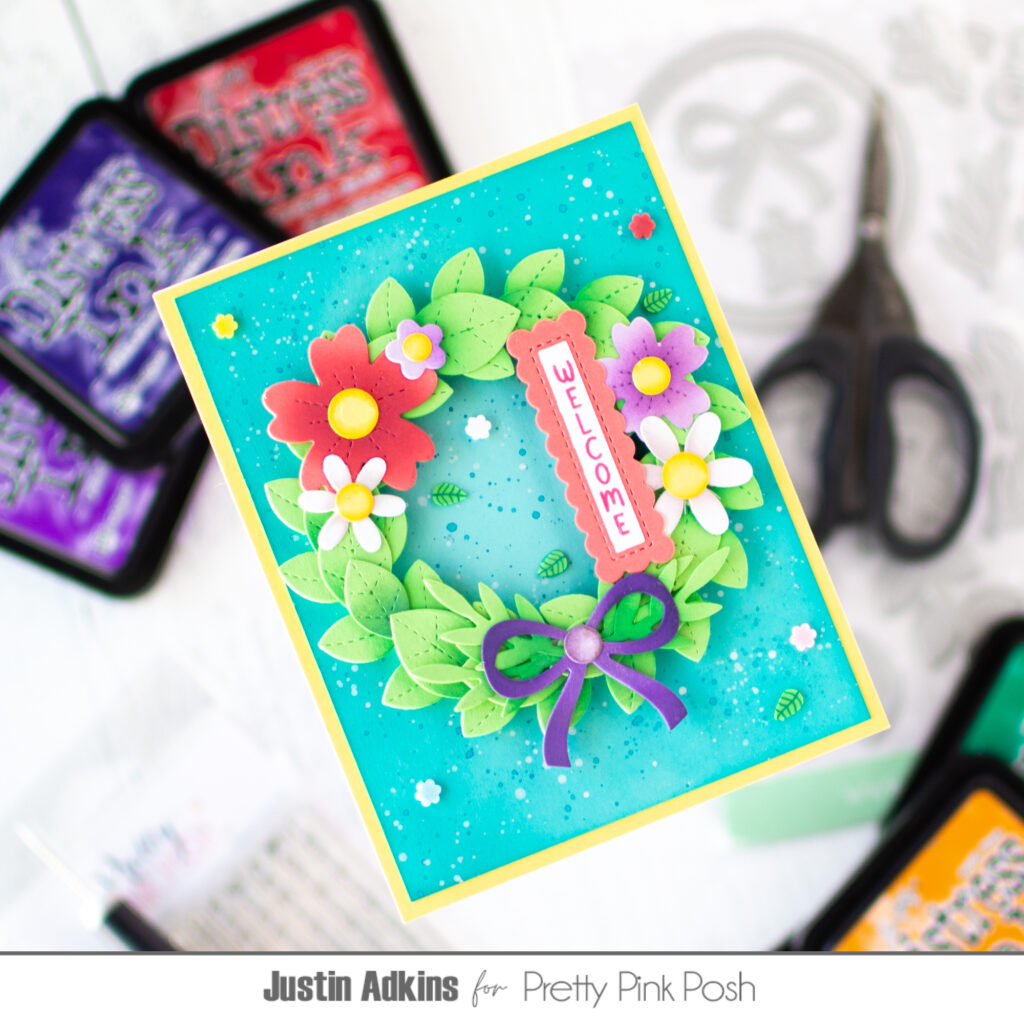
Hello friends! Justin Adkins here, and I am so excited to be guest designing for Pretty Pink Posh for their May Release! This release features Spring-themed items that I feel are slightly delicate by design! For today’s post, I am featuring a project using the new Floral Wreath Builder dies, along with the Upright Greetings: Occasions stamp set.
When working with wreath-related images and shapes, the first thing my mind goes to is “what sort of design elements for a wreath do I want to see on my own front door”. So, using this mindset, I went ahead and cut different shapes included with the Floral Wreath Builder Dies from colored cardstock. For my sentiment, I wanted to make the sentiment look like it was a vertical sign that was actually part of the wreath itself, so I stamped out the sentiment “welcome” from the Upright Greetings: Occasions stamp set, and then used the Sentiment Strip dies to cut out the sentiment and also frame it with an included scalloped rectangle die from the same set.
I think the design of the Floral Wreath Builder Die is really unique, because it allows you to transform your wreath into different aesthetics based on what you’re going for! I wanted my wreath to have that over-sized bushy and leafy look to it, so I die cut out a handful of the individual leaf dies included in the set, ink blended the bottom edges of the leaves, along with the center circle of the base wreath die, with Lucky Clover Oxide Ink, and layered the individual leaf dies on top of the base die cut! I thought this made the wreath look full! I then took the different floral die cuts, ink blended the edges, and adhered them around the wreath for a simple arrangement! I finished off the wreath element with popping on my “welcome” sentiment sign.
My background was honestly pretty easy to create. I cut down some light aqua cardstock to 4″ x 5.25″, ink blended the edges with Peacock Feathers Distress Oxide Ink, splattered the background for some fun interest, and then adhered it to an A2-size panel of light yellow cardstock to give it a nice frame!
Of course, I finished this card off with some embellishments. I loved using the Enchanted Garden Clay Confettibecause it helped play with the colors that existed with the wreath and background already!
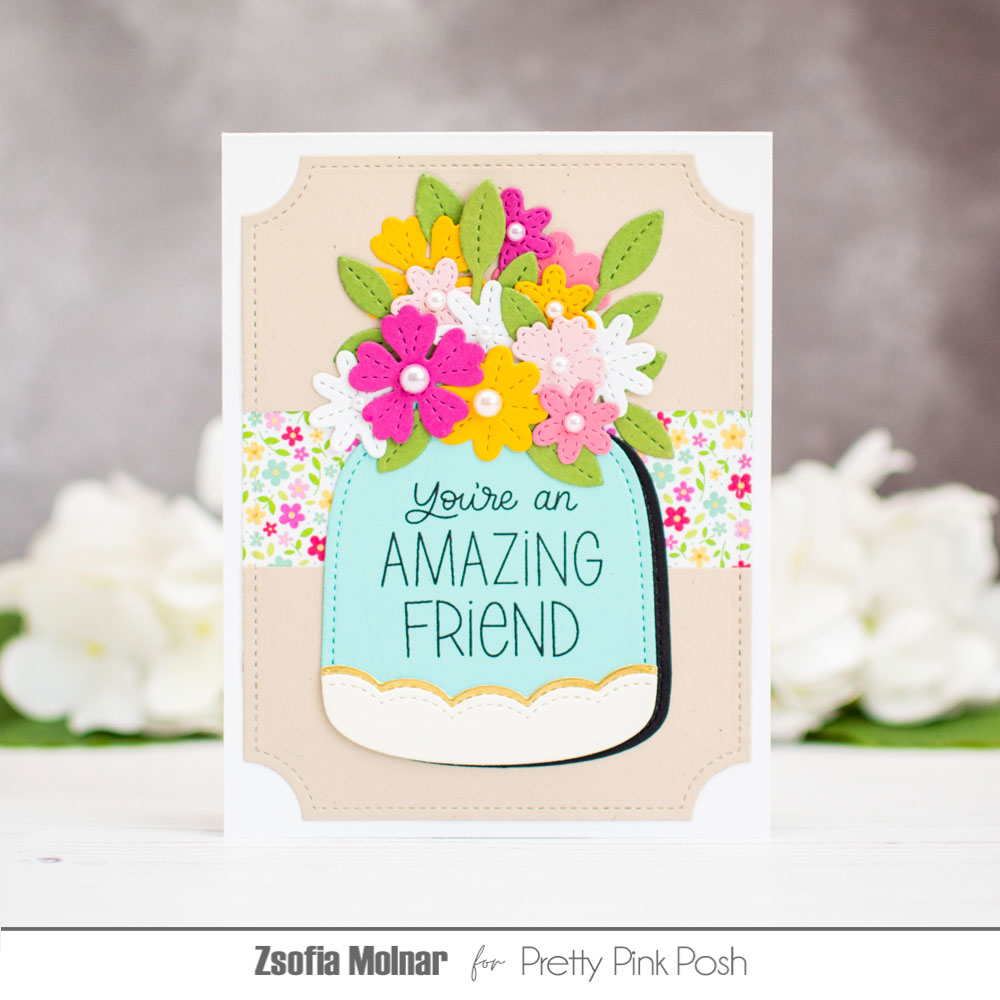
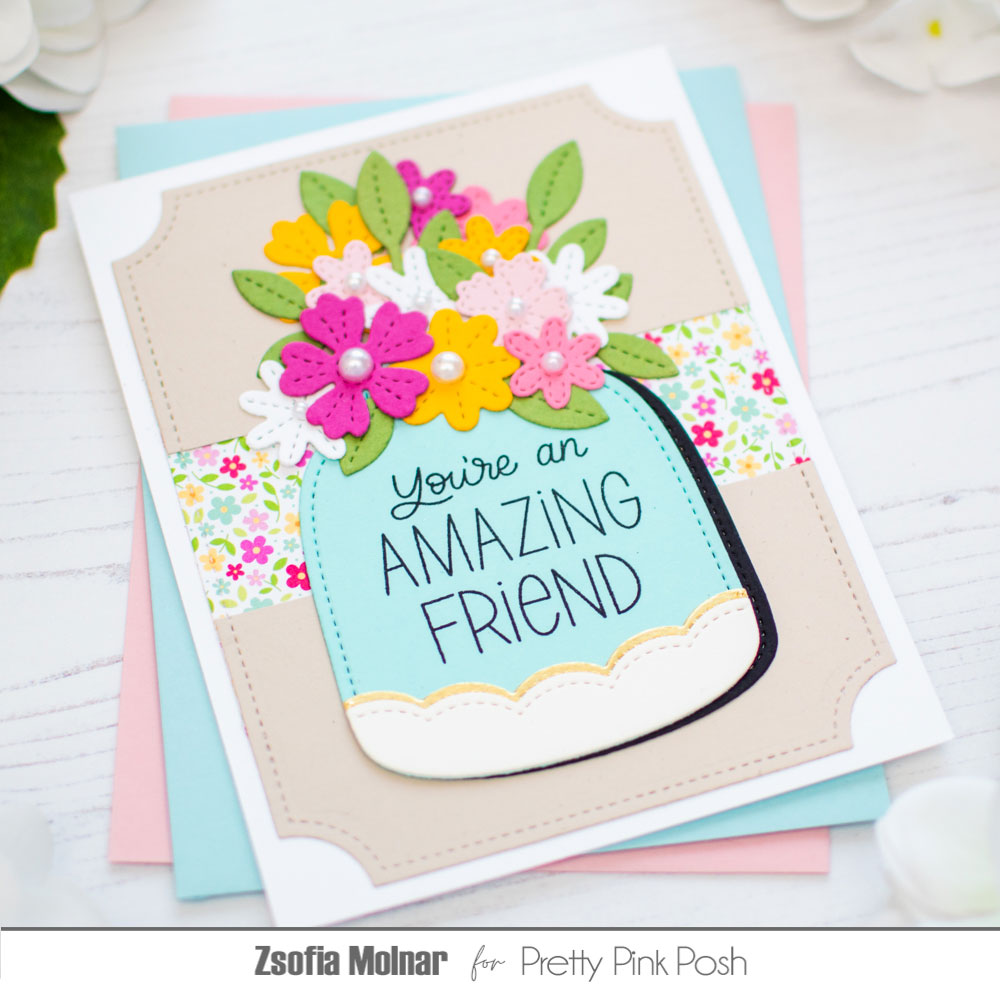
Hello Everyone! It is Zsofi here today with a pretty floral inspiration on how to use a shaker die not for a shaker card. I mixed the latest release with some of my older favourite dies, let me guide you through the process.
First I die cut the elements from the Vase Shaker die set. For the vase I cut one light blue and one black, the bottom layer I cut from cream and gold cardstocks and layered them on top of each other tiny offset, so the black layer serves as shadow, while the gold works as extra embellishment.
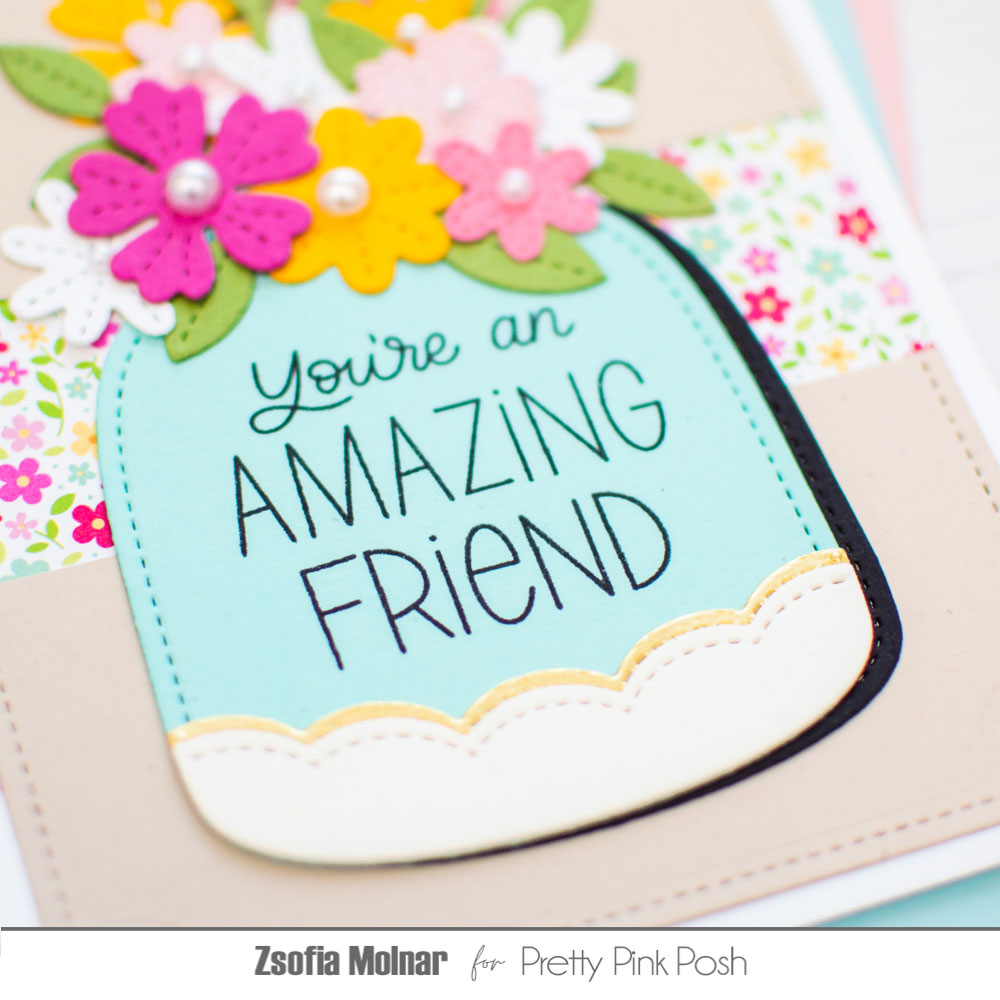
I stamped the sentiment from the new Friend Greetings stamp set directly on the vase. I like this technique when there is not much extra room on a card front for a bit bigger sentiment.
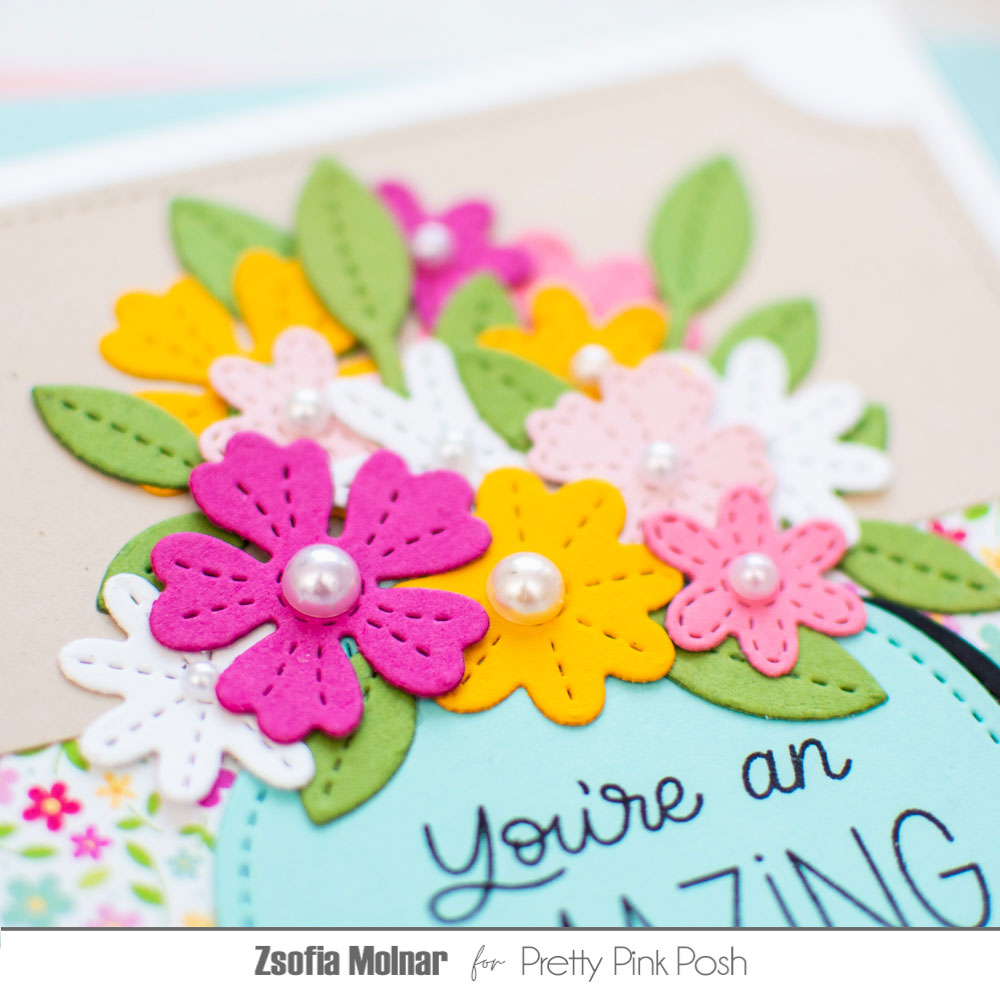
For the bouquet I used my all time favourite Spring Foliage die set and used up a bunch of scrap cardstock. When arranging them on the top of my vase, I started from the bottom and kept adding extra flowers and leaves till my heart was happy how it looked.
I really wanted to use the new Notched Squares dies for the background, but my bouquet was too big to fit. Therefore I had to use a trick: I die cut the biggest square from kraft cardstock and cut it in half. Then I die cut another square from patterned paper and simply adhered the 2 kraft halves on the top and bottom of the patterned piece. This way I got a rectangle out of a square and it fills a card front completely!
After assembling the card, I used Marshmallow Pearls to embellish the flower centres. It really adds a lot to the design.
I hope you liked this card idea and got inspired. I cannot wait to see your beautiful floral creations, make sure to share them in the Pretty Pink Posh Friends Facebook group!
Thanks for stopping by and hope to see you soon, Zsofi
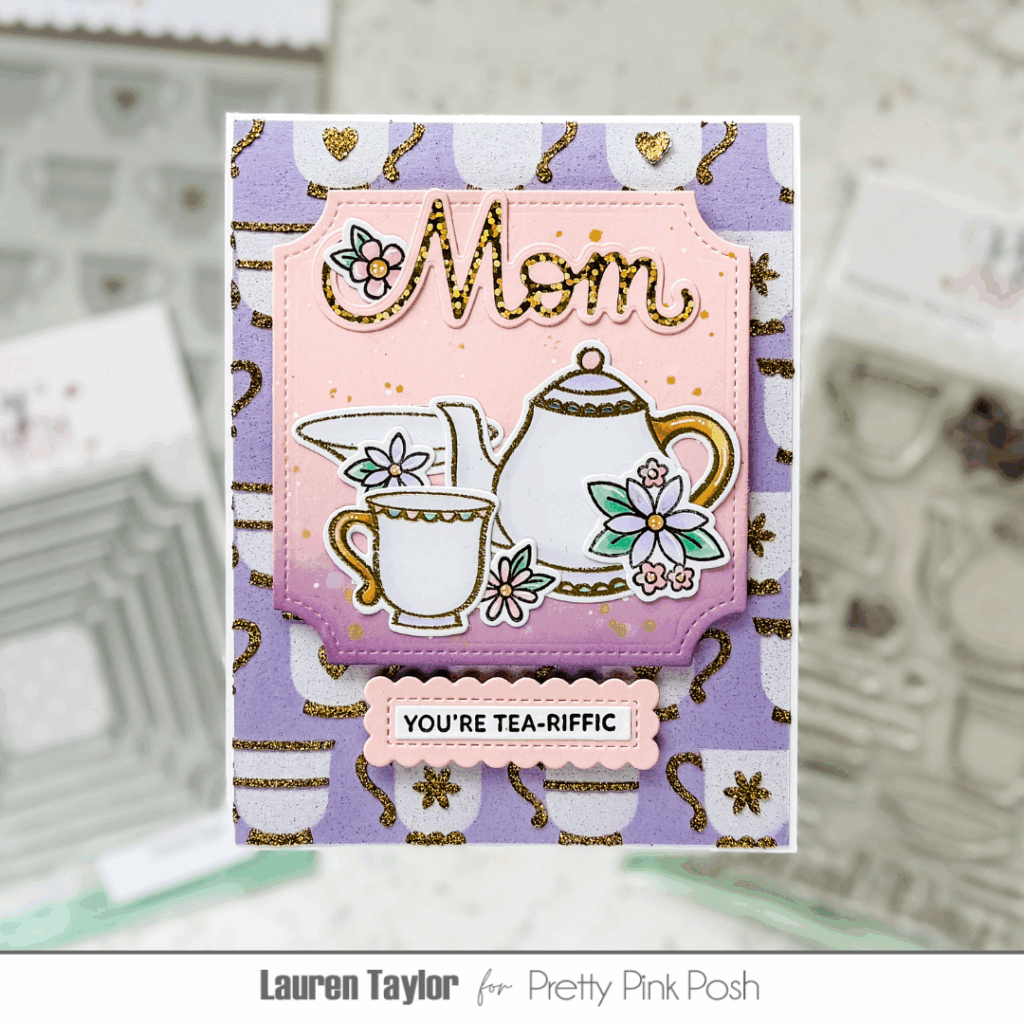
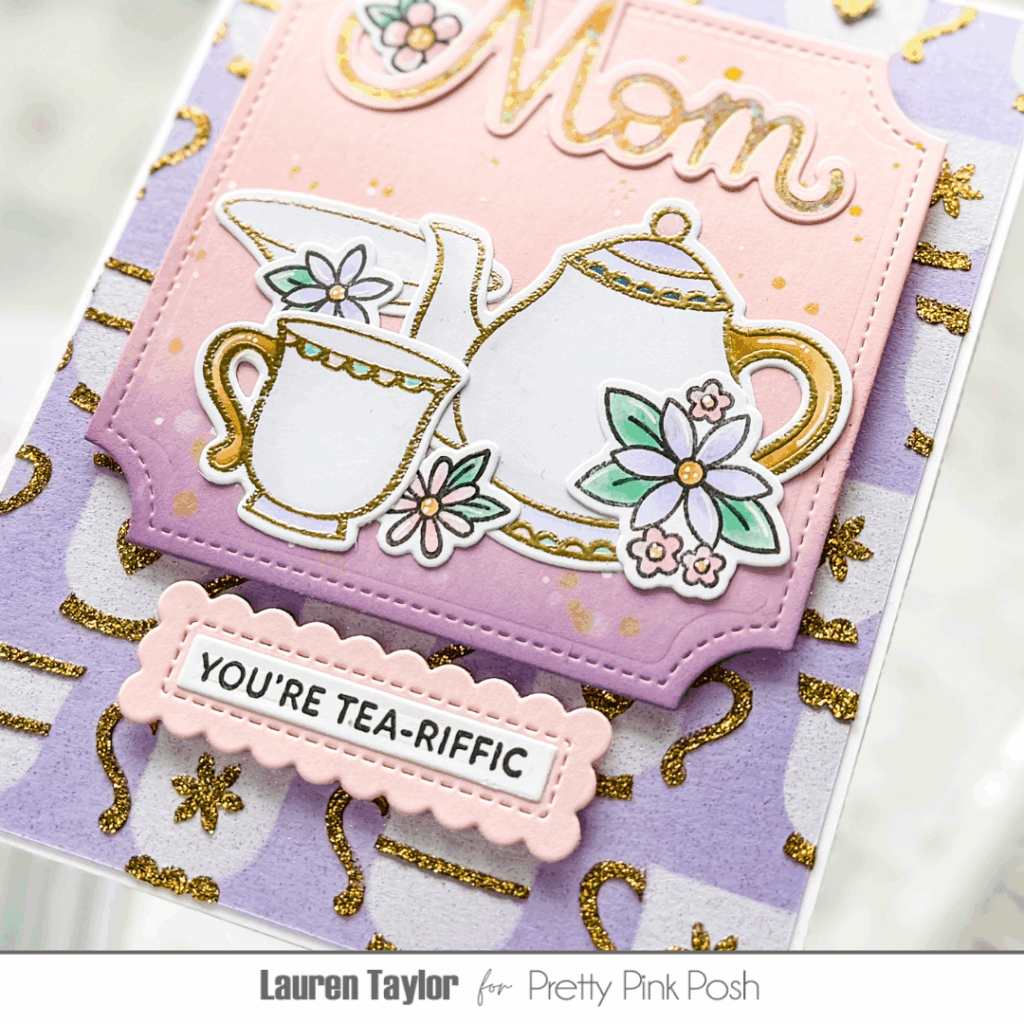
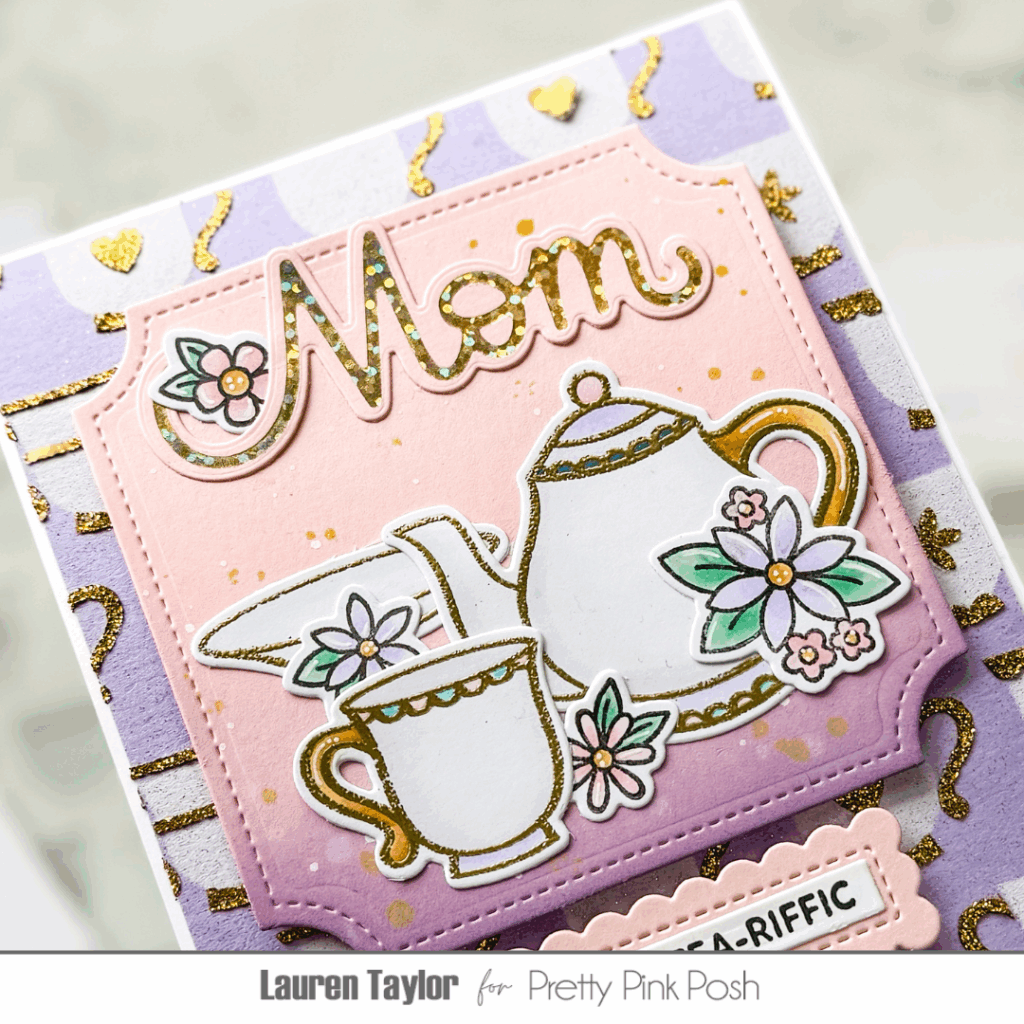
Hi, friends! Lauren Taylor here and get ready to steep yourself in creativity because I’ve brewed up a delightful handmade card featuring the new and absolutely charming products from Pretty Pink Posh! If you’re anything like me, you adore adding a touch of elegance to your creations, and the latest release from Pretty Pink Posh is overflowing with just that. Today, I’m sharing a card I crafted using the Tea Time Stamp Set and Coordinating Dies, the Layered Teacups Stencils, and the versatile Notched Squares Dies. Trust me, these products are a game-changer for anyone who loves crafting heartwarming cards.
To begin this tea-riffic creation, I first stamped several images from the Tea Time stamp setusing a mix of black and fadeout ink, perfect for no-line coloring. Inspired by the beloved Mrs. Potts and Chip from Beauty and the Beast, I colored my teapot and teacup with alcohol markers, envisioning their iconic charm. To add a touch of luxury, I re-stamped their outlines with clear embossing ink and heat-embossed them with gorgeous gold powder. Once cooled, I die-cut all the images using the Tea Time coordinating dies. For the background, I took a piece of lavender cardstock and, using the first layer of the Layered Teacups Stencils, applied white pigment ink through it. To give it a subtle shimmer, I spritzed it with a glitter dust spray – the effect is simply magical!
Next came the intricate details using the second layer of the Layered Teacups Stencilsand a beautiful gold glitter paste. This adds a wonderful texture and shine without the mess of loose glitter. While that dried, I die-cut a notched square from pastel pink cardstock and created a soft ombre effect using Distress Oxide inks in Milled Lavender, Sponge Sugar, and a touch of Dust Concord. To enhance the visual interest, I splattered the inked square with water, gold mica spray, and white acrylic paint, creating lovely textures and dimension.
Finally, the assembly! I adhered the stenciled background to an A2 card base, leaving a thin white border. Then, I arranged my die-cut teapot, teacup, and floral elements onto the notched square, using liquid adhesive. I even added a sweet Large Mom Hot Foil Plate sentiment, hot-foiled in a shimmering gold and cut with the Mom/ Mother Shadow Die, and a die-cut Sentiment Strip that reads “You’re Tea-rrific.” This card is a celebration of all things lovely, perfect for Mother’s Day or just to your Mom you care. For a more in-depth look at the stenciling techniques and step-by-step directions, be sure to watch my video! You won’t want to miss all the sparkly details and helpful tips. Happy crafting!
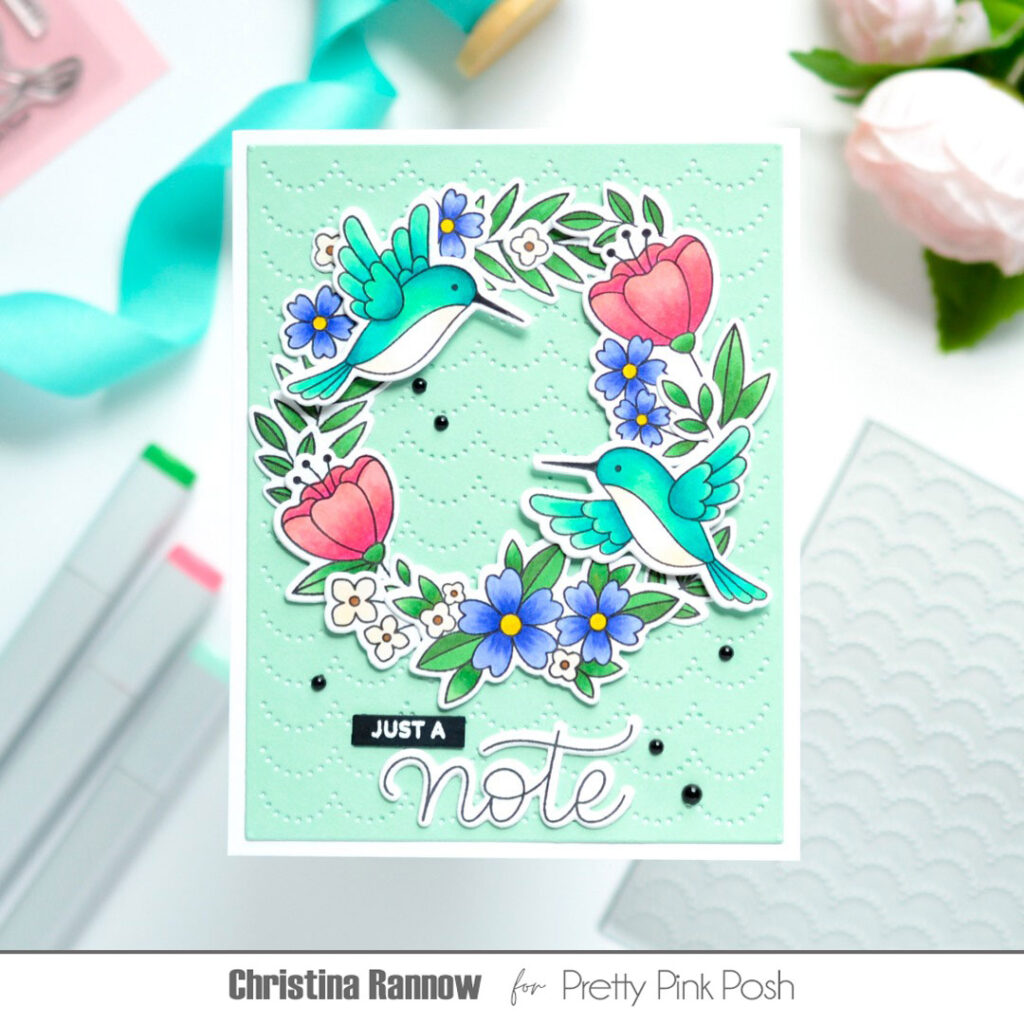
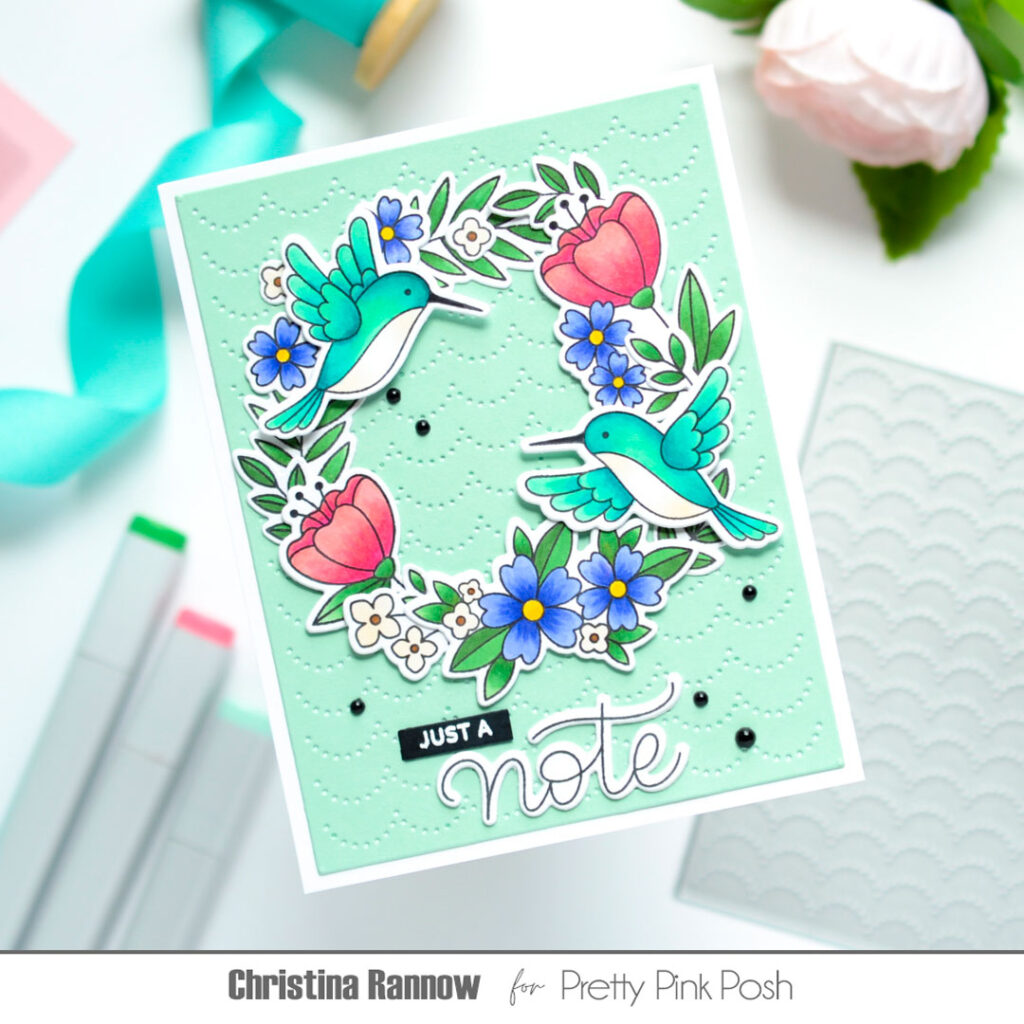
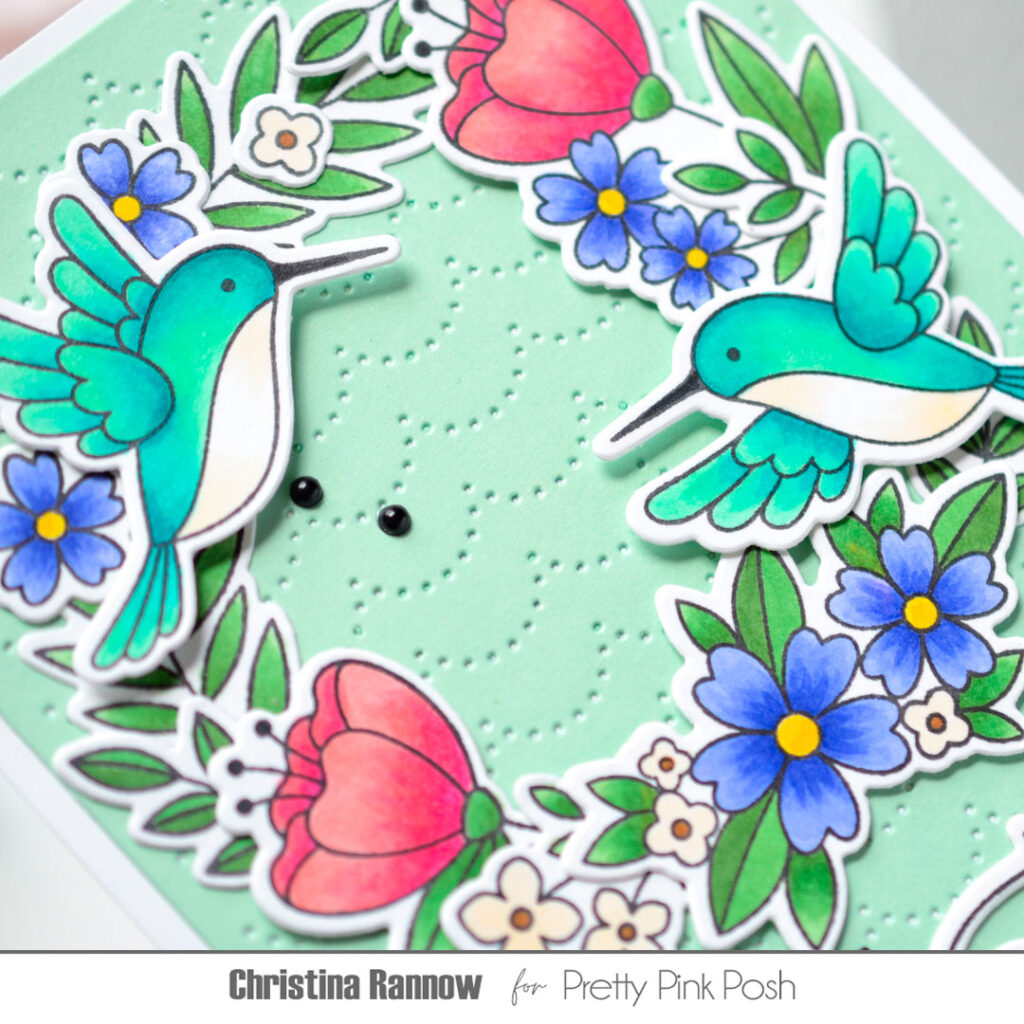
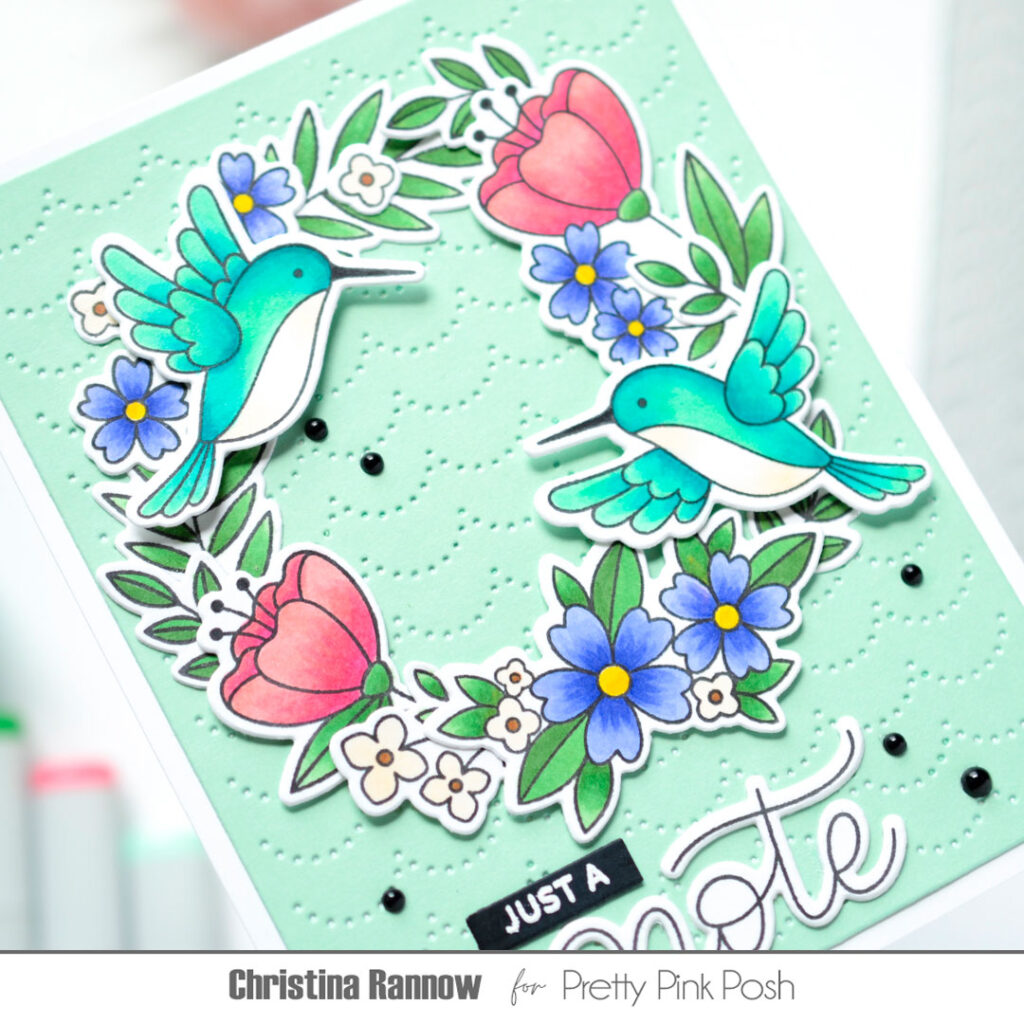
Hello friends! It’s Christina again, and I’m back to share another card featuring some of the lovely things from the May release. For this card I used the new Hummingbird Floral stamp set to create a pretty floral wreath on a background made with the Scallops Pierced Plate. I loved coloring these beautiful images, and after they’re colored, this card design is quick and easy to put together. Follow along as I give you all the details!
My first step was to die cut the pierced scallops from sea glass cardstock and mount it on a white cardstock panel measuring approximately 4 ½ x 5 ¾. This card is slightly larger than the typical A2 size, but you can trim the pierced panel a bit and then mount it on an A2 card base if you prefer.
Next I stamped all of my images, including some greenery from the Simple Thanks stamp set, with a Copic-friendly black ink on white cardstock. I colored my images using the following Copic colors before die cutting them with the coordinating dies:
B63, BV13, BV04, Y15 for the purple flowers G00, G12, BG23, BG13, BG49, E50, N9 for the hummingbirds R32, R43 for the pink flowers YG45, G46 for the greenery E50, E57 for the small flowers
To assemble my card front, I arranged the images into a wreath and secured them to the pierced background with glue and foam squares. Then I created a sentiment using stamps from the Hummingbird Floral set, heat embossing part of it on a sentiment strip and stamping and die cutting the other part of the sentiment. I attached these under the wreath and finished things up by adding a few Onyx Pearls for embellishment.
Thanks so much for taking time to read about my card featuring the Hummingbird Floral stamp set. See you again soon!
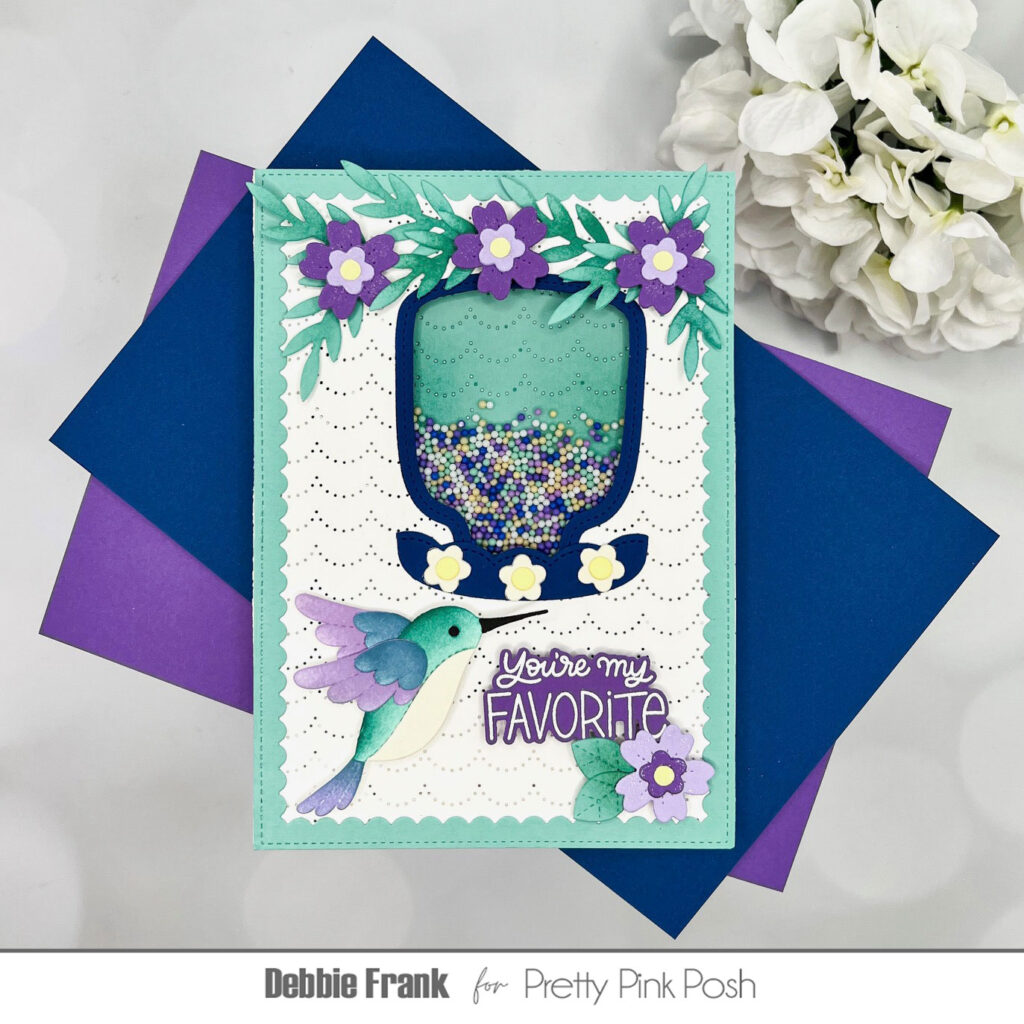
Yes, I said Vase but I got a little creative and made a bird feeder! I did start off with making as intended, but as I was trying to figure on how to get the new Stitched Hummingbird die on a A2 panel with the flowers and vase. I flipped the panel and there it was the new idea! I just brought the scalloped base down for the Bird feeder bottom. I’m super excited with this one!
So let’s start from the beginning! I die cut out a white 5X7 panel and placed the Scallops Pierced Plate Dieover one corner. With the cutting plate off the cutting edges of the other three sides, so each time three of the corners will not have the cutting plate over it. I should also mention that I have an Anna Griffin die cutting machine. So to make this panel with the Scallops Pierced PlateI did four creative cuts. Also I die cut out with Tidepool cardstock a panel with the Scallops Pierced Plate for the background of the feeder.
Next with the Scallop Frames Die, it was a little more creative cutting. This was way easier though. With a 5X7 panel of Tidepool cardstock. I place the die horizontal, which is a perfect 5inch cut. Ran it through the machine, with the cutting plate offset. Slide the die down and locked it in place and ran it through once more.
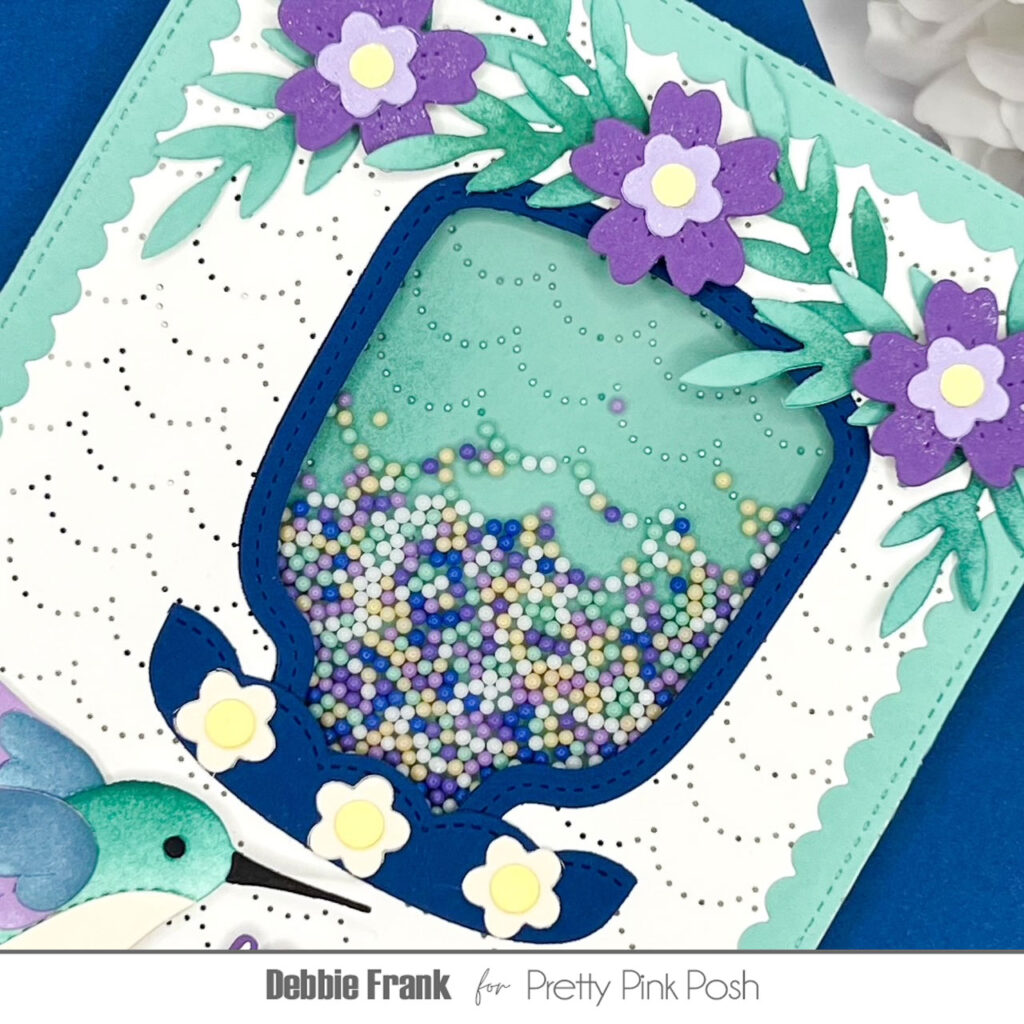
Then with the white scallop panel I die cut out the vase opening, always remembering it will be upside down and I was wanting the scallops to look like waves! Die cut out the frame from a dark blue cardstock to match the Serene Beads. On the back side of the panel I added clear acetate and then thick foam tape around the window to make a well for the beads.
For the top of the feeder to make it look like it was hanging from a tree. I used the new Floral Wreath Builder Set, die cutting out the medium and smaller flowers to stack them and then the leafy vines. There are three of the smallest flowers on the base of the feeder for the birds to drink from.
Next, I needed to make the Stitched Hummingbirds, I die cut them out of white cardstock. And found inks to match, ink blending on lightly with a little more pressure towards the top to give dimension. Adhered it all together and add foam squares on the back side.
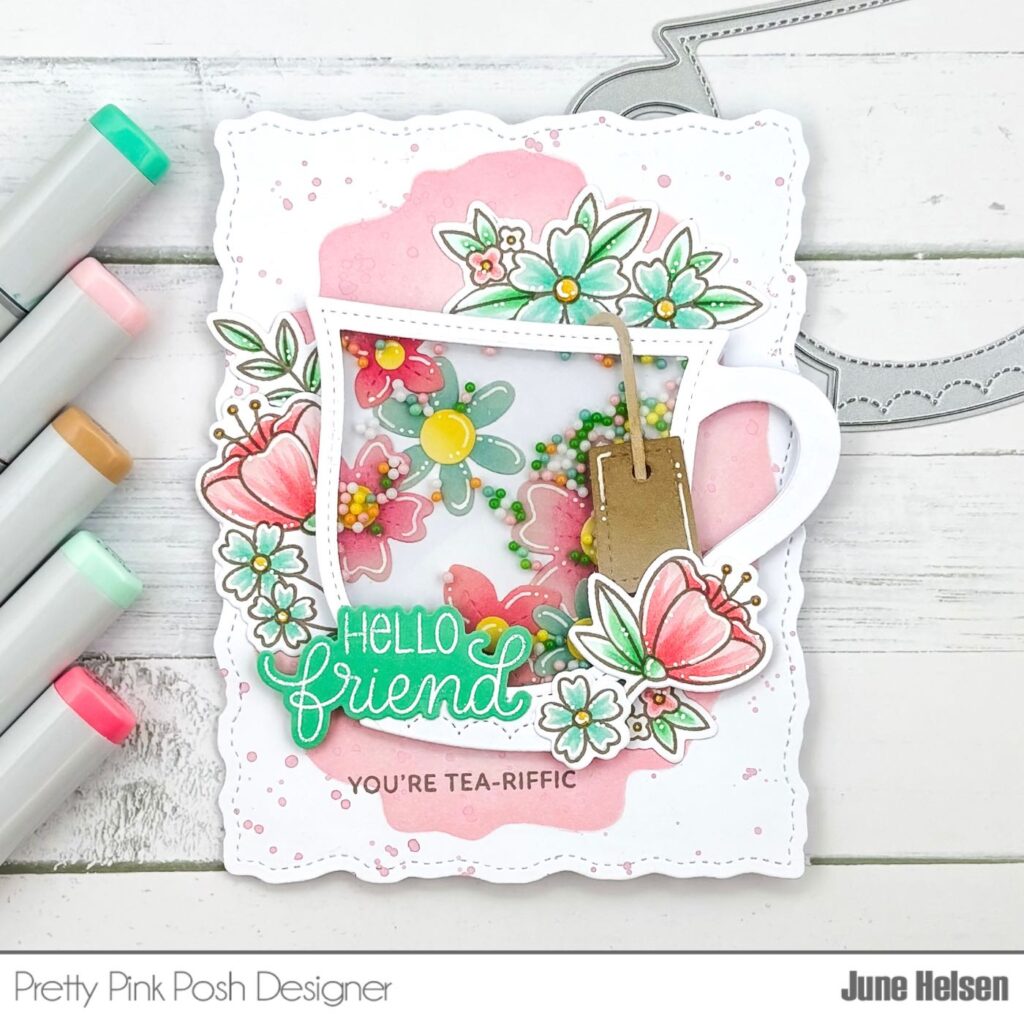
Hello crafty friends, June here! Today I’m back with a cute card using some products from the new release.
I’m not gonna lie – I might have screamed when I saw the new products. This release has my name written all over it: all the cute tea themed products, the florals, the birds?! It’s all just too adorable!
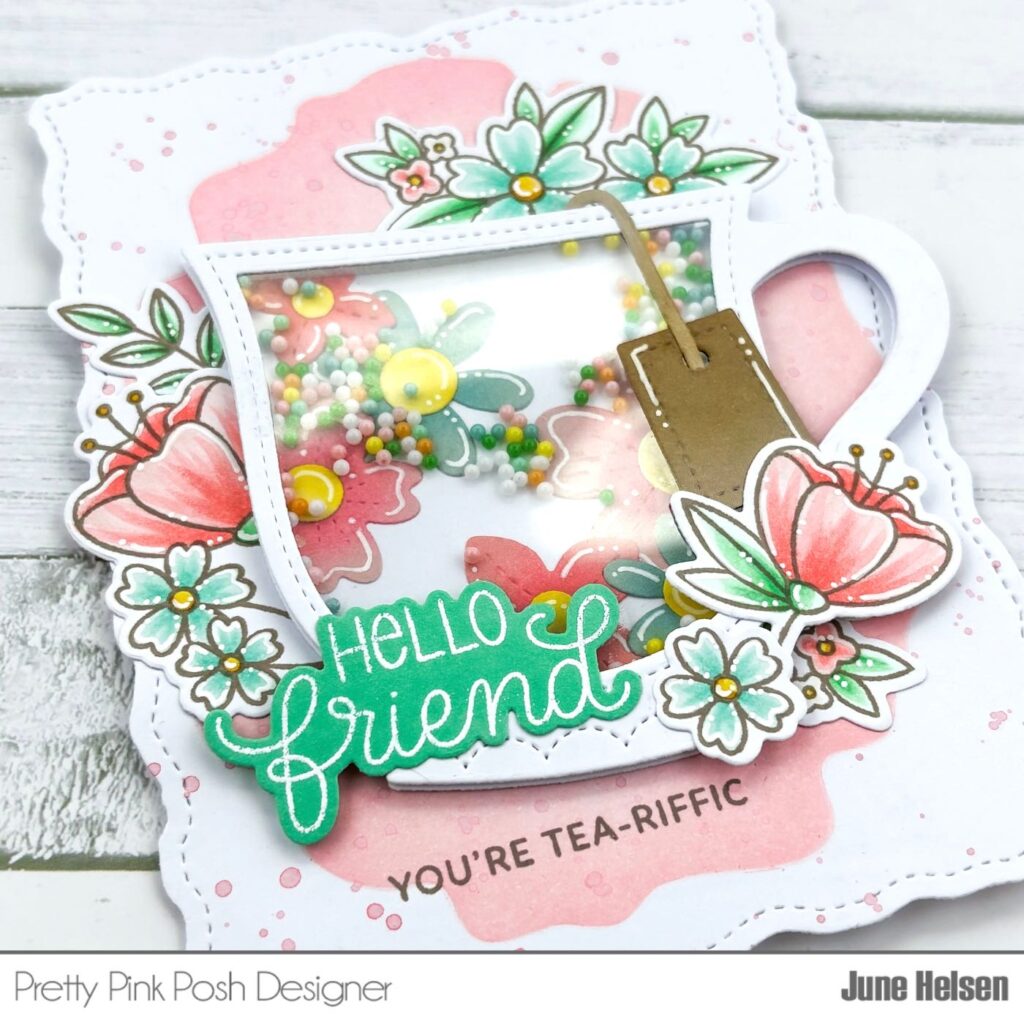
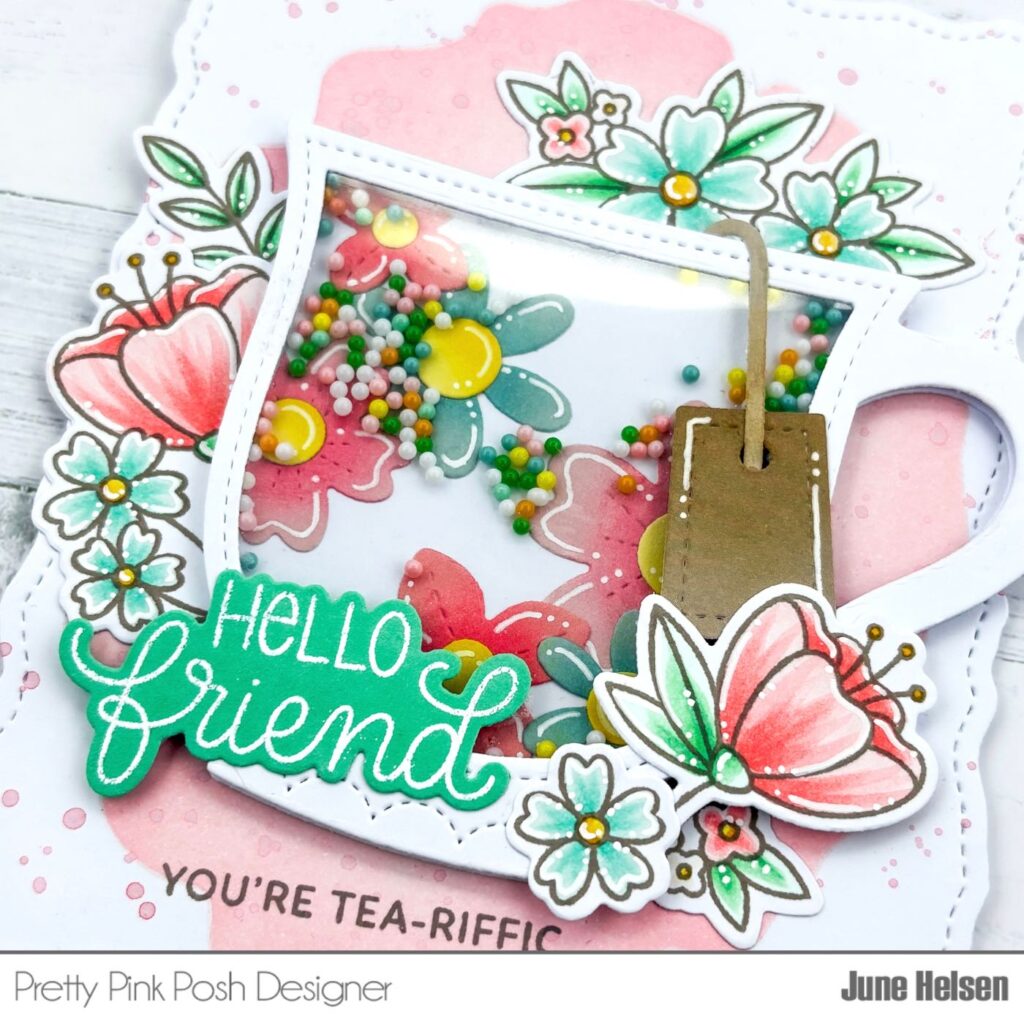
One of the many products that instantly caught my attention was the Teacup Shaker. When I saw it, I knew exactly what I wanted to make with it. The Floral Wreath Builder has some fantastic flowers that I could use to make an antique floral china pattern that goes inside of the cup. I chose muted cardstock colors for the flowers, did a little bit of ink blending and added gel pen details to give them some dimension. I kept the cup itself white without any ink blending, so I felt like the flowers really needed that extra touch.
I also cut out the tea bag from some brown cardstock scraps and added my shaker bits. I chose all my colors based on the Enchanted Shaker Beads, so they looked great inside of the cup.
I wanted to add onto the vintage floral theme, so I stamped the florals from the Hummingbird Floral stamp set using brown ink and colored them in a matching color palette.
My card was already looking very detailed with all those flowers, so I went with a rather simple background. I used the Watercolor Oval stencil from the March release for this because it’s already a staple in my craft room. To achieve the watercolor look, I used Worn Lipstick Distress Oxide and made sure that the borders were more saturated than the middle. After that, I added a lot of splatters in the same color around the oval to make it look like a big watercolor splotch. Or a tea stain maybe?
I cut out my panel using the largest Stitched Torn Rectangle die, which I think looks amazing combined with the new watercolor stencils. To finish my card, I embossed a sentiment from the Friend Greetings stamp set onto aqua colored cardstock and used the same brown ink from before to add another sentiment from the Tea Time stamp set right underneath my cup.
I still can’t believe how adorable this release is, so I’ll be back soon on the blog with more inspiration for these products. I hope to see you again then, bye for now!
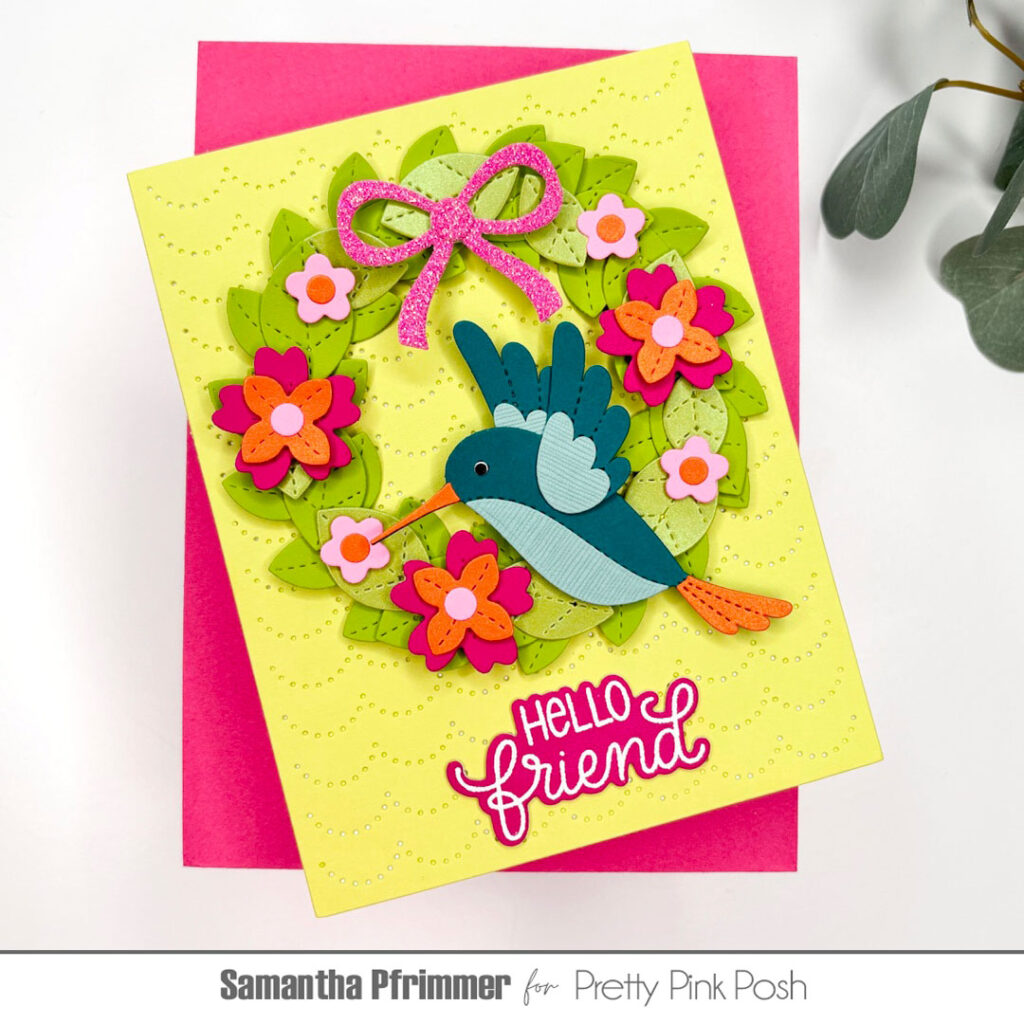
Hello, everyone! It’s Samantha here happy to be guest designing for the new Pretty Pink Posh release and I’m so excited to share a friendship card featuring some of my favorite products from the latest release.
I love hummingbirds and I knew I wanted my design to feature the new Stitched Hummingbirds Die Set. I also couldn’t wait to try out the new Floral Wreath Builder and I knew they would be a perfect pairing for my sweet bird. I wasn’t sure about colors, so to get me started, I decided to go through my stash of specialty paper to see what inspired me.
When I came across some citron-colored cardstock I knew that I wanted to go with bright, bold colors and that this would be the perfect base color. Next, I selected a shimmer paper in orange and another card stock in magenta because I love these two colors together. For my bird I was looking for just the right blue when I found a light aqua textured paper that I was so excited to use. For my leaves I selected a shimmer paper and a solid paper in a green that would complement my citron background and lastly a dark teal to finish of my bird. I was ready to get started.
I die cut all the elements for my hummingbird and my wreath, and also die cut my background panel using the new Scallops Pierced Plate. The plate added the perfect amount of subtle pattern to the scene. I adhered my wreath base and leaves together first.
PRO TIP: Dimension is everything! For added dimension with this card I die cut two extra wreath bases to prop the wreath up off the card base. I also curled my leaves with my pickup tool, and intermittently used a little bit of thin foam tape to prop up some of my leaves.
Next, I assembled my hummingbird and used him as a guide to help determine where I wanted to place my flowers making sure my arrangement was balanced and symmetrical. After adhering everything down with a combination of glue and thick and thin foam tape, I decided to top my wreath of with a bright pink glitter bow die cut.
All that was left was to white heat emboss my sentiment from the newFriend Greetings stamp set onto magenta cardstock, die cut it and add it to my card panel. I then glued everything to an A2 folding card-base and now I have something pretty in my stash to send to a friend.
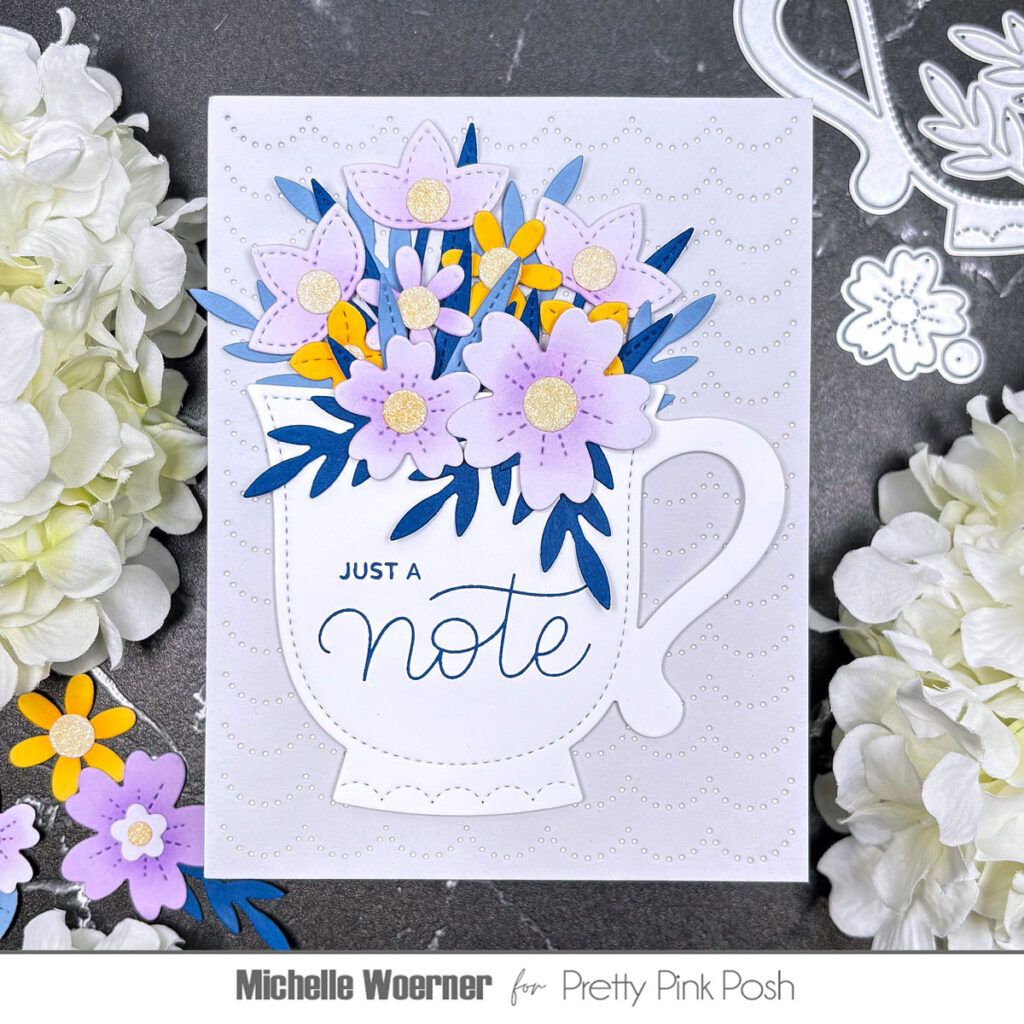
Before I start my floral cards, I always choose my color palette and die cut all the flowers, stems and leaves in the die set with all my colors. I love having lots of color options when I start assembling my blooms. Next, I lightly inked the flowers from the centers outward to create some depth. I wanted some sparkle, so I die cut the flower centers from glitter cardstock and inked them with yellow ink. This adds sparkle to the card without adding bulky gems, making it easier to mail.
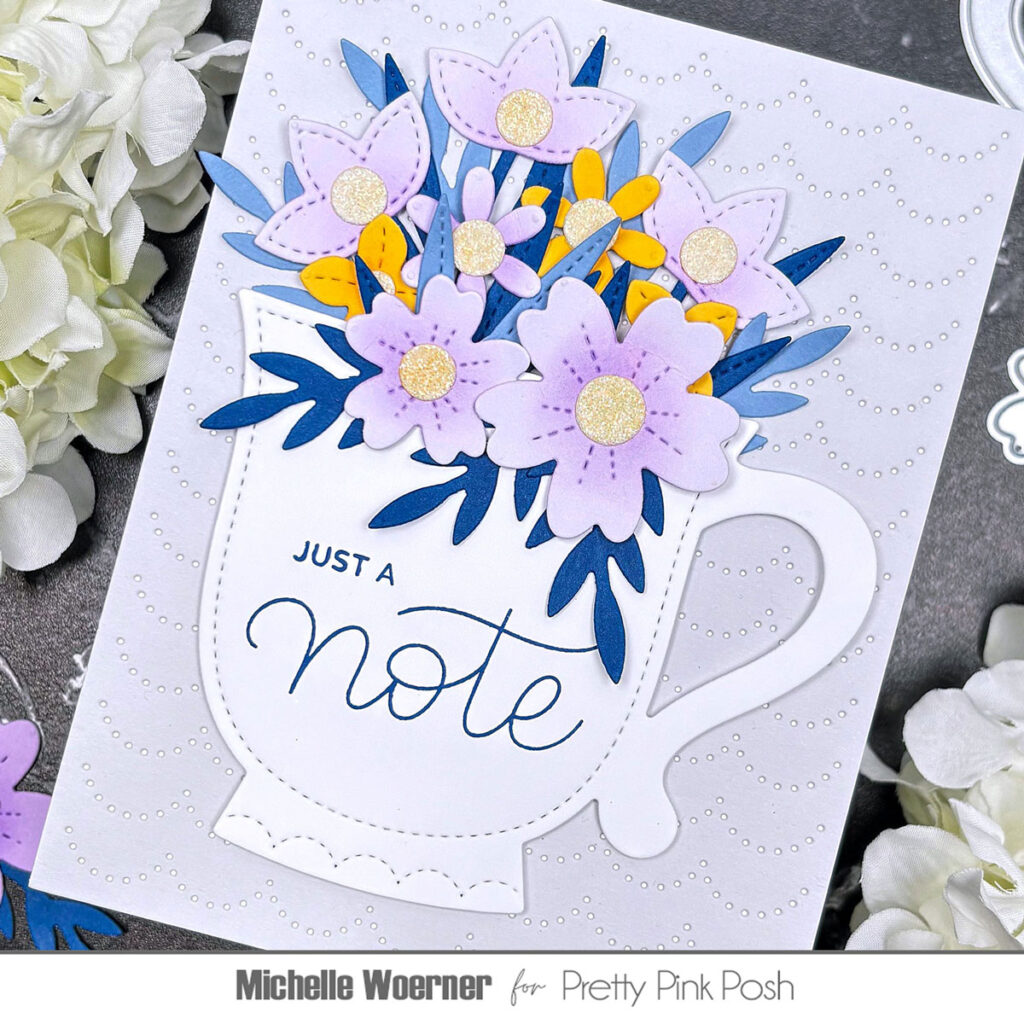
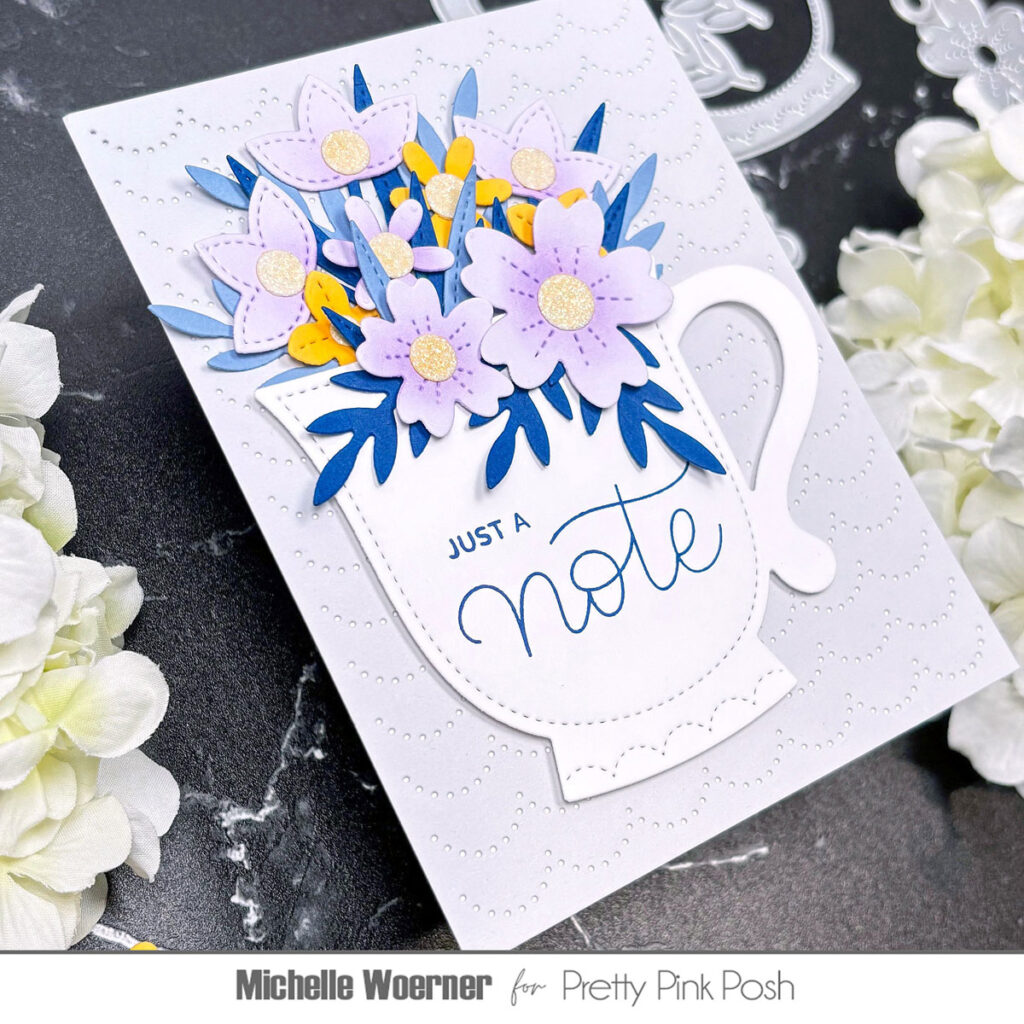
I die cut my teacup with white cardstock and stamped the sentiment using navy blue ink. I wanted the teacup and florals to really pop, so I die cut the background with light gray cardstock using the Scallops Pierced Plate and adhered it to a white card base. I love how the white from the card base shows through the pierced scallops giving it a soft look. Next, I adhered the teacup using foam squares. Then came the fun part, I arranged the flowers and foliage coming out of and around the teacup until I had an arrangement I loved.
Designer Tip: To create some depth with a flower arrangement, try adhering some flowers and foliage directly onto the panel and others with 1mm and 2mm foam squares. This is a simple trick that can really give a lot of extra dimension.
Thanks for stopping by and be sure to check back tomorrow for some more inspiration from the team!