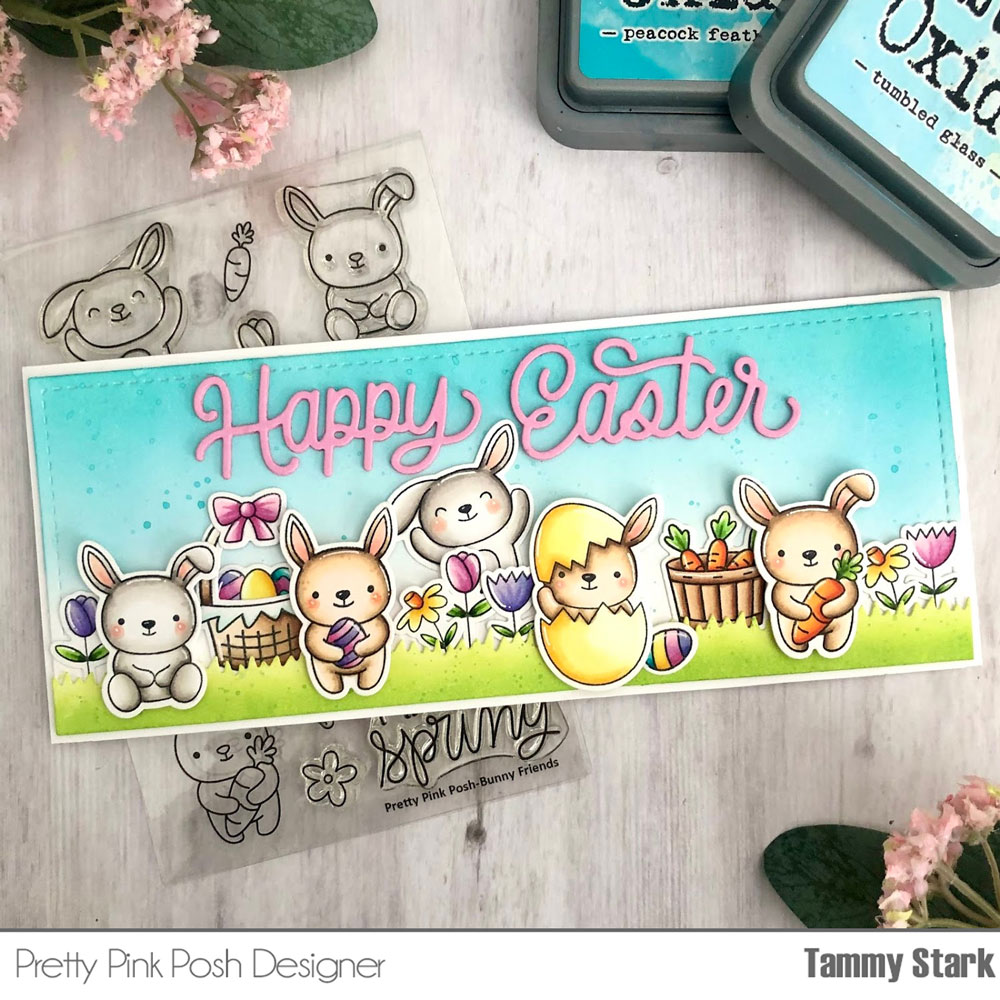
Hi friends, Tammy here! I’m so excited to be kicking off Easter Theme Week with Pretty Pink Posh! I’m sharing a slimline card, combining older sets with some new items, to create this fun Easter scene!
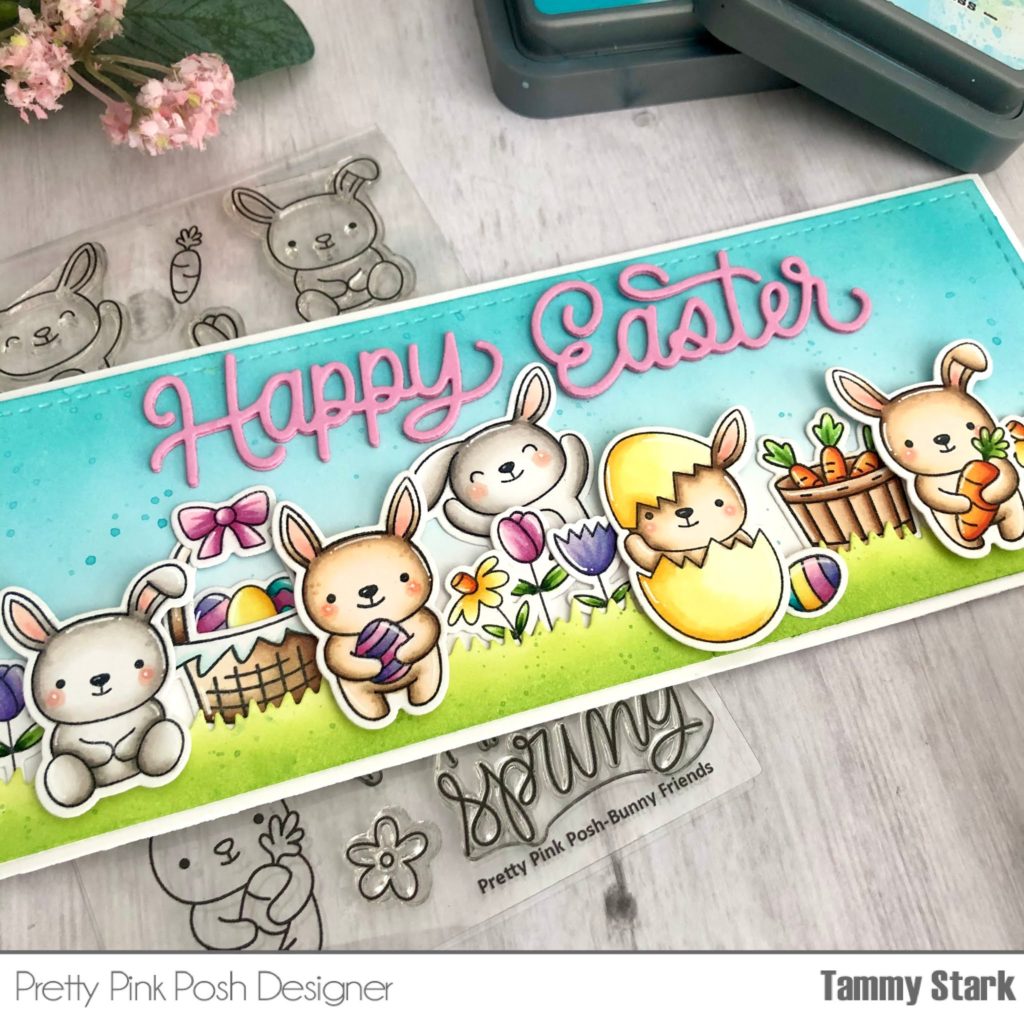
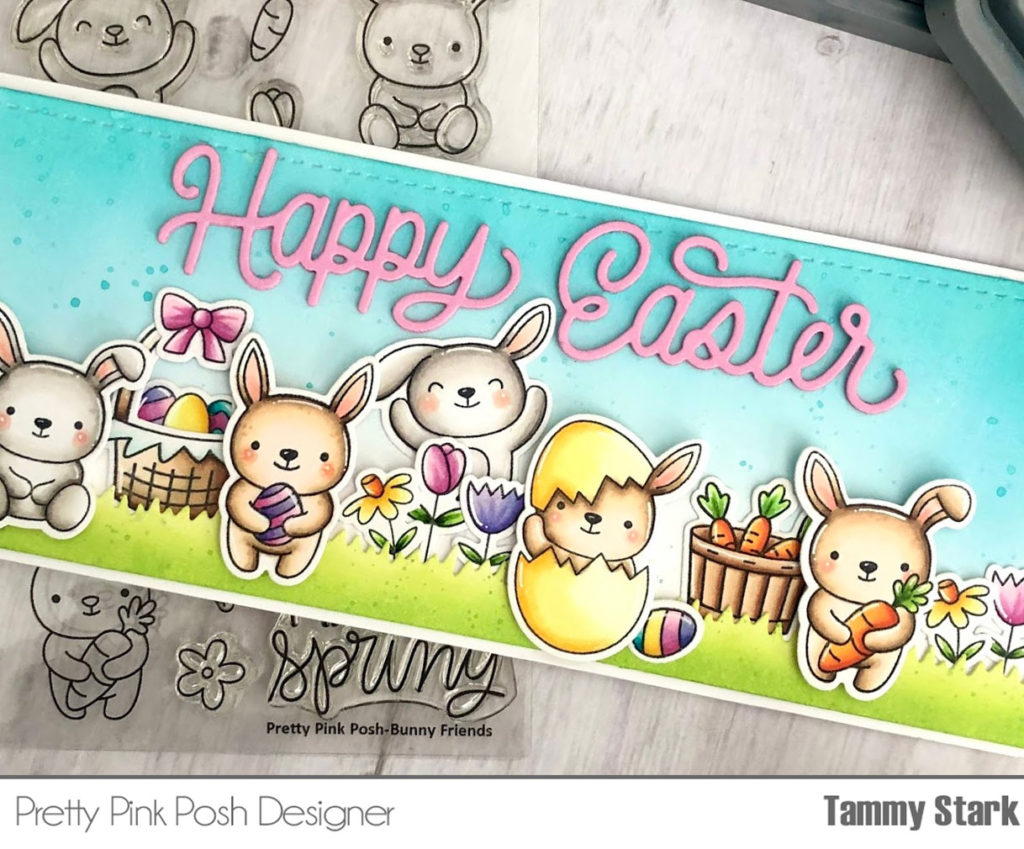
Next, I cut a piece of Bristol smooth cardstock using theSlimline: Peekaboo Windows Dies. I ink blended the background with Peacock Feathers and Tumbled Glass Distress Oxide inks, adding some splatters for interest. I then cut the grassy borders using the Nature Essentials Dies, ink blended with Twisted Citron and Mowed Lawn inks and pieced them together to span across the length of my card. I arranged the sweet images onto my card, adding foam squares on some for dimension.
Lastly, I die cut pink cardstock 3 times using the Fancy Easter Script Dies, stacked together, and attached across my card. I then attached my card front to a white 3 1/2 X 8 1/2″ card base to complete my card.
Thanks so much for stopping by! I hope you are inspired to create some fun Easter, or Spring cards! See you tomorrow for Day 2 of Easter Theme Week!
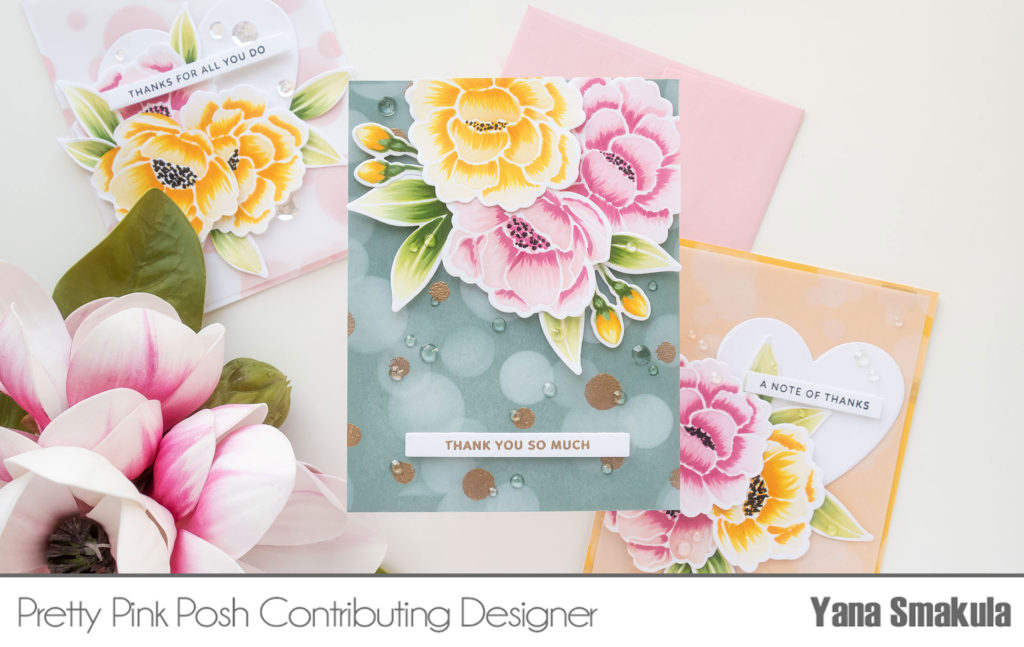
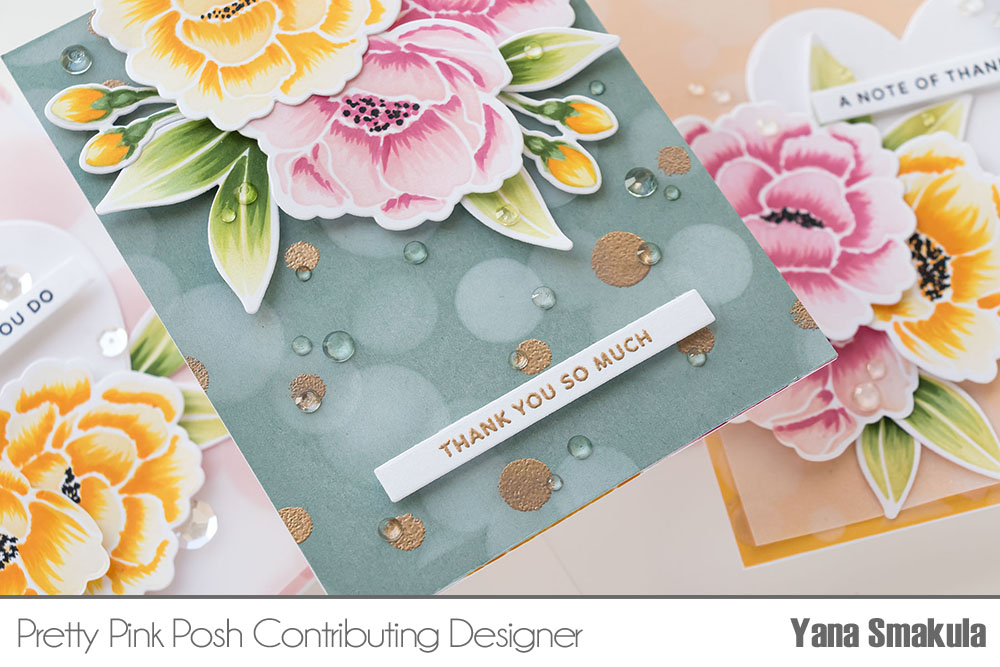
Hello everyone! This is Yana Smakula, thank you for joining me!
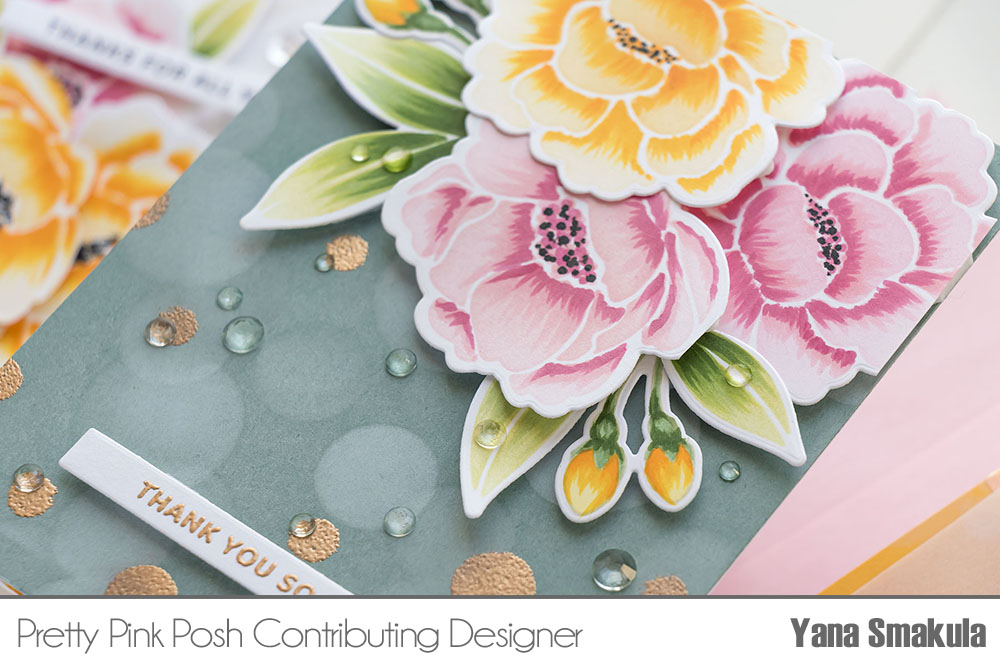
Today’s video takes a different look at the Peonies Stencil and shares a fun way to add detail to these beautiful blooms. Peonies stencil is a 5 7/8″ x 5 7/8″ stencil designed to create beautiful peony flowers. You have several floras, one flower bud, and 3 leaves. Two of the flowers are mirror images of each other.
There is also a Peonies stamp set with identical images, the size of these matches, allowing you to stamp the outline in black or any other ink color and blend the petal color using the stencil. It is a brilliant combination, really. There is also a set of coordinating dies that work with both the stamp set and the stencil. How cool is that?
In this video, I’m going to show you how you can combine the stencil with the coordinating dies. I also have a video on my Youtube channel showing how to combine all 3 products to create phenomenal flowers.
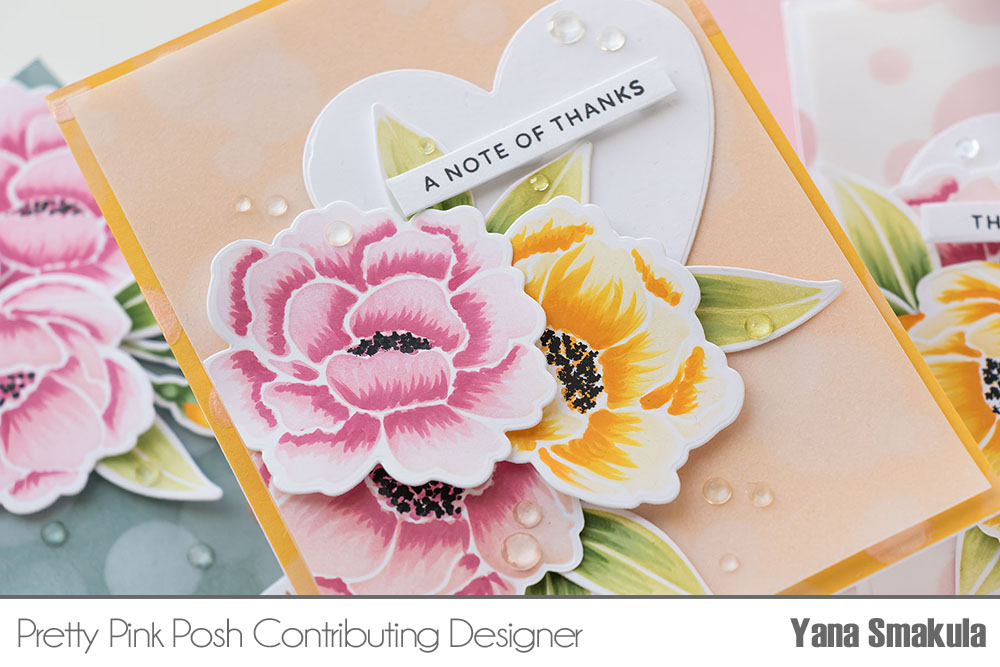
I started by ink blending the flowers and leaves using a blending brush and various colors of ink. I used dye ink for this video, but of course, these can be blended with any type of ink, and of course, any color.
Next, to add detail to these images I used Copic markers. The idea is to use a flick style coloring method and flick the color onto each petal adding veins and beautiful detail. I matched the colors of the markers to the colors of the ink blending. You don’t have to use alcohol markers for this step, you can also use colored pencils if you prefer.
Think of this as a way to do no-line coloring. When you want to do a no-line coloring technique with your stamps, you stamp the image with a very light ink color, the kind of color that is just barely visible for you to do your coloring. This ink blending and flick style coloring technique is somewhat similar – we first ink blend a light color of ink to give us the general flower or leaf shape and then we add detail using a marker.
Next, I used the coordinating dies and cut these images out. Isn’t it clever, to have coordinating dies for stenciled images? I think it is quite brilliant.
Now, there are more flowers in the stencil, than there are in the stamp set. One flower is mirrored. That means you can still cut that flower out using a coordinating die, but you need to position the die from the back of the paper. You do get a bit of a different edge to the flower you cut from the backside, but it is hardly noticeable. The edge is sharper, compared to the regular cut flower and if the sort of edge bothers you, you can flatten it using your scoring you – just go over that edge with the tool you use to create card bases and burnish that edge. That should do the trick.
I decided to make the flower centers black, so I used a black pen from my stash and just dotted black marks inside the flowers.
Another fabulous product from Pretty Pink Posh is a set of stencils to create a bokeh background.
The bokeh stencil is a 3 stencil set with large, medium, and small dots. When you overlap the dots you get a beautiful bokeh result.
Because it is a stencil, you of course can use all of the stencil techniques out there. So not just ink blending, you can add paste, emboss, and use various mediums to get different results.
I wanted to have some gold embossed dots on my background so I started by adding those first. As with any heat embossing, I treated the panel with anti-static powder first, I applied a very generous layer of powder to the entire background. Next, I tape the stencil in place using low tack tape. I didn’t want to use a sticky spray, as that can leave a bit of a sticky residue on the paper, not enough to notice the residue, but enough for the embossing powder to stick to. So better to use tape, at least for this step of the process.
Next, I ink blended the dots using clear embossing ink. I used an ink blending – a dauber type, not a brush, tool and I pounced the ink onto the stencil using my tool. I did go a bit heavy-handedly, but not so heavy, that the ink would seep from under the stencil. Having applied the ink through all the openings on the stencil, I removed it and added Antique Gold embossing powder over the background. I then used my heat tool and heat set the powder in place to melt it. So this created the first layer of my bokeh background. Now the heat embossing wasn’t absolutely perfect, but I didn’t mind, as I knew I’d be adding additional ink blending on top and I’d also pop the flower on a portion of this background so I was okay with some imperfections.
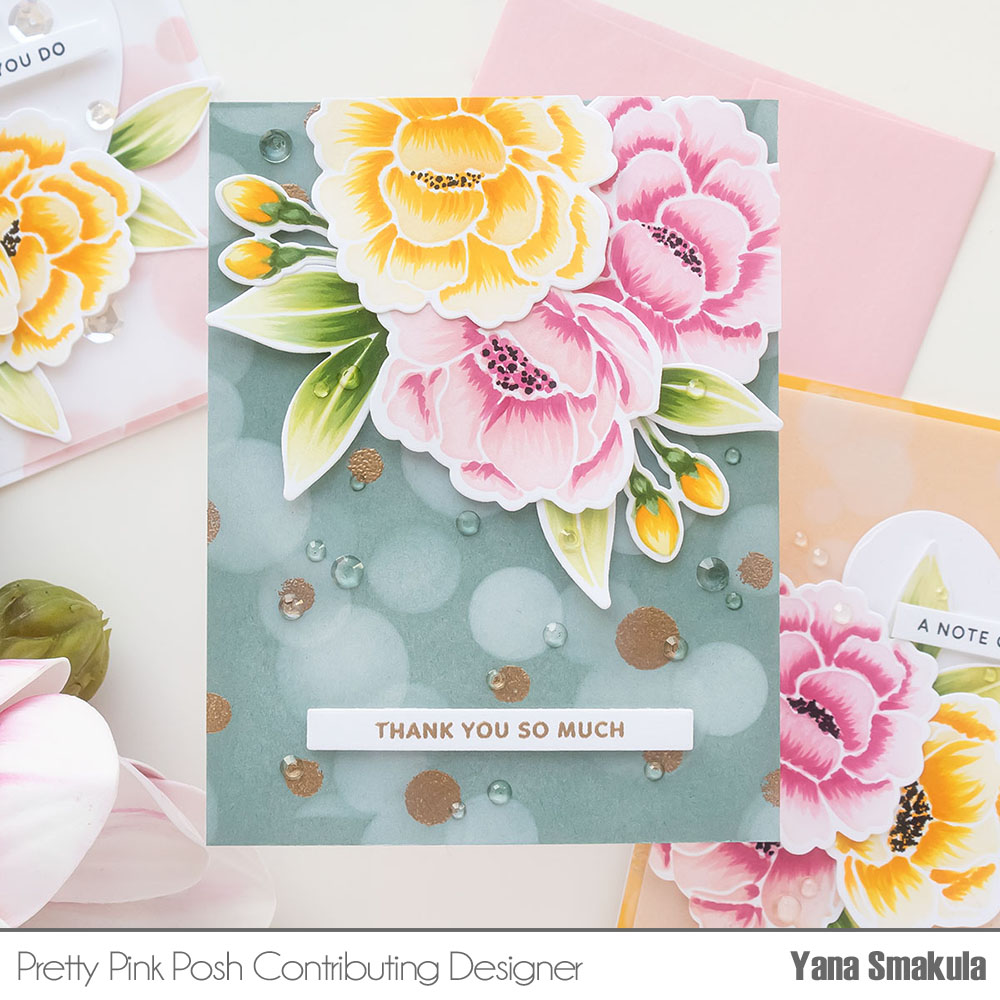
I placed the 2nd layer stencil on top and ink blending white pigment ink. My entire idea for this card was to use a darker color cardstock for the background, heat emboss a part of the bokeh background in gold, and ink blend the rest in white. Where the ink blending overlapped the gold embossing, it muted it significantly, creating a stunning result.
If you want to re-create this background, it is important to heat emboss first, as the rest of ink blending happens with pigment ink, and pigment ink takes a very long time to dry.
I kept on blending the background and used the 3rd layer stencil in the same way. I also went back to the 2nd layer, to add a few additional dots to fill the background in.
You can use the stencil as intended, carefully layering each layer, but you can also go rogue, and layer and blend it in your own way. This is what I did. And I love the result!
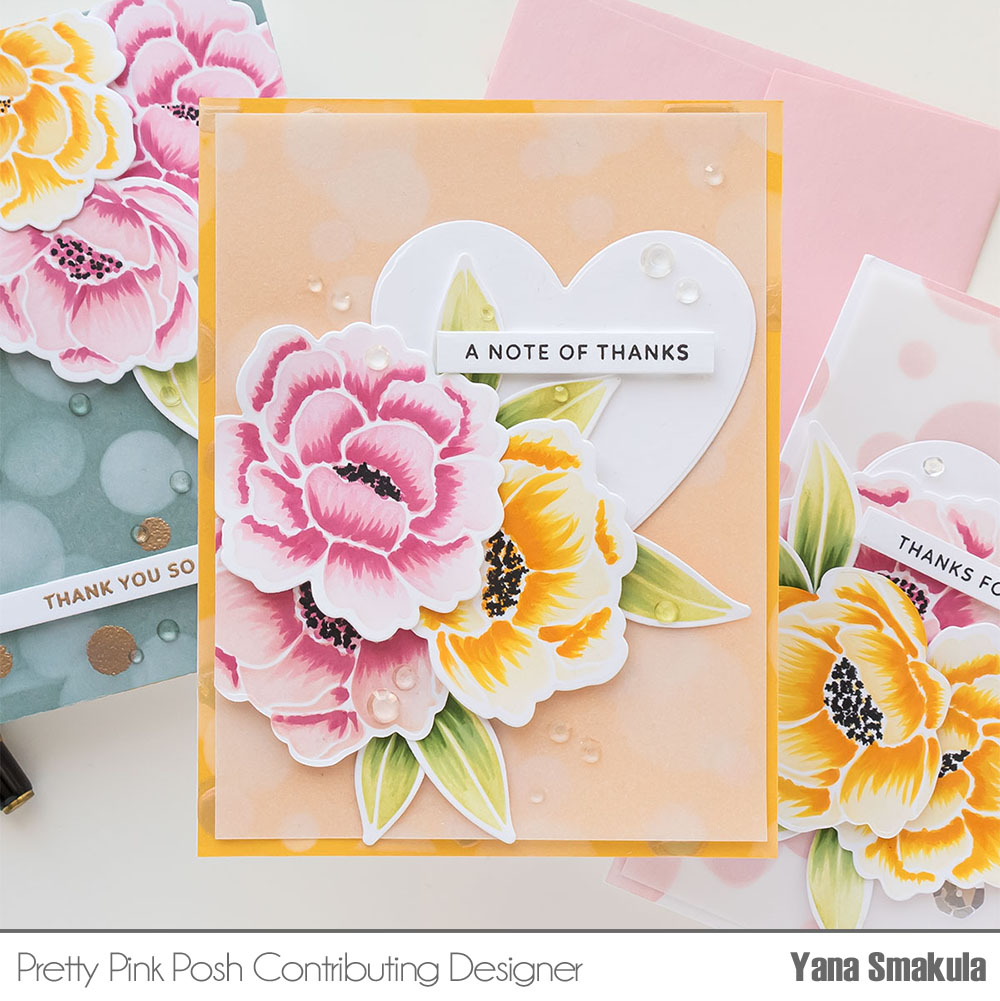
I adhered my background on an A2 white side folding card base and foam mounted my fresh floral cluster on top.
I used my scissors and trimmed the excess flowers off so that there was no overhang. Next, to add a sentiment for this card, I went with a skinny strip heat embossed one – it reads Thank You So Much. But of course, you can add any type of sentiment to this card. This one comes from the Simple Sentiments stamp set. I used a skinny strip from adhesive to add it onto the card and I first thought about adding it over the florals but ended up adding it over the bottom part of my card.
I had quite a few leftover flowers, and I didn’t want them to go to waste, so I added them to the inside of this card. I also used Sparkling Clear jewelsand scattered them over the background adding to the overall bokeh look.
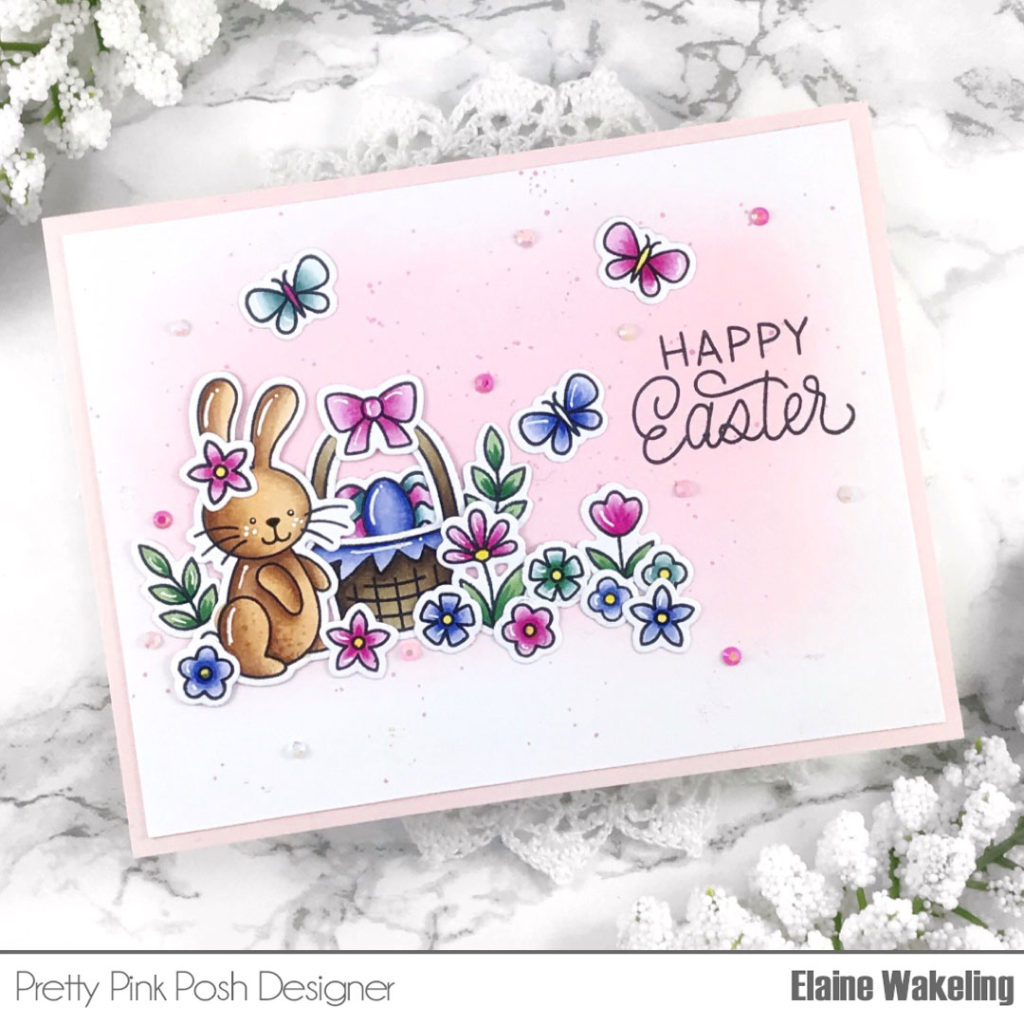
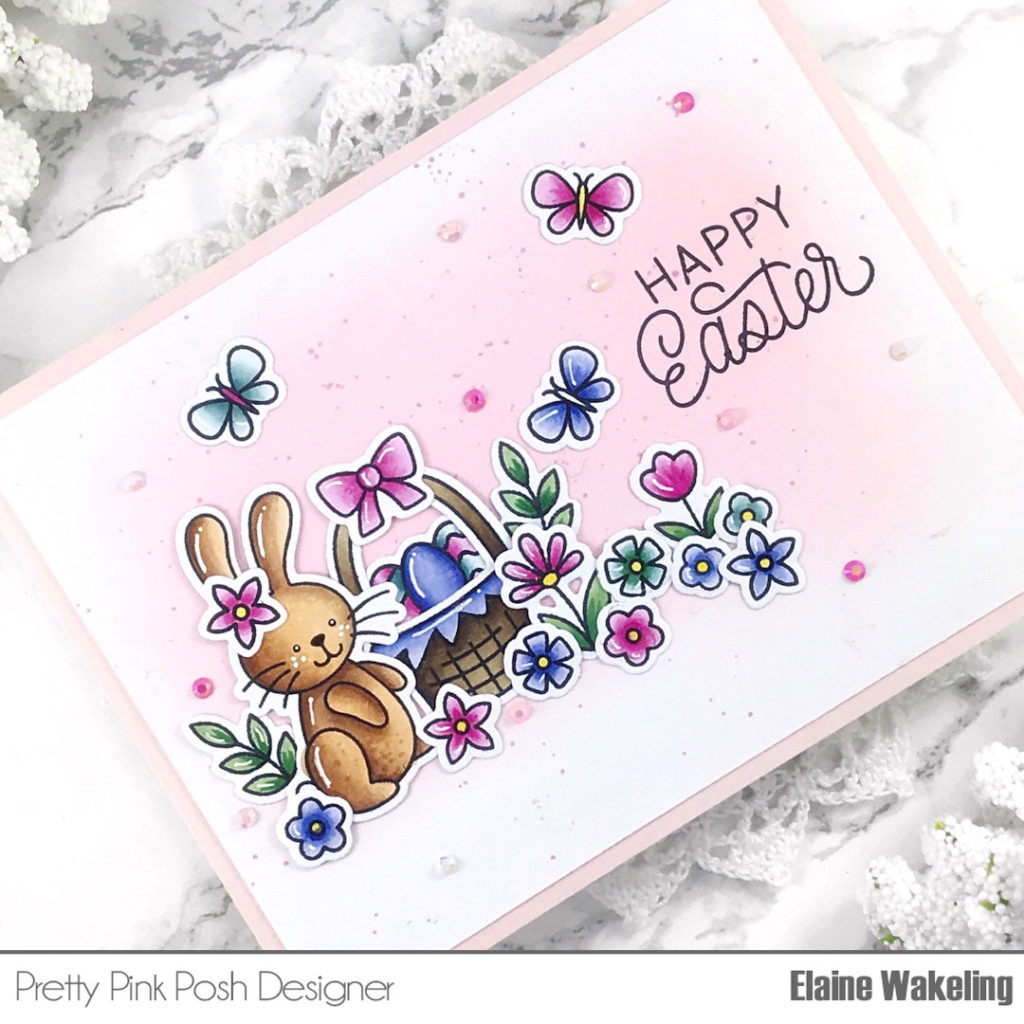
Hello friends! Elaine here today to share a super sweet Easter themed card using new stamps from the March release.
I started my card with the colouring, so I stamped out my images on to copic friendly cardstock with copic friendly ink. I used Easter Bunnies stamp set and added in lots of the individual floral images from the Mom stamp set. For the bunny I used shades E27, E25, E23 and E21 with some R32 in the ears. The flowers and butterflies were coloured with B66, B63, B60, RV66, RV55, RV52, BG75, BG72, BG70, Y11 and Y15. For the leaves on the flowers, I used G28 and G24.
Once all my images were coloured, I cut them out using the co-ordinating dies for both Easter Bunnies and Mom stamps.
Setting the images aside, I started creating the background for my card. I cut a piece of white cardstock to 4” x 5 3/8” and lightly blended on a soft pink background using Spun Sugar Distress Oxide with a large blending brush concentrating the colour at the centre blending lightly out.
Using liquid adhesive, I adhered my stamped images to the ink blended card panel. I secured the main images first; the bunny and basket and then secured the flowers with leaves. Finally, to fill in the gaps and create a full scene I secured all the little flowers and the butterflies. The sentiment was stamped directly on the card panel with a black pigment ink.
To complete the card, I cut a piece of blush pink cardstock to 4 1/4” x 5 1/2” and secured it to a white A2 sized card base, then secured the scene panel on top. Lastly, I adhered a few small jewels from the Valentines jewel mix to finish off the card.
Thank you for joining me today! I hope this card gives you some ideas for your own Easter themed projects!
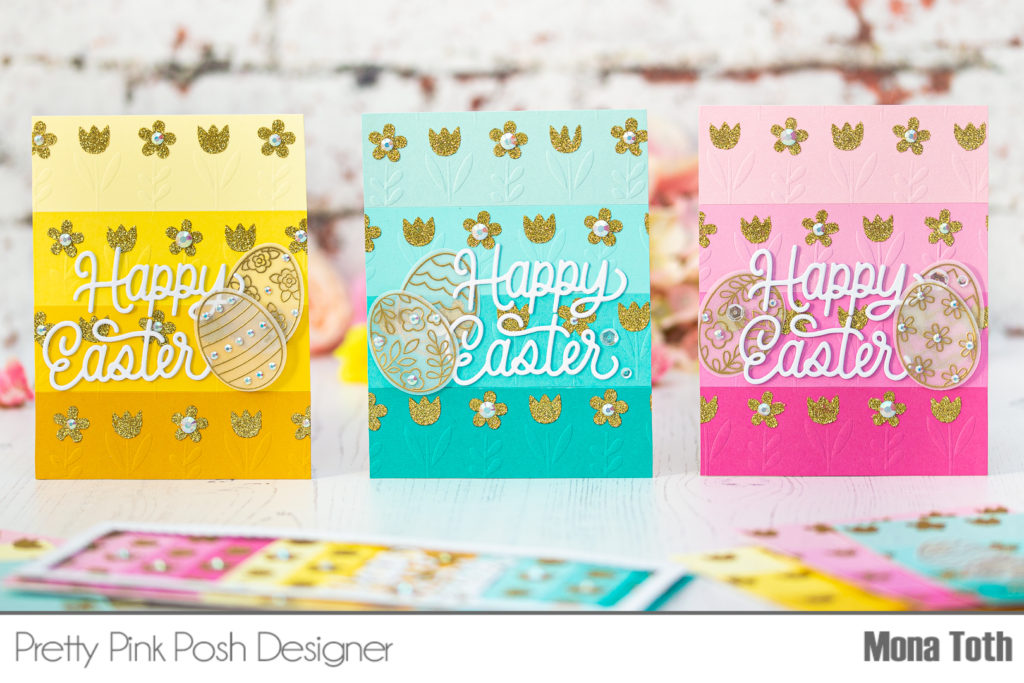
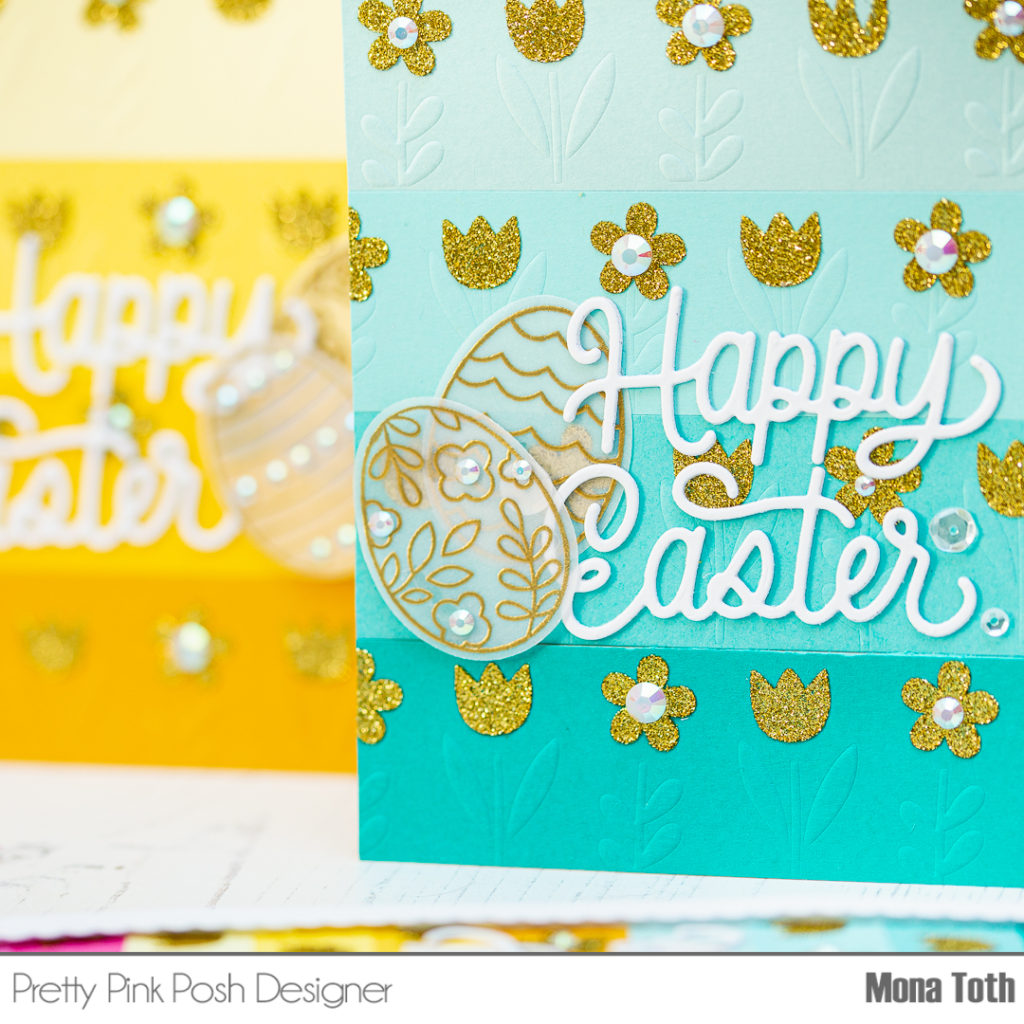
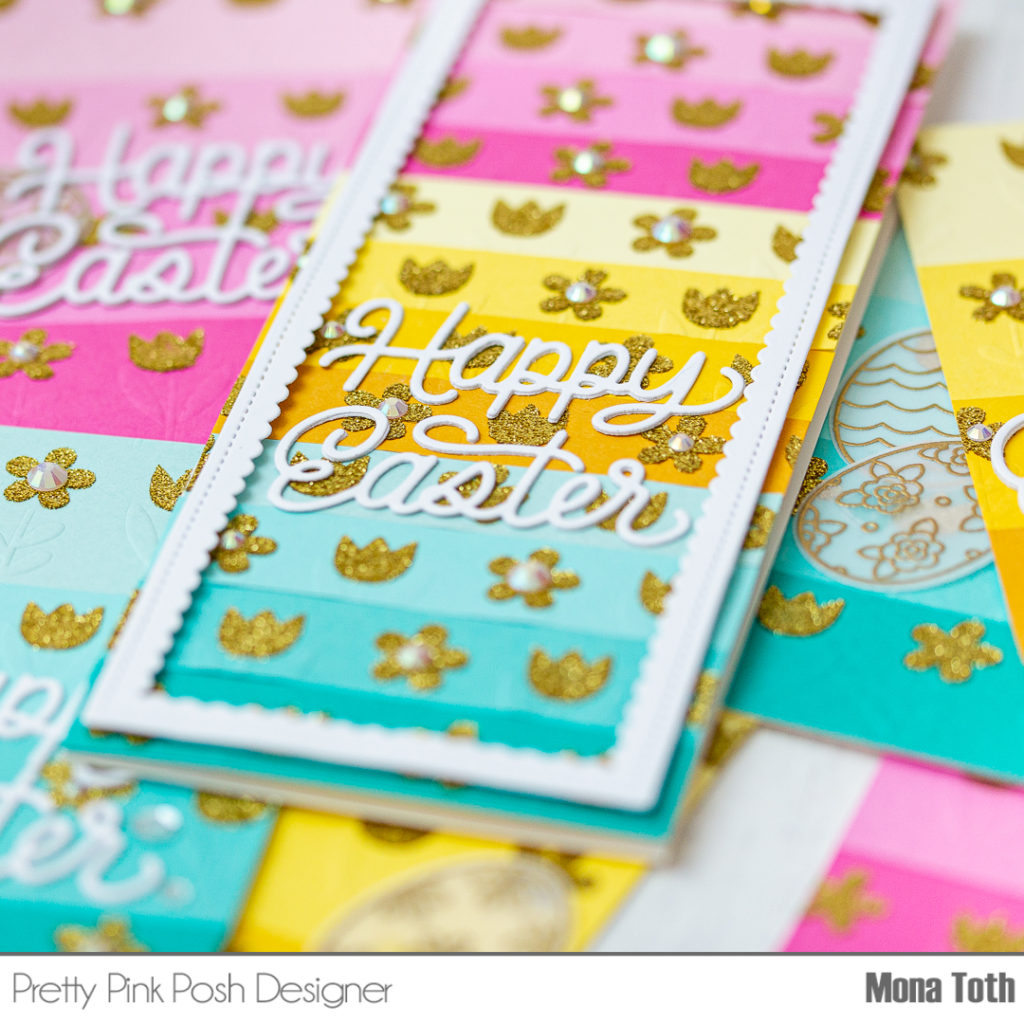
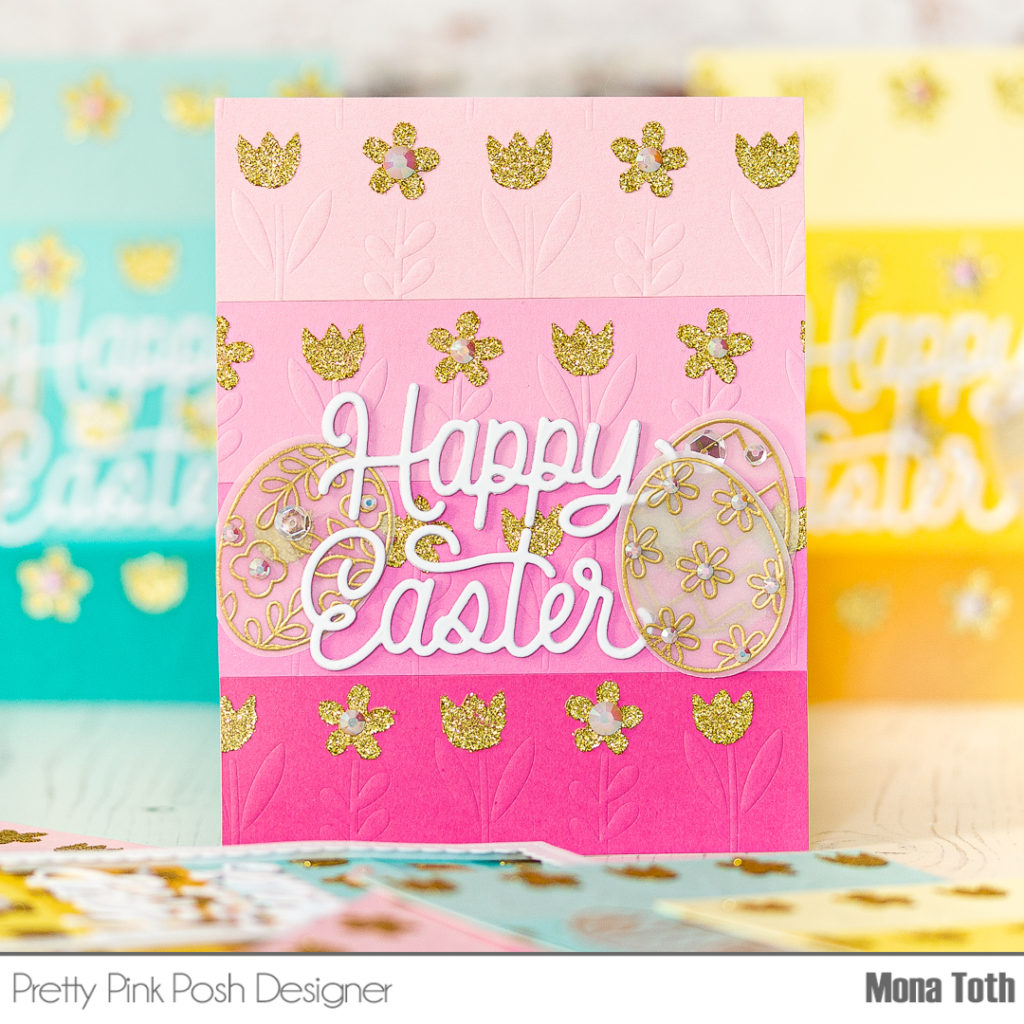
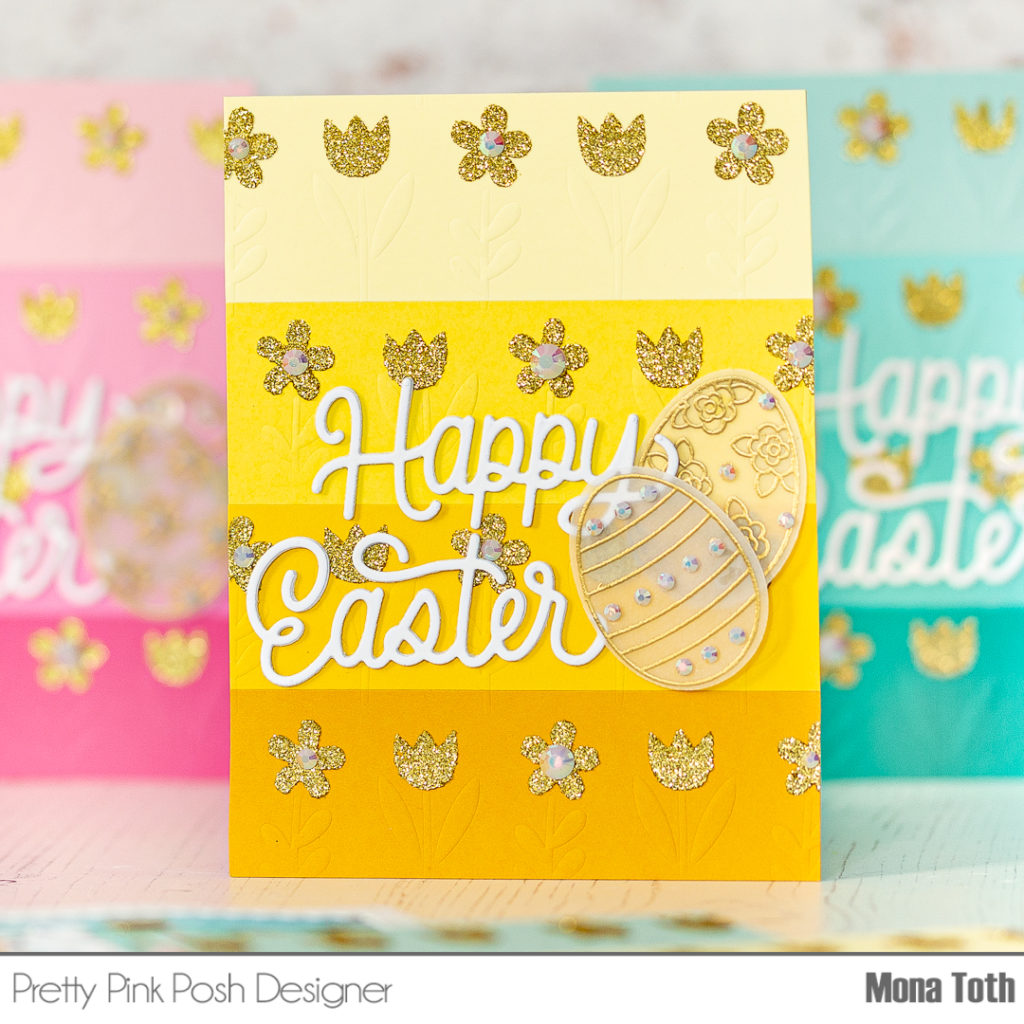
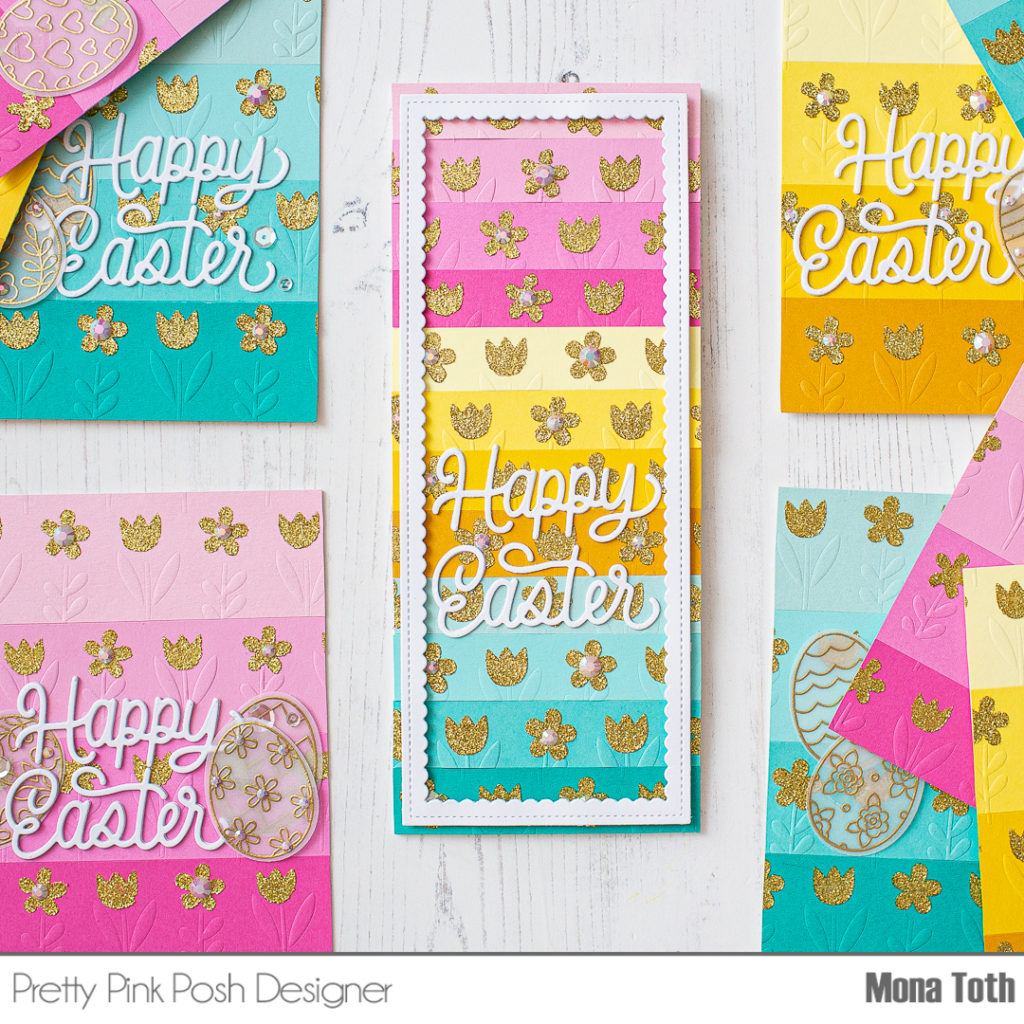
Hi crafty friends! It’s Mona here, today I am sharing with you a fun, ombre color blocking technique. If you need lots of cards at once, then this bulk cardmaking tutorial is for you!
For these cards I have used these beautiful Spring Florals Stencils, the Spring Eggs stamp and coordinating die set as well as the Fancy Easter Script die. I prepared heavyweight cardstocks in different colors and shades for the ombre monochromatic look. Once it was done, I made dry embossing with one of the stencils from the set. You can find this process in the video.
Next, wanted to add an elegant touch to the dry embossed base with the gold glitz glitter gel. First, I am spraying pixie spray on the stencil. This will keep the stencil on its right place, and I can reuse the stencil many times.
When the last cardstock is done, I am letting them air dry for one hour. I am washing the stencil and the tools with soapy water immediately and the stencil looks like a new again.
While the glitter gel background dries, I created the Happy Easter Sentiment from a white heavy weight cardstock and adhered 3 pieces together to have a heavy chipboard looking sentiment.
Because this is going to be an easter card, for me eggs are a mandatory part. I am going to use this beautifulSpring Eggs Stamp setwith its coordinating dies. I am going to stamp these eggs with VersaMark watermark ink to a piece of vellum with the help of my MISTI. Next, I am heat embossing it with gold fine embossing powder and a heat gun. I am in love with them and they look so amazing without coloring too.
Now I have everything to put together my cards. In the end I embellished my cards withPearl White Jewels as well as Sparkling Clear Sequin Mix too. With the leftover cardstock I have created a slimline card as well.
Thank you so much for stopping by. See you next time.
Hello, Gemma here with a new post for my Clean and Simple series.
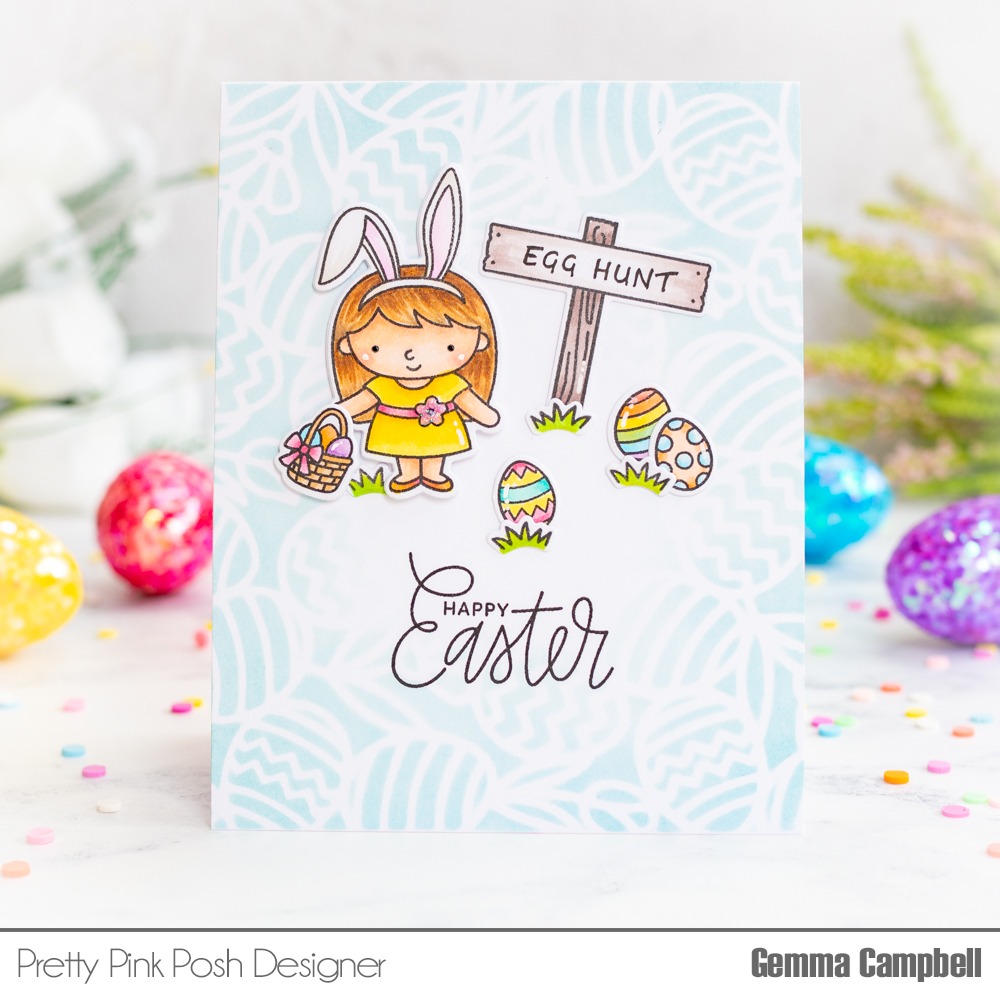
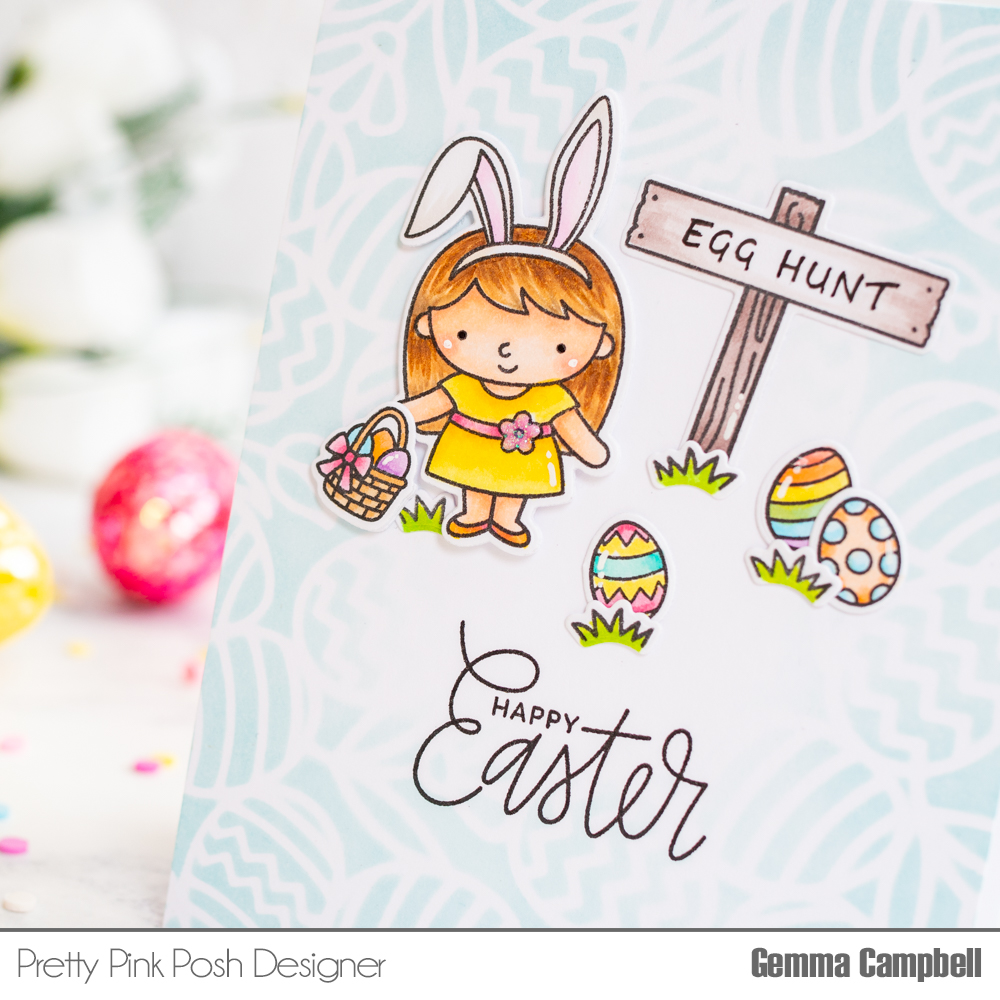
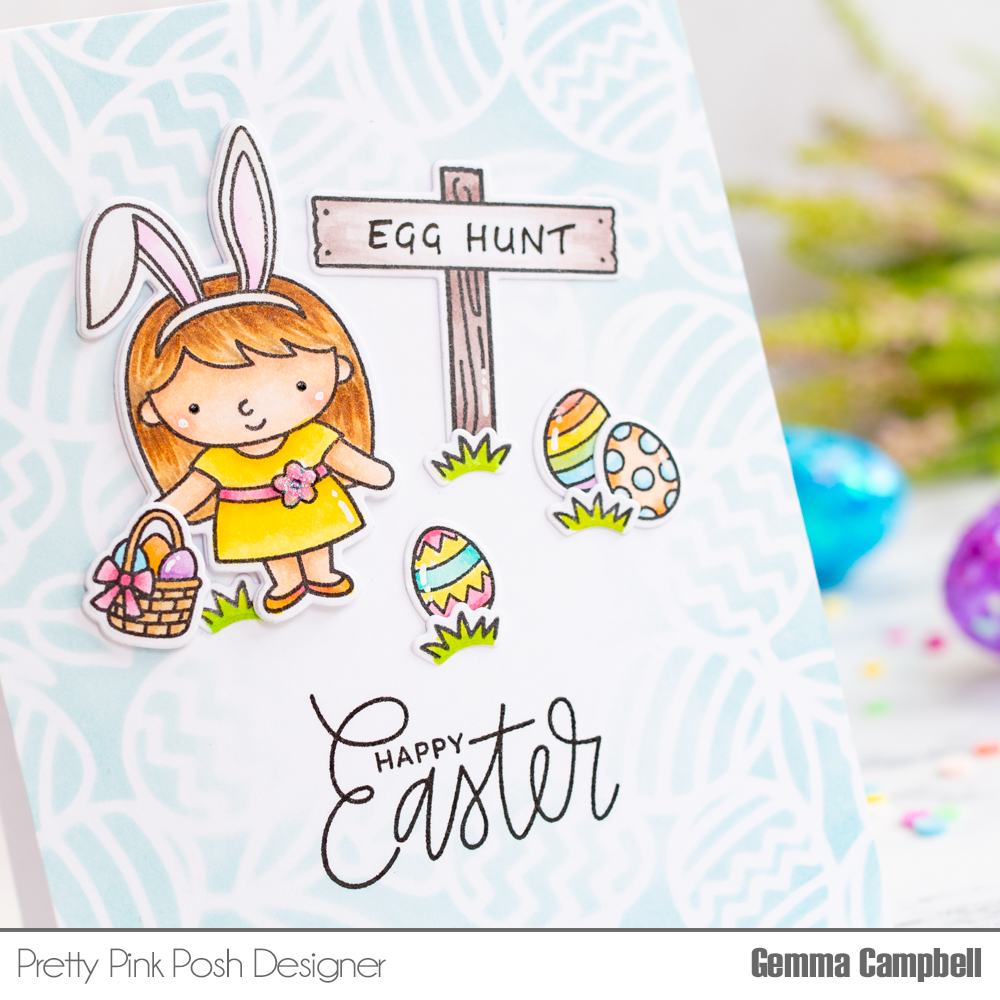
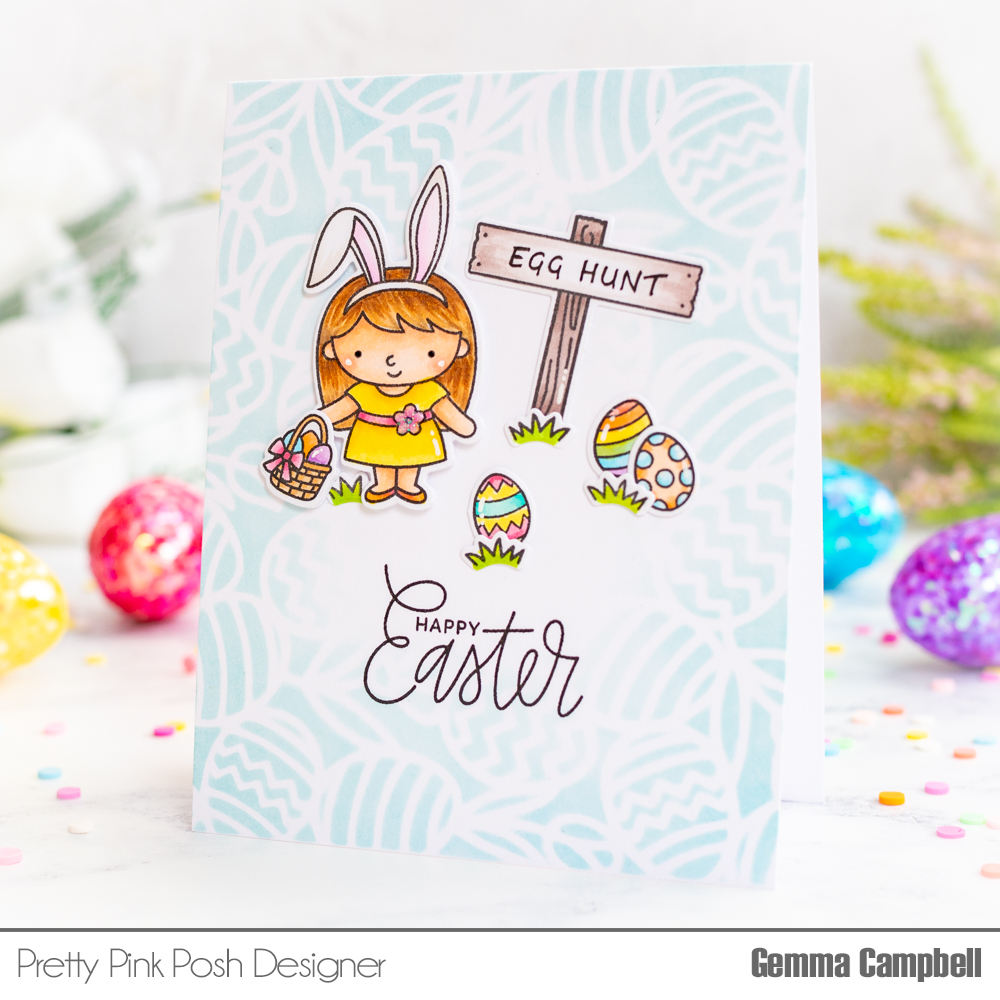
Stencils are a great way to add interest to a CAS card. By keeping the inking soft and just around the edges, the eye is drawn towards a focal area in the centre of the card. Perfect for a sweet Easter scene.
I had an idea for an Easter egg hunt scene. I found the perfect sign post in the Camping Friends stamp set. After copic colouring the image, I wrote my own message on the board using a copic multi-liner pen. I also got the grass images from the same stamp set.
The sweet girl, Easter eggs, basket and sentiment are all from the Easter Friends stamp set. I coloured the images with copics and die cut them out with the coordinating dies.
I adhered some extra layers behind the girl and her basket, so there’s some dimension in the scene. For finishing touches, I added white gel pen details and some Nuvo White Blizzard glitter drops to the flower.
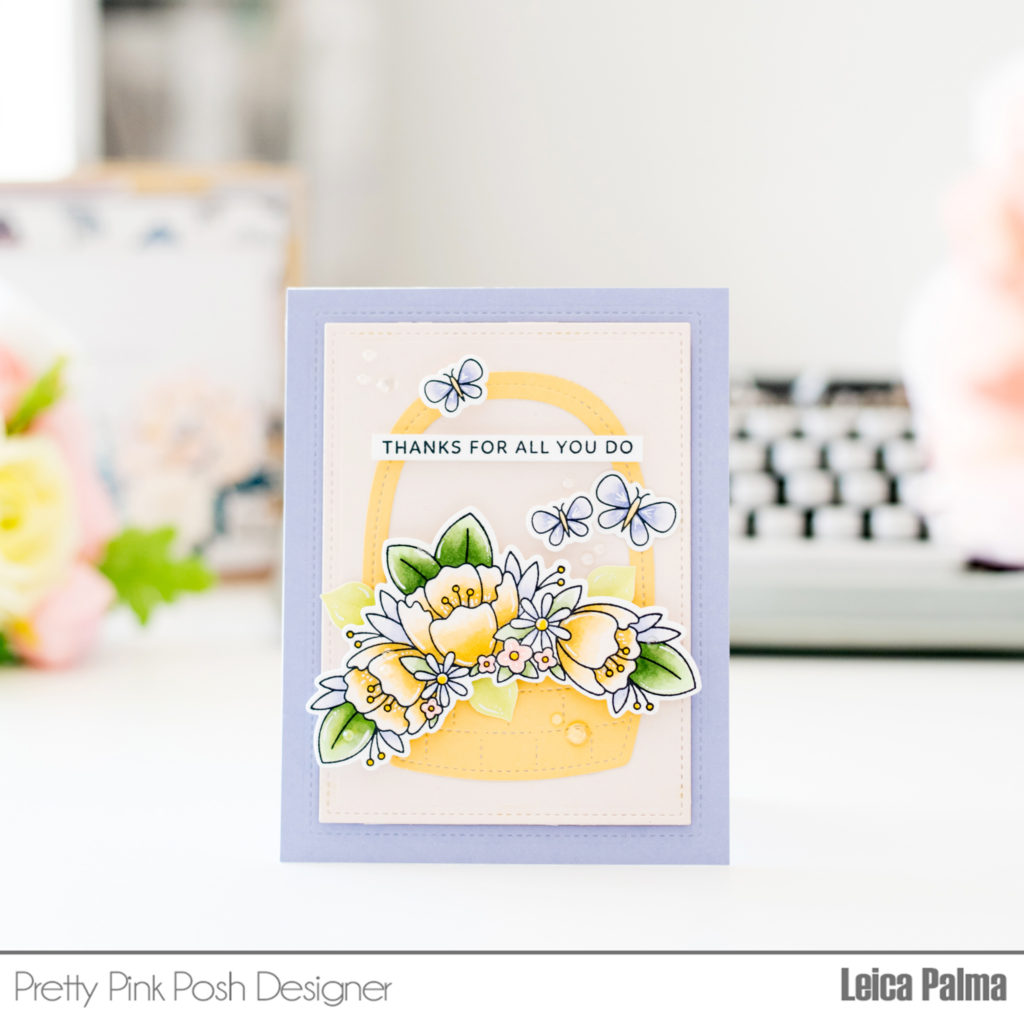
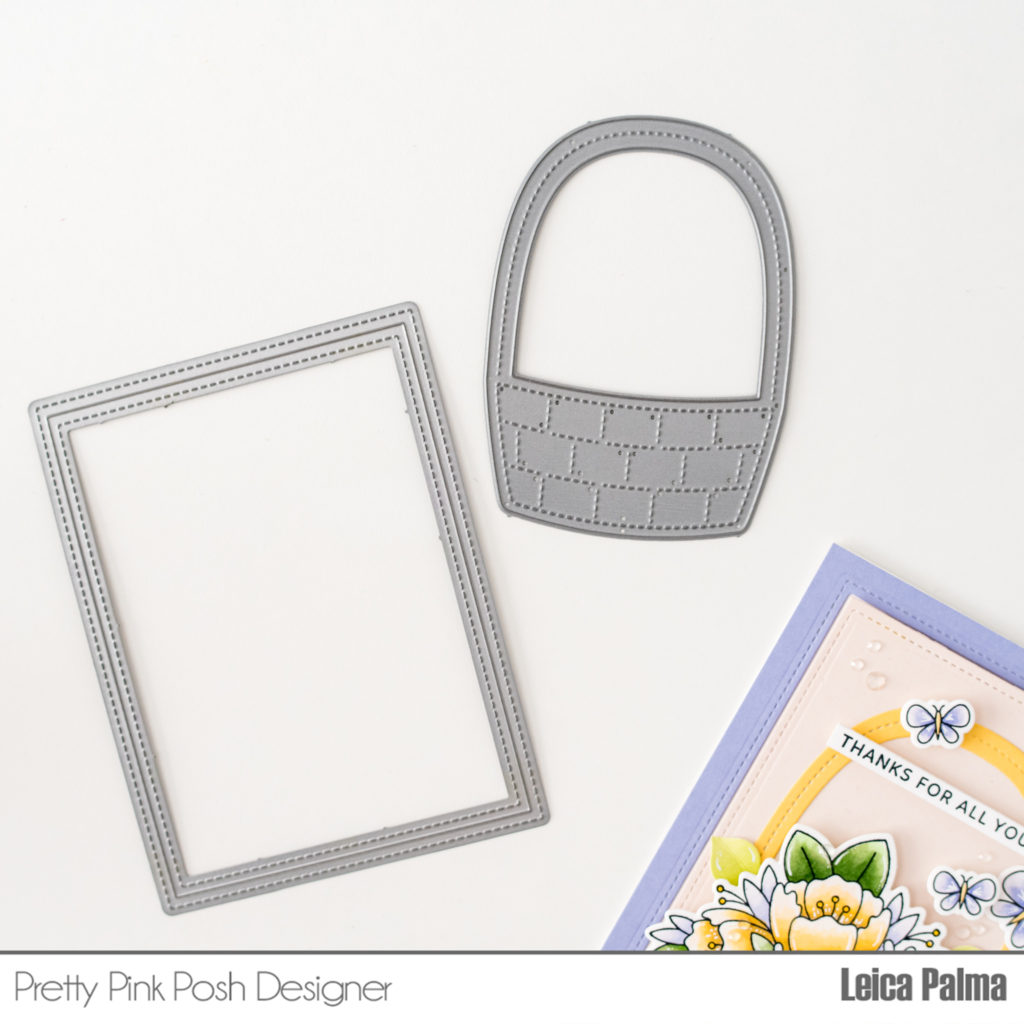
Hi, crafty friends. It’s Leica here today and I have an adorable thank you card using stamps and die cuts from the new release. Let’s get started!
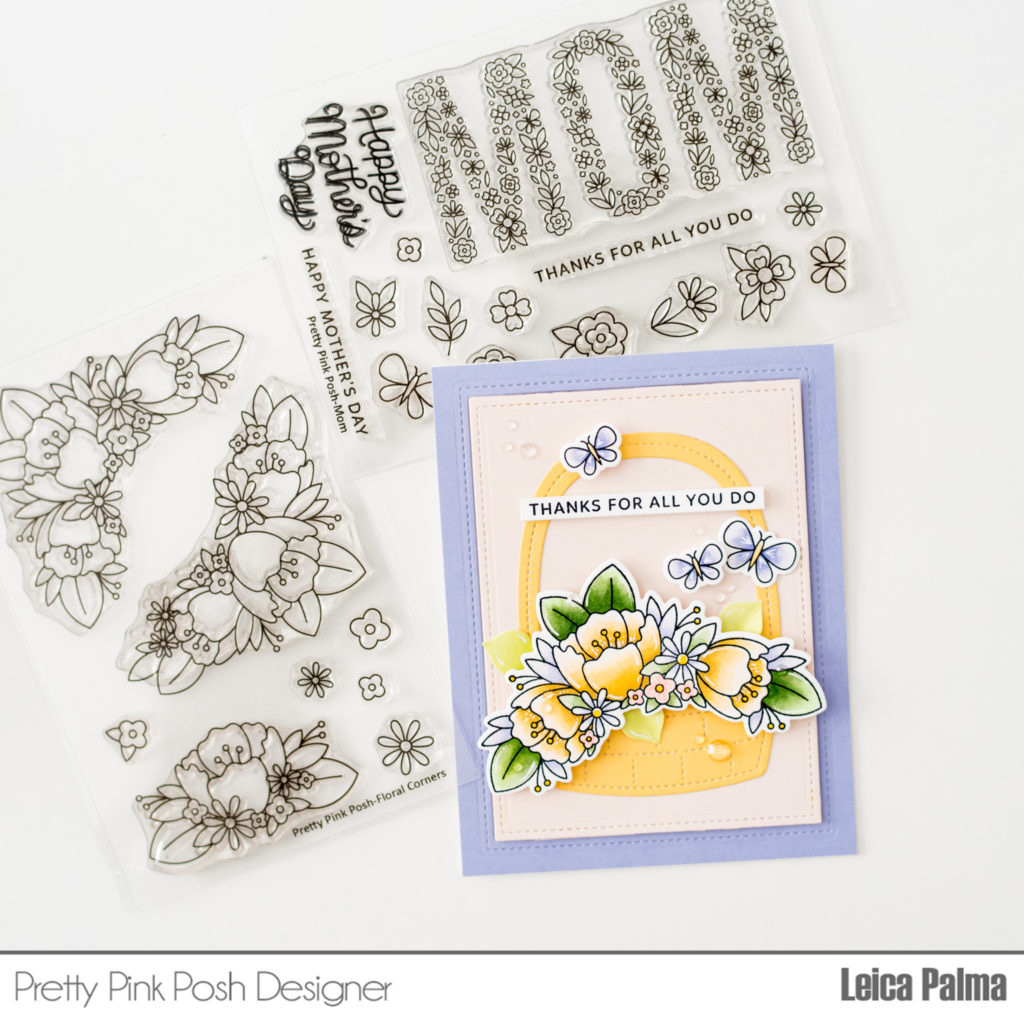
In lilac and blush colored cardstock, I cut the panels using Stitched Notes Die for this A2 sized card. I then cut the basket in yellow cardstock. I love this new basket die, which is intended for Easter but also looks great with flowers in it.
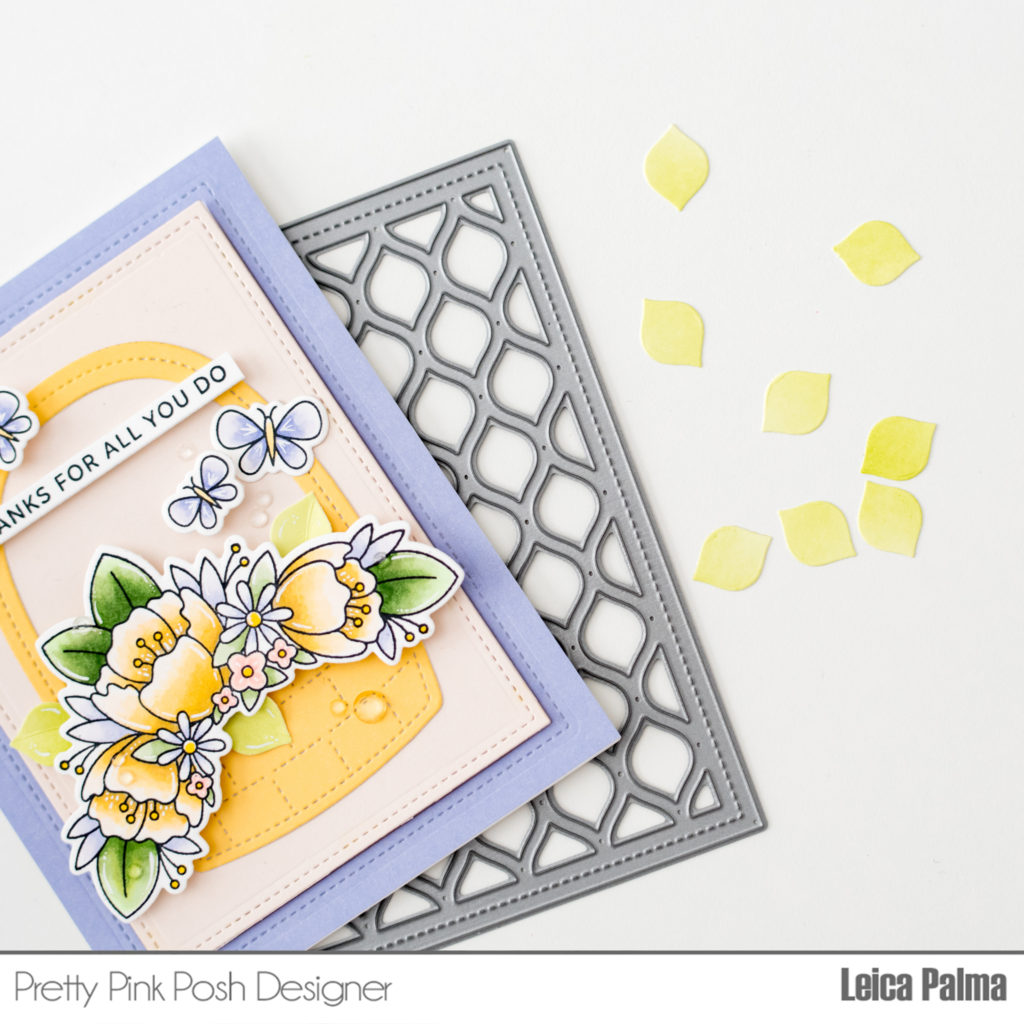
Next, I stamped the flowers from the Floral Corners stamp set and colored with Copic Markers – Y28/26/21, YG67/63/61, R00, BV01/000/0000. I also stamped my favorite butterflies from Mom stamp set and colored in BV01/000/0000 to fill the card. I cut the images with their coordinating dies and adhered to the card.
I then tucked in some leaves under the flowers, using negatives from the Pretty Petals Backgroundthat I used on a different project. So make sure to save those, as you can use them as leaves or to create a 3D flower to use on your cards and scrapbook layouts.
Lastly, I feel like it’s not a Pretty Pink Posh card without the jewels, so I added Sparkling Clear Jewelsfor extra texture and interest to the card.
PRIZES: be sure to leave comments on each stop. We are giving away 3 $25 gift certificates to three random comments (1 winner each day) left before March 16, 2021 at 11:59 PM PST. I’ll be announcing the winners next week, so be sure to return and see if you are one of the winners!
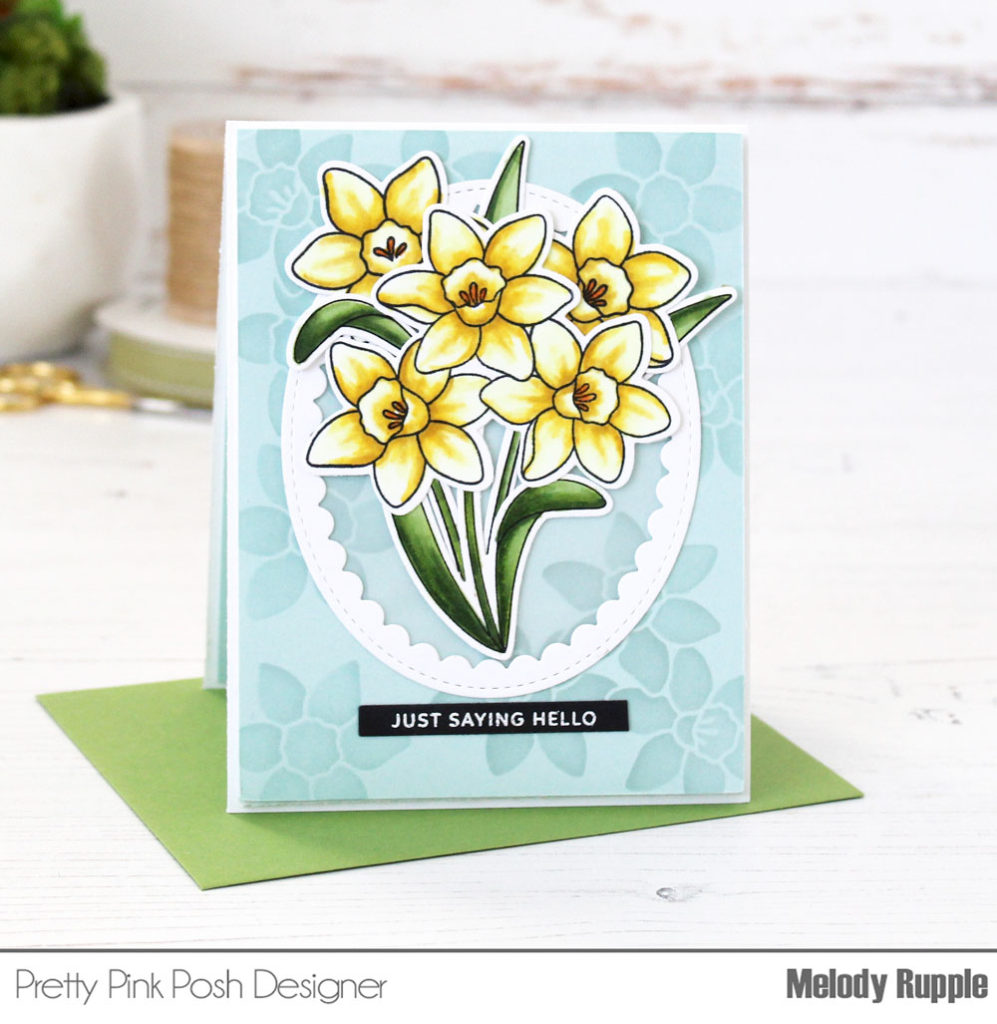
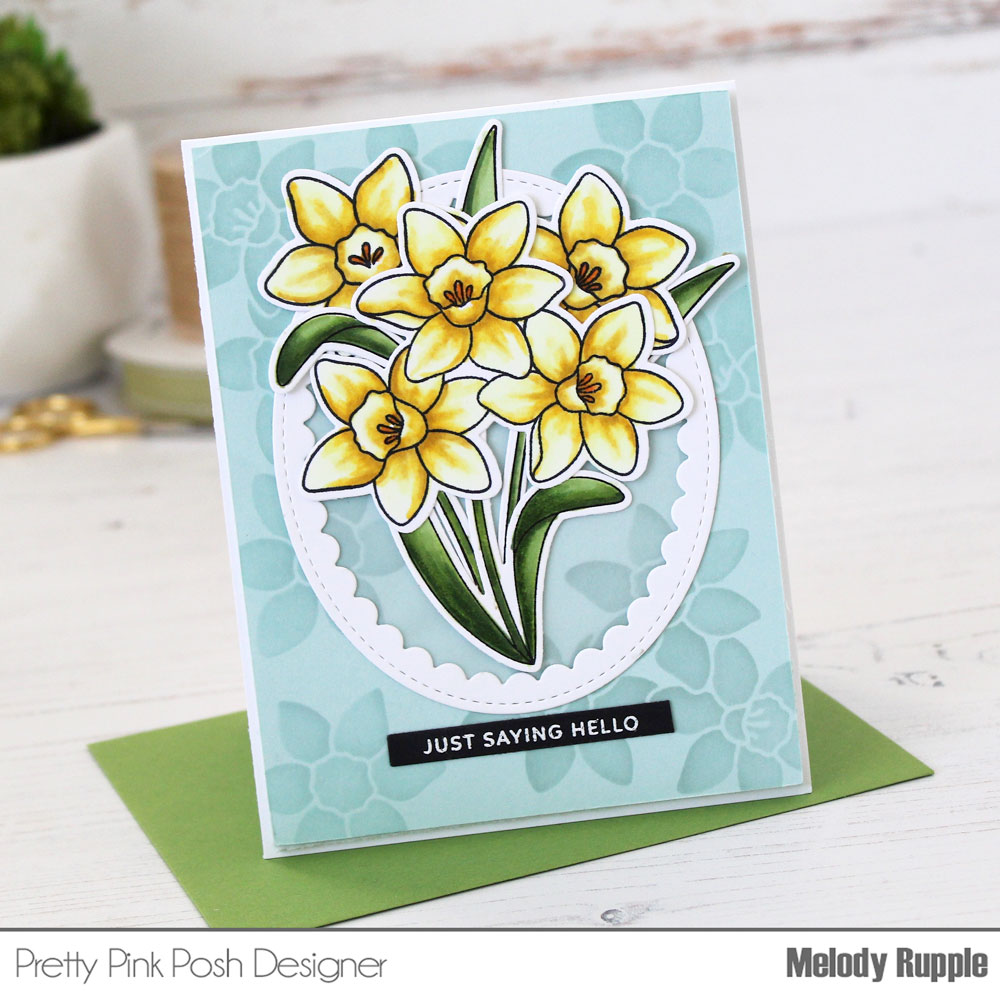
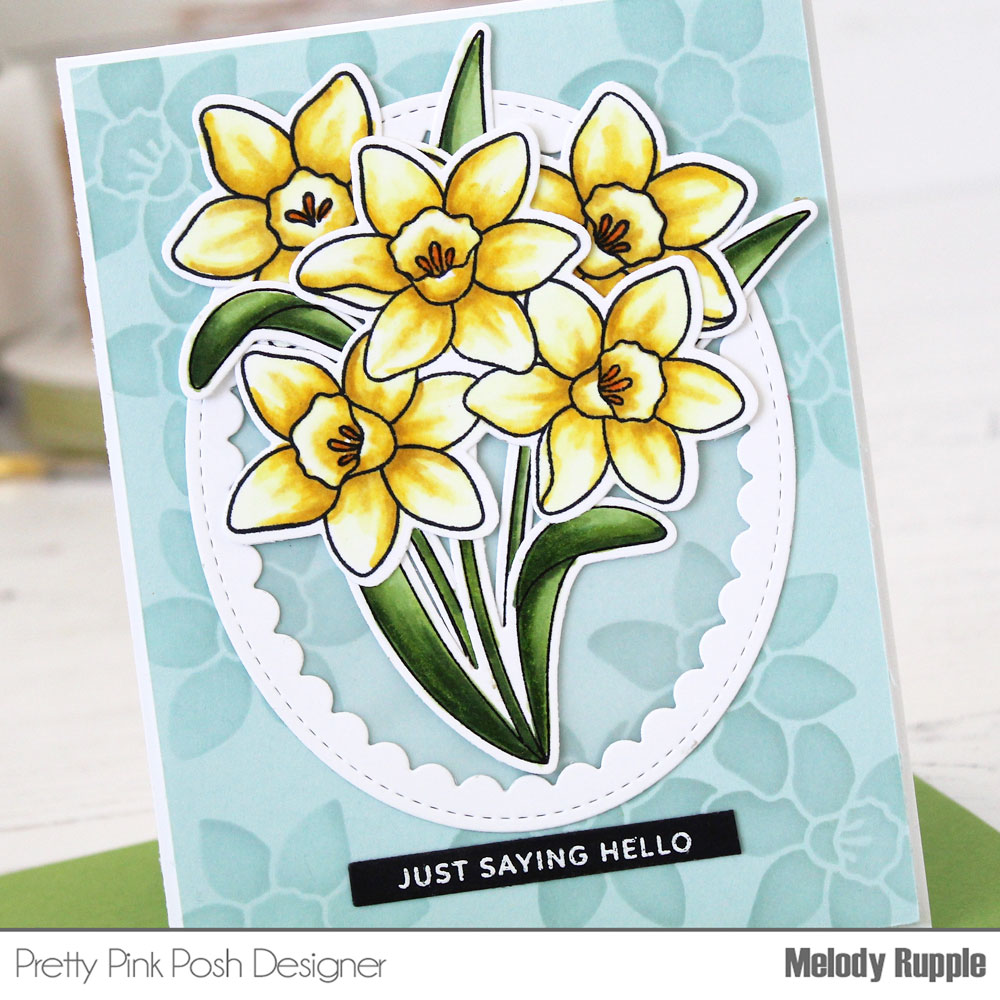
I started by stamping the daffodils in Black Hybrid Ink and colored the flowers and leaves with Copic Markers. Next I die cut my stamped images with the Daffodils coordinating dies.
Next I cut a piece of cardstock to fit the card front in a light aqua. Then in a coordinating ink I stenciled the daffodils with the new Daffodils stencil.
Using the largest die in the Scallop Ovals Dies, I created an oval frame from whtie cardstock. Behind the frame I added a piece of vellum. Vellum allows the pattern to show through, but still gives the effect of framing the tulips. At the bottom I stamped a sentiment from the Simple Sentiments stamp set. I stamped in Versamark Ink and embossed with white embossing powder. The sentiment is die cut with the Simple Strips dies.
PRIZES: be sure to leave comments on each stop. We are giving away 3 $25 gift certificates to three random comments (1 winner each day) left before March 16, 2021 at 11:59 PM PST. I’ll be announcing the winners next week, so be sure to return and see if you are one of the winners!
The March 2021 Release is now available in the Pretty Pink Posh Shop and select retailers that carry our products. If you missed our post yesterday, we revealed all of the products in picture form, but if you would like to see them in a video, Heather has that for you today!
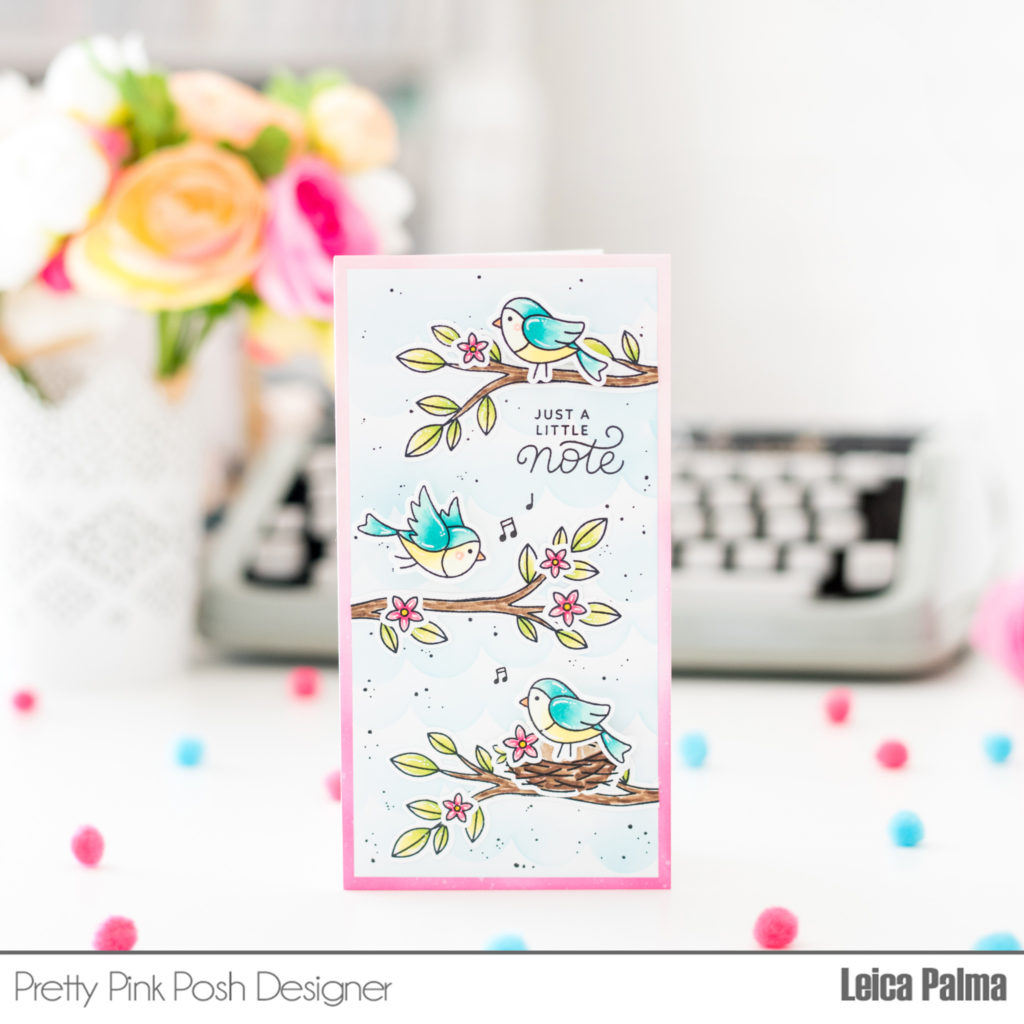
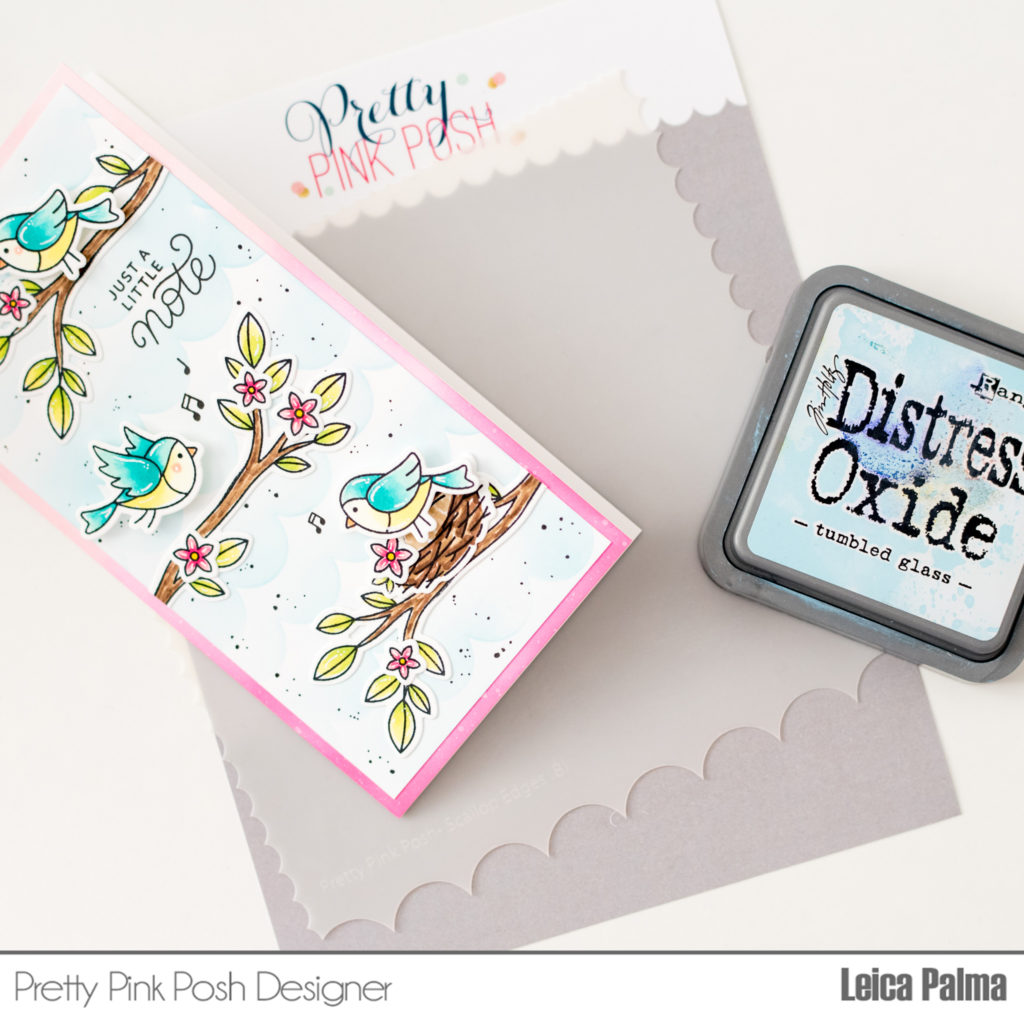
Let’s begin! First, I cut a panel in white cardstock to 3.25 x 6.25 inches. I inked the bottom part with Picked Raspberry and the top with Spun Sugar distress oxide. I then cut another panel to 3×6 inches and used Tumbled Glass distress oxide ink to stencil the clouds. For that, I used the new Scallop Edges stencil which gave the clouds a whimsical look that I love. With a black gel pen, I added dots here and there for added interest to the card.
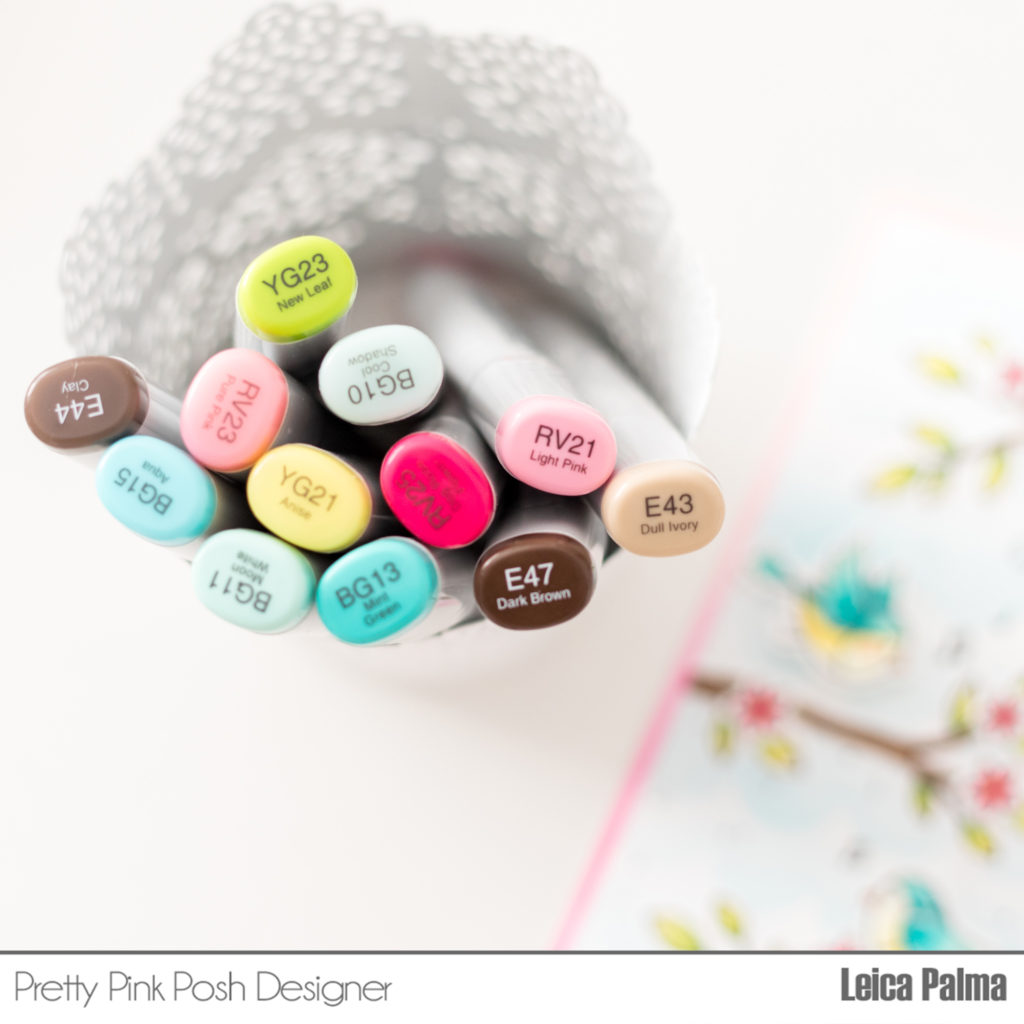
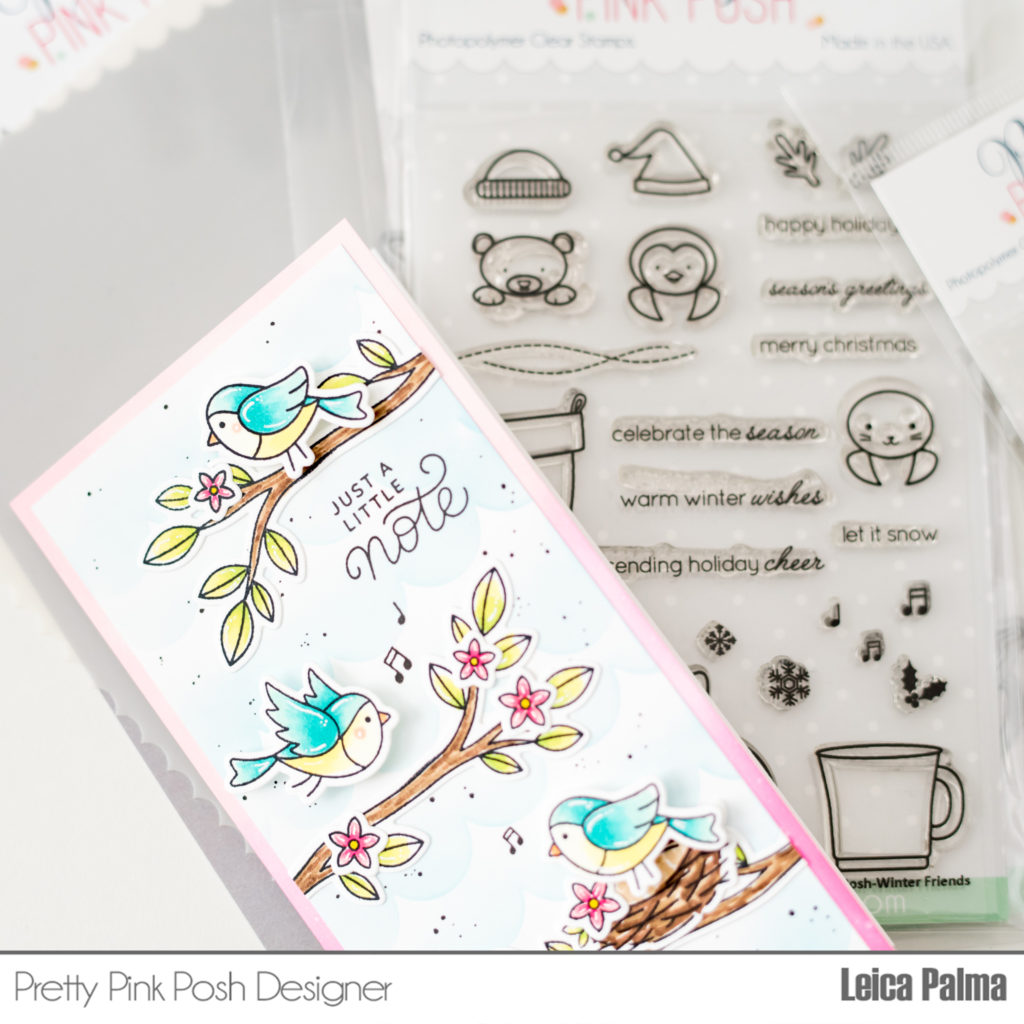
I then stamped, colored, and cut the images from theSpring Robins stamp set. I just adore this set. You can stamp and color as many images as you would like to fill your card.
Next, I adhered the images using liquid glue and foam tape for dimension. I then thought of drawing in some music notes to match the sentiment, but I found some in an older stamp set. So make sure to check what you already have. You can always mix and match older stamps with new ones.
These adorable birds just make me smile and I know you will enjoy creating cards with this stamp set.
PRIZES: be sure to leave comments on each stop. We are giving away 3 $25 gift certificates to three random comments (1 winner each day) left before March 16, 2021 at 11:59 PM PST. I’ll be announcing the winners next week, so be sure to return and see if you are one of the winners!
Be sure to leave comments on all the stops- we’ll be randomly picking comments to win gift certificates. We’ll see you tomorrow for another day of inspiration!
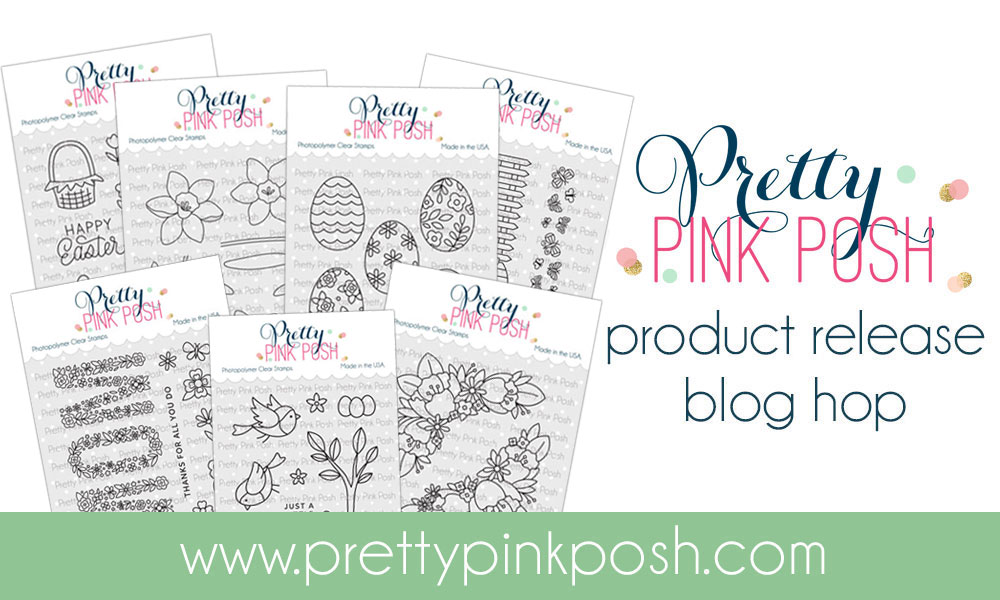
Hello friends! It’s time to reveal all of the individual products that are part of the March 8th release.
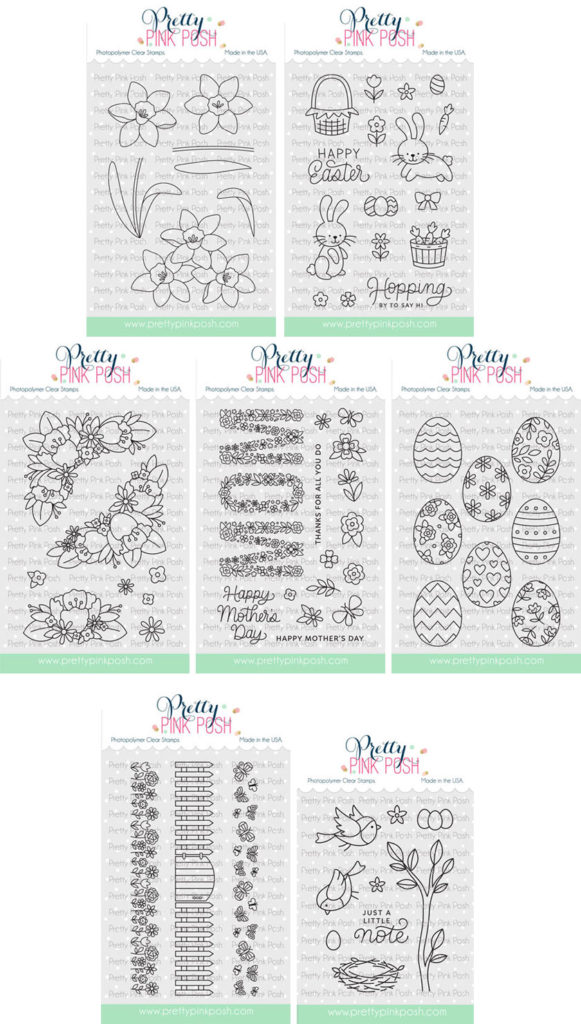
Here’s a look at the seven new stamp sets that will be available for purchase: Daffodils, Easter Bunnies, Floral Corners, Mom, Spring Borders, Spring Eggs and Spring Robins.
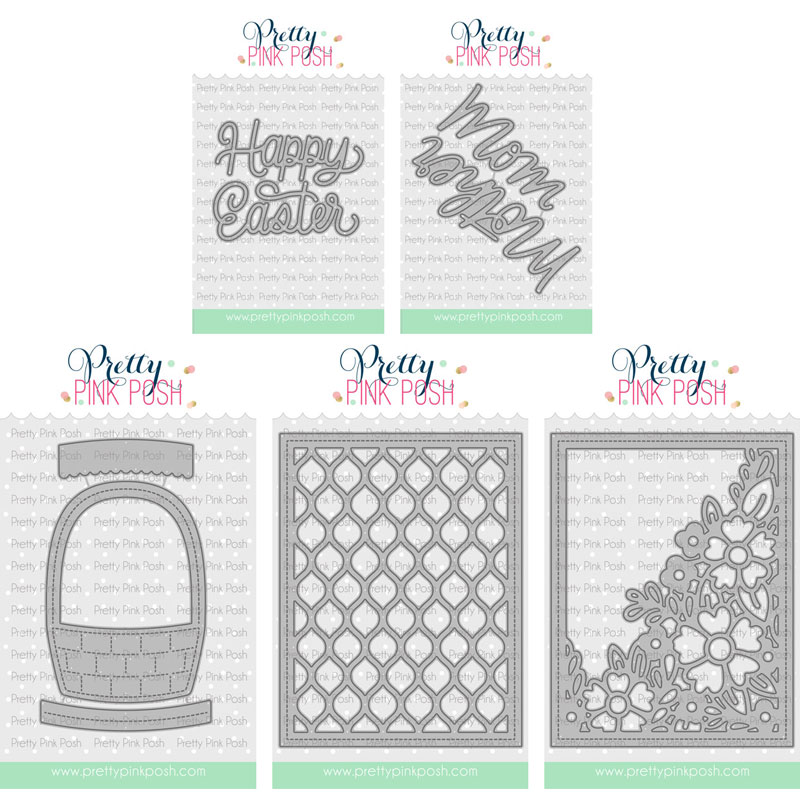
Here are the individual die sets that will be available: Fancy Easter Script, Mom/ Mother Scripts, Easter Basket, Pretty Petals Background and Spring Corner Frame.
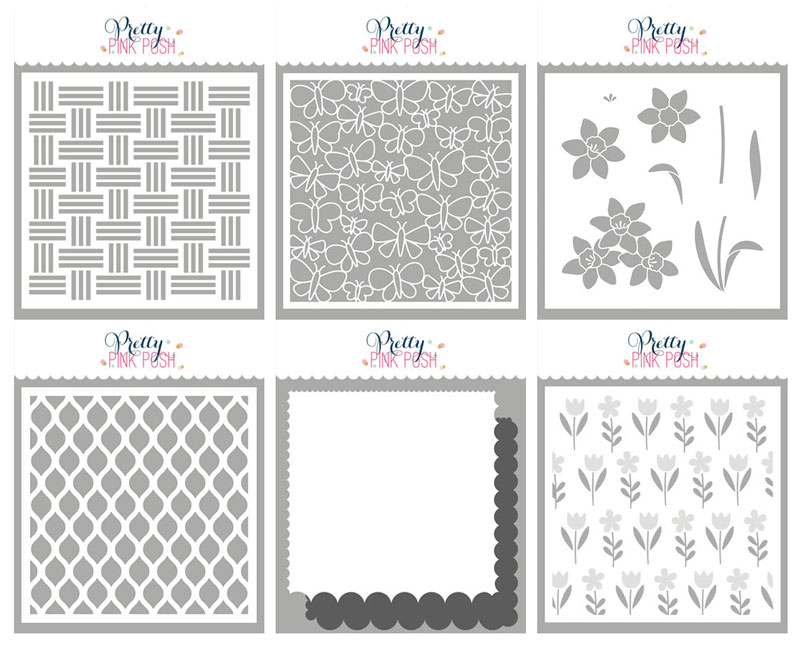
This month we have six new stencil packs, including two new layered stencils: Basketweave, Butterfly Background, Daffodils, Pretty Petals, Scallop Edges (2 pack) and Spring Flowers (2 pack).
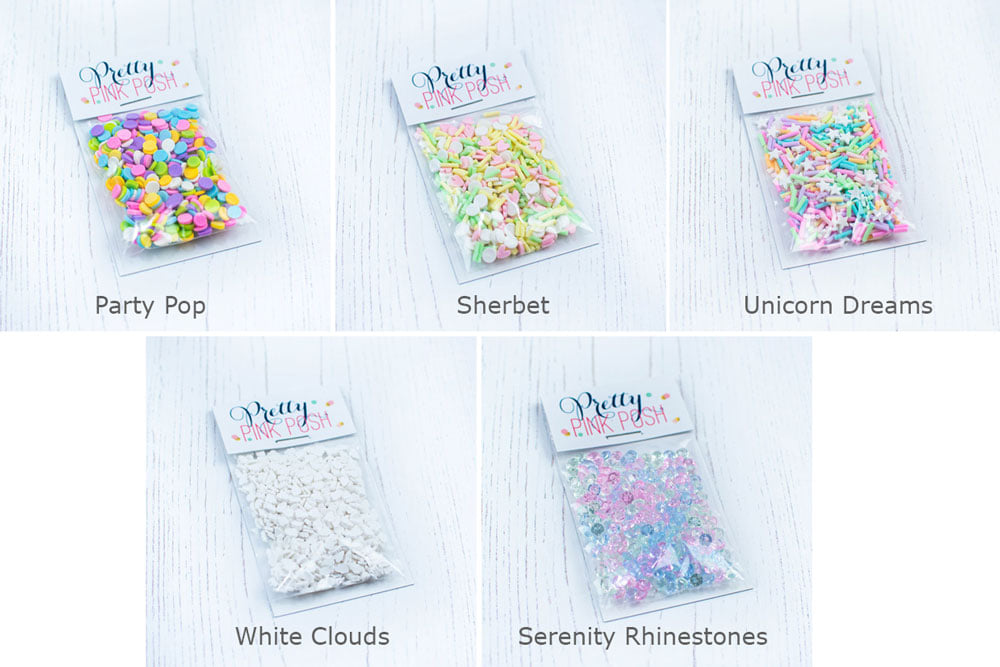
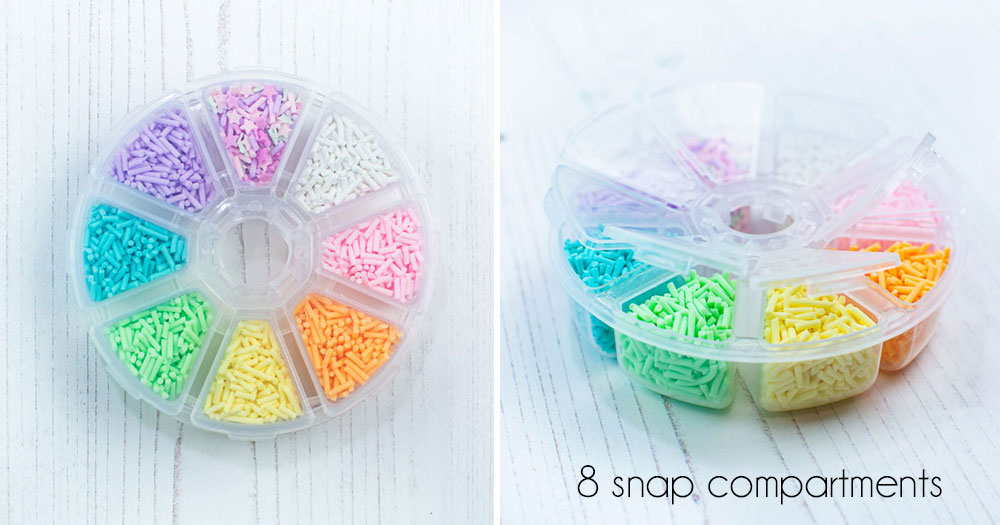
We have some new embellishments to go along with this spring release. There are four new clay confetti packs, one new rhinestone pack and a PPP Shop exclusive confetti wheel that is oh so fun!
Last release we did an exclusive clay confetti wheel and you all seemed to like it, so I just couldn’t resist doing a pretty one for this month! There are eight snap compartments with a different color in each, along with one special mix! These will be available exclusively in the Pretty Pink Posh Shop.
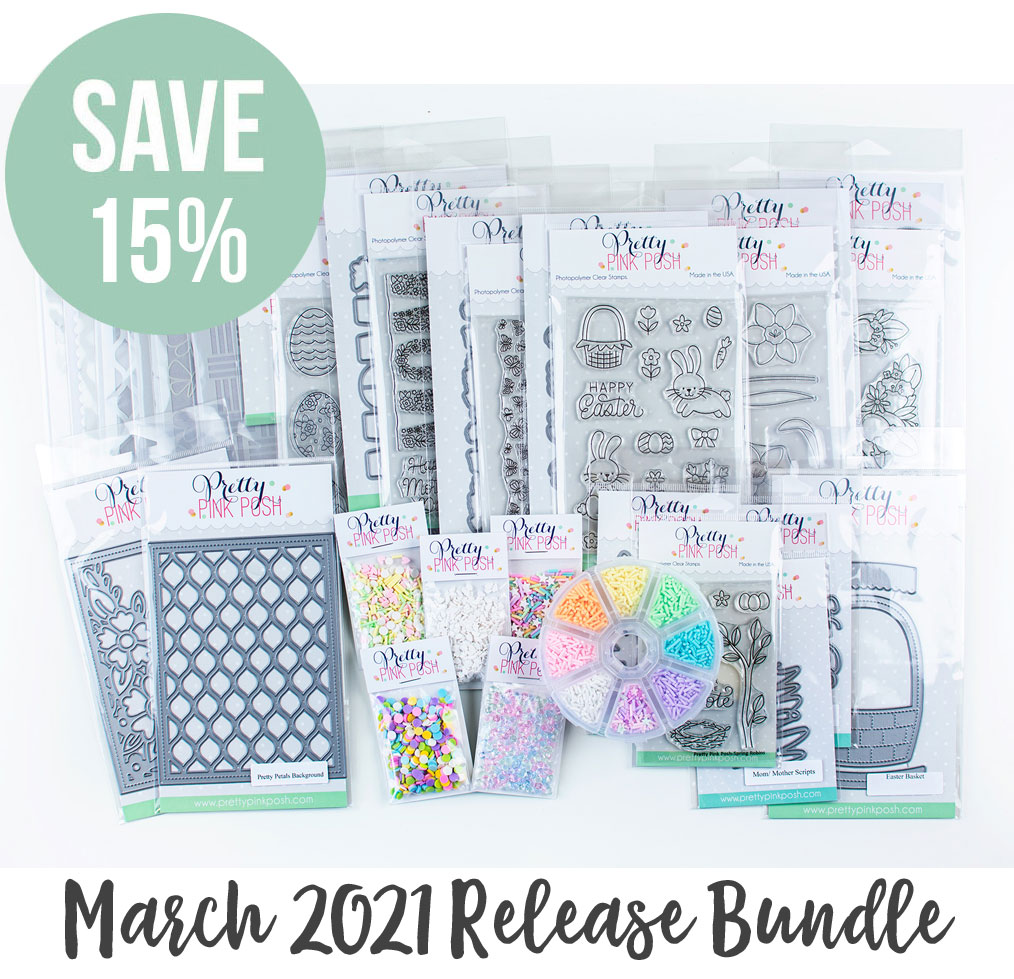
I have a limited amount of bundles available where you can buy the whole collection in one easy click. Plus, you’ll get 15% off when you buy it altogether.
We will see you tomorrow as we show you the new products in a video and the products go live individually. Plus, we will be kicking off our three day blog hop!
Hi everyone, Jane here! I’m so excited to be sharing a sneak peek at the amazing new die sets which will be released on March 8th! Be sure to stop by the blog every day this week for sneak peeks from the Spring release!
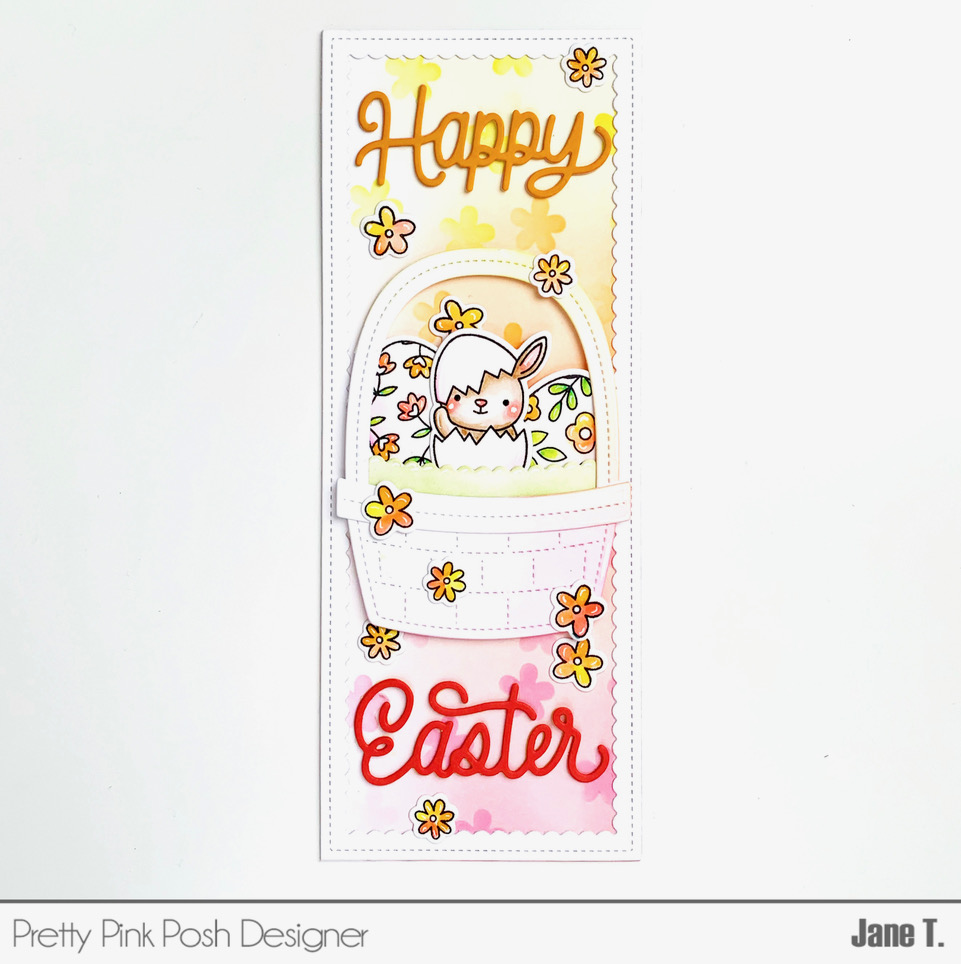
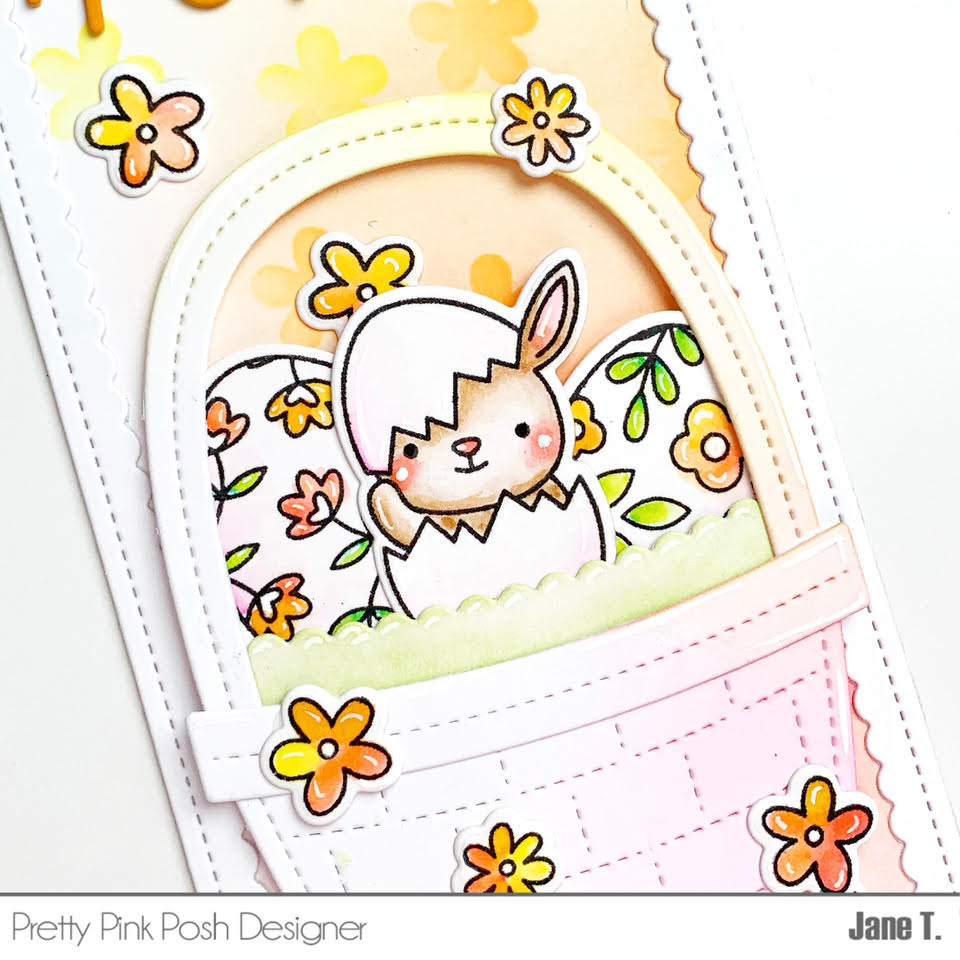
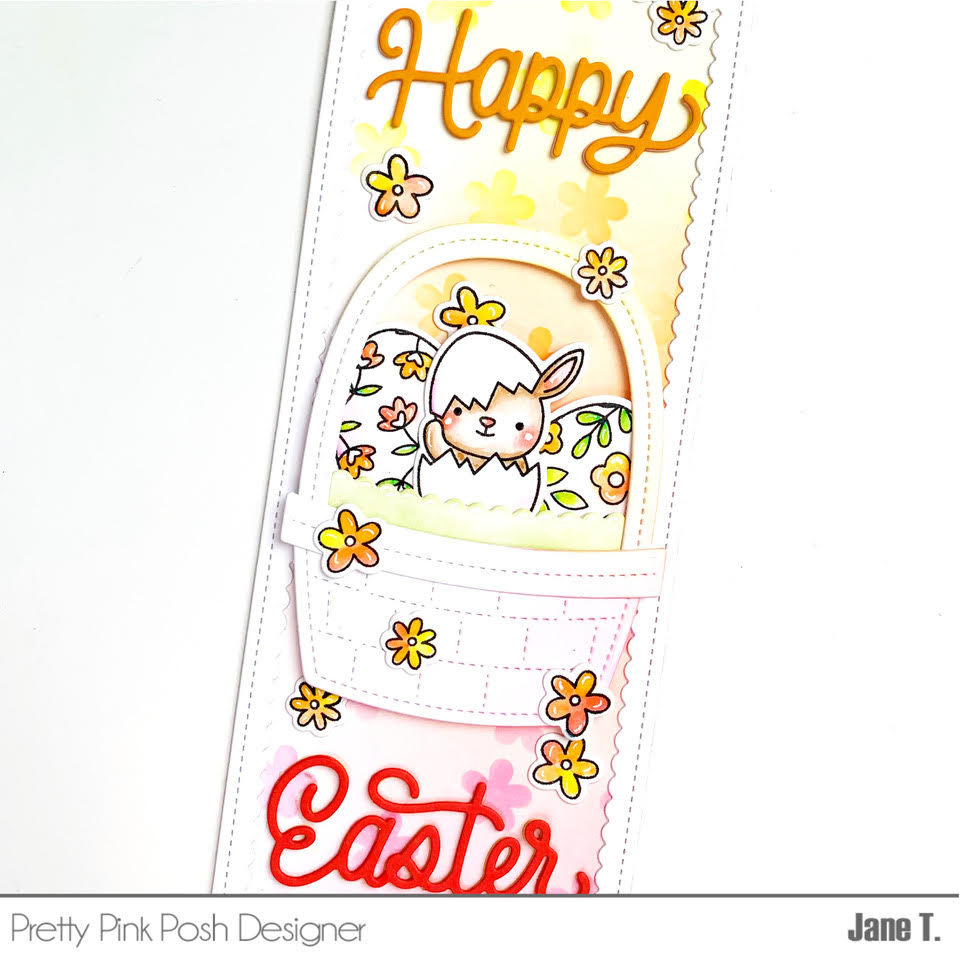
My first card features the new Easter Basket die and the Fancy Easter Script dies. To create this scene, I first cut a piece of Bristol cardstock to 8.25 inches by 3.25 inches. Next, I used various shades of pink, orange and yellow inks to blend a soft background using a large blender brush. Then, the flower images from the new Spring Flowers stencil were ink blended to create a faux pattern paper look on the background. A white border was cut from white cardstock using the largest Slimline: Scallop Frames die.
To create the cute images, I stamped images from the Bunny Friends stamp set and the new Spring Eggs stamp set on Bristol smooth cardstock. The images were then colored using a small water brush and the following Tombow ABT colors: bunny (992, 942), cheeks (803), eggs/flowers (243, 133, 703, 873, 055, 803, 946). The images were cut using the coordinating dies and set aside.
To create the basket, I die cut the Easter Basket from white cardstock and lighty ink blended one edge using the same colors as the background. Next, all the images were arranged on my card front and adhered using liquid glue and foam tape. White gel pen used to add details to the images and basket.
The Fancy Easter Script was cut using colored cardstock and stacked three times to create dimension and adhered to the card front using liquid glue. The card was then adhered to a slimline card base and that completes the card!
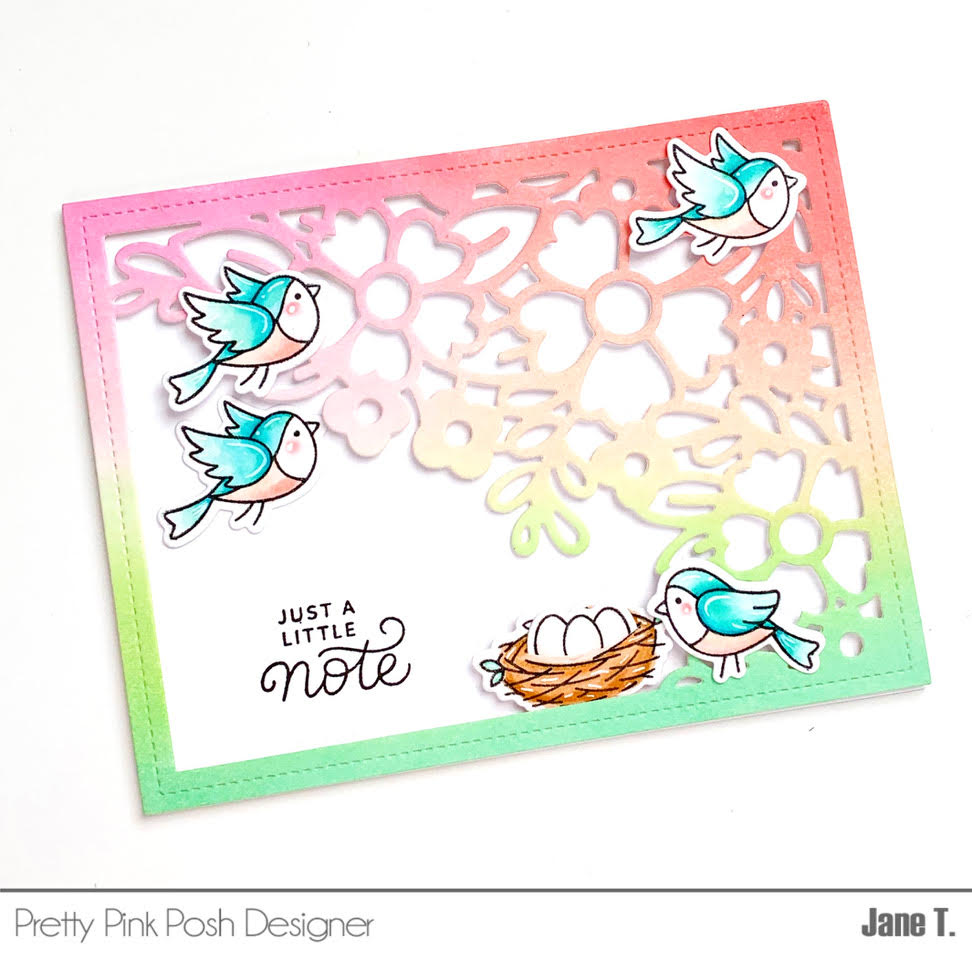
The next card features the new Spring Corner Framedie. To create this card, I first ink blended an A2 piece of Bristol smooth cardstock using the following distress oxide inks: kitsch flamingo, spun sugar, worn lipstick, tattered rose, twisted citron and cracked pistachio. The Spring Corner Frame die was then used to die cut the blended background. Thin strips of foam tape were attached to the die cut piece and then adhered to a white A2 card base.
Images from the new Spring Robins stamp set were stamped using Versafine black ink on Bristol cardstock. The following Tombow ABT colors used to color the images: nest (977, 912), eggs (800), birds (910, 761, 403, 243), cheeks (803).
The images were cut using the coordinating dies and adhered to the card base using liquid glue. I did use a bit of foam tape to prop up the nest with the eggs. Lastly, I used a stamp positing tool to stamp the sentiment “just a little note” on the card base and that completes the card!
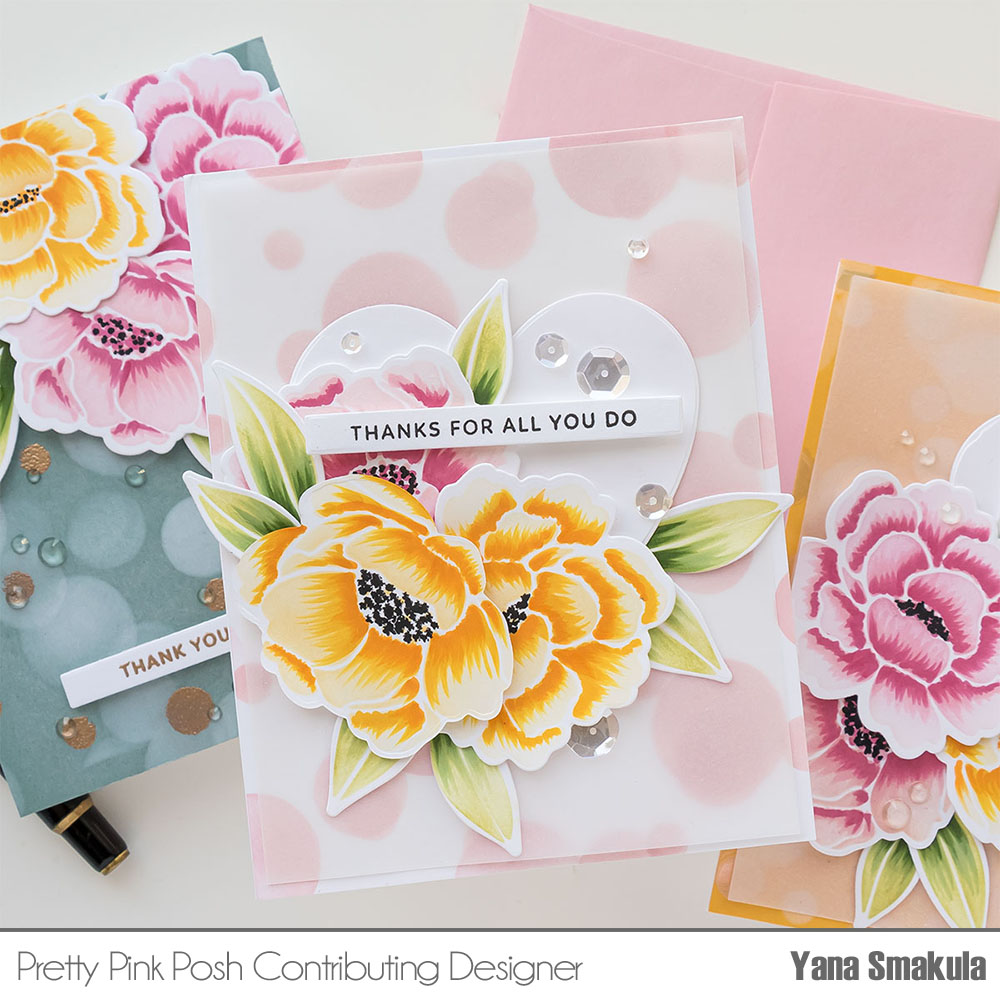
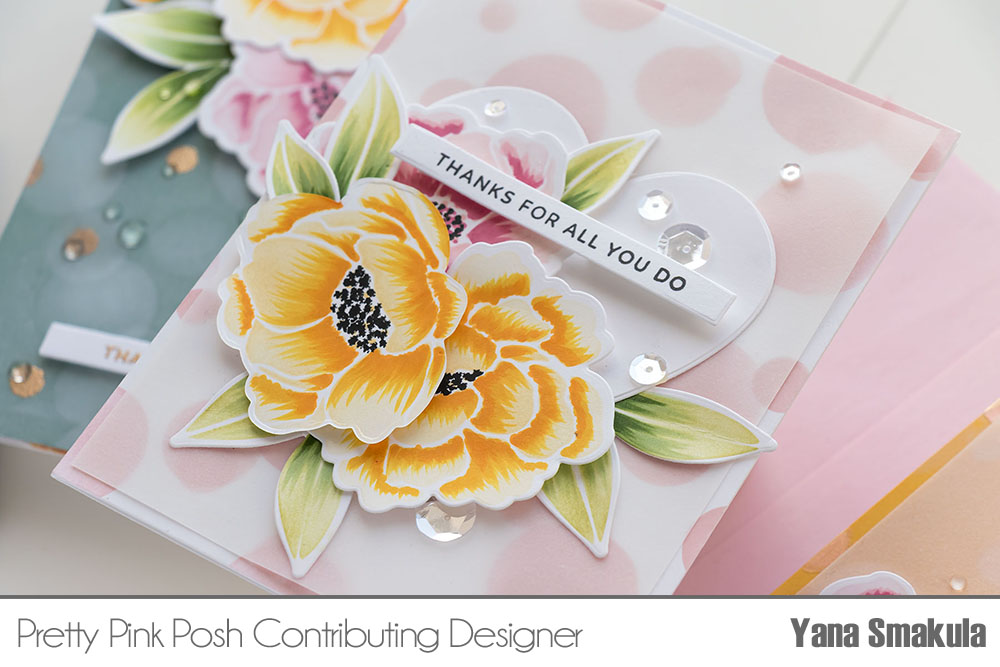
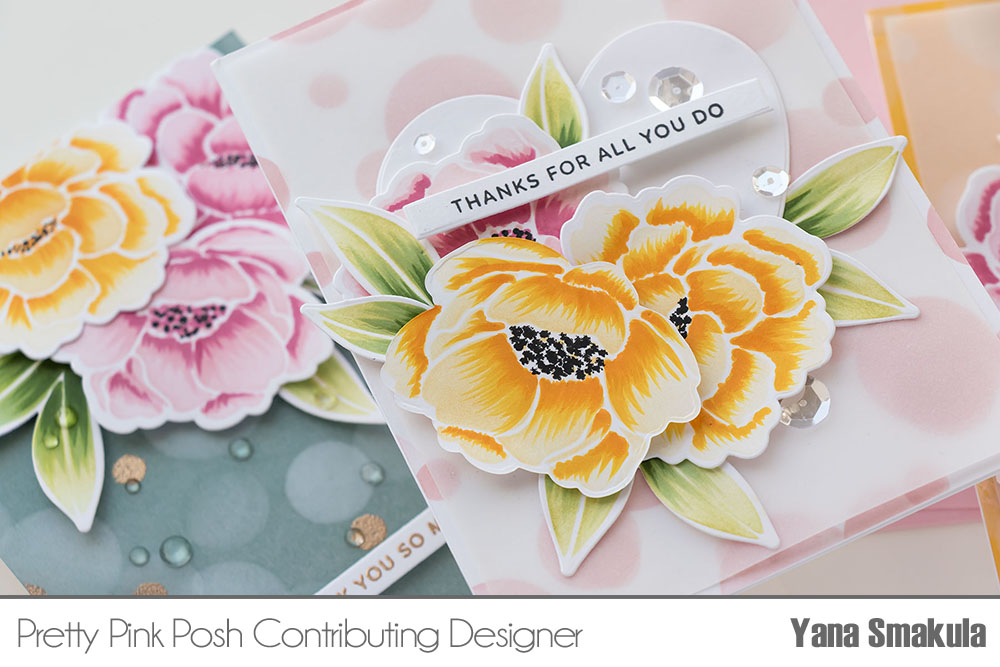
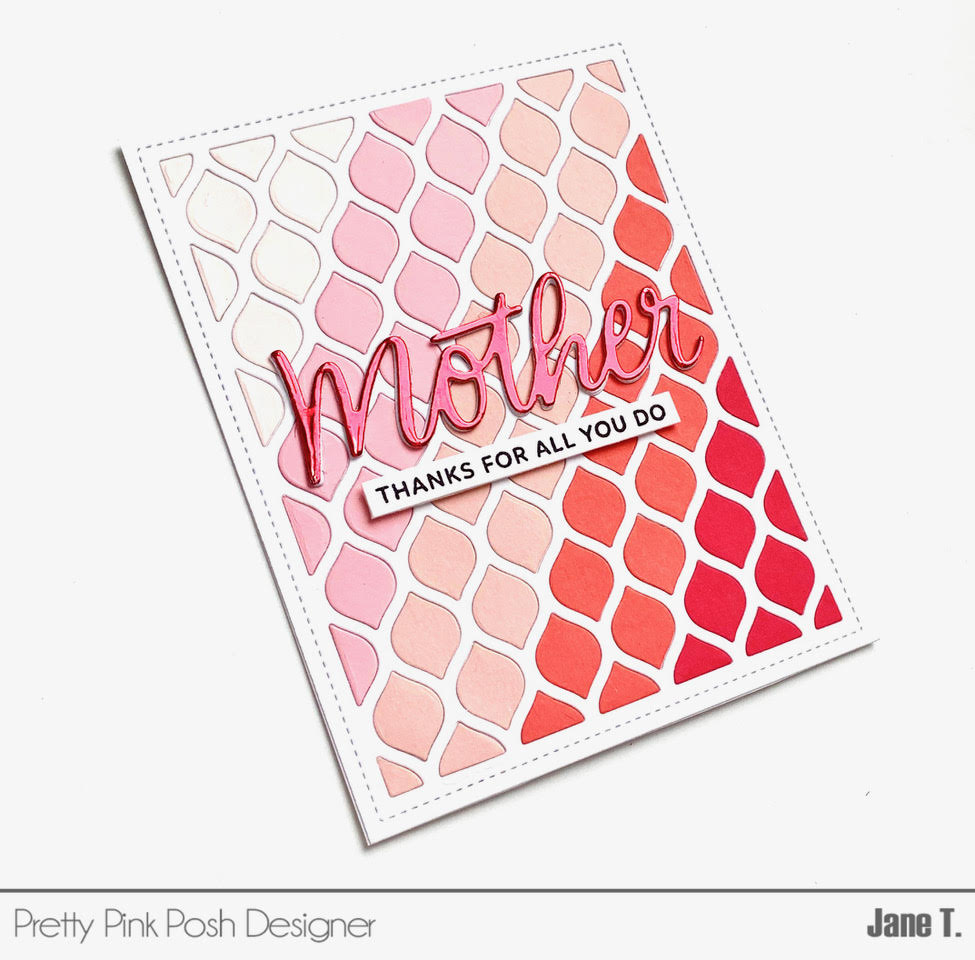
For my last card, I’m featuring the new Pretty Petals Background die and the new Mom/Mother scripts dies.
To create this card, I first die cut an A2 piece of white cardstock using the Pretty Petals Background die. Then, I die cut several more pieces of colored cardstock and saved the interior pieces. Card stocks used here (upper left moving to lower right): Bazzil pale rose, Lawn Fawn ballet slippers, Lawn Fawn Apricot, PaperTrey Ink Berry Sorbet, Stamp Market Peony.
Liquid glue used to adhere the outline piece to an A2 white card base. Then, each piece of colored cardstock was adhered to the card front using liquid glue, sort of like a puzzle!
After all the pieces were adhered, I used the “Mother” die to cut the word three times and stacked it using liquid glue to create dimension. Then, I die cut a sheet of metallic card stock (Memory Box 24 6×6 inch sheets) and glued it to the top for shine. The sentiment “thanks for all you do” is from the new Mom stamp set which was featured earlier in the week!
Thanks so much for stopping by today! Stay tuned- we’ll be revealing the full collection in picture form tomorrow so you can start to create your shopping lists!