Fox In A Mug Box Card
This is part of the Instagram Hop. If you’d like to hop along for more inspiration and a chance to win a gift card, visit us on the Pretty Pink Posh Instagram account.
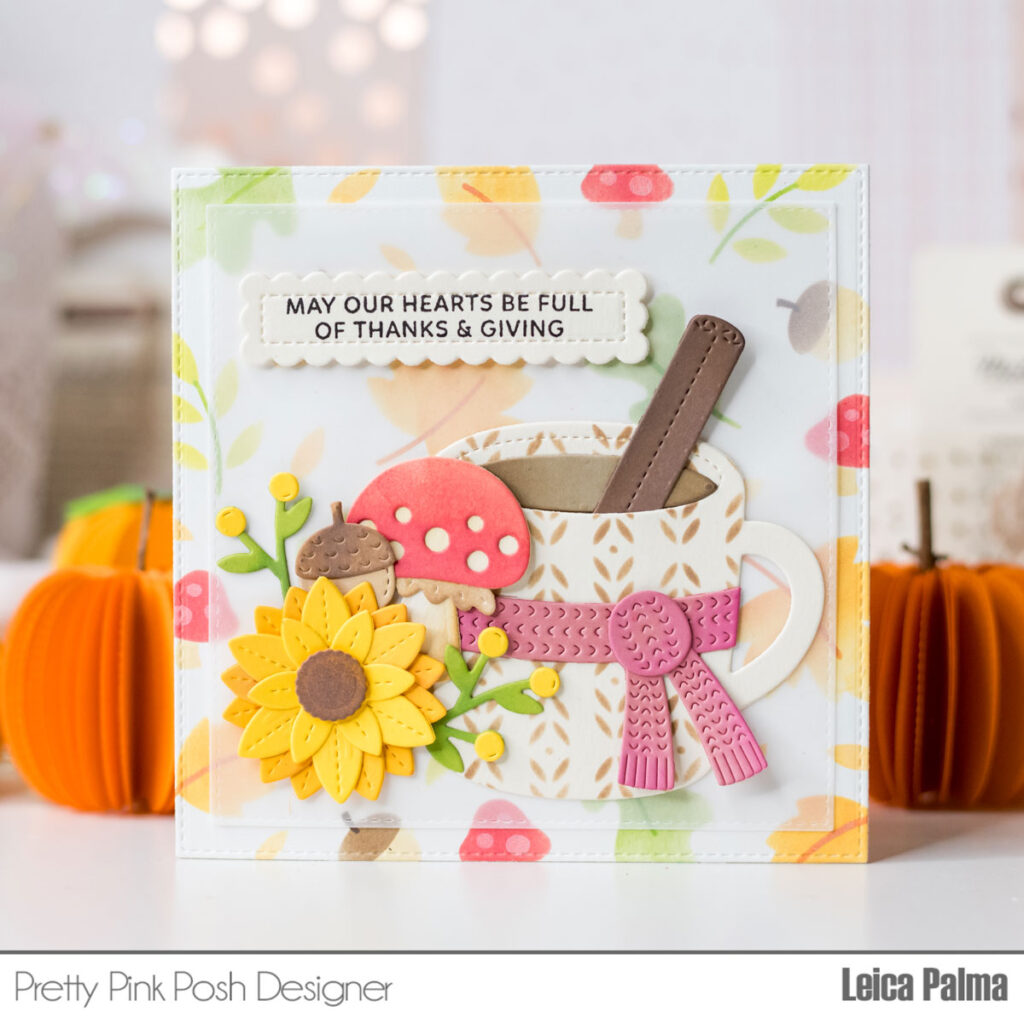
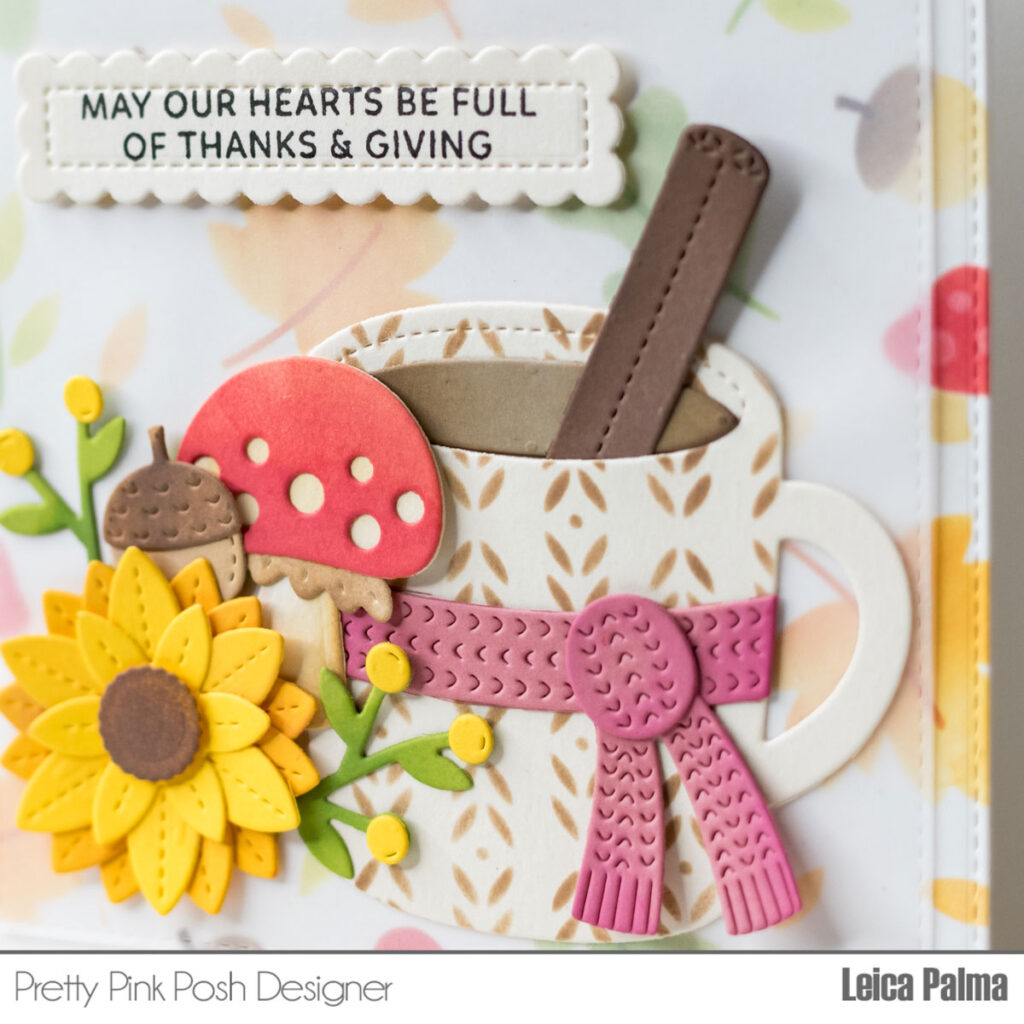
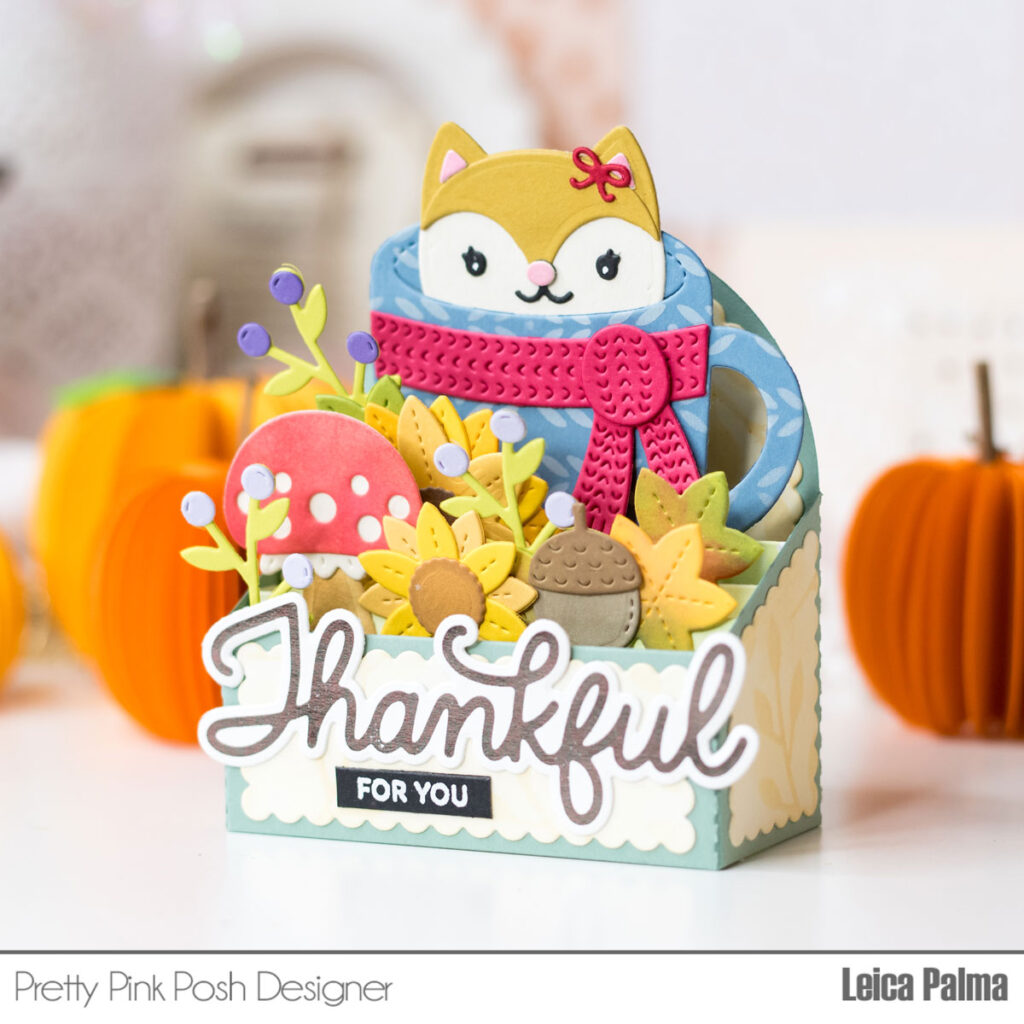
Hey crafty pals! Leica here with a cool box card to share. I had this idea of fitting the Winter Mug into the Scallop Box Card, and guess what? It totally worked, and I’m beyond thrilled!
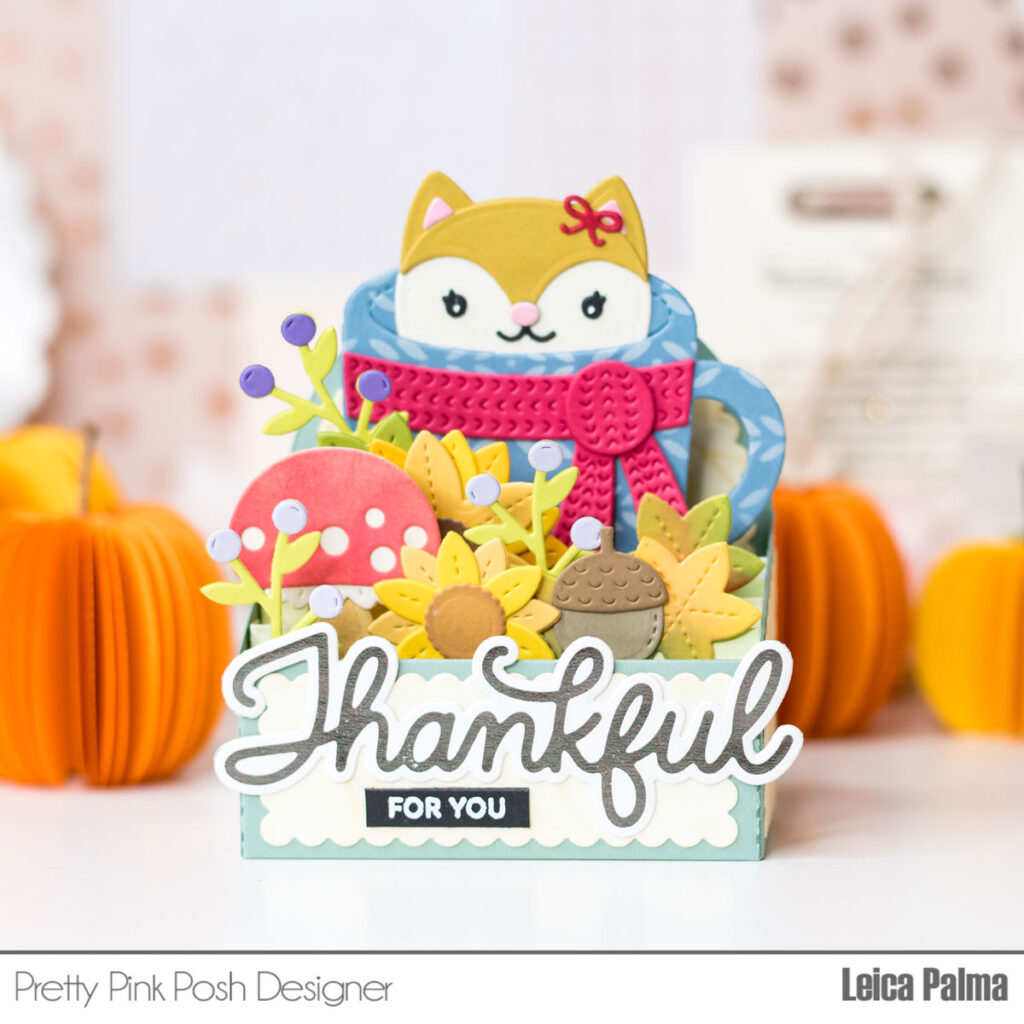
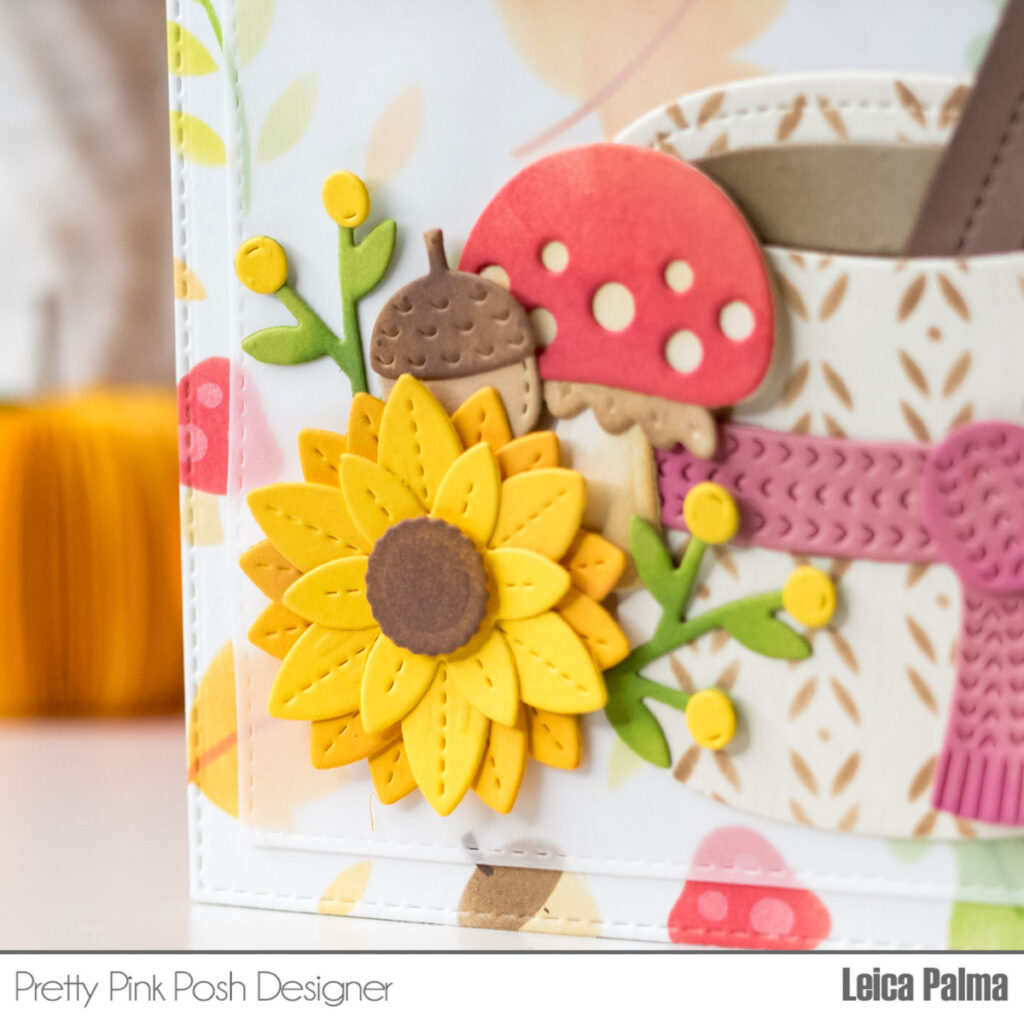
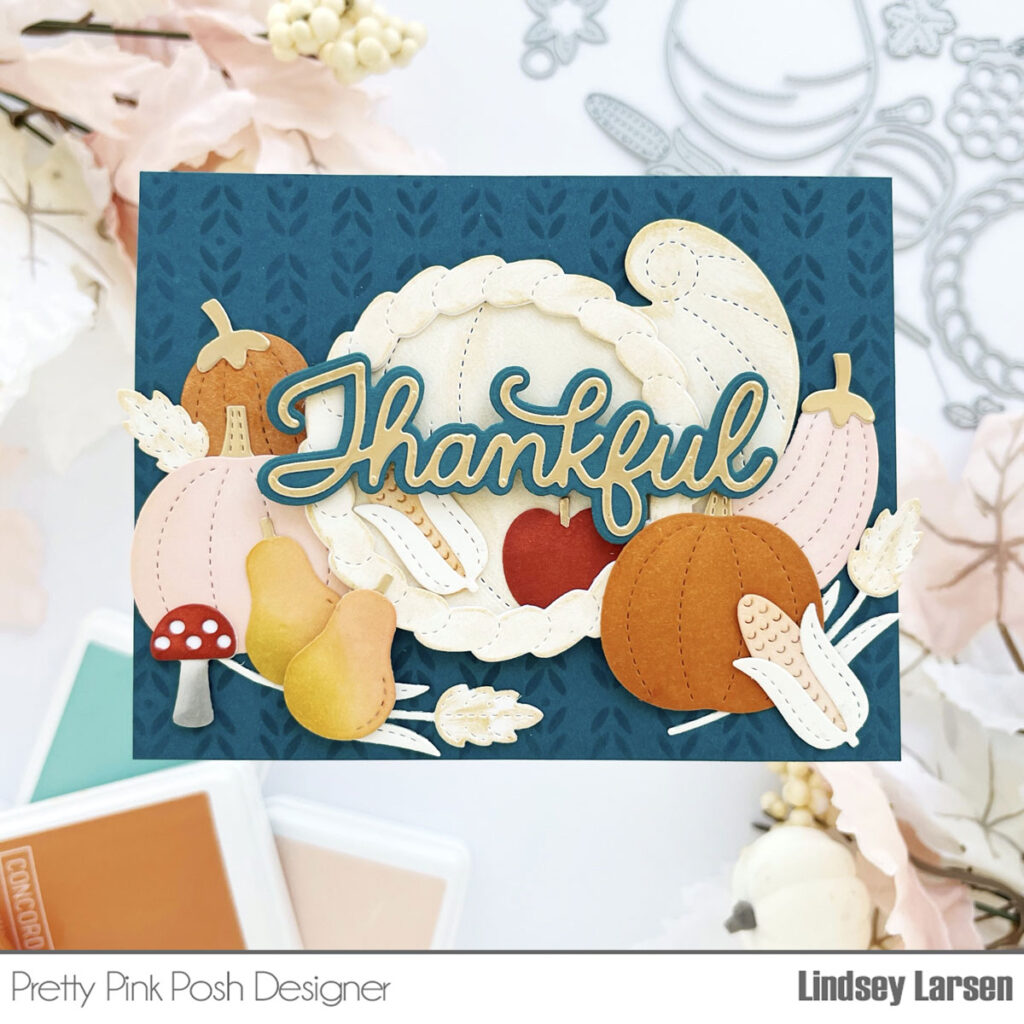
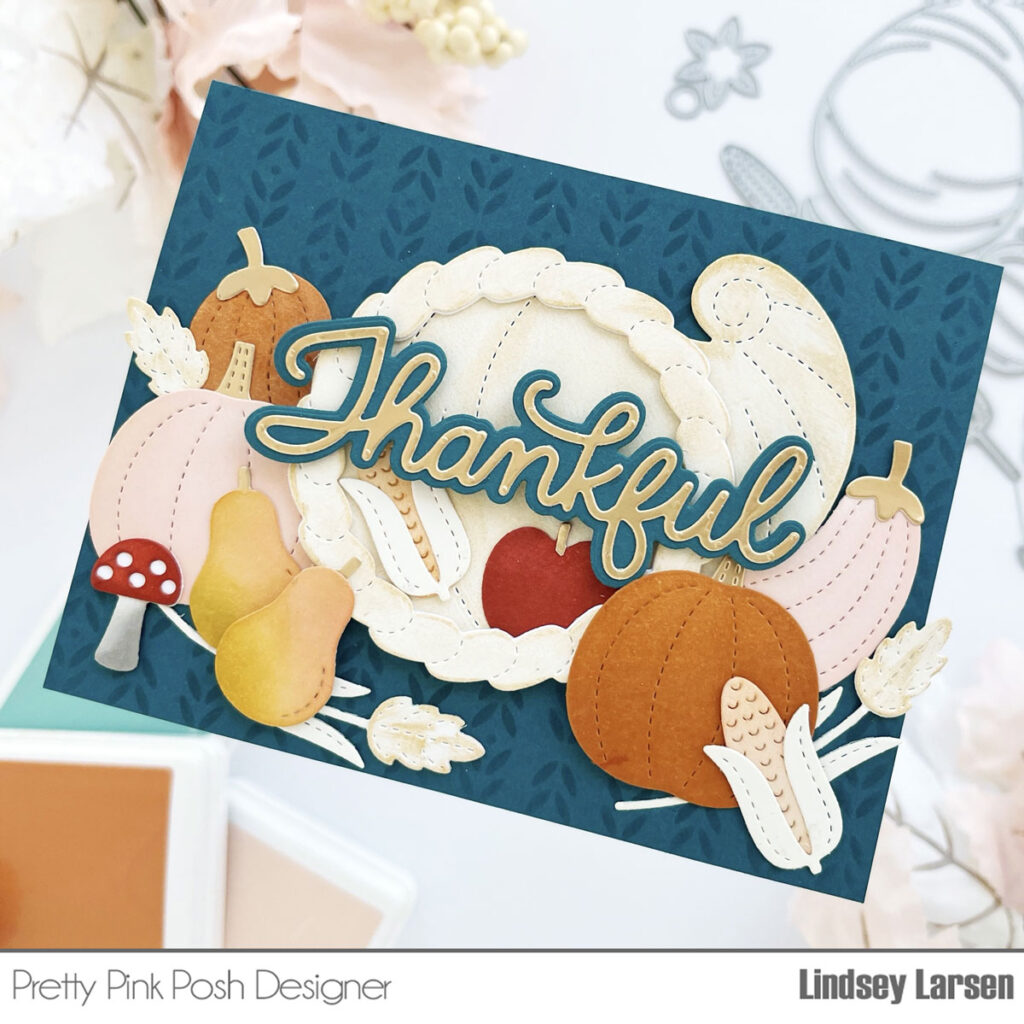
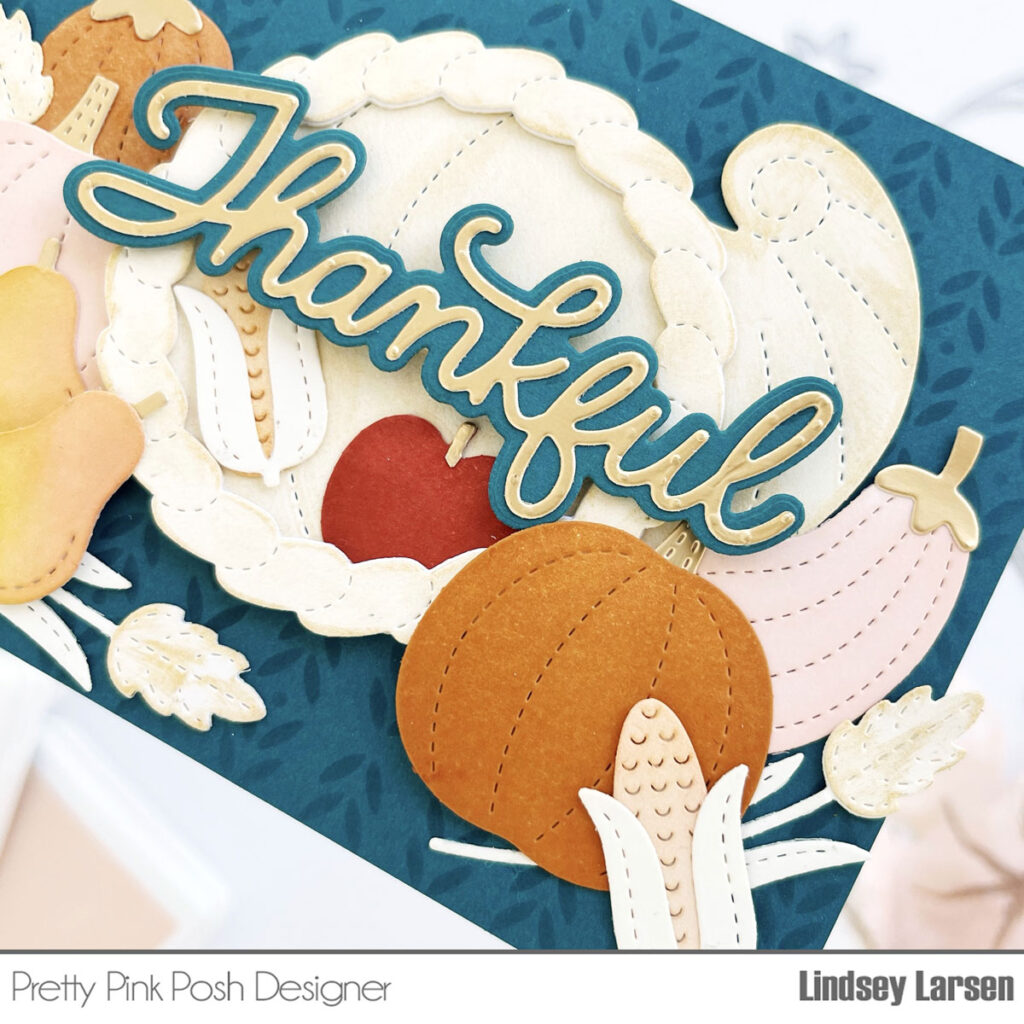
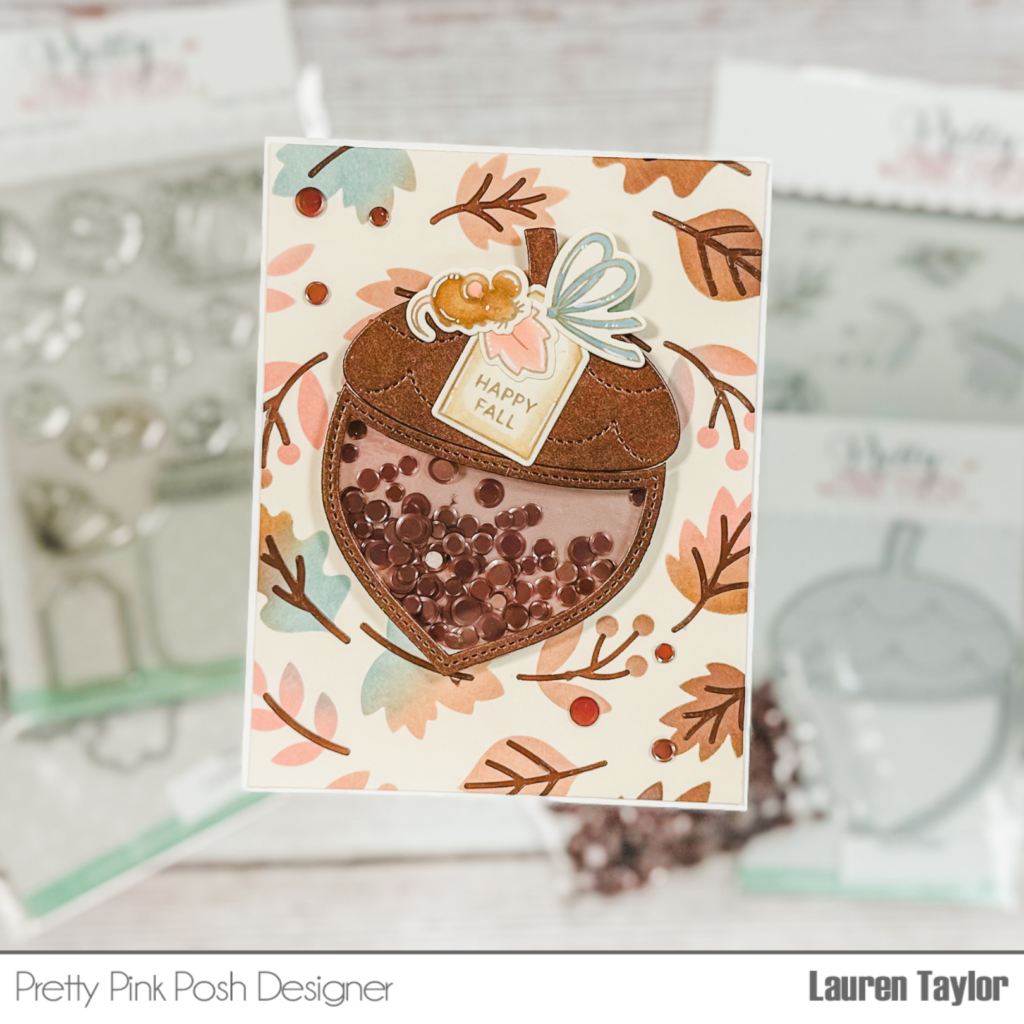
So, let’s dive into the nitty-gritty. I grabbed some Sage green cardstock and cut out the box card. I assembled the box and added in three inserts and jazzed things up with dies from the Fall Cornucopia and Fall Mug Additions Dies. I used Spellbinders cardstock for all those awesome dies. How adorable is that little fox peeking out of the mug, by the way? And speaking of the mug, I added a sweet design using the Deco Leaves Stencil and some Glacier White Ranges Pigment Ink.
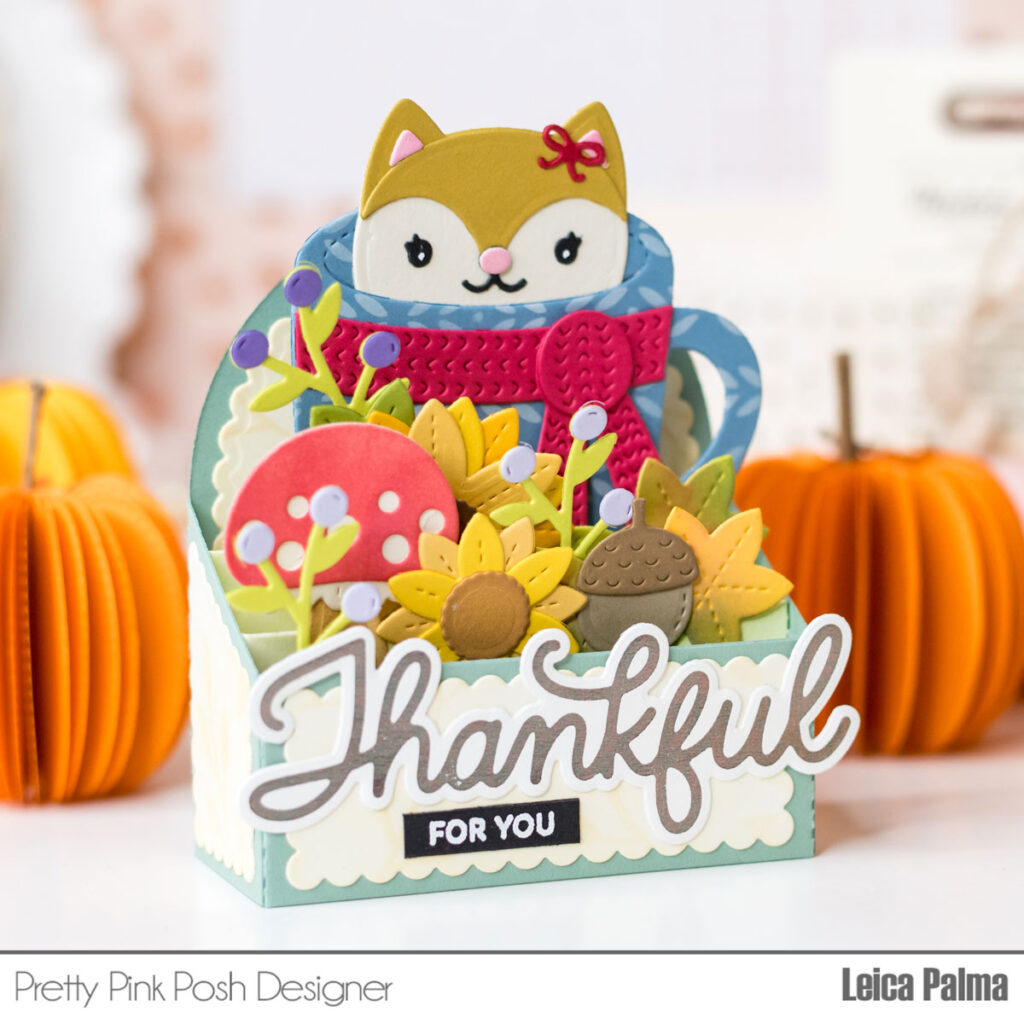
Now, here comes the fun part. I used the Fall Mug Additions dies and Fall Cornucopia dies to cut out various shapes in different cardstock colors. I glued these on the inserts, creating the cutest autumn scene you ever did see.
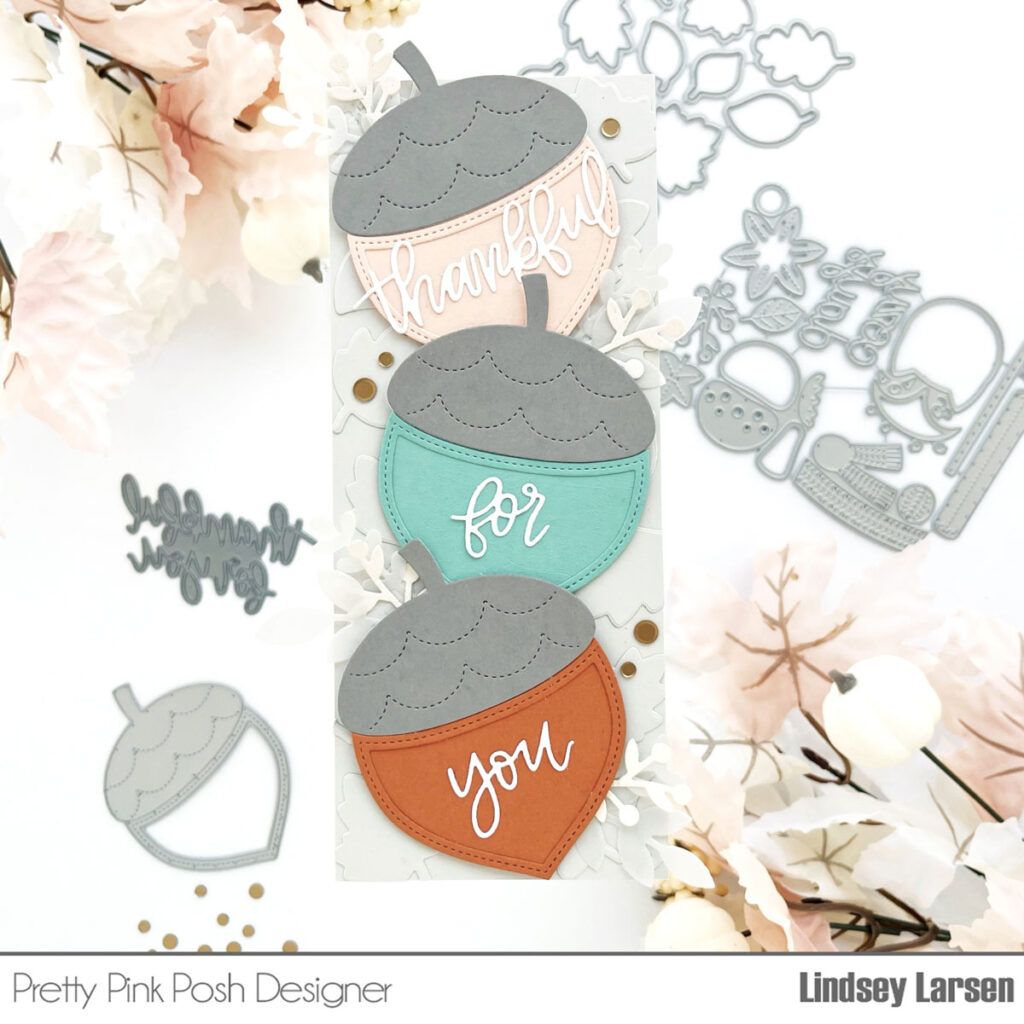
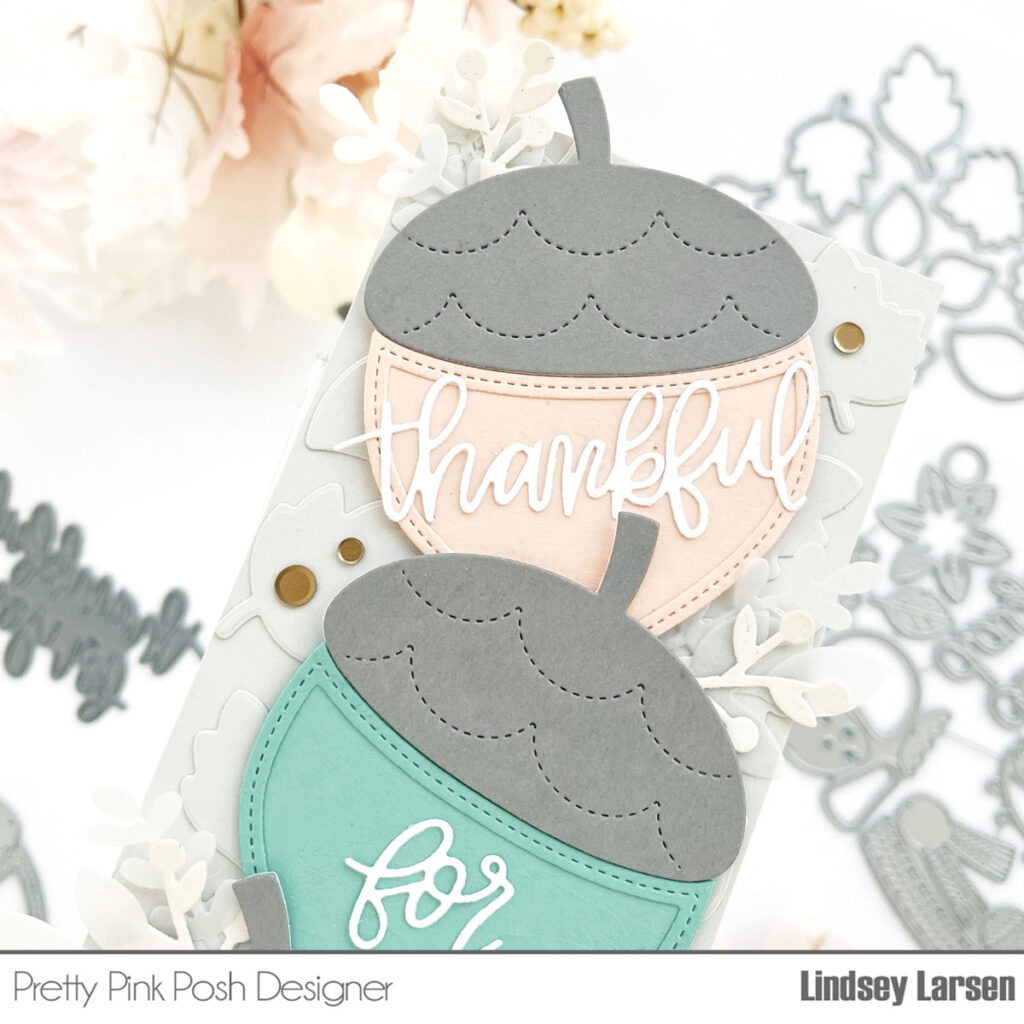
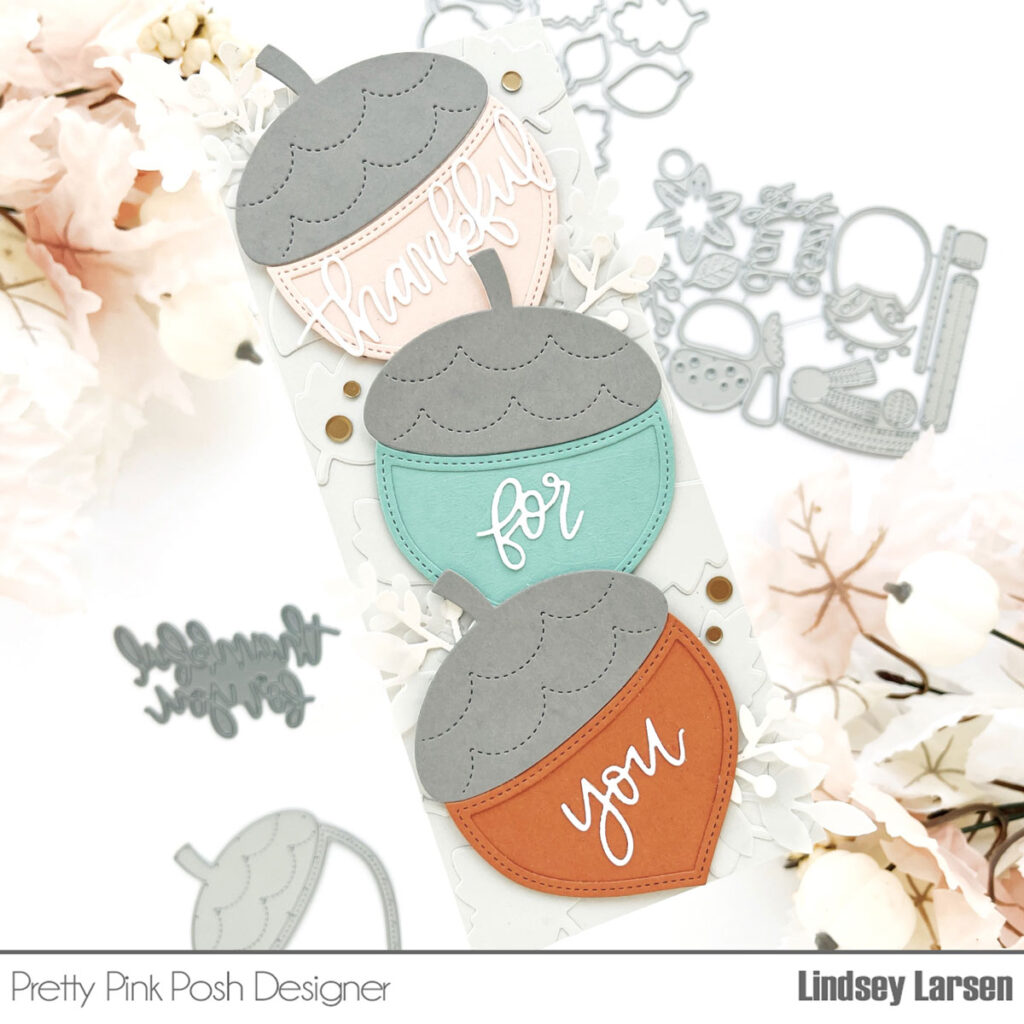
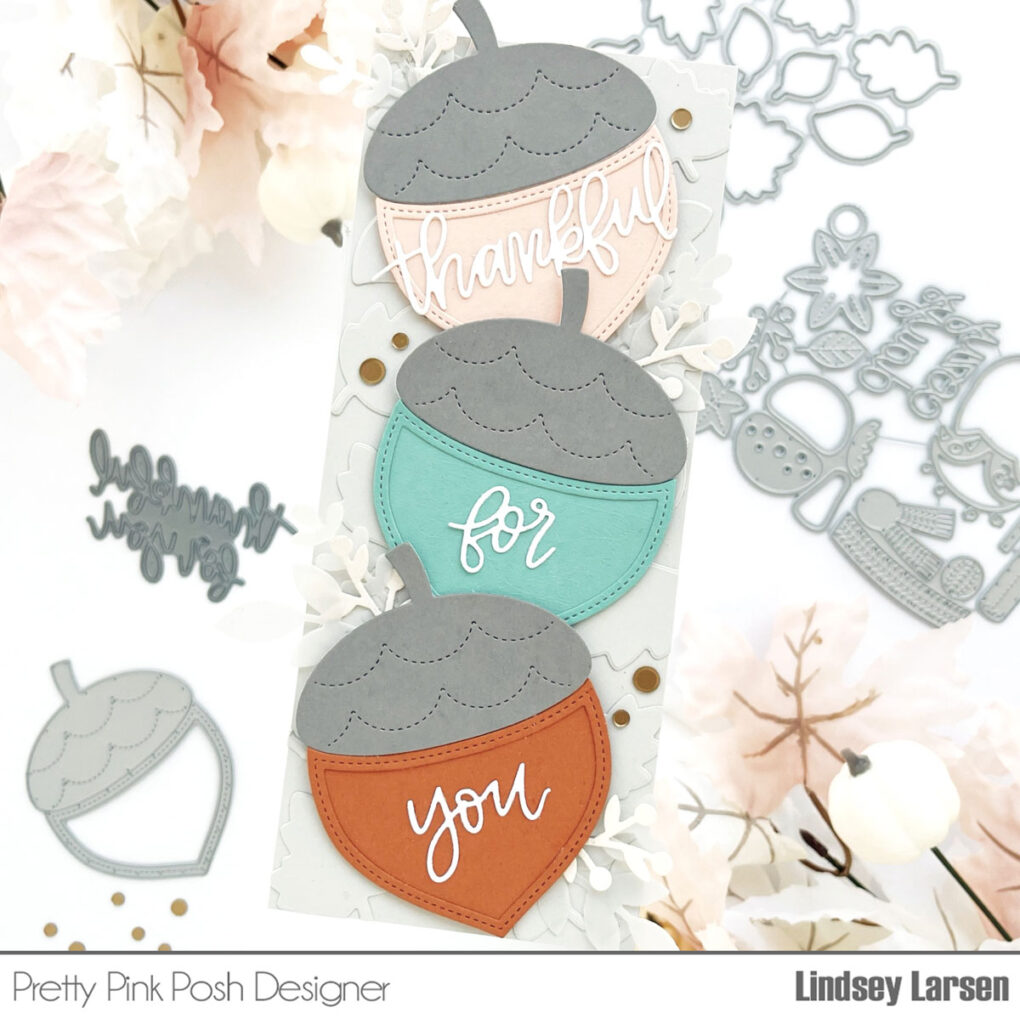
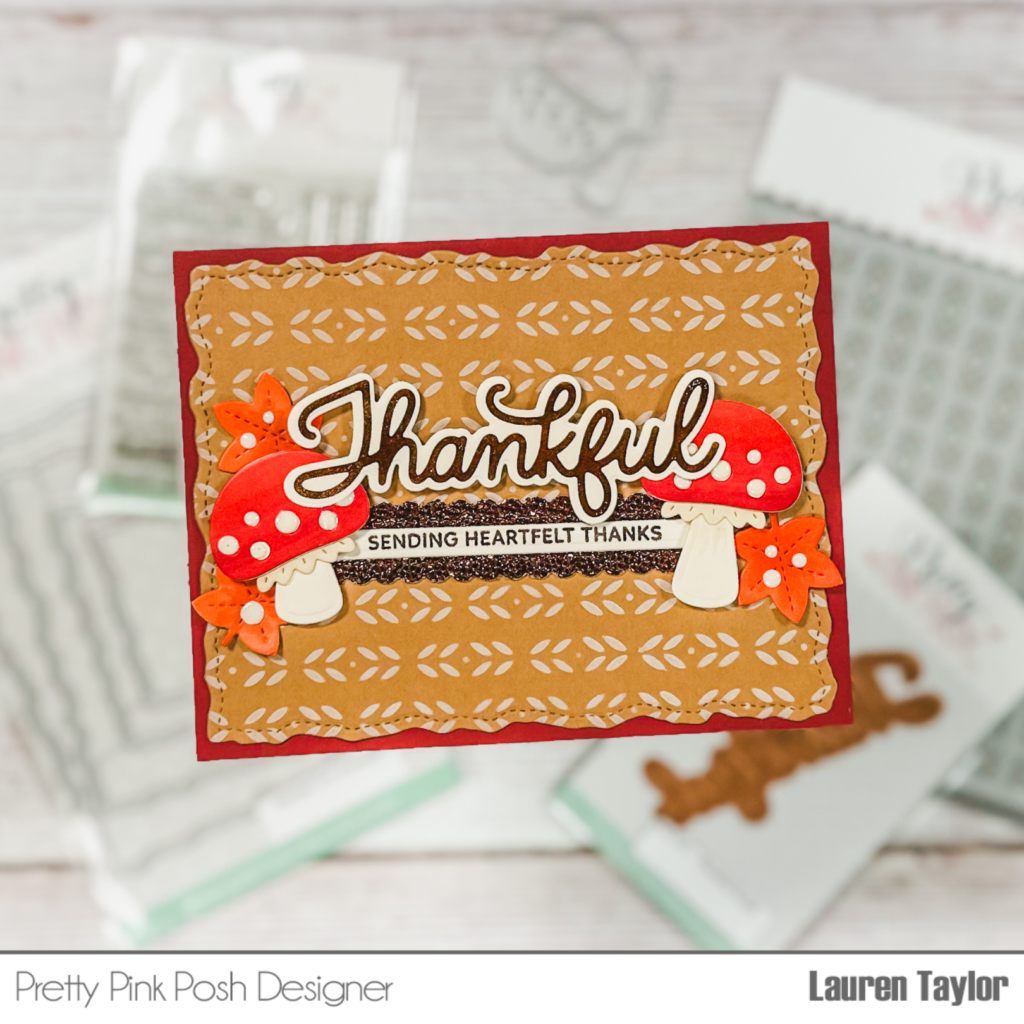
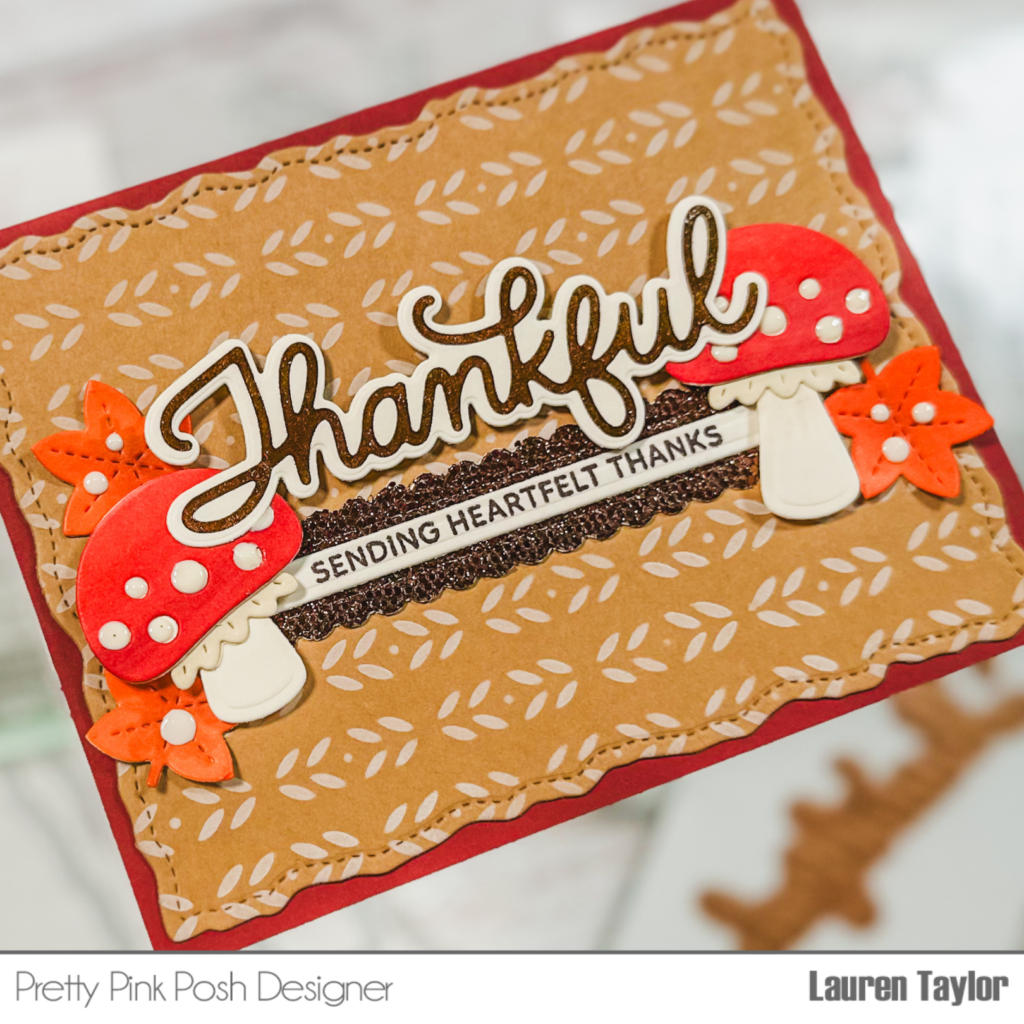
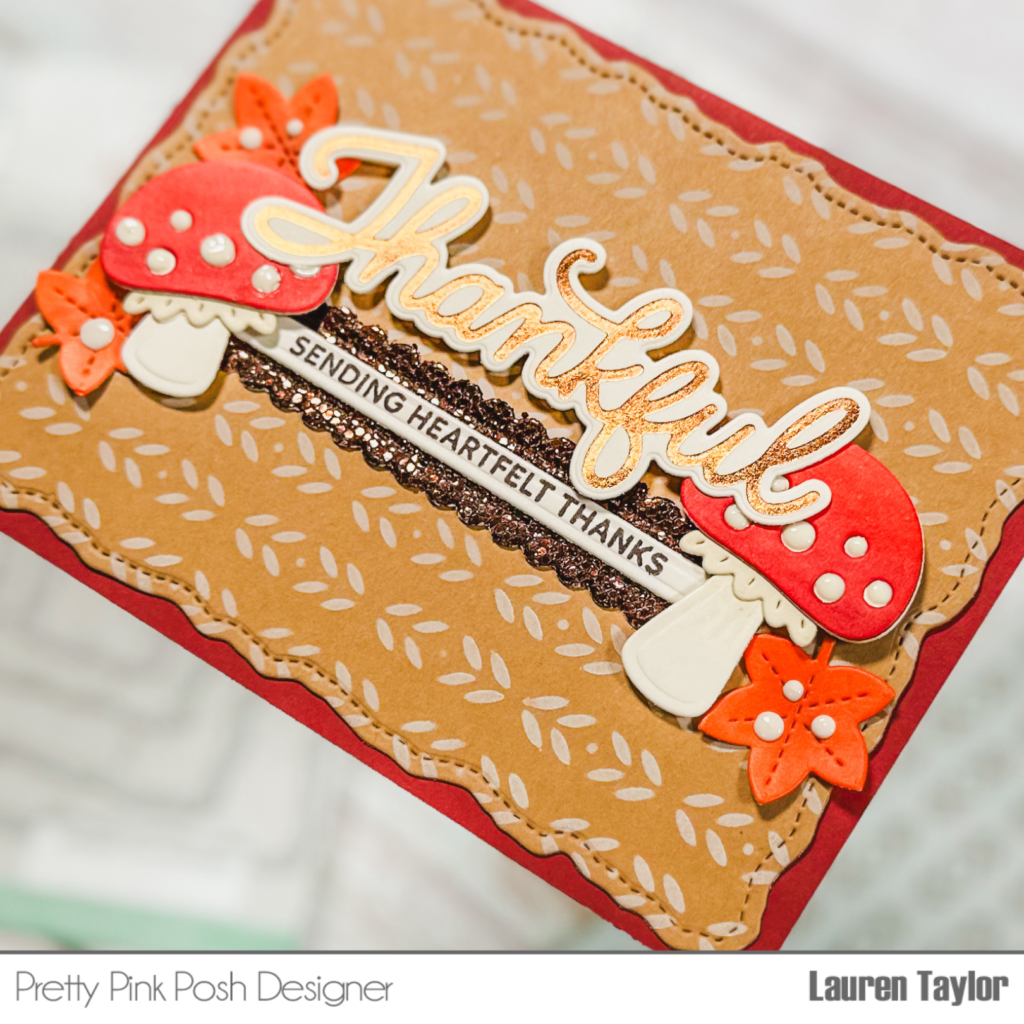
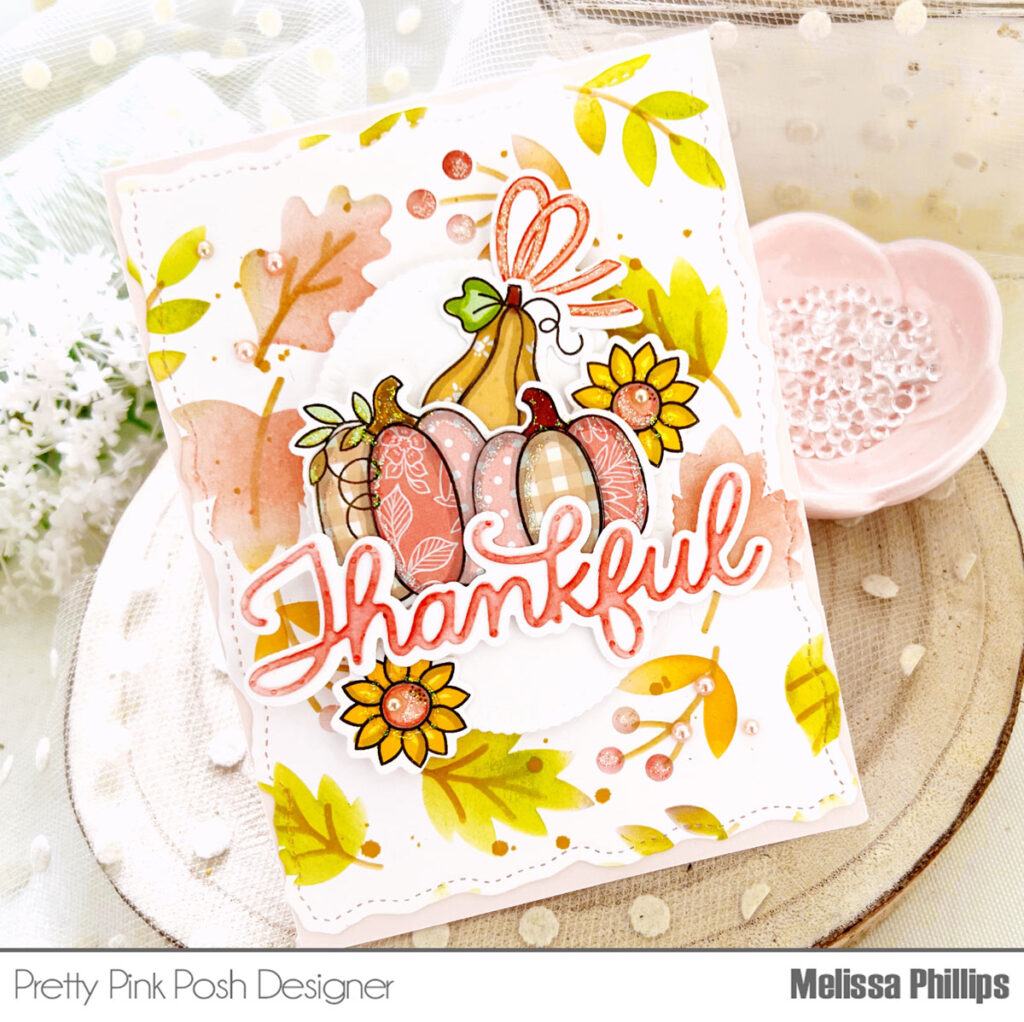
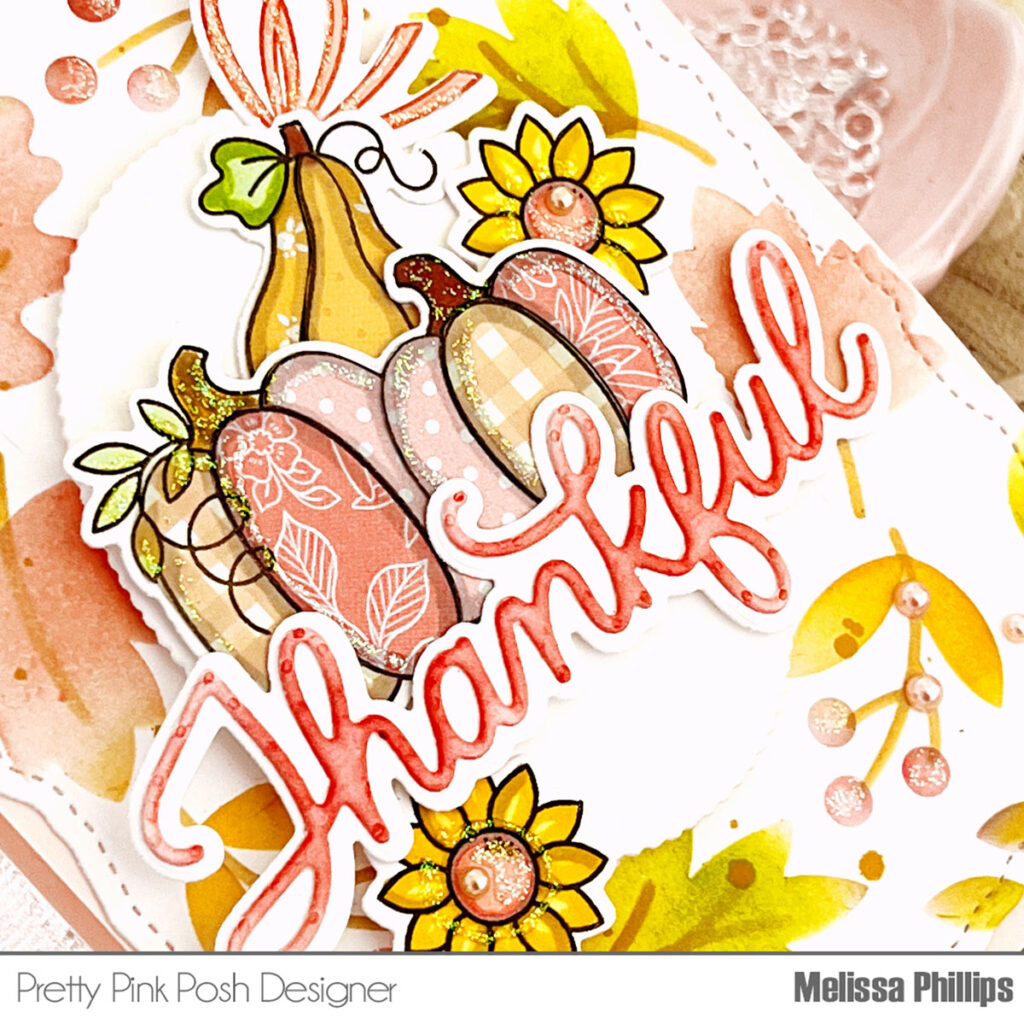
Next up, I used hot foil to make the Thankful Script shine, cut it with the Thankful Shadow, and glued it on the front of the box card. Then I added “for you” in white heat embossing on a black cardstock strip and glued it neatly under the Thankful script.
And that’s a wrap on my box card adventure. I’m hoping you’ll give this all-dies-on-a-box-card thing a try and create your very own autumn wonderland. It might even be a hit with the little ones! Happy crafting, everyone!