Wild greetings, crafters! Julia here and today I’m showing off the Fox Friends stamp set which has a few cute foxes and lots of sentiments and because it’s a small stamp set, it’s also much cheaper than regular sized ones. Let me show you how I combined it with other sets to create a mini-scene!
A few of you have asked me to show more scene-building tutorials over on my blog, and this is one of them, even if it might not appear so immediately. I started out with just the fox, but then added some nature images from the Camping Friends set to give context to the fox. It’s not much, but the wood stump and greens help to create a scene in your mind which the fox alone wouldn’t have been able to.
The sentiment is from the Darling Friends set and you can see that I accidentally stamped the two parts too far apart. The fix was easy – I just grabbed another image from that set and filled the space. There – everyone will think that was intentional and not a mistake :)
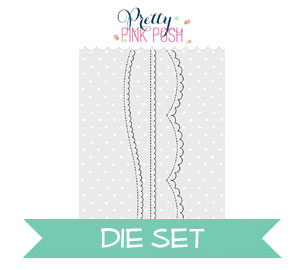
Last but not least I created a border with one of the new Scallop Border dies and added some glitter to the background because … glitter!
Want to see how to create this card from start to finish? Click on the graphic below!
Thank you for stopping by today! I hope you got inspired!
Amy here today to share my first card as a Pretty Pink Posh designer. I am so happy to join sweet Paulina’s team! ☺
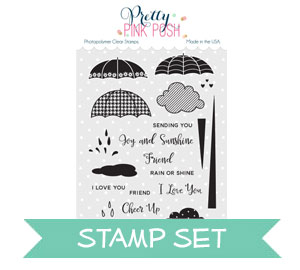
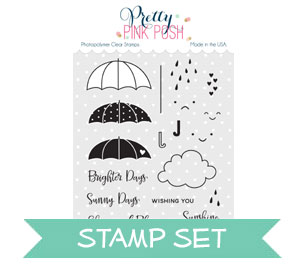
For my card today, I have used Rainy Days Stamp Set and Rainy Days Additions Stamp Set. These two sets coordinate perfectly! The umbrellas remind me of rain, which is very common in Seattle. However, rainy days don’t have to be bad days. Let’s brighten it up with rainbow umbrellas!
Here is how I made my card:
Stamp umbrellas from Rainy Daysand Rainy Days Additionswith distress inks. I have used (from top left) Fired Brick, Tea Dye, Picked Raspberry, Tumbled Glass, Salty Ocean, Seedless Preserves and Peacock Feathers.
Add shading and highlight to each umbrella with the same inks using a wet paint brush. Paint the background with teal blue watercolor paints. This creates a perfect rainy sky!
Hello, Pretty Pink Posh fans! This is Yana and today I am stretching my dies and using them to make flowers for an elegant Sending Hugs card.
Dies are such versatile tools and you can do so much using them. In one of my previous blog posts I shared a card where I used one of Pretty Pink Posh dies to die cut canvas, today I’m going to die cut felt and manipulate the die shapes slightly to create florals.
Before we get start I’d like to point out that you can use your thin dies to die cut felt, but not all brands felt will cut equally nicely. I suggest staying away from the cheapest felt and going with something a bit more expensive if you’d like to get a nice clean cut with your dies. I have a few different brands of felt and some die cut okay, some die cut beautifully, others don’t cut at all. My favorites so far are Simon Says Stamp and WPlus9.
So grab your felt and Pretty Pink Posh dies and start die cutting! I’m using a scalloped border die from the Stitched Borders 1 set and also an inner circle die from the Stitched Duo 2 set.
The scalloped border die gives you a nice border which you’ll need to trim with your scissors. I like to trim mine pretty close to the scallops, this way when I roll my flowers they end up being not too dimensional (not too tall). You can also use border die from the Stitched Borders 2 set, Stitched Borders 3 and Stitched Borders 4. If you have all of these sets you can even mix and match your die cuts and have flowers with different size petals. To create the flower simply roll the scalloped strip and secure the end with glue. I used Glossy Accents, however a hot glue gun would probably be a better option.
You can also create flowers out of circles. Here I’ve die cut a few using the inner die from the Stitched Duo 2 set and used white thread to pinch the middle of the circle to create tiny blooms. If you’d like to have bigger flowers, use a circle die from the Stitched Essentials 1 set or even from the Stitched Banners Duo 2.
No flowers look complete without a few leaves, so I used a branch from the Holiday Pals die set to die a few leaves for my floral clusters.
To put this card together I also created a mini see-through shaker by using a die from the Stitched Essentials 1 setalong with tiny silver confetti stars and smallest clear sequins from my Sparkling Clear Sequin Mix. I die cut one more tag out of dark gray cardstock by using a die from the Mini Tag die set. The sentiment, Sending Hugs, was heat embossed in white embossing powder onto vellum and the vellum strip was wrapped around the card.
I also added one tiny banner die cut out of felt to continue the overall felt theme and embellished my card with a number of clear sequins.
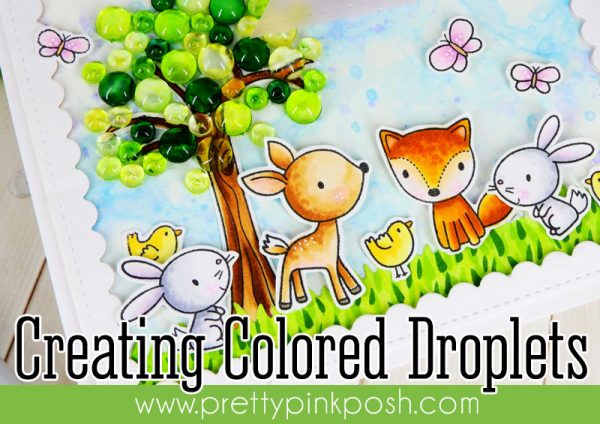
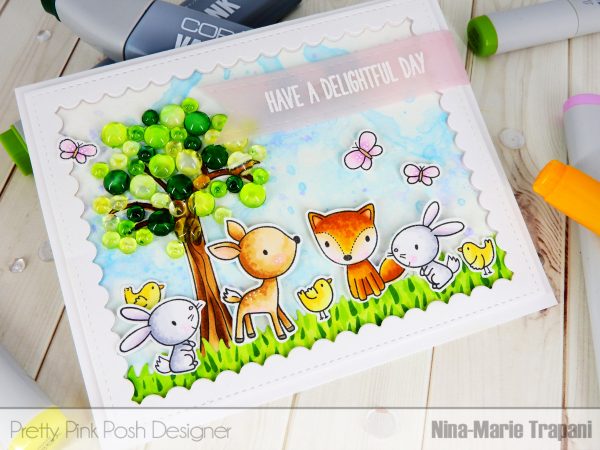
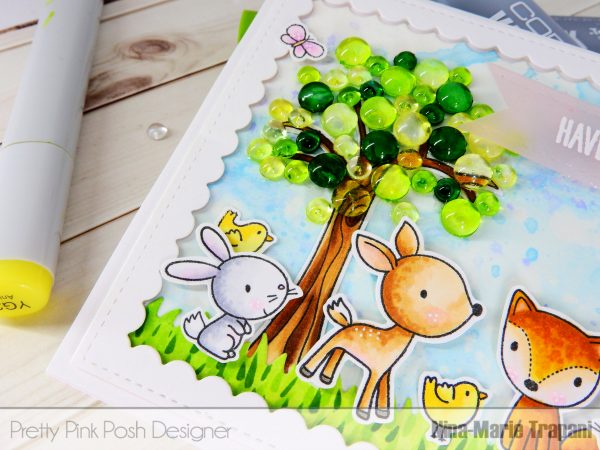
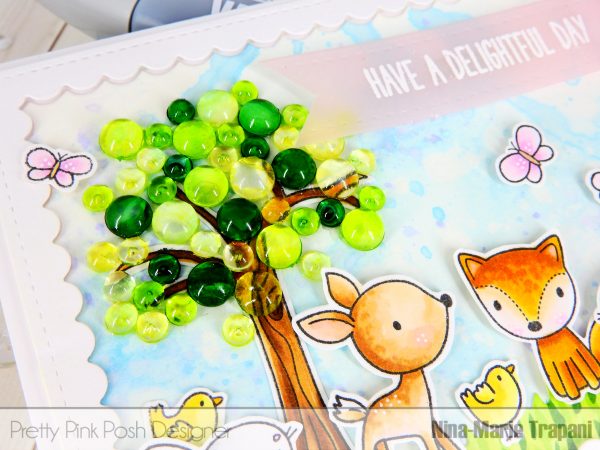
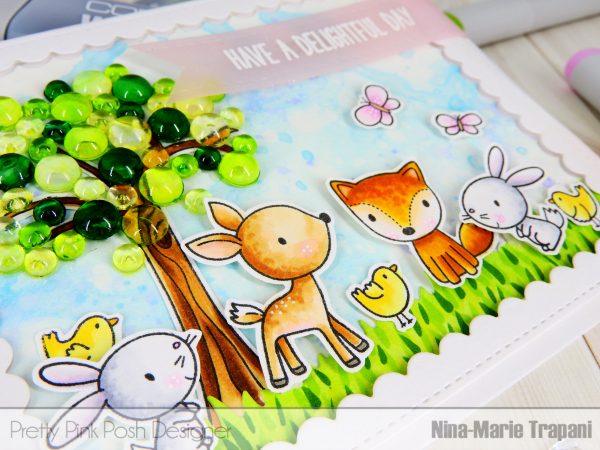
Welcome back everyone! It’s Nina-Marie here with you today featuring a fun technique on coloring your Pretty Pink Posh Clear Droplets to create gorgeous embellishments for your cards!
I love using Clear Droplets on my cards; because they are clear, this makes them perfect for using with just about any style of project! However, sometimes you might find you want them to be a specific color to coordinate better with your card, or to create a certain effect. Well, by using some Copic refill ink, you can do just that!
I used refills for this technique today, but bear in mind you can color over the Clear Droplets with markers instead. Since I was creating a lot of the same color of droplets, I ended up using the Copic refills because it was faster than coloring with an individual marker.
For those of you looking for other alternatives to recreate this technique: Copic ink is alcohol based; and while I haven’t tried it personally, I would imagine that other alcohol inks like Ranger Adirondacks, Nuvo/Tonic Creative Pens, Chameleon Pens, Touch Twin Markers and others would also work. Just do some testing before trying it on a specific project!
In today’s video, I’ll be sharing the steps I took to create the colored Clear Droplets, including a few tips and tricks! I’ll then walk you through how I used those droplets to create the sweet scene card you see in the photos, using Pretty Pink Posh dies and stamps from My Favorite Things!
This is Amy! I am back today to share another card using Pretty Pink Posh supplies. I am playing with the Rainy Days Additions set. This set is so cute!!
Here is how I made my card:
White heat emboss the clouds from Rainy Days Additions all over a watercolor panel
Blend rainbow colors of distress inks on top and add water with a paint brush. The colors I used are Worn Lipstick, Dried Marigold, Fossilized Amber, Lucky Clover and Peacock Feathers
Die cut the right side of the panel with Scallop Borders Die. Mount the panel on a card base matted with patterned paper
White heat emboss the sentiment on black cardstock. Cut out a banner. Add some twine to embellish
Good morning Pretty Pink Posh friends! Heather here to share a couple Butterfly theme shaker cards again using some of the NEW release from Pretty Pink Posh – SOOOO much to love!
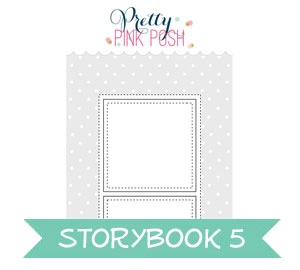
To begin with, I cut my card front using the fabulous new Storybook 5 die from white cardstock, then cut it again out of kraft cardstock to get the center windows. I then used the large butterfly die to make a window for my shaker.
Next, I used some Versamark ink to stamp the solid tiny butterfly from the stamp set randomly over the white background, sprinkled with clear embossing powder, and heat set – at this point, the butterflies are invisible…
THEN – I blended distress inks over the background – see how the white butterflies magically appeared? Then I took the tiny outline butterfly stamp set, and stamped it around the outside as well, but in the same distress ink color as was blended on each area – in this next photo, you can see how the right hand card front was already done this way – doesn’t it add so much to the background?
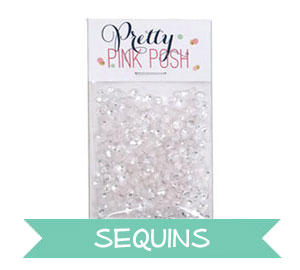
Finally, I added the butterfly trail to the shaker part, and stamped a sentiment from Camping Friends Stamp set, and heat embossed them both in white, then added the acetate and foam adhesive to these pieces to form the shaker element – which is filled with the new size 3mm Sparkling Clear Sequins– such a PERFECT size for shaker cards, and I’m pretty sure they are extra sparkly!!!
Here is a close up look at the finished cards:
See what I mean? Don’t you think those sequins are especially sparkly?
I love how just changing the distress ink colors helps change the entire feel of the card:
That small size sequin moves especially well in the shaker cards too – small enough that I only had to use one layer of foam adhesive, and it still moves freely.
Hello, Pretty Pink Posh fans! This is Yana and I have a video tutorial to share today featuring one of the new stamps & dies- Camping Friends.
To create the shaker area for this project I used a coordinating die, not a stand alone die, and die cut a tent window in a rectangle panel. I often like to use my coordinating dies on their own without the stamps and using the die like this is a great example of how you can stretch the use of dies beyond just using them with their matching stamps.
I also filmed a video tutorial to walk you through the cardmaking process from start to finish.
Instead of using acetate for my shaker window, I once again used vellum. If you missed my earlier post, click here. The reason I went with vellum here is because when using vellum, unlike acetate, I’m able to emboss it. I embossed a tent image in Gold Embossing powder (I made two identical cards and for the other card I used Simon’s Antique Gold embossing powder) and adhered vellum screen onto the die cut rectangle from behind.
Tip: when using acetate you won’t be able to heat emboss it unless the acetate is heat resistant, but you can stamp on acetate with special kind of ink like StazOn. You can also stamp on vellum and there are a lot of different kinds of ink what will dry on vellum surface.
Instead of using regular white and brown cardstock, I used woodgrain textured card as I feel is was a perfect match for this nature-themed project. I also added a bit of natural twine to the mix.
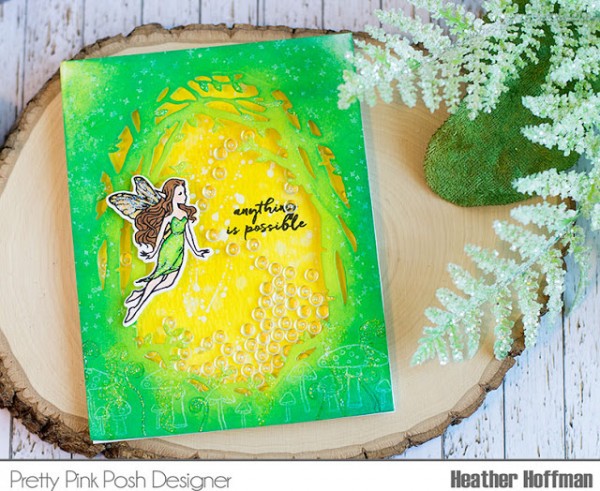
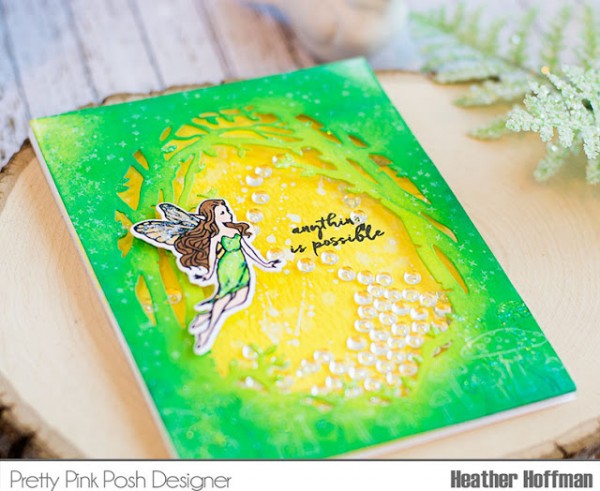
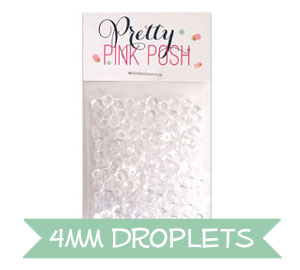
Heather here to share a couple cards using the brand new Hero Arts August My Monthly Hero Box – featuring some Pretty Pink Posh 4mm Droplets – such a fun addition to this kit! We are really excited to be part of their kit this month and also part of their blog hop.
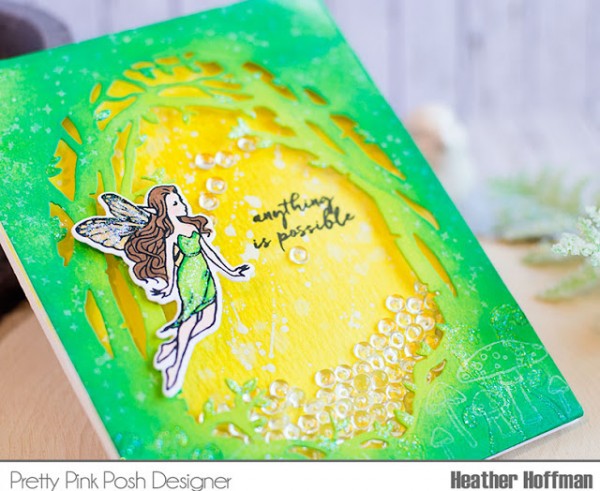
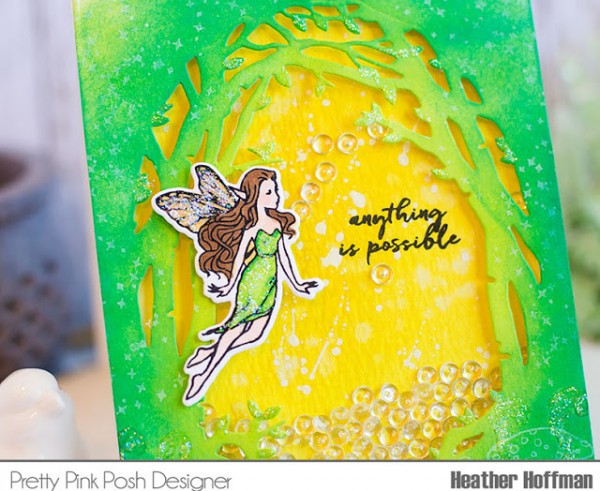
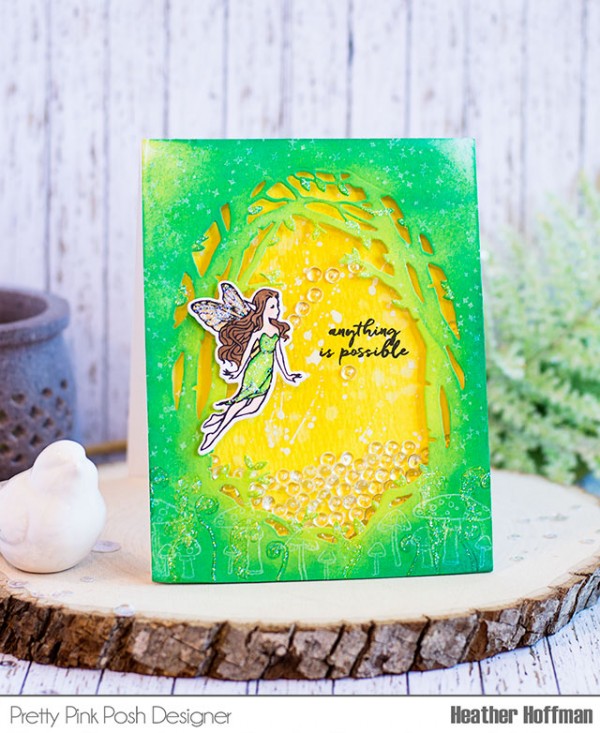
This is such a unique kit – I felt like it was very fresh and different than anything else I’ve been seeing around lately – I started off by putting together a shaker card filled with those Clear Droplets.
I die cut the Fancy Frame Die Set without the matching oval die, then blending on distress ink in two shades of green. I also stamped several of the little mushrooms and fern pieces in white pigment ink and the same two distress ink colors on the bottom, and added the sparkle star stamped several times in white around the rest of the outside.
The inside of the shaker card is two shades of yellow distress ink on watercolor paper, some water flicked on, and some white paint splattered over that.
I stamped and colored the fairy, die cut with the coordinating dies, and then added the included Clear Stickles on the wings, dress, and on selected areas around the frame – the leaves, and some of the stamped images on the bottom, then filled my shaker with lots of the clear droplets!
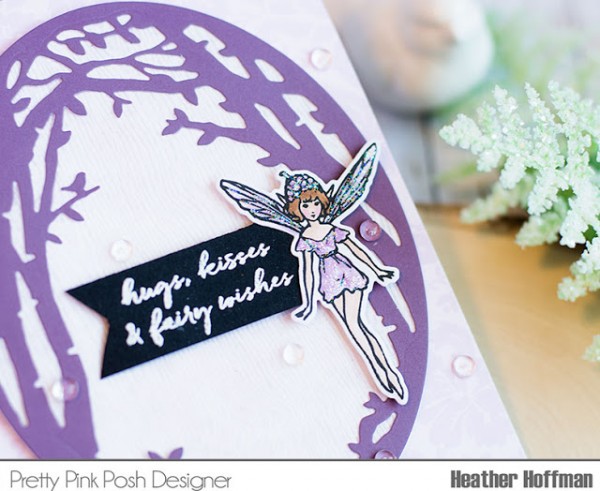
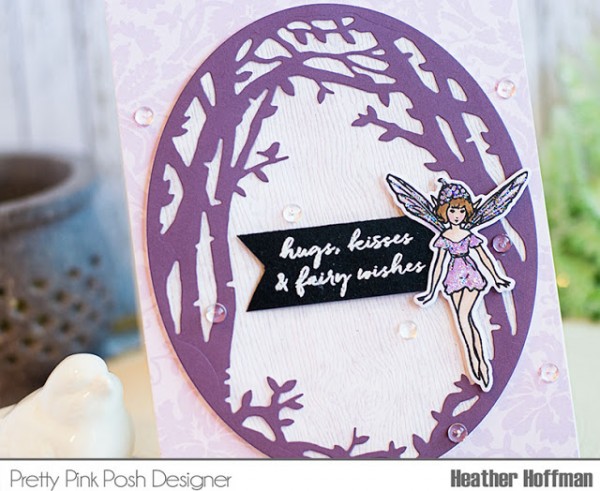
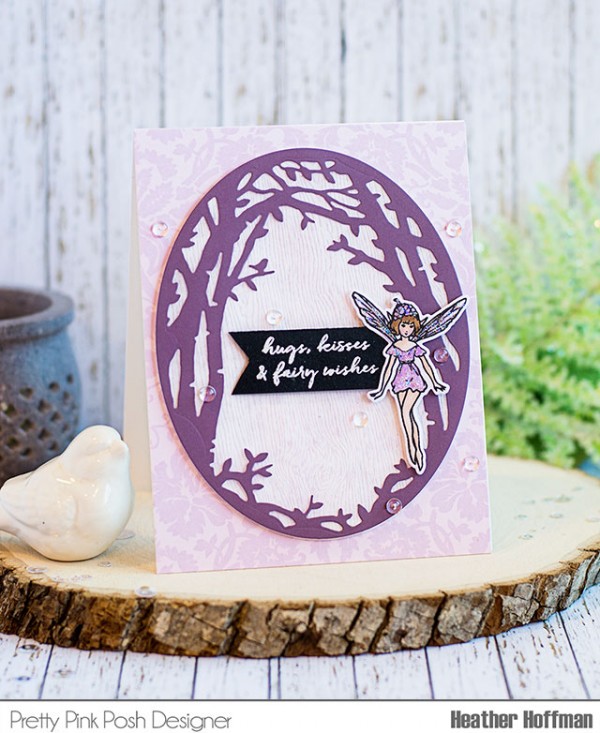
Next up I made a more flat one layer card using some of the papers that came in the kit, and using the clear droplets as embellishments on the front of the card.
This fairy was colored to match the purple papers in the pack, and also sparkled up the dress and wings.
This time I used the frame with the matching oval die, then used the oval die on it’s own to cut the translucent woodgrain paper for the back of it. Hard to see in the photos, but you can actually see through it a little to see the pattern paper underneath.
The sentiment was heat embossed on black cardstock, and the clear droplets glue on just perfectly with a drop of Glossy Accents.
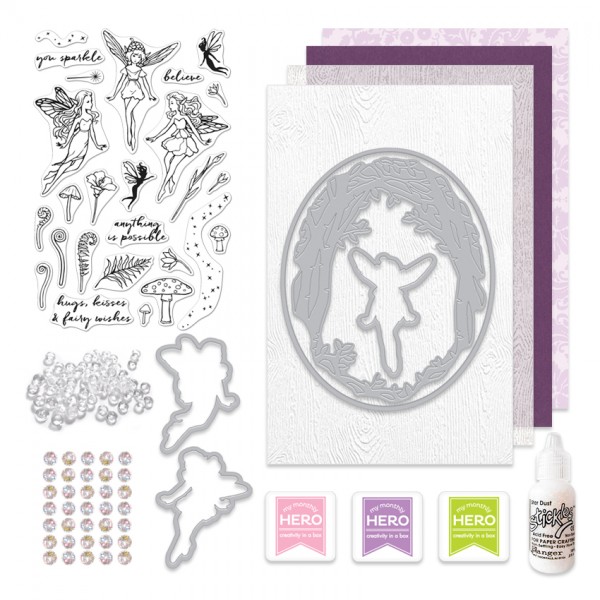
Here is a look at what the complete kit looks like.
The kit contains:
A 4×6 clear stamp set
Three matching Frame Cuts dies
An oval border with frame Fancy Die set
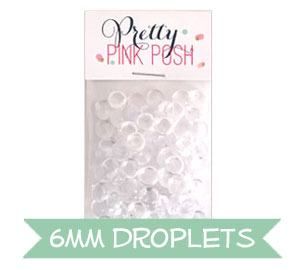
Pretty Pink Posh Droplets
Ranger Star Dust Stickles
Three ink cubes in Bubble Gum, Orchid and Green Apple
Woodgrain Cardstock and Vellum
Other gems and cardstock
The kit value is over $50, and they are selling this one for $34.99.
Prizes: Hero Arts is giving away one kit as a prize to one blog reader – selected from the comments across all of the blogs in the hop. Be sure to hop along and leave comments on all the stops!
Here is the entire blog line up – in case you get lost along the way:
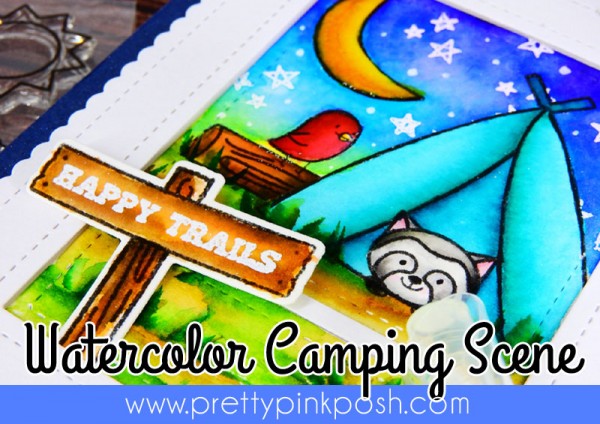
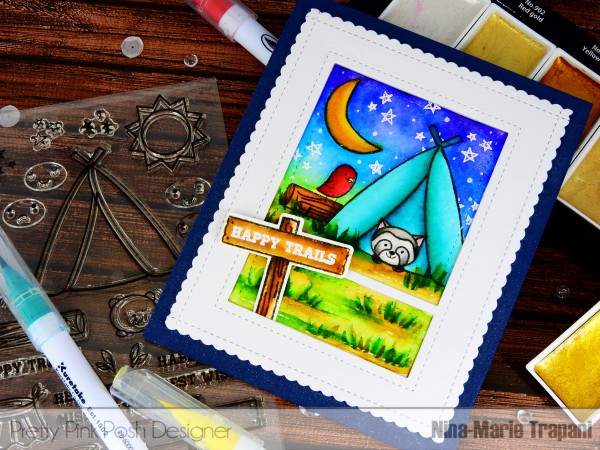
Hi friends! It’s Nina-Marie here with you today sharing a fun scene card with you, as well as a look at some of the new stamps and dies that are being released by Pretty Pink Posh on August 5th!
For my card I am going to be using the new Camping Friends stamp and die set, along with the newest addition to the Storybook die collection, Storybook 5! I love this new die and how it has a larger square incorporated into the design, and then a smaller rectangle down below. I can see this being perfect for using as a scene panel like I have done today, or a shaker window!
Because I wanted to make a one layer scene using this die, I did a bit of masking during my initial stamping to achieve this. However if you wanted to skip the masking process, you could stamp all the images individually, die cut them out and then layer them together to build the scene the same way.
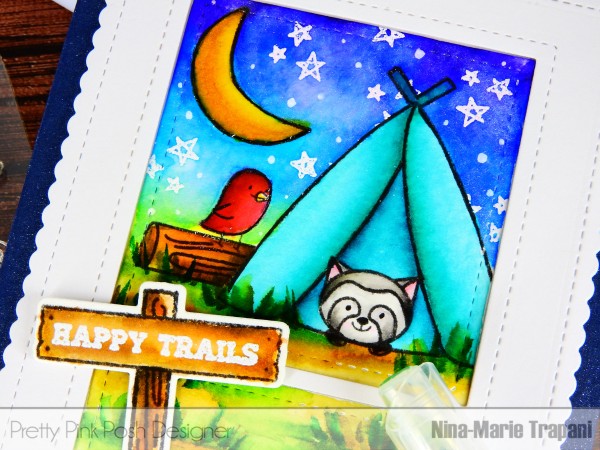
I’ll be doing some Zig Clean Color marker coloring in this video; for those of you who are interested in the color combinations I use, I’ll break them down for you below; they are also annotated in the video.
Raccoon: Gray Brown 094, Light Gray 091, Light Pink 026, Light Carmine 021 Tent: Turquoise Green 042, Persian Green 033 Bird: Red 020, Wine Red 024, Yellow 050 Tree Log & Wood Sign: Beige 072, Brown 060, Mid Brown 065 Sky: Light Blue 036, Persian Blue 032, Deep Violet 084, Yellow 050 Moon: Yellow 050, Lemon Yellow 051, Orche 063 Grass: Light Green 041, Mid Green 046, Olive Green 043, Green 040
I hope you’ll watch the video below to see how I created this card! I’ll be sharing tips and tricks along the way, including how I fixed a watercolor mishap (yes, it happens to ALL of us)!
Thanks so much for stopping by and spending some time with me! Stay tuned to the blog all next week as we share more looks of the new release leading up to the launch on August 5th!
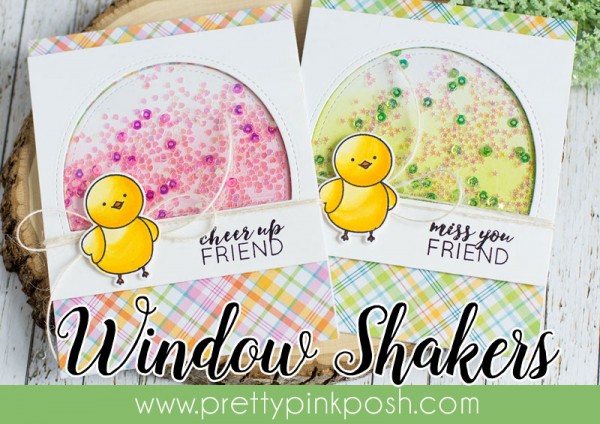
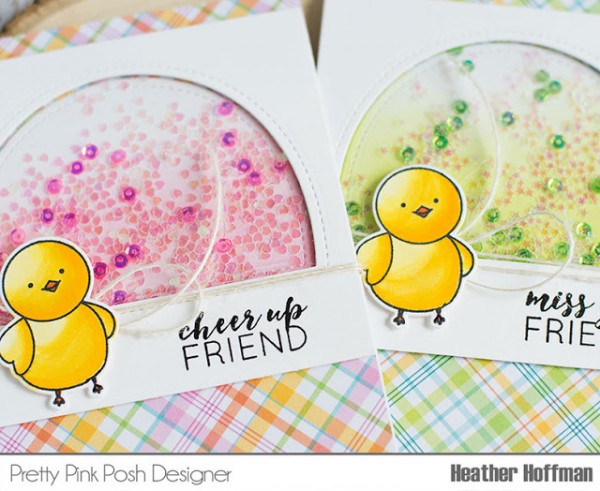
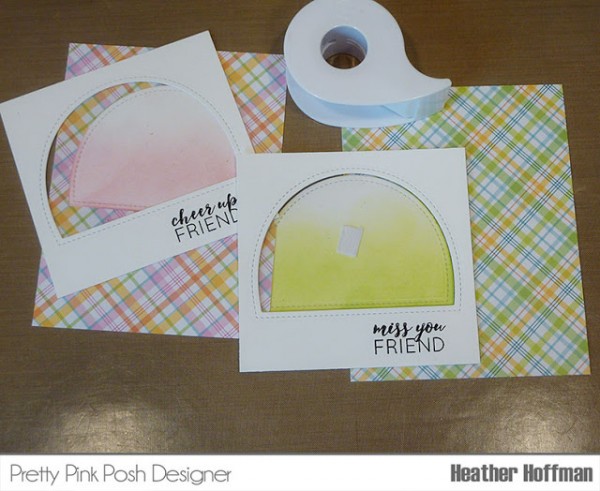
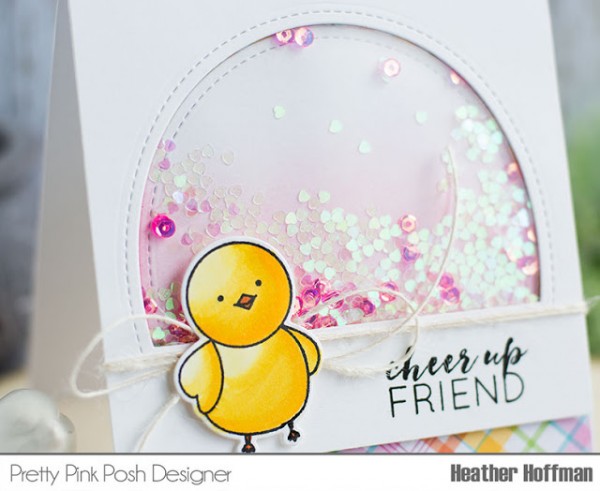
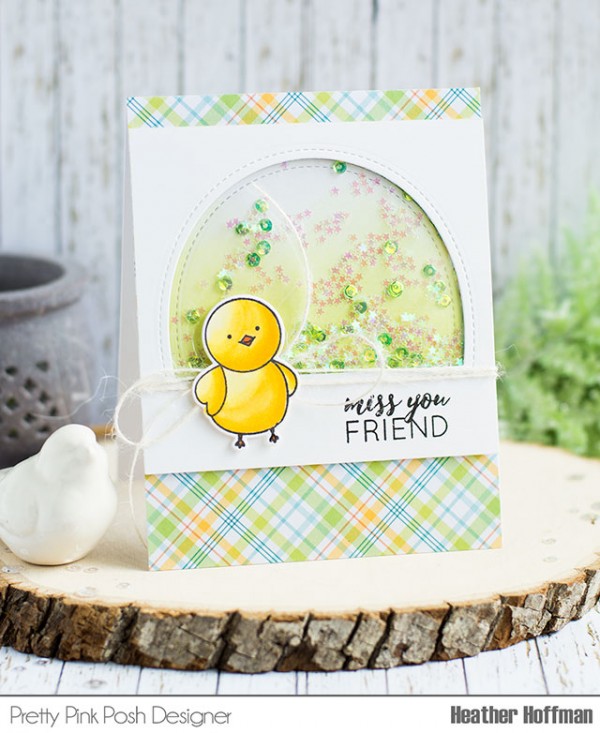
Good morning Pretty Pink Posh friends! Heather here with a couple shaker cards using both the positive and negative die cuts from the Window Frames Die Cuts and some ink blending to create an ombre color fade on the inside of the shaker to compliment the sequins and confetti!
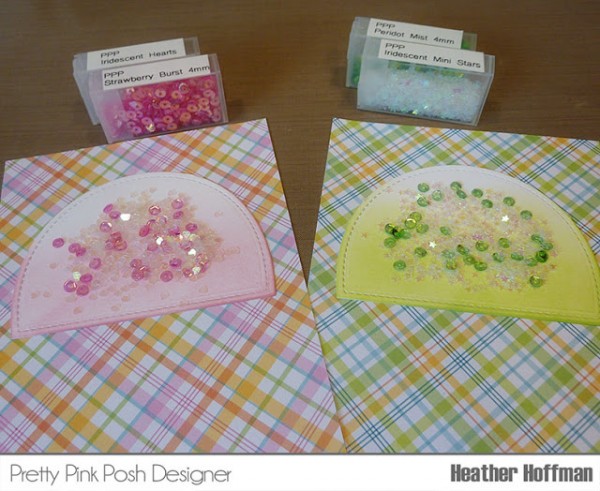
Look how the soft ink blending on the inside of the shaker sets off the filling so well – and the Iridescent Mini Star and Heart Confetti pick up the color of the ink that is underneath them – helping make it more versatile than ever!
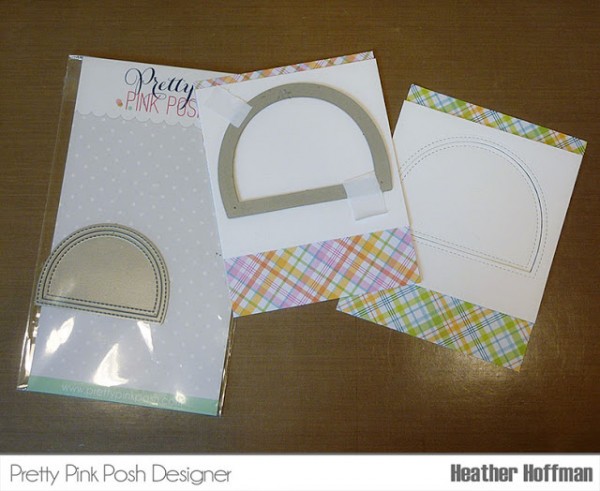
I started off by choosing my pattern paper, and trimming a piece of white cardstock to fit the front of my card, leaving the pattern paper showing at the top and bottom – in this case I did 4 1/4″ by 4″ – almost a square. Use some removable tape (washi tape or Post It tape which is what I used here) to hold the die in place and run through your die cut machine, saving both pieces.
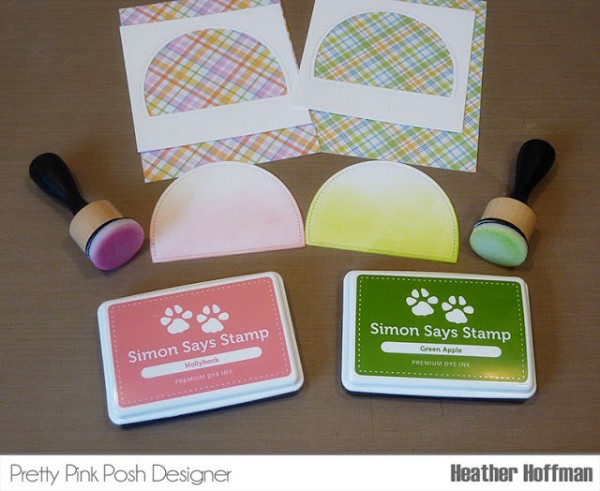
I chose some inks that coordinated with the dominate color of my pattern paper and used a foam ink blender to add a soft color on the bottom of the inside piece. I used a light touch – I didn’t want the color too deep, and let it fade out to white at the top.
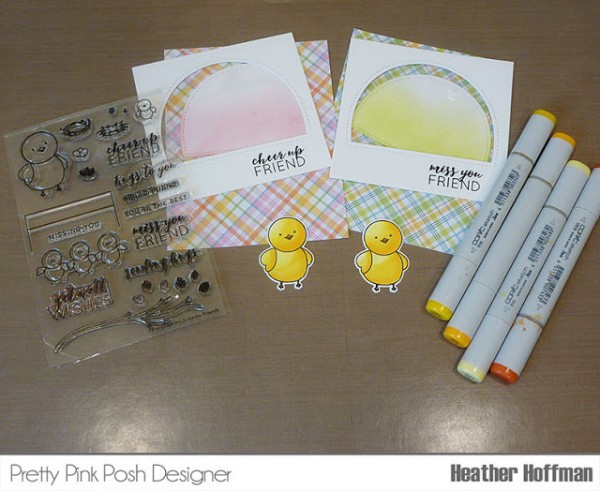
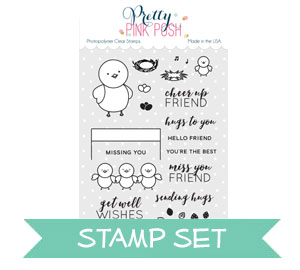
Next, I stamped my sentiments on the outer portion of the frame using Birdie Friends Stamp set, and also stamped the larger birdie, Colored with Copics, and die cut with the coordinating Birdie Friends Dies.
Add the acetate windows to the outer portion of the frame, and then a little trick I like to use to line up the inner portion perfectly – use a tiny bit of easily removable tape (again, I used Post It tape) to hold the back piece to the acetate window, apply adhesive to the back of just the inner portion of the window, place panel where you would like it on the card front, press firmly to attach adhesive, then easily pull off the outer portion that is only attached with that tiny piece of tape.
I used a mix of the Iridescent Mini Starand Heart Confetti, and some smaller 4mm Strawberry Burst and Peridot Mist sequins – I only used one layer of ordinary foam adhesive, so I didn’t want my shaker to have bulky items in it. I also spaced out the colored sequins, that way if things didn’t shake around a lot, I knew everything would be evenly spaced out to begin with with. Aren’t those sequins so pretty and sparkly together?
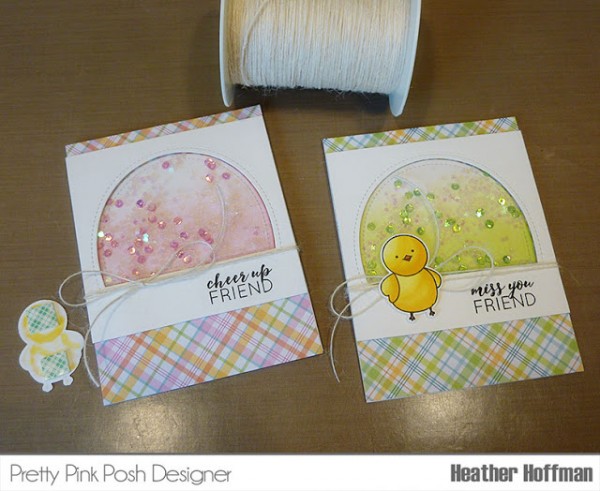
Add foam adhesive to the front of the shaker windows and attach over the sequins – see how perfectly they line up? To finish off, I wrapped some twine around the entire card front, tied in a bow, then mounted my little birdies with foam adhesive over the bows.
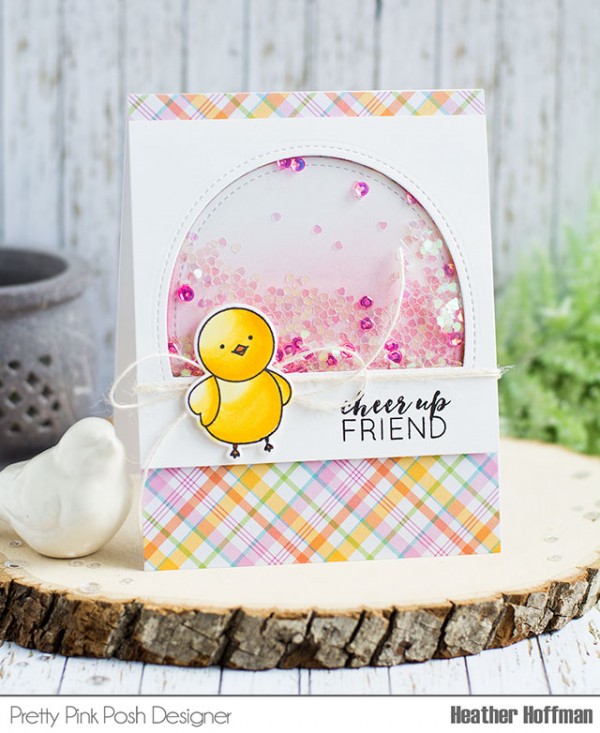
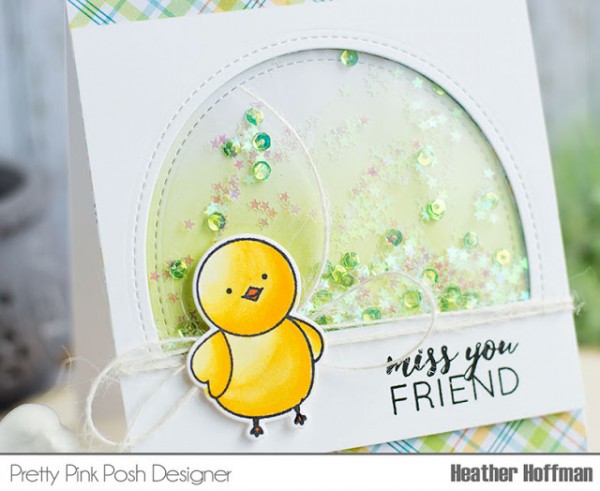
Here is a closer look at each of the finished cards!
Would love to hear what your favorite color combo of these is! I don’t think I can choose between the two – and I can’t get enough plaid paper these days! LOVE it!
Thanks so much for stopping by today – have an absolutely wonderful day!!!


 Hello friends!!


 Hello friends!!
 Here is how I made my card: