
Pretty Pink Posh Shop

3 Halloween Projects with Stencils + Video
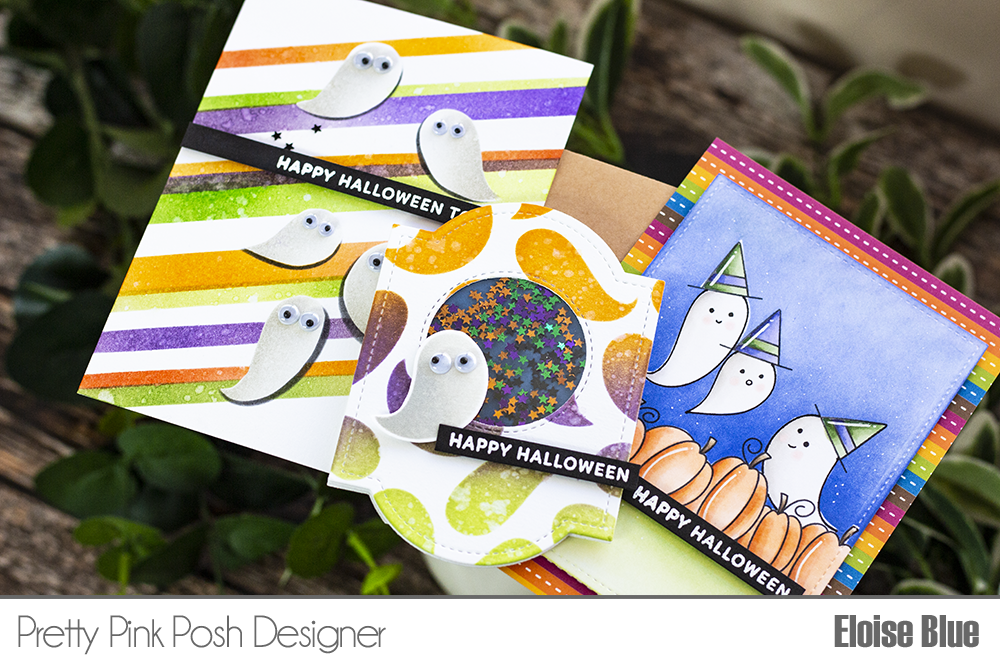
Hello friends, Eloise here and today I have three Halloween cards to share with you all using the Brush Strokes Stencil. I paired it with a few of the Halloween themed stamps in the most current release.
Watch the video above I Watch the video in HD on YouTube
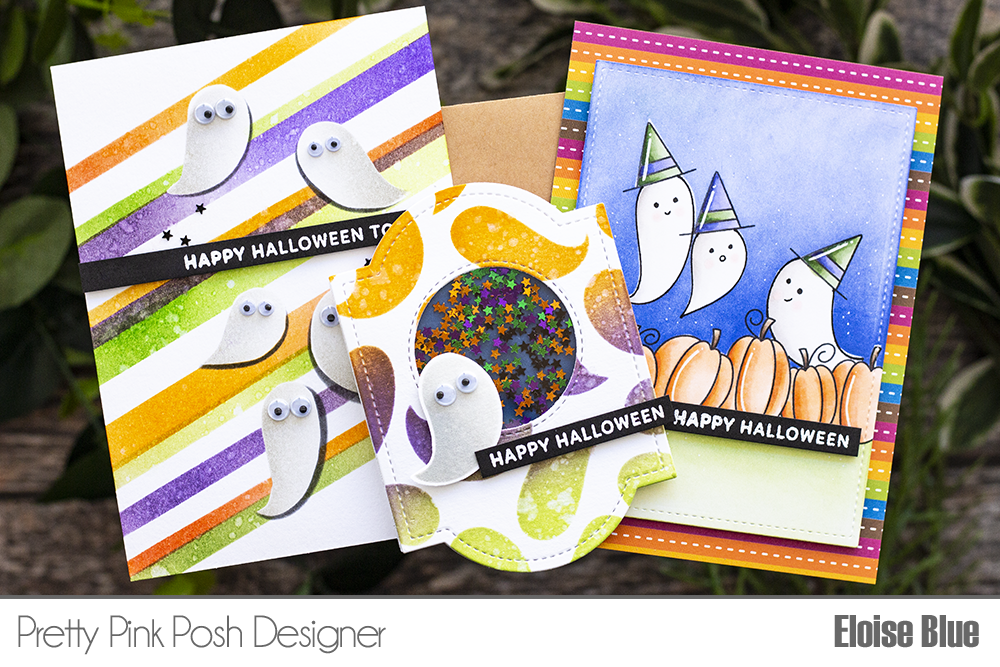
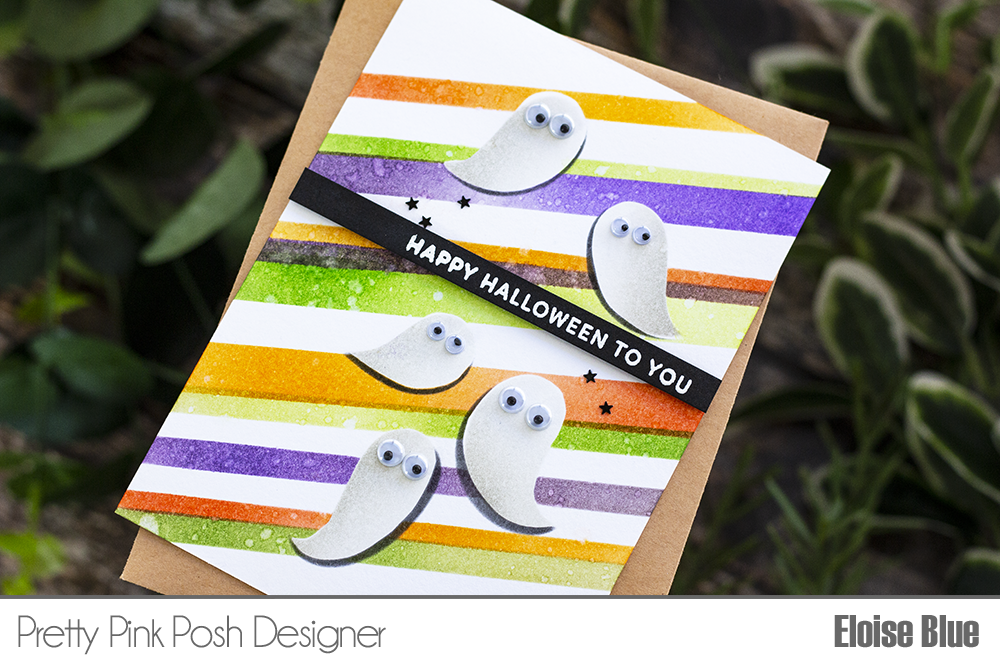
To start off my first card, I took a piece of watercolour cardstock and masked off individual “ghosts” from the Brush Strokes Stencil to ink blend onto the background. I used Pumice Stone Distress Ink and a little white pigment ink to blend them. Once they were all done, I made masks for them all using masking paper and adhered them over the top. I then used Washi Tape and the Wide Stripes Stencil to ink blend stripes over the background diagonally. I flicked on some water and dried it off with a heat tool.
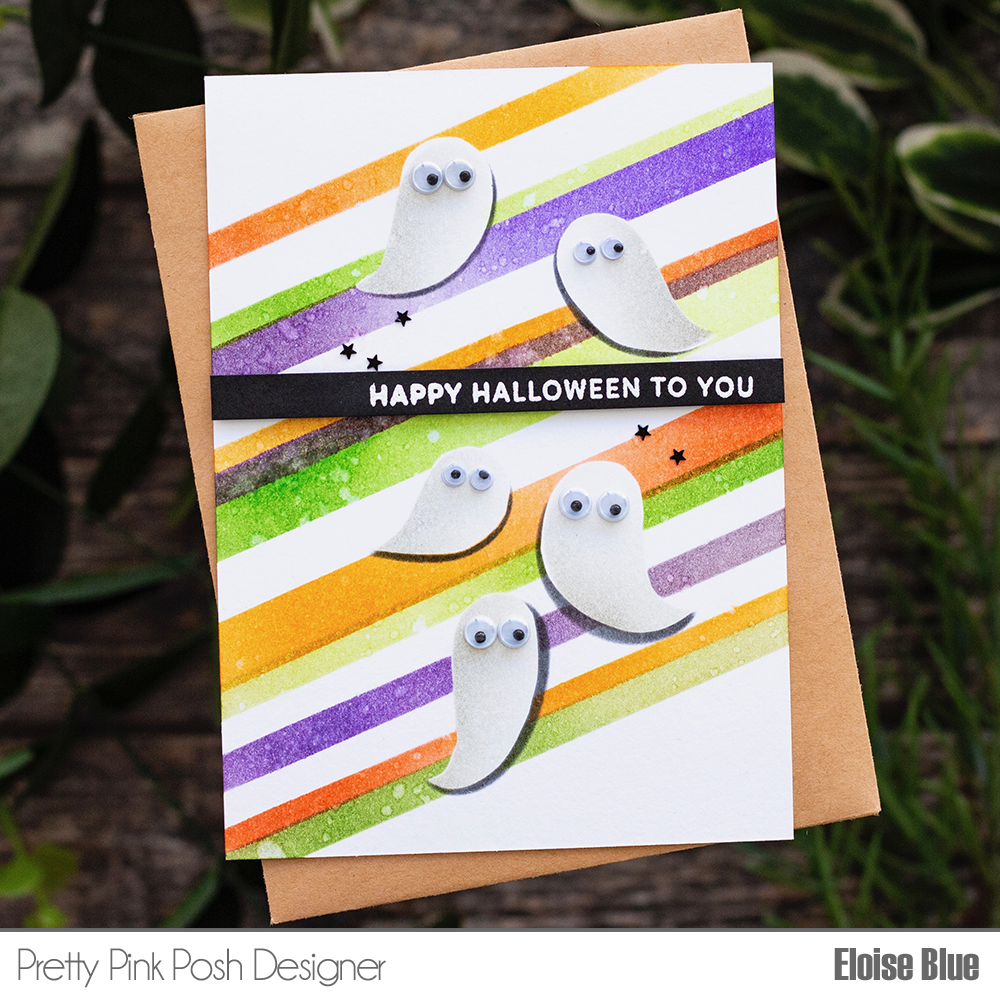
Distress Inks Used: Spiced Marmalade/ Carved Pumpkin / Dusty Concord/ Wilted Violet / Twisted Citron/ Mowed Lawn
I decided that the ghosts blended into the background too much, so I re-applied the masks and laid over the stencil and used some Black Soot Distress Ink to create a drop shadow on the each of them. Lastly, I adhered Silly Eyes to each of them using some glossy accents and white heat embossed the sentiment ‘Happy Halloween To You’ from the Boo Stamp Set onto a thin strip of black cardstock and adhered it straight across the card.
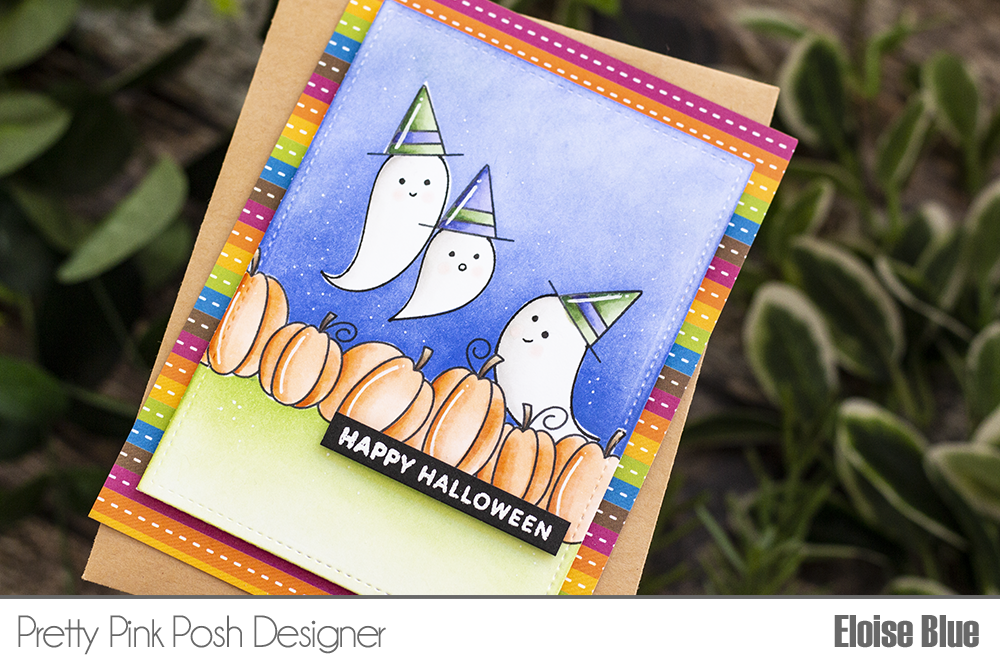
For the second card, I decided to turn the Brush Strokes Stencil into stamped images. I first took a piece of white cardstock and cut it down with the rectangle in Stitched Notes Dies. I then used a stamping tool to stamp the pumpkin border from Fall Borders Stamp Set. I traced around the heads of the “ghosts” and then used the hat stamp from the Boo Stamp Set to stamp on the top of each of them. I erased the pencil lines, took the stencil and traced around each of the ghosts with a black marker. I then coloured everything in with Copic Markers.
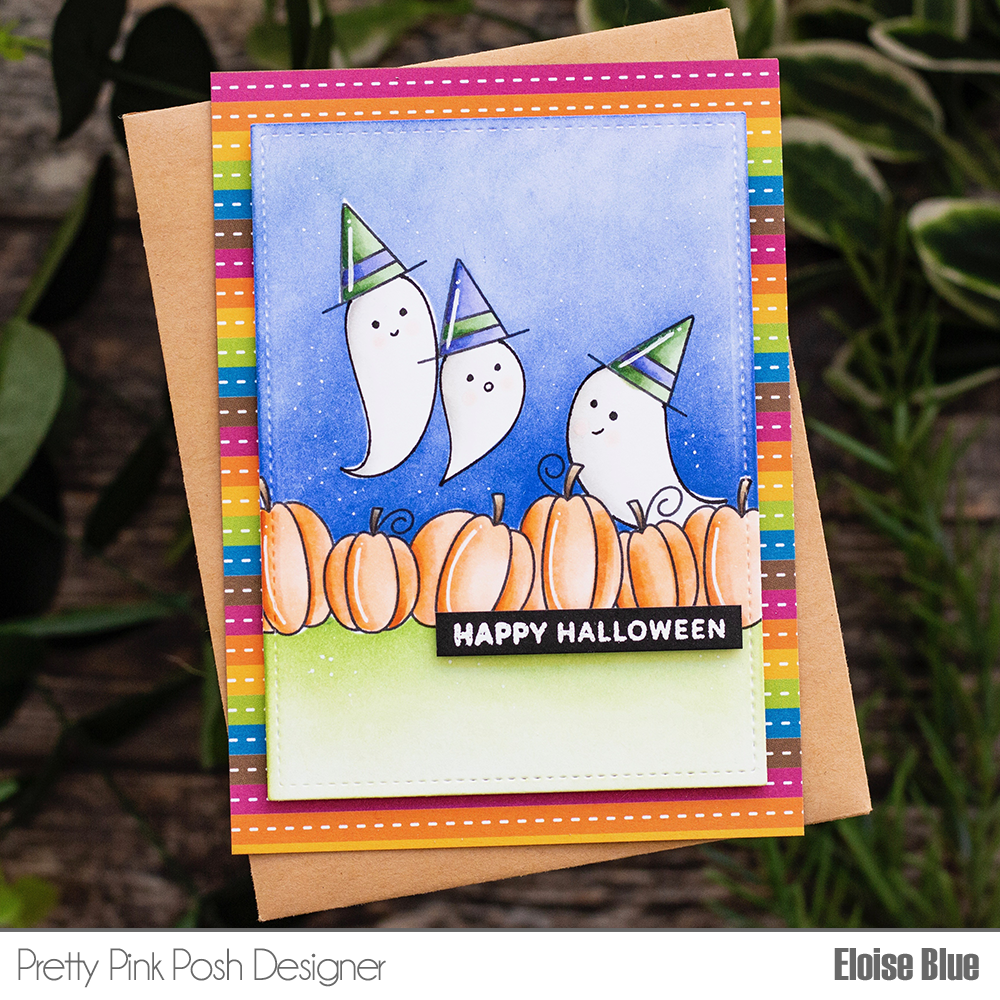
Copic Markers Used: R000, R00 / YR00, YR02, YR12, YR18 / BV01, BV02, BV04, BV08 / W00, W0, W1, W2 / YG61, YG63, YG67, G28 / E42, E43, E44, E47 / 0
After they were coloured, I drew faces on each of the ghosts using the same black marker. I then created masks for everything, adhered them on top and ink blended some Twisted Citron and Mowed Lawn onto the bottom and Blueprint Sketch for the top. I removed the masks and then white heat embossed the same ‘Happy Halloween’ sentiment from the Boo Stamp Set onto a thin strip of black cardstock. I adhered it to the card and then adhered the entire panel onto a piece of patterned paper.
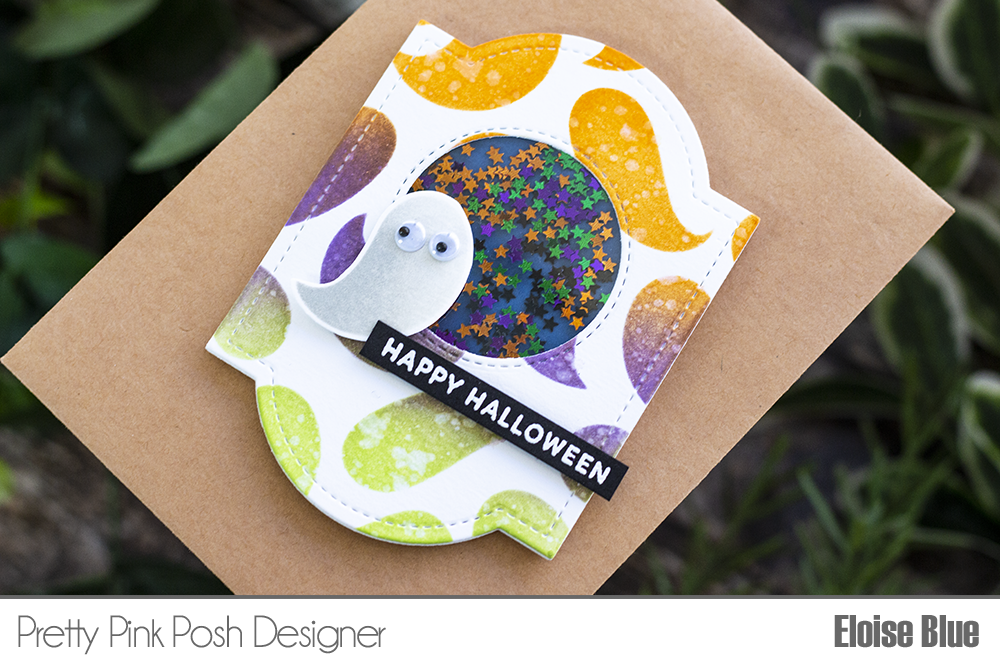
For my final card I wanted to create a mini shaker card. I started off with die cutting the Decorative Tag 2 three times, once from watercolour paper and twice from normal white cardstock. I used the Brush Strokes Stencil to ink blend some Wilted Violet, Carved Pumpkin and Twisted Citron Distress Inks over the top onto the watercolour cardstock tag. I flicked on some water and dried it off with a heat tool. I took a circle die and cut it from the centre and added acetate onto the back. I then took the one of the other white tags and adhered a piece of blue cardstock onto it. I added foam tape around the entire perimeter of the piece and added the star confetti’s inside. I then adhered my ink blended tag on top.
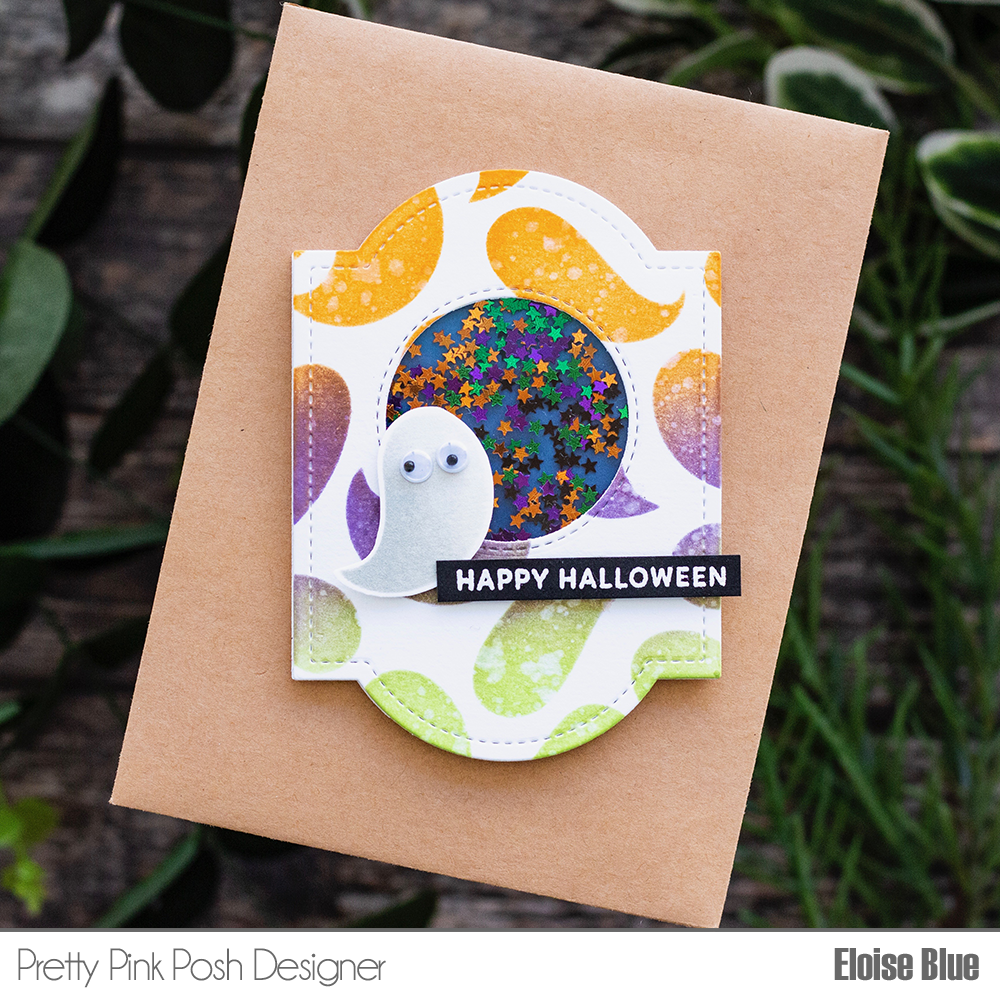
I then ink blended one of the “ghosts” from the Brush Strokes Stencil onto some more cardstock using Pumice Stone and white pigment ink, cut around it with scissors and adhered Silly Eyes on top. I then adhered it onto the front of my tag. I white heat embossed the same sentiment from the Boo Stamp Set onto a strip of black cardstock and adhered it into place. I then adhered the last tag I cut onto the back using a little bit of tape at the top and that finished off my third card.
First Card – Brush Strokes Stencil / Wide Stripes Stencil / Boo Stamp Set/ Fall Confetti Bundle / Silly Eyes
Second Card – Brush Strokes Stencil / Stitched Notes Dies /
Fall Borders Stamp set / Boo Stamp Set
Third Card – Brush Strokes Stencil / Decorative Tag 2 Dies / Boo Stamp Set / Fall Confetti Bundle
I hope you enjoyed my cards today using the Brush Strokes Stencil and you got inspired. Thanks for stopping by today and I’ll see you next time.
2019 Mega Sponsor Fall Blog Hop Begins Today!

Hello, Gemma here today and we are excited to be part of an exciting event. We have partnered with 13 other stamp and paper craft companies to do a special blog hop and will be giving away 15 prizes to 15 lucky winners!
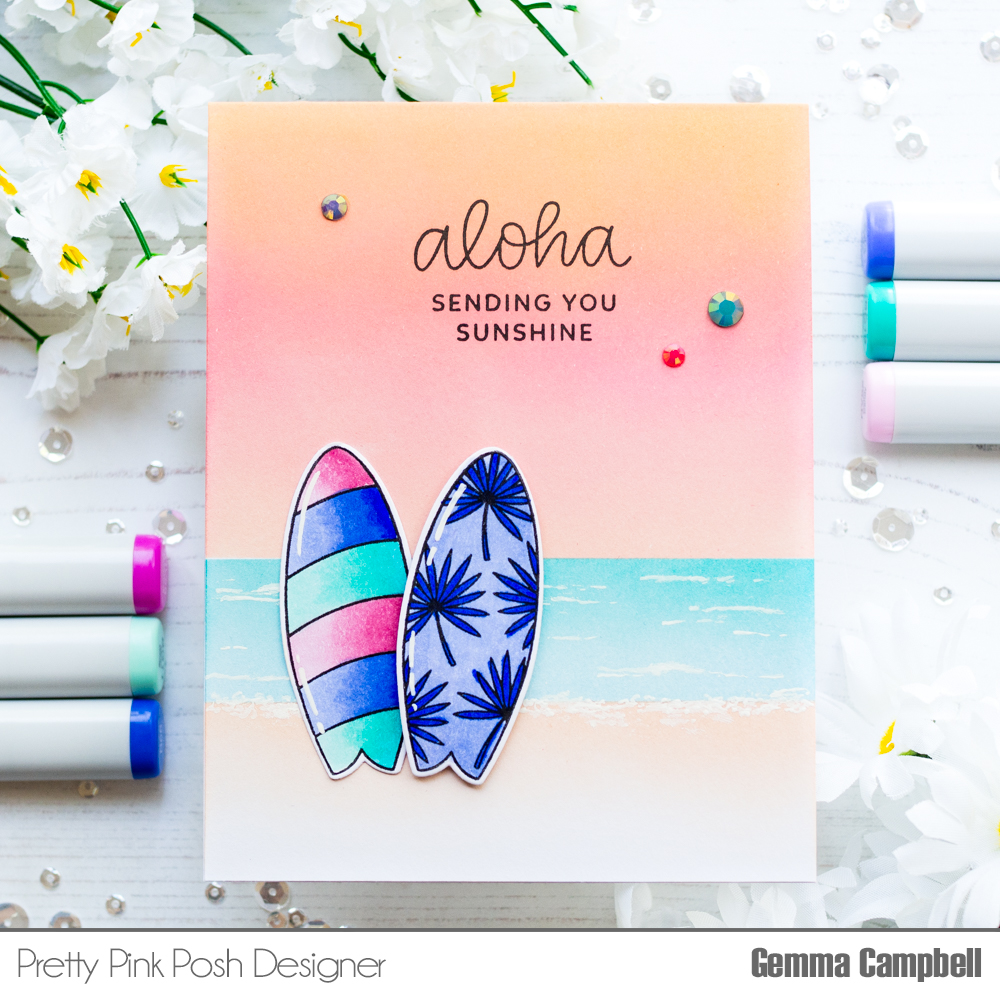
Today’s card is using the fabulous Summer Surfboards set. This card just makes me want to be by the seaside on a summers day. I began by adding some colour to my card base with distress oxide inks. I masked off areas of the card to create sky, sea and sand. Here are the colours I used:
Sky: tattered rose, picked raspberry and dried marigold
Sea: tumbled glass and peacock feathers
Sand: tattered rose
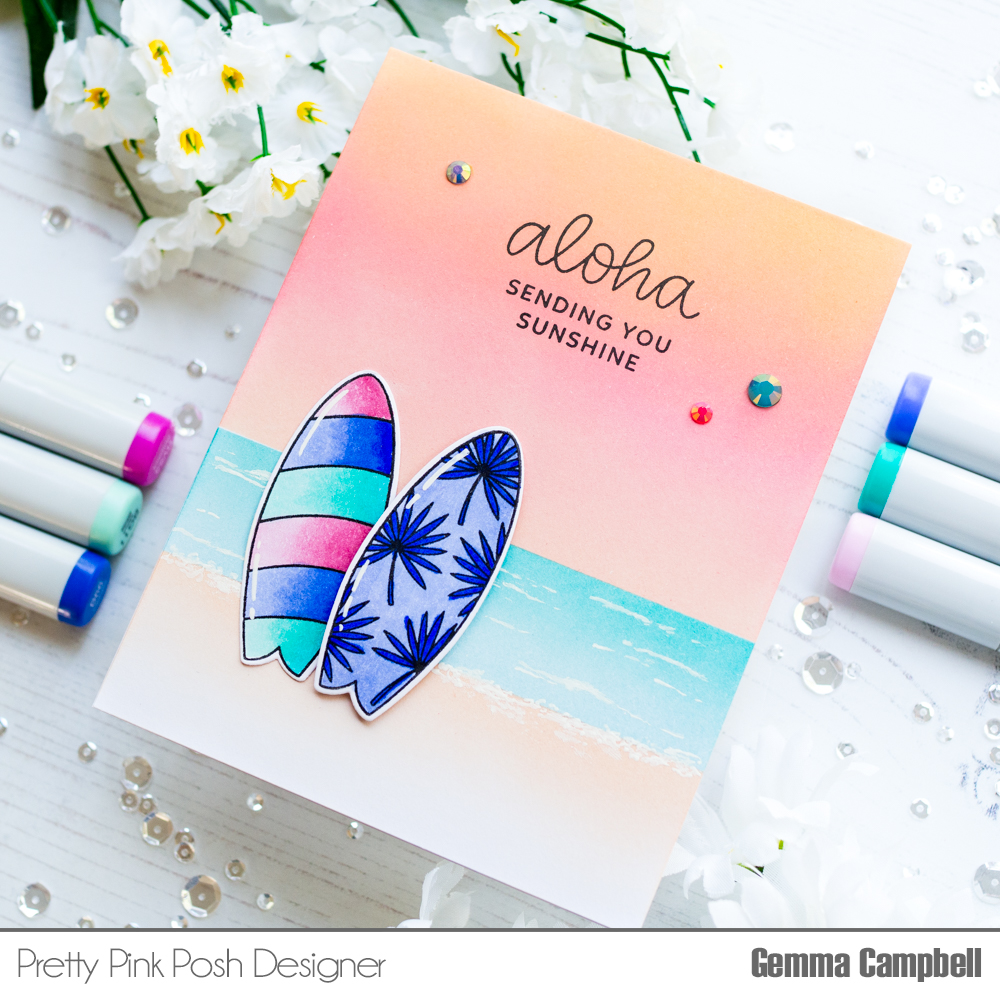
By using a light hand with the tattered rose distress oxide ink, it adds a lovely warm glow to the sand, reflecting the colour in the sky. For the sea, I added some white gel pen details for surf and waves, smudging with my fingers to soften.
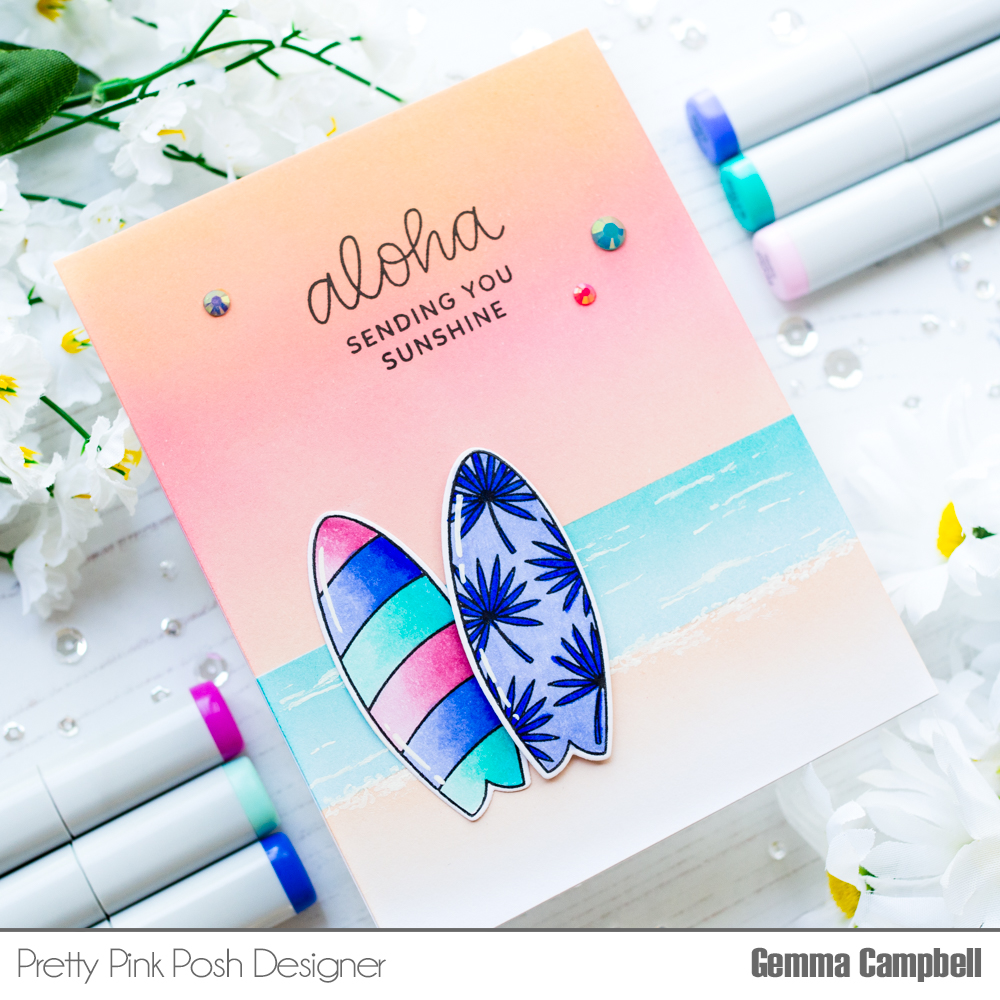
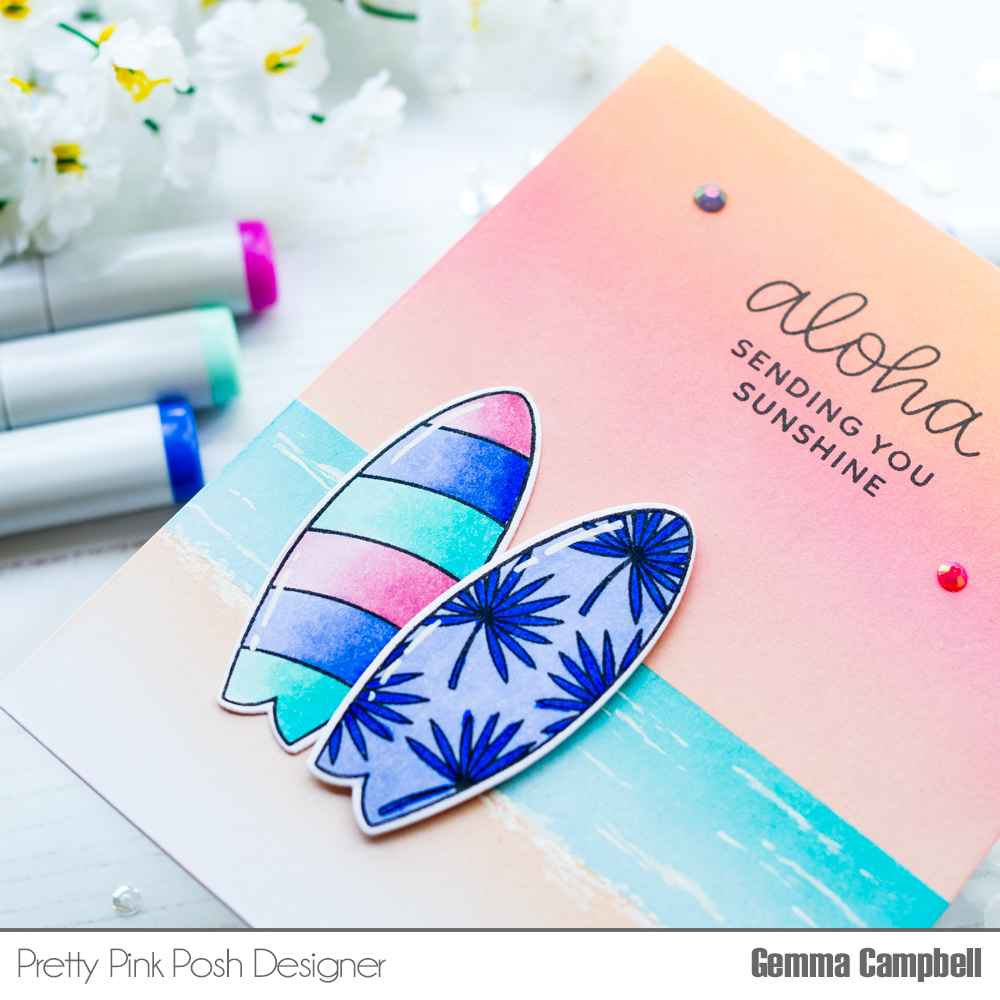
Next, I coloured two of the Summer Surfboards with copic markers, then die cut them with the coordinating dies. I used foam tape to adhere them to my card base,
The sentiment is from the Tropical Birds stamp set, and I added some watermelon, cornflower, and caribbean blue jewels around it to finish.
1) Follow this blog and each participating sponsor in the hop
2) Comment at each blog stop
- DeNami Design
- Neat and Tangled
- Flora and Fauna
- Technique Tuesday
- Art Impressions
- Pink and Main
- Pretty Pink Posh <—–you are here
- Reverse Confetti
- Impress Cards and Crafts
- Taylored Expressions
- Winnie and Walter
Thanks so much for stopping by and joining us today. I hope you were inspired!
Tutorial: Toucan Aloha Shaker
Rina here with a card using the fun Aloha Shaker. I absolutely enjoy using these shaker dies from Pretty Pink Posh, they make shaker card making a breeze!
Watch the video above I Watch the video in HD on YouTube
Please watch my video on a step by step tutorial on how I made this card. I used a different method this time. I made a standalone shaker and then adhered it to my card base. It makes a really big impact because of its dimension.
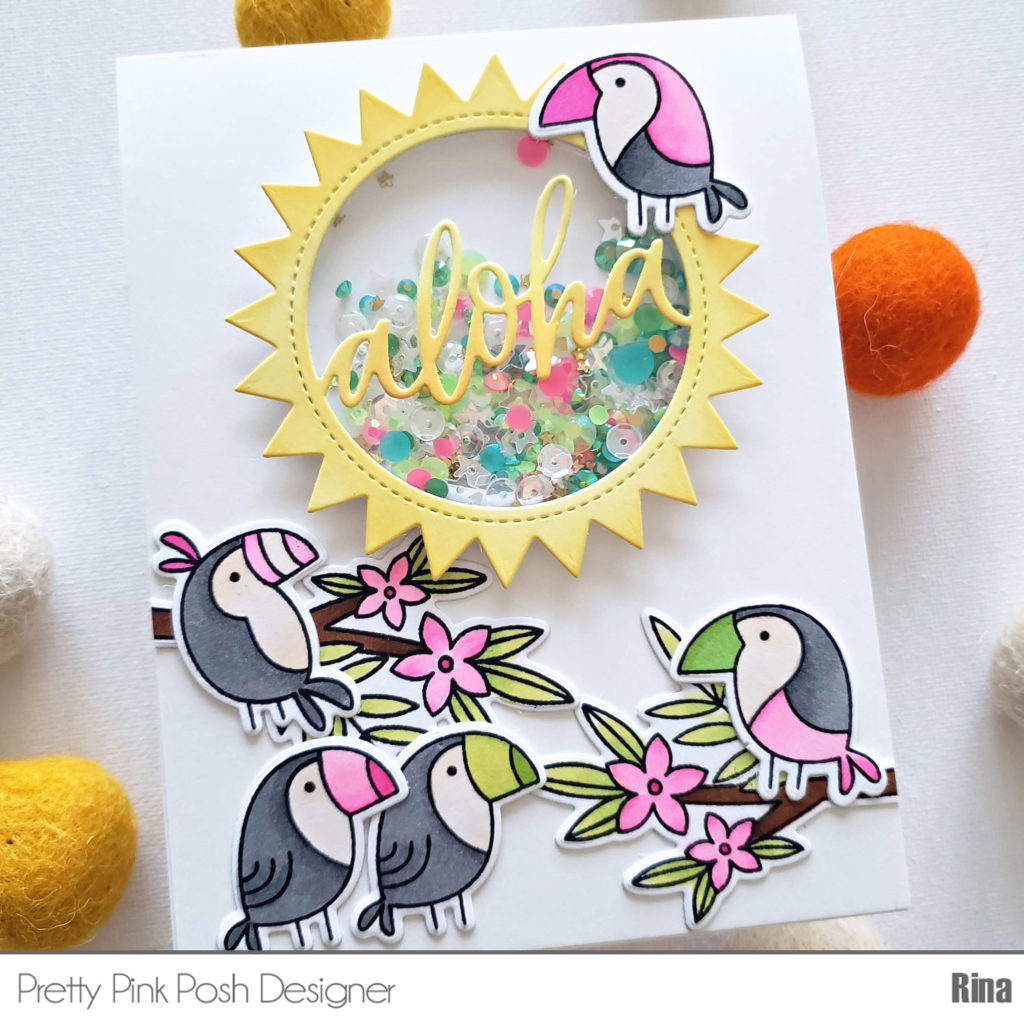
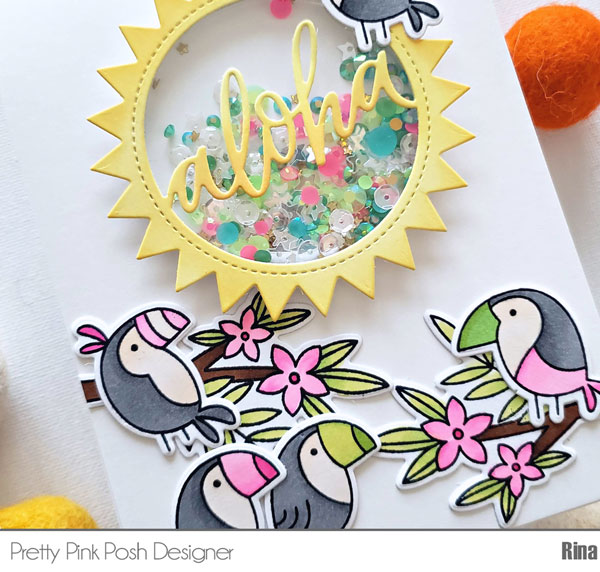
I used the Tropical Toucans stamp set and its one of my favorite stamps sets from this release. I love the small set that makes a big impact with the variety of birds and the awesome floral branch.
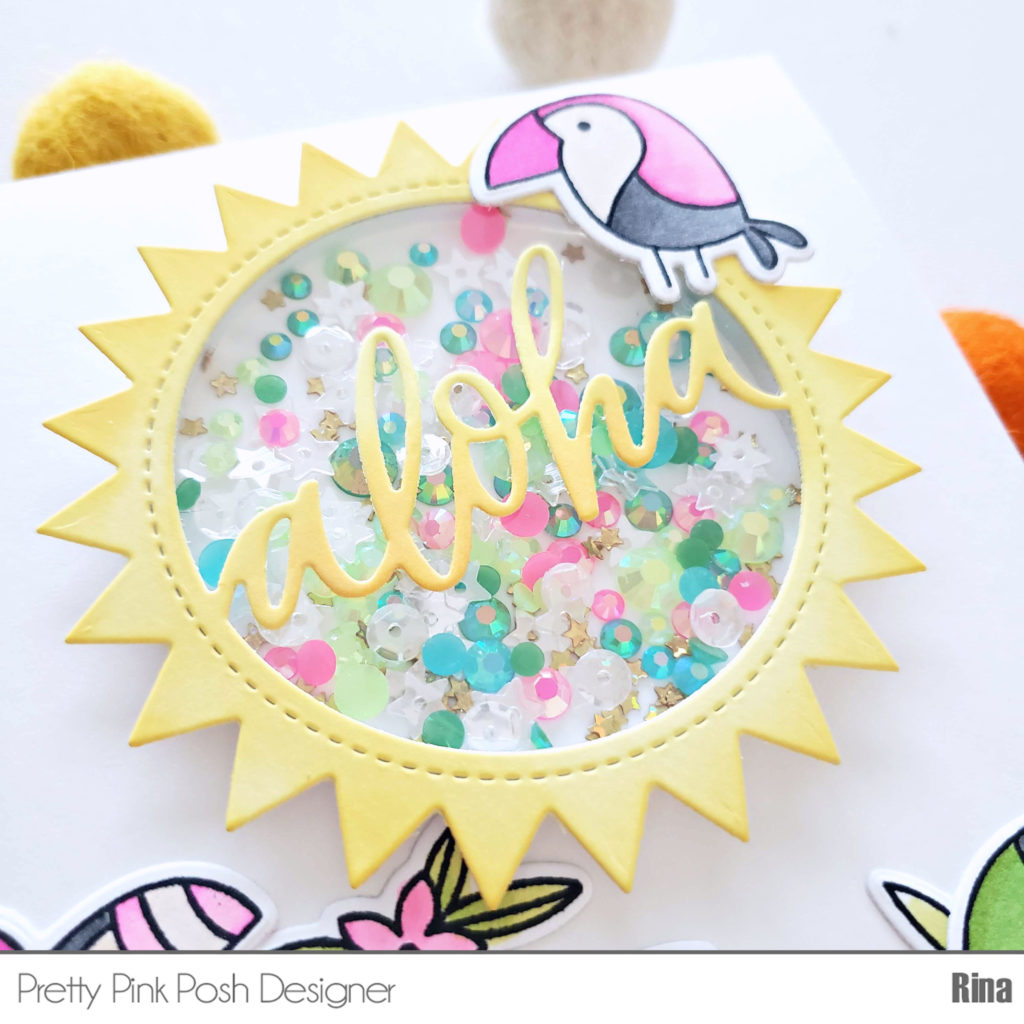
For the shaker bits, I’ve used the new Luau Jewels, it is a gorgeous mix of blues, greens and fuchsias. This color combination is the perfect combination for a fun tropical card. I also added gold mini stars and the sparkling clear stars to top off the shaker mix.
I hope you try out this fun shaker card and enjoy your summer so far!
Rina
3 Cards Using Stencil Techniques
Hello friends, Eloise here and today I’m continuing on with the Stencils Video that was posted a little while ago. I shared 12 ways to use the newly released stencils using different mediums and techniques and in today’s video I’m using four of my favourite backgrounds that I created to make three cards.
Watch the video above I Watch the video in HD on YouTube
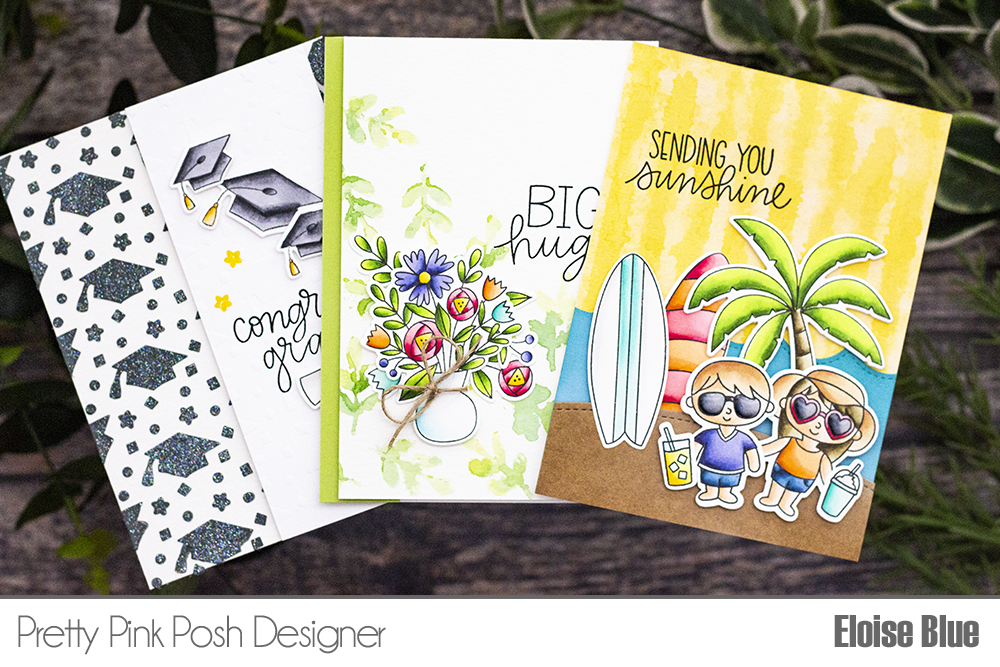
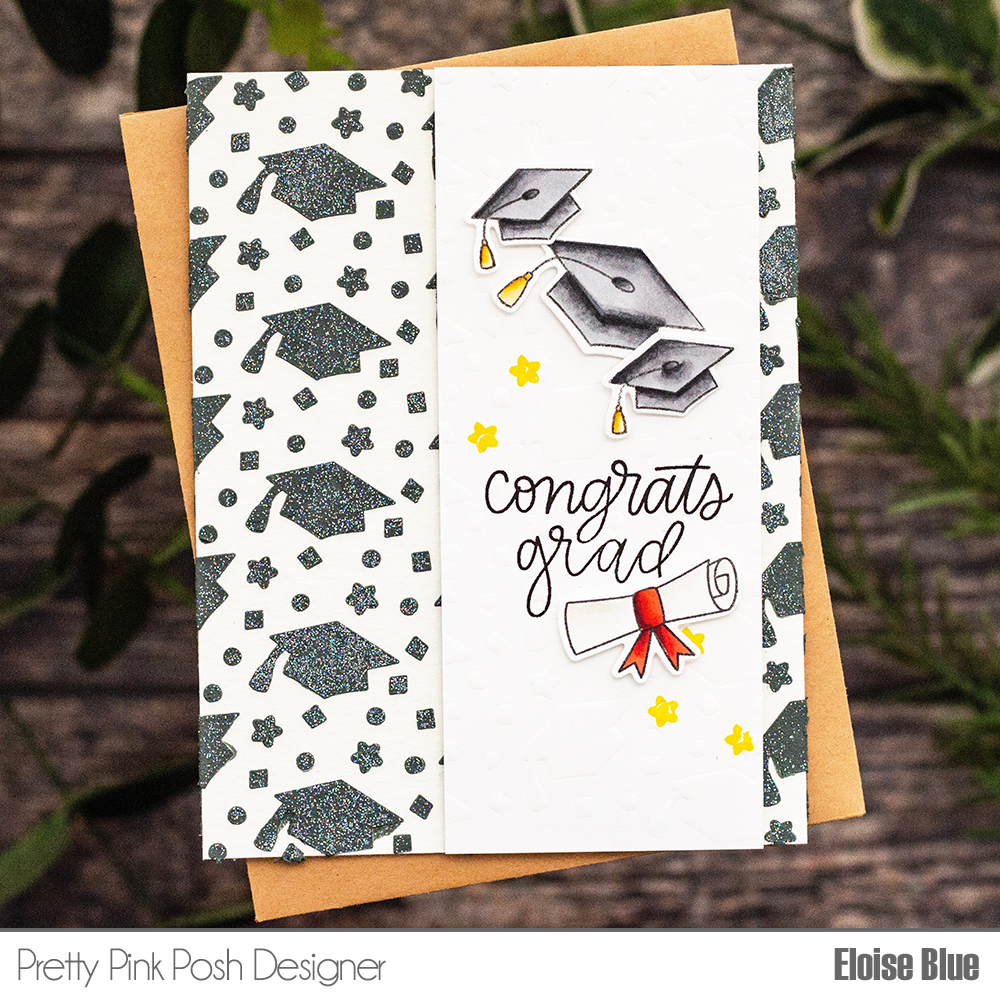
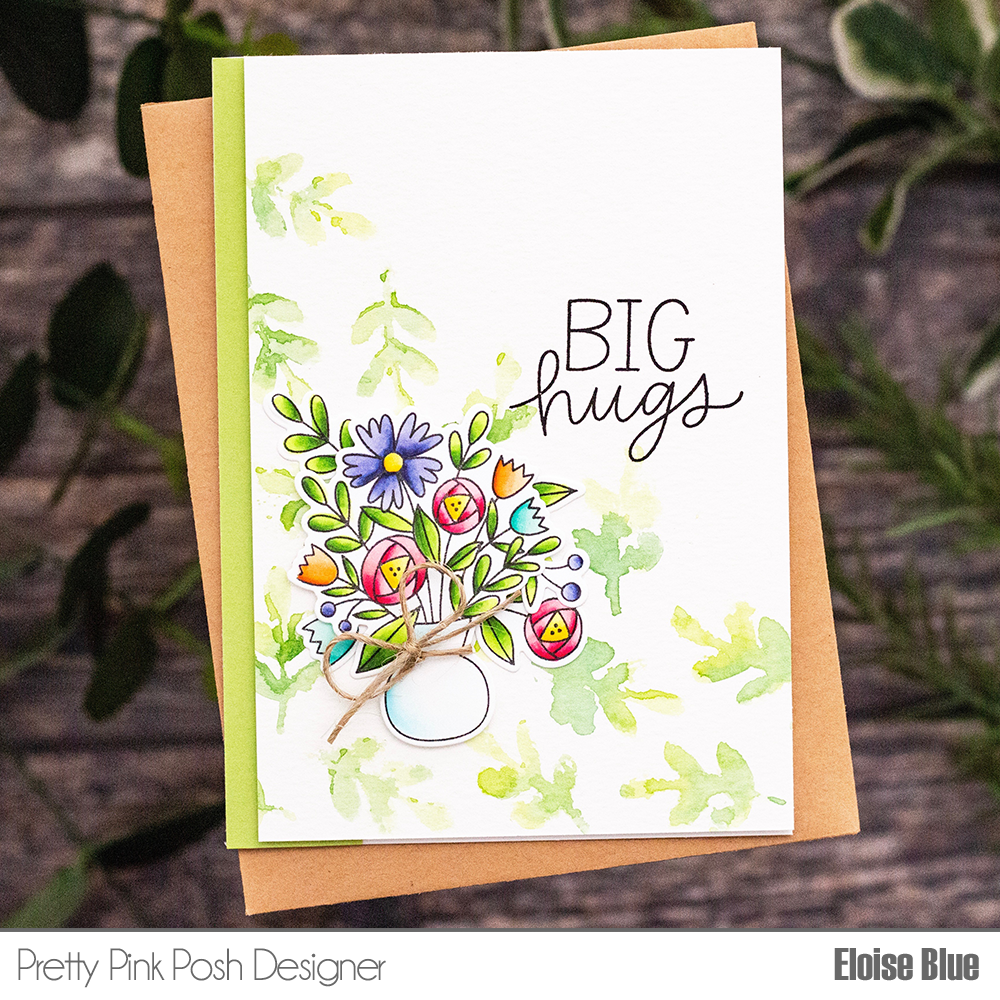
I started off with picking out the four backgrounds. I used the embossing paste and dry embossing backgrounds together using the Graduation Stencil, the water-coloured leaves background using the Leaves Stencil and also the bleached background using the Wide Stripes Stencil. I used various stamps from different releases to help decorate each card. Once I knew what stamp sets I was using, I stamped out my images, coloured them in with Copic Markers and cut them all out.
Copic Markers Used: Y11, Y13, Y15, Y19 / R14, R24, R27, R89 / N2, N4, N6, N8 / 0 / W00, W0, W1 / BV01, BV02, BV04, BV08 / YG01, YG23, YG17, YG67 / RV21, RV23, RV25, RV29 / B000, B00, B01 / YR00, YR02, YR12, YR18 / BG10, BG11, BG34, BG45 / E30, E31, E33, E34 / E000, E00, E21, E02 / B93, B95, B97, B99 / E81, E84, E87, E89
For my first card I used the embossing paste and dry embossed background. I also used the Congrats Grad Stamp Set for the images and sentiment. I stamped them out, coloured them in and then cut them out. I then cut down the dry embossed background to a thinner strip and adhered it onto my embossing paste background using foam tape. I then stamped the ‘Congrats Grad’ sentiment into the centre and stamped a few yellow stars around it as well. I added foam tape onto the back of the hats and scroll and adhered them into place. I lastly adhered the panel onto a white card base.
For my second card, I used the water-coloured leaves background. I used the Mother’s Day Stamp Set stamped and coloured in a few of the images, I then cut them out. I added foam tape onto the backs and adhered them into place on my card. I then used the Elephant Friends Stamp Set and stamped the ‘Big Hugs’ sentiment into place. I tied a small hemp cord bow onto the vase to give a little extra texture. I added a green strip of cardstock onto the left-hand side and adhered the entire panel onto a card base.
For my last card I used the bleached yellow sunray background. I used some images from Tropical Birds, Summer Friends and Summer Surfboards stamp sets, I stamped out some images and coloured them in. Once they were coloured, I cut them out. For my background as well as the bleached background, I used the Stacked Edges 1 Die and used the scallop one to cut a wave border on a blue piece of cardstock.
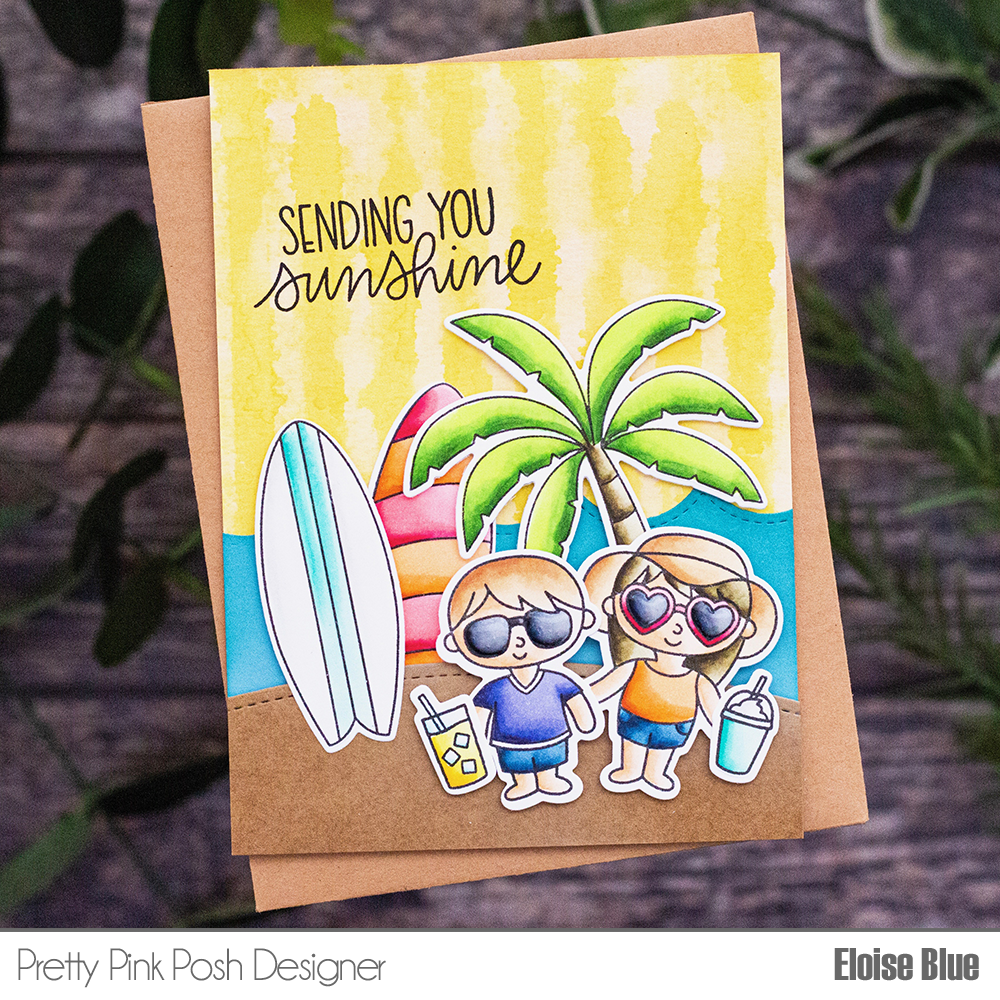
I then used the Stitched Borders 1 Die and used the curved one to cut from some brown cardstock. I added adhesive onto the backs of both of the pieces and adhered them down onto the sunray background. I then added foam tape onto the backs of the images and adhered them down into place. For my sentiment I used the ‘Sending You Sunshine’ from Summer Friends and stamped it in black ink on the top of my card.
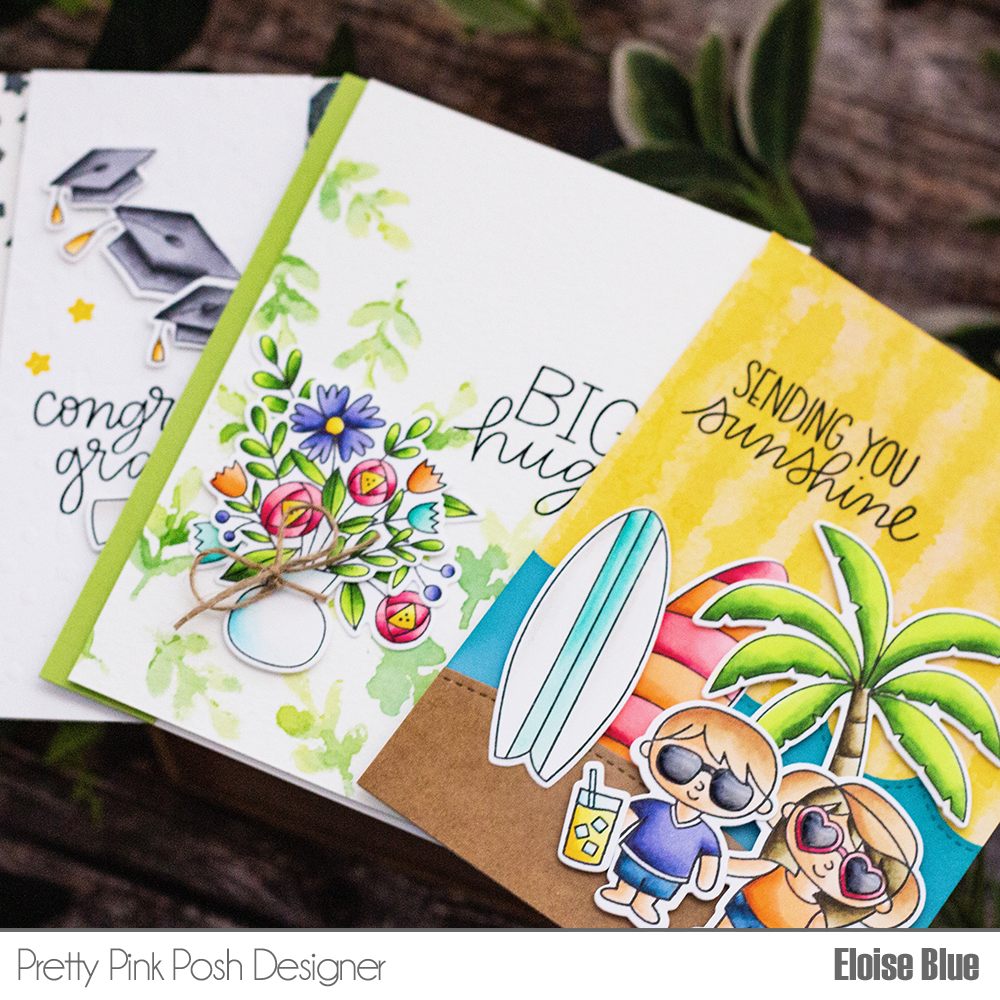
That finished up all three of my cards today, using four of the stenciled backgrounds I made in a previous video. Thank you so much for stopping by today and I’ll catch you all next time.
Tutorial: Creating A Tropical Background
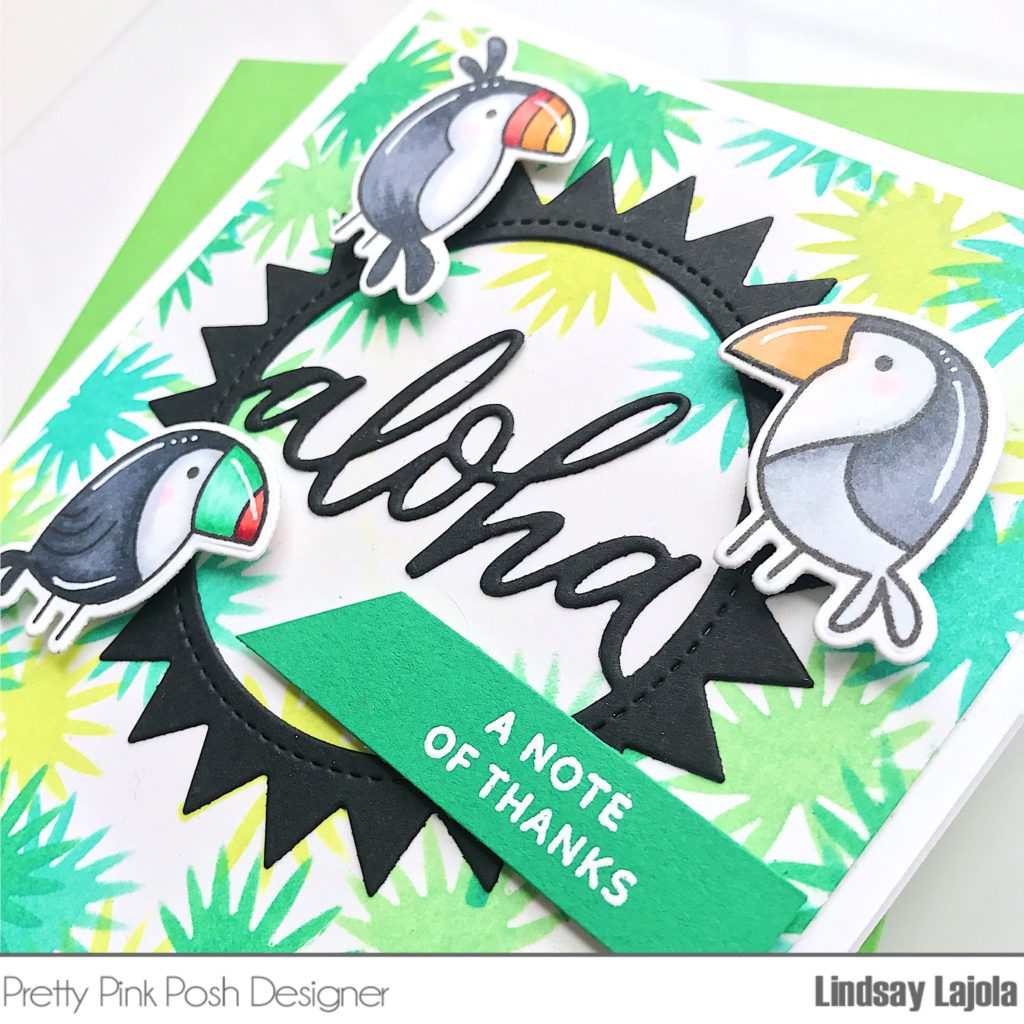
Hello! Lindsay here on the Pretty Pink Posh blog today. I’m going to be sharing a card using the Tropical Toucans Stamp Set, Tropical Toucans Coordinating Dies, Aloha Shaker Die, and Tropical Leaves Stencil.
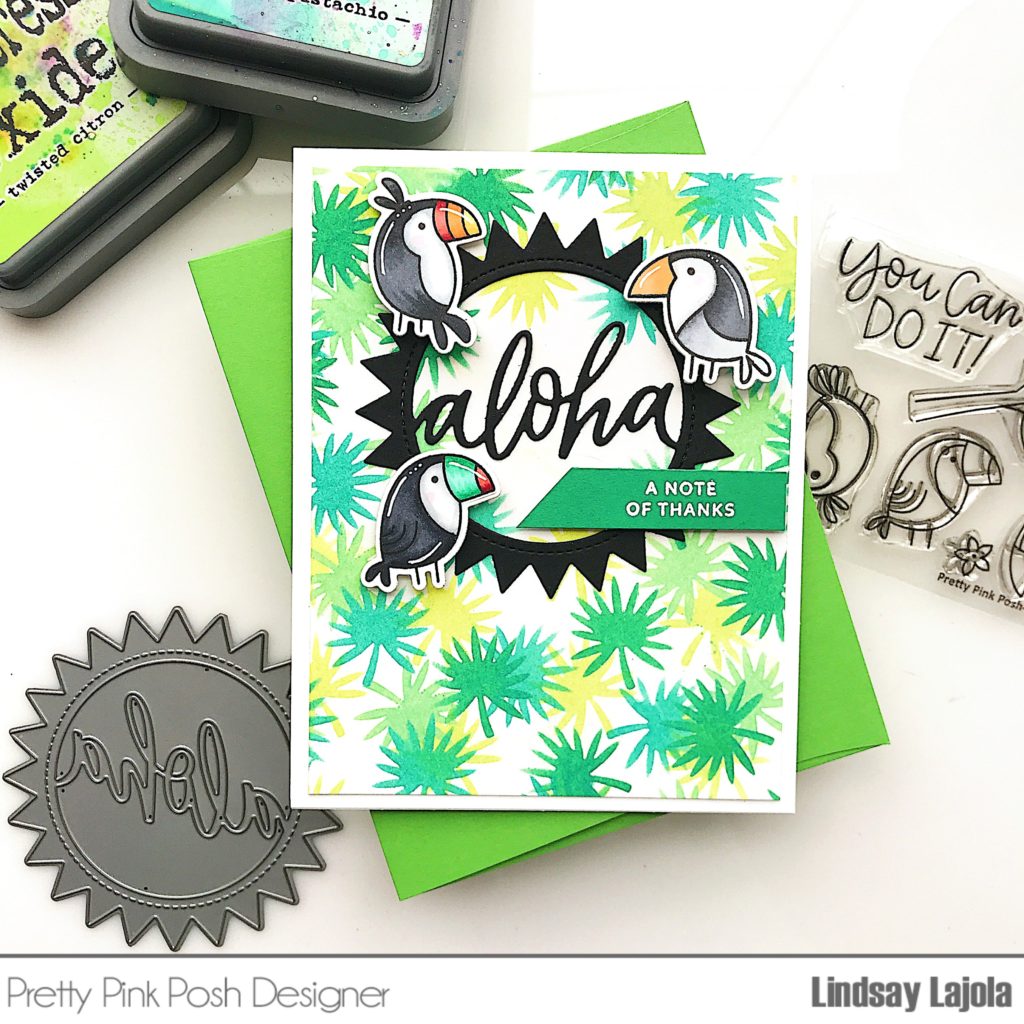
To begin, I cut a piece of smooth cardstock to 4” by 5 ½” to fit into the Gina K Wreath Builder 4” template. I watched a video by Jennifer McGuire on how to use the wreath builder template with stencils and I knew ALL of the PPP stencils would be so great for the technique! Check out her video here for even more details and amazing examples.
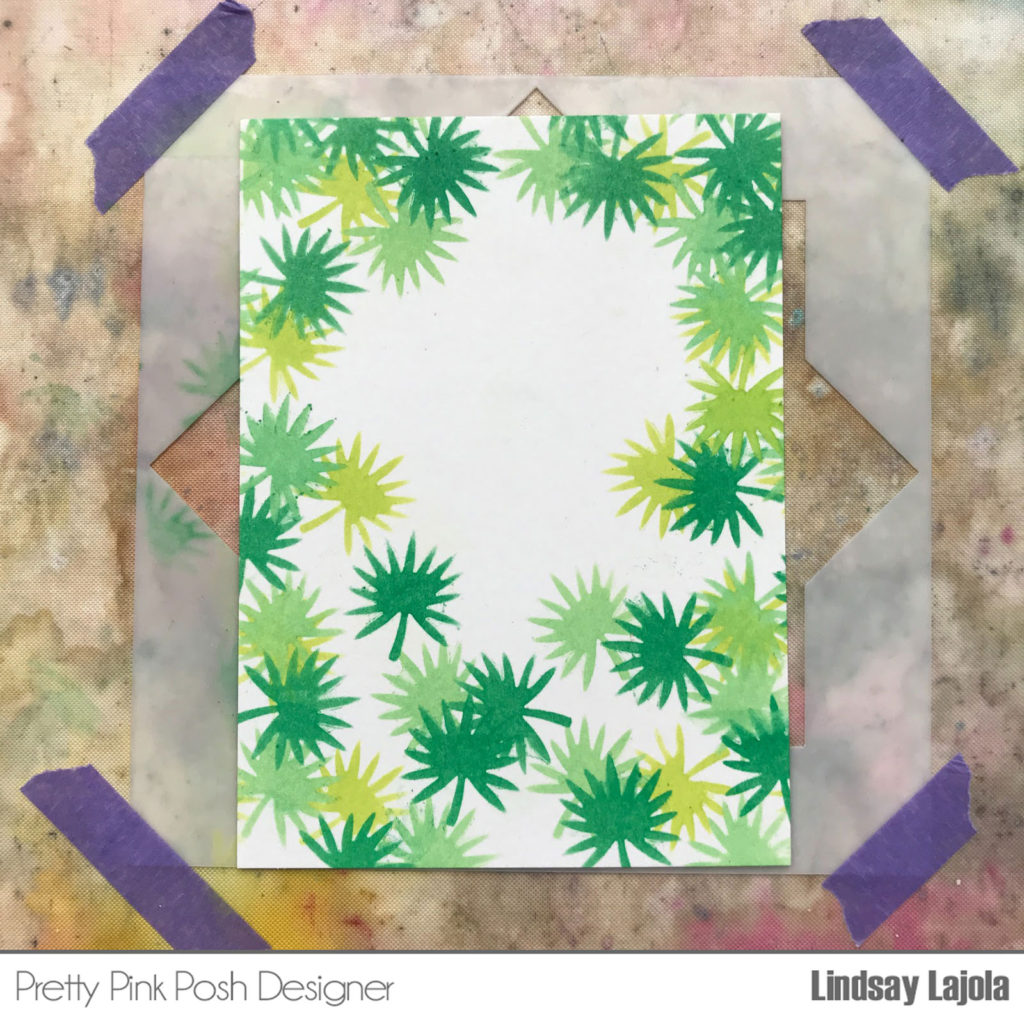
To set up the wreath builder and stencil, I taped down the wreath builder onto my craft mat. I added the stencil off to the side, taping the top of the stencil down to create a hinge in order to be able to move the cardstock around freely in between rotations. I started with the top part of the cardstock lined up as pictured, that is the edge that will always stay in the stencil as you rotate around to create the pattern. I then rotated the cardstock around in the wreath builder, changing up the ink blending colors as I went between Cracked Pistachio, Lucky Clover, and Twisted Citron.
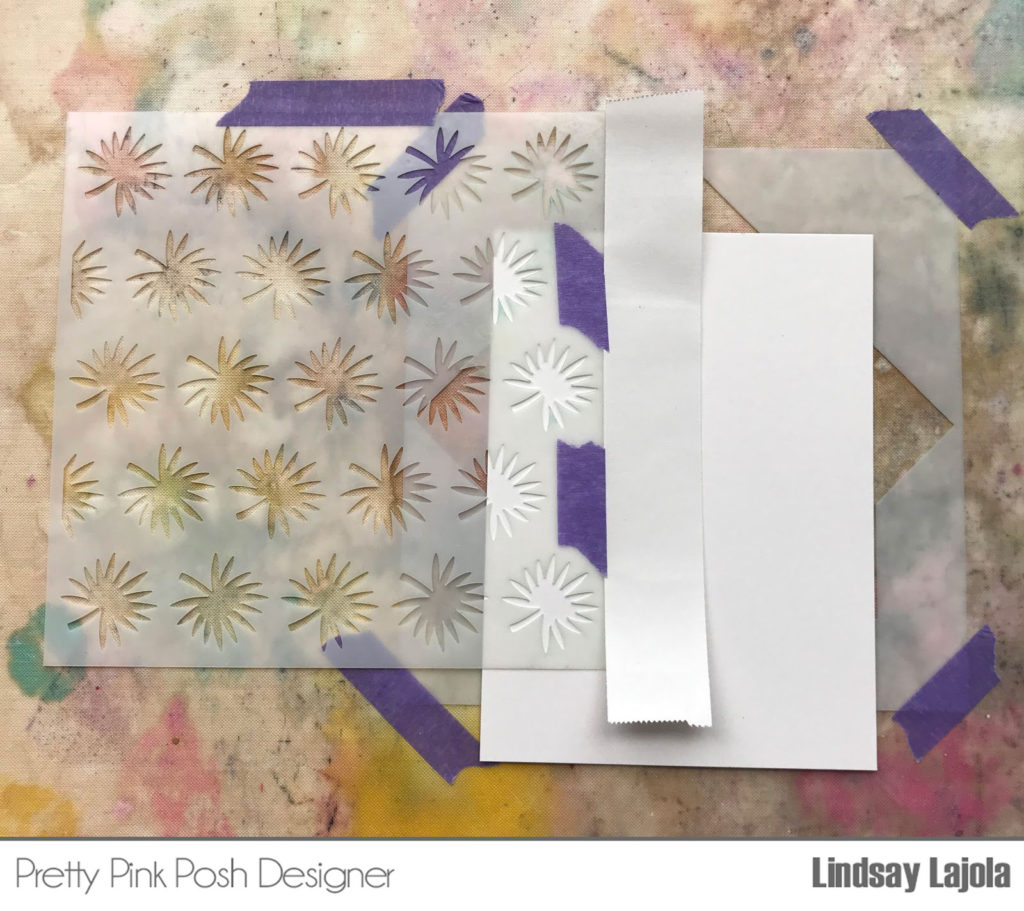
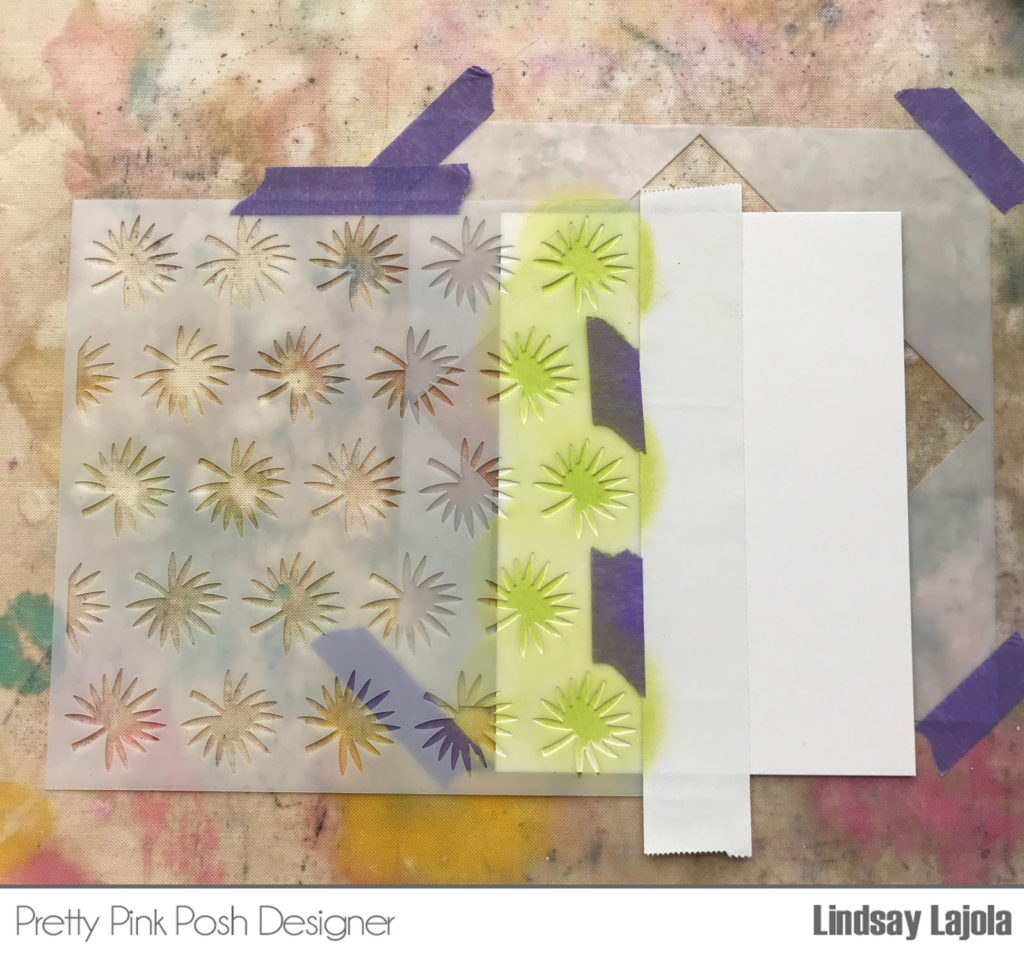
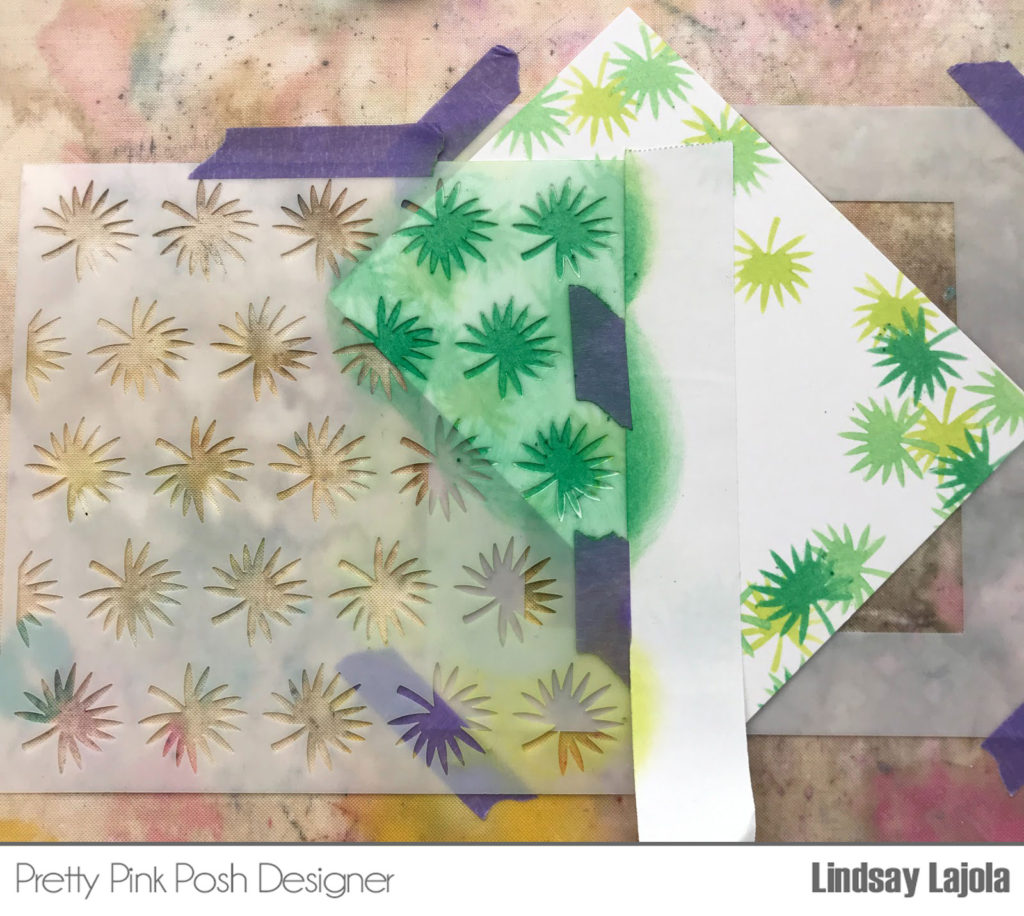
After I was done, I added in some individual leaves where I felt I needed a bit more color and ended up with this as the background.
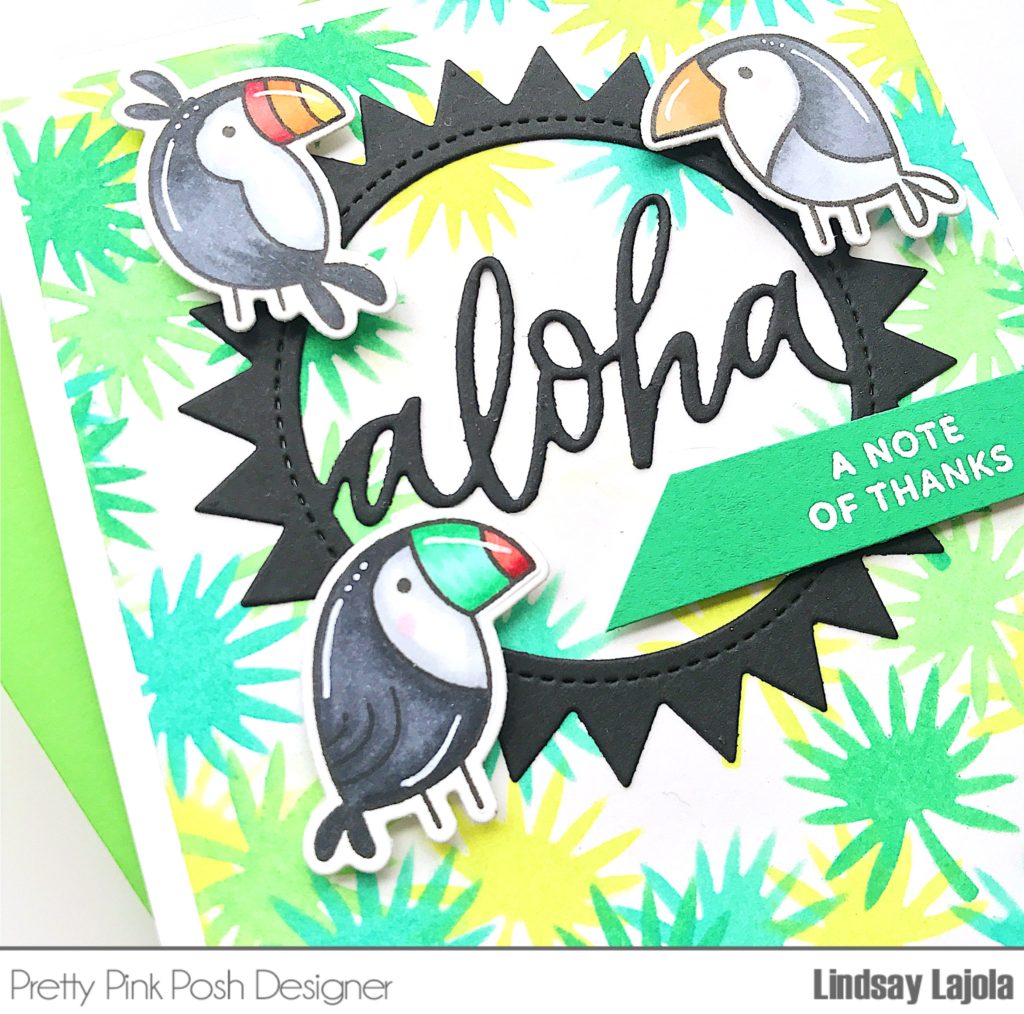
With the background complete, I started on my images from the Tropical Toucans Stamp Set and stamped them with a copic friendly ink and got to coloring with my copics. I added white details with a gel pen for a little pop.
For the sentiment I heat embossed the sentiment on matching green paper and paired it with a black die cut Aloha Shaker Die. I then arranged all of my die cuts around the white aspect of my background to finish up the card.
I hope you enjoyed this card and got some more ideas for how to use all the amazing stencils that PPP has to offer!
Lindsay
Designer Announcement + $100 Gift Certificate Giveaway
I wanted to announce the new team for this upcoming design term. I have been so blessed by amazing designers and as seasons change, sometimes people need to move on. We are saying a very fond farewell to Mayra, Nicky and Rina (though we do have a couple more videos from her that you’ll see soon).
We are welcoming two new Pretty Pink Posh designers to the team. These gals are extremely talented and have a unique style that I know you will love. Please join me in welcoming Adelle and Sharna to the Pretty Pink Posh team! We are so excited to have them joining us!


In honor of the new team, let’s have a big $100 gift certificate giveaway! Leave a comment on THIS post sharing your requests for stamps or dies you would like to see from Pretty Pink Posh in 2019/ 2020! One lucky comment left by July 7th will win a shopping spree. Congratulations to Kathleen Dumpert! You’re the lucky winner. Please email me your information and I’ll get your gift certificate sent off to you!
Thanks for joining us today. Be sure to give lots of love to the designers!
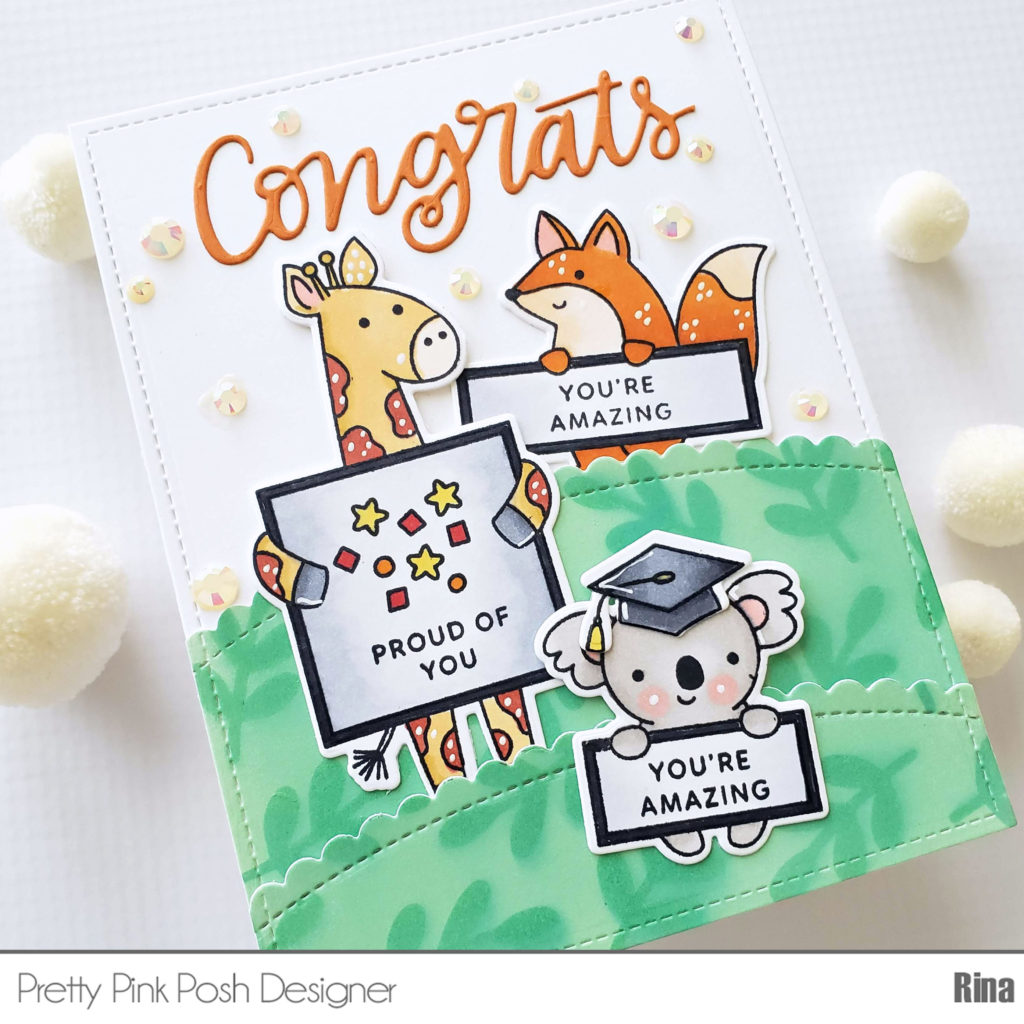
Tutorial: Animal Signs Graduation
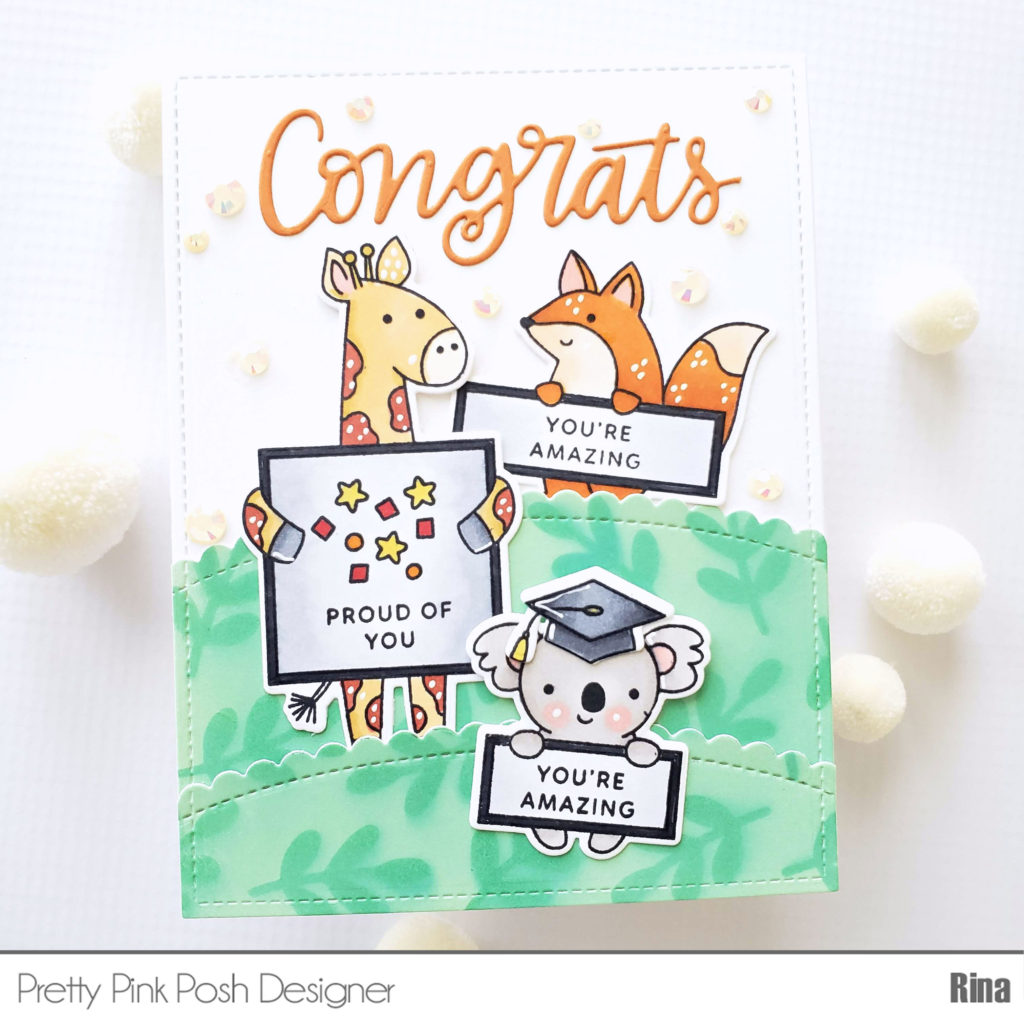
Hi everyone, Rina here with a congratulations card using the Animal Signs stamp set. I really enjoyed tailoring the signs to exactly what I wanted. Since it is graduation season, I also used the Congrats Grad stamp set to pair with the koala. The Pretty Pink Posh script dies are always a favorite of mine so I used the Congrats Script die.
Watch the video above I Watch the video in HD on YouTube
I also wanted to take this opportunity to play with the new stencils. I created a fun landscape using the Scallop Borders 2 dies and Distress Oxide ink in Cracked Pistachio and Lucky Clover. I used the Leaves Stencil to create texture on my landscape. I cannot wait to use the other stencils!
I colored my images in copic markers using the following colors:
Y13, YR24, YR04, YR27
W1, W3
E51, E50, E55
C00, C1, C3, C5, C7
R20, R27

I finished off the card with the Buttercream Jewels, which added the right amount of sparkle!
I hope you enjoyed my card, have a wonderful day! Thanks for stopping by!
Vibrant Tropical Scene
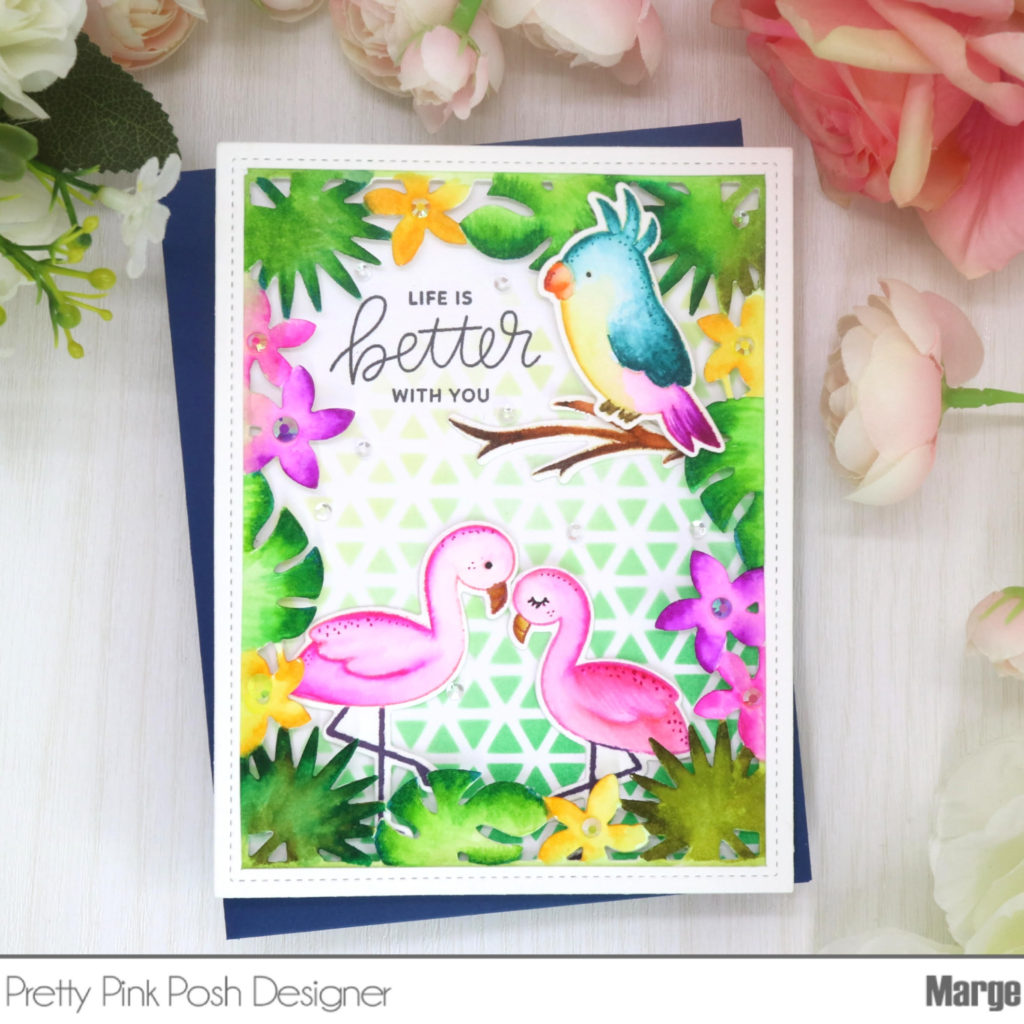
Hello, everyone! Marge here for you today and I’m so excited to share a card with you for the June Release from Pretty Pink Posh.
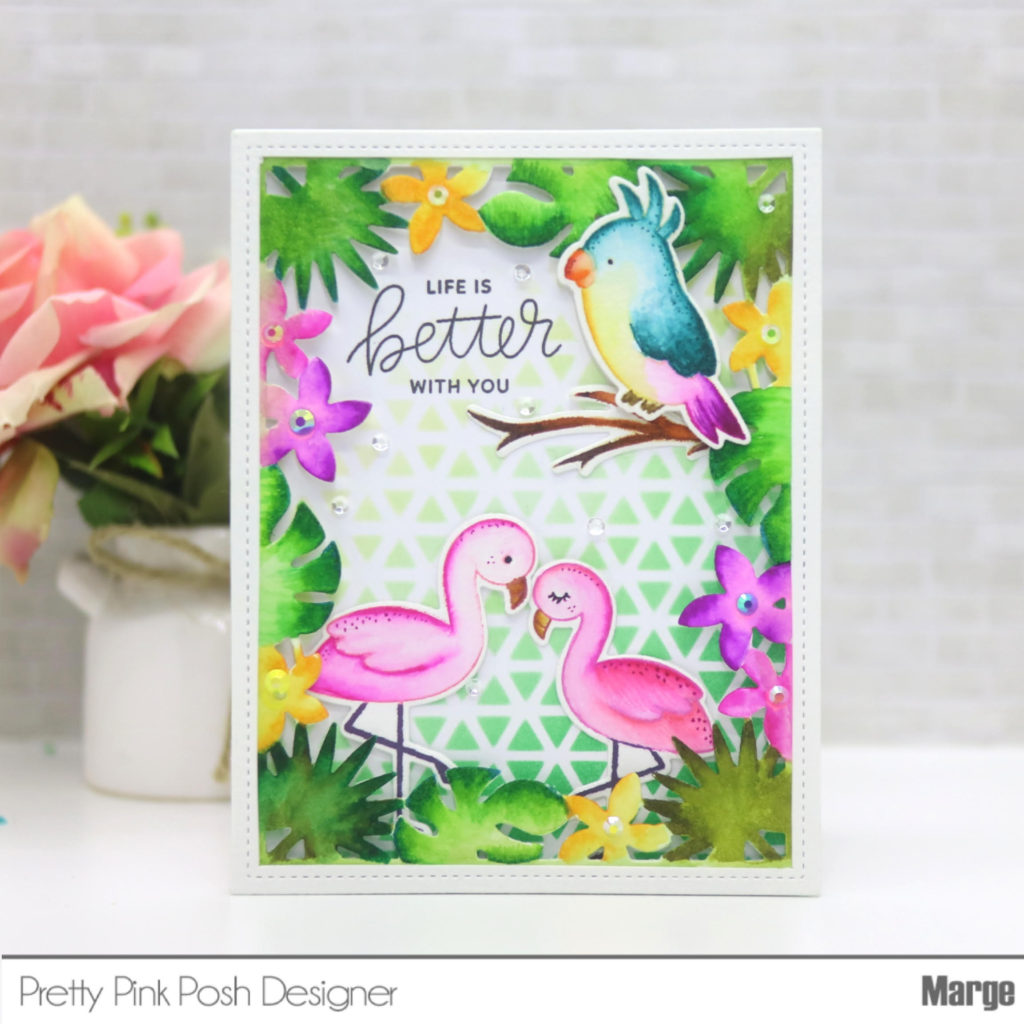
I started by die cutting Tropical Frame Die from watercolor cardstock and then I water-colored the frame in tropical moods. I cut another Tropical Frame Die, removed the inner pieces using a knife, then I adhered the rectangle to my colored frame.
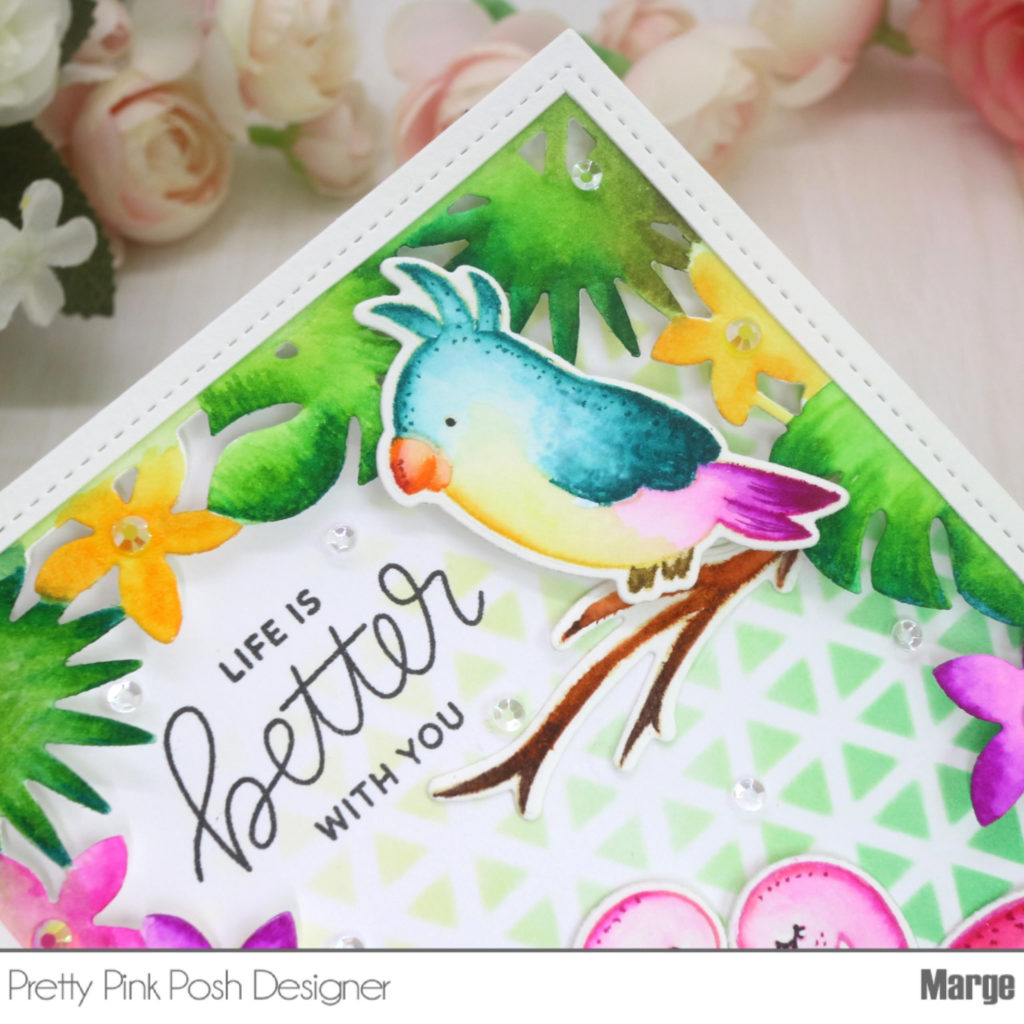
I made a green background with graduation using the brand new Triangles Stencil, then I stamped a sentiment from Encouraging Greetings Set. Next, I adhered the Tropical Frame onto the stencil background using Thin Strips Foam Adhesives and Square Foam Adhesives.
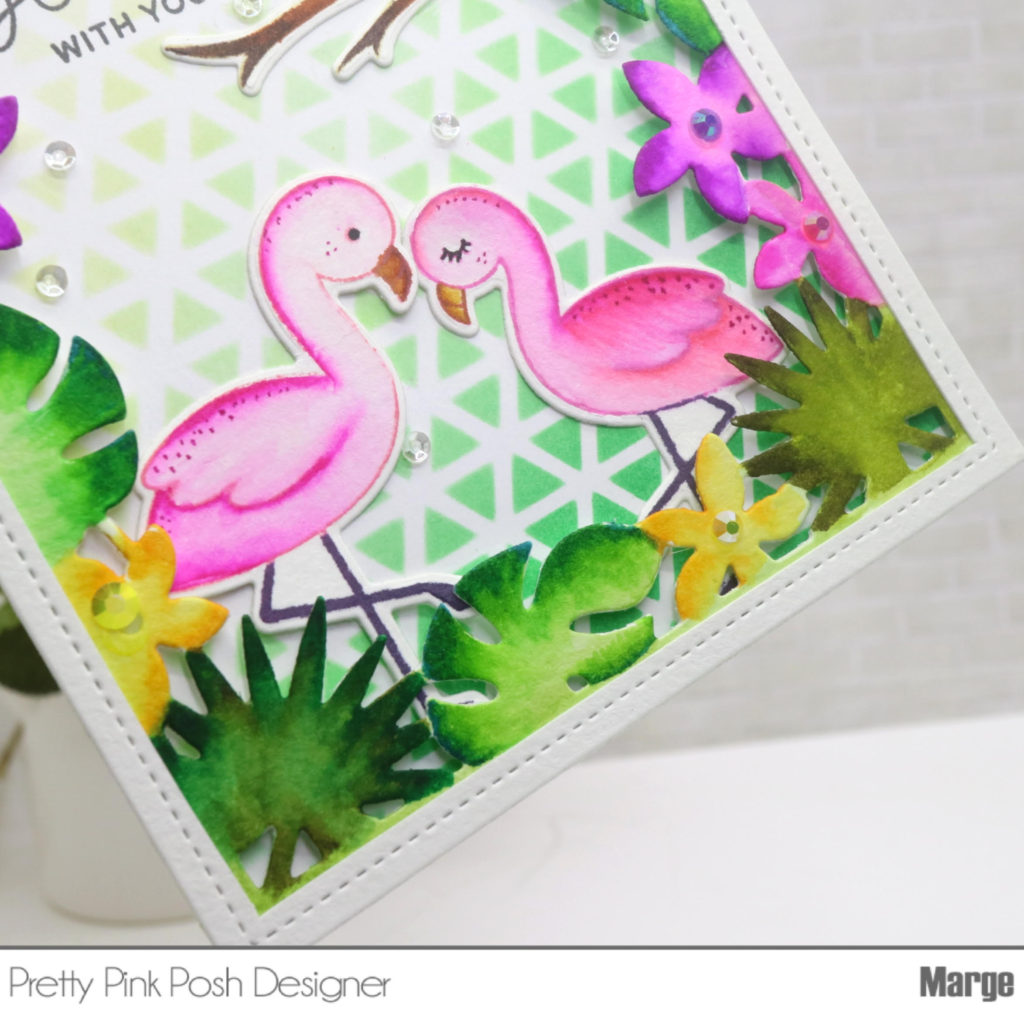
I added flamingos, a parrot from Tropical Birds Set, and a bough from Birdie Friends Set, all of which were cut with Tropical Birds Coordinating Dies and Birdie Friends Coordinating Dies. For embellishing, I adhered various colors of Jewels and 3mm Sparkling Clear Sequins.
Have you been enjoying the new release? We are expecting more shipments of products soon. Stay tuned for that!
Tropical Toucans w/ Distress Oxide Background
Aloha! Lindsay here on the Pretty Pink Posh blog today. I’m so excited to be sharing a card I made using the Tropical Toucans Stamp Set along with the coordinating dies.
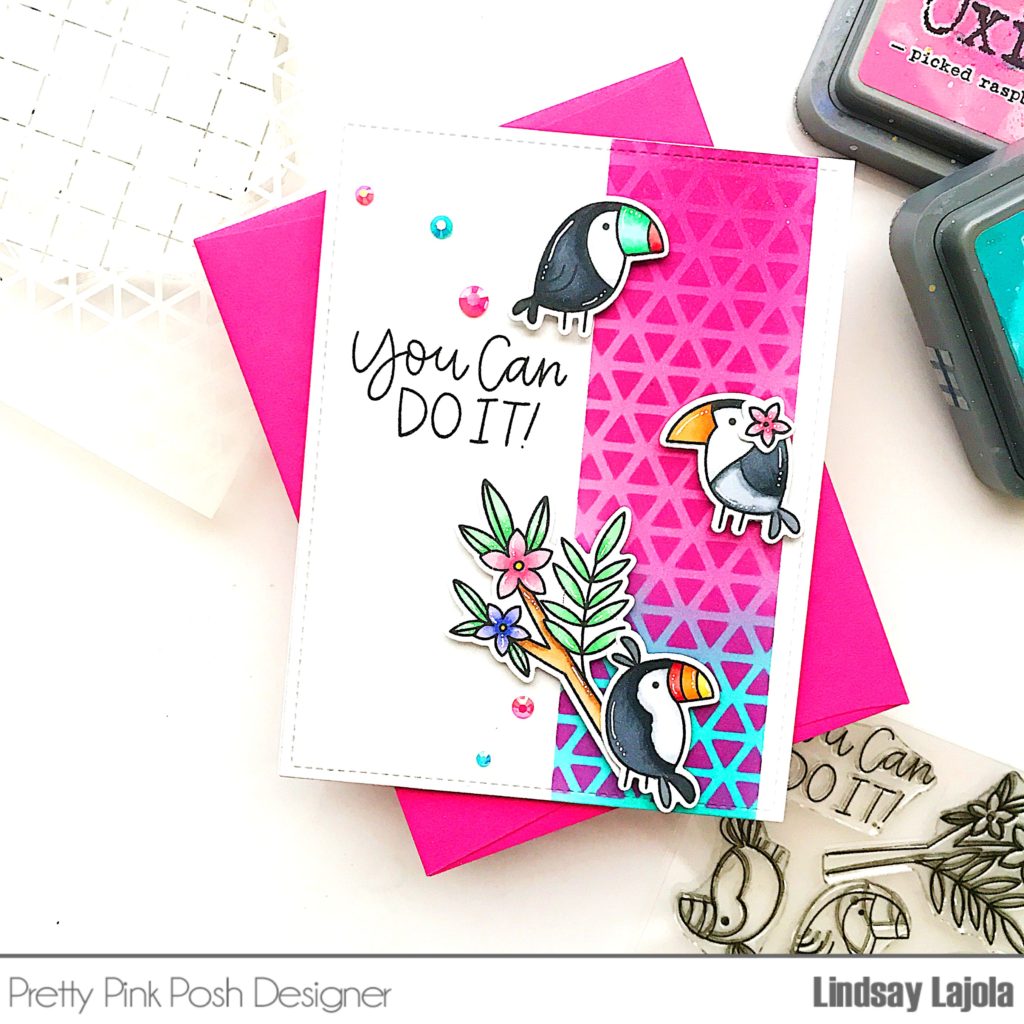
To start, I began with a smooth cardstock and masked off an area for distress oxide ink blending. I first blended Picked Raspberry, Worn Lipstick, and Peacock Feathers within the masked area. I then applied the Triangles Stencil over the ink blended area and blended another layer of Picked Raspberry on top of the ink blended area.
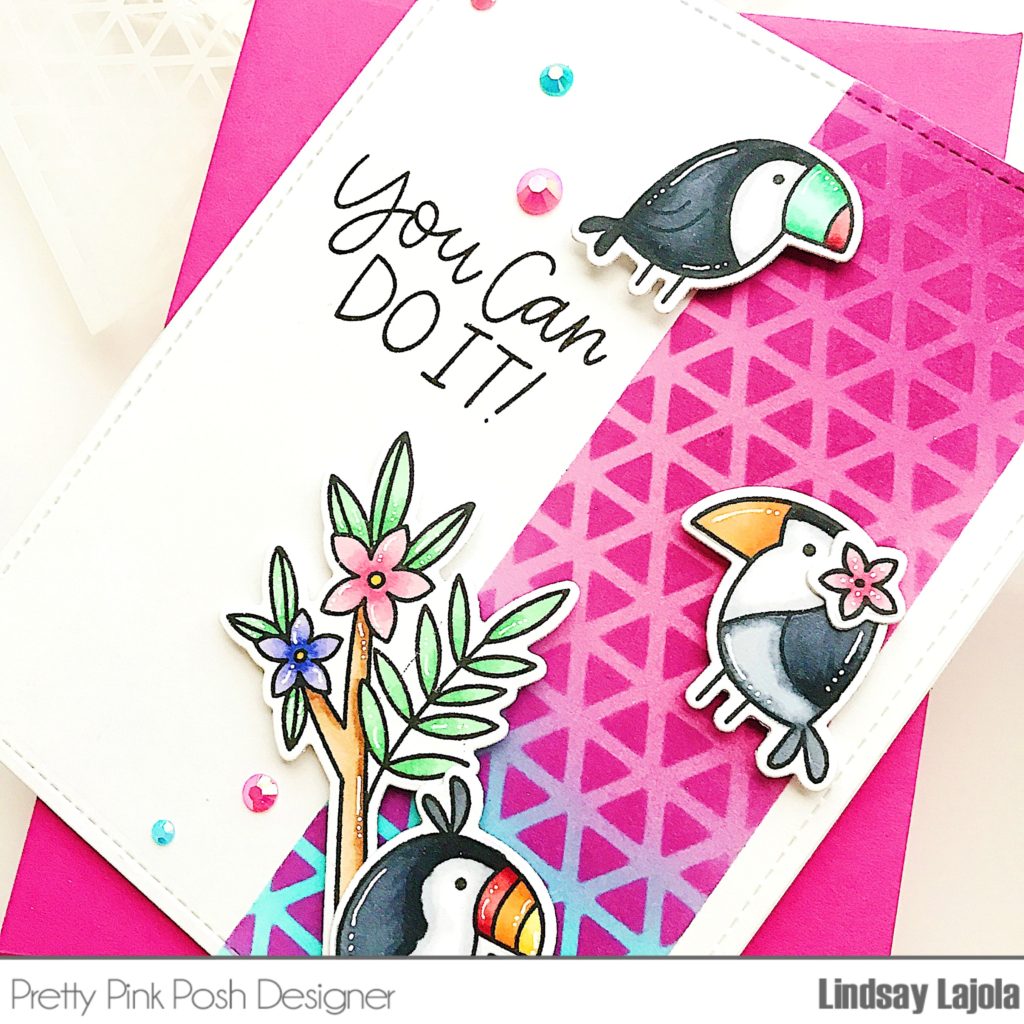
I then got to coloring the lovely Toucan images! I stamped all the images with a copic friendly ink and then proceeded to color all the images using my copic markers. I love adding details with a white gel pen to the critters as a final touch.
To stamp the sentiment, I got out my MISTI (I didn’t want to mess up my ink blended background!) and arranged the images and sentiment to where I wanted it and then stamped the sentiment with black ink. I adhered the images with foam tape for a little pop.
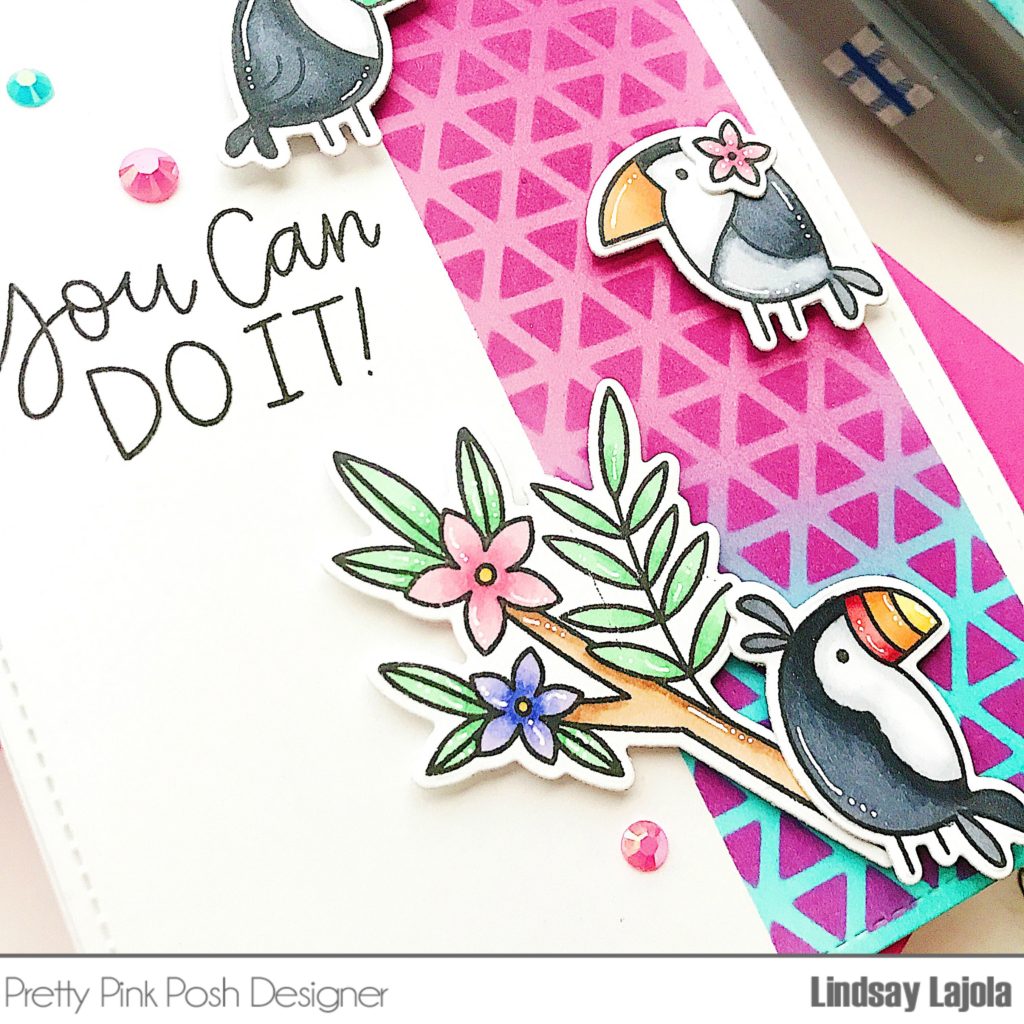
As with any card, you know I have to add some jewels! I added Watermelon Jewels and Caribbean Blue Jewels as a final touch.
Thanks for stopping by the blog today and I hope you enjoyed this card!