
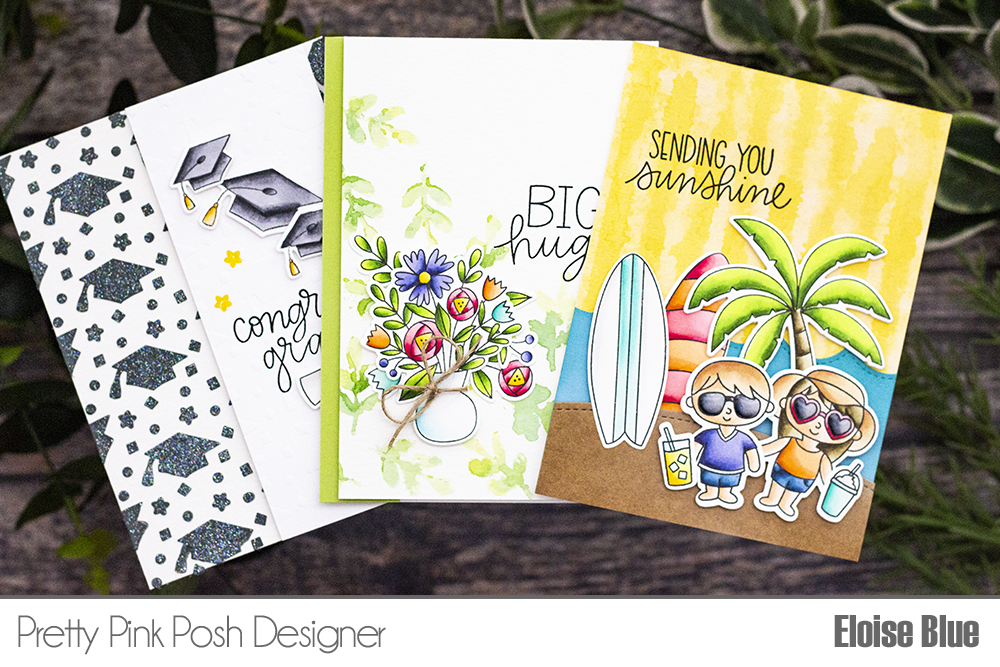
3 Cards Using Stencil Techniques
Hello friends, Eloise here and today I’m continuing on with the Stencils Video that was posted a little while ago. I shared 12 ways to use the newly released stencils using different mediums and techniques and in today’s video I’m using four of my favourite backgrounds that I created to make three cards.
Watch the video above I Watch the video in HD on YouTube
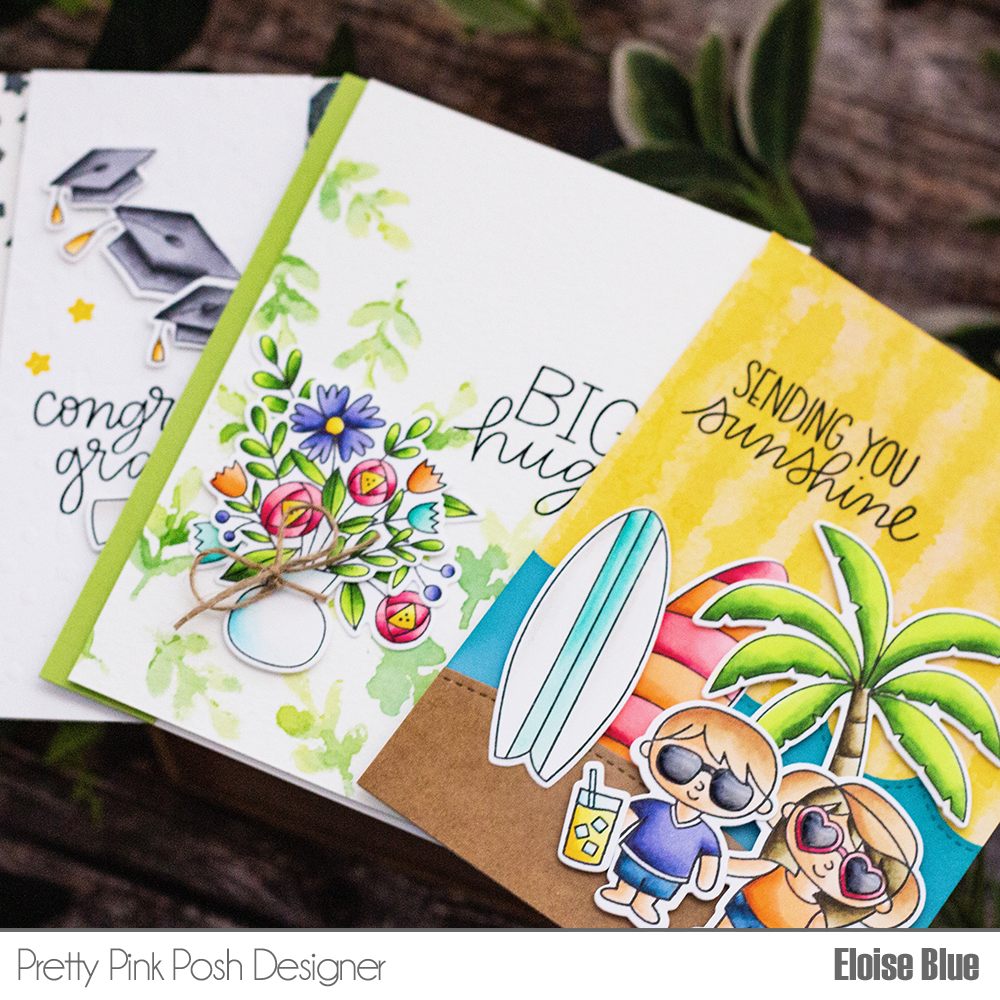
I started off with picking out the four backgrounds. I used the embossing paste and dry embossing backgrounds together using the Graduation Stencil, the water-coloured leaves background using the Leaves Stencil and also the bleached background using the Wide Stripes Stencil. I used various stamps from different releases to help decorate each card. Once I knew what stamp sets I was using, I stamped out my images, coloured them in with Copic Markers and cut them all out.
Copic Markers Used: Y11, Y13, Y15, Y19 / R14, R24, R27, R89 / N2, N4, N6, N8 / 0 / W00, W0, W1 / BV01, BV02, BV04, BV08 / YG01, YG23, YG17, YG67 / RV21, RV23, RV25, RV29 / B000, B00, B01 / YR00, YR02, YR12, YR18 / BG10, BG11, BG34, BG45 / E30, E31, E33, E34 / E000, E00, E21, E02 / B93, B95, B97, B99 / E81, E84, E87, E89
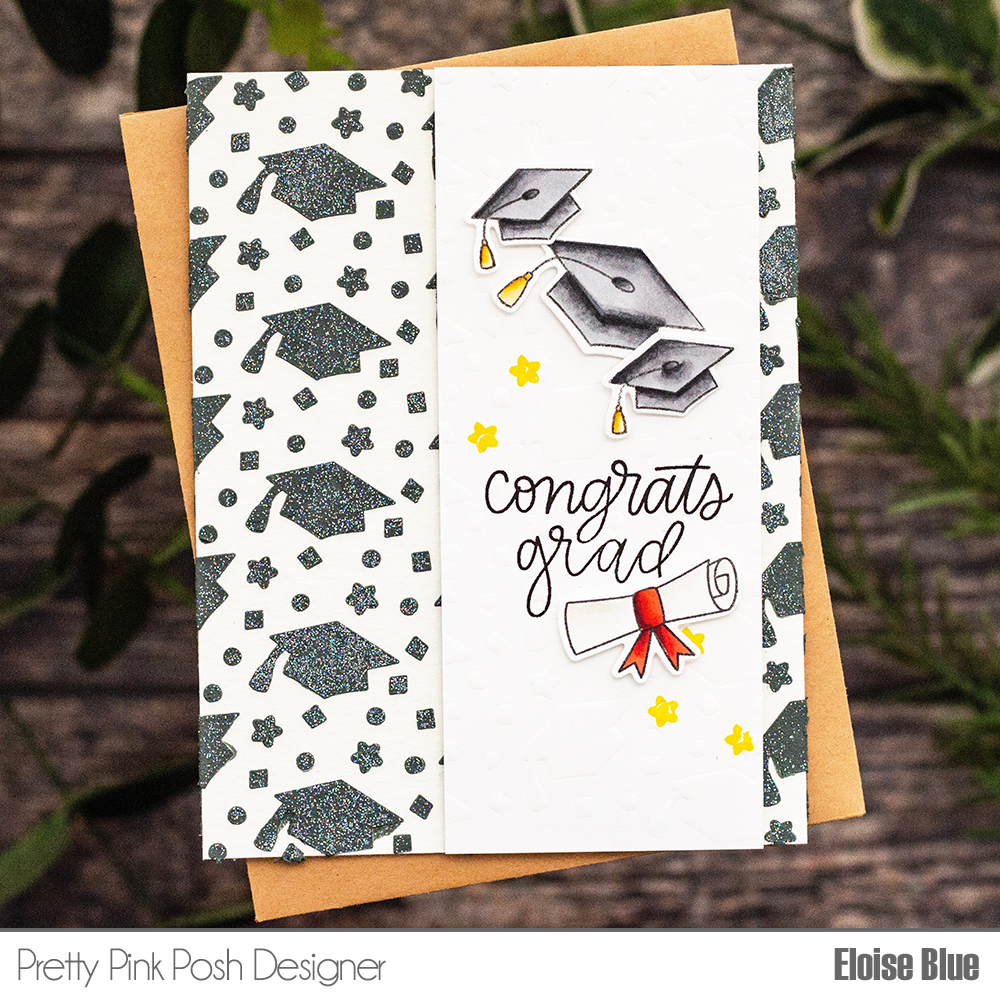
For my first card I used the embossing paste and dry embossed background. I also used the Congrats Grad Stamp Set for the images and sentiment. I stamped them out, coloured them in and then cut them out. I then cut down the dry embossed background to a thinner strip and adhered it onto my embossing paste background using foam tape. I then stamped the ‘Congrats Grad’ sentiment into the centre and stamped a few yellow stars around it as well. I added foam tape onto the back of the hats and scroll and adhered them into place. I lastly adhered the panel onto a white card base.
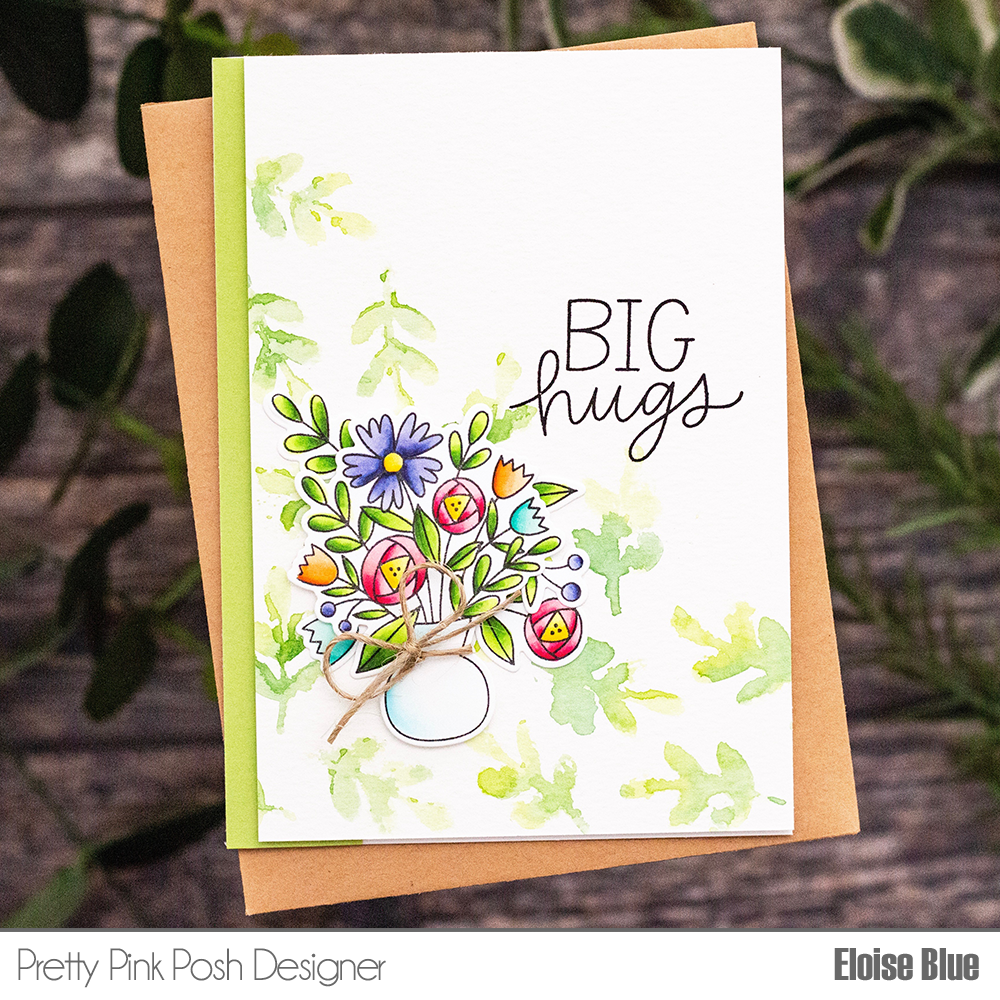
For my second card, I used the water-coloured leaves background. I used the Mother’s Day Stamp Set stamped and coloured in a few of the images, I then cut them out. I added foam tape onto the backs and adhered them into place on my card. I then used the Elephant Friends Stamp Set and stamped the ‘Big Hugs’ sentiment into place. I tied a small hemp cord bow onto the vase to give a little extra texture. I added a green strip of cardstock onto the left-hand side and adhered the entire panel onto a card base.
For my last card I used the bleached yellow sunray background. I used some images from Tropical Birds, Summer Friends and Summer Surfboards stamp sets, I stamped out some images and coloured them in. Once they were coloured, I cut them out. For my background as well as the bleached background, I used the Stacked Edges 1 Die and used the scallop one to cut a wave border on a blue piece of cardstock.
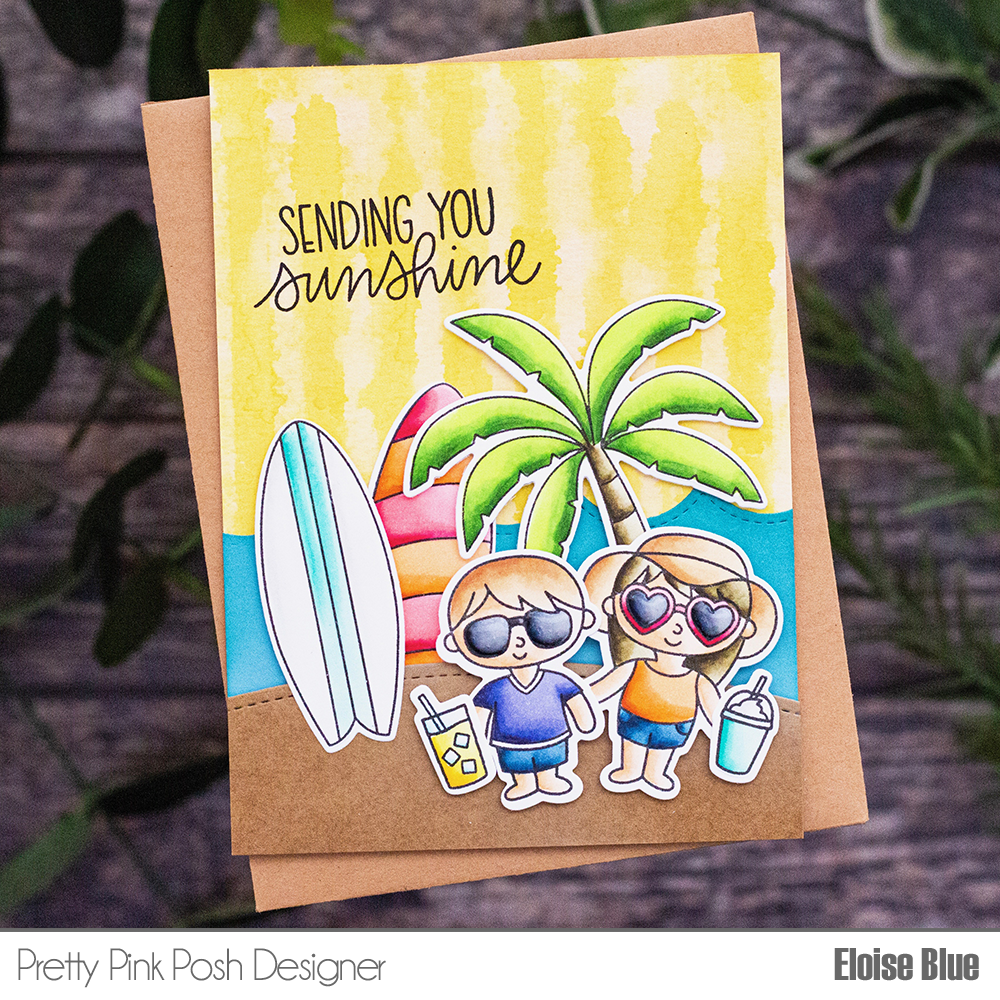
I then used the Stitched Borders 1 Die and used the curved one to cut from some brown cardstock. I added adhesive onto the backs of both of the pieces and adhered them down onto the sunray background. I then added foam tape onto the backs of the images and adhered them down into place. For my sentiment I used the ‘Sending You Sunshine’ from Summer Friends and stamped it in black ink on the top of my card.
That finished up all three of my cards today, using four of the stenciled backgrounds I made in a previous video. Thank you so much for stopping by today and I’ll catch you all next time.
Beautiful cards!! I love the summer beach scene a lot! :)
Fantastic card design’s, so colourful & bright. The touch of twine on the base was excellent. Here’s to your summer xxxx