Hello all! Just a quick post to announce the four lucky winners of the Product Release Blog Hop posts HERE and HERE. Here are the lucky winners…
Ladies, email me within 7 days and I’ll send over the gift certificates so you can shop!
Thank you to everyone who left comments on the blog hop and for the special guests and designers who shared their beautiful inspiration using our new release!
Hello! This is Day 2 of a two day hop to celebrate the tenth 30 Day Coloring Challenge. Have you heard of “The Daily Marker’s 30 Day Coloring Challenge” hosted by Kathy Racoosin? Right now it’s in the middle of the challenge and it’s a great time to take a leap, jump in and get your feet wet! Don’t feel like you are jumping into the middle of the challenge I hope you will think of it as a new beginning.
The premise of “The Daily Marker 30 Day Coloring Challenge” is to color something everyday even if it’s for five minutes. However feel free to jump in or out as time permits.
This Koala Friends from Pretty Pink Posh is so darn cute with the different size Koalas so I decided to create this fun upright card. Also, reached for the Birdie Friends set to add a branch, leaves, and sentiment to add to the scene.
For this card, I started out by die cutting a couple of Scallop Circles, one for the inside of the card and the other for the top of the card and shaker.
To color these Koala’s, I used the following copic colors: CO, C1, C3, C5, R11 for the belly and ears. For the branch, E37, E33, E31 and for the sentiments, I used the Zig Clean Color Brush.
Next, I die cut a large basic circle almost the same size of the Scallop Circles to create the background and use for closing the shaker from behind. Added some clouds using Salty Ocean distress ink and began to piece together the shaker by adding several sequins using the Berry Bright Mix and glued down some Silver Mini Star Confetti on top.
From there, I created the circle card base by placing the same circle onto a folded card stock and ran it through the die cutting machine leaving a little portion of the circle die not hitting the top of the card stock. This way it leaves a fold on top.
Once the card base was done, I scored the front cover halfway and glued the bottom half only to add the circle shaker on top.
To decorate the inside of the card, I used patterned paper for the center along with the second Scallop Circles. From there, I added a sentiment from the Birdie Friends set where I colored using my zig clean color brush. Also, added some foam mount under the sentiment to pop it up which helps to hold the card upright so one can place anywhere.
From there, I created another white circle card base, but used a larger circle die since I was trying to create a double card put together. Plus, I wanted to give this upright card a white border around it and add an extra area to write a message.
When it lays flat, it shows the white border around the card, but when upright, only shows the top original card.
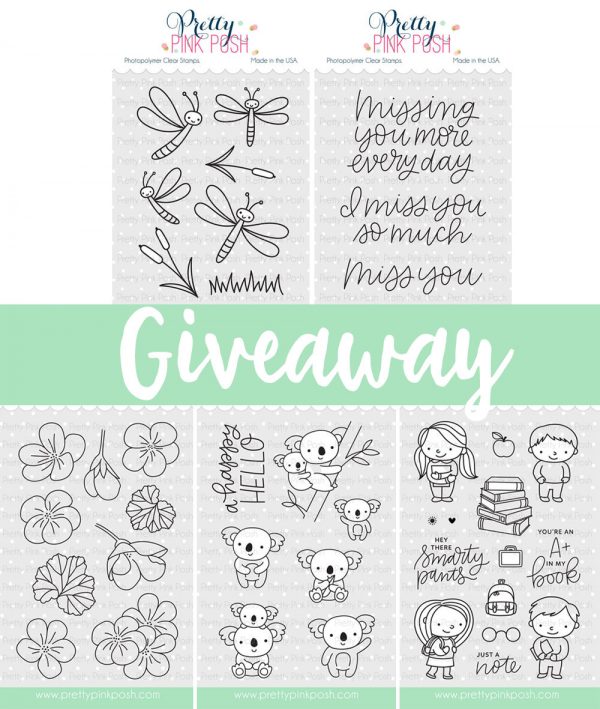
GIVEAWAY: leave a comment on this post and one person will win all five of our brand new stamp sets!
Congratulations to Katie Baird!
If you have any questions about “The Daily Marker 30 Day Coloring Challenge” you can refer to this post.
Hello, Gemma here today to share a card featuring some fabulous June release products.
The new Geraniums stamp set has a lovely selection of different images, perfect for building floral clusters and scenes. I especially love the textured look of the leaves. For my card today, I coloured some images with copic markers, then die cut them with the coordinating dies.
Next, I die cut the new Hello Shaker die from gold glitter paper. I adhered this square die cut at an angle on my card base.
I placed the geranium leaves around the frame, adhering with liquid glue. I then used foam squares to add the flowers over the top. I love the look of gold and pink together. To finish my card, I added some of my favourite Pearl White jewels.
BONUS: we’re giving away a free not-yet-released die in each order over $60 this month, while supplies last!
PRIZES: be sure to leave comments on each stop. I’m giving away 4 $25 gift certificates to four random comments (2 winners each day) left before June 19, 2018 at 11:59 PM PDT. I’ll be announcing the winners next week, so be sure to return and see if you are one of the winners!
We hope that you enjoyed the blog hop these last two days. Be sure to leave comments on all the stops- we’ll be randomly picking comments to win gift certificates.
To make a shaker window, I diecut one of the inked panel usingMini Storybook 1 Dies, and simply cut out the inside bars to make a large rectangle window. I found that the cut out square from Mini Storybook 1 Dies perfectly matches with the Hello Shaker Die in size. (You could just use Hello Shaker Die only to make a window.) I adhered a piece of acetate film behind the window panel. I cut Hello Shaker DIe out of 110 Neenah White paper three times then glued them top on top to make a dimensional frame. Then I put the frame onto rectangle window I had created previously.
I heat embossed a sentiment from Everyday Greetings on black cardstock in white, then I cut it using Stitched Pieces Die. I rounded natural twine 3-4 times beneath the window, fixed it with adhesive, and then foam mounted the sentiment label onto it. Next I turned the panel upside down to fill the shaker.
Look at the beautiful mixture of sequins and seed beads just before I covered the shaker. I really love how they look together. Above all, I would strongly recommend to mix Pewter seed beads to your shaker since the neutral gray color of them balances the colors in the shaker beautifully. Finally, I covered the shaker with another inked panel then I adhered the shaker onto white card base.
BONUS: we’re giving away a free not-yet-released die in each order over $60 this month, while supplies last!
PRIZES: be sure to leave comments on each stop. I’m giving away 4 $25 gift certificates to four random comments (2 winners each day) left before June 19, 2018 at 11:59 PM PDT. I’ll be announcing the winners next week, so be sure to return and see if you are one of the winners!
There is so much amazing inspiration today, I hope you enjoy it all! Be sure to leave comments on all the stops- we’ll be randomly picking comments to win gift certificates. See you tomorrow!
It’s time to announce the four lucky winners of the Product Release Blog Hop posts HERE and HERE. I’m so thrilled that you enjoyed the wonderful inspiration and this release. Here are the lucky winners…
Ladies, email me within 7 days and I’ll send over the gift certificates so you can shop!
For those waiting on items to be restocked, they have all been reordered and I’ll be updating once they arrive. Thank you to everyone who left comments on the blog hop and for the special guests and designers who shared their beautiful inspiration using our new release!
We are excited to announce the winners of the 2018 Mega Sponsor Spring Blog Hop. Thank you to all who participated! We are so happy that you joined in on the fun.
The lucky winner of the $30 Pretty Pink Posh gift certificate is: Linda K Kahn
We had so much fun participating in this blog hop- thank you for all the lovely comments. Watch for future Mega Sponsor giveaways!
Hi, there! It’s Marge here with you and I’m sharing two shaker cards featuring the new Hugs Shaker Die from Pretty Pink Posh. I’m so glad to share these as I really had fun playing with the shaker die along with other new products from the May 2018 Release.
I started my cards by diecutting Hugs Shaker Die out of heavyweight white card stock . I also cut lovely pastel colored pattern papers to use as front panels of the cards. Then I adhered acetate film on the back of front panel, and then adhered Hugs Shaker Die cut onto the front surface of acetate film.
Now I finished my two cards. As Pretty Pink Posh provides us all colors of beautiful sequins, jewels, and seed beads, I always enjoy making my own assortment according to the color schemes of my cards.
PRIZES: be sure to leave comments on each stop. I’m giving away 4 $25 gift certificates to four random comments (2 winners each day) left before May 14, 2018 at 11:59 PM PDT. I’ll be announcing the winners next week, so be sure to return and see if you are one of the winners!
We hope that you enjoyed the blog hop these last two days. Be sure to leave comments on all the stops- we’ll be randomly picking comments to win gift certificates.
Hello, Gemma here today to share a card for the May blog hop. When I think of fuchsias, I think of the classic pink and purple flowers so I chose this colour scheme for my card today.
Next, I blended on some distress oxide inks in Picked Raspberry and Seedless Preserves on the right hand side of a white card base. I flicked it with water for distress details. I then used a Scallop Border die to trim down another panel of white card, which will sit on top of the card base and allow the pop of colour to show at the edge.
I planned out my layout of flowers and leaves to help me figure out the best placement for my sentiment. I then chose a sentiment from the Everyday Greetings stamp set, stamping it in black versafine ink and heat embossing with sparkle embossing powder.
I added the panel to the card base with some foam sheet behind, which adds some nice dimension. I then adhered the flowers and leaves on top, using a mix of liquid adhesive and foam squares.
I finished the card with a scattering of Pansy Purple jewels, which fit the colour scheme perfectly.
Ready to hop along and see LOTS more fabulous inspiration with this new release?
PRIZES: be sure to leave comments on each stop. I’m giving away 4 $25 gift certificates to four random comments (2 winners each day) left before May 14, 2018 at 11:59 PM PDT. I’ll be announcing the winners next week, so be sure to return and see if you are one of the winners!
There is so much amazing inspiration today, I hope you enjoy it all! Be sure to leave comments on all the stops- we’ll be randomly picking comments to win gift certificates. See you tomorrow!
Good morning Pretty Pink Posh friends! Heather here this morning with a couple cards to share for a very special blog hop for Autism Awareness! You can find all the info on the hop HERE – what it’s all about, who’s participating, and all the sponsors of this great event!
I made two cards today featuring a variety of new and old Pretty Pink Posh products!
I created some bright happy scenes with fun sentiments, happy balloons, and pretty flowers – not to mention a few of the popular new Pretty Pink Posh jewels!
I started off with the cute little boy and girl from Birthday Friends, and stamped the bundle of balloons for them as well. I colored them up, then die cut with the coordinating Birthday Friends Dies. I die cut a couple of Stitched Speech Bubbles from black cardstock, and heat embossed sentiments on them from the new Encouraging Greetings Stamp Set(a must have!).
Next, I stamped several of the flowers and greenery from the new Bunny Friends Stamp set, and cut them out with the coordinating Bunny Friends Dies. I tried to keep the color combos well coordinated, using the same Copic colors between balloons, flowers, and clothes, then mixing them up between the cards to balance everything out.
After I planned my placement of everything, I did some Copic coloring with my Warm Gray Copics to add a ground for the scene. Next, I adhered the girl and boy and their balloons with foam adhesive, and covered the balloons with a good thick coat of Glossy Accents. Once they dried, I even added a second coat for lots of shine! You can see it best in the next two photos.
Once that all dried, I adhered the sentiment on the speech bubble with two layers of foam adhesive to pop it up above the rest, then adhered the flowers directly on the cardbase. This layering makes the scene pop just that much more! I finished off by adhering a few of the new jewels- Spring Green on the girl card, and Lemon Drop on the boy card.
I had so much fun building the scene on these! Pairing all the different sets together was so much fun – and as always, I love how well all the Pretty Pink Posh products work together!
Thanks so much for stopping by today! Have a wonderful day!
Although we call this no-line coloring, it actually isn’t no-line coloring because we can see lines stamped with a light colored ink. Since the Cherry Blossoms images have simple yet beautiful outlines, no line coloring is not too difficult. Coloring these small to moderate sized blossoms was really fun!
There are so many color options in Daniel Smith Paints that you may feel difficult what to choose, but, I found that I need only several of those colors to make watercolor flower cards. Here, I used my favorite colors which are Quinacridone Coral, Quinacridone Violet, Permanent Alizarin Crimson for blossoms, Prussian Green and Sap Green for leaves, Burnt Umberfor background. After I finished watercoloring, I trimmed the four edges a little to make the panel look clean.
To add a sentiment, I made a round stitched rectangle tag from a deep green card stock using the Stitched Pieces Die, then a sentiment from Encouraging Greetings Stamp Set was chosen and heat-embossed on the tag with white embossing powder. Then I punched two small holes on both sides of the tag, put natural twines through the holes, and tide a bow. The tag was also adhered onto the panel using foam tape.
Next, I foam mounted the panel onto an A2 sized side-folded card base. As a final touch, I added Buttercream Jewels onto the empty spaces between blossoms and leaves. Look how the jewels sparkle beautifully on the card! The Jewels Collection is now my favorite among the new release!
Here’s another look at the finished card.
Ready to hop along and see more inspiration with this new release?
PRIZES: be sure to leave comments on each stop. I’m giving away 4 $25 gift certificates to four random comments (2 winners each day) left before March 12, 2018 at 11:59 PM PST. I’ll be announcing the winners next week, so be sure to return and see if you are one of the winners!
We hope that you enjoyed the blog hop these last two days. Be sure to leave comments on all the stops- we’ll be randomly picking comments to win gift certificates. Also, join us next week as we have our Easter Theme Week here on the blog!


 Next, I die cut the new
  I placed the geranium leaves around the frame, adhering with liquid glue. I then used foam squares to add the flowers over the top. I love the look of gold and pink together. To finish my card, I added some of my favourite