Sneak Peek: Sports
Hello, Gemma here today and I’m excited to share a sneak peek at the new Sports stamp set from the upcoming June release. There’s a fantastic variety of different sports in this set. On my first card, I featured lots of these together.
New release will be available June 10th
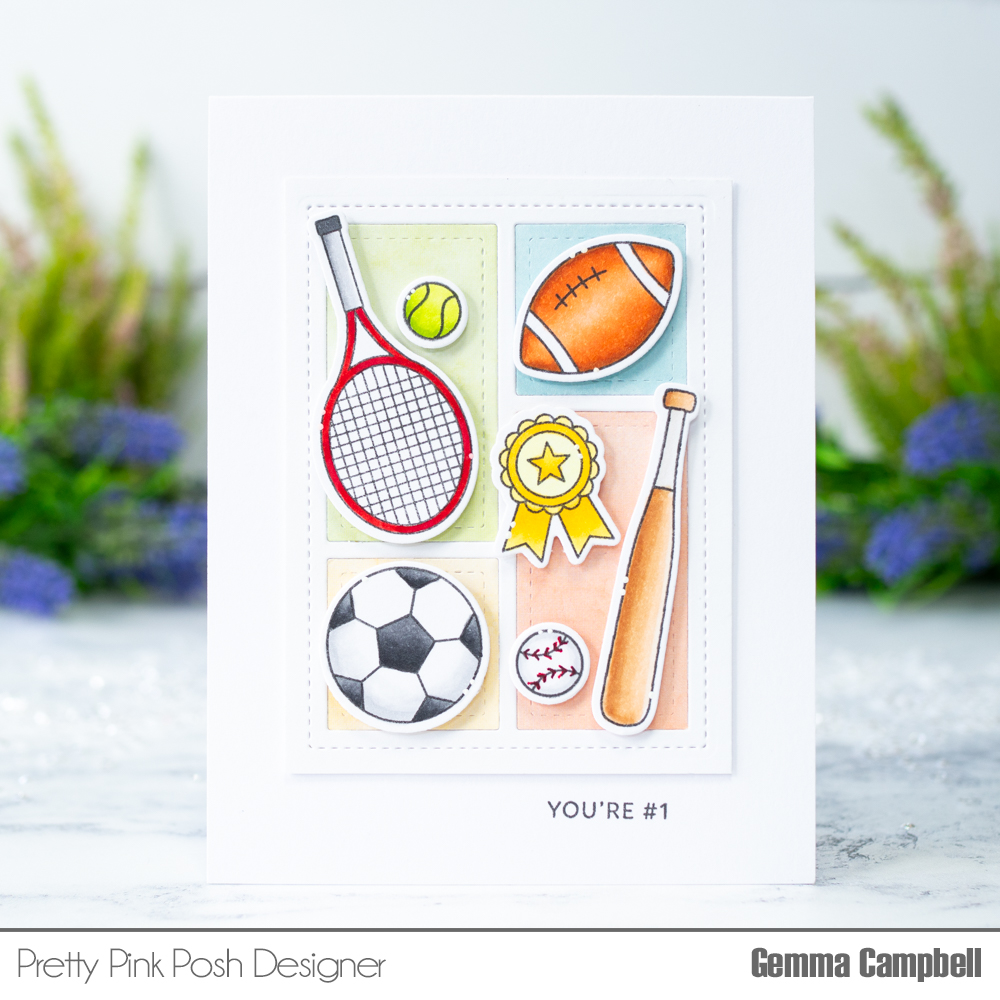
I stamped out all the images and coloured them with copic markers. I’ve listed the colours used later in the post. I also used a red fineliner pen to add detail to the baseball.
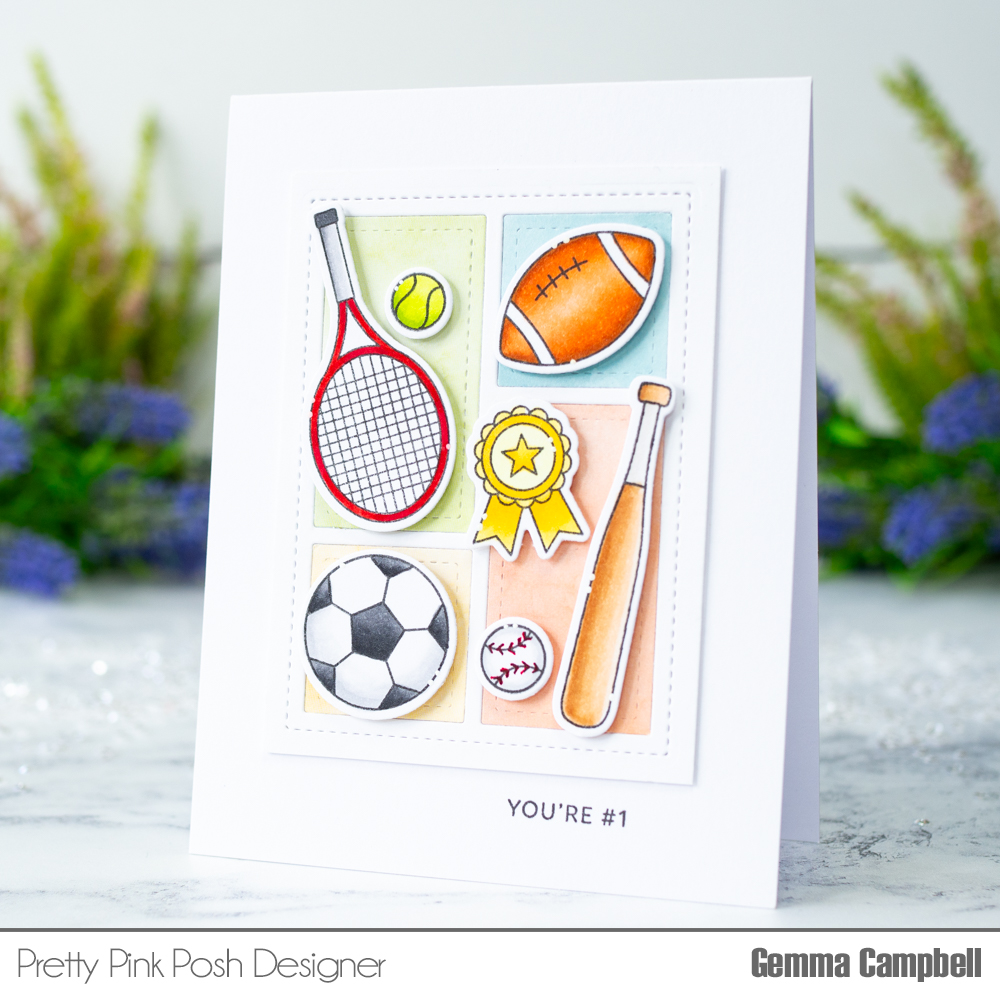
For my background, I used the previously released Storybook 6 die. I layered this for dimension, adhered it on an A2 card base, then added some pattern papers in each of the window spaces.

Underneath the Storybook 6 die, I stamped one of the sentiments from the Sports stamp set. I then added the images to the card with foam tape
Copic colours
- American Football E95-99, W0-1
- Baseball N0-1, red fineliner pen
- Baseball Bat E30-33, W0-1
- Basketball E95-99
- Football / Soccer N0-7
- Rosette Y00 Y13-15
- Stars R24-27, Y13-15, B63-66
- Tennis Racket R24-27, N0-5
- Tennis Ball YG01-03
- Trophy Y00 Y11 Y15 YR23
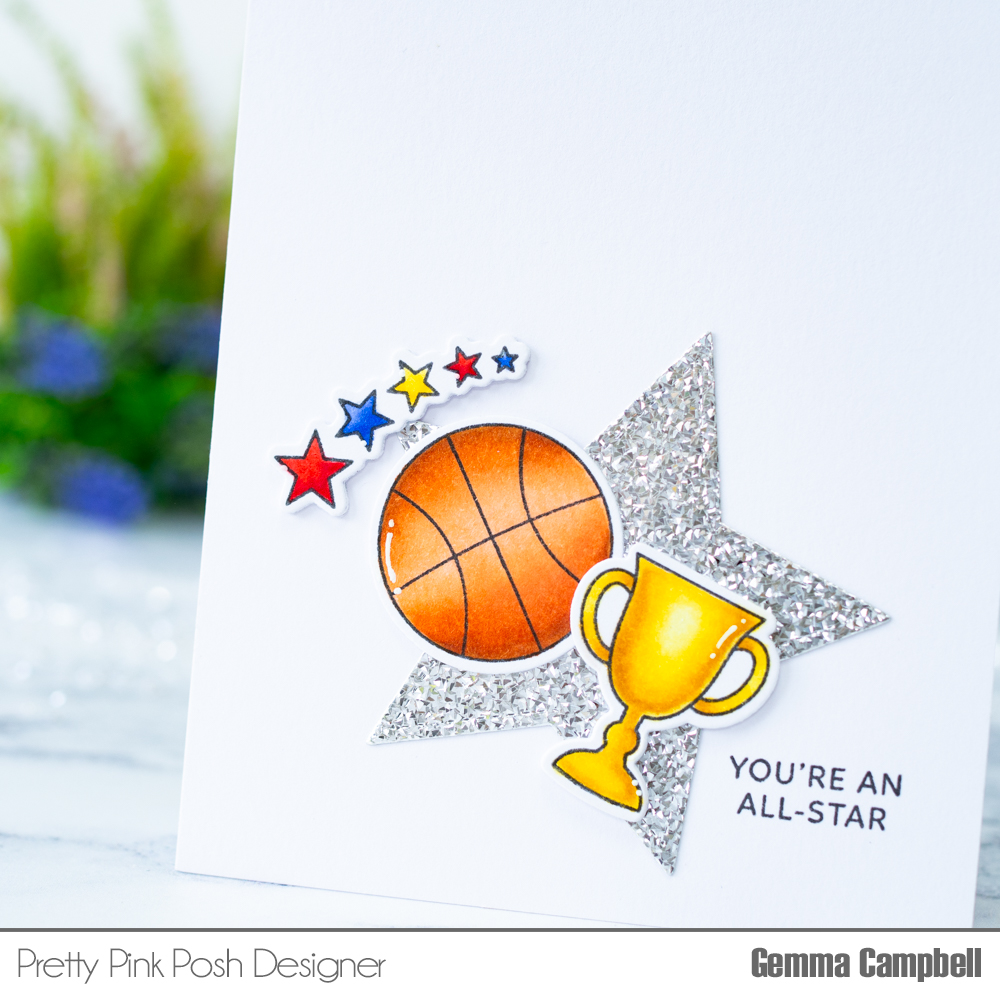
For my second card, I focused on one sport. I stamped out the basketball, trophy and stars from the Sports stamp set. I coloured them with copic markers and die cut them with the coordinating dies.
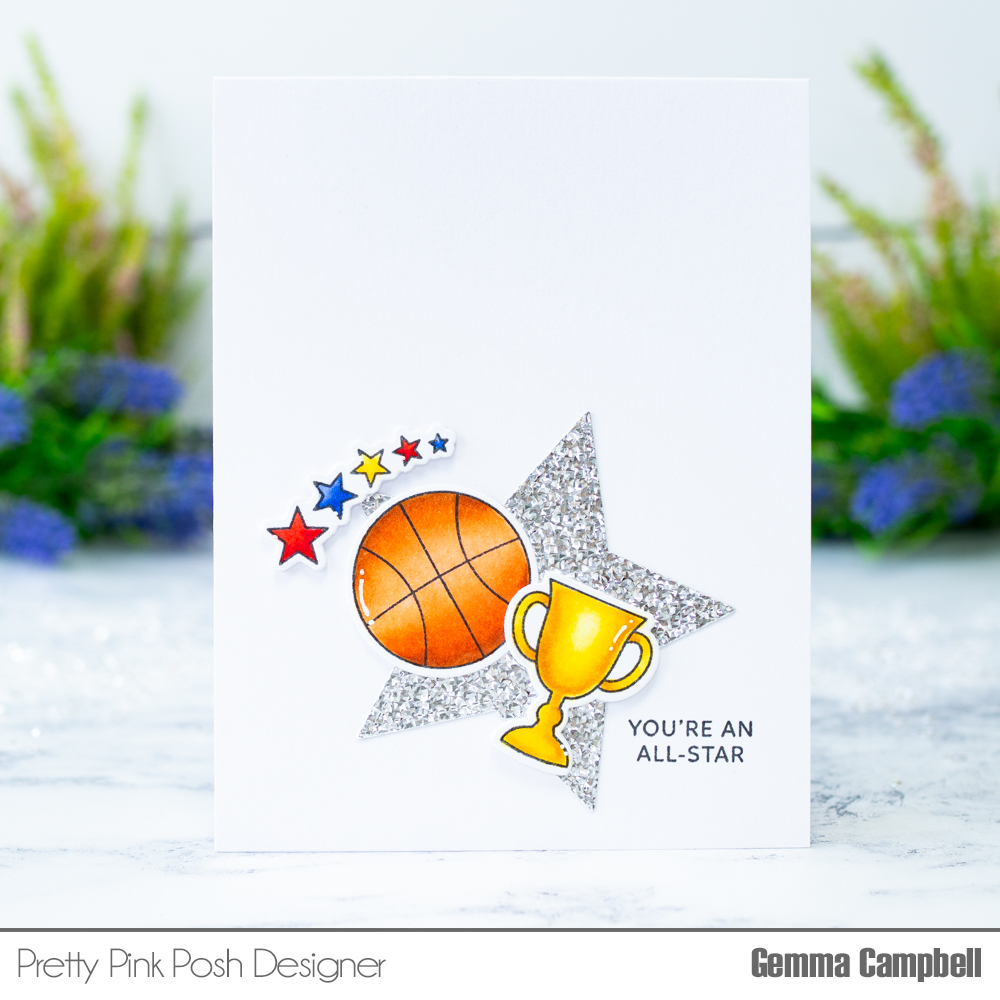
Taking inspiration from the sentiment in the Sports stamp set, ‘You’re an all star’, I teamed the images with a holographic star, using a die from the new Stitched Stars set.
Thank you for stopping by, I hope you enjoyed these cards. Come back tomorrow for more sneak peeks!