| |

Pretty Pink Posh Birthday Celebration- Day 2

birthday1

Hello and welcome to Day 2 of the Pretty Pink Posh 2nd birthday celebration!

Today I wanted to share some photos from a creative session I did last year and it’s still one of my favorite posts to date. I’m a cardmaker at heart- I love being able to start and finish a project in one sitting- but every now and then, it’s fun to go outside the norm. These photos were from a session where we created birthday themed items and used sequins in non-traditional ways.

Pretty Pink Posh I Springtime Party

Balloons are always a must for a party and to make them extra special, we filled them with some confetti and sequins! It added a pop of color and really brought the whole theme of the party together.

Pretty Pink Posh I Springtime Party

This is just a small glimpse into the post that I created with these items. It was so much fun to create with the Pretty Pink Posh sequins on projects other than cards. Be sure to click the photo below so you see all the photos and products used.

party4

No party would be complete without guests, gifts and a party favor, right? During the celebration, save 10% off your order using the coupon code provided below. Also, if your order is over $60 (before taxes and shipping), you’ll get the not-yet-released Birdie Notes stamp set.

For the celebration, I brought along some very special guests to celebrate with me and I cannot wait for you to see what they made. Be sure to leave them lots of love- I’ll be giving away prizes to some comments left on their blogs!


PRIZES: I love giving back to you all, so I’ll be giving away 2 $50 gift certificates to random comments left on the different stops every day. Also, if you haven’t already, head over to the Day #1 post for a MISTI giveaway.

RULES: Please be kind and courteous in the comments. Comments must be left by January 19, 2016 at 11:59pm PST, to be eligible for prizes. Winners will be announced late next week on this blog.

a Rafflecopter giveaway

Thank you for celebrating with me today and for all the love! I’ll see you bright and early tomorrow for day #3 of the birthday celebration.
| |

Pretty Pink Posh Birthday Celebration- Day 1

Pretty Pink Posh

Hello and welcome to Day 1 of the Pretty Pink Posh 2nd birthday celebration!

For those new to my blog or company- welcome! I opened the Pretty Pink Posh Shop as a way to share quality sequins and embellishments and now, two years later, I’ve branched out into steel dies and a handful of stamp sets. It’s been a crazy, wonderful journey thus far and I’m happy I get to share my products with you. Grab your favorite beverage and join us for this 3 day party!

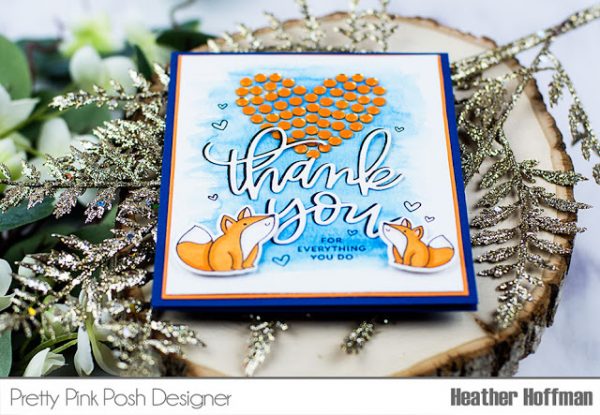
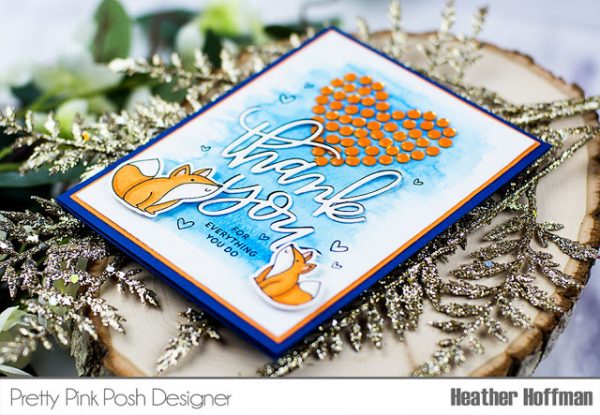
Today one the new PPP designers, Heather, has this darling card to share using products from the brand new release, along with the FREE stamp set I’ll be giving away during this celebration for qualifying purchases, while supplies last.

Pretty Pink Posh

The brand new Scallop Squares are the latest addition in the scallop series and boy, they are so fun to use! Heather used both sizes on the card and with the light colored cardstock, you really can see how pretty and delicate the stitching and scallops are. *swoon*

For the sentiment, she paired it with the Stitched Speech Bubbles die set, which works perfectly with any kind of critter stamp set you may have. For the adorable bow on the birdie, she used the Twine and Bows die set, which gives you three perfectly shaped bows without fuss!

Pretty Pink Posh

For a little dimension, Heather added a sprinkling of the Sparkling Clear Mix across the card. Our favorite adhesive for sequins is the Multi Medium Matte– it has a tiny tip and makes it easy to adhere even the smaller sequins. The last finishing touch is some Clear Wink of Stella, just to bring a little more shimmer to the birdie.

Pretty Pink Posh

No party would be complete without guests, gifts and a party favor, right? During the celebration, save 10% off your order using the coupon code provided below. Also, if your order is over $60 (before taxes and shipping), you’ll get the not-yet-released Birdie Notes stamp set that Heather used on today’s card!

For the celebration, I brought along some very special guests to celebrate with me and I cannot wait for you to see what they made. Be sure to leave them lots of love- I’ll be giving away prizes to some comments left on their blogs!


PRIZES: I love giving back to you all, so I’ll be giving away 2 $50 gift certificates to random comments left on the different stops every day. Also, I’ll be having extra giveaways that could be considered “party favors” for a couple lucky guests.

RULES: Please be kind and courteous in the comments. Comments must be left by January 19, 2016 at 11:59pm PST, to be eligible for prizes. Winners will be announced late next week on this blog.

a Rafflecopter giveaway

Thank you for celebrating with me and being so incredibly supportive. Go hop on over to the other stops, be inspired by the design team and special guests and be sure to share this with your friends. I’ll see you bright and early tomorrow for day #2 of the birthday celebration.

|

Giveaway Winners + Free Stamp Set

Today I have a quick post announcing the winners from the last two giveaway posts! The winners from the Product Release Blog Hop ($25 gift certificates) and the winner of the matching game ($100 gift certificate).

winners4

Ladies, please email me within 7 days and I’ll send over the gift certificates to you!

Thank you all for your guesses in the matching game and for welcoming both the new and old designers with open arms. I know that each of them are grateful for the kind comments you left and are looking forward to sharing their creations these next few months!

Some of you may be wondering how the winner of the matching game was picked. Those who guessed correctly were put into a raffle and I randomly selected one winner. The answers to the game are listed below….

a) Amy  b) Carissa  c) Gayatri  d) Heather  e) Joni  f) Julia

g) Lisa  h) Liz  i) Nichol  j) Nina-Marie  k) Yoonsun  l) Yuki

matchinggame

border

Tomorrow is the day the birthday celebration begins and I am so excited for you to see what we have in store.

I wanted to share a quick sneak peek… In honor of the 2nd birthday, I wanted to give back to you, my amazing customers and readers. Orders over $60 placed during the celebration will receive this not-yet-released set. The details, along with Heather’s adorable card, AND sale information will be in tomorrow’s post!

mini

That’s going to wrap up today’s post. I’ll see you all bright and early tomorrow, or if you’re on Facebook, come join me on the birthday celebration event page! I’ve been sharing sneak peeks there and I’ll be interacting with you all there over the weekend!


|

Umbrella Shaker Card

Good morning!
Heather here from Houses Built of Cards. Did you see the new release from Pretty Pink Posh? I am in love with the adorable new Mini Star Confetti! I played with that, and some other PPP stamps, dies, sequins, seed beads, and confetti to put this fun card together – hopefully it would cheer someone up if they weren’t feeling well!
Pretty Pink Posh

I stamped and fussy cut out the umbrella from Rainy Days stamp set – masking the bottom of the handle so I could make the entire think the more thick and solid size. I layered it with the sentiment on the Decorative Tag 1 Die‘s main frame image.

Pretty Pink Posh

I cut the Scallop Frame die in white to make the shaker portion, and filled it with a fun mix of embellies – no skimping here! I filled it with a mix of Iridescent Mini Star Confetti, Silver Shimmer Seed Beads, 4mm Lemon Meringue sequins, and 6mm Silver Confetti. This shaker is full of fun! I adhered the front panel on top of the acetate, so the goodies are free to shake underneath to their hearts content.

Pretty Pink Posh
border

As soon as I saw this card, I knew I had to share it with you all here on the blog. Thank you Heather for sharing this with us today!

birthday1
Tomorrow I’ll be announcing the winners from the last two posts that I had giveaways on. Also, I’ll be sharing a sneak peek at something extra special I’ll be giving away during the birthday celebration, but it’ll be limited in quantity!

Thanks for stopping by.

| |

Watercolor Friends Tutorial

Hello everyone, Joni here!

I have a new tutorial for you today using the new Storybook 3 die set to create a window scene. I also used the past released Stitched Border 3 die set for the window drapes.

Pretty Pink Posh

To begin, I first die-cut the white cardstocks using the Storybook 3 dies and one of the Stitched Border 3 dies for the curtains (see picture below). I used the non-stitched one for the curtains.

Pretty Pink Posh

Pretty Pink Posh

Next, I used the Storybook 3 dies die-cut as a guide to traced the lines on the watercolored paper, this will help as a guide on where to watercolor some images for the scene outside the window.

Pretty Pink Posh

Next, I watercolored some grass and trees. To create the leaves for the trees, I just used the tip of the 6 round brush to create the leaves. This does not have to be perfect, it’s more like creating an imperfect round or oval.

Pretty Pink Posh

For the flowers and fruits for the trees, same concept is applied. I used the tip of the brush to create small circles for the flowers and fruits.

TIP: for easy application, use the tip of the ZIG Clean Color Real Brush for a much precise shape drawn image and just move the image with a wet tip watercolor brush.

Pretty Pink Posh

Using a ZIG Clean Color Real Brush in brown, I created the birds flying in the sky.

Pretty Pink Posh

Next, to cut the drape for the window, I die cut one of the stitched scallops from Stitched Border 3 dies and distressed it using a melon colored ink on the curtains and then adhered with foam tape.

Pretty Pink Posh

For the sentiment I used was from the Rainy Days stamp set. The two girls by the window is available on my blog at HERE.

Pretty Pink Posh

I also added the bows for the curtains using the Twine and Bows die.

Pretty Pink Posh

The curtains, drapes, girls, and the window were all adhered with foam tape. I also used some of the new Sweet Pea Mix sequins for added touch.

Pretty Pink Posh

Another look of the whole card.

Pretty Pink Posh

If you didn’t know, we’re celebrating Pretty Pink Posh turning 2 later this week and Paulina has a special event page on Facebook sharing sneak peeks and giveaways. Be sure to join us as there will be lots of guests and prizes.

birthday1
I hope you enjoyed today’s tutorial.

sig name

|

Shaker Smile Card + Video

Hello again!

I hope that you all were able to hop along in the Product Release Blog Hop yesterday. The design team did such a great job with their cards and videos and judging from your orders, you all seem to like the new release- yay! I’ll be working all week and through the weekend on the orders, so please bear with me as it may take a bit longer than usual to process.

sneak2

I always love creating- both with my products and with other brands. When I first started the shop, I loved that my products could work with all my favorite companies and to this day, I still keep that in mind when I design new dies, mixes and other products. For today’s card, I wanted to bring out some of my favorite stamps from other brands- WPlus9 and Mama Elephant.

Pretty Pink Posh

It’s been a while since I created a shaker card, so I knew that I’d use the new Storybook 3 die set in this way. I love using the Storybook dies with critter stamps and for this card, I decided to use the adorable little elephant from WPlus9. For my sentiment, I used the ‘thinking of you’ from Mama Elephant and paired it with one of the dies from the Stitched Labels 1.

I wanted to add another pop of blue to bring out the sequins in the shaker, so I die cut one of the tabs from the new Stitched Tabs die set. Can I just say, I love the way these look on cards and I can really see this being one of my favorite die sets. (Don’t tell my other sets that though!) 

Pretty Pink Posh

In previous releases, you all seem to enjoy the videos showcasing the new products, so I have one for this release as well. In this video I show all the products and give some comparisons to current products, along with some info on how the products came to be.

Excuse the poor lighting- this new system I have isn’t my favorite and the sun hasn’t been peeking out in Seattle much lately.

Watch the video above   I Watch the video in HD on YouTube
border
It’s hard to believe, but I just celebrated the business turning 2! It’s been such a whirlwind ride of amazing, new experiences and opportunities, along with some tough times and learning experiences. Through it all, you all have stuck with me and for that, I am so very grateful.

Join the event page on Facebook for tons of sneak peeks, interaction and exclusive giveaways!  We have TONS of special guests joining in the celebration and I know you’ll be inspired.

birthday1

I truly hope you enjoyed this release and will continue to join me here on the blog. Thank you from the bottom of my heart for continuing to make my dream a reality.

|

January Product Release Blog Hop

Pretty Pink Posh

Today the new January release went live and I’m doing something different. Instead of waiting a week for the design team to share their inspiration, they’re sharing it today. I have another big event happening next week, so I thought it would be a good time to try this new blog hop date.

I am so very excited to be sharing these new products with you. This month, I have three super versatile die sets, along with new sequin mixes, mini star confetti and a brand new sequin color that you’ll love.

Pretty Pink Posh

I thought we’d change things up and have Nina-Marie share a card in today’s post. Her card has the new Storybook 3 die set, Share Kindness Mix and a sprinkling of the Mini Silver Stars

Pretty Pink Posh

Card details by Nina-Marie

To start off, pulled out my Tim Holtz distress inks to do a bit of watercoloring. I used a slightly damp sponge brush to dab the ink all over my background; the colors I used were Mermaid Lagoon and Peacock Feathers. Using just a slightly damp brush allowed me to achieve a “dry brush” type of effect, which I really loved.

Once my watercolored panel was dry, I die cut it using the new Pretty Pink Posh Storybook 3 die, as well as a stitched rectangle die from Simon Says Stamp. I then layered the pieces onto my white card base; the “frame” is attached with regular adhesive and the Storybook 3 rectangles are adhered down with foam tape.

Of course, this card then needed a sentiment; so I foiled a “friend” die cut from Winnie and Walter with silver Deco Foil by Thermo Web.

Finally, I finished the card off by sprinkling the Share Kindness sequins and the silver Mini Star confetti (also new this month for Pretty Pink Posh!) around the card.

Pretty Pink Posh

Pretty Pink Posh

Ready to hop along and see LOTS more fabulous inspiration with this release?

PRIZES: be sure to leave comments on each stop on each day. I’m giving away 2 $25 gift certificates to two random comments left before January 10, 2016 at 11:59 PM PDT. I’ll be announcing the winners next week, so be sure to return and see if you are one of the winners!

 Pretty Pink Posh

Thank you all for your enthusiasm about the new products.  Even though I’ve been in business for two years, I still get so nervous sharing the new products. I truly hope you enjoy these items and I can’t wait to fill your orders and see your creations in blog and social media land.

Happy shopping!

New Designers + Matching Game

Hello and Happy New Year!

Today I wanted to announce two brand new Pretty Pink Posh designers to the team. Both of these gals have used my products on their creations for quite a long time and I’ve been fans of theirs for a long time. With two designers stepping down in roles, I knew exactly who I wanted to invite to the team. I was so thrilled that they both ecstatically accepted when I extended the invitation. Please join me in welcoming Heather and Liz to the Pretty Pink Posh team!

designteam
 headshot_Yuki headshot_Joni headshot_Heather
headshot_Nichol headshot_Gayatri headshot_Liz
 headshot_Lisa headshot_Amy headshot_Carissa
headshot_Julia headshot_NinaMarie headshot_Yoonsun
As I mentioned above, we have two designers stepping down from design team members BUT they’re still part of the Pretty Pink Posh family. Yoonsun and Nina-Marie  are so very talented and I just couldn’t part with their talent. I decided to create a new position and they’ll be contributing designers, which means you’ll still see their work on a semi- regular basis.

In honor of this special day, and the fact that I love hosting giveaways, I’m offering up a $100 Pretty Pink Posh gift certificate! How can you win? Guess which designer made which card below. These cards can be found on their blog, so it won’t be too terribly hard to match them up.

From those who guess correctly, I’ll put them into a drawing and one lucky person will get a $100 shopping spree to the Pretty Pink Posh Shop. Whether you want to catch up on previous releases, or want to get the new products that release this month, this will come in handy!

matchinggame

Comments must be left by January 9th to be qualified for the gift certificate. Winner will be announced next week.

I hope that you all have a great start to your new year and give the new and old designers a warm welcome! We’ll see you tomorrow for the new release!

| | |

Tutorial: Watercolor “Flowers” + Giveaway

Hello, Joni here!

I hope everyone enjoyed their holiday. I am back with more inspiration using Pretty Pink Posh products. It is still cold here in California and I’m already wishing for spring. With that in mind, I created a project that you can design a watercolor flower card using Rainy Days Coordinating die set.

Pretty Pink Posh

To begin, I die-cut some of the clouds (flowers) and hearts (flower center) from the using Rainy Days Coordinating die set. I used the Matte Multi Medium to adhered the flower petals then watercolored them using the Zig Clean Color Real Brush set.

Pretty Pink Posh

For the leaves for the flowers, I simply drew a leaves image on a watercolor paper then fussy cut each one and watercolored.

Pretty Pink Posh

Here’s the finished look after the die-cuts have been watercolored. I also added a 6mm Espresso sequin to the center of the flowers for a little dimension and contrast.

Pretty Pink Posh

Next, I assembled the flowers on the white cardstock then adhered with foam tape, the leaves were adhered with Matte Multi Medium.

Pretty Pink Posh

Then, I added a strip of an old white and black patterned paper at the bottom of the card and stamped the sentiment “sorry you’re under the weather” from Rainy Days stamp set to finish off the card.

Pretty Pink Posh

Here’s another look of the finished card.

Pretty Pink Posh

Paulina wants to give you the opportunity to win some of her favorite watercolor markers and brushes. All you have to do is enter below leaving a comment with your favorite color combination to use on your crafts!

a Rafflecopter giveaway
Thank you so much for stopping by. I hope I have inspired you to look at your dies in a different way. Have a wonderful week and good luck on the giveaway!

sig name

|

Merry Reindeer + Giveaway Winners

Hello, friends!

We’re just a couple days away from Christmas and I wanted to share a card I made this year. I didn’t get to send Christmas cards this year, but thanks to a couple guest spots, I did create a couple cards that I’ll be giving to some family members. I was so bummed that I didn’t have time to create cards for crafty friends and my designers this year, but it’s also a blessing, because I was so busy with orders.

This year there were several amazing Christmas sets that came out and while I didn’t get to create with many of them, I’m happy for the time I did get to play with some! This adorable one called Reindeer Games by Mama Elephant was such a fun one.
december2a

On this card, I used the Decorative Tag 1 die set for my focal point and the Mama Elephant stamps went along with it perfectly. I added just a few sequins- one for the nose and three for the “snowballs”.

december2b


As promised, I have the winners from the Christmas Gift Guide giveaways. It made me so very happy to read that the guides were helpful and some of you purchased items from them! While they were a lot of work, reading how much you appreciated them made it so worth it. I just may have to do this again next year!

Without further ado, here are the winners. I have emailed the winners (using the email addresses given) so I can be sure to send the gift certificates to the right email addresses! winners3Thanks for spending some time with me today!