Hey crafty friends! I’m Rebecca Keppel and summertime is shimmer time in cardmaking! But we’ve all got places to be during the summer so shimmer techniques need to be quick and easy so we can spend more time in the pool!
Start with your background. I love plate dies like the Chevron Pierced Plate Die to create a background in one pass of the die cut machine. To add shimmer I start with something like Solar Spray because it doesn’t really change the color of the cardstock I chose.
To create shimmery die cuts I like to add shine and color all in one quick spritz, so Distress Spritz sprayed on white cardstock makes a nice soft shimmery color. Then use the Stitched Seashells Dies and Stitched Coral Dies to cut out some shimmery shapes. The added bonus of spritzing first is that running them through the die cut machine helps to flatten out the paper.
One final way to add some extra shine is to use a shimmer watercolor pan. Simply wet the watercolor paint and brush a paint brush through it and then tap on the handle over the project.
I hope you grab some Pretty Pink Posh summer dies and shimmer them up with these easy techniques so you can create a pretty card in a snap and get back to your sun and fun!
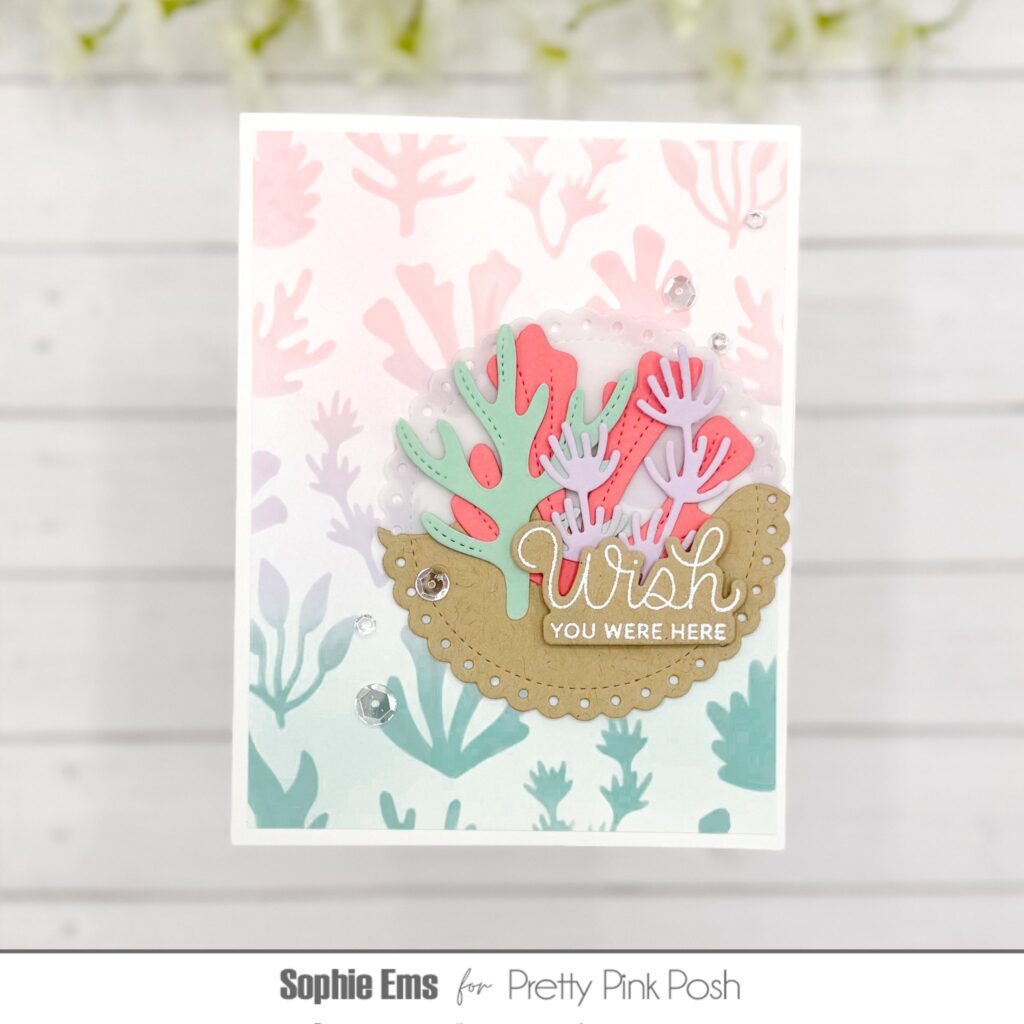
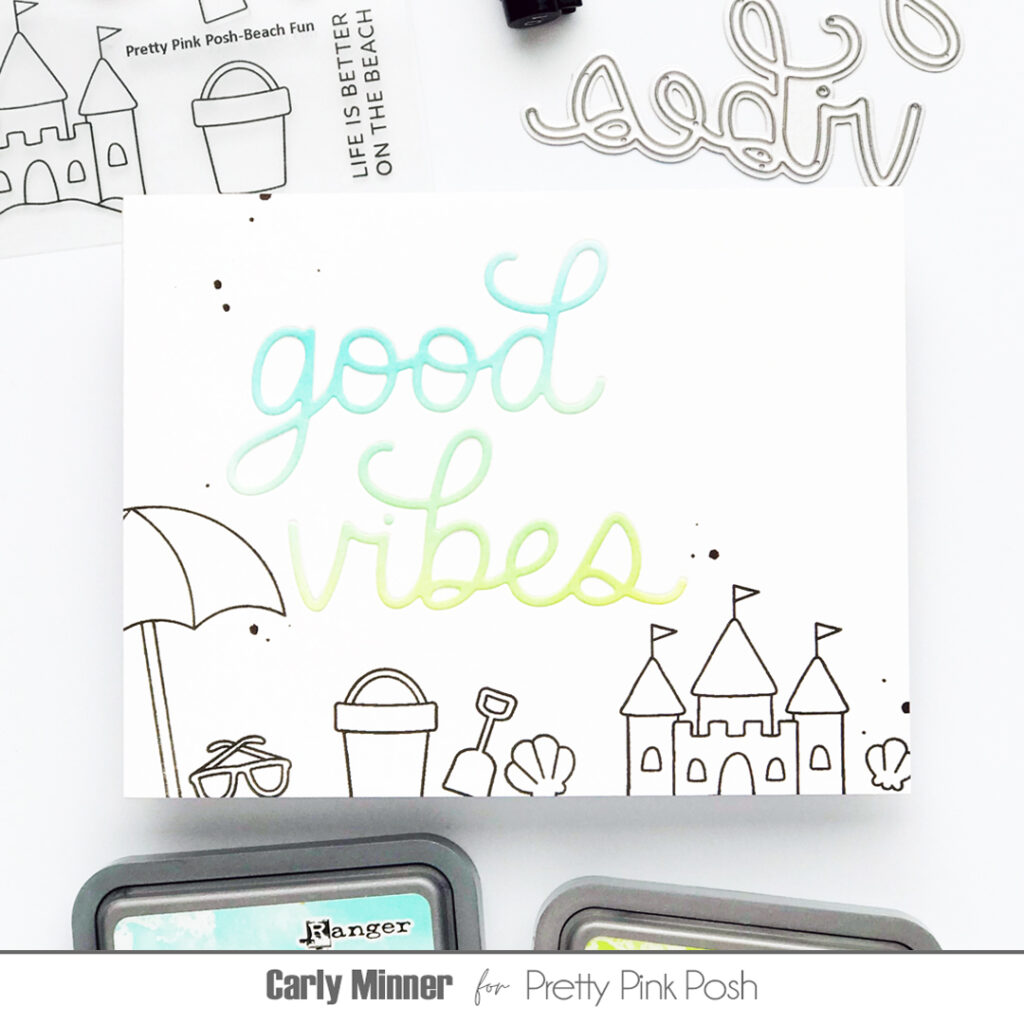
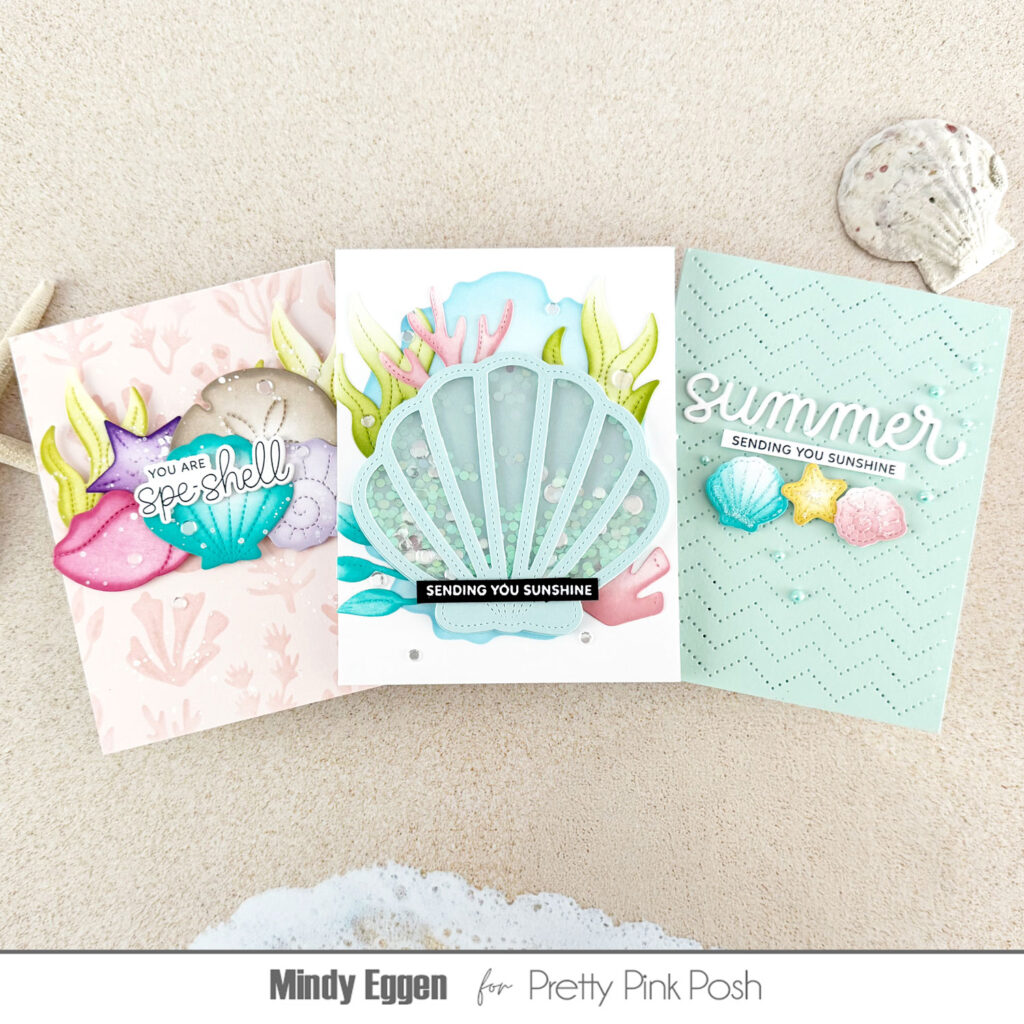
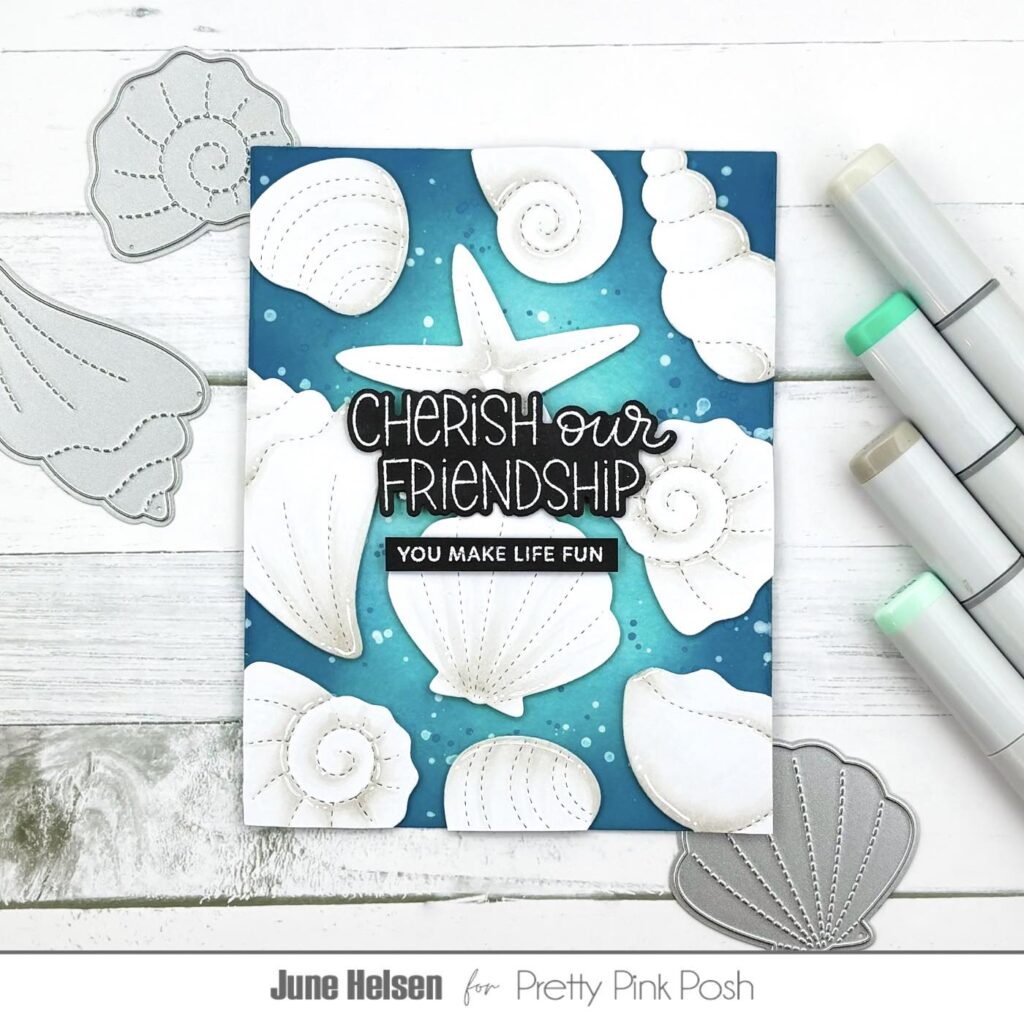
Hey friends, it’s Mindy! If you’re a fan of beachy vibes and serene color palettes, this project is right up your alley! Using a (mostly) monochromatic color scheme, I created a calming ocean-inspired card that captures the beauty of the shore with just one color family — beautiful shades of teal.
For this card, I worked with the delightful Beach Fun stamp set, stamping images onto smooth 80lb white cardstock and coloring them with alcohol markers for rich, blendable shading. To complement the stamped elements, I used the Layered Seashells stencil on a base of Seaside cardstock, blending Sea Glass and Turquoise Sea ink pads with a soft brush to create a textured, layered seashell background.
This limited color palette really helps unify the design while evoking the peaceful feeling of the ocean. The soft layering through the stencil combined with the detailed coloring on the stamped images brings dimension and interest without overwhelming the senses.
Whether you’re a beginner or an experienced card maker, I hope this inspires you to experiment with monochromatic schemes in your own beach-themed projects.
Happy crafting and may your creativity always feel as refreshing as a day at the beach!
I’ll tell you a secret…as a clean & simple cardmaker, I used to struggle with actually using my stencils. I loved them so much but I also loved white space and plain backgrounds. What was I do to?!
One solution was for me to make the stencil the primary star of the card instead of a background and this design is one of my favorites!
You need a little masking tape, your favorite inks to blend with, sentiment strips stamps and any of their gorgeous stencils (but don’t sleep on the Seashell Background for summer!)
Hi, friends! Lauren Taylor here and today I’m sharing a handmade card I created featuring some of the spring products! This project truly captures the essence of spring with its cheerful floral design and a playful shaker element that’s bound to bring joy.
I began by die-cutting various elements using the Tulip Shaker Dies and the Grass Border Die. From green cardstock, I cut out the grass border as well as the stems and leaves for the tulips. For the tulip tops and their frames, I chose a lovely rose pink cardstock, and for the shaker portion of the tulip, I die-cut the flower bud shape from acetate, using a helpful trick of placing printer paper underneath to ensure a clean cut. Assembling the tulips involved adhering the pink tops to the green stems and leaves. The shaker tulip required attaching the acetate to the frame using adhesive.
The real magic happens with the shaker element! I used thin foam strips to build a little container within the tulip frame and then filled it with the vibrant Sugar Pop Shaker Beads. To seal the shaker, I attached one of the solid tulips to the back of the frame, creating a delightful interactive element. For the background, I opted for a soft, blended look using the Watercolor Oval Mask Stencil and Distress Inks in shades of Squeezed Lemonade, Dried Marigold, and Tumbled Glass, aiming for a sunny, sky-like feel. A touch of black splatter added a bit of whimsy.
After adhering this background to an A2 card base, I arranged the die-cut tulips and grass border across the front. Finally, I added the Large Celebrate Shadow Diesentiment, die-cutting the word and its shadow from white and pink cardstock respectively, and attaching it with foam strips for added dimension. This card, with its celebratory sentiment and fun shaker, is perfect for so many occasions!
I hope you were inspired by this shaker card. Thanks for stopping by!
Hey crafty friends! I’m Rebecca Keppel and when it comes to three dimensional or interactive cards, I am hopeless if I need to do any measuring at all! That’s why I love Pretty Pink Posh’s die sets like the Shadow Box Dies. There is no measuring required! You die cut all the pieces that you need (which are all included in this set) and adhere everything together. That includes both sides of the box as well as decorative rectangles for the window and decorative edges for the “shelves” or layers of the shadow box.
It is so quick and easy to create the shadow box that you can spend more time decorating it! I added some of the Stitched Humingbird Dies. Cutting them out of colorful cardstock really popped off the greens and blues I used for my shadow box.
The June 2025 Release is now available in the Pretty Pink Posh Shop and select retailers that carry our products. If you missed our post yesterday, we revealed all of the products in picture form, but if you would like to see them in a video, Mindy has that for you today!
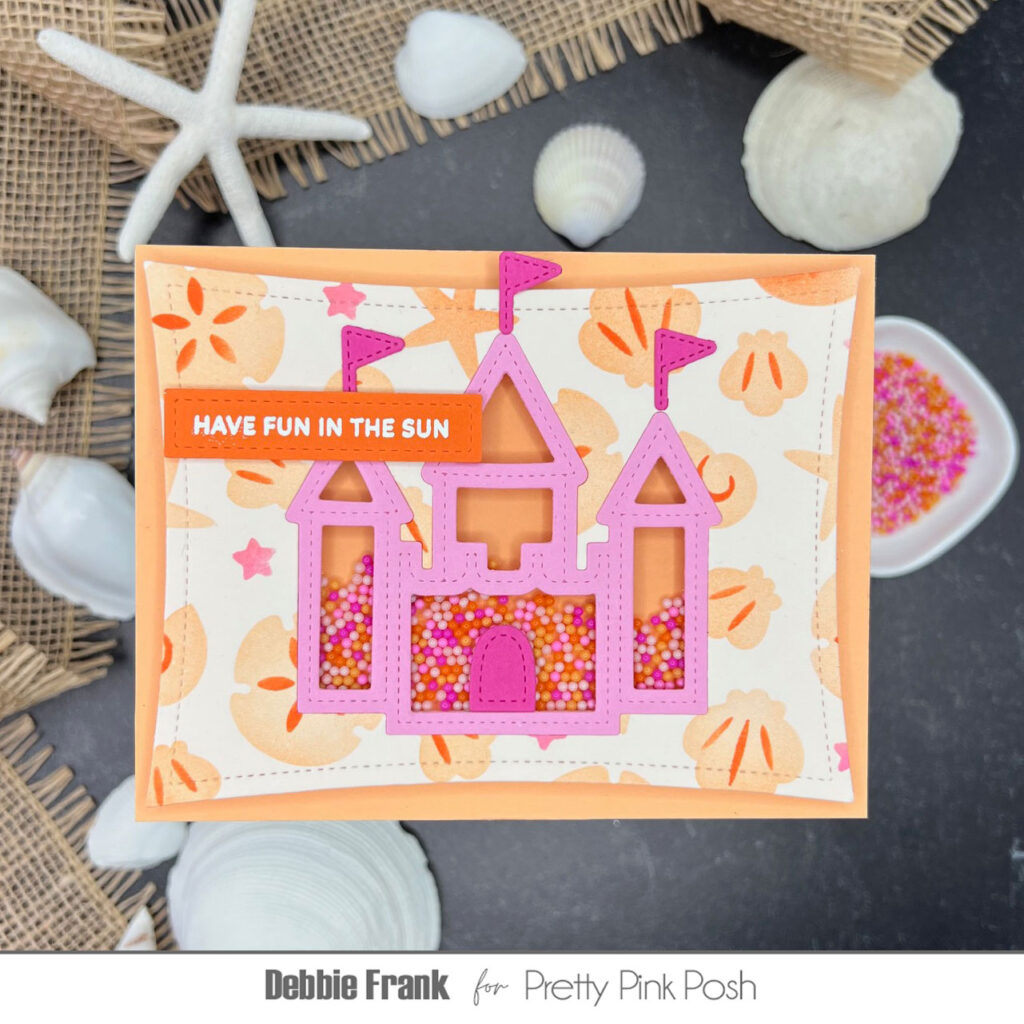
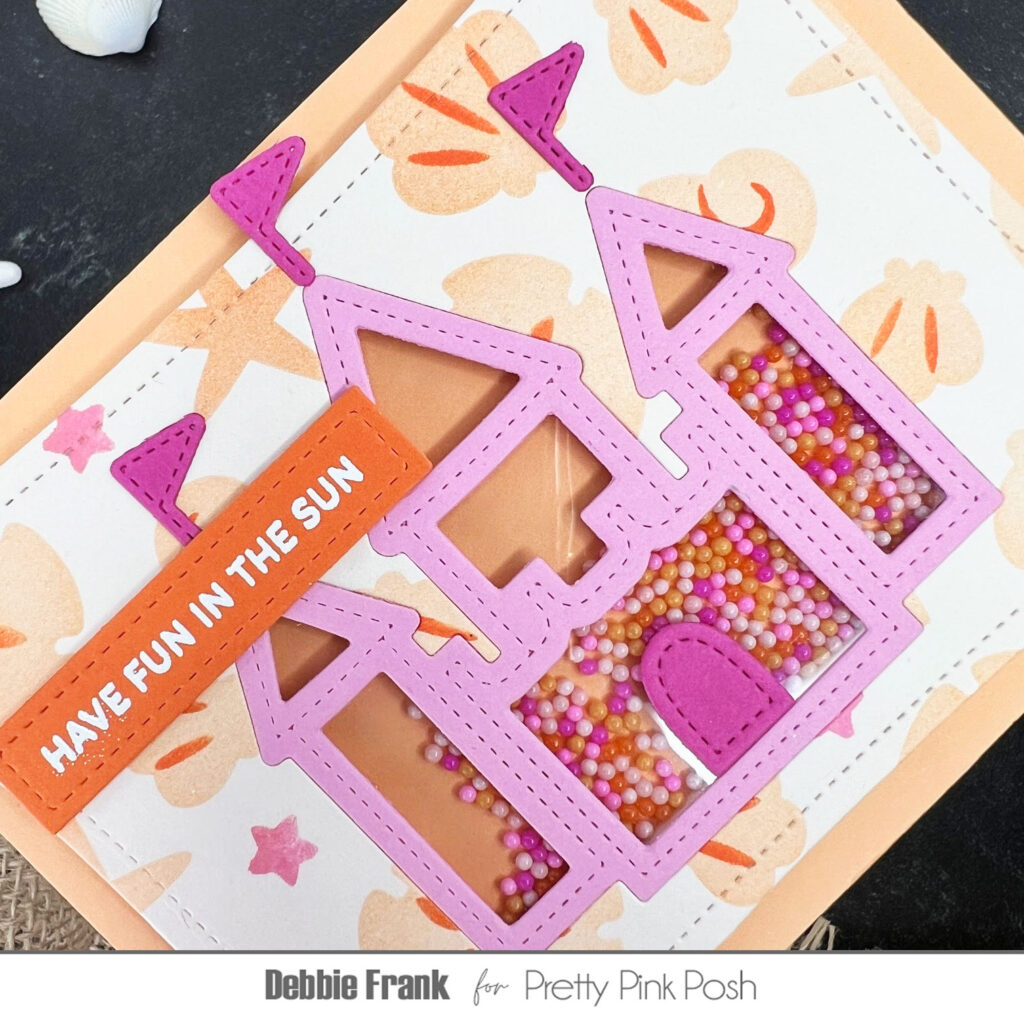
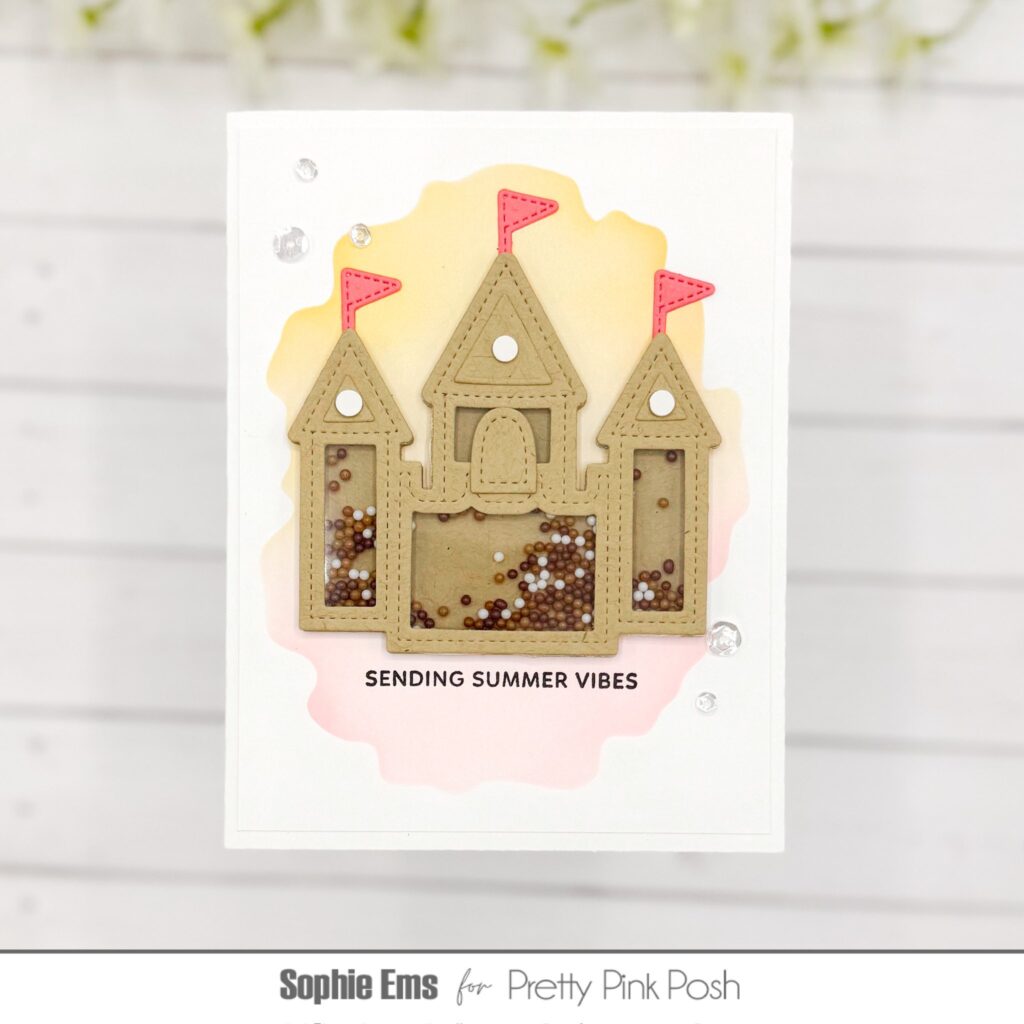
Hi friends Debbie here with the new Sandcastle Shaker from the June Release. This whole release is so fun and adorable. With all the fun shakers, Seashells, Stencils, and the beautiful mixes for inspiration! It brought out the inner mermaid in me! And who is ready for Summer!
Speaking of using the beads for inspiration, the Paradise Shaker Beads was mine on this Pink Sandcastle.
Starting off with the background, using the Layered Seashells Stencil. With Layer A, I ink blended on a light Orange. Once it was done I then placed layer B over the panel and ink blended on a darker Orange on the shells. To incorporate the pink, I added pink ink to the stars on layer B. Next, I die cut the panel out using the larger Wonky Stitched Rectangle Die.
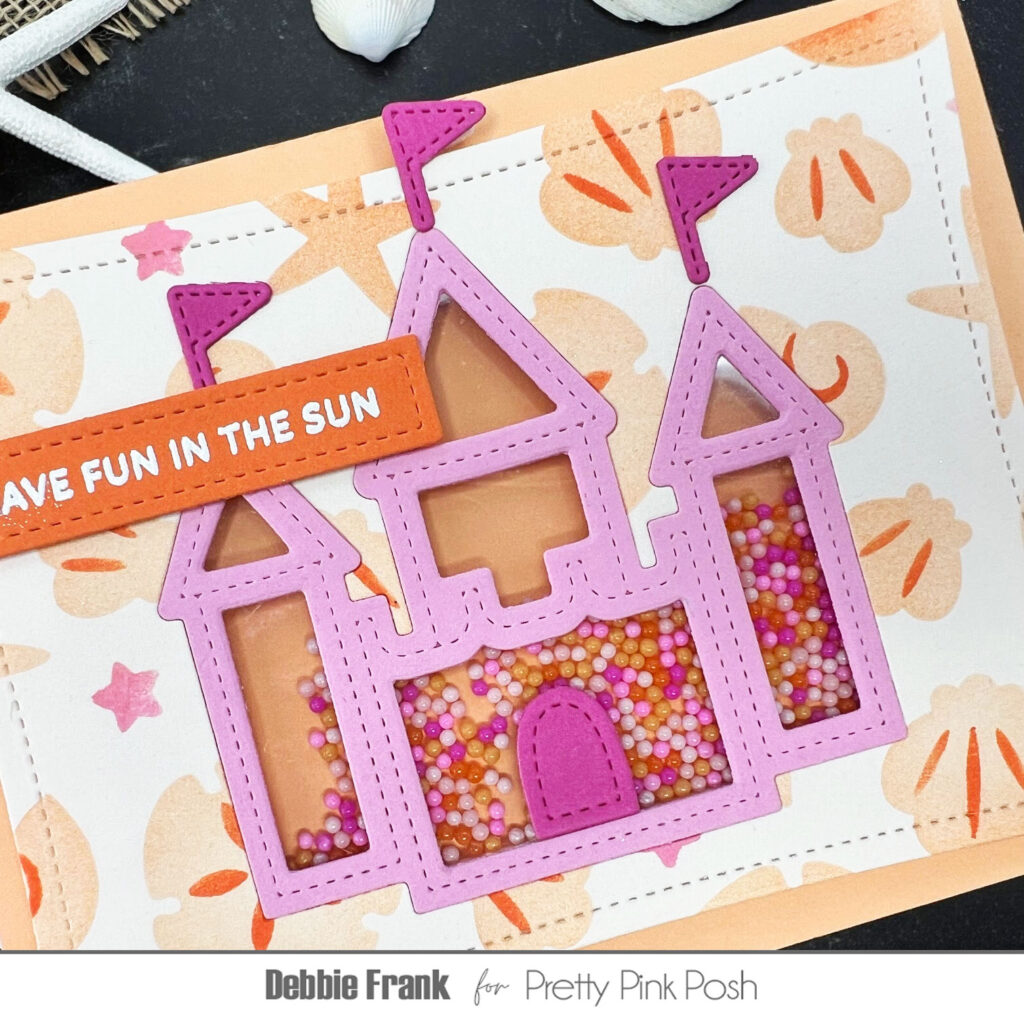
Then in the center of the panel I die cut out the whole Sandcastle Shaker Die. Also die cutting it from a pink card stock using both the outer and inner dies to create the frame of the sandcastle.
Adhering acetate to the back of the panel with double sided adhesive. Then adding foam strips around the window to create a well for theParadise Shaker Beads. Once the beads were poured inside I placed a Melon colored card stock over to in case the beads.
Next, on the front of the panel I attached the sandcastle frame. Adding a darker pink for the flags and door. The center flag did go off the panel so I popped a small foam square to the back of it.
For the sentiment I used one from the Sentiment Strips: Summer. Stamping and White heat embossed it on a brighter Orange. Then die cutting it out with Sentiment Strips Dies, adding thin foam squares to the back but making sure they aren’t where the flag would be. This will keep the sentiment nice and even.
I love how this card turned out, let me know what you think! It such a fun and really pretty easy card to make. It’s like our own Barbie Sandcastle!
Thanks for stopping by and stay crafty my friends!
Welcome to the last day of sneak peeks of our June 5th release. Today we’ll be taking a look at the Stitched Coral, Chevron Pierced Plate, and Good Vibes Shadow die sets.
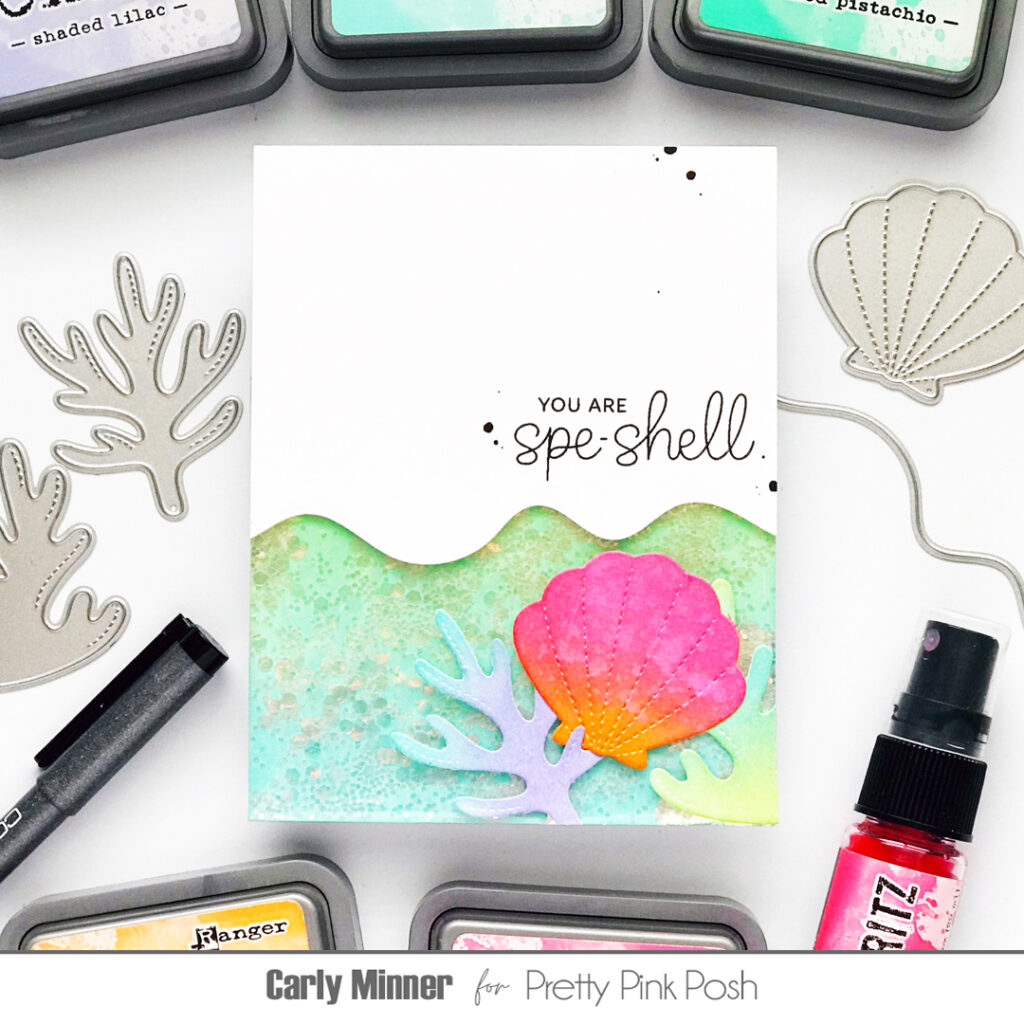
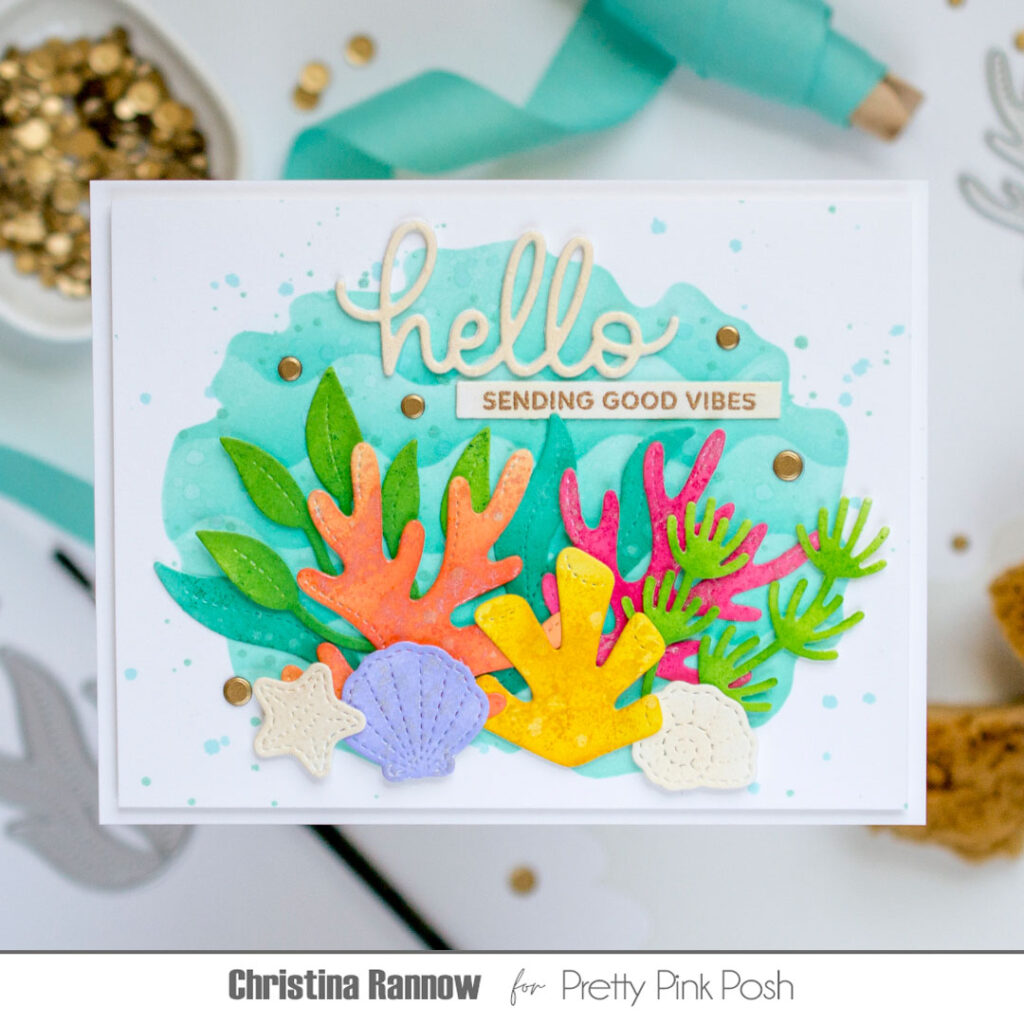
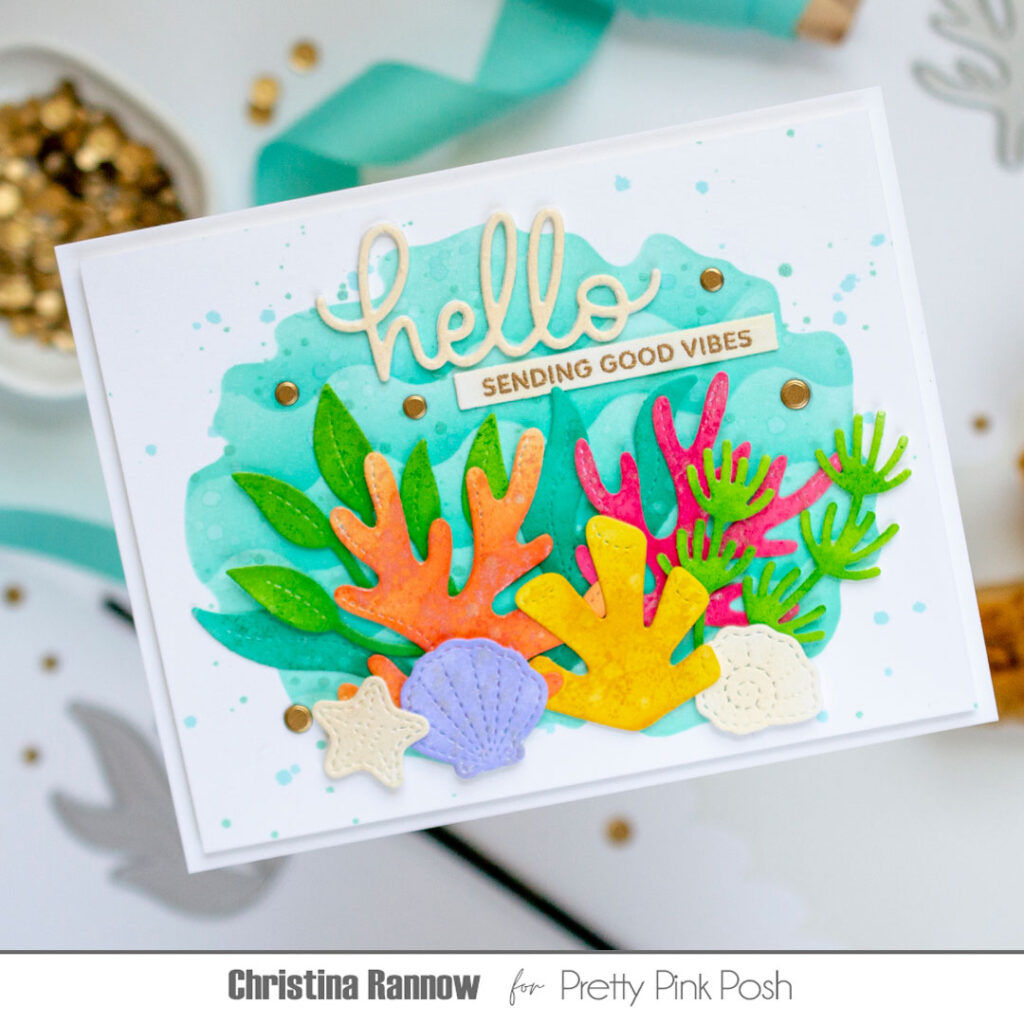
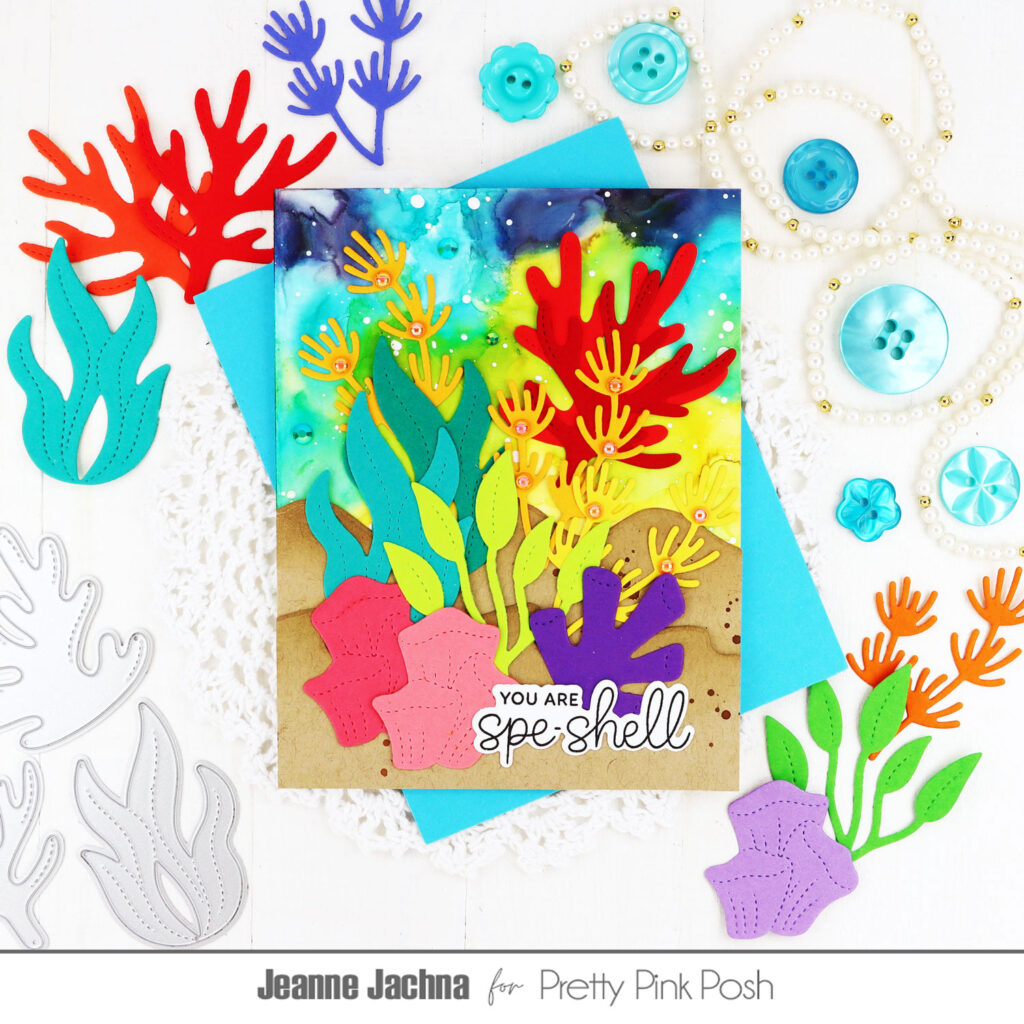
Hi Friends! It’s Christina and I’m here to share another sneak peek at the incredible June 5th summertime release. Today I’m showcasing the Stitched Coral die set, one of my favorite things from this release. I thought these tropical-colored die cuts paired perfectly with the Watercolor Oval stencil stencil to create a dazzling under-the-sea card design. Below you’ll find even more sneak peek inspiration from the team, but first I’ll share all the details for my inspiration project!
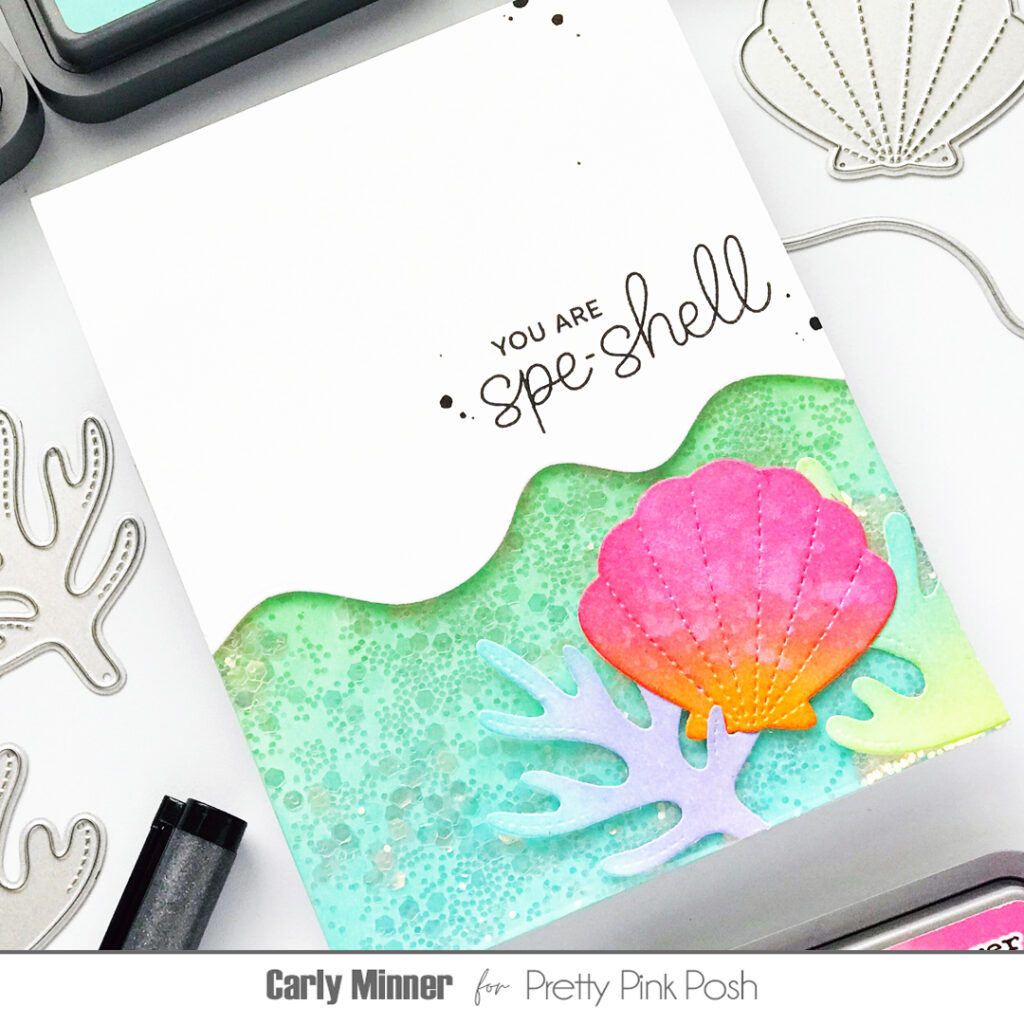
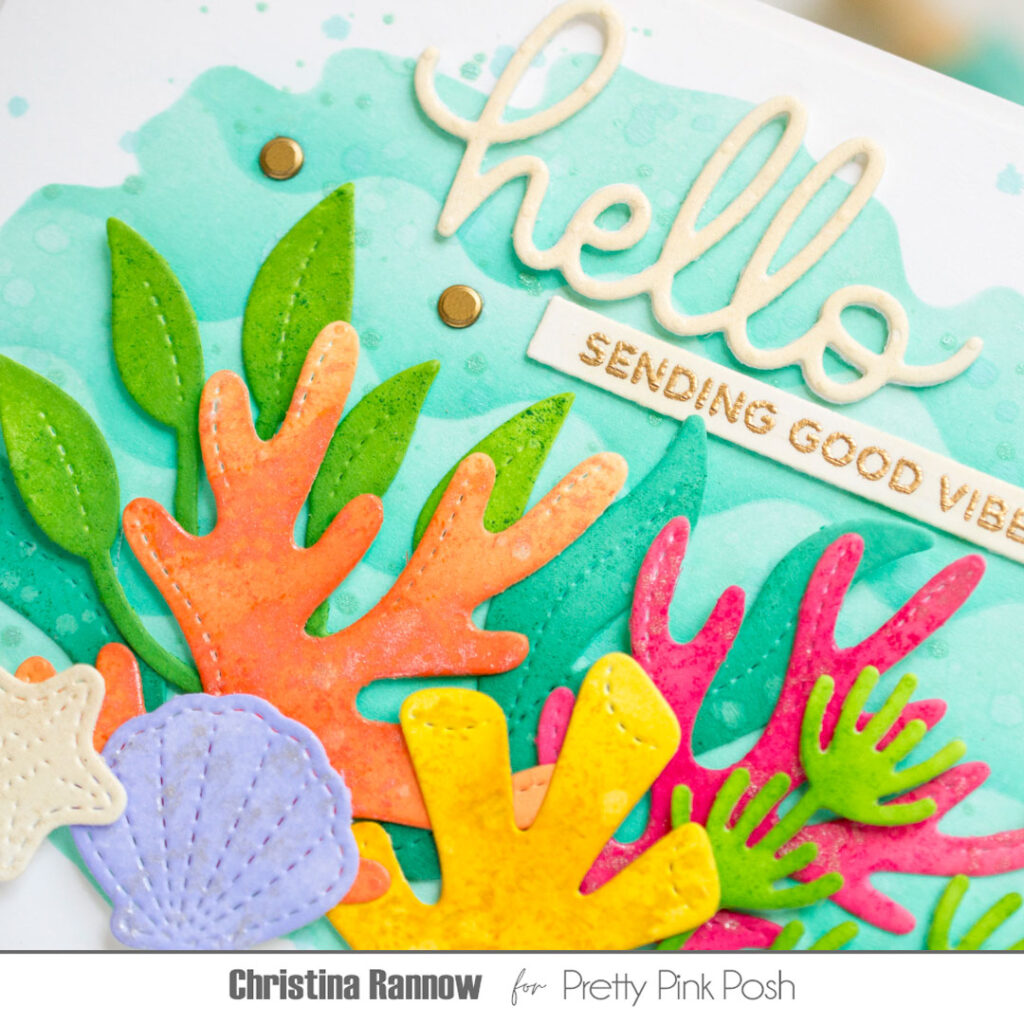
I started by die cutting the elements I wanted to use from the Stitched Coral die set and the new Seashell Border die set from white cardstock. Using tropical ink colors, I ink blended the die cuts using blending brushes and then added texture with a darker ink color and a sea sponge. By the way, sea sponges are a great tool to have in your arsenal; they are inexpensive and can be used with almost any medium to add texture and interest to your craft projects! Finally, to give the coral and the shell die cuts a little shimmer, I spritzed them with coordinating Mica Stains.
To create an under-the-sea backdrop for the die cuts, I started by stenciling the Watercolor Ovalon a white cardstock panel with teal ink. Then, using the new Wave Edges Stencil, I stenciled a wave pattern inside the oval with a darker teal shade. And to give the background a little more interest, I splattered it with plain water and with the same teal ink colors I used for stenciling.
With the background and the die cuts ready to go, I got to work assembling and finishing up my card design. First I trimmed the background panel to 4 x 5 ¼ and attached it to a card base with foam tape. Then I arranged my coral and shell die cuts inside the watercolor oval and attached them with either glue or foam squares, depending on their placement and if they overlapped. Next I added the Hello Script greeting and a gold heat embossed sentiment from the new Sentiment Strips: Summer set. I die cut the sentiment with a Sentiment Strip die before attaching it under the greeting and then added a fewMatte Gold Confetti embellishments.
Keep scrolling to find even more sneak peek inspiration from the team!
We hope you enjoyed this sneak peek. We’ll be back tomorrow with a full picture reveal of the release!
Welcome to day 3 of sneak peeks for our June 5th release. Today we’ll be sharing a look at the new Seashell Border, Seashell Shaker, and Stitched Seashells die sets.
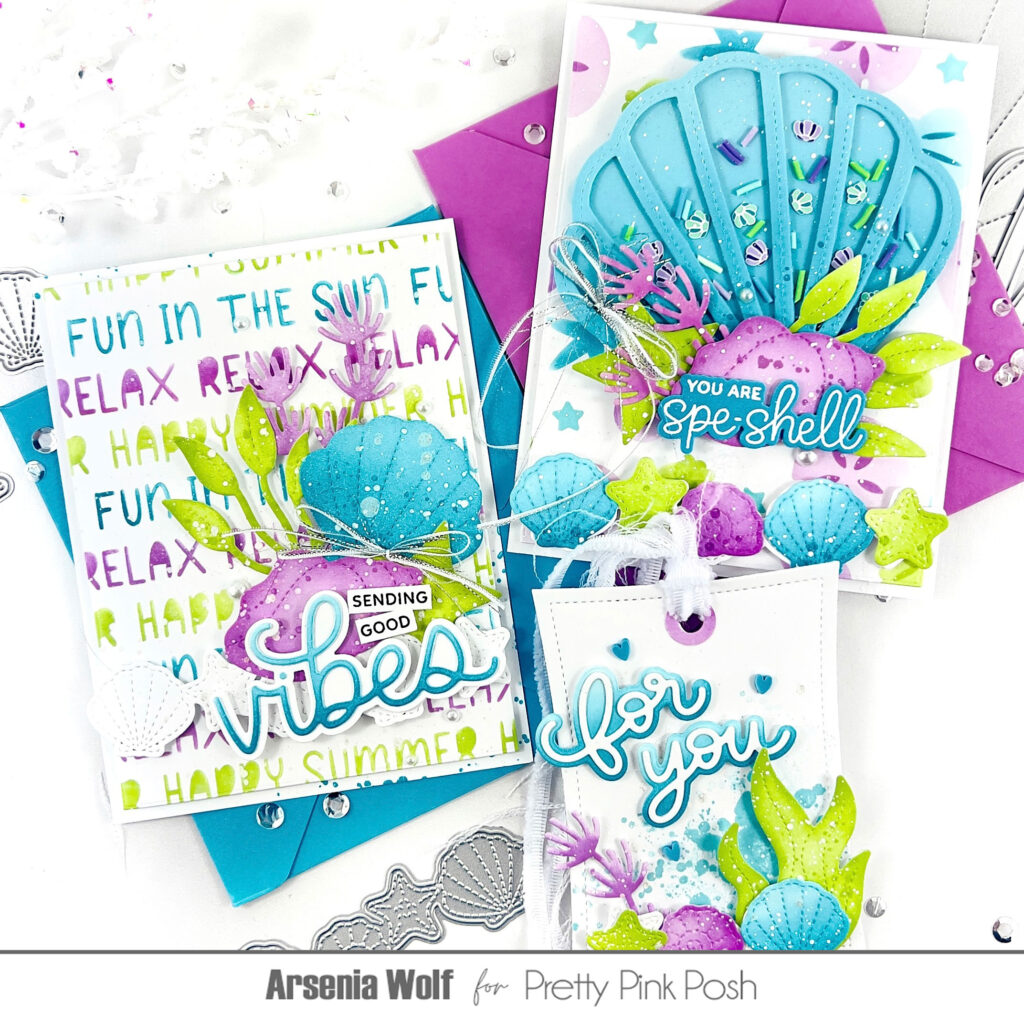
Hello Crafty Friends! Arsenia here — and oh boy, do I have something fintastic to share with you today! I’ve teamed up with some of my favorite crafty pals to bring you a sun-soaked sneak peek featuring the brand-new Stitched Seashells Dies, Seashell Shaker Dies, and the beautiful Seashell Border Die. These dies are everything you need for creating beachy, summery goodness — from ocean vibes to tropical flair!
I’m sharing two cards and a sweet little gift tag that are bursting with seaside goodness, so grab your shades and let’s dive right in!
Ready to make some waves? For my first card, I used the fabulous new Seashell Shaker Die — but with a twist! I created a faux shaker by skipping the acetate and popping up the outer shell with foam tape. Then, I tucked in some super cute bits from the new Underwater Mix Clay — total treasure vibes!
My color palette? Inspired straight from the mix itself — it’s minimal but totally packs a punch! I inked up two shells from the new Stitched Seashells Dies and added some whimsy with the new Stitched Coral Dies. These sets play so well together, like a perfect beach day!
To anchor the design, I added the new Seashell Border Die along the bottom — color coordinated, of course — and for the background, I used the gorgeous new Layered Seashells Stencil with my three fave inks. A little splatter here, a few pearls there, and a ribbon to finish it all off. I stamped a sentiment from the new Seashells Stamp Set, popped it on with the coordinating dies, and boom — instant ocean bliss!
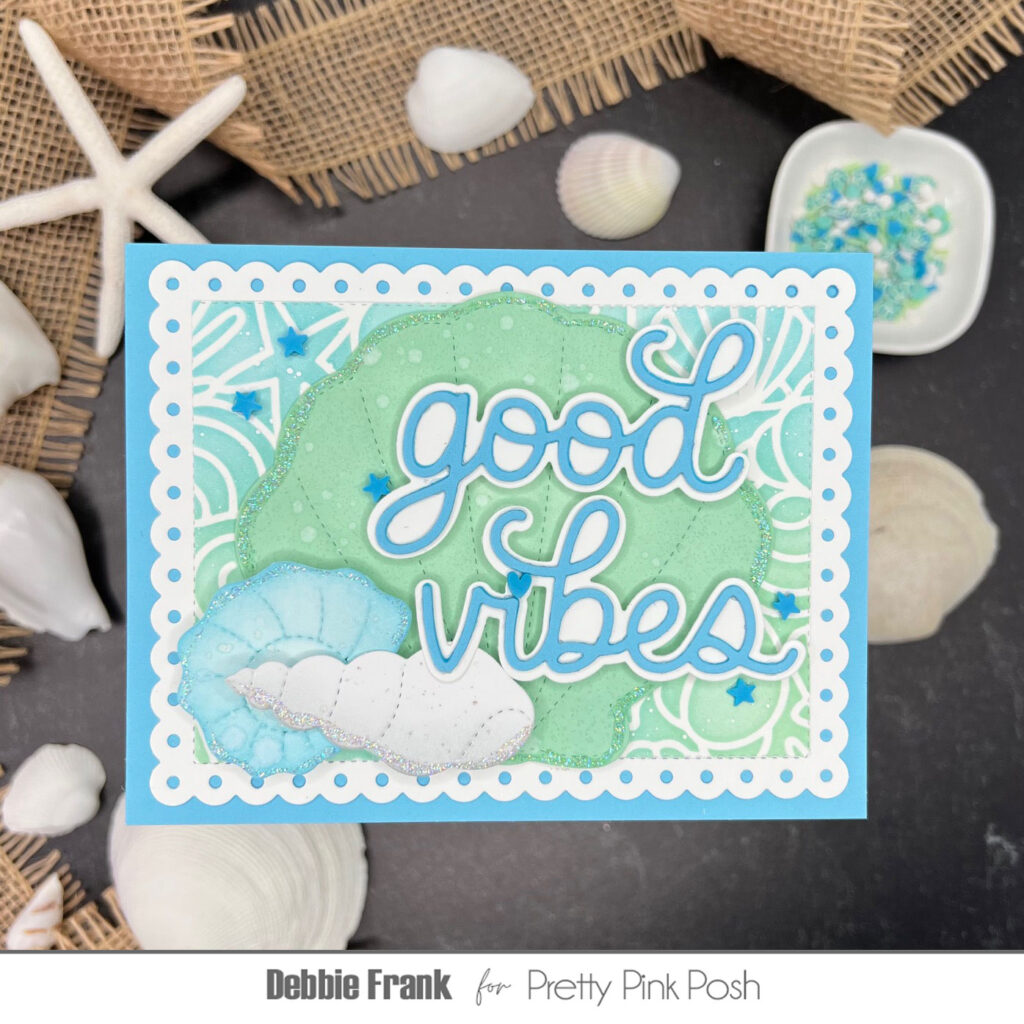
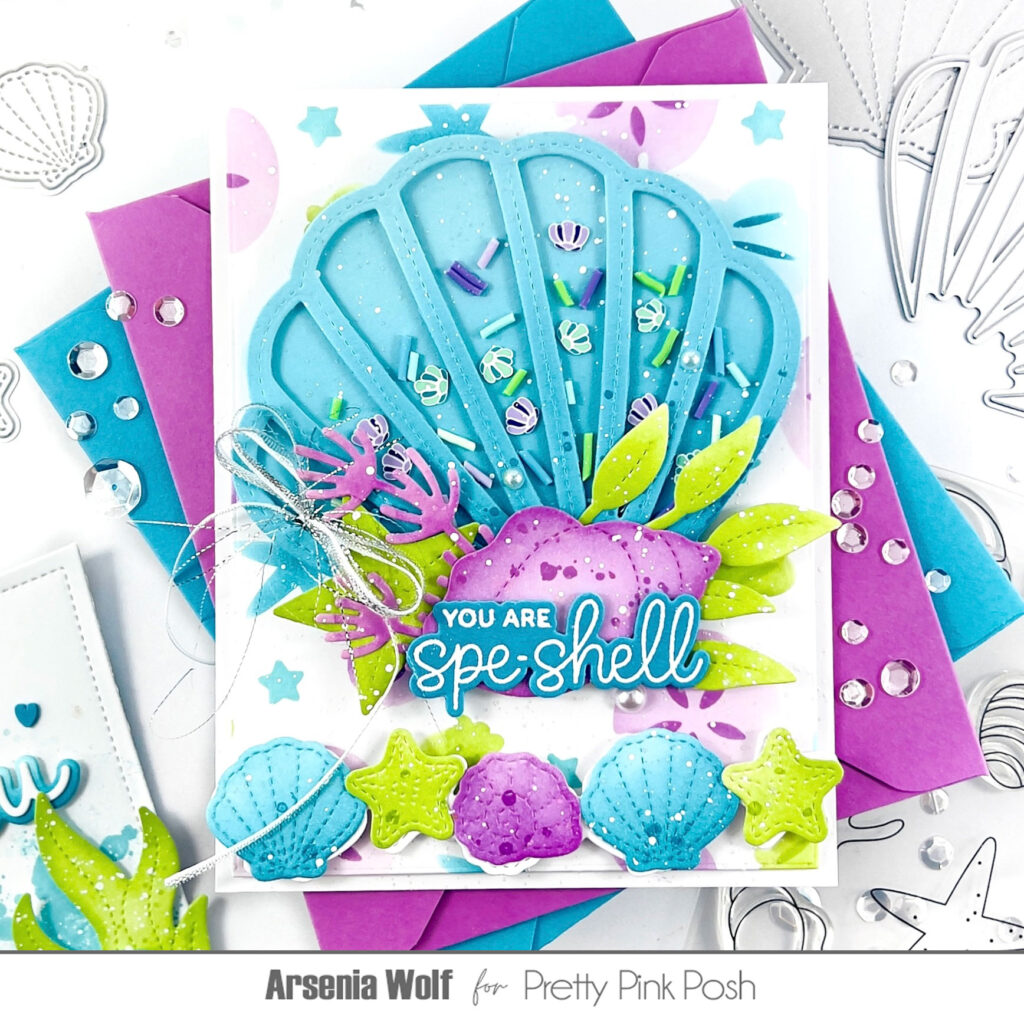
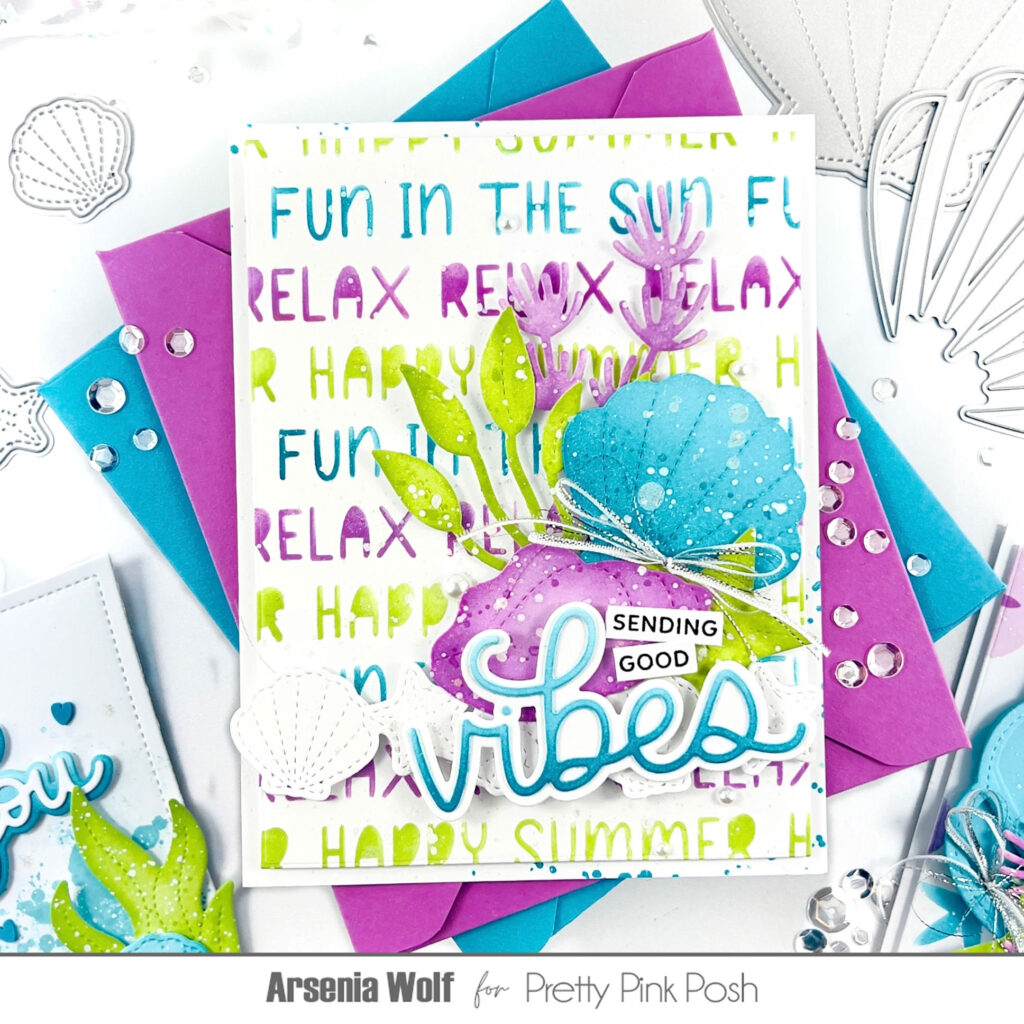
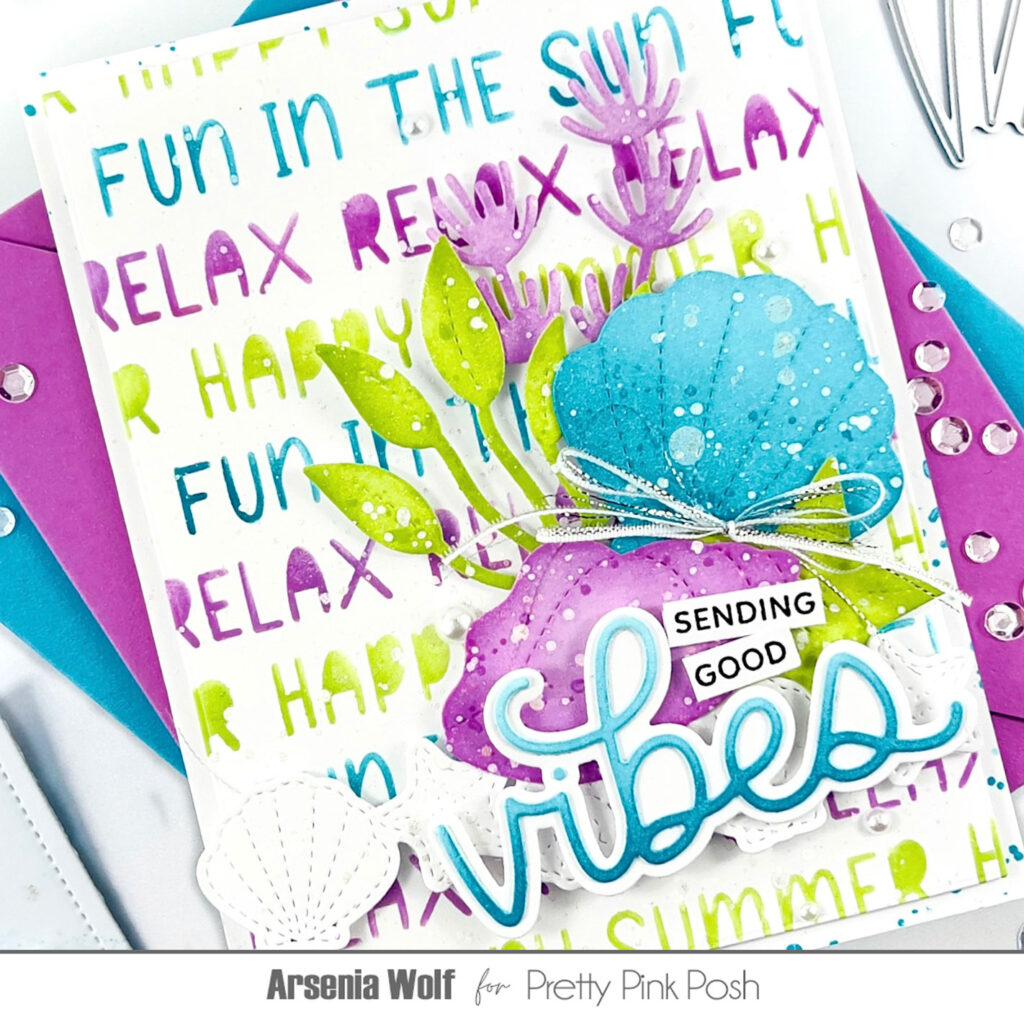
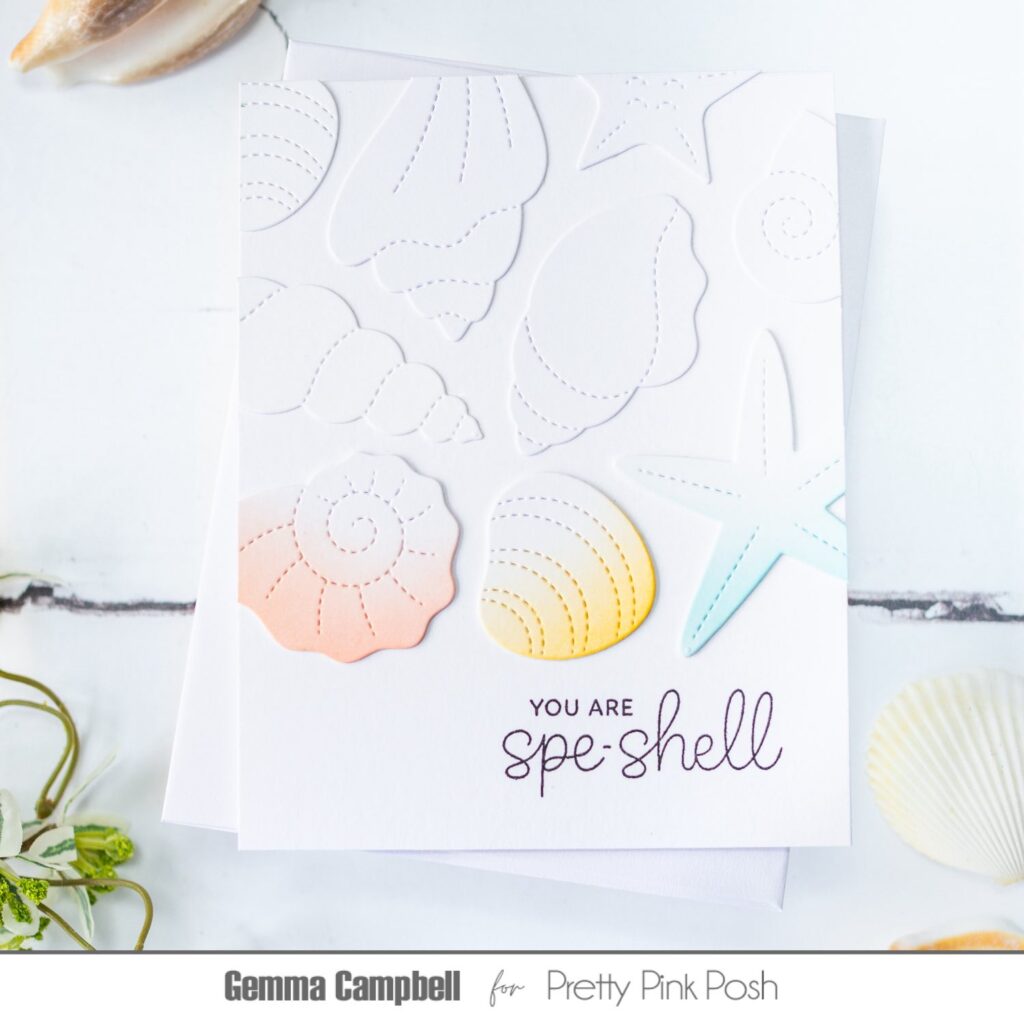
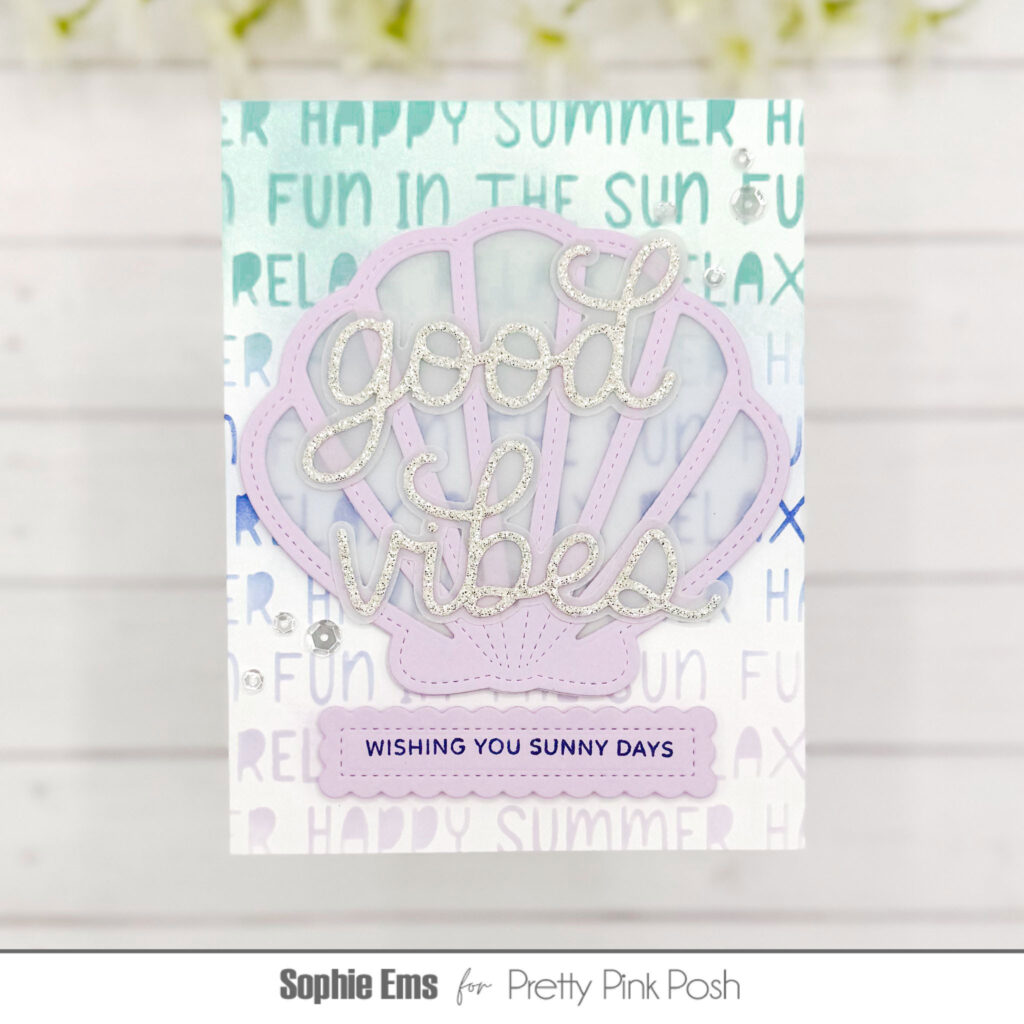
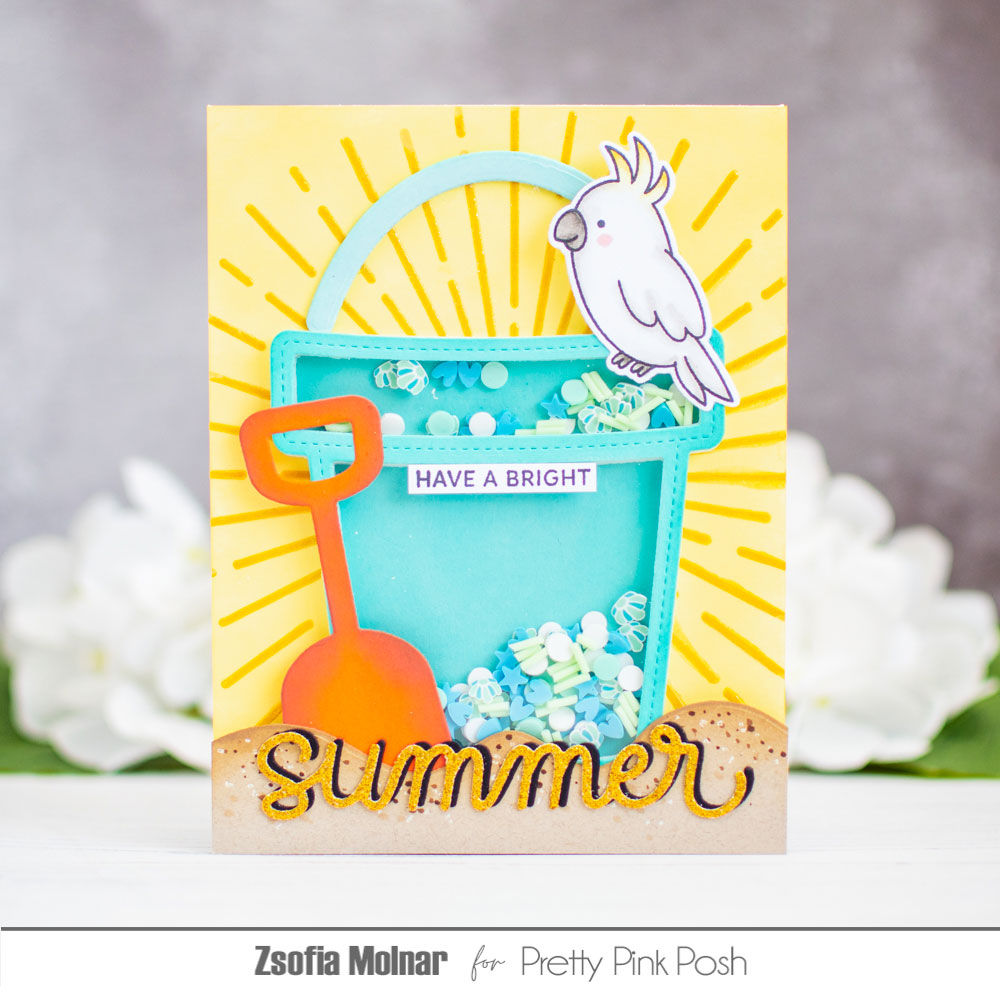
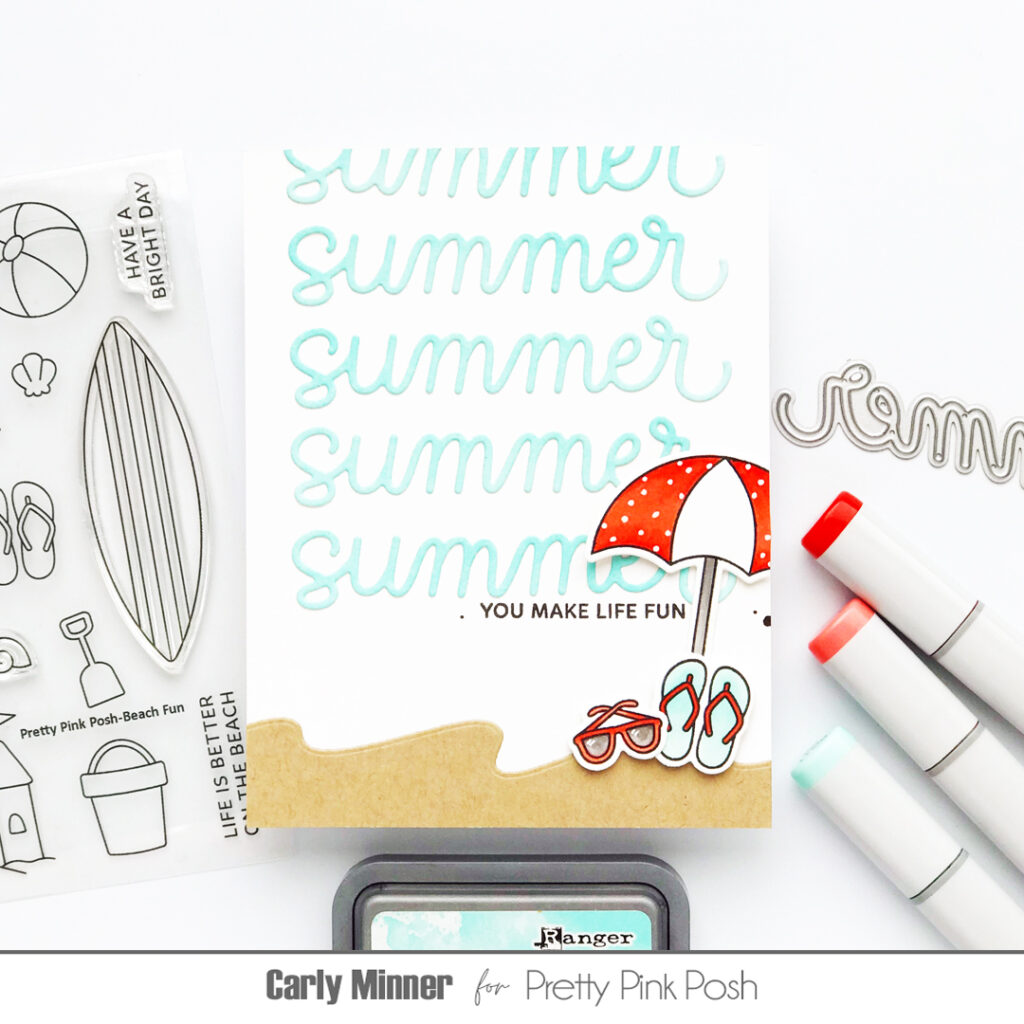
For card number two, I couldn’t wait to play more with the new Stitched Seashells and Stitched Coral Dies. I inked everything up in fresh, beachy colors and paired it with the new Summer Words Stencil for the background — one of my absolute favorites for adding bold, fun texture or soft, subtle vibes depending on your inking style.
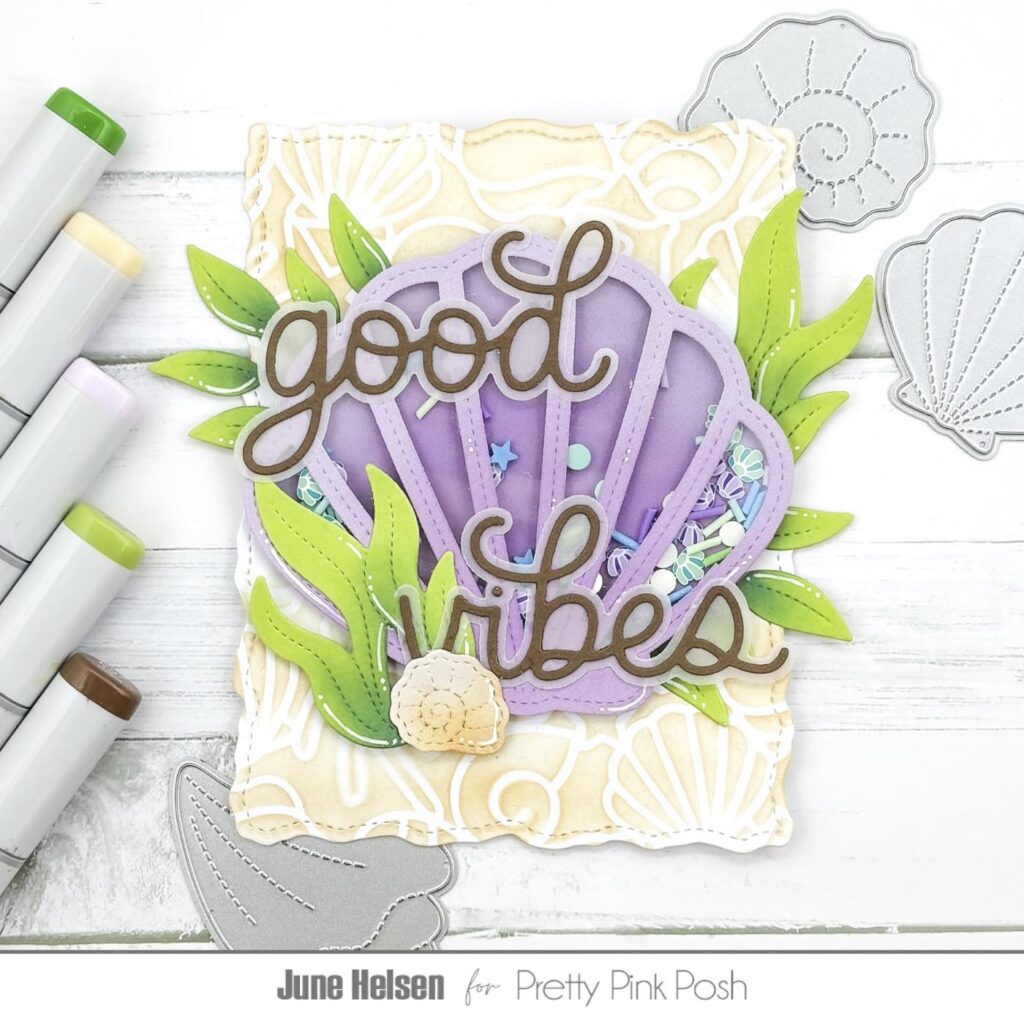
To keep things from getting too busy, I used the Seashell Border Die again — this time in crisp white — to break up the background and give my sentiment a cozy resting spot. I layered in the new Good Vibes Shadow Die and a sentiment from the new Sentiment Strips: Summer set, then sprinkled in white splatters, sparkle, pearls, and a bow. And just like that — card two is done and shining brighter than a beach sunrise!
Not one to waste those pretty leftovers, I whipped up a quick and adorable gift tag using the Wonky Stitched Rectangles. I added some leftover shells and coral, then topped it off with the For You Shadow Dies and a couple of blue hearts from the new Beach Town Clay Mix. Perfect for a gift bag, party straw, or a gift topper!
These new goodies are so much fun to play with and beyond perfect for all your summer-themed crafting — think cards, party décor, cupcake toppers, gift tags, and more. This release is pure sunshine and sea breeze — and I’m in love with every single piece!
Here’s a look from the team showcasing the products we’re featuring today.
Stay tuned for more inspiration and happy crafting, friends!
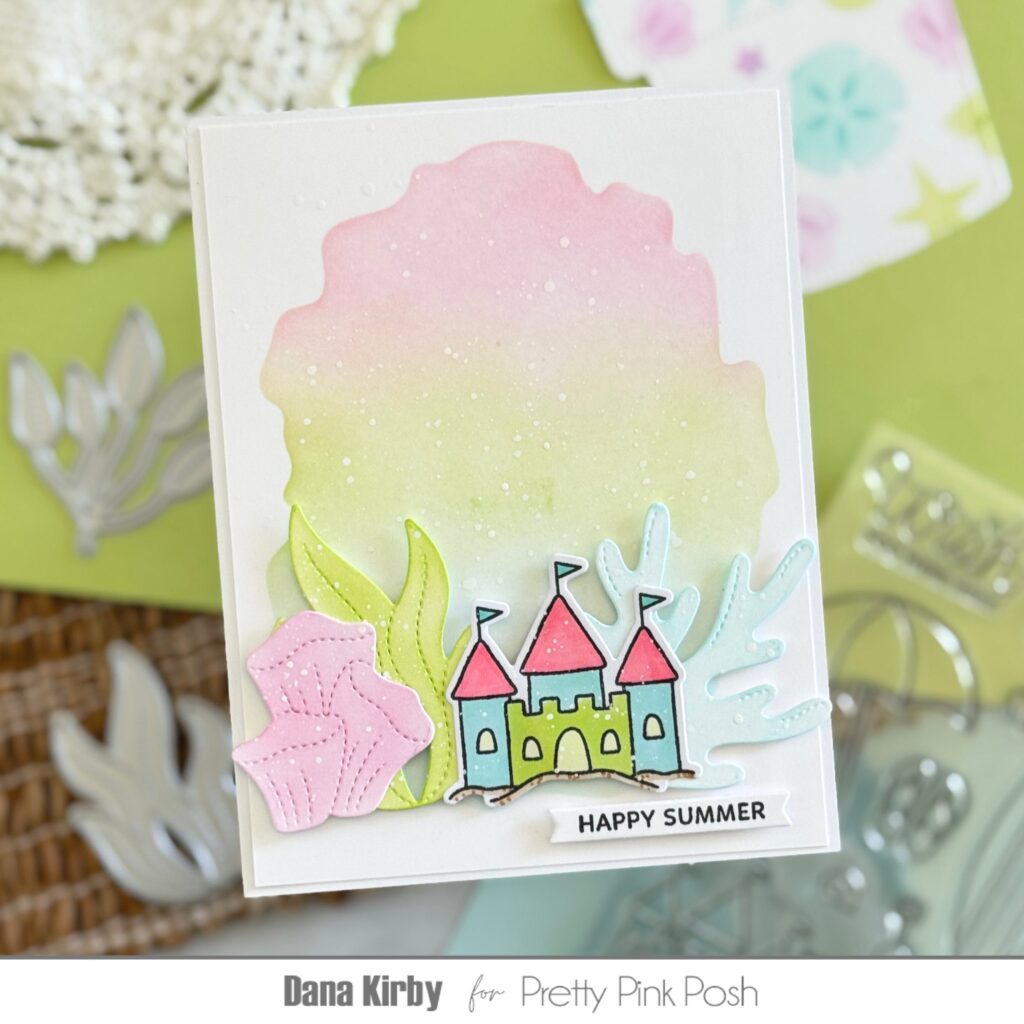
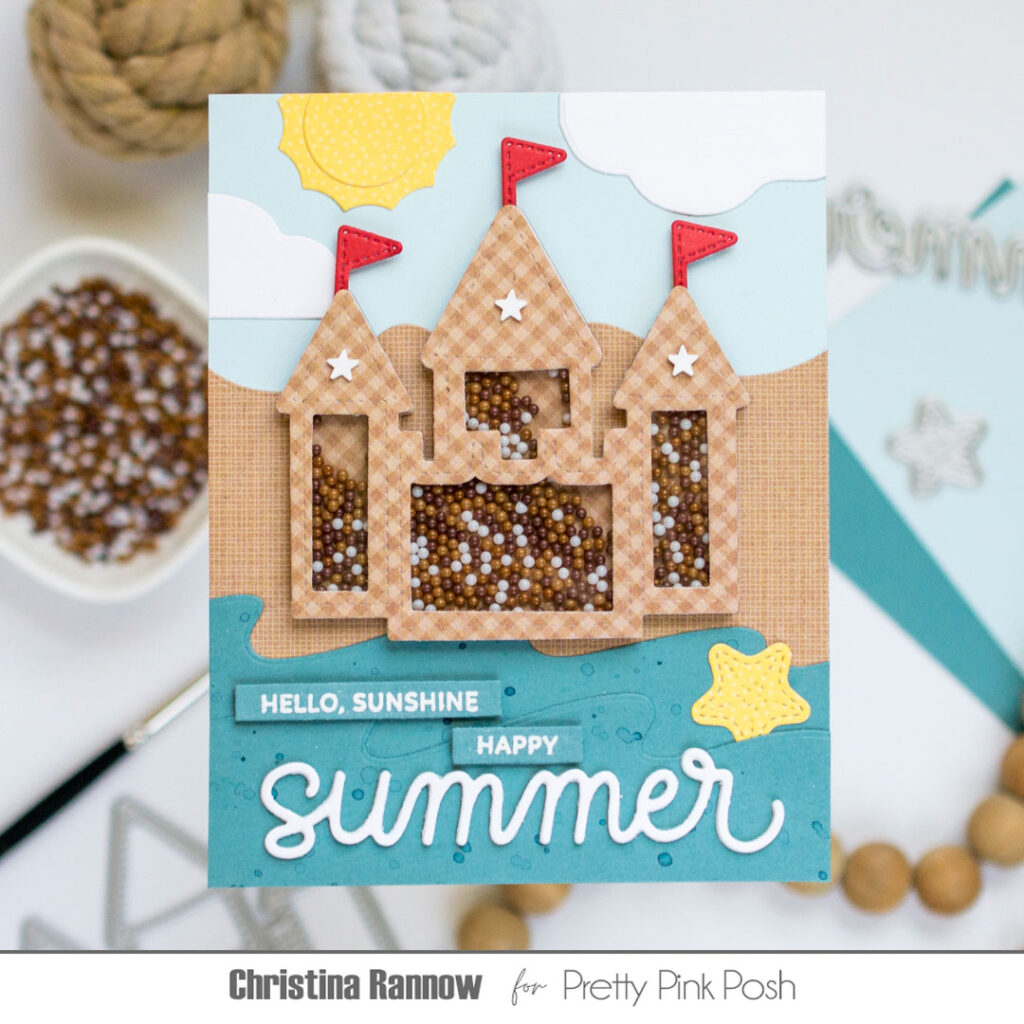
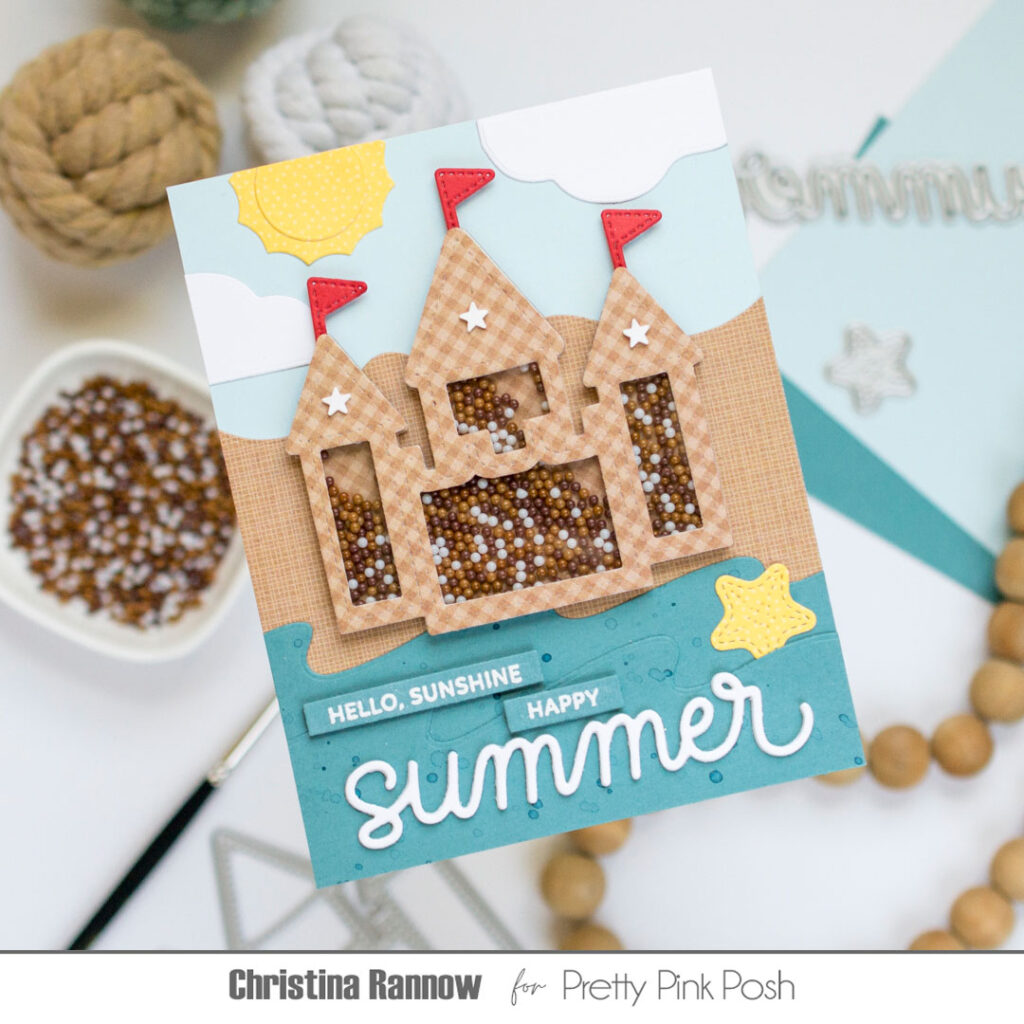
Hi crafty friends! Christina here, and it’s time for some more sneak peeks at the fabulous summer-themed June release. Today I’m super excited to give you the first look at the new Sandcastle Shaker and the new Summer Script die that I combined to create a fun beach day shaker card. Below you’ll find more sneak peek inspiration from the other designers, but first I’ll give you all the details about my card design!
I started by creating the layered background for my beach scene using the new Shoreline Borders to die cut colored cardstock and patterned paper. I adhered the sand layer first, on a light blue cardstock panel, covering about ⅔ of the panel. Before adding the water layers on the bottom third of the panel, I spattered them with a little Distress Ink and water.
I wanted to add some interest to the sky, so I got creative and used the dirt mound from the Big Dump Truck die set for the clouds and the new Summer Icons coordinating dies to create a sun, which I die cut from patterned paper. I glued these in place and trimmed away anything that overhung the background panel.
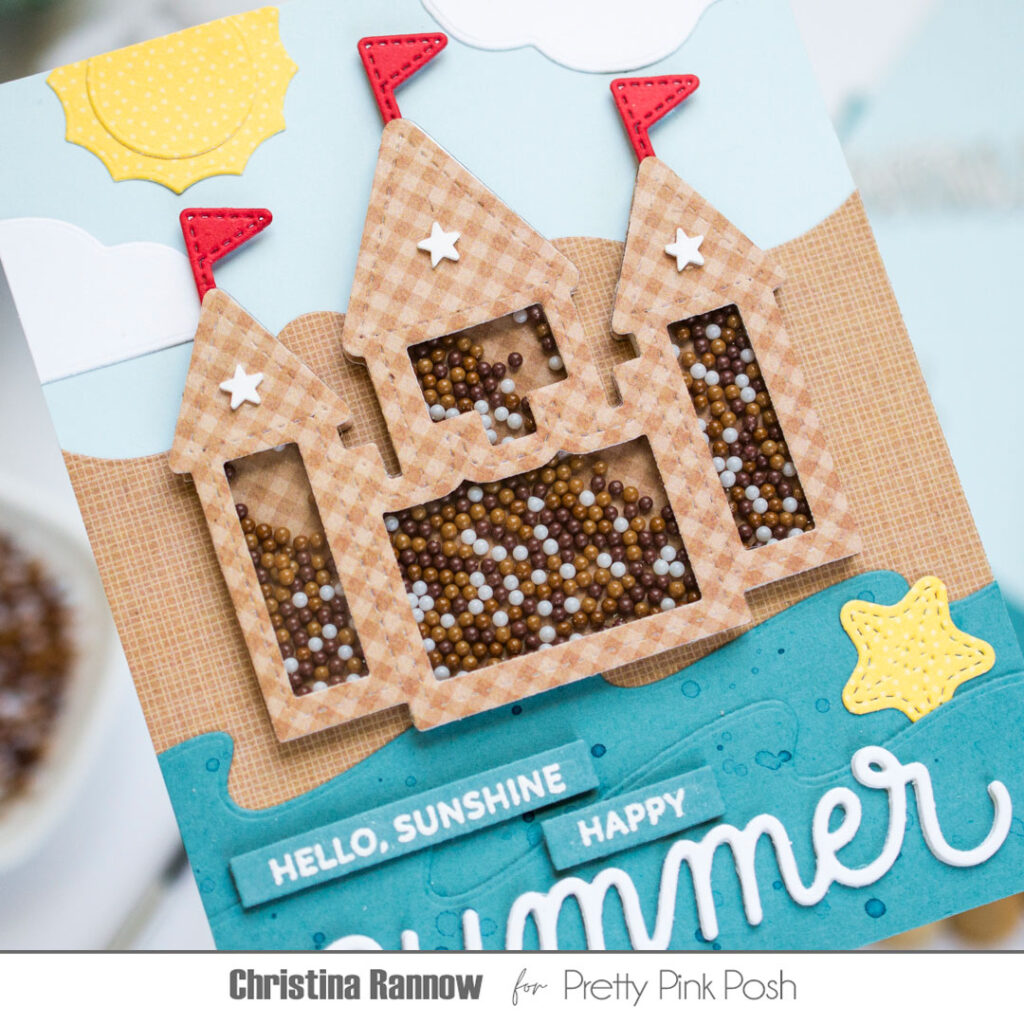
Next I constructed the Sandcastle Shaker using more patterned paper and filling it with Chocolate Shaker Beads – the colors are perfect for this sandcastle! To keep things simple, I constructed the shaker separate from the card design using thin foam strips and then attached it to my scene with glue. I adorned the castle with red flags and, from the Patriotic Stars Clay Confetti, a few white stars.
To finish things up, I added a greeting and a sentiment by combining the new Summer Script die with a couple of stamps from the new Sentiment Strips Stamp Set: Summer. I chose white cardstock for the Summer Script to coordinate with the clouds and the stars. And for the stamps, I heat embossed them on the same blue cardstock I used for the water before die cutting them with Sentiment Strip Dies and attaching them with foam squares. Finally, I tucked a little starfish from the new Seashell Border die set into the water to balance out my design.
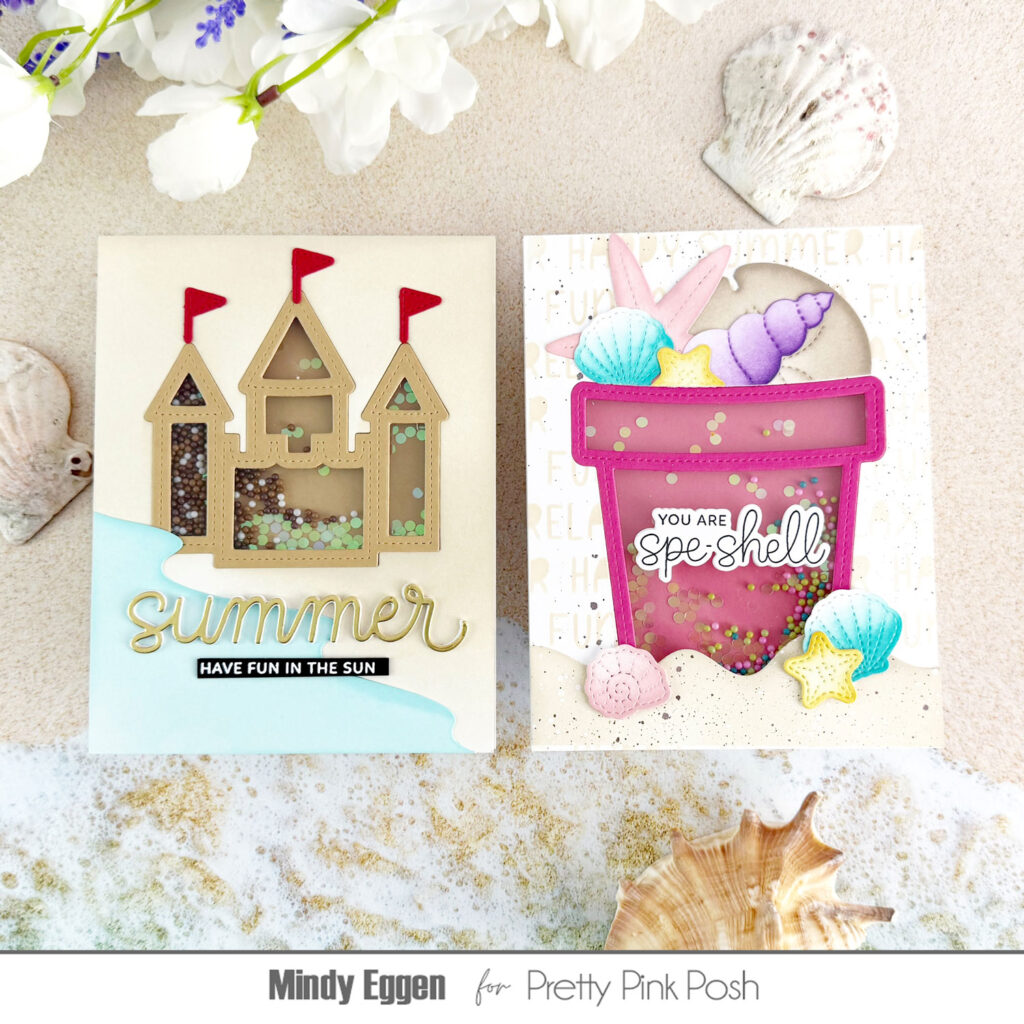
Here are some more samples from the team…
And that’s it for my sneak peek at the new beachy-keen items. Thanks for stopping by! Join us again tomorrow for a look at more of the new June 5th release.