Videos

| | |

Creating A Scene with Clarity Brushes + Video

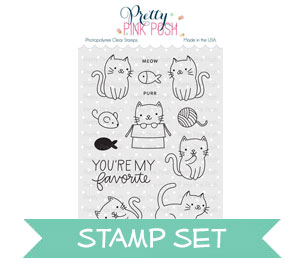
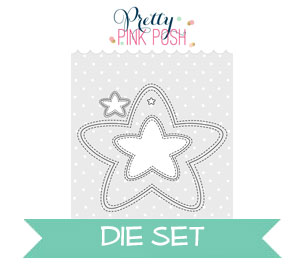
Hello everyone, Eloise here and I have a video showcasing a couple of the brand new products that released on March 1st.  I’m using the new Friends Forever stamp set along with the Stitched Notes die set for my card today.

To begin my card I stamped out some of the new images from the Friends Forever stamp set on some Copic Marker friendly paper with Memento Tuxedo Black ink. I then used various colours of Copic Markers and coloured all my images, then used the coordinating dies to cut them all out. Once my images were coloured in I could work on my background. I die cut two panels using the rectangle die from the Stitched Notes die set out of some watercolour paper. I then used the older Stitched Borders 1 dies and cut the curved die out of one of the pieces, to resemble a grassy hill.

Now my pieces were ready to go I pulled out my Clarity Stencil Brushes and a few Distress Ink colours, Twisted Citron and Mowed Lawn for the grassy hill and Mustard Seed and Fossilized Amber for the sunrays. I first coloured my grassy hill with the greens, I just brushed the colour on, going back and forth horizontally across the card to get a nice blend. Once I did both colours I set it aside and moved onto my sunrays. I used a Tim Holtz stencil for this, I could have used masking tape to mask the rays off, but the stencil was easier.  I did the same thing with the brushes for the stencil, instead I moved my brush vertically up and down the stencil a lot more than horizontally, since that’s the way the stencil openings go. Once both pieces were done I could assemble.

I adhered a blue piece of cardstock to my card base, and then I used some fun foam to adhere my sunrays panel. Before I added my grassy hill on top I stamped down the ‘You’re my Favorite’ sentiment on top with black ink. I then added the grassy panel with foam tape and added my absolutely adorable coloured images on as well. This set is so adorable, it’s insane! Once all my images were added and my scene was complete, I added some 4MM, 6MM and 8MM Sparkling Clear Sequins to finish off my card.

Watch the video above   I Watch the video in HD on YouTube  border
Clarity Stencil Brushes

I hope you enjoyed my card today and have already purchased some of the new release! You guys are absolutely going to love the new products Paulina has designed, they’re so much fun!

Thanks for stopping by today and I’ll catch you next time.

Eloise


| | |

Hidden Watercolor Pocket Card+ Video

Hello everyone, it’s Vera here. Today I’ll share a card showcasing items from the Pretty Pink Posh March release.  Here, I used the Friends Forever stamp set along with the coordinating dies and Stitched Notes Die Cut.

PRETTY PINK POSH PRODUCTS:

I created a friendship card with a watercolor background. I’m so in love with this Stitched Notes die cut, I can slip in my tag on my card. As you can see, it turned out so cute!

Here’s a video to show how I created my card from the start to finish.

Watch the video above   I  Watch the video in HD on YouTube

border
kuretake
blendingtool

Thanks so much for joining me today! Hope you have a wonderful weekend!

| |

March 2017 Release Now Available

Hi Pretty Pink Posh friends! Shannon here today! So happy to join you to share a card featuring some of the yummy new products from the March release that went live today! Before we get to the card, here’s a video that Eloise filmed showcasing all of the new products.

Watch the video above   I   Watch the video in HD on YouTube  


Okay, now back to the card… today’s card features the Easter Blessings and Everyday Greetings stamp sets along with the Scallop Square Tags dies.

For my card I started off with an A2 sized white card base and stamped flowers in grey ink as my background. I also stamped them once a separate piece of white card stock, colored in with Copic markers and fussy cut out. I die cut the smaller scallop square with blue card stock and adhered onto my card along with my cut out flowers on top. I stamped my sentiment and finished my card off with Sparkling Clear sequins!

That’s it for my card today, it was fairly quick and simple to create and i just love the scallop square with the flower pot!

Thank you so much for joining me today. Be sure to visit the Pretty Pink Posh Shop to view all of the new products!

| | |

Sneak Peek: Easter Friends

Hello, Pretty Pink Posh fans! This is Yana and I’m excited to share a card using one of newest stamp sets – Easter Friends (releases on March 1st)!

I did quite a bit of watercoloring to create this project. First, I started by painting a plaid watercolor background using Gansai Tambi watercolors (colors I used are #34 pink, #40 yellow, #20 black and #10 white) and Arches Rough watercolor paper.

I also used flat ¾”, ½” ⅜” brushes. I find it much easier to paint plaid backgrounds using flat brushes, although this can be done using a regular round brush. I also used a #4 round brush to add white stripes at the very end. Remember to dry your paper in between each layer of stripes when creating this kind of background.

Watercolors were also used to color my stamped images – bunny as well as a boy and girl dressed in bunny costumes. Whenever I color small images like these I prefer to use watercolor pencils as this way I have a lot more control over where, how and how much color I am adding. I used Faber Castell watercolor pencils in gray (silver), pink, yellow and gold. My images were stamped onto Arches Hot Press watercolor paper which has a nice smooth finish to it and is ideal for watercoloring images that are stamped.

I cut bunny image out using a coordinating die and foam mounted him onto my character panel. I also added several die cut easter eggs (I used a coordinating easter egg die and cut images out of my test plaid watercolor background, I didn’t use a stamp image that goes with it, although you can if you want to).

Finally I embellished my card using Friendship sequin mix. This is limited edition mix, a portion of the profits made from selling this mix in March 2017 will be donated to a cause.

Watch my video tutorial below to learn how I made this card.

Watch the video above   I   Watch the video in HD on YouTube  
 

Happy cardmaking!

| |

Sneak Peek: Everyday Greetings

Hello, Pretty Pink Posh fans! This is Yana and I today I’m excited to share a card using one of newest stamp sets- Everyday Greetings (releases on March 1st)!

We often look at sentiments as a last piece or a last step when we create a project and we forget that sentiments can be used in a variety of ways.

I used a large thank you message for my cards today, but many other sentiments from the Everyday Greetings set or other sets can be used for this technique.

I started working on this card by stamping a sentiment repeatedly in clear embossing ink onto a teal cardstock panel. I stamped each sentiment somewhat at an angle trying to create one continuous pattern. As soon as my stamping was done I added white embossing powder and heat set it with my heat tool.

I ink blended bottom left corner of my panel to make it slightly darker. Peacock Feathers distress ink was used as it best matched in color to my cardstock panel. I knew I will be adding a few additional elements to that corner, so I needed to make it slightly different from the rest of the card to help elements pop.

Even though I stamped Thank You repeatedly in the background I still wanted to add additional sentiment to my card. I used You’re The Best from the Birdie Friends set and stamped it in Black ink onto a strip of white cardstock.

I am enjoying using critters on my projects lately, so I wanted to add a few fun bees onto this card. I used several images from the new Bee Friends stamp set that comes as a gift with a qualifying purchase in March (and will also be available for purchase in May).

I used Copic markers and did simple coloring (B00 and B000 to color the wings; BG18, BG15 and BG32 to color bodies of my bees). The Bee Friends stamp set also has a set of coordinating dies, again you can get it as a gift with a qualifying purchase or buy it later this year in May. I used these to cut my images out.

I trimmed my background panel down to 4 x 5 1/4 inches and foam mounted onto an A2 top folding card base. Next I foam mounted my little critters on top. Lastly, I embellished the card using the Sparkling Clear Confetti Mix.

Be sure to watch my video tutorial below to learn how to make this card and see another bonus idea at the end of the video.

Watch the video above   I  Watch the video in HD on YouTube  
 

Happy cardmaking! Be sure to join us tomorrow for another day of sneak peeks.

| |

Spring Shaker Card + Cutting Stamps Apart

Hello everyone! Eloise here and today I have a video showcasing a couple of older products. I’m going to be using the Storybook 4 die to make a shaker card along with the Winter Wonderland stamp set, to alter a sentiment.

To begin my card today I used the Storybook 4 die and cut it out of some Neenah Solar White cardstock., making sure it was even on all sides, since I knew I would be using  the negative piece. Once I die cut it out, I used some thin 1/8” Scor Tape and added adhesive on all of the lines connecting the frames together and then added a piece of acetate on top. Once I added the acetate I cut thin strips of 3M Foam Adhesive and added that behind the lines too, so it would create little cavities. I then filled each of the sections with a different colour of sequin. I used 4mm Lemon Meringue, 4mm Tangerine, 4mm Lime Sorbet and 4mm Aquamarine and then 6mm Pink Peonies. Once I filled all the sections I used another piece of acetate to cover the back. I really love how all the colours mix well together, but yet they’re separated. It’s super fun.

Once the shaker was complete I chose a coloured cardstock for my card base and adhered it together. At this point I didn’t want the purple to show through so I added a white piece of cardstock behind the shaker panel and that looked much better.

Cutting Stamps Apart

Once I adhered my card together it was time to work on the sentiment. I first die cut a banner out of some grey cardstock and I then took the ‘There’s Snow One Like You’ sentiment from the Winter Wonderland stamp set and cut it apart., leaving out the ‘snow’. I could have masked it, but it’s easier if it’s cut I find. I then stamped down the ‘There’s’ part onto my banner first, then I masked off the ‘One Like You’ part – just leaving the ‘On’ section clear masking. I inked it up, removed the masking tape and turned the stamp around so I could stamp ‘No’. Once I stamped that down, I turned the stamp back around, and stamped the additional ‘One Like You’ like normal. Now my sentiment reads ‘There’s No One Like You’ and that worked much better, since I wasn’t doing a winter card. I adhered the banner with foam tape onto the centre of my shaker panel and the card was complete.

Here’s a video to show how I created my card from the start to finish.

Watch the video above   I Watch the video in HD on YouTube

I hope you enjoyed my card and tutorial today. I wanted to make a simple yet effective shaker card today and I love doing this with the Storybook dies, they’re so versatile and fun to work with. Also, altering stamp sets is a fun way to stretch them for more life!

Thanks for stopping by! – Eloise

| | | |

Christmas Theme & Giveaway Week- Day 6

Christmas Theme & Giveaway Week- Day 6

Hello crafty friends. It’s Vera Rhuhay here!

Today I’ll share a card with winter coffee themed card (which happens to go along with the brand new Winter Coffee Lovers Blog Hop). Here, I used Christmas Friends stamp set along with the coordinating dies.

Christmas Theme & Giveaway Week- Day 6

I create a coffee shop scene using Stitched Pieces Die and coffee cup and mug from Christmas Friends stamp for wall decorations. I used scallop border dies from Stitched Borders 4  to make a table, so the sweet couples can sitting in the cafe and enjoy their coffee latte.

Christmas Theme & Giveaway Week- Day 6

I added sentiment from Holiday Pals Stamp Set and finally I finished my card by added here and there with PPP sequins! Here I used Sparkling Clear Sequins and the Snowflake Sequins Mix.

 Christmas Theme & Giveaway Week- Day 6

Watch our video tutorial below to see how to create this card.

Watch the video above   I Watch the video in HD on YouTube

Today we have another big giveaway as part of our giveaway week. We are giving away a 60 pack of Zig Clean Color markers! Leave a comment below sharing your favorite Christmas or holiday memory.

a Rafflecopter giveaway
We hope you enjoyed today’s video and post. Join us tomorrow for our last day of holiday inspiration and giveaways!

| | | |

Christmas Theme & Giveaway Week- Day 1

Christmas Theme & Giveaway Week- Day 1

Hello, Pretty Pink Posh fans! This is Yana and I have an interactive Christmas card to share featuring the Winter Wonderland stamp set and wobble springs. Plus, this post kicks off our Christmas Theme and Giveaway Week!

Christmas Theme & Giveaway Week- Day 1

Wobble springs are something new and very exciting you can now find in Pretty Pink Posh store. And just in time for the Holidays, too! I was very excited to get my hands on these and I can’t wait to share a card I made using them.

In case you don’t know what wobble spring is, it’s a little plastic spring that attaches with one end to the card base (or anything else; thank tags, gift bags etc) and with another end to an object and provides that object with movement when touched. It is super fun to play with, even for adults – it’s mesmerizing in a way and addictive I’d say.

Christmas Theme & Giveaway Week- Day 1

The element that wobbles on my card today is the igloo and a little penguin. The spring is hidden behind both of these and adds movement to both objects. To embellish the card, I added 4mm Clear Droplets and 6mm Clear Droplets, which are one of my favorite finishing touches.

Christmas Theme & Giveaway Week- Day 1

Winter Wonderland stamp setAction Wobblers
Mini Misti4mm Clear Droplets6mm Clear Droplets
Watch my video tutorial below to learn how to make this card and how to use wobble springs to create addictive interactive cards.

Watch the video above   I Watch the video in HD on YouTube
Now it’s time for our first giveaway of the week. Today we are giving away a MISTI stamping tool!

a Rafflecopter giveaway
Happy cardmaking! Be sure to join us the rest of the week for more holiday inspiration and giveaways!

| | |

Clarity Brushes for Distressing

Pretty Pink Posh: Clarity Brushes for Distressing

Good morning Pretty Pink Posh friends! Heather here to share a couple cards using the Clarity Stencil Brushes – along with a video review of them. I was super excited to recently get my hands on a set of them – I have been seeing them used so much, that I was really curious how they worked.

Clarity Stencil BrushesFox Friends stamp set

If you aren’t familiar with them, they are brushes that can be used as an alternative to foam ink blenders with beautiful results! I paired them up with the adorable Fox Friends Stamp Set and coordinating Fox Friends Dies to create one layer stenciled panels. I was originally going to just make one layer cards, but they kind of grew into this by the time I finished!

Pretty Pink Posh: Clarity Brushes for Distressing
Here is the video sharing how I used the stencils – and with my first voice over of my video (I was a bit nervous – please forgive the soft voice and occasional humming or losing my place!)

Watch the video above   I Watch the video in HD on YouTube  border

After the video I colored all the foxes in with some Copic Markers – I used Warm Grays – W00, W1, W3, and W5, and Blush R20, added my frames, and stitched with my sewing machine around the outside edges to finish them off a little. Added some jute twine, then attached with foam adhesive to colored card bases to finish off.

Here is a close up look at each one – on this first one I also used the Scallop Circles Dies to frame my fox.

Pretty Pink Posh: Clarity Brushes for Distressing

For this next one, I used the two largest Stitched Hexagon Dies to create a frame.

Pretty Pink Posh: Clarity Brushes for Distressing

And on this last one, after my stenciling, I cut a fresh Scallop Ovals die to frame the fox.

Pretty Pink Posh: Clarity Brushes for Distressing

And here they are all together – aren’t those colors so pretty together? They remind me of a rainbow of sherbet!

Pretty Pink Posh: Clarity Brushes for Distressing
Thanks so much for stopping by today – have an absolutely wonderful day!!!
| |

Giving Thanks (with Zig Markers)

Pretty Pink Posh: Giving Thanks (with Zig Markers)

Hello, friends! This is Vera and I have a Thanks Giving card with video tutorial to share today featuring Giving Thanks stamp set and Scallop Borders Dies.
Pretty Pink Posh: Giving Thanks (with Zig Markers)

I began by stamping the images on Canson Illustration paper with Versafine Ink and then colored with watercolor medium Gansai Tambi and Zig Clean Color Real Brush Pen. I then die cut it with the Giving Thanks coordinating dies.

Pretty Pink Posh: Giving Thanks (with Zig Markers)

I die cut the header of my card using Scallop Border dies on white cardstock with size 5.5″ x 1.5″ (my card size is 5.5″ x 4.25″) and then I heat embossed the sentiment with Liquid Platinum embossing powder. To finished my card, I added here and there with my favorite Sparkling Clear Sequins.

Here’s a video to show how I created my card from the start to finish.

Watch the video above   I Watch the video in HD on YouTube