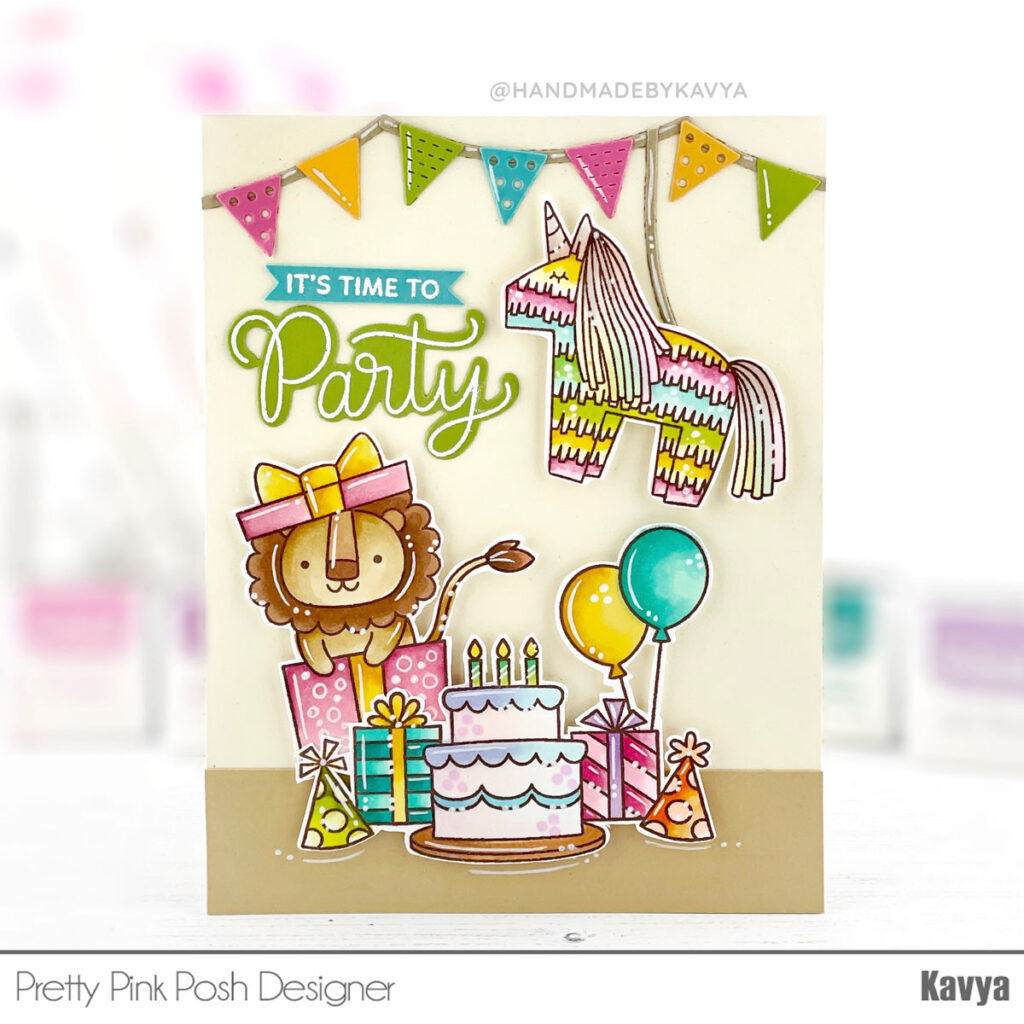
Hi folks, Kavya here with another fun sneak peek showcasing the new Party Time stamp set! If you have any party themed set from PPP, you need to get this ‘extension pack’. It’s filled with so many focal points that make scene building easy!
New release will be available February 7th
I started off with some Buttercream and Linen colored cardstock. This is my go to color combo for background if I am looking for an alternative for who the cardstock but still want to draw attention to the focal point. I then stamped, colored and die cut images from Party Time, Piñata Partyand Party Friends. I created a pennant banner using dies from Graduation Mug Additions. I finished off the card using a sentiment from Party Time.
I hope you liked this fun project. Check your stash now and see what other stamps you could use with this die set! Stop by tomorrow for another look at the birthday release!
Hello everyone! This is Melissa and I’m here to share a couple of cards made with the adorable Patterned Presents stamps and coordinating dies.
New release will be available February 7th
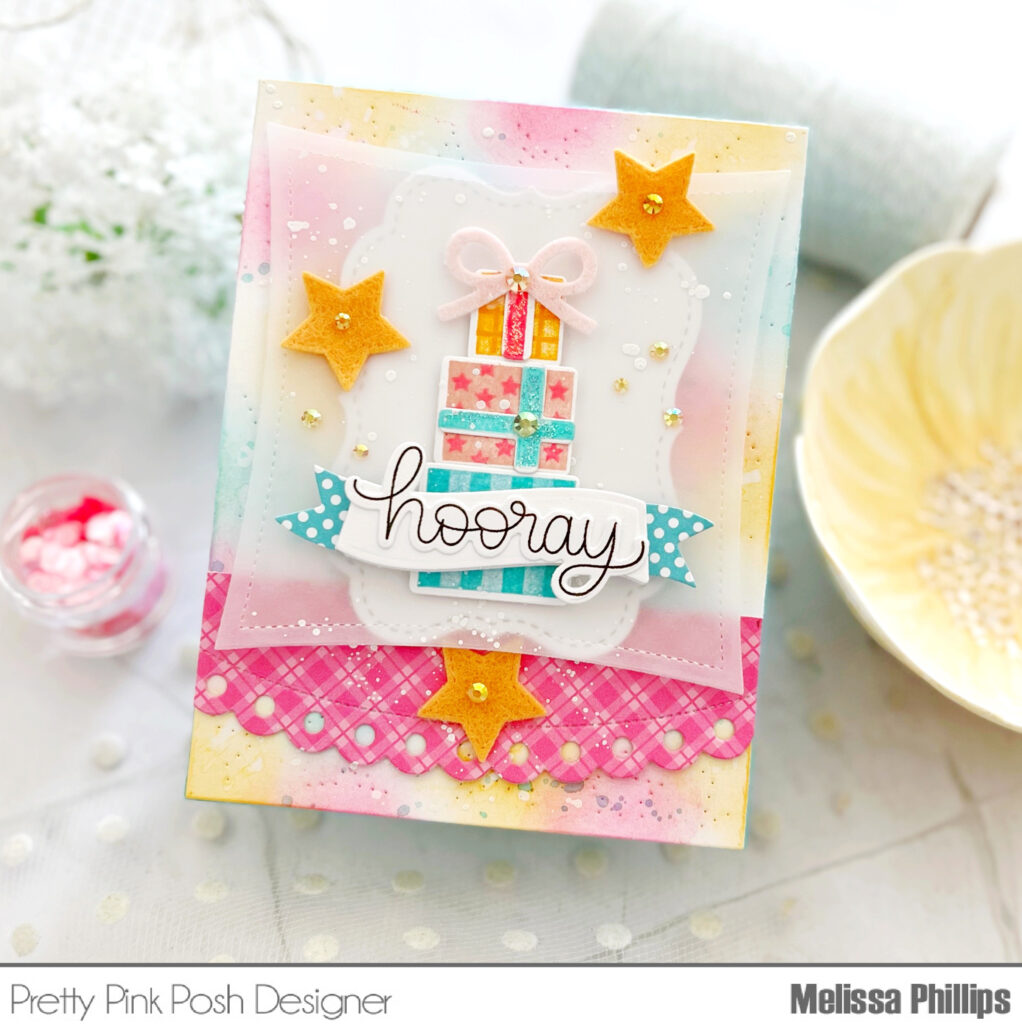
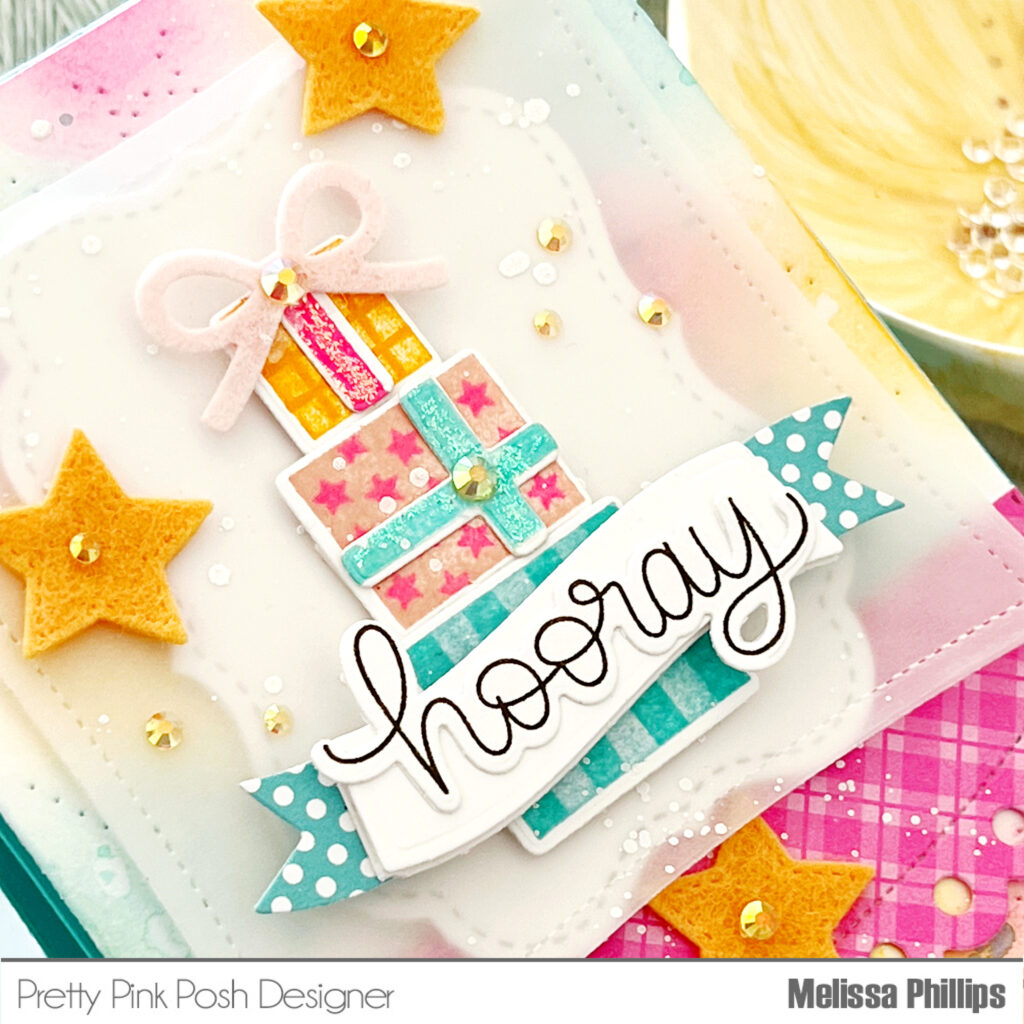
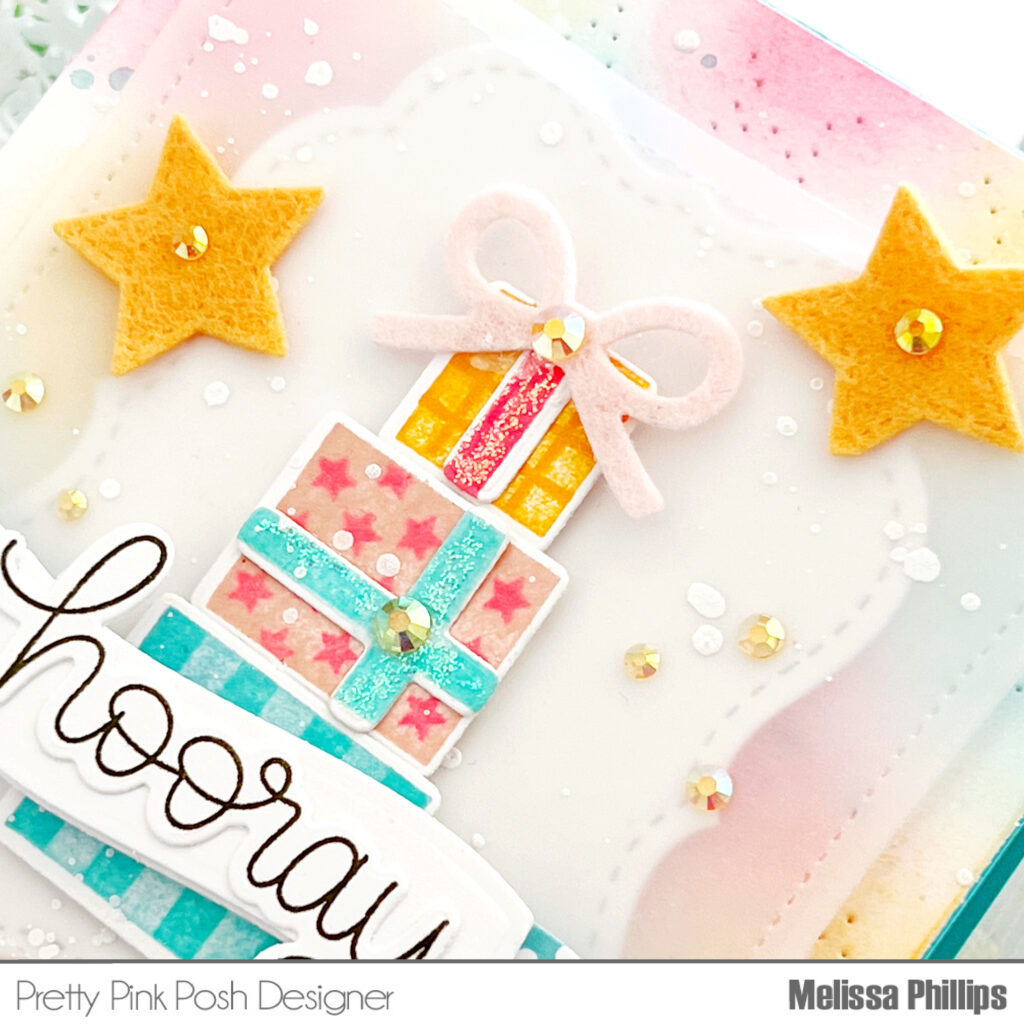
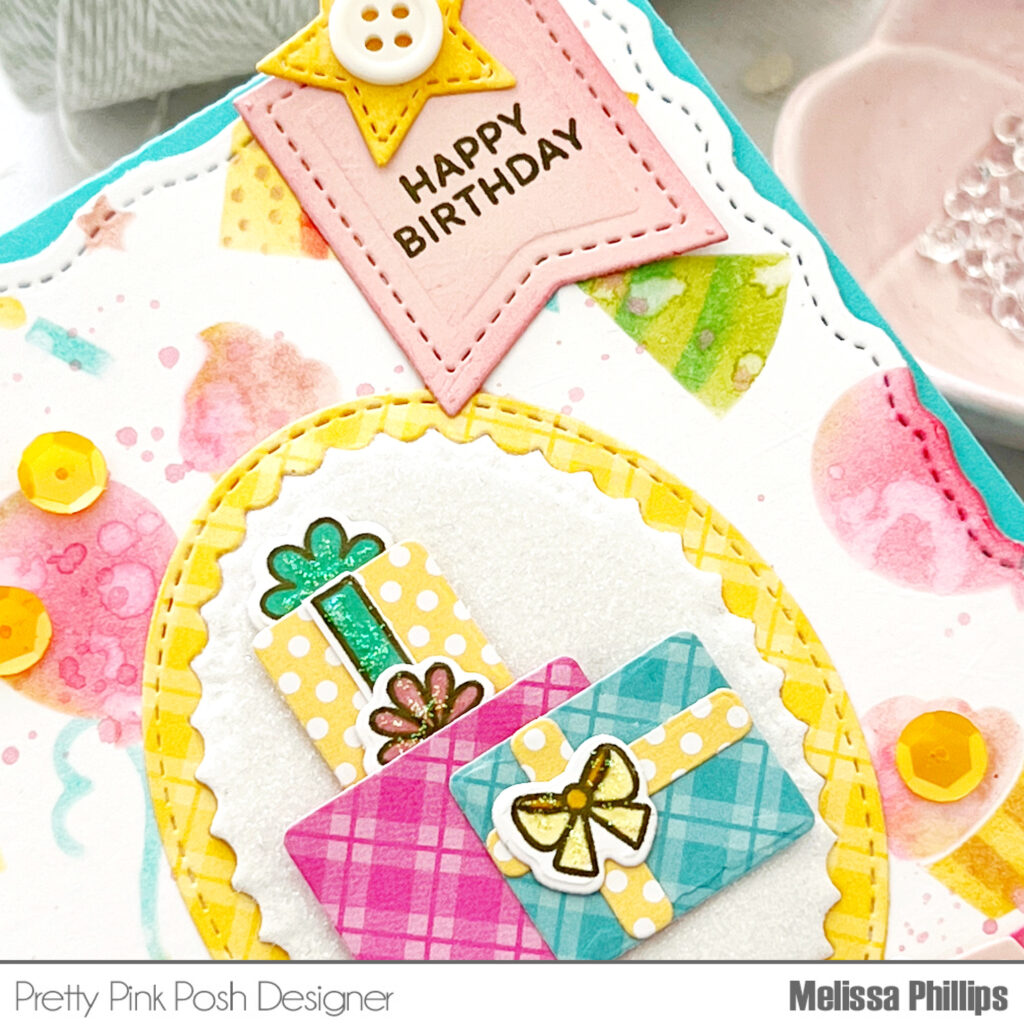
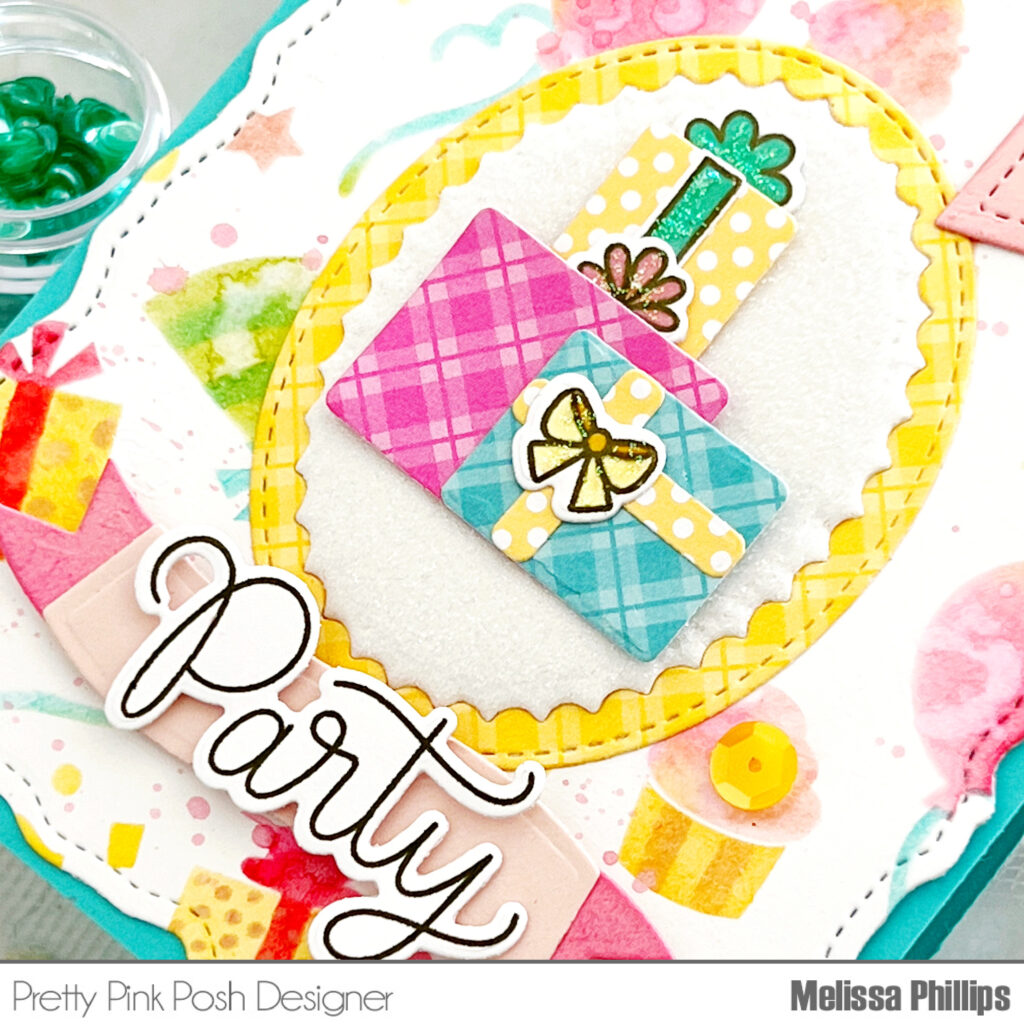
On my first card, I stacked a trio of stamped and die cut Patterned Presents to adorn the center of my card. I layered them over a die cut, vellum Wonky Stitched Square that was layered over a die cut Fall Circles bracket. I love how vellum softens everything and creates gorgeous layering too!
My background was created using the darling Pierced Stars Plate that I had sponged yellows, pinks, and aquas over. I then added a scalloped, decorative pop of pink patterned paper across the bottom of my card, cut using the Eyelet Borders dies.
My sentiment is from the new Birthday Train stamp and coordinating dies and is layered over the cutest banner, cut using the new, Big Birthday Cupcake die set. This is a must-have die collection, with so many possibilities! I added in a felt die cut bow topping my Patterned Presents and felt stars, all cut using the Big Birthday Cupcake die set. Such a fun card to create!
I’ve used the sweet Patterned Presents once again on my second card, beginning with the fun, and oh, so cute, Layered Birthday Wreath Stencils. I stenciled these images on a die cut Stitched Torn Rectangle, all of which created the most fun background for my Patterned Presents.
I die cut my Patterned Presents from patterned paper and layered them over Scallop Ovals die cuts. I love that the Patterned Presents can be stamped and colored in, stamped in with solid colors, or die cut from patterned paper. There are so many fun ways to use this delightful stamp set!
To finish, I added in two sentiments, one uses the Patterned Presents stamp set and is stamped on a die cut Mini Tagsand adhered at the top corner of my card. I added a die cut star from the Big Birthday Cupcake dies and a banner that contains my second sentiment, which is from the Party Time stamp set. I love how all of these creative February products combine so perfectly together…such a party!
Hello crafty friends, Arsenia here! First, Happy 10th Birthday to Pretty Pink Posh! I’m thrilled to share these sneak peeks using the Birthday Cupcakes stamp set with coordinating dies and Birthday Train stamp set with coordinating dies! The images are fun and coordinate well with past products. I absolutely adore these products!
New release will be available February 7th
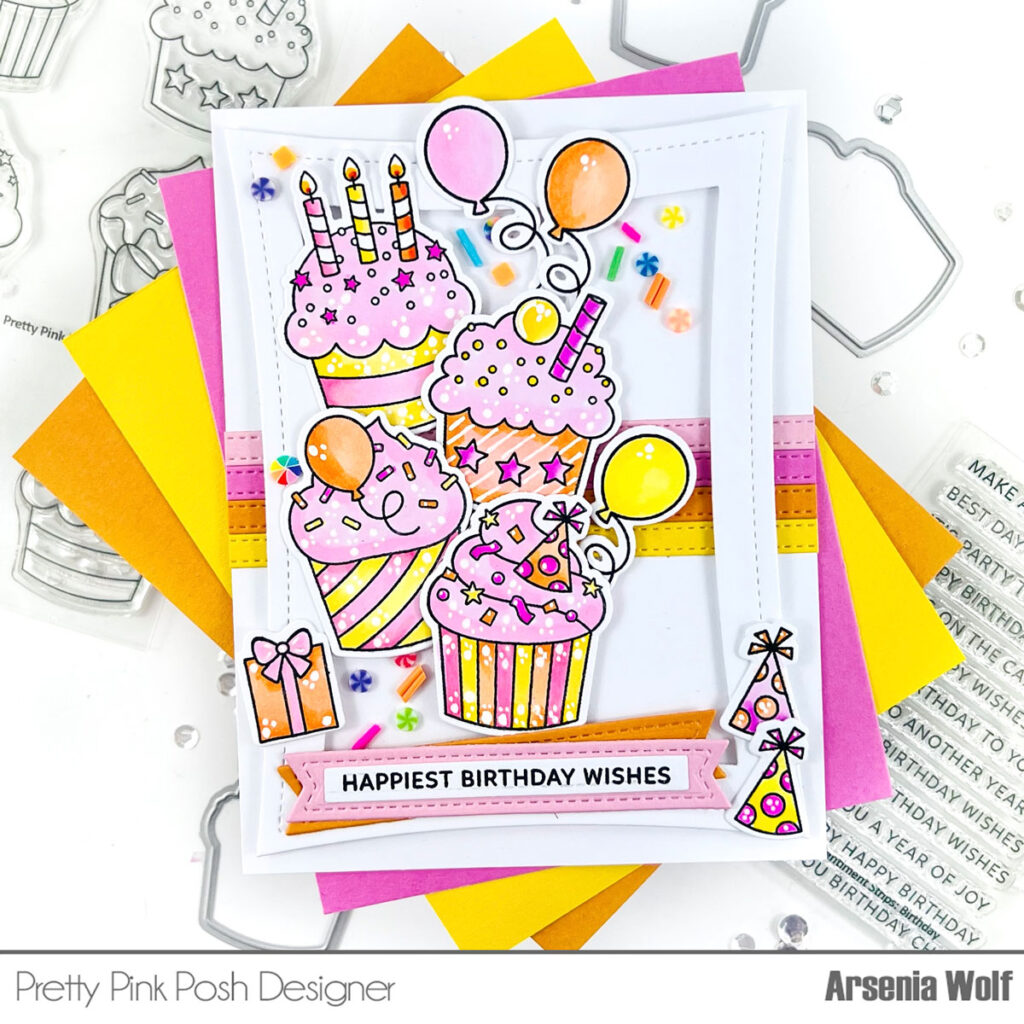
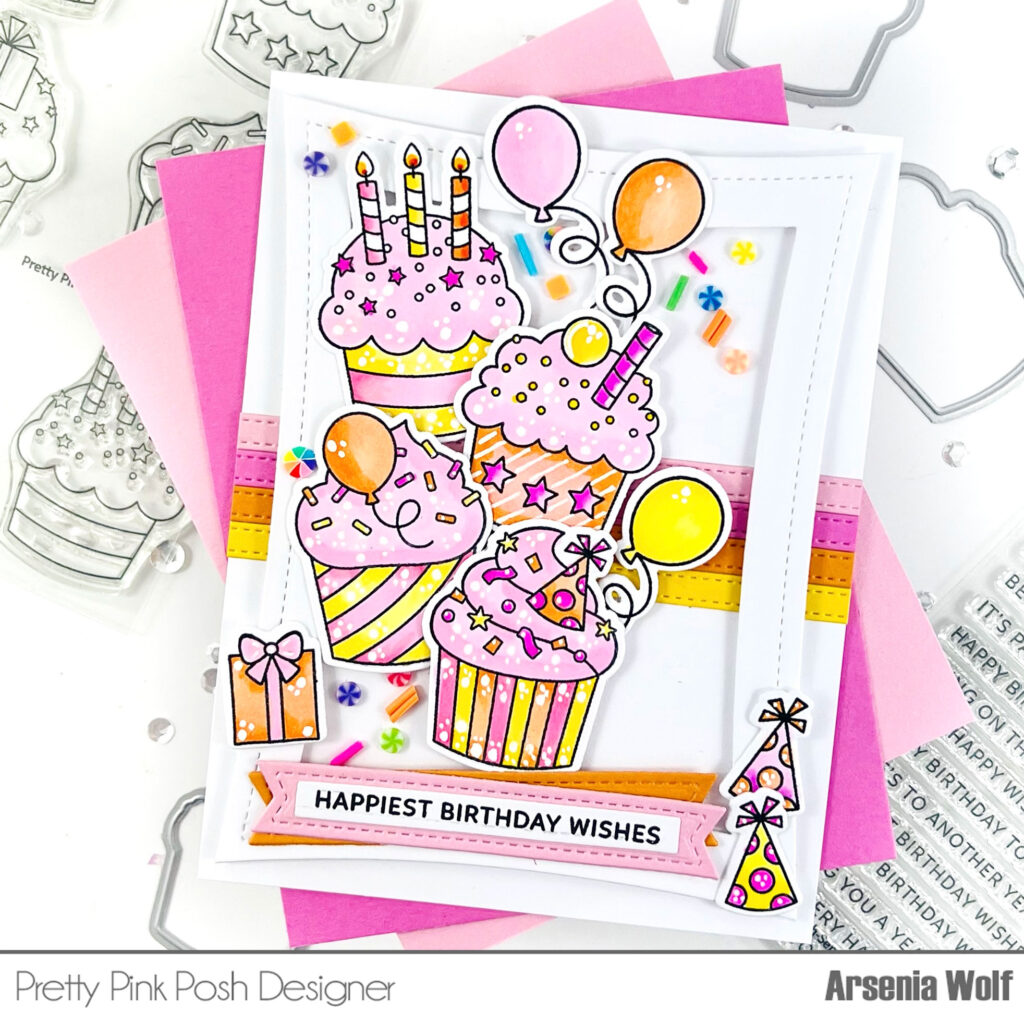
For my first card I stamped, colored, and die cut the images from the Birthday Cupcakes stamp set. I colored the images with Olo alcohol markers and added some white gel pen highlights. For my background I took a A2 card panel and added some strips of cardstock using the Stitched Strips Dies. Once I adhered the strips to the card panel, I added a frame using the Wonky Stitched Rectangles Dies. I decided to add a few more elements to card, I pulled out a fun birthday set from last years release called Wish stamp setwithcoordinating dies. This set coordinates perfectly with the Birthday Cupcake Set! I adhered all the images to the card base.
To finish the card, I added a sentiment from the new Sentiments Strips Birthday stamps! I adhered the sentiment to one of my most used die sets, Sentiment Strips Dies! I added lots of clay confetti from the new Over the Rainbow Mix! I adhered the clay pieces to resemble a faux shaker and ta-da all done!
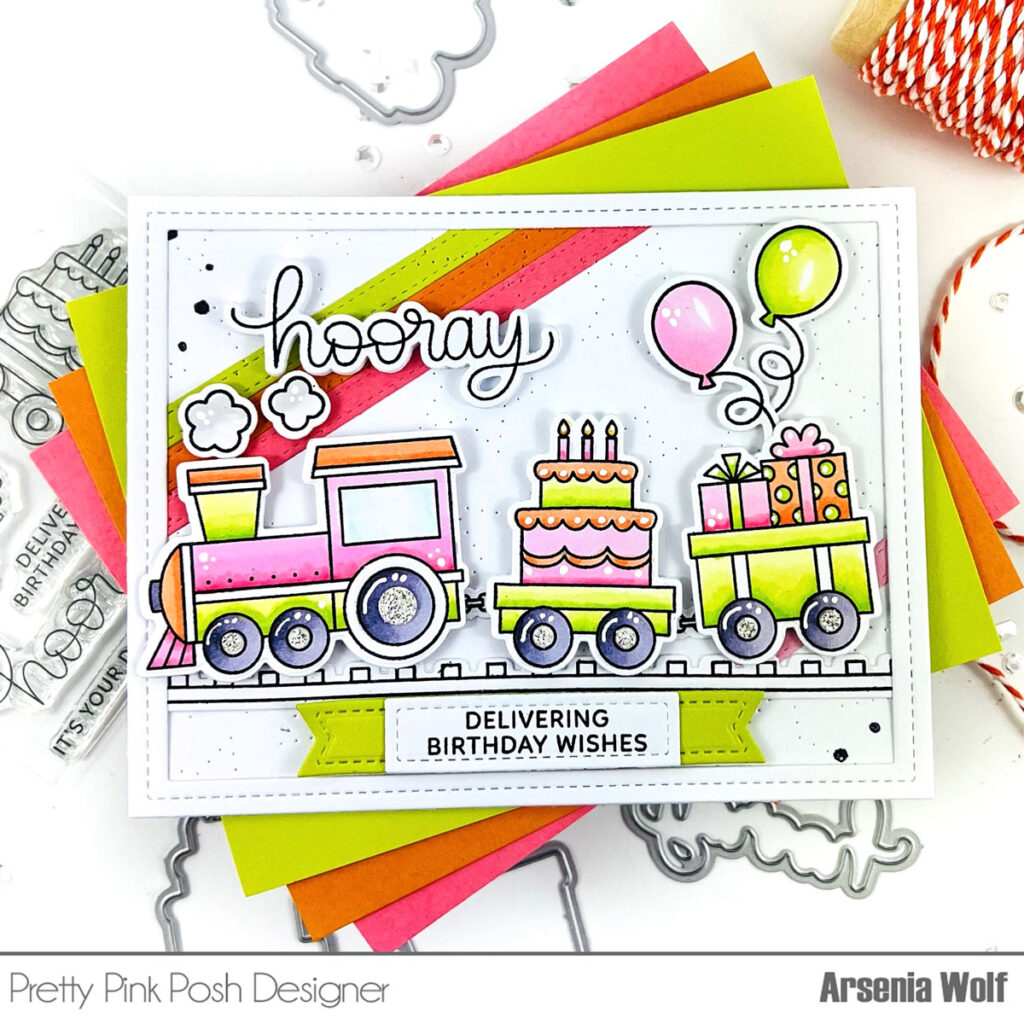
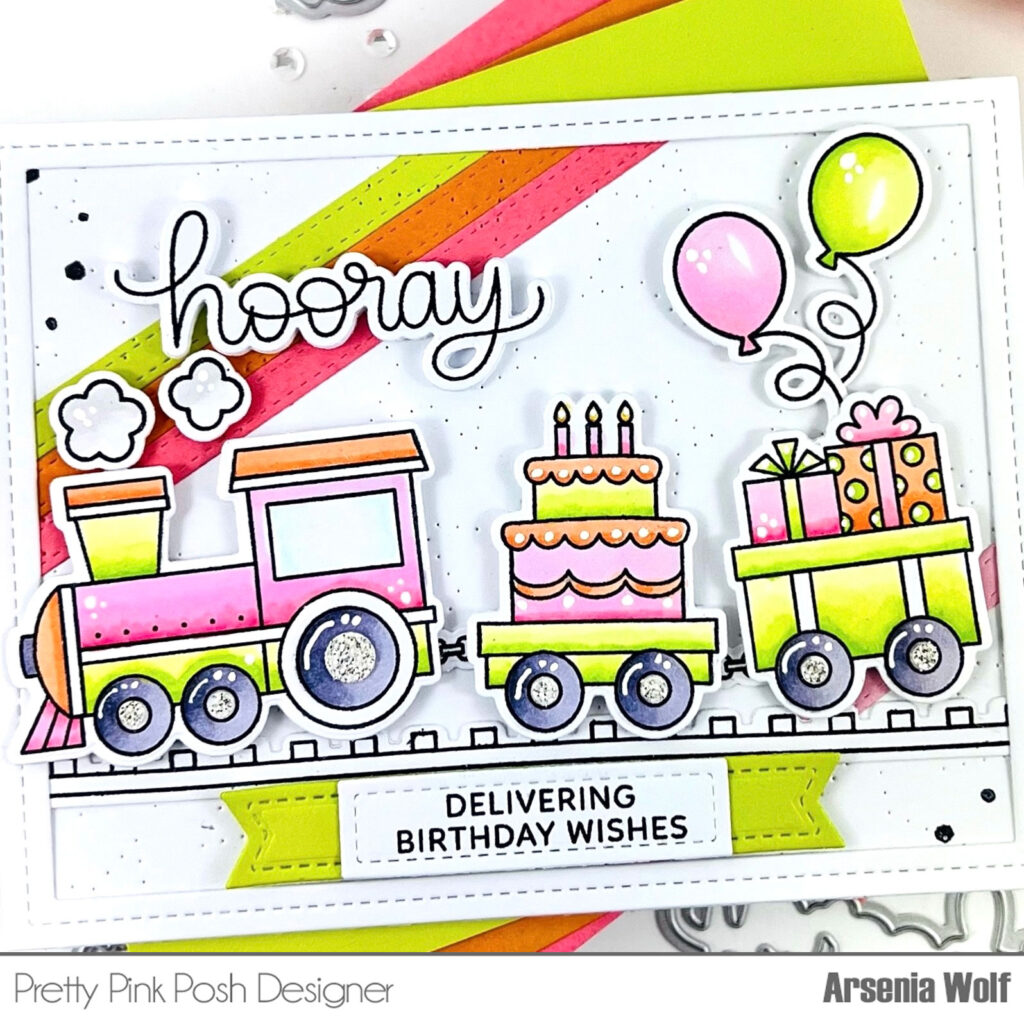
Now onto my second card using the adorable Birthday Train stamp set with coordinating dies! This train is becoming a favorite of mine in my crafty realm! I stamped and colored the images with an array of Olo markers. For the background I took a A2 card panel and added some strips of cardstock using the Stitched Strips Dies. I then ran the panel through the die cutting machine using a brand-new product called Pierced Stars Plate Die, I love the extra texture it adds to the A2 panel. I added a few faux black splatters to the top left corner and the bottom right corner. I adhered the images to the panel and decided I needed a frame. I used the Fancy Cake Dies and I love the way it framed the images.
To finish card, I stamped one of the sentiments from the Birthday Train stamp set and adhered the sentiment to some layered Sentiment Strips Dies! I added a few extra balloons from a fun birthday set from last year’s release called Wish stamp setwith coordinating dies. My last step was to add some white gel pen highlights and I absolutely love how this card turned out.
Friends the release is amazing, it’s chock full of Birthday goodness! Lots of fun stuff, stay tuned for more sneak peeks, blog hops, and Instagram Hops all in celebration of Pretty Pink Posh 10th birthday. I’m so grateful to be a part of this amazing celebration! Pretty Pink Posh has superb, fun, timeless products! Happy Birthday Pretty Pink Posh and many more to come!!!
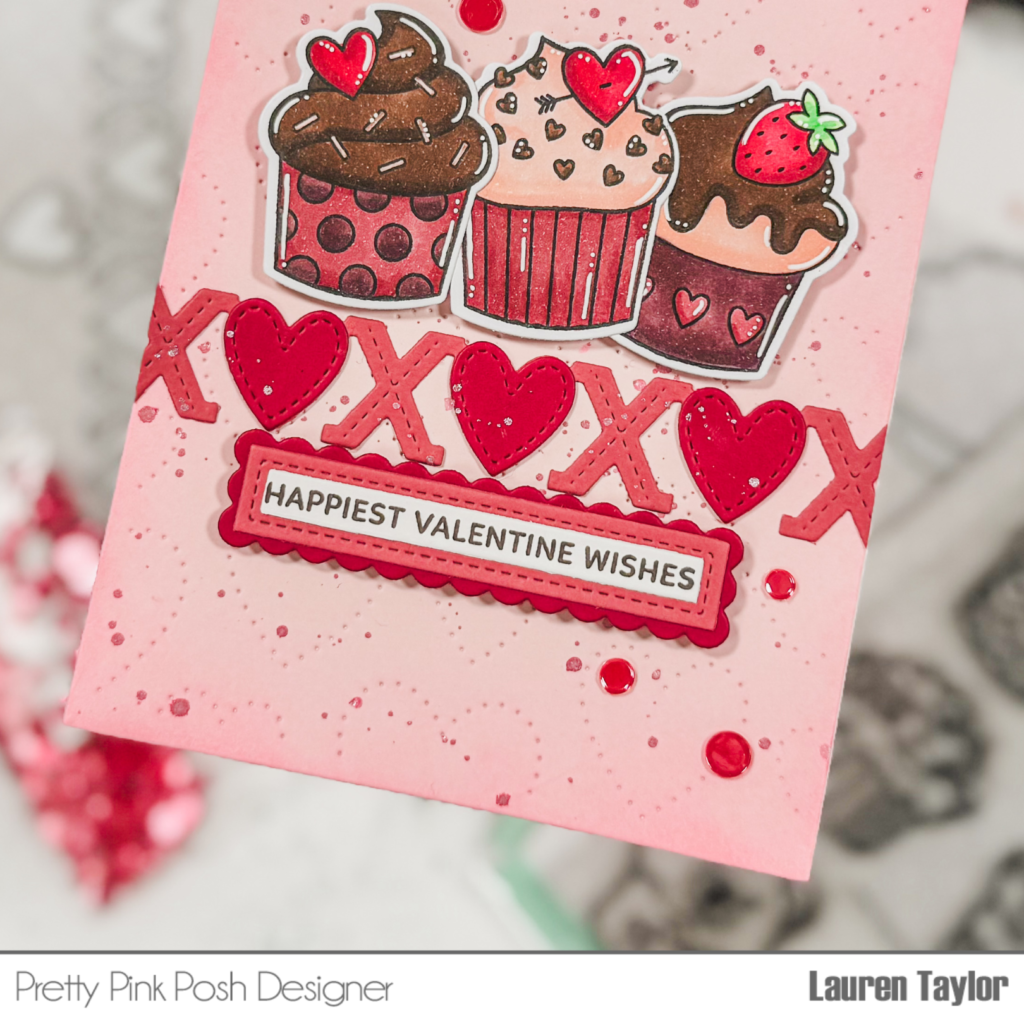
Hi, friends! It’s Lauren and I am back with a new video on the blog today. I designed this card to make with friends at a Galentine’s Day themed crop and I wanted to share it with all of you, too!
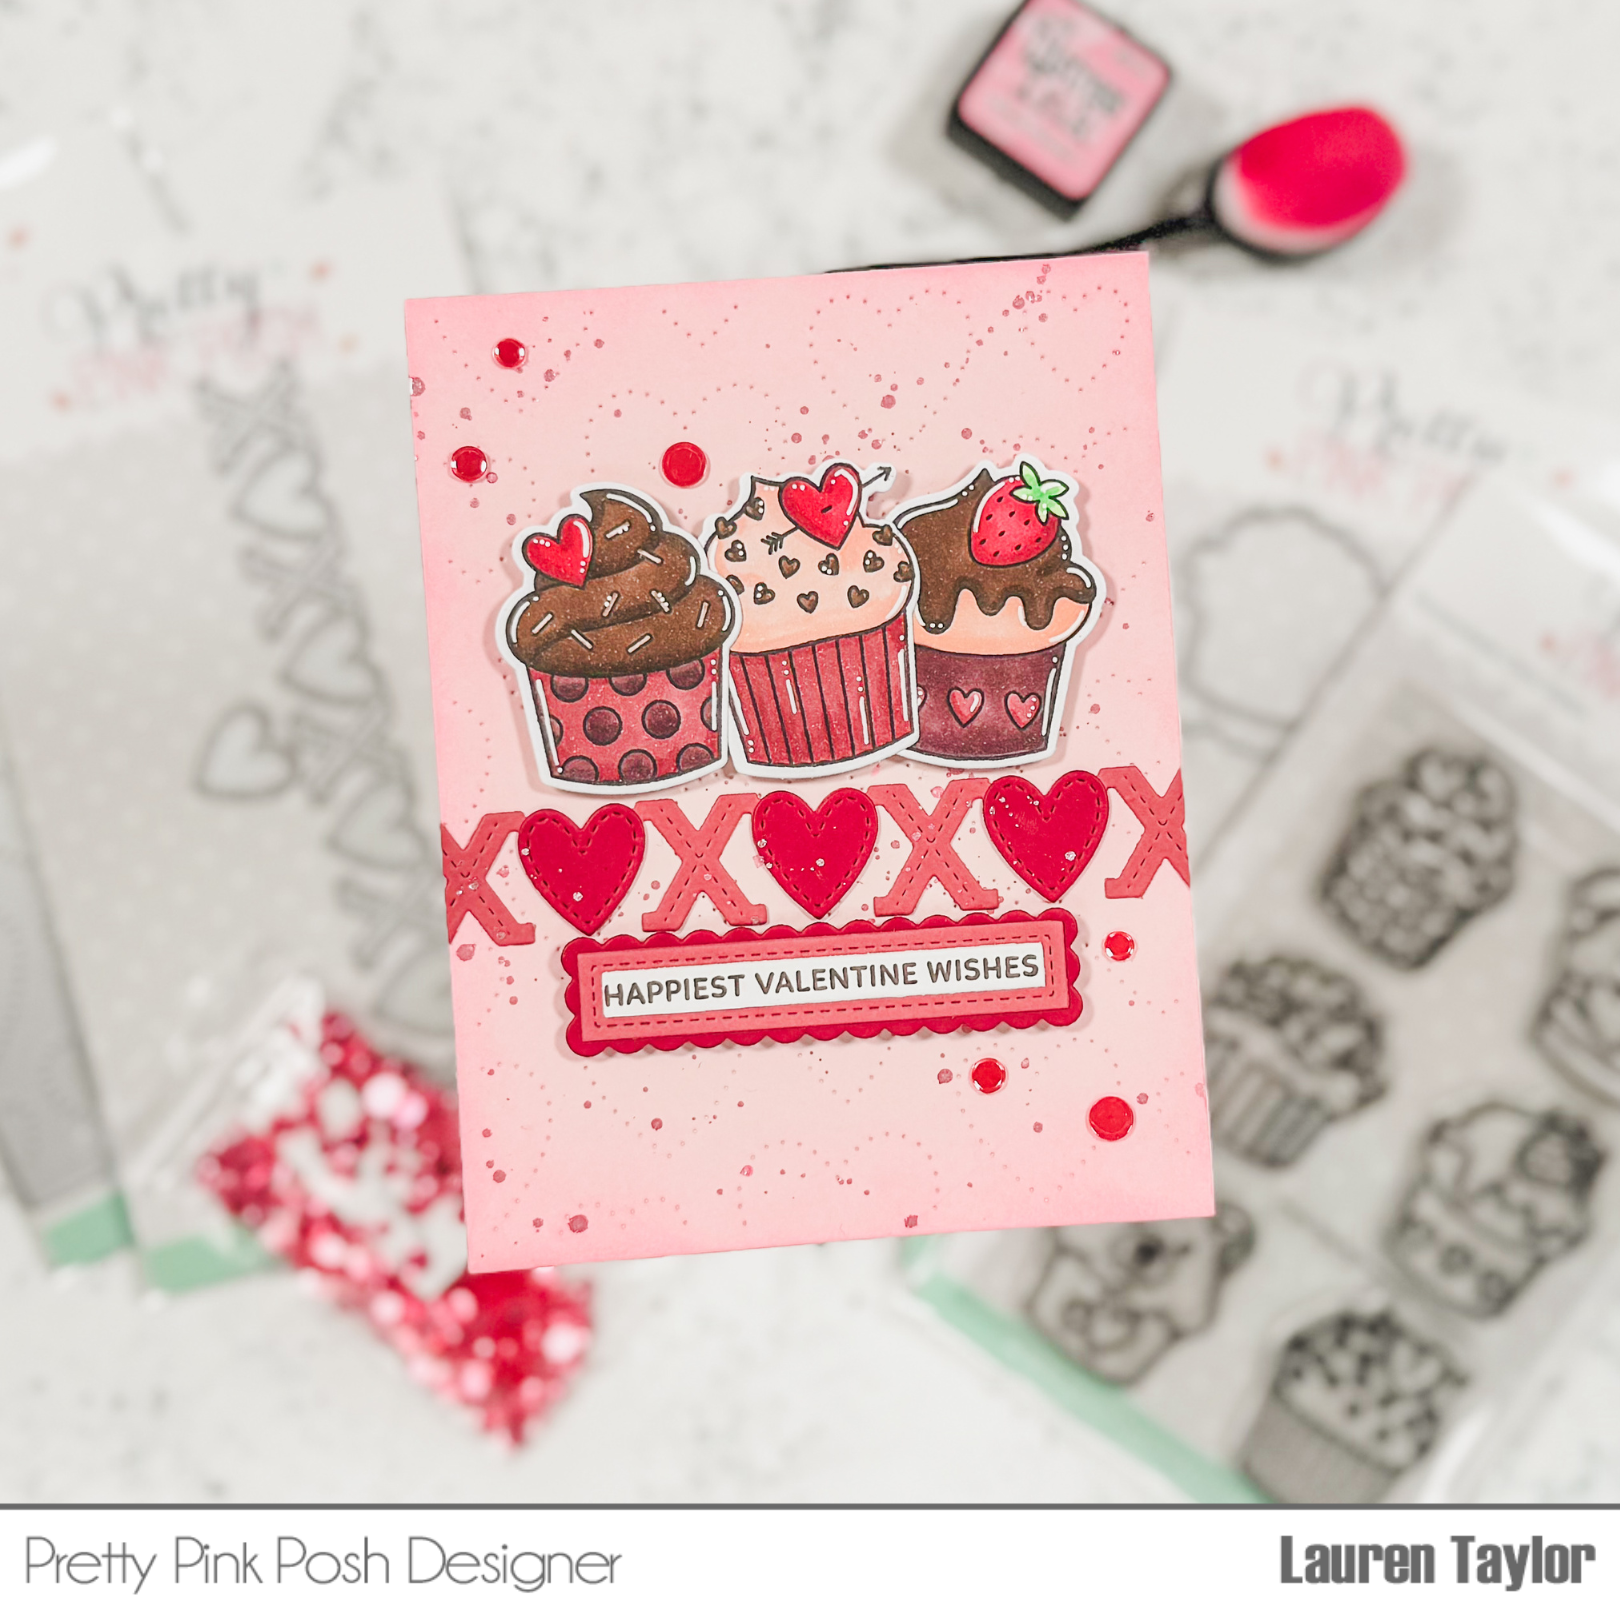
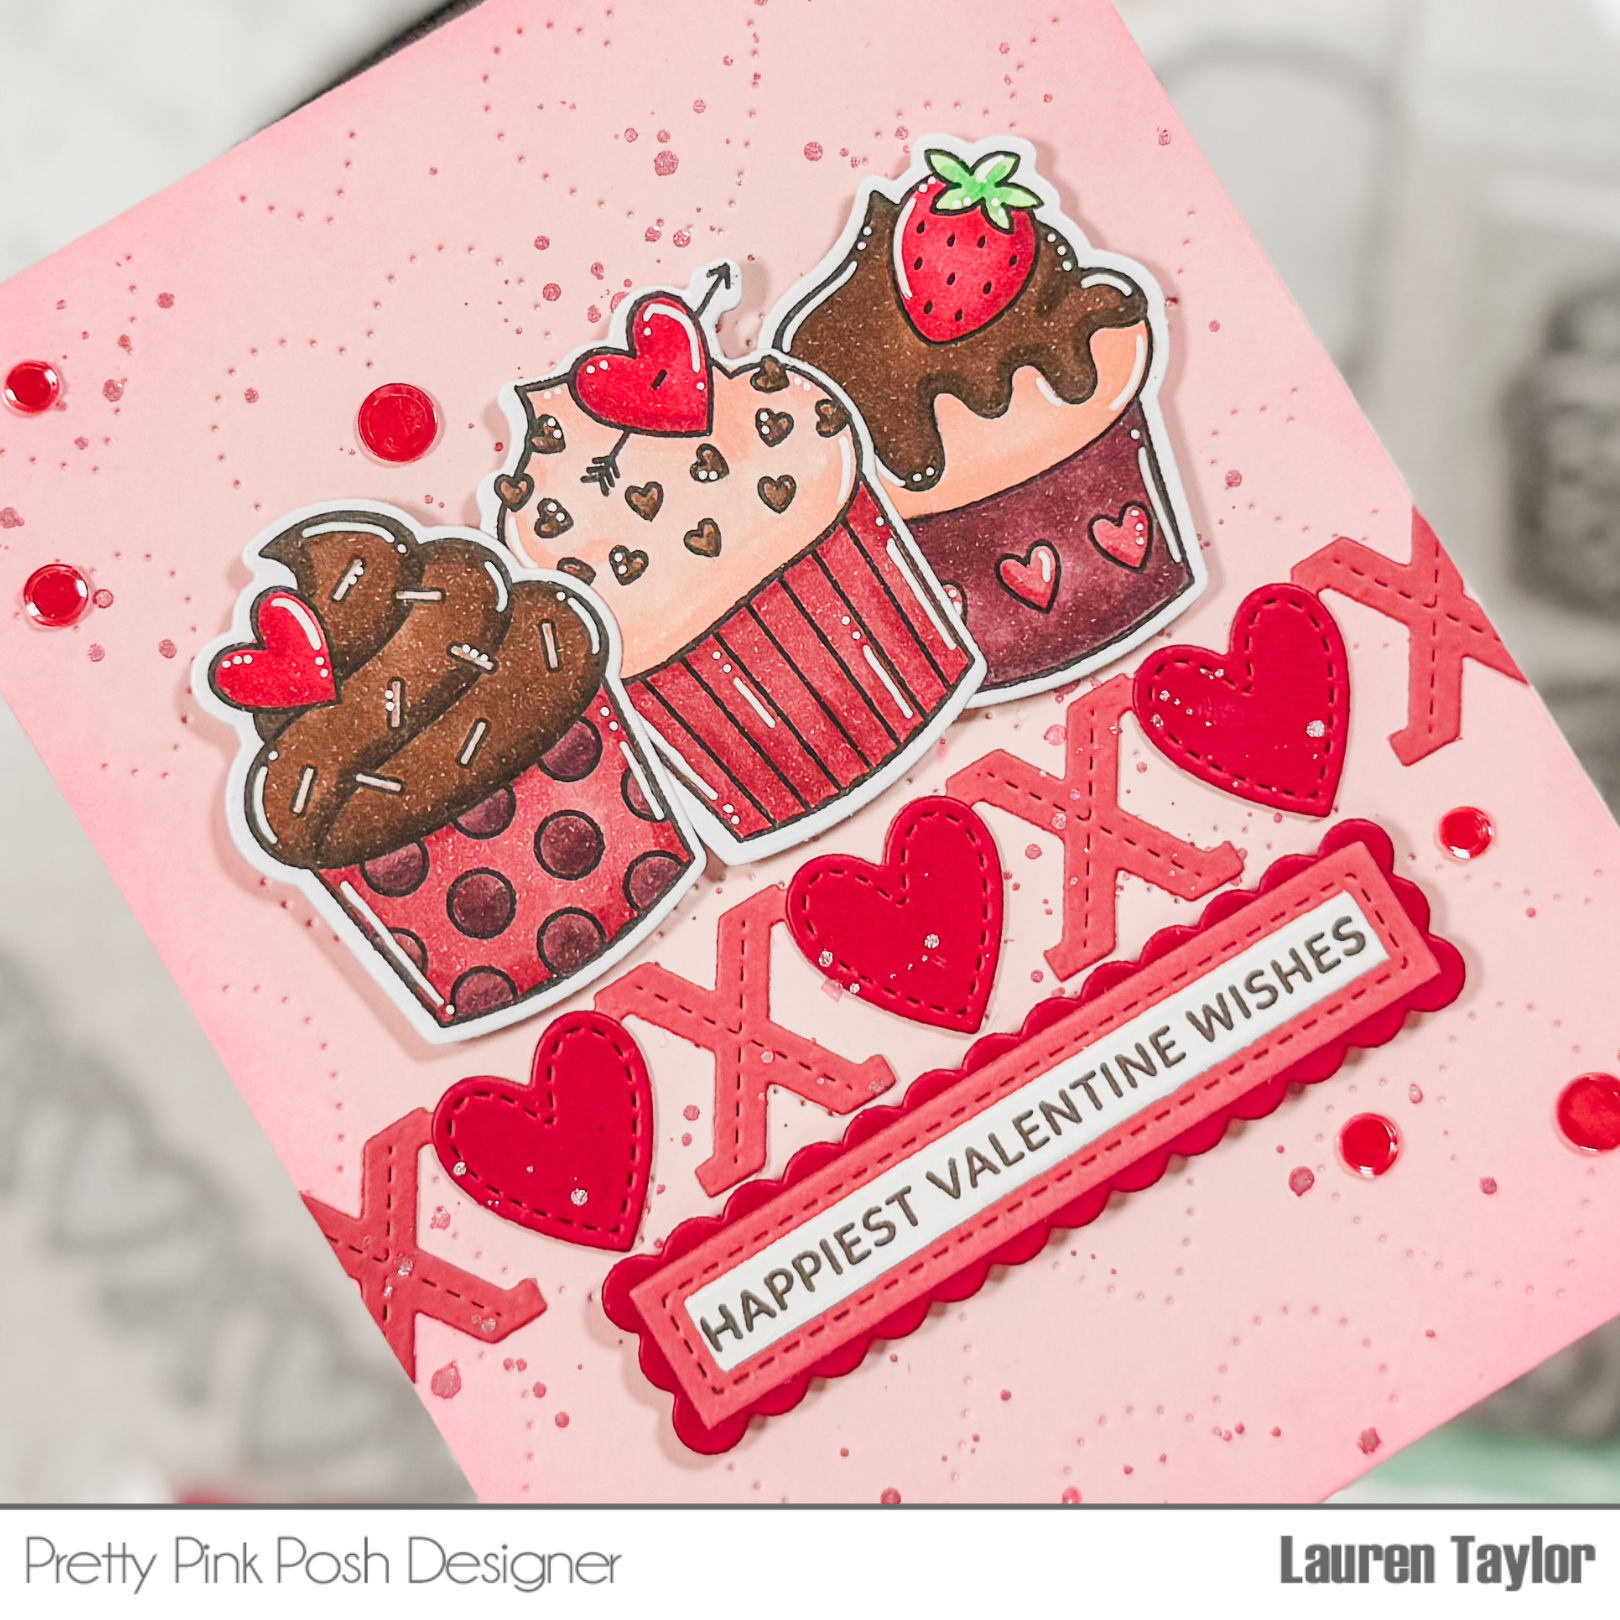
I started with die cutting the Pierced Hearts Plate Die out of light pink cardstock. Using an ink blending brush, I added Kitsch Flamingo Distress Ink to darken the edges of the A2 background. Next I cut the XOXO Heart Border Diefrom pink cardstock with the separate heart die three times from dark pink cardstock. I glued the dark pink hearts to the first three hearts on the XOXO border.
Using liquid adhesive, I glued the XOXO Heart Border to the Pierced Hearts background a little more than half way down the A2 background so that the three hearts are centered. I used a metallic pink watercolor to add splatter to the background and once everything was dry, I trimmed off the excess XOXO border from the sides of the background.
Next I stamped three of the Valentine Cupcakes Stamps in an alcohol marker friendly black ink and colored them in with my Ohuhu Art Markers. They are also cut out with the Valentine Cupcakes Coordinating Dies. I also used a white gel pen to add a few highlights and to cover up anywhere I colored outside the lines!
My sentiment is stamped in a brown ink on white cardstock from the Sentiment Strips: Valentine Stamp Set and I used the Sentiment Strips Dies to cut out the sentiment as well as the coordinating stitched rectangle in pink and scalloped rectangle in dark pink. They are all glued together to create a pretty layer of the scallops peeking out behind the rectangle.
The cupcakes and sentiment are added to the card with foam adhesive to add some fun dimension to the card. I also added some Strawberry Shimmer Confetti around my card with liquid adhesive to add more shine! I hope you enjoyed this card and let me know which cupcake is your favorite from the stamp set!
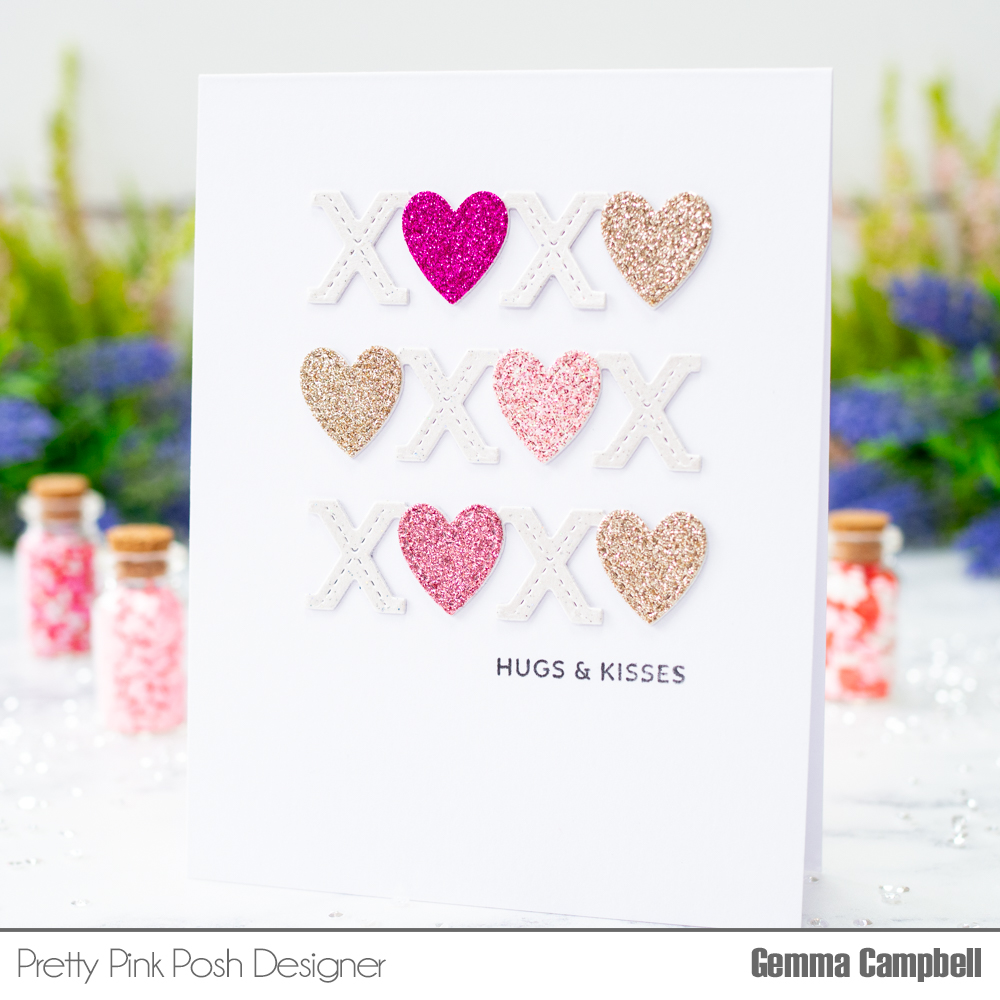
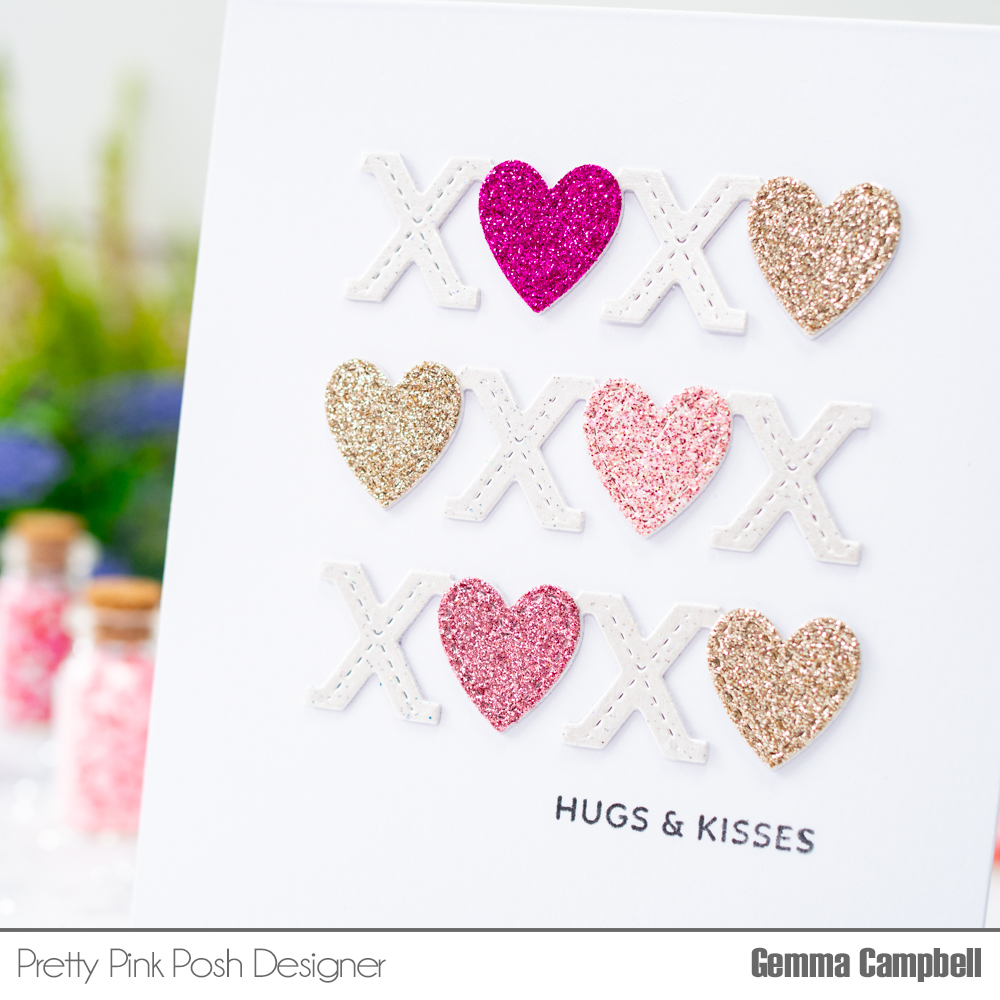
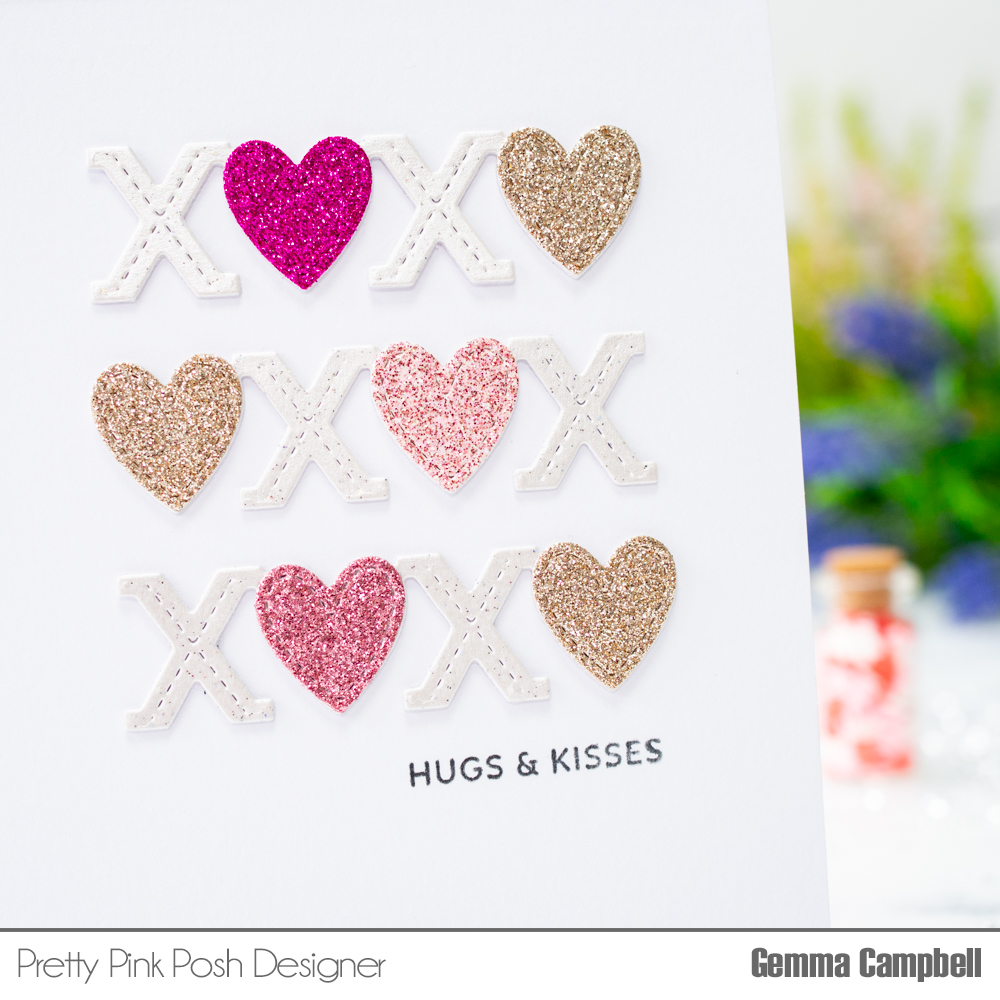
Hello, Gemma here today with a card featuring the new XOXO Heart Border. This versatile die can create lots of different looks.
I cut the XOXO Heart Border twice from pearl white sparkle card, then used scissors to cut them apart to create three shorter borders. I added an additional layer behind each for some dimension.
The border comes with a separate heart die, perfect for layering. I cut this from different pink and gold glitter card to add to the borders.
On an A2 card base, I lightly marked the horizontal centre to help me line up the first border, then adhered the other two underneath. A t-square ruler is useful to keep the borders straight.
I hope you’ve been enjoying all the Valentine inspiration lately. Stay tuned, we’ll be celebrating the Pretty Pink Posh birthday soon and you won’t want to miss out on that!
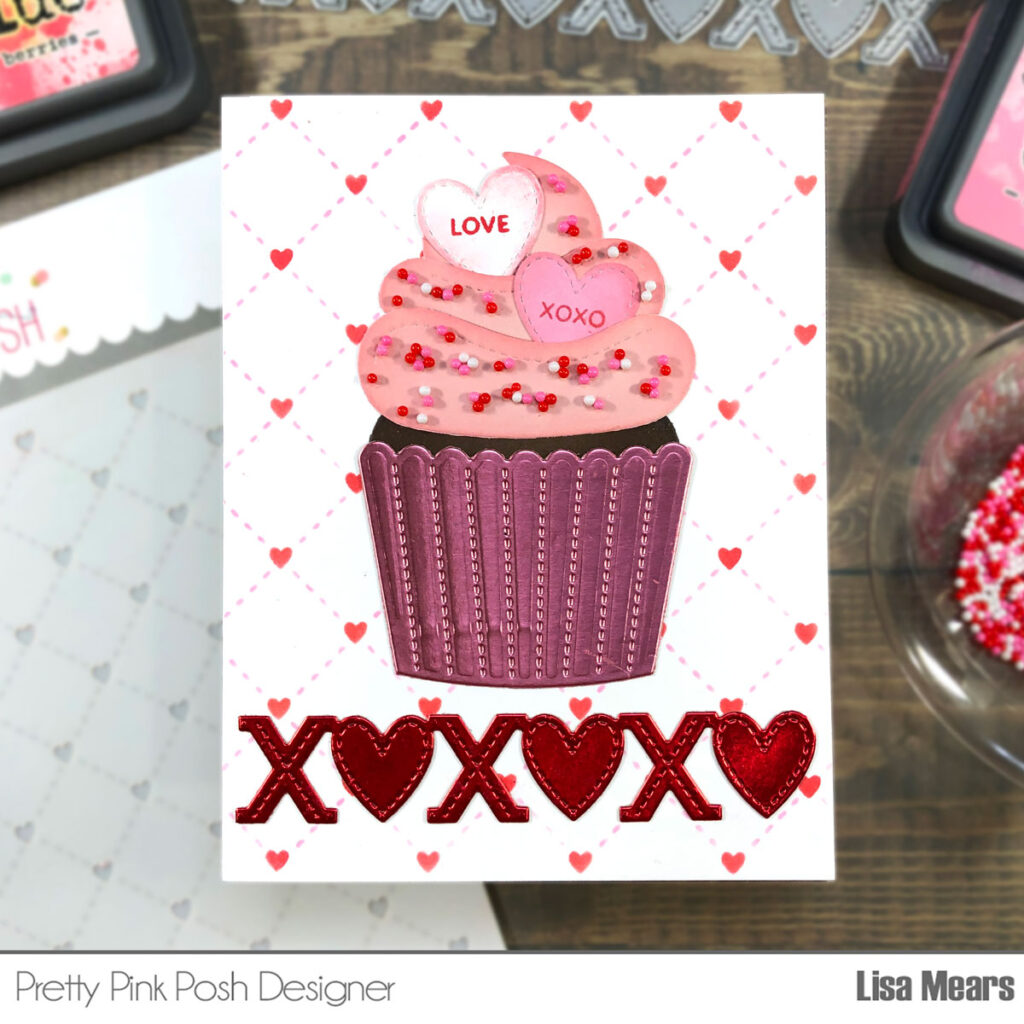
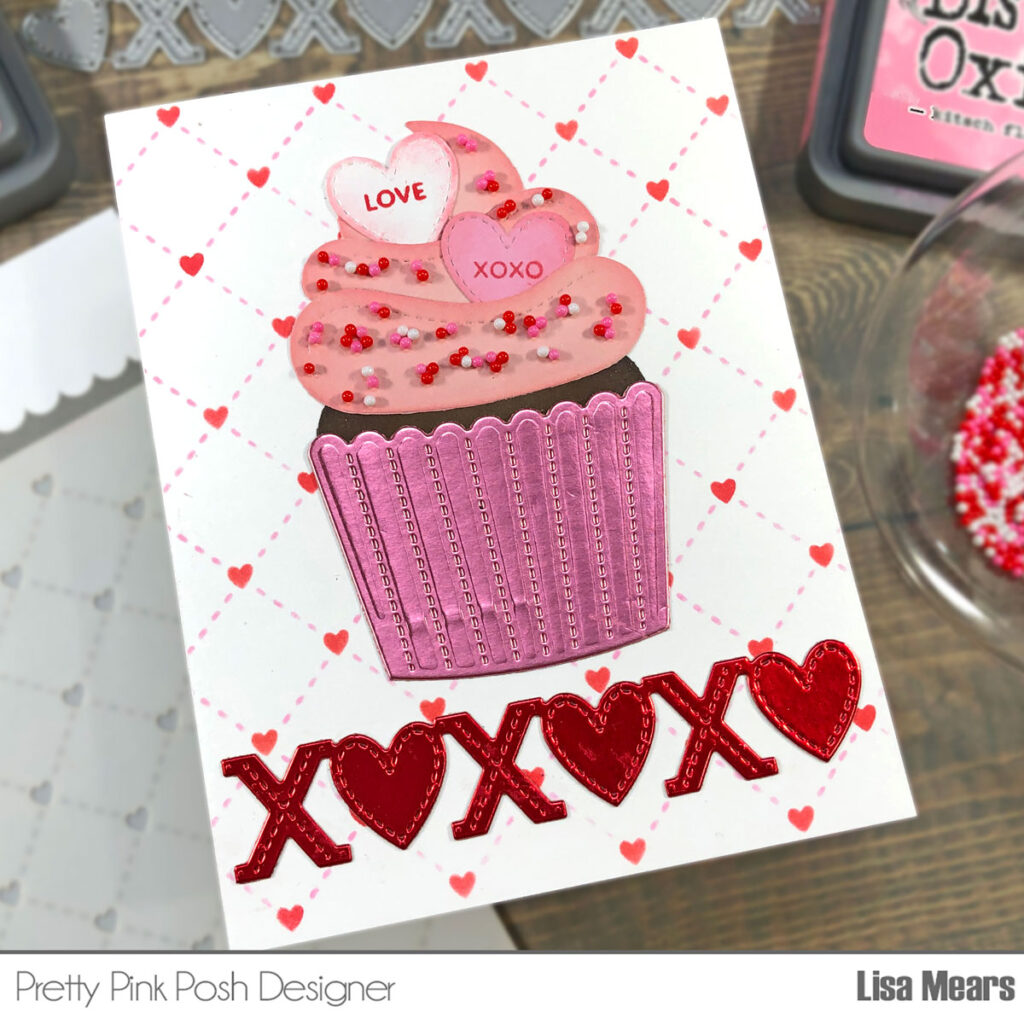
I started by stenciling the Layered Heart Lattice Stencil onto a piece of white card that measures 4 1/4” x 5 1/2”. I used Festive Berries Distress Oxide ink for Stencil Layer A and Kitsch Flamingo Distress Oxide ink for Stencil Layer B.
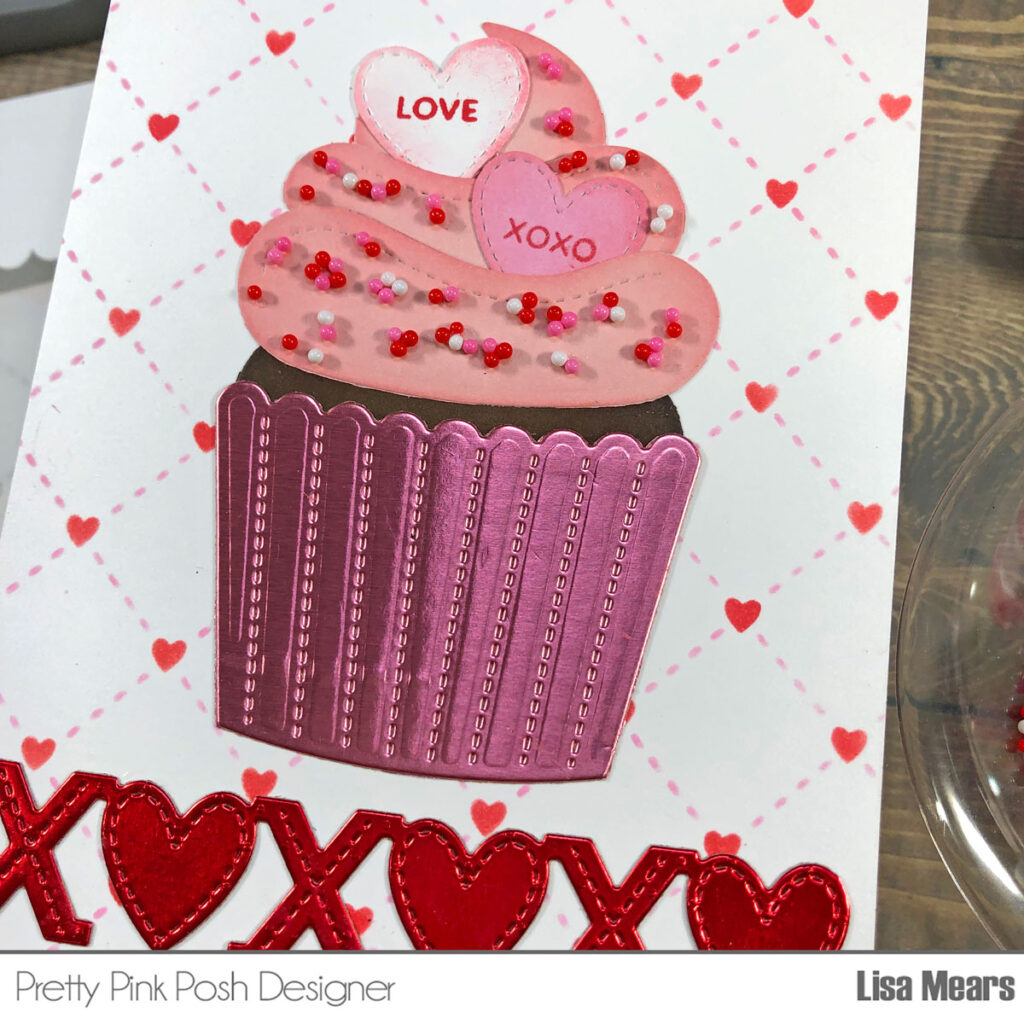
Next, I worked on the Big Valentine Cupcake. I die cut the cupcake frosting with pink cardstock, the cake with brown cardstock, and the wrapper with metallic pink cardstock. I inked the edges of the frosting and cake with their corresponding color inks to add some depth to the die cuts. I also die cut the hearts with white and pink cardstock and stamped the words “Love” and “xoxo” inside the hearts so they would resemble the conversation hearts candy you get on Valentine’s Day.
Hi crafty friends! It’s Dana here today with a fun Valentine’s Day card to share with you all.
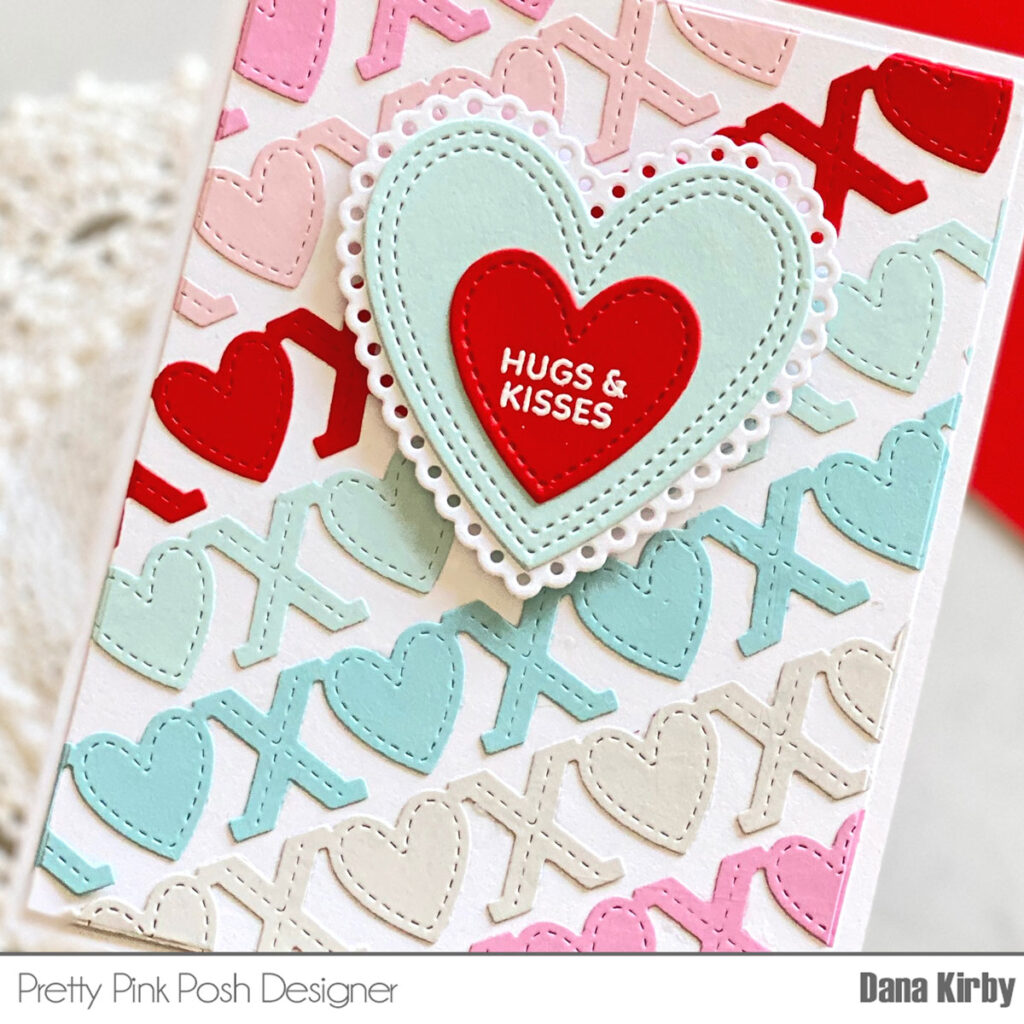
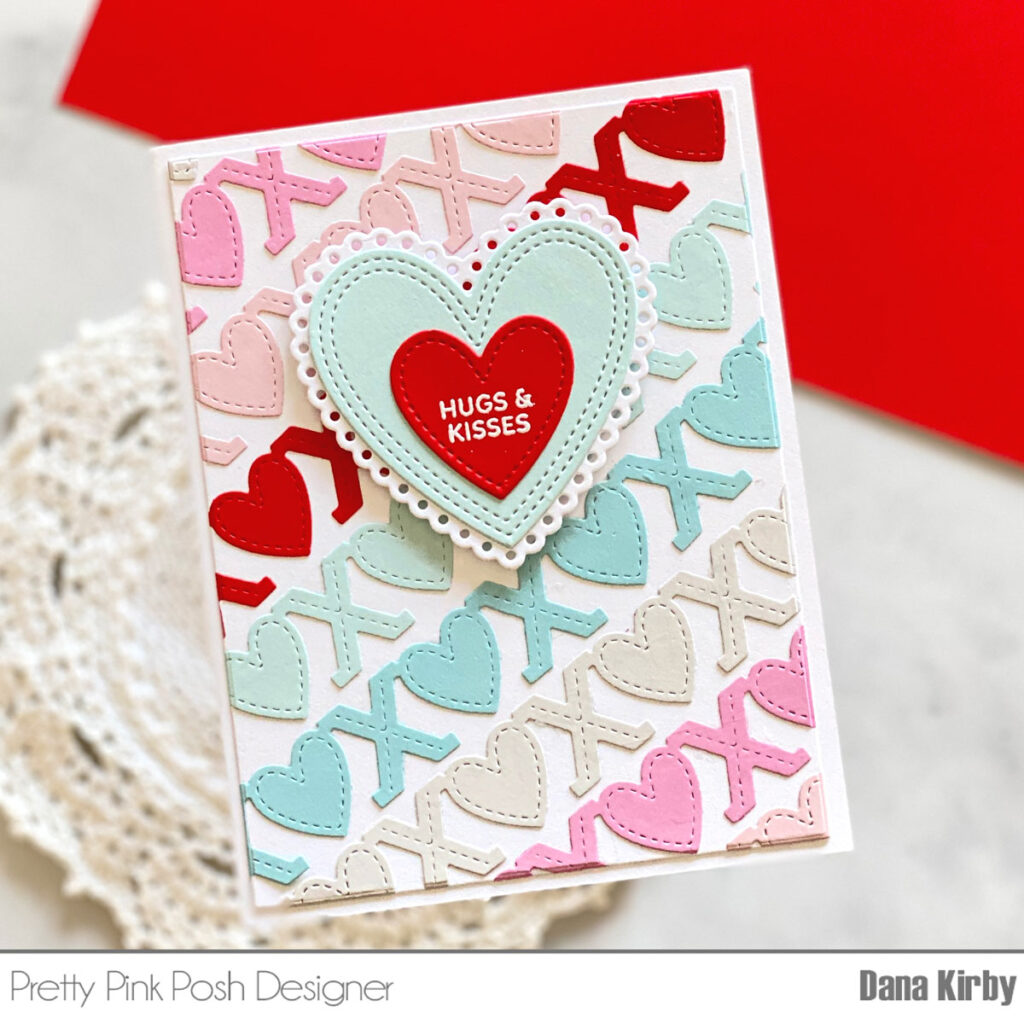
I started my card by creating my card panel with the XOXO Heart Border die. I ran the die through my die cutting machine in a variety of colors. I then attached the XOXO borders to my panel on a diagonal. I trimmed the panel down and attached it to an A2 card base.
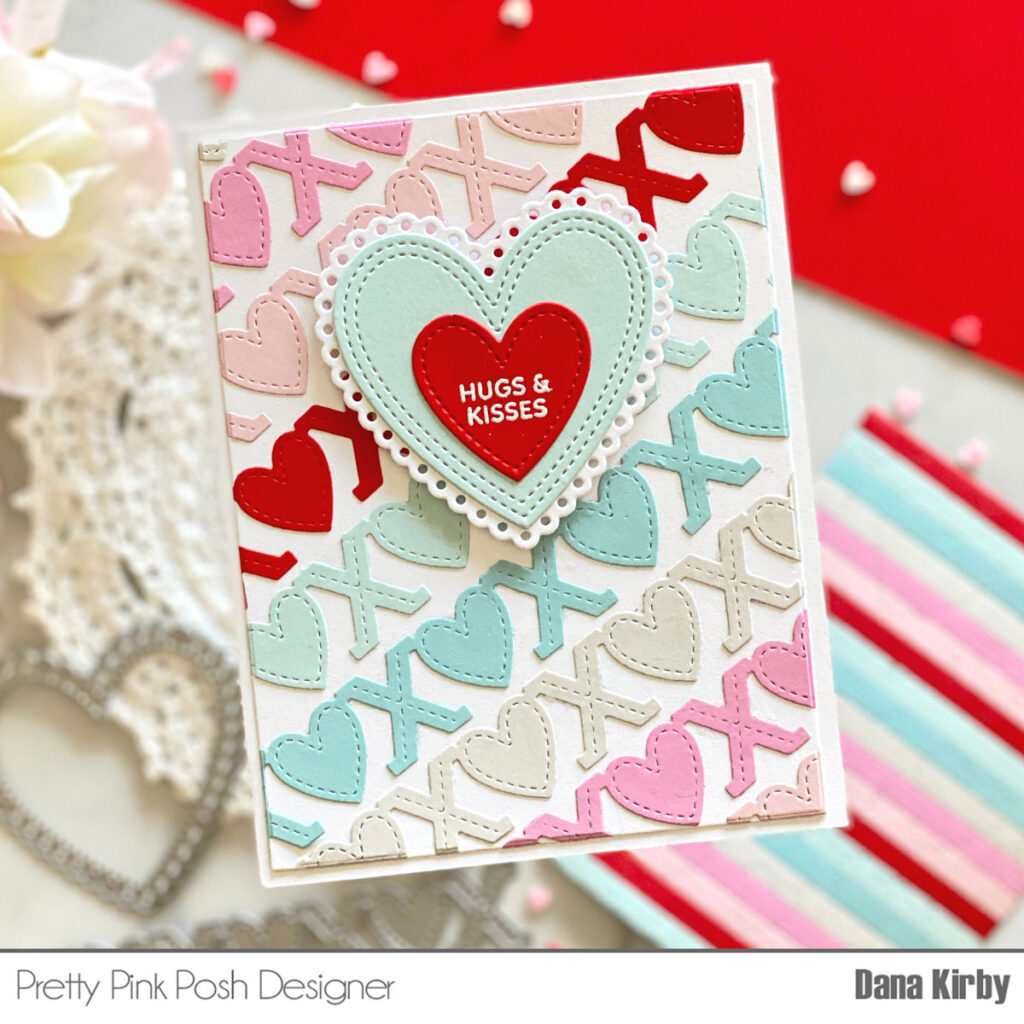
Next, I used the Eyelet Hearts die along with two of the Stitched Hearts dies to create my hearts. I used the Decorative Hearts stamp setto stamp my sentiment onto the red heart with VersaMark ink. I then heat set the sentiment with white embossing powder. Lastly, I layered the hearts and attached them to the center of my card with foam adhesive.
Thanks for joining me today. I hope I inspired you to use some of the fun new Valentine dies! I love how they can all be mixed and matched to give you so many options.
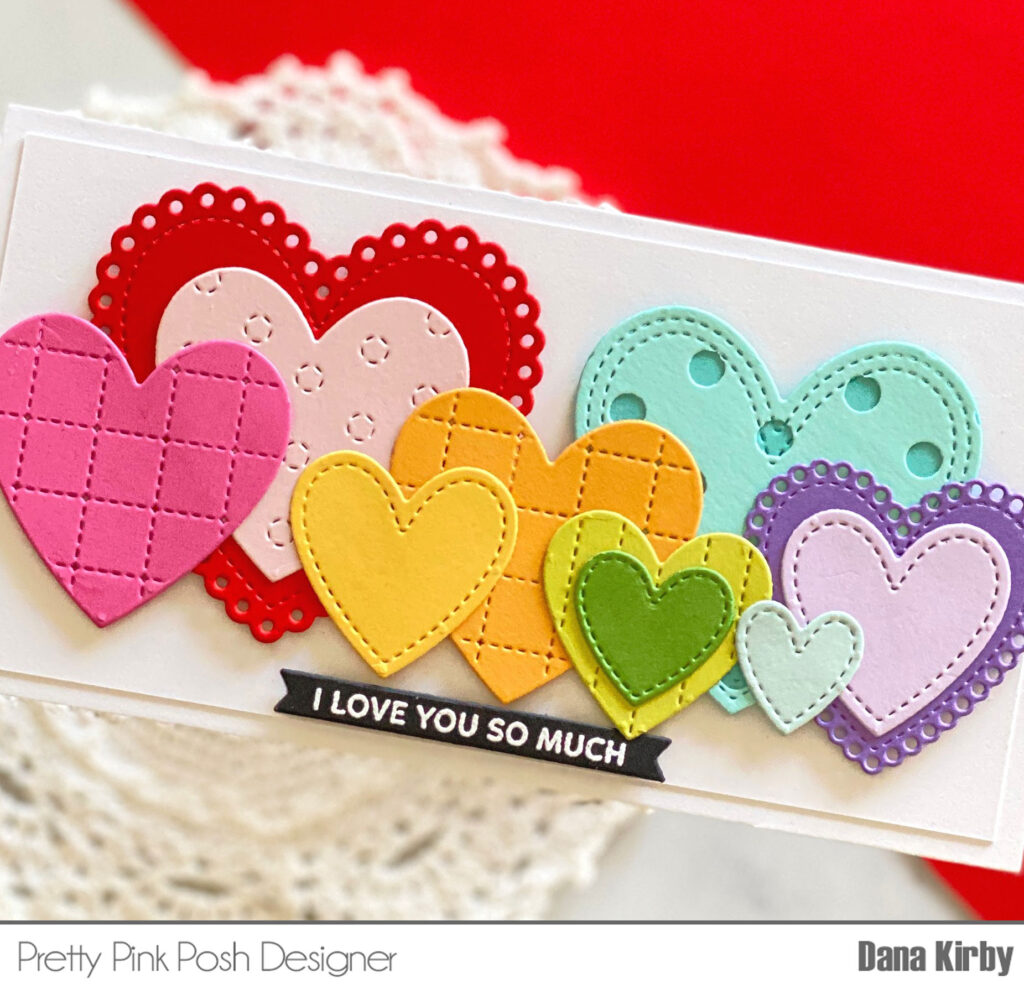
Hi friends! It’s Dana here today with a colorful (and easy) Valentine’s Day card to share with you all.
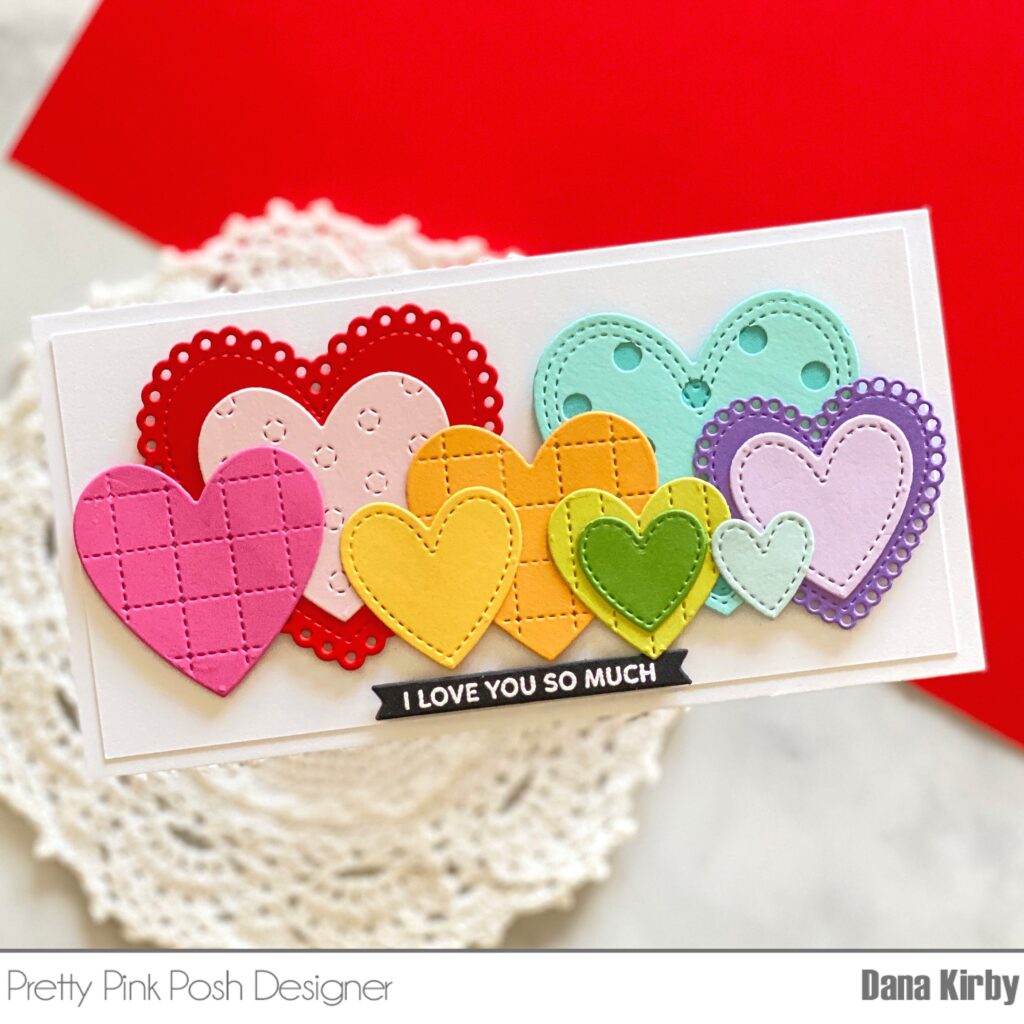
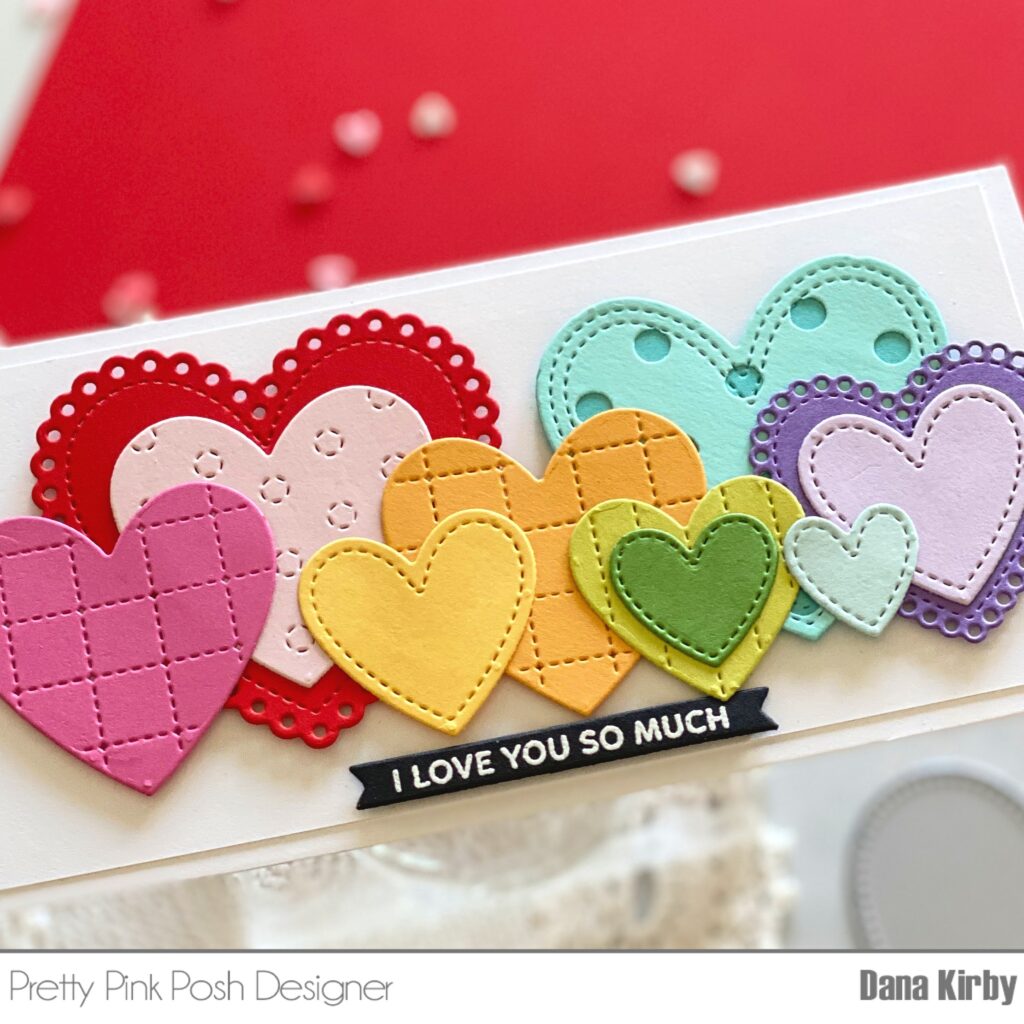
I started my card by using theStitched Hearts, Eyelet Hearts, Big Valentine Cupcake die(green heart) and the single heart from the XOXO Border die (soft aqua heart) to die cut all of my hearts. I love how all of these dies can be mixed and matched and layered together to give you so many options. Once everything was die cut I attached my hearts to a mini slimline panel with foam adhesive.
Next, I used the Sentiment Strips: Valentine stamp setto stamp my sentiment. I stamped my sentiments with VersaMark ink and heat set it with white embossing powder and attached it to the bottom of my panel to finish my card.
Such a clean and simple card to create! Though I think the colorful hearts are a lot of fun and are sure to bring a smile to the recipient’s face.
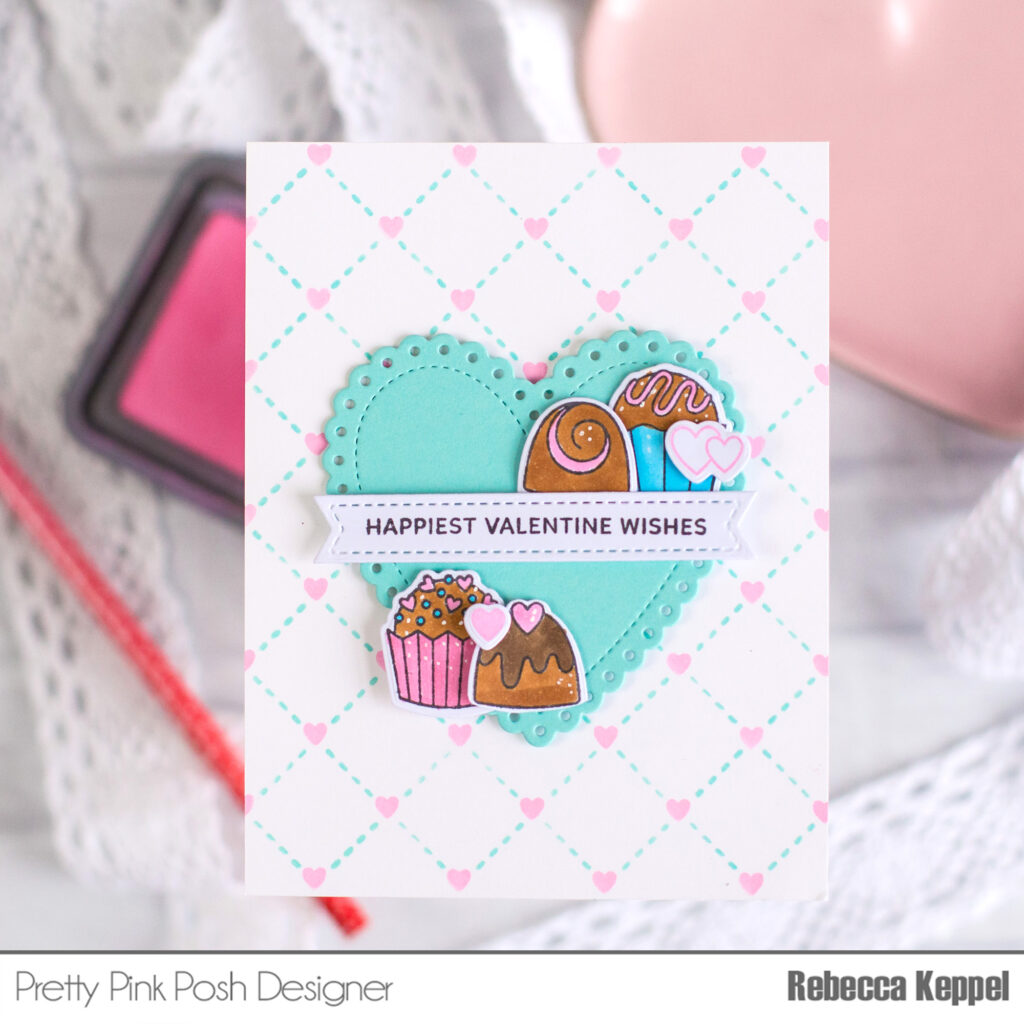
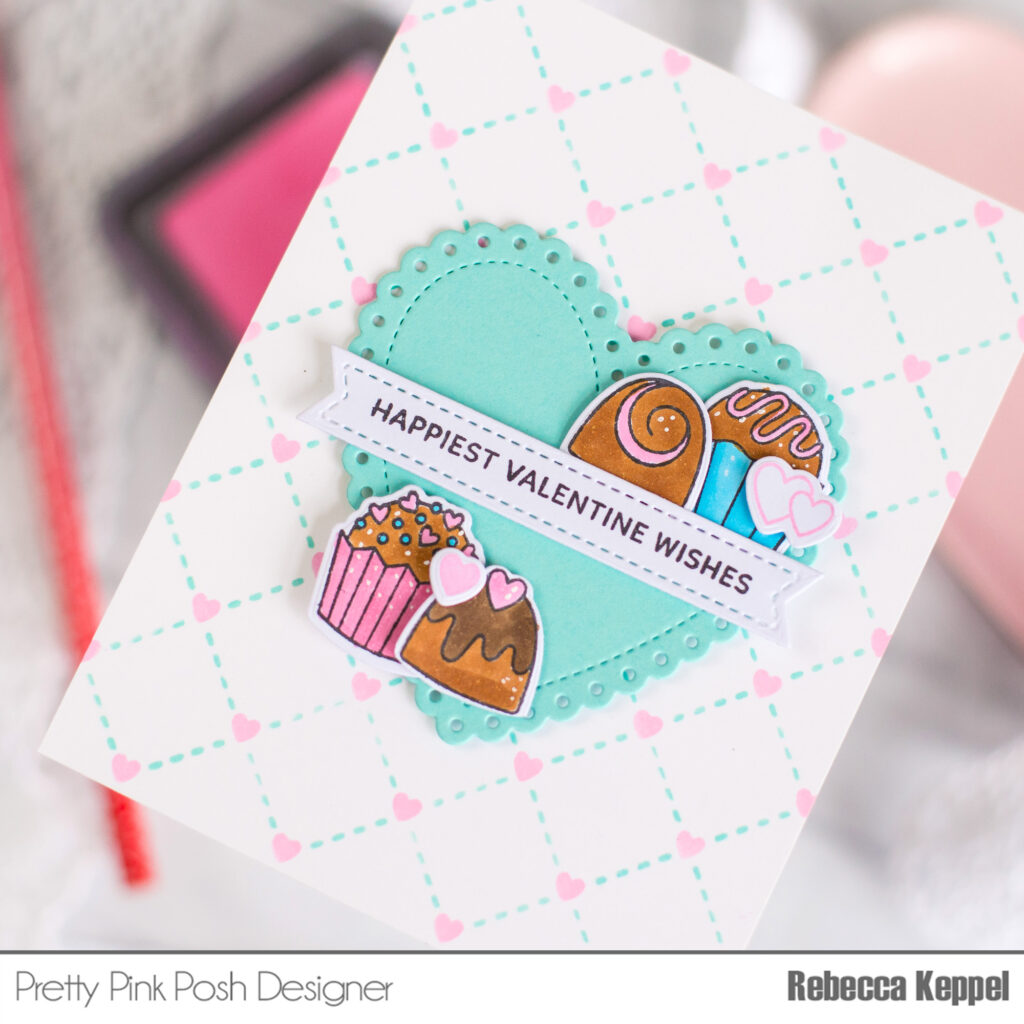
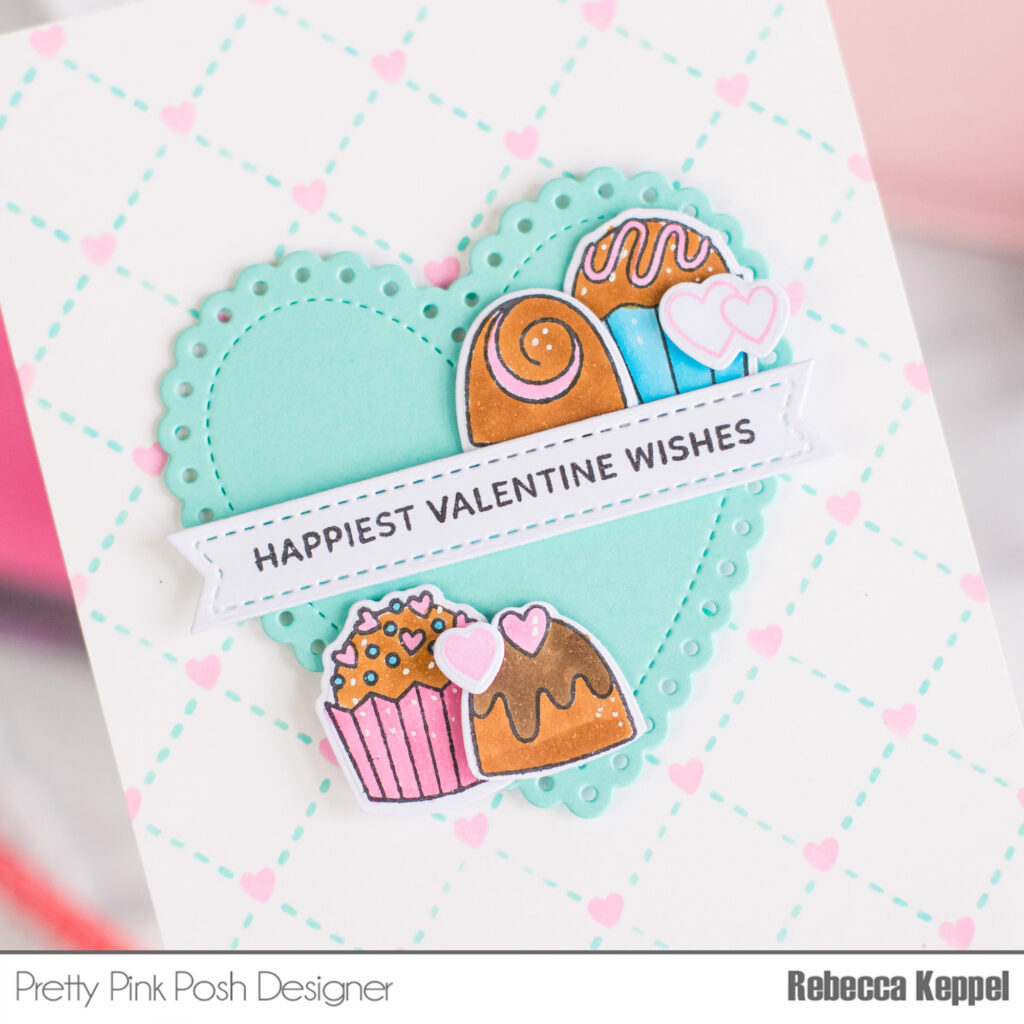
Hello crafty friends! Rebecca here and I am so in LOVE with the latest release! One of my favorite things about a Pretty Pink Posh release is how well all of the supplies work together. In fact, today I am sharing a card that combines stamps, dies and stencils!
To create the background I used the Lattice Hearts Layering Stencils. This is a 2 pack of stencils. One creates tiny hearts and one creates a criss cross of stitches. You could use them separately, but when you combine them you create the sweetest hearts and stitches background!
Next I die cut several colors of hearts with the Eyelet Hearts Dies. I used the second largest heart which I cut out of light blue cardstock to match the background.
Then I stamped a bunch of images from the Sweet Chocolates stamp set. I love to color all the images and die cut them out with the Sweet Chocolates coordinating diesand then decide which I will use on my card. Any extras can stay organized in the stamp and die pocket for future cards.
At last comes the fun part of putting it all together! I love the look and interest that is created on a card by combining stenciling, die cutting and stamping!! The Pretty Pink Posh releases are meant to work together so have fun mixing and matching to your heart’s content!
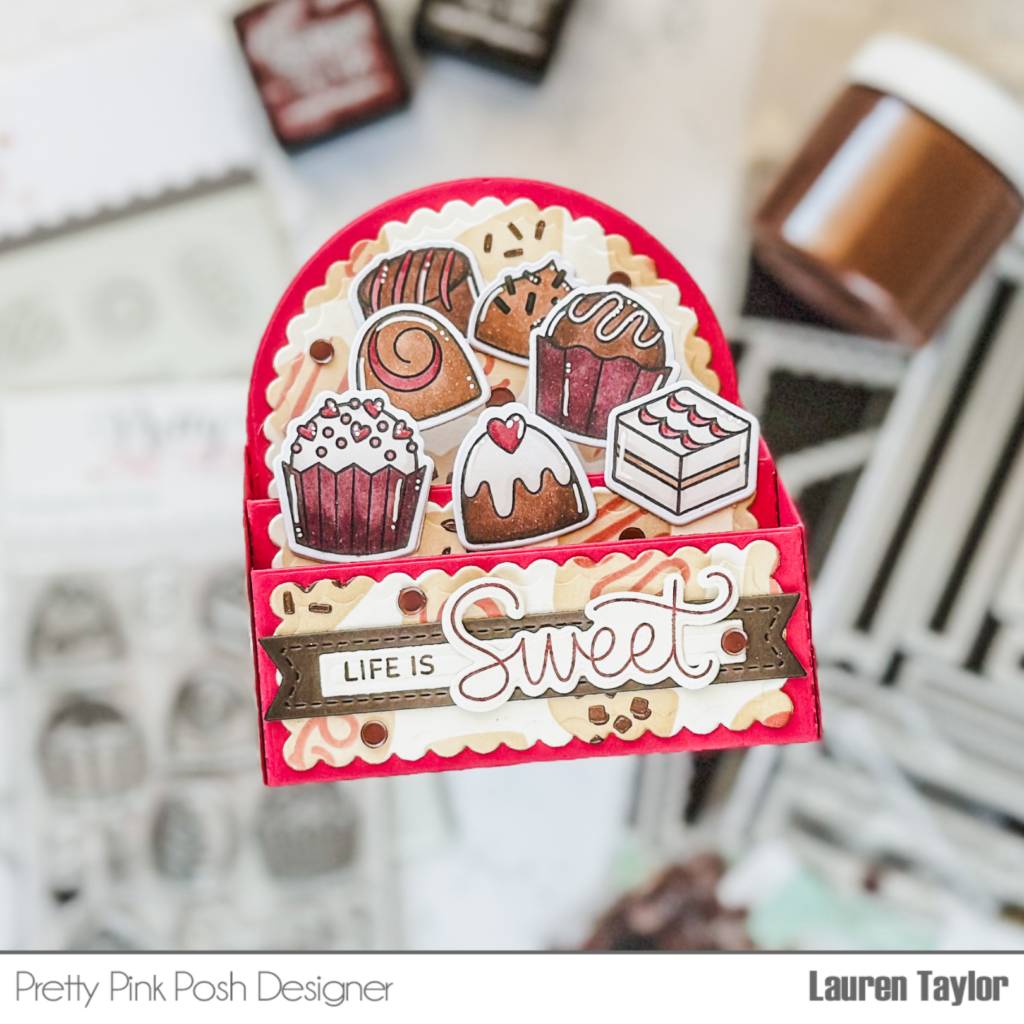
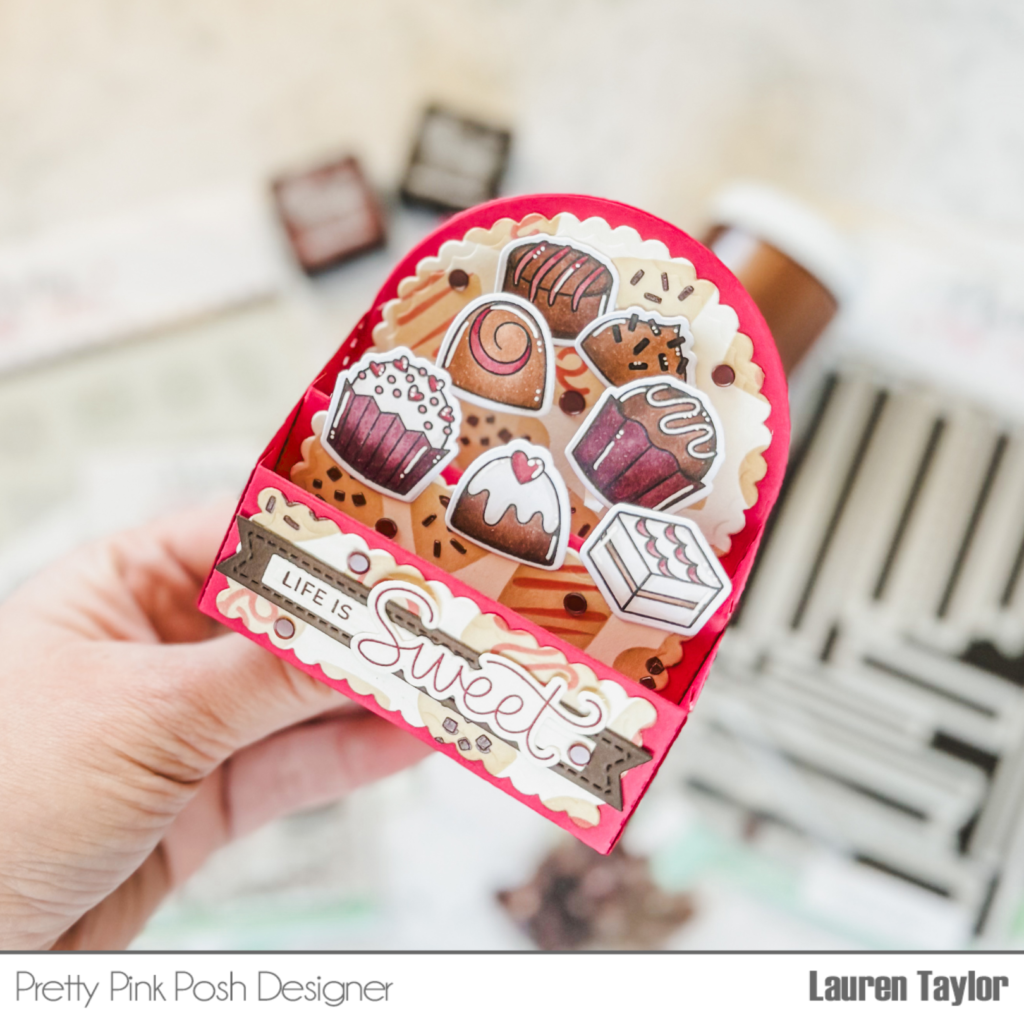
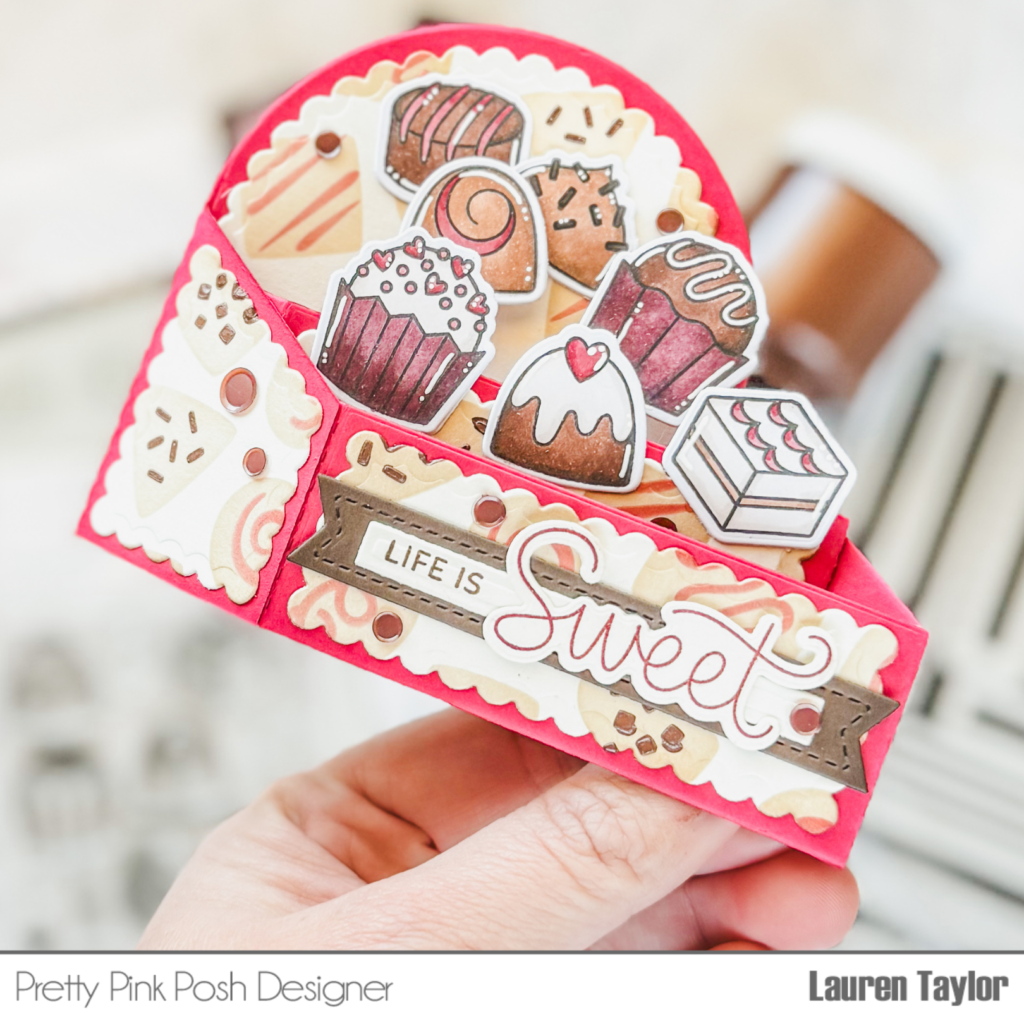
Hi, friends! It’s Lauren and I am back with a new video on the Pretty Pink Posh YouTube channel today. I love a good box of chocolates, but a boxcard of chocolates is just too cute!
I started with die cutting all of the scallop dies from the Scallop Box Card Dies from a vanilla cream cardstock. Using the Layered Chocolates Stencils, I started with the (A) stencil with Ground Espresso Distress Ink, then the (B) stencil with Aged Mahogany Distress Ink, and finally the (C) stencil with Chocolate Stencil Butter.
While the stencil paste was drying, I stamped the candy images from the Sweet Chocolates stamp set with an alcohol marker friendly black ink and cut them out with the Sweet Chocolates coordinating dies. Using Ohuhu Art Honolulu Alcohol Markers, I colored my images in and you can see the colors in today’s video!