Pretty Pink Posh Shop

|

Rainbow Theme Week- Day 3

Pretty Pink Posh: Rainbow Theme Week- Day 3

Good morning my sparkly Pretty Pink Posh friends!

Heather here to share a card for this week’s Rainbow Theme at Pretty Pink Posh!

Pretty Pink Posh: Rainbow Theme Week- Day 3

I started off by watercoloring a rainbow background, then created a window shaker using the new Storybook 4 Die. I die cut it out of kids fun foam as well as the gray cardstock – an easy way to create separate windows for my shaker.

 Pretty Pink Posh: Rainbow Theme Week- Day 3

I added a white frame with the larger size of the Scallop Frames to set it all off, and stamped my sentiment from Birdie Friends on the inside.

Pretty Pink Posh: Rainbow Theme Week- Day 3

Finally, I filled each window with a coordinating 4mm sequins, and some Iridescent Mini Star Confetti. I mixed together Lemon Meringue and Lime Sorbet in the center window, then the other windows have WatermelonTangerine, Orchid, and Aquamarine. One of the Watermelon sequins managed to sneak into the center window – see it hiding there? Haha!

Pretty Pink Posh: Rainbow Theme Week- Day 3

Hope this week of rainbows is brightening your days! Thanks for stopping by – and have a wonderful day!!!

border

If you have missed any our other rainbow inspired cards, click on the photos below to see the post from that day.

Pretty Pink Posh: Rainbow Theme Week- Day 4rainbow2rainbow4
|

Rainbow Theme Week- Day 2

Pretty Pink Posh: Rainbow Theme Week- Day 2

Hello Pretty Pink Posh friends!

Shannon here today to share a rainbow card I created for rainbow theme week! I decided I wanted to make a rainbow completely out of sequins! So that’s exactly what I did! I’m in love with the new 4 mm iridescent sequins and I thought this was a perfect way to show them off!

I started off creating my rainbow by just adhering my sequins to the paper but I noticed my rows were just wonky and did not look like a rainbow at all so I found something circular in my craft room to trace a faint half circle with. In my case I just used a roll of painters tape but you can use whatever you have on hand that would give you a good guide to start making your rainbow. After I had my rainbow traced out I started adhering my sequins following my traced line, changing colors of sequins each row. I found the best way to adhere the sequins down were to use the Zots bling dots which are just teeny tiny glue dots. I found this worked best simply because I could move my sequins around if I found I wasn’t lining them up the way I liked it.
 Pretty Pink Posh: Rainbow Theme Week- Day 2

I used the following sequin colors all in 4mm to create the rainbow:

Pretty Pink Posh: Rainbow Theme Week- Day 2

Now that my rainbow is done onto the rest of my card, I stamped my clouds from the Rainy Days stamp set. My blue clouds are stamped with Bashful Blue ink from Stampin up and then I went in with a blue Copic marker on the edges. My larger cloud was stamped with Lavender ink from SSS.

I fussy cut my clouds out leaving a small white border and adhered towards the top of my rainbow with some fun foam to give them some dimension.

Pretty Pink Posh: Rainbow Theme Week- Day 2

I die cut the Scallop Frames die out of white cardstock to frame my card, I also adhered some fun foam on the back of my frame to pop it up to the same dimension of my clouds. Lastly, I stamped the ‘Brighter Days’ sentiment in Dusty Concord Distress ink and the ‘Wishing You’ part of the sentiment in just black ink from SSS.

That’s it for my rainbow card today!! I just love how the rainbow full of sequins turned out!

Thanks for joining me today! Stay tuned… we have more rainbow themed cards this week AND a little birdie told me we’ll have a challenge coming soon.

border

If you have missed any our other rainbow inspired cards, click on the photos below to see the post from that day.

Pretty Pink Posh: Rainbow Theme Week- Day 4Pretty Pink Posh: Rainbow Theme Week- Day 4rainbow4

|

Rainbow Theme Week- Day 1

  Pretty Pink Posh: Rainbow Theme Week- Day 1

Hello everyone! It’s Vera here!

Today we are starting our Rainbow Theme Week on the Pretty Pink Posh blog! Here, I choose Pastel Rainbow colors featuring Rainy Days stamp set. Actually, I challenged myself to stretch my stamp set to create a set of card with pastel rainbow colors :)

Pretty Pink Posh: Rainbow Theme Week- Day 1

My first set of card is happy clouds card in framed using Scallop Frames Dies. I white heat embossed the clouds and blended with distress ink pad.

Pretty Pink Posh: Rainbow Theme Week- Day 1
 Pretty Pink Posh: Rainbow Theme Week- Day 1

Next, I create sweet clouds cotton candy combined with Stitched Duo 3 Dies.

 Pretty Pink Posh: Rainbow Theme Week- Day 1
 Pretty Pink Posh: Rainbow Theme Week- Day 1
And for my last card, I created rainbow ice cream!
 Pretty Pink Posh: Rainbow Theme Week- Day 1

In this video below, I show how I created all of my cards from start to finish.

Pretty Pink Posh: Rainbow Theme Week- Day 1

Hope you like it and hope you will give it a try. Enjoy the rest of our Rainbow Theme Week!

S U P P L I E S :
Sequins : Sparkling Clear
border

If you have missed any our other rainbow inspired cards, click on the photos below to see the post from that day.

rainbow2rainbow3rainbow4
| |

Tutorial: Die Cut Rainbow Background

Pretty Pink Posh: Die Cut Rainbow Background

Hello, Pretty Pink Posh fans! This is Yana and I have a Get Well card with a DIY rainbow die cut background to share today.

I love to create unique and one of a kind backgrounds for my cards and I find dies to be great tools for this task. Today I’m inviting you to use one of the Pretty Pink Posh border dies to create a rainbow background.

Pretty Pink Posh: Die Cut Rainbow Background

To minimize the use of supplies (such as watercolor paper) and time I first cut a rectangle out of watercolor paper (I knew I wanted to use distress inks and add a lot of water, so I needed my paper to be able to absort water and not warp) and using a border die from the Stitched Borders 1 set cut the panel into 8 curved sections.

Pretty Pink Posh: Die Cut Rainbow Background

The number of sections was not random, I knew I wanted to have a background that resembled a rainbow, so I needed to make sure to have 7 die cut elements, the 8th one, the one on the bottom was discarded as I planned to have a bit of white space on the base of the card. If you don’t want any white space and would rather have the rainbow cover the entire card front, go with 7 sections.
Pretty Pink Posh: Die Cut Rainbow Background

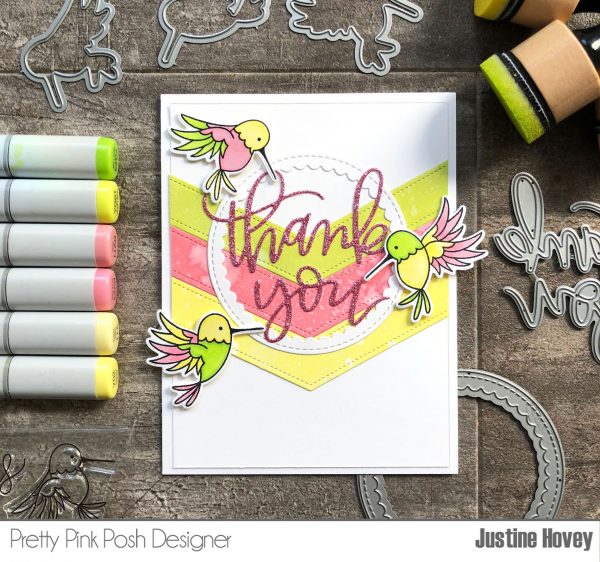
The next step is all about adding color to the die cut pieces. There are a number of ways this can be done depending on the look you’d like to get. I went with Distress inks (the colors I used are: Worn Lipstick, Picked Raspberry, Ripe Persimmon, Wild Honey, Crushed Olive, Peacock Feathers and Seedless Preserves). You can also use watercolors, alcohol markers, ink pads or even die cut individual sections out of colored cardstock.

Pretty Pink Posh: Die Cut Rainbow Background

Colors shown: Worn Lipstick, Picked Raspberry, Ripe Persimmon, Wild Honey, Seedless Preserves, Peacock Feathers, Crushed Olive

After blending each color rather heavily onto the paper, I added lots of water drops to activate Distress inks and create beautiful effects on my background. I worked in layers – added a first layer of drops, let the water sit on the paper for about a minute, soaked up extra water with a rag, dried the paper with my heat tool and repeated the process a few more times to get the look I wanted.

Tip: You can also heat emboss outline images onto the die background in white embossing powder to add some additional texture (do so before blending ink or watercoloring to save time).

Pretty Pink Posh: Die Cut Rainbow Background

Once I was happy with the result I adhered my die cut panels onto a white cardstock panel using a tape runner and that finished the background for my card. You can also adhere these directly to the card base.

Pretty Pink Posh: Die Cut Rainbow Background

To embellish this project I first stamped and die cut an umbrella from the Rainy Days stamp set, it was a perfect match to go with my rainbow. Because the rainbow background ended up being vibrant I needed to create some sort of screen to mute a part of it and to also house the umbrella and the sentiment.

Pretty Pink Posh: Die Cut Rainbow Background

I used the smaller circle die from the Scallop Circles Die set and die cut it out of white cardstock to serve as a frame, the inner section was die cut out of vellum to serve as screen. To be able to adhere these together and to adhere onto the card  (and make sure the adhesive would not be visible from under the vellum) I also die cut two clouds using dies from the Rainy Days Coordinating Die set. I did not stamp the clouds, but only used the dies on their own as I feel stamping wasn’t necessary here, these clouds have a perfect shape.

I adhered both of the clouds onto the scalloped circle and this way was able to attach the vellum to the frame. The clouds also let me hide the adhesive to adhere vellum to the background.

Pretty Pink Posh: Die Cut Rainbow Background

Lastly, I heat embossed a Get Well Soon sentiment in white embossing powder over black cardstock for a pop of contrast, adhered it onto the umbrella and foam mounted the latter over the cloud cluster. I also added a little branch from the Holiday Pals stamp set stamped in light pink ink and embellished the card with my favorite clear sequins and small Clear Droplets (I adhered those over the largest sequins).

Pretty Pink Posh: Die Cut Rainbow Background

Pretty Pink Posh: Die Cut Rainbow BackgroundPretty Pink Posh: Die Cut Rainbow Background 
Pretty Pink Posh: Die Cut Rainbow BackgroundPretty Pink Posh: Die Cut Rainbow Background Pretty Pink Posh: Die Cut Rainbow Background

border

We hope you enjoyed today’s tutorial. Happy cardmaking!

| | |

Tutorial: Rainbow Shakers

Pretty Pink Posh: Rainbow Shakers

Hello there everyone! It’s Nina-Marie here with you today and I have a fun set of shaker cards to share with you that feature not only a bunch of Pretty Pink Posh’s fabulous new iridescent 4mm sequins, but ALSO all four of the Storybook dies in the Storybook collection! Oh and did I mention that the shaker cards I am creating are RAINBOW shaker cards????

Pretty Pink Posh: Rainbow Shakers

Pretty Pink Posh: Rainbow Shakers

I love making shaker cards and the Storybook dies from Pretty Pink Posh are SO perfect for making cute little shakers! My favorite from the Storybook collection is the new Storybook 4 die; I love all the tiny squares! I actually used this die in another video not too long ago to create a “peek-a-boo” card… you might want to check out after you’ve finished up this post; you can find it on the Pretty Pink Posh blog here.

Rainbow Shakers with Storybook Dies_6

Pretty Pink Posh: Rainbow Shakers

And since I was turning these Storybook dies into shakers, I thought this would be a perfect way to showcase the GORGEOUS new iridescent sequin colors! So I used a rainbow assortment (literally!) of 4mm and 6mm sequins to create my shakers. The colors I used are as follows:

Fairytale Fuchsia // Ballerina Pink // Strawberry Burst

Peridot Mist /Peacock Feathers // Ocean Spray

Bermuda Blue // Blue Lagoon // Lavender Moon

Sunshine Glow // Iridescent Mini Heart confetti

Pretty Pink Posh: Rainbow Shakers

Yes, I know that’s a lot of sequins, but the result is SO worth it! Be sure to check out the video below to see how I created this card set from start to finish! If you enjoy, please give the video a big thumbs up and subscribe to our channel for more inspiration!

Watch the video above   I Watch the video in HD on YouTube  border

Pretty Pink Posh: Rainbow Shakers Pretty Pink Posh: Rainbow Shakers

Pretty Pink Posh: Rainbow ShakersPretty Pink Posh: Rainbow ShakersPretty Pink Posh: Rainbow Shakers

border

Thanks for stopping by and spending some time with me, I’ll see you again very soon!

xoxo, Nina-Marie

|

Memorial Day Sale!

Hello, friends!

I wanted to let you know that I’ll be having a sale for Memorial Day weekend. If you follow my shop, you know that I keep my prices as low as possible on a day to day basis, which is why I don’t often have sales. However, every now and then I like to offer sales and I thought this holiday weekend was the perfect time to do one!

may2016Sale_MEDI hope that many of you are able to take advantage of the savings. I filled the shop up with tons of inventory, so hopefully there’s enough to go around!

Have a blessed holiday weekend.

| |

Throwback Thursday: Stitched Photo Frames

Pretty Pink Posh: Throwback ThursdayHello!  Amy K. here and it’s Throwback Thursday with a look back at some of your favorite Pretty Pink Posh dies.  This is a great time to pull out some of the older dies and create something new!

Pretty Pink Posh: Throwback Thursday

One of my favorite die sets from Pretty Pink Posh is the Stitched Photo Frame Dies.  These dies are PERFECT for creating some mini cards and make them into tiny shakers!  I’ve used the largest of the Stitched Photo Frame Dies for this trio of shaker cards.  The photo frame has the perfect place to stamp sentiments that are just fun little “pick me up” phrases from Birdie Friends and Birdie Notes. For each mini shaker, I’ve added some of my favorite Pretty Pink Posh sequin mixes!  Here’s a little about each mini shaker:

I stamped and Copic colored the largest birdie from Birdie Friends and die cut with the coordinating die.  The sentiment, from Birdie Notes, was stamped onto my Stitched Photo Frame.  The sequin mix called Sunny Days (which was limited edition) was used for this shaker.

Pretty Pink Posh: Throwback Thursday

I stamped and Copic colored the puppy from Holiday Pals and die cut with the coordinating die.  The sentiment, from Birdie Friends, was stamped onto my Stitched Photo Frame.  The sequin mix called Wisteria Blossoms was used for this shaker.

Pretty Pink Posh: Throwback Thursday

I stamped and Copic colored the bunny from Holiday Pals and die cut with the coordinating die.  The sentiment, from Birdie Friends, was stamped onto my Stitched Photo Frame.  The sequin mix called Sweet Pea was used for this shaker.

Pretty Pink Posh: Throwback Thursday

I can’t wait to give these out with a short handwritten note inside!  Who doesn’t love a shaker card?

border

Along with the great mini cards that Amy has shared with us, I have a few cards that have used the Stitched Photo Frames in the past. Click on the photos below to see the original post from the designers.

Pretty Pink Posh: Throwback Thursday Pretty Pink Posh: Throwback Thursday Pretty Pink Posh: Throwback Thursday
Thanks for visiting the blog today! I hope you’ll join us tomorrow… I have info on a sale I’ll be having in the shop!

| |

Tutorial: Creating Focal Points

Hello, sweet friends!

Today we have a special post that Liz put together showing how to create a focal point that stands out. Plus, she’ll be using a “Christmas” set and show us how we can use it year round!

Pretty Pink Posh: Creating Focal Points

This card was fun to make and best of all, the steps are easy so you can make several cards to send out to family and friends.

Take any A2 size card stock or designer paper and lay down flat. Then, place a circle die and rectangle die on top and run through the die cut machine. Here, I used a 2 5/8″ circle die as I wanted to add the smaller Scallop Circle from Pretty Pink Posh on top to add a decorate look.

Pretty Pink Posh: Creating Focal Points

Here is a picture after I ran it through the die cut machine, but still wanted to add some extra touches.
Pretty Pink Posh: Creating Focal Points

Next, I flipped the cardstock upside down and added white fun foam to pop the card base up. It doesn’t have to be fun foam. You can use foam mount tape instead.

Pretty Pink Posh: Creating Focal Points

Next step, I added the Scallop Circles directly on top of the circle opening that was previously cut.  Here, I used the smaller scallop circle.

From there, I wanted to add a sentiment, so I die cut the mini scallop border using the Stitched Borders 4  as it’s one of my favorites and then cut a 3/8″ black strip to place on top and in the middle of the white border.

Pretty Pink Posh: Creating Focal Points

Here, I pulled out the Birdie Fiends stamp set as it has a wonderful variety of sentiments and love the font style which I embossed using versa mark and white embossing powder. Then, I stamped the little envelope and little heart from the Birdie Notes set to add next to the sentiment.

Pretty Pink Posh: Creating Focal Points

Now moving on to the focal point of the card, I pulled out the Winter Friends stamp set, again, it’s not just for winter and can be used all year round, so I stamped the little coffee mug along with the little bear. Then, I colored it using my copic markers and added foam mount tape to pop them up along with one more little envelope stamped with the little heart.

Pretty Pink Posh: Creating Focal PointsLast but not least, I added some beautiful new 4mm Rose Gold sequins along the inside of the circle and alternated it with some 4mm clear sequins

Pretty Pink Posh: Creating Focal Points

I love the rainbow background that Liz paired with her focal point. It really makes the card stand out and those 4mm sequins do a perfect job highlighting the adorable bear in mug!

Stay tuned to the blog… I heard there might be a sale in honor of Memorial Day happening soon!

| |

Tutorial: Watercolor Backgrounds

Hello Everyone, Joni here sharing another project creating a soft watercolor background. For this project I used The cute stamp set Holiday PalsWindow Frames dies and for the sentiment I used the Birdie Friends stamp set.

Pretty Pink Posh: Creating Watercolor Backgrounds

To begin, I first stamped the critters from the Holiday Pals stamp set then watercolor directly from the brush to the watercolor paper, I picked the lightest color from the set of the ZIG Color Clear Brush.

Pretty Pink Posh: Creating Watercolor Backgrounds

After coloring the critters, I then colored more of the background using the RB-6000AT, this is really a gorgeous gray.Pretty Pink Posh: Creating Watercolor Backgrounds

Next, I set up the pieces to assemble my card. For the Window Frames I die-cut a pieces using the paper cardstock from Michaels. Next, I stamped the sentiment from Birdie Friends stamp set. Then adhered some sequins from the Sweet Pea Sequins Mix.Pretty Pink Posh: Creating Watercolor Backgrounds
This technique would be great for any occasion and you can customize it to fit the recipient!

Pretty Pink Posh: Creating Watercolor Backgrounds

I hope you guys enjoyed, thank you so much for stopping by! Have a wonderful week!

sig name

|

Wishing You Sunshine

Wishing-You-SunshineJeanne here today!  I wanted to share how easy it is to create color block backgrounds for your projects using the largest border from the Stitched Borders 3 Set.

This die is ¾” x 6” long with a stitching along both longer edges of the die.   Simply cut several strips in different colors and attach them to a panel of card stock.

Wishing-You-SUnshine-Five

Different color combinations can be used to create lots of great looks like ombre and rainbow patterns in your favorite colors for different occasions.  I chose a rainbow background of brights for the little birdie from Birdie Friends today!   

Wishing-You-Sunshine-Two

When you have all your stitched borders arranged on the panel,  trim the panel to size.  Now for the fun part – creating a scene!

Wishing-You-Sunshine-Three

I topped the panel with a die cut Scallop Frame cut from white card stock for contrast.

Wishing-You-Sunshine-Four

I stamped little birdie with Memento Tuxedo Black ink and colored it with Copic Markers before die cutting and attaching it with adhesive foam tape. The sentiment, umbrella and clouds are from the Rainy Days Stamp Set with coordinating dies. I love that Pretty Pink Posh die sets are complete with cuts for every single image in the stamp sets.

Wishing-You-Sunshine-One

The final touch is a sprinkle of Clear Droplets for rain – I used the small and the large here.  They shine like morning dew!

Thanks for stopping by!  What will you make today?