
Fall Easel Card Tutorial + Video
 Hi everyone, Rina here!
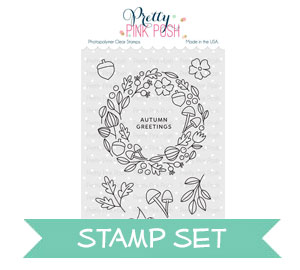
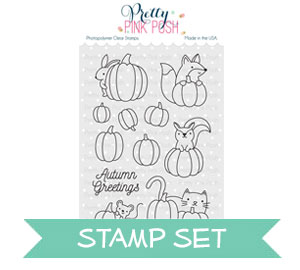
I am loving the transition to fall crafting and wanted to make a super fun fall card with the latest Pretty Pink Posh release. The new Autumn Wreath stamp set pairs up so well with the Pumpkin Patch Critters set so I decided to combine these stamp sets for my ‘Thankful for You” card using the latest script die. I also wanted to use the new Espresso jewels, which are a new favorite of mine.
I colored the images with copic markers in the following colors and cut them with the coordinating dies.
- Brick Reds – E07, E08, E09
- Warm Grey – W1, W3, W5, W7
- Warm Browns – E53, E50, E30, E34, E37, E33, E51, E35
- Olive Greens – BG93, BG96, BG99
- Oranges – Y17, YR21, YR04

Creating the expanded easel card:
- Cut a 8 ½ x 11 inch piece of white cardstock in half, you will have two pieces of 4 ¼ x 11 paper
- Take one piece and score and fold at 2 ¾ inches and 5 ½ inches, fold to create the easel stand
- Take the other piece and score and fold at 1 3/8, 2 ¾, 4 1/16, and 5 ½ inches, fold to create the easel card front
- Add adhesive to the easel stand and adhere the easel card front
- Decorate your card front, I used mats but you can ink blend, watercolor, or choose whatever way you want to create the background
- If you are going to mat your images the dimensions are 4 1/8 x 5 3/8 for the big panel and 4 1/8 x 1 ¼ for the 3 smaller mats for the “mountains”

So many fab elements layered on this fun card. Thanks for sharing your creativity and technique video.
That’s a lovely card with cute details 😊