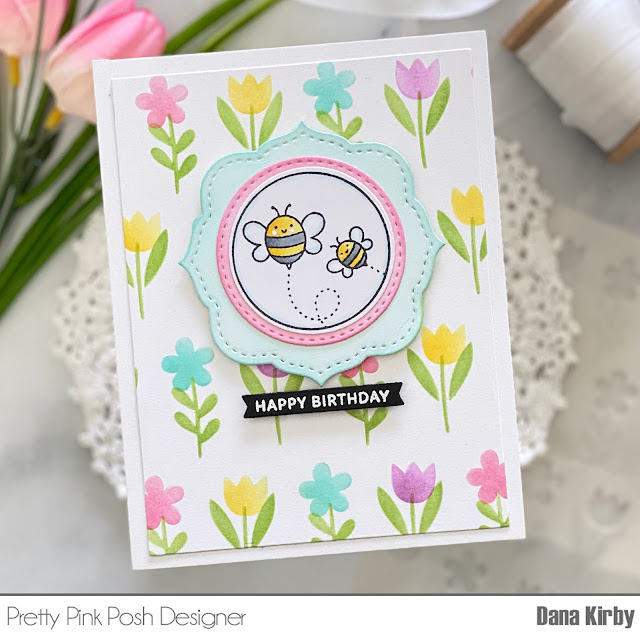
Hi friends! It’s Dana here today sharing an adorable birthday card with you all.
I started my card by creating my card panel with the Spring Flowers stencil set. I love these stencils and I had to use them again!! They make such a pretty card panel. I used dye inks and kept my colors soft and “spring like.” Next, I used theSpring Circles set to stamp my bees. This set has such sweet images, perfect for this time of year. For my frames I used the Easter Circles dies. I love the stitching detail on these dies. Lastly, I used the Simple Sentiments set to stamp my birthday sentiment.
Thanks for joining me today and I hope you liked my card. I love creating cards like this, by just changing the sentiment they are perfect for so many occasions.
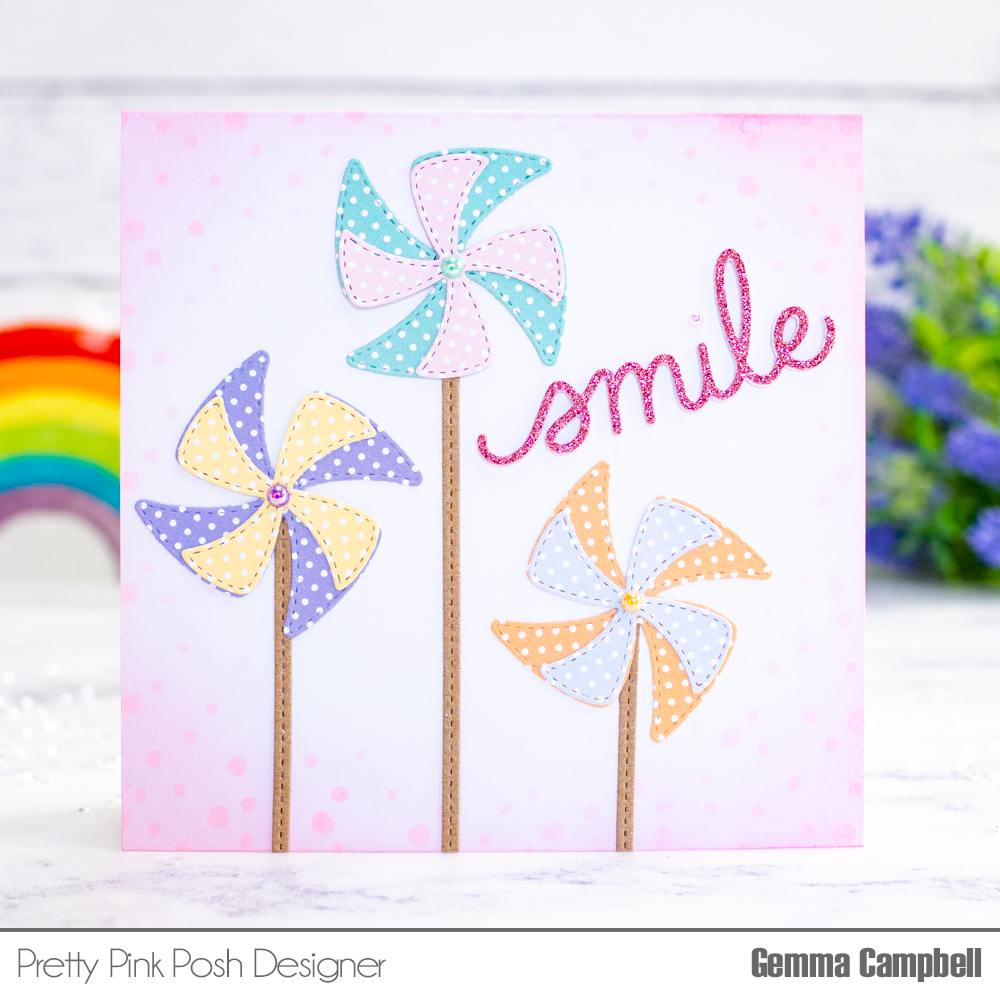
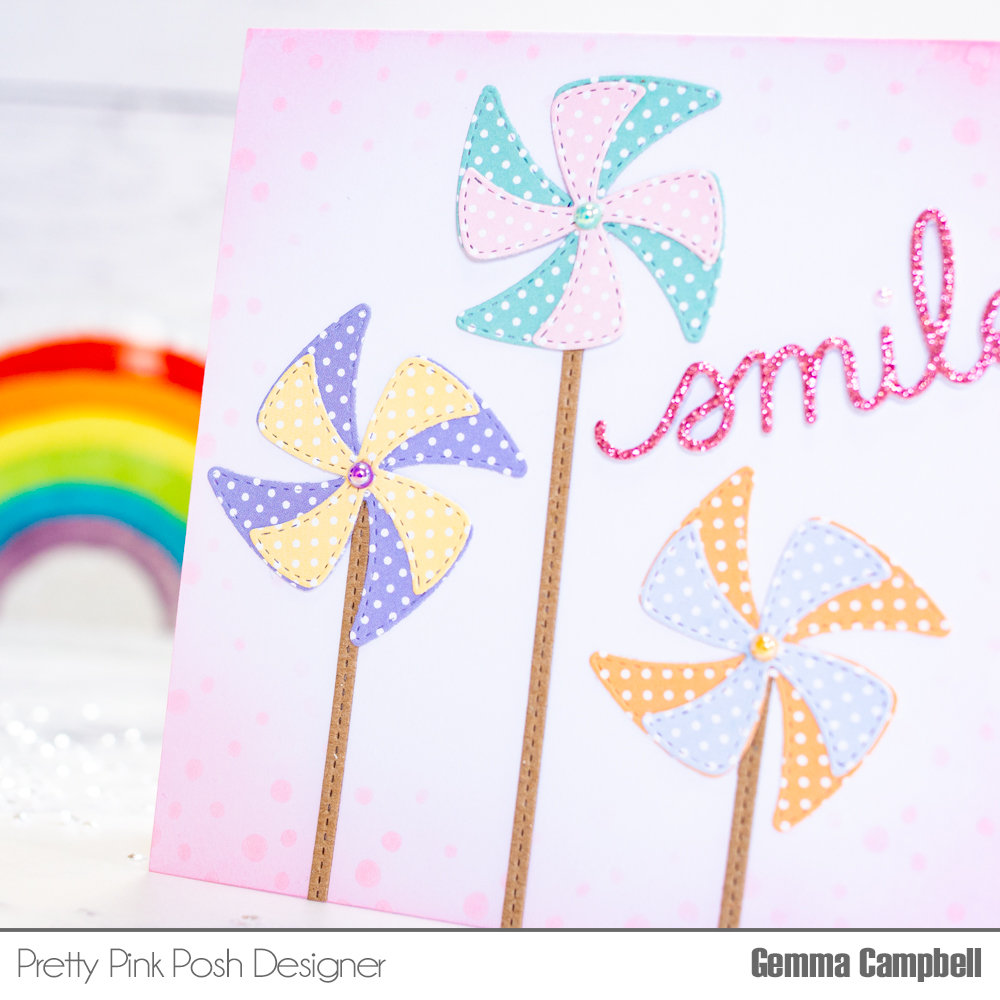
Hello friends, Gemma here. Today I have a card to share featuring the new Flat Pinwheelsand Smile Script die sets. Together, these make a fun and happy card.
I began by die cutting the two smaller size pin wheels from the Flat Pinwheels die set, using polka dot patterned papers. I then layered two together to make my pinwheels. For the centre, I adhered a pearl embellishment to match. For the pinwheel sticks, I die cut some Stitched Strips from Kraft card and adhered them to the back of the pinwheels. The Smile Script die is cut from two layers of white card, with a top layer of pink glitter card.
Next, I worked on the background. On a 5.25” square card base, I blended spun sugar distress oxide around the edge first, then blended some more through the Snowfall stencil to add some details.
I adhered the pinwheels to the card, followed by the scripty sentiment. For the dot on the ‘i’, I used a Pink Blush pearl. I used Lilac pearls, Sea Foam pearls and Creamsicle pearls for the middles of the pinwheels. They’re the perfect finishing touch.
I hope you enjoyed this card. If you’re on Instagram, there will be a reel of how to create this card up very soon.
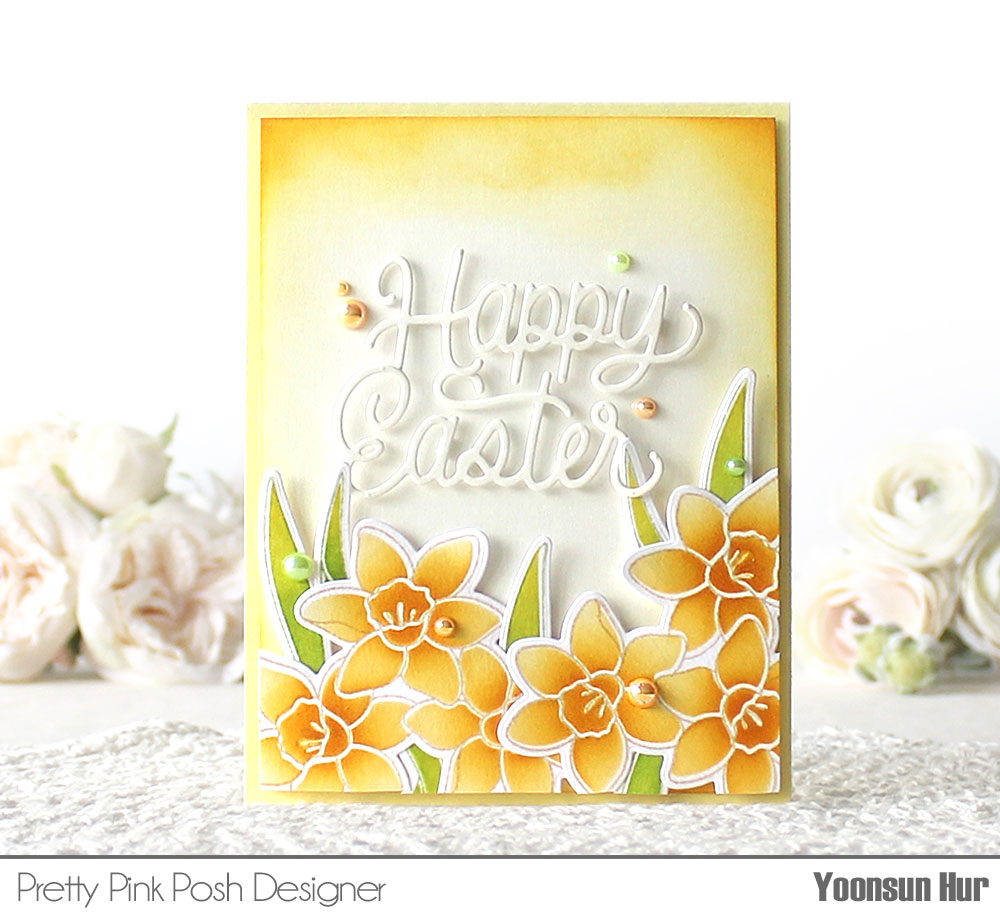
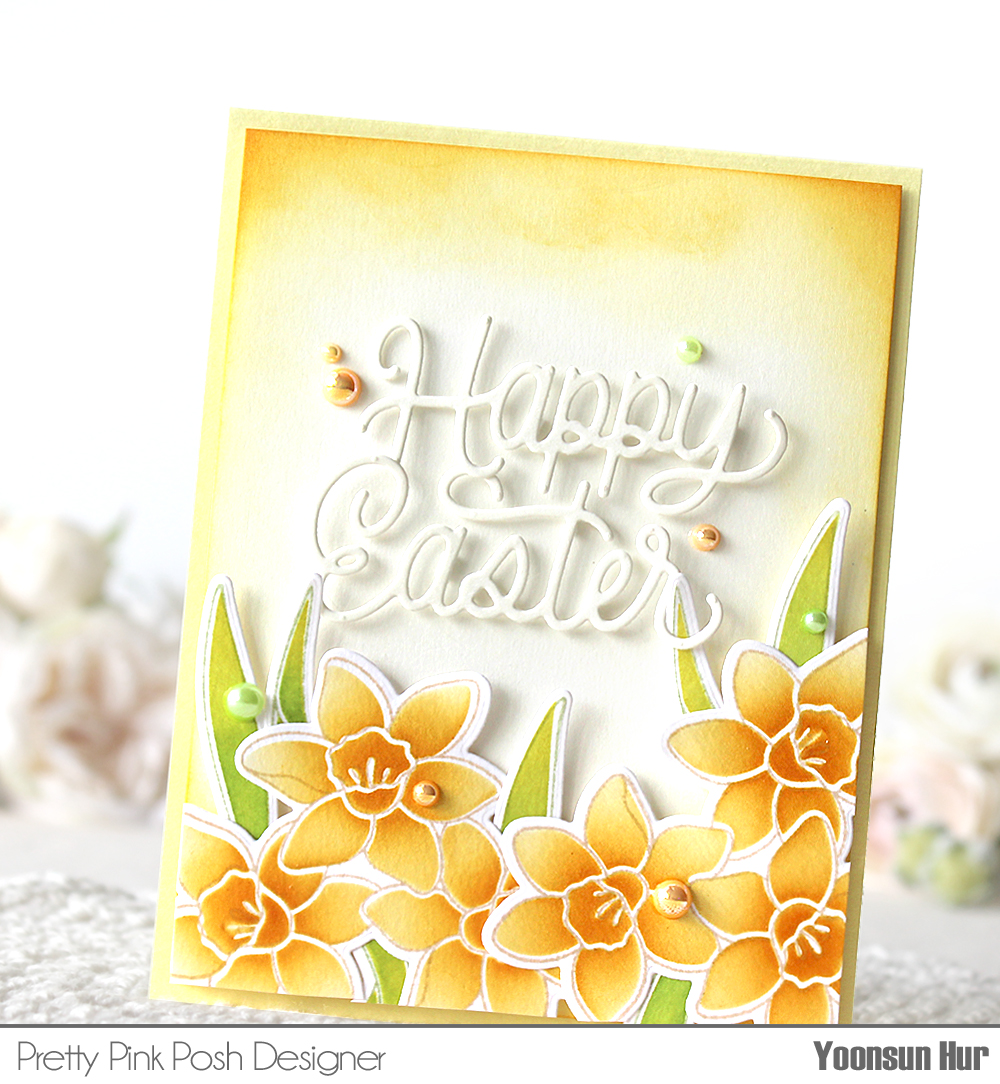
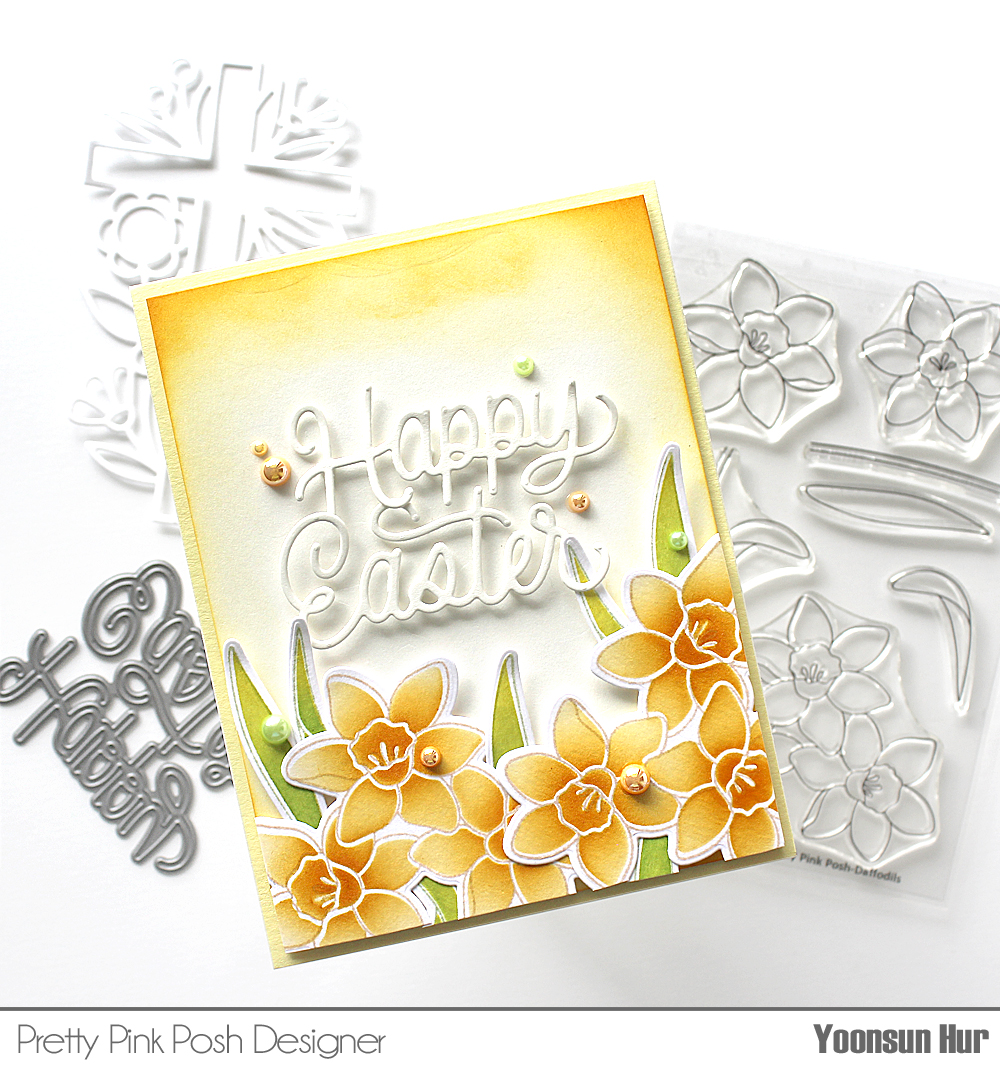
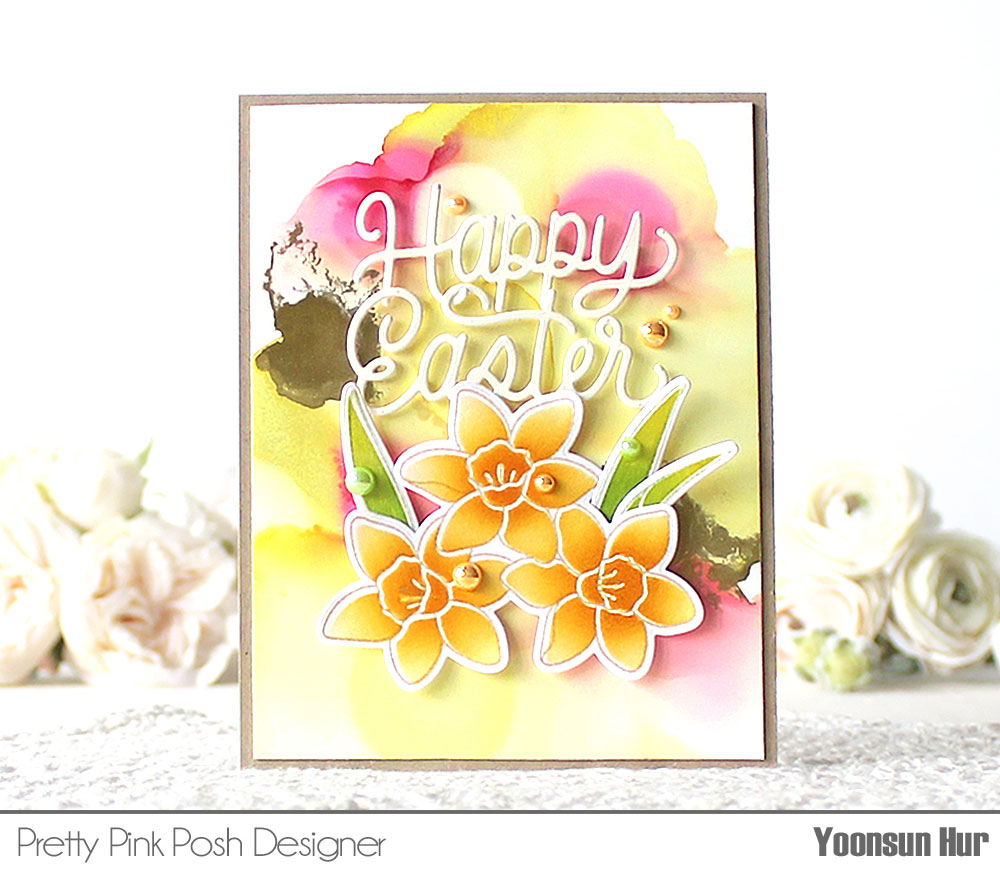
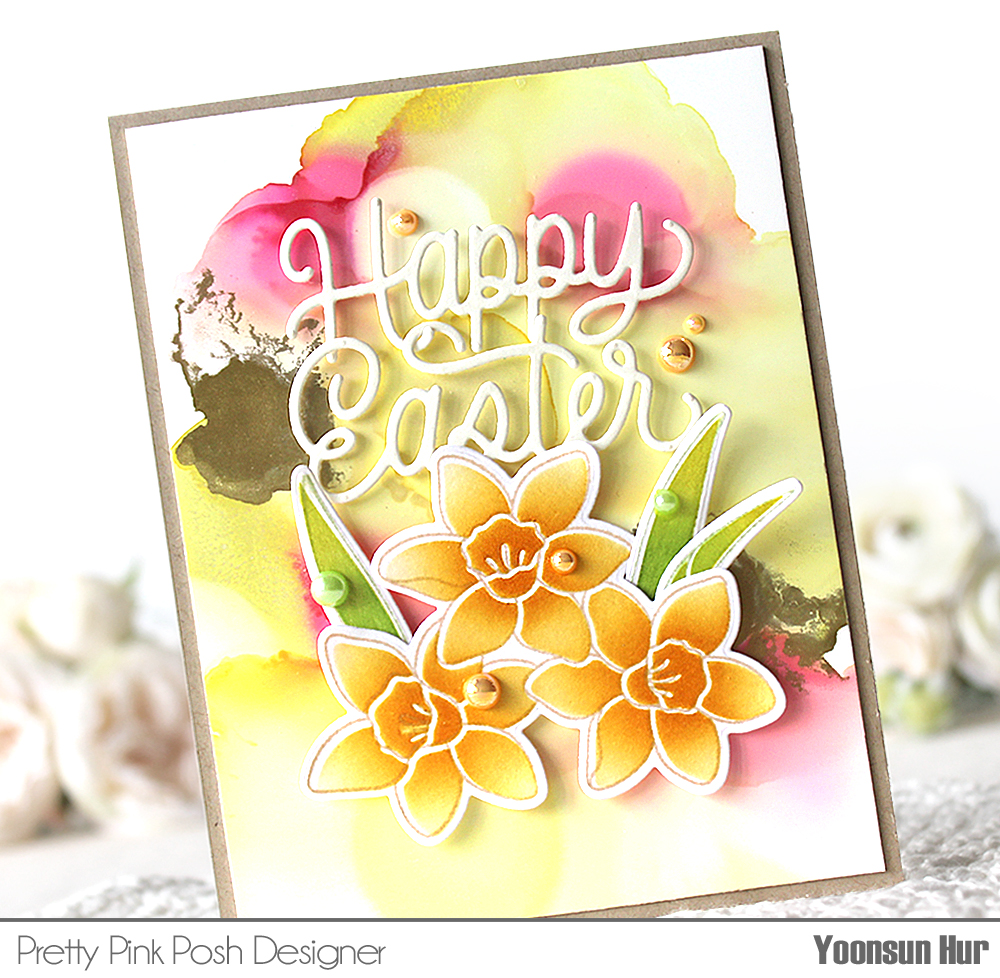
Hello crafty friends! It’s Yoonsun here to share a couple of “Happy Easter” cards with the Daffodils set along with the Fancy Easter Script die. Sunny yellow daffodils are called “Easter flower” because they are one of the first flowers to bloom in the spring and are usually in bloom for Easter. So the daffodils products are perfect for the Easter cards.
For the Daffodils on the bottom of the card, I laid theDaffodils stencil onto white cardstock, applied Fossilized Amber & Wild Honey Distress inks to petals, Crushed Olive & Mowed Lawn Distress inks to leaves using blending brushes. I then stamped outlined Daffodils using pale beige dye ink in place, die cut them with the Daffodils coordinating dies – This Daffodils trio is so awesome!
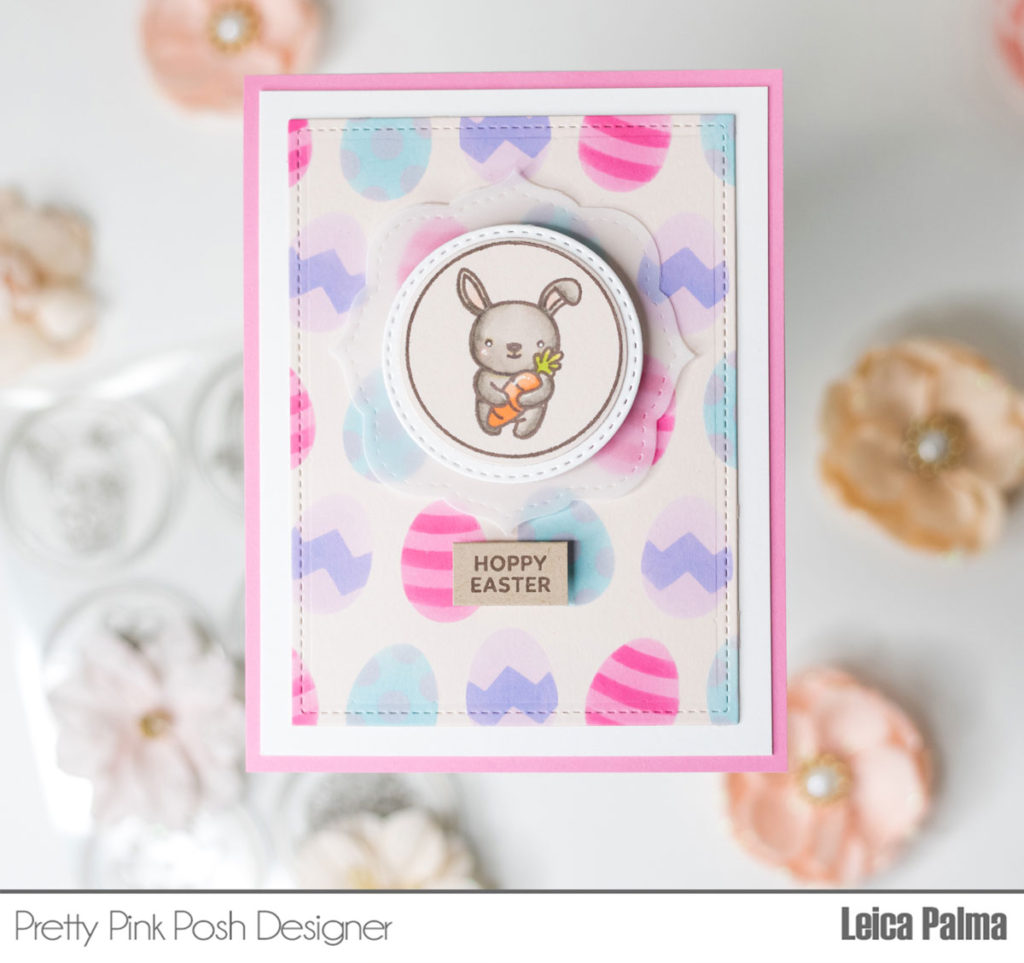
Hello crafty friends! It’s Leica here today with a Hoppy Easter card with the cutest Pretty Pink Posh bunny. This is super simple and fun to make. Let’s get started!
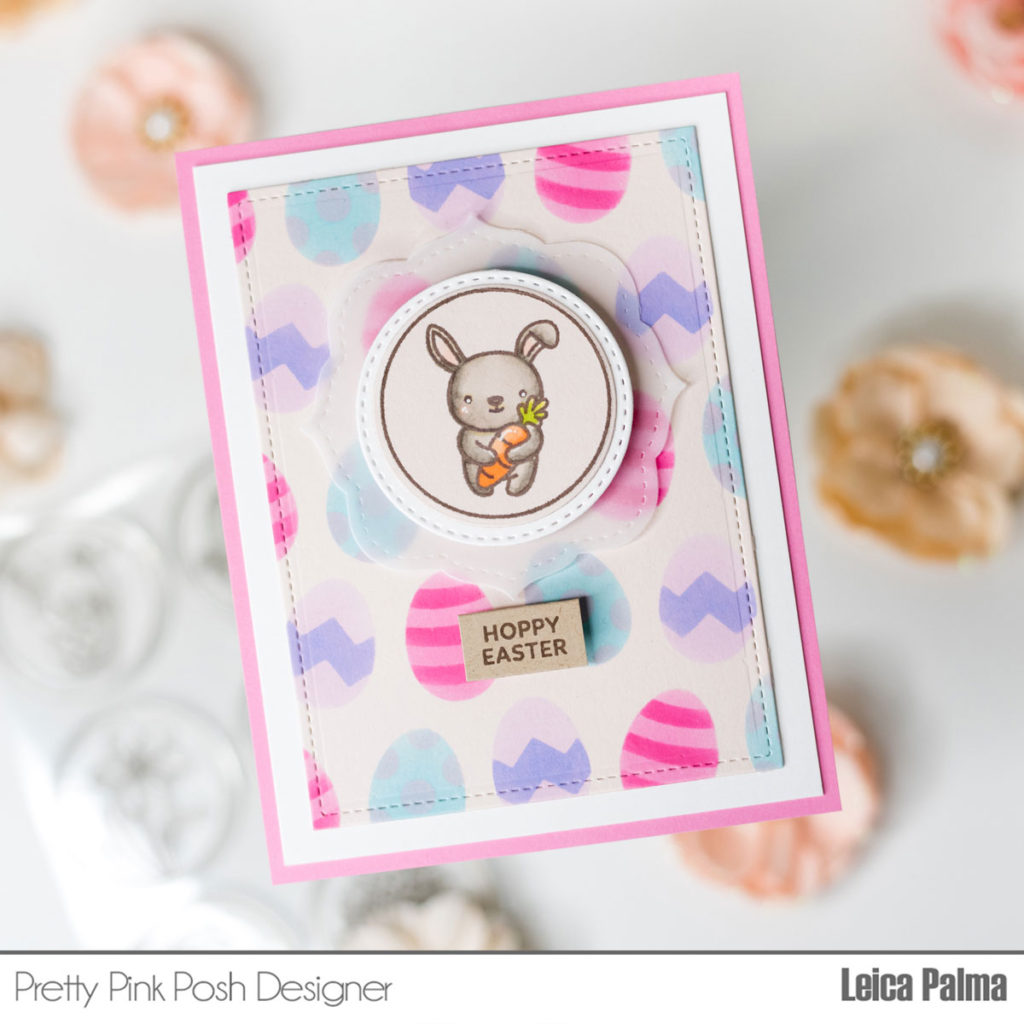
I first cut a panel in light pink cardstock using theStitched Notes Die. I then ink blended through the Layered Eggs Stencils with Distress Oxide Inks – Kitsch Flamingo + Picked Raspberry, Tumbled Glass + Spun Sugar, and Milled Lavender + Shaded Lilac.
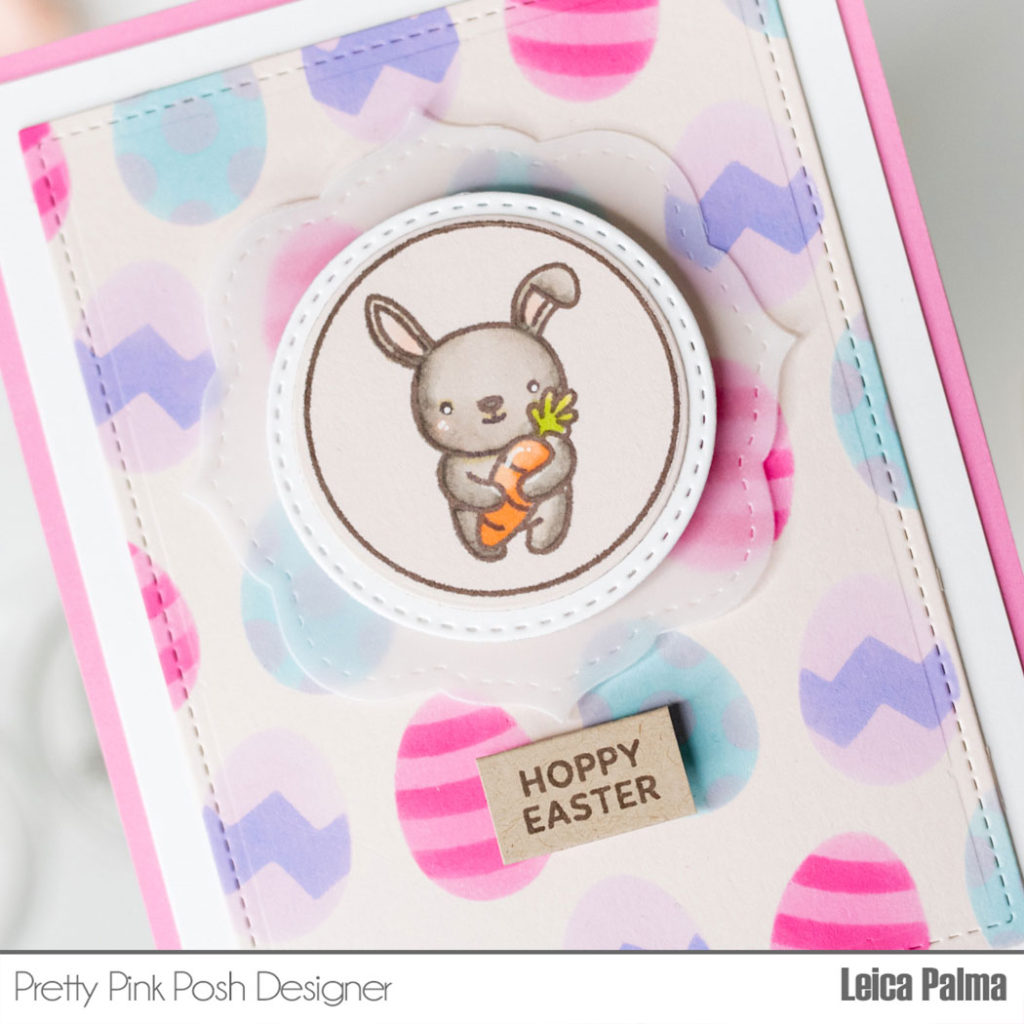
I then stamped the bunny from the Easter Circles Stamp Set on a light pink cardstock and colored with Copic markers – W5/3/1, YG03/00, YR02/00. I cut the circle with the coordinating die and layered it with a stitched circle die in white cardstock. Next, I cut the ornate die in vellum and layered all the pieces together. These extra dies are all part of the Easter Circles coordinating dies.
Next, I cut a 4” x 5.25” panel in white cardstock and a 4.25” x 5.5” panel in pink cardstock. I adhered all the panels using liquid glue. For the sentiment, I stamped Hoppy Easter from the Easter Wreath Stamp Set on a strip of Kraft cardstock and foam mounted it onto the stenciled panel. Lastly, I adhered the card panel onto an A2 sized card.
Thanks so much for stopping by today! I hope that you enjoyed today’s card share.
Hello crafty friends. It’s Lisa Mears here. Today I’m sharing some Easter treat bags that I made using the Easter Circles stamp and coordinating dies. These treat bags were so much fun to make. They can be used as gifts for children, friends, family, and co-workers during Easter or the spring season.
The Easter Circles stamp set comes with six circles with Easter and spring-themed images inside of them such as an Easter bunny, Easter basket, flower bouquet, Easter eggs, a flower, and a spring chick. I started by stamping my images onto Bristol Smooth cardstock using a black archival ink. I colored the images with Zig Clean Color Real Brush pens. The colors I used are listed below.
Bunny: Gray, Pale Gray, Orange, Light Green, Light Blue, Blender
I die cut the images with the Easter Circles coordinating dies. Using the stitched circle die, I die cut a piece of solid colored cardstock that matched the colored stamp. Using the label die in the set, I die cut another piece of matching colored cardstock.
To create the bag toppers, I cut a piece of solid colored cardstock to 4 1/2” x 3 1/8”. I used white pigment ink and the Mini Polka Dot stencilto ink a polka dot pattern on the cardstock. Next, I scored the cardstock at 2 1/4” (along the 4 1/2” side) and folded it in half.
I added some Easter grass and chocolate eggs to the inside of a 3 inch bag. I used double-sided adhesive tape along the inside bottom and inside top of the bag topper and adhered it to the bag. I added the labels to the top.
Thank you so much for stopping by today. Have a wonderful day!
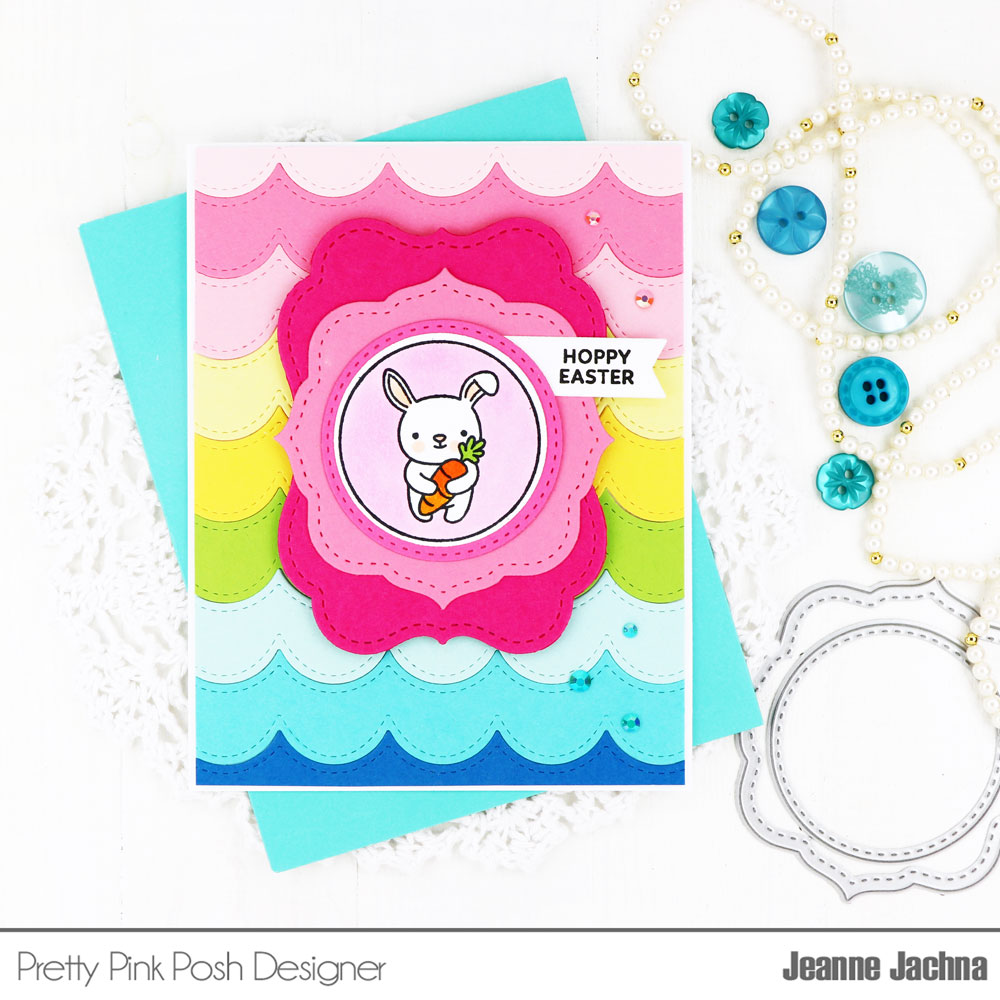
Hello, it’s Jeanne here for another day of inspiration for Easter theme week. Every holiday makes me feel a little sentimental because it brings back memories of special moments from my childhood, and from time spent with my own children. Easter always has me laughing about rainbow-colored fingers from egg painting.
When I was young we would soak our eggs in the cups of dye until they turned the darkest shade of violet or chartreuse. Sometimes it would seem like forever. Maybe you remember making colorful stripes on the eggs or personalizing them with the clear wax crayon included in the dye pack.
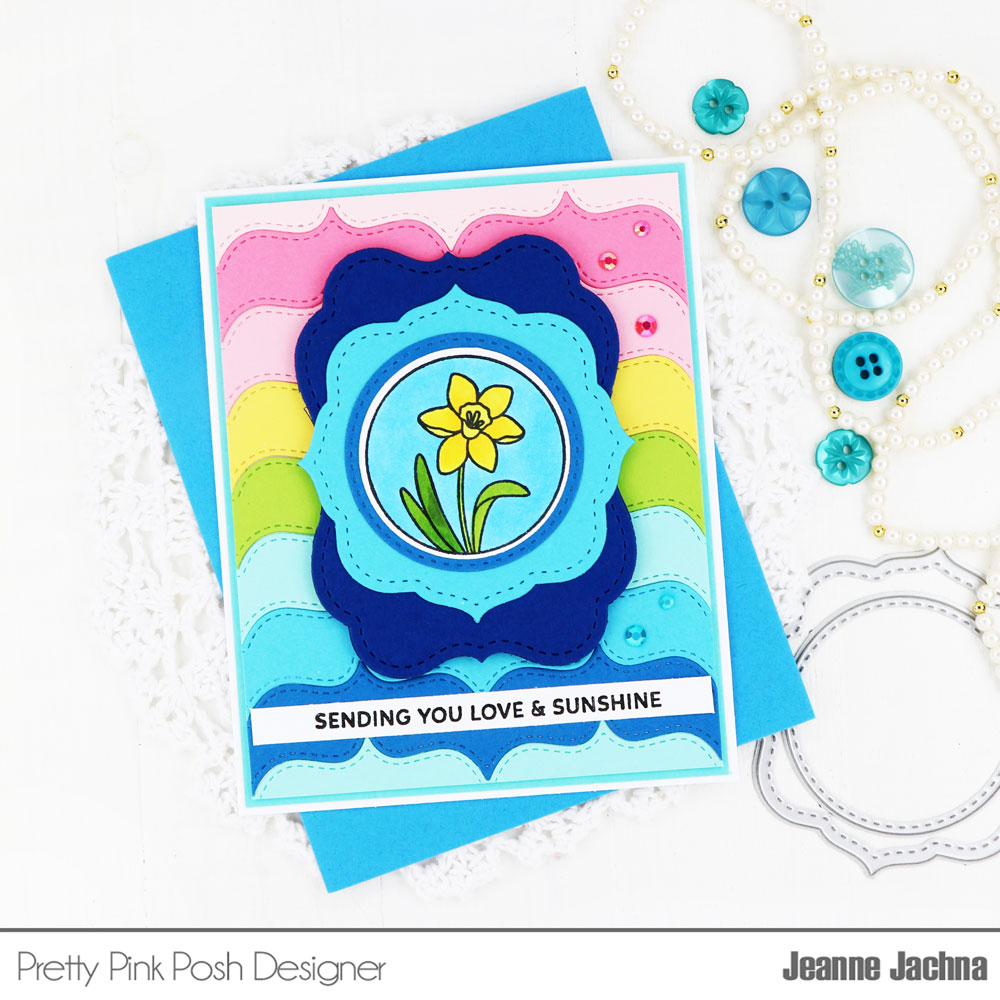
I’m sharing a trio of cards today with colorful striped backgrounds made with Stacked Edges dies. If you’ve never tried these you should! You’ll love how the borders fit together perfectly keeping your card front smooth and flat – something you CAN’T accomplish with regular borders.
I like to cut three borders at a time. A little wax paper helps free them from the stitched die, and before you know it you’ll have lots of borders in a rainbow of colors.
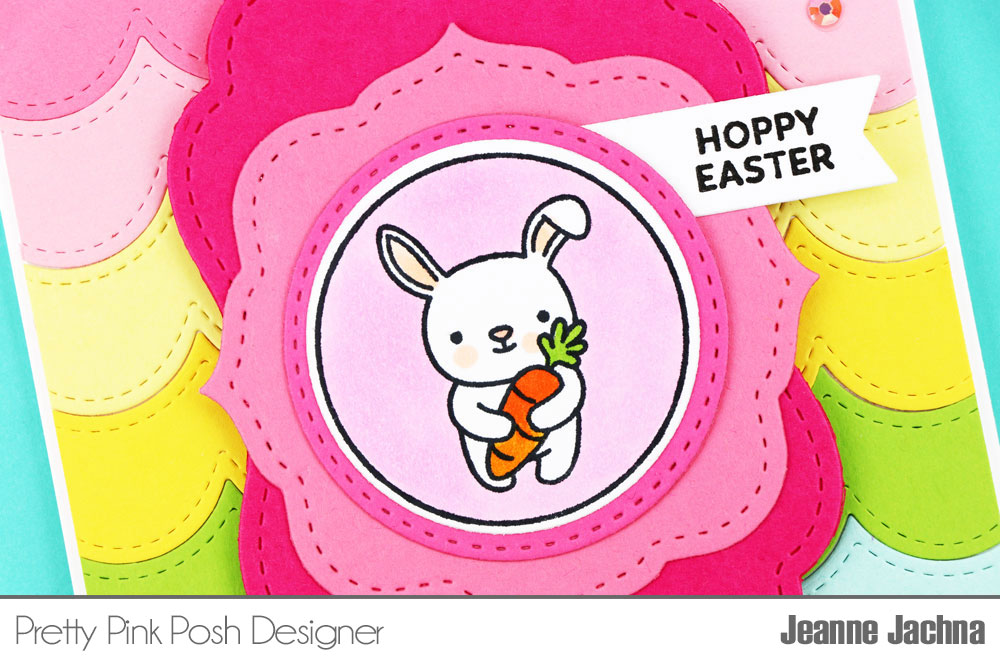
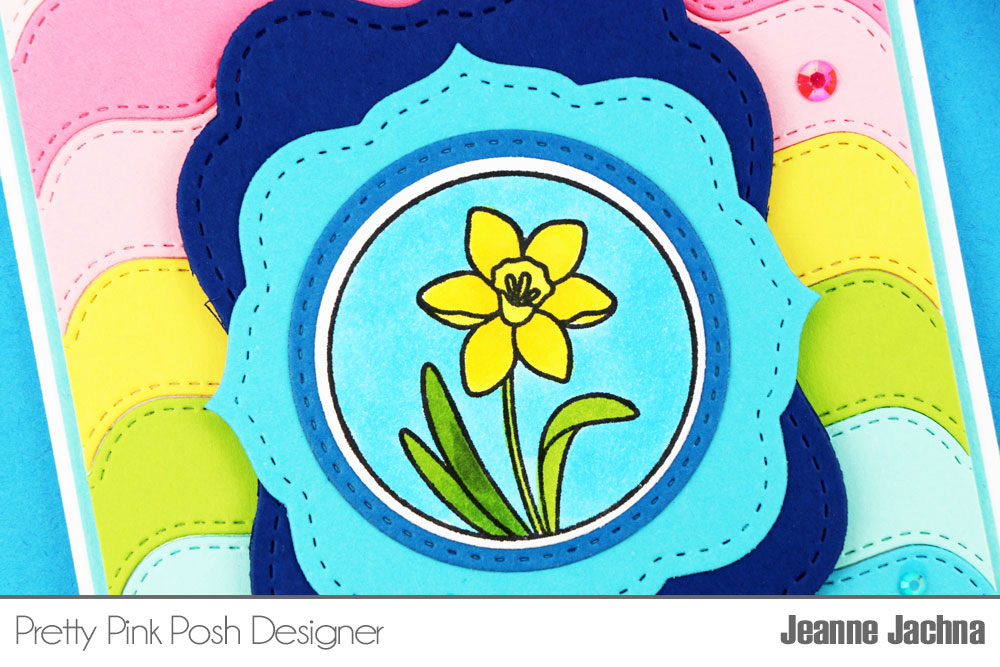
The striped backgrounds are topped with images from the Easter Circles stamp set. Even if you don’t celebrate Easter, the pretty spring images like the daffodil and flower bouquet are total eye candy.
Each of the “Circles” Series stamp sets has a different complimentary die set that can be used as a tag, label, or beautiful frame for the stamps. I used the Easter Circles die and layered it over the Fall Circles coordinating die.
You can achieve lots of different looks with just a few different die sets – each one prettier than the next!
I hope my cards inspired you to create some colorful Easter projects. There are so many possibilities with these dies and stamps!
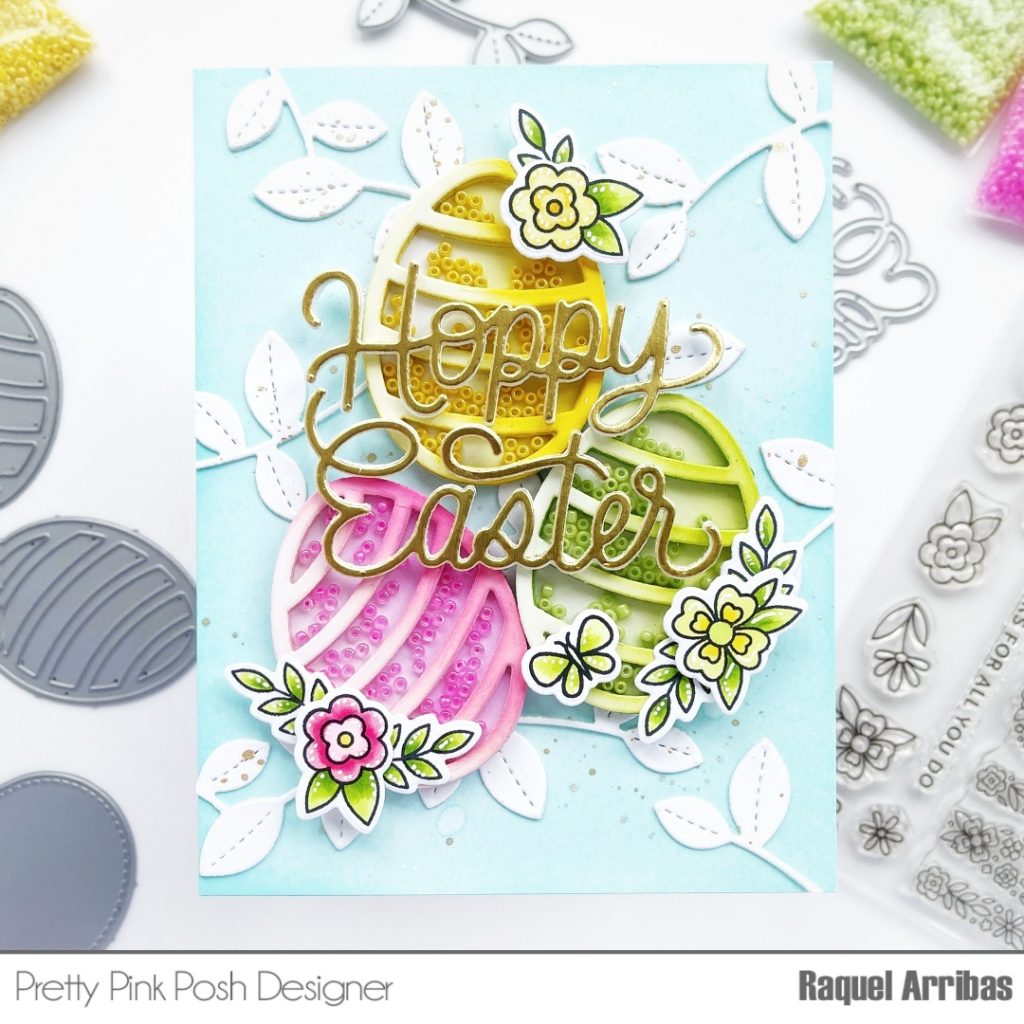
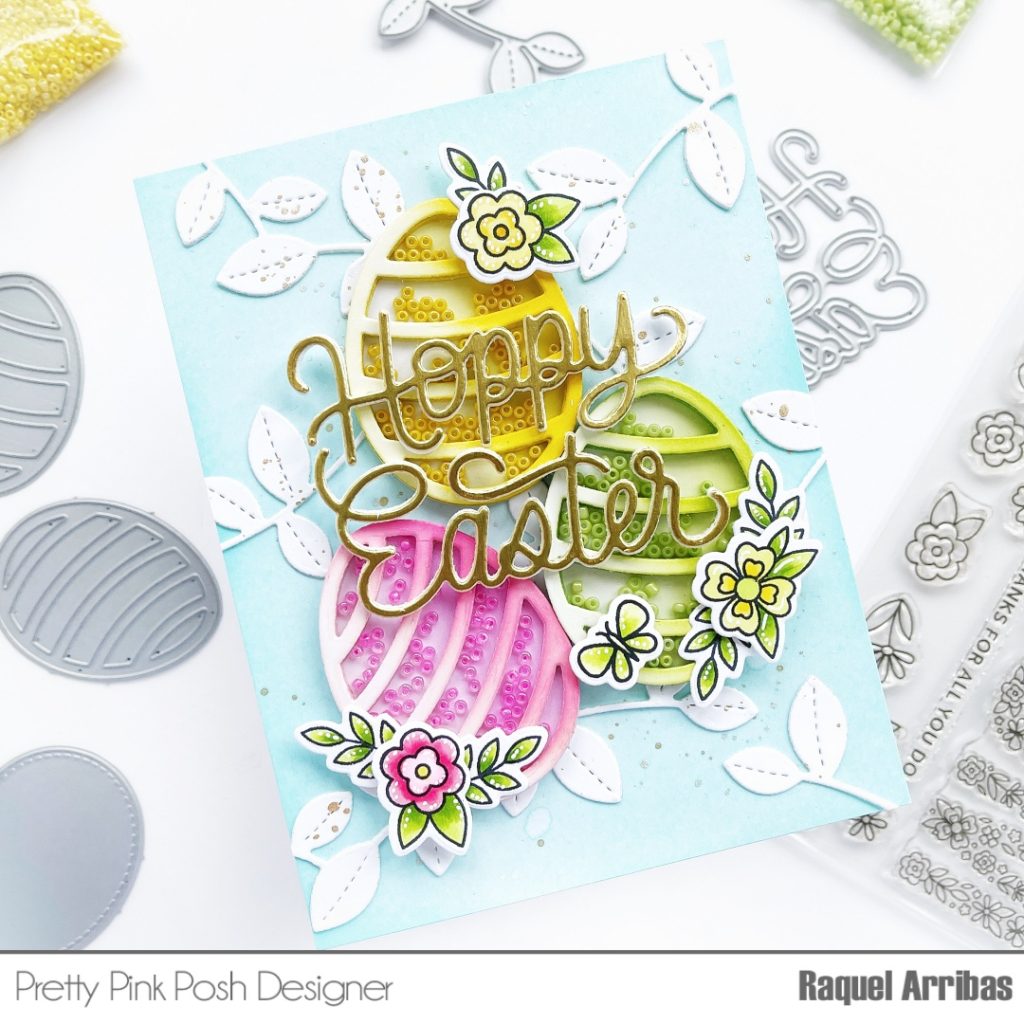
Hello friends, Raquel here! Welcome to Pretty Pink Posh Easter Theme Week Day 3! From March 28th to April 3rd, we will be showing you lost of inspiration with these super fun products.
There is a 15% discount on all items in our Easter Section during this theme week!
For my project today I used the Decorative eggs dies. I love to create colorful designs so I couldn’t resist to ink blend each egg with a different color.
First, I die cut several layers of these eggs out of white cardstock. Then I applied Twisted Citron, Kitsch Flamingo and Mustard Seed Distress inks on the die cut layers. I wanted to create three eggs shakers so after the top layer was colored, I glued an acetate piece and stacked the rest of the layers to achieve the dimension I needed.
Next, I filled these eggs with Petunia, Sunshineand Grass Green seed beads (love love love these small but gorgeous beads for shakers). Then I placed the bottom layer to which I also applied the same ink that I had used on the front layer with a gradient look from left to right.
Next, I created a background by ink blending Salvage Patina Distress Ink. To add some extra dimension, I added some white die cut leaves using one of theStitched Leafy Border Dies and added some splatters of gold watercolor.
Finally, I added some small flowers from the Mom stamp set and used the new Hoppy Easter die for my sentiment using gold foil cardstock.
I had so much fun creating this design and I hope it inspires you to create some projects too! Hope you like this card and visit Pretty Pink Posh Blog for more inspiration throughout this week.
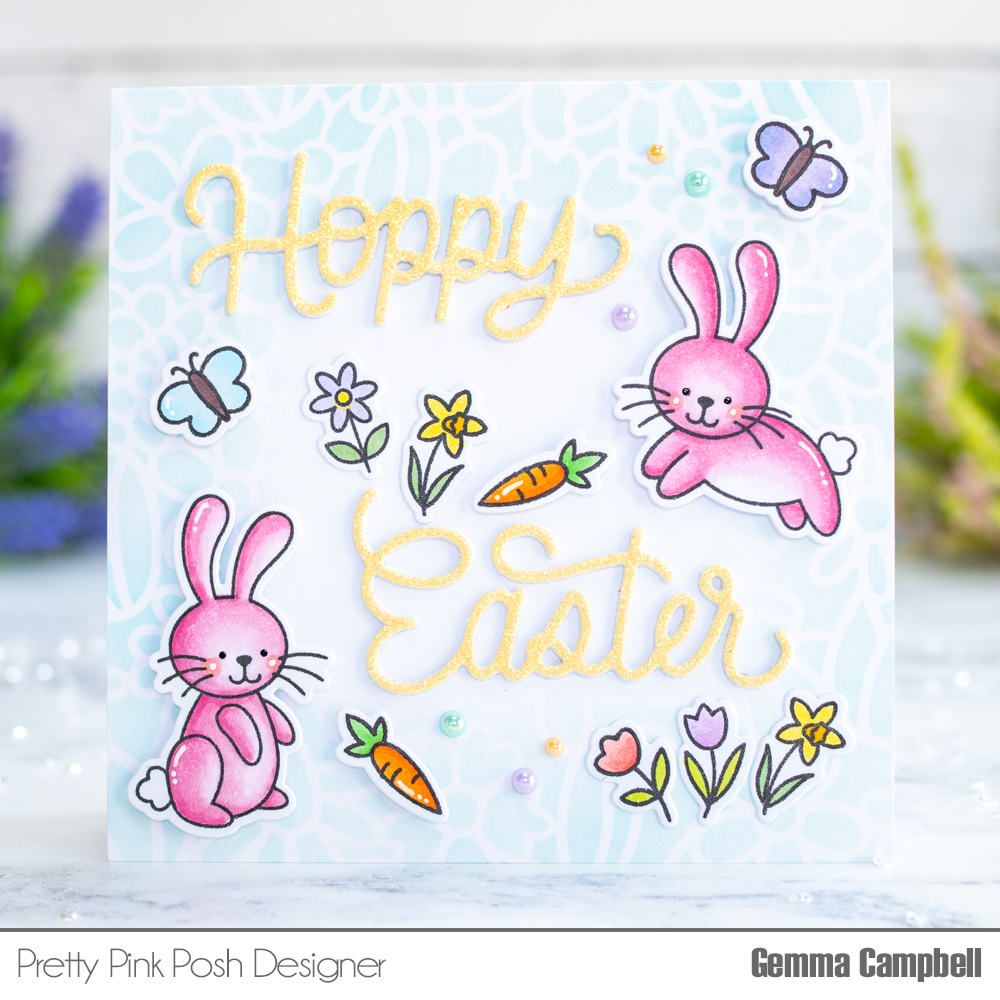
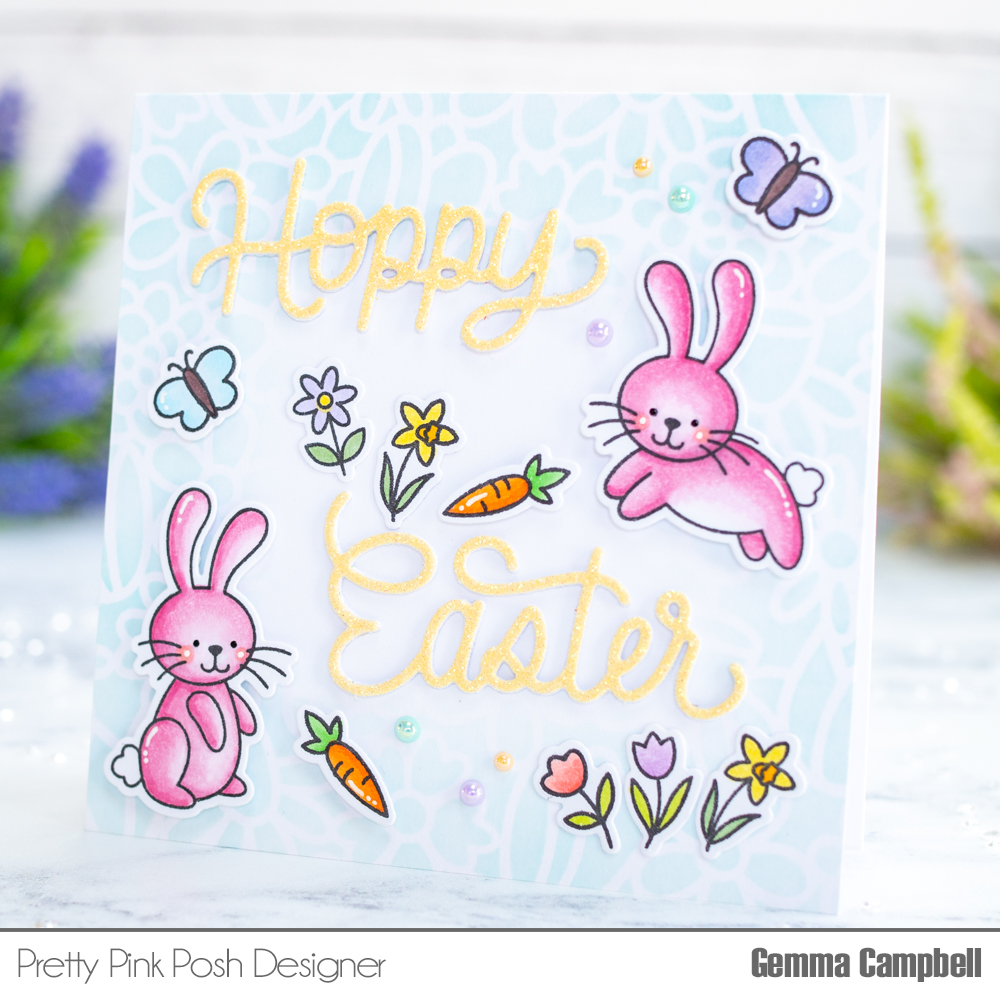
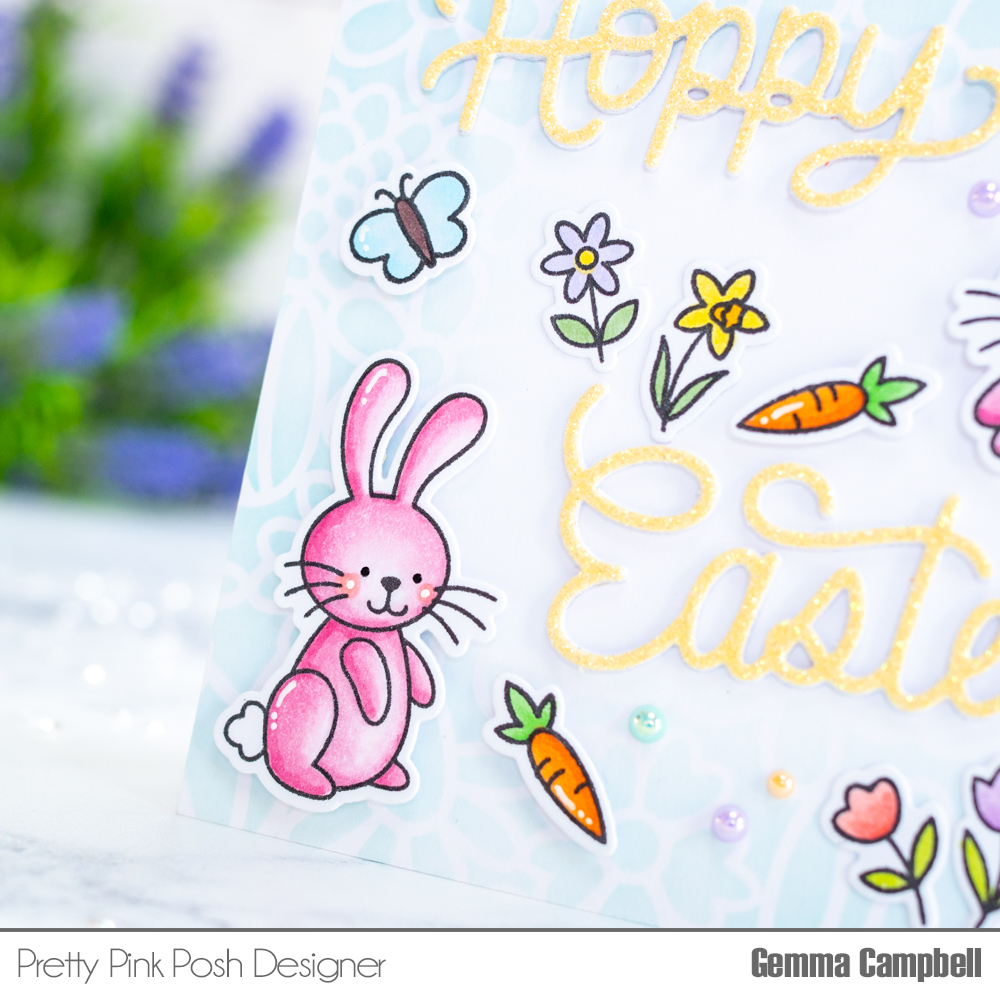
I began by stamping out images from the new Easter Wreath stamp setand the previously released Easter Bunnies stamp set. My niece’s favorite cuddly toy is a pink bunny so I coloured the bunnies in pink for her.
On a square card base, I added detail to the edges with the new Floral Background stencil and Salvaged Patina distress oxide ink.
I die cut the new Hoppy Easter Script die from white card (2 layers) and added a top die cut layer of yellow glitter card. I adhered the scripty sentiment to the card, then added the images around the words. I popped up some with foam tape for more dimension.
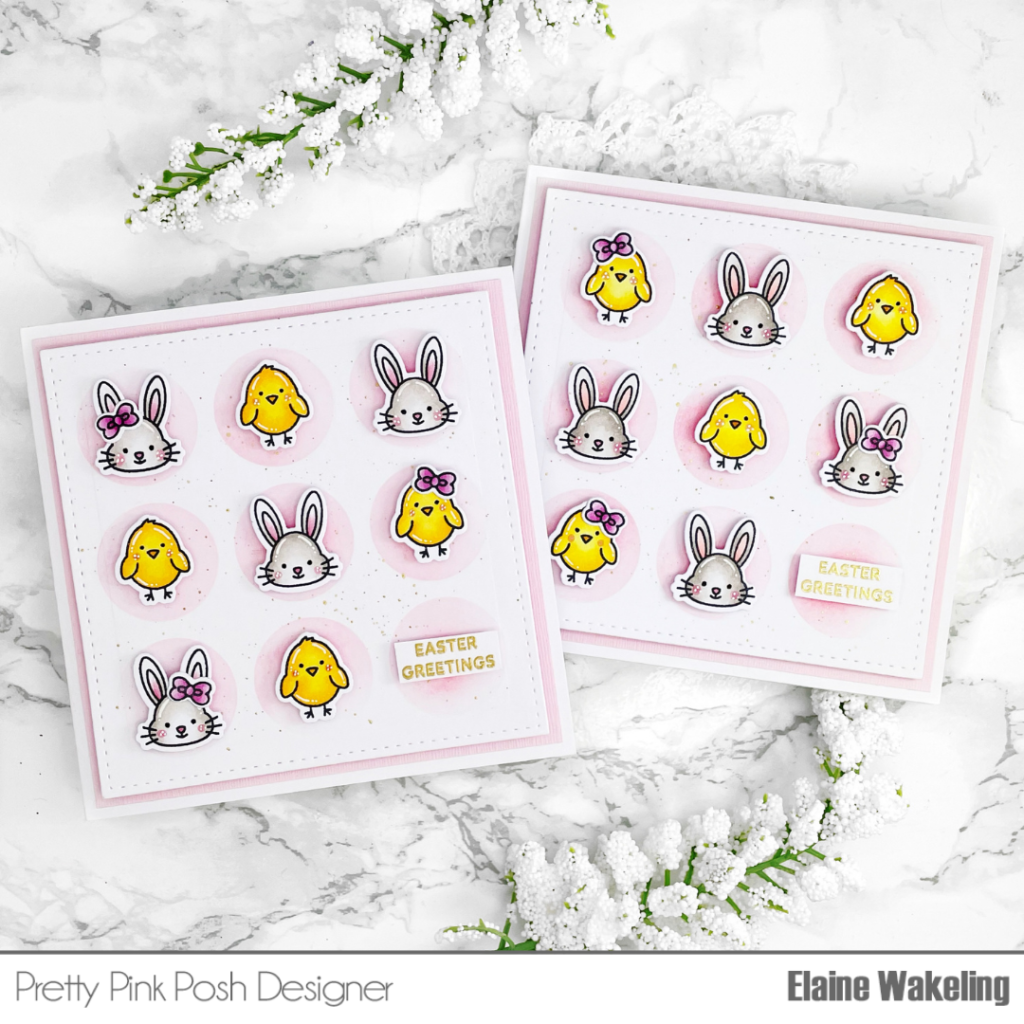
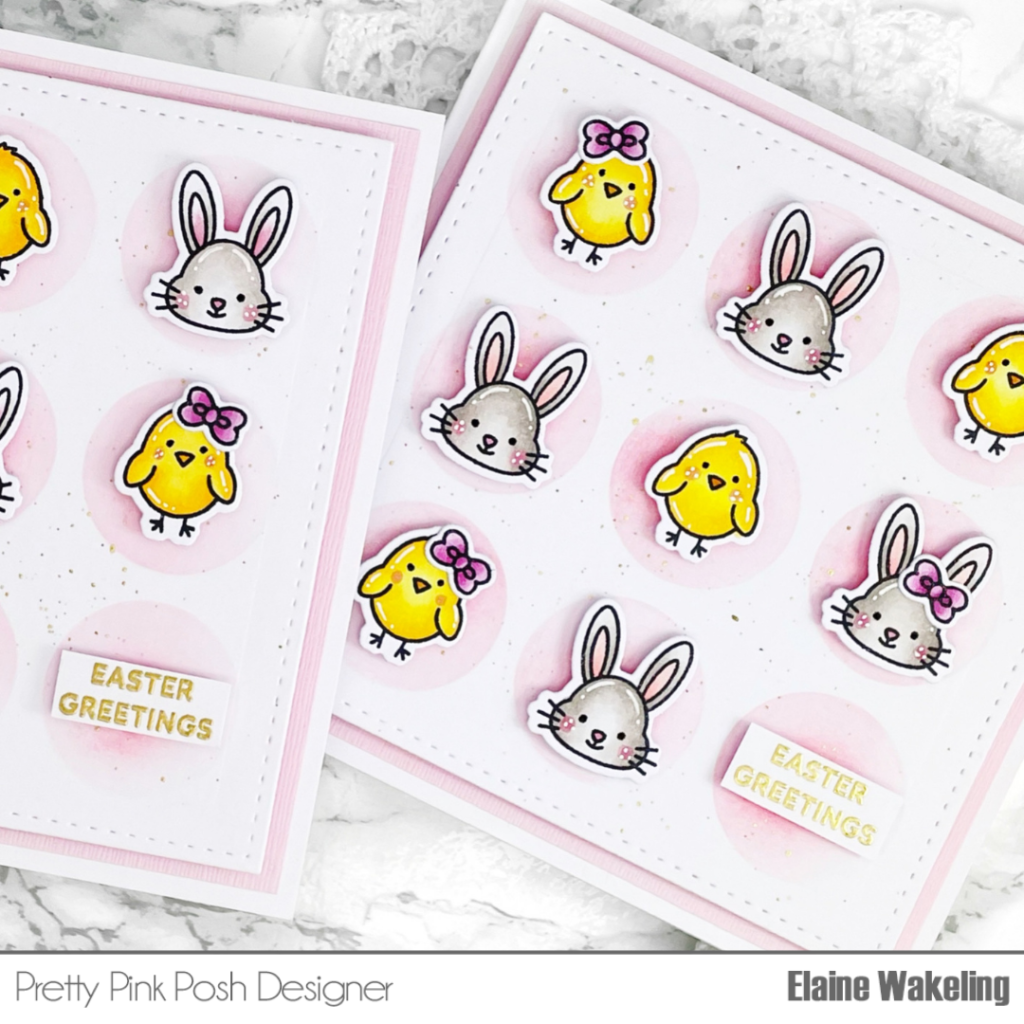
Hello crafty friends! It’s Elaine here from Pink Peppermint Cards for the start of Easter theme week here at Pretty Pink Posh. I am so excited to be kicking things off with a fun project to inspire you with Pretty Pink Posh products old and new. Here’s how I made these cute Easter cards!
I started by cutting a piece of card stock to 5”x10” then scored at 5” on the longest side. I folded the card at the score line and used a bone folder to reinforce the crease. This gave me a 5”x 5” card base. I then cut a piece of light pink card stock to 4 ¾”x 4 ¾” and adhered directly to the card base ensuring the borders were even all the way around.
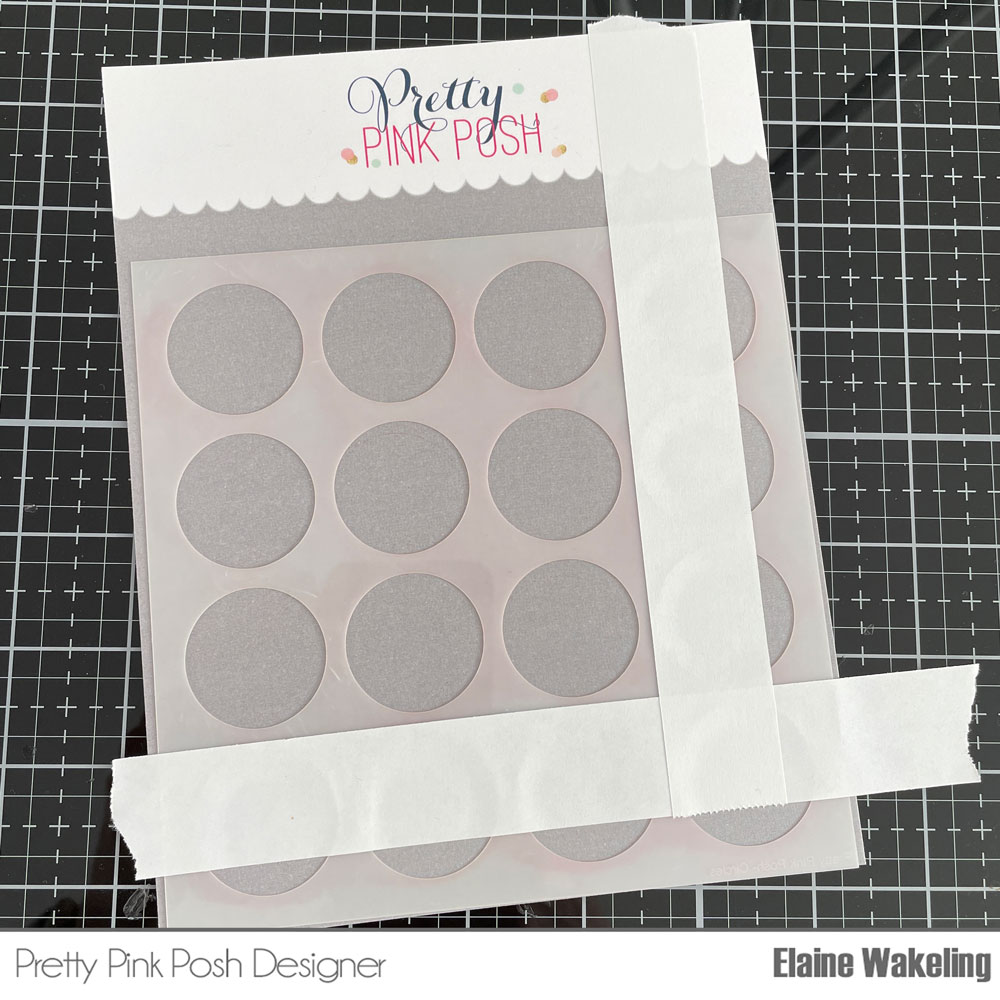
Next, I cut a piece of heavyweight white card to 4 ½” x 4 ½” for the card front. To create a background for my images to sit on I used the Circles stencil. I masked off some of the circles to give me a 3×3 circle grid as this best fit the card measurements.
Using the centre circle on the stencil, I placed it in the centre of the card panel (I didn’t do any exact measuring, I just eyeballed it, but you could easily measure this out with a ruler to be exact). I used a blending brush and Distress Ink in Worn Lipstick to lightly blend on color over the stencil. I carefully removed the stencil once I was happy with the depth of color and then splattered some shimmery gold ink all over the card front to help break up some of the white.
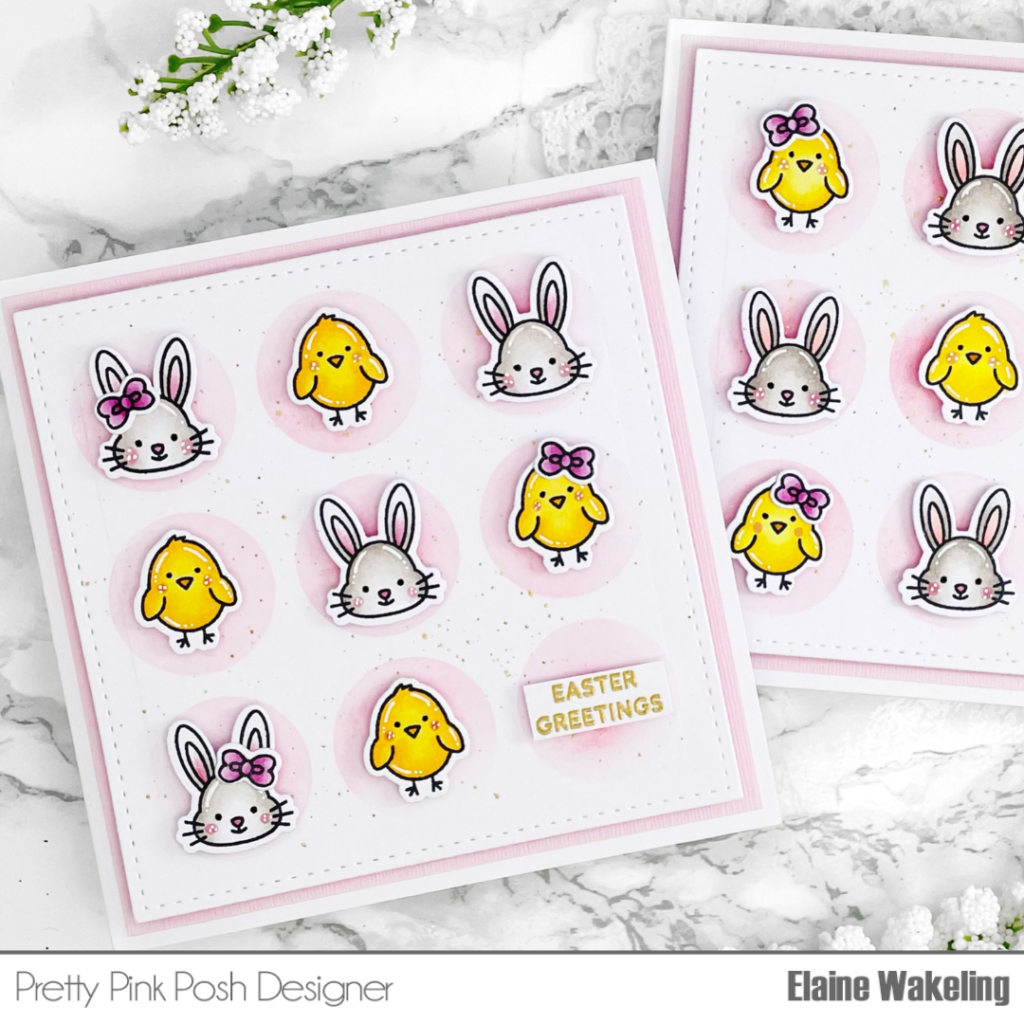
Now for the cute images! I stamped the bunny face and the chick from the Easter Wreath stamp set and the bow from Holiday Pals stamp set multiple times on to copic friendly card stock.
COPIC MARKER COLORS
Bunny – W4, W3, W1, W0, R83, R81
Chick – Y17, Y15, Y13, R83
Bow – RV66, RV52, RV52
I cut the images out with thecoordinating dies and placed foam tape on the back of all the bunnies and chicks. I placed an image in the centre of each of the circles, alternating in each row. I used liquid adhesive to adhere a bow on some of the images.
I gold heat embossed the ‘Easter Greetings’ sentiment which is also from the Easter Wreath stamp set on to white card stock and used my guillotine trimmer to trim around the edge. This was popped up on to the card with foam tape also.
Finally, to finish the card I adhered strips of foam tape to the back of the front panel and adhered to the card base. I love the dimension the foam tape gives.
That finishes up this project, I hope you find it useful for your own Easter cards and projects! Come back tomorrow for more inspiration!
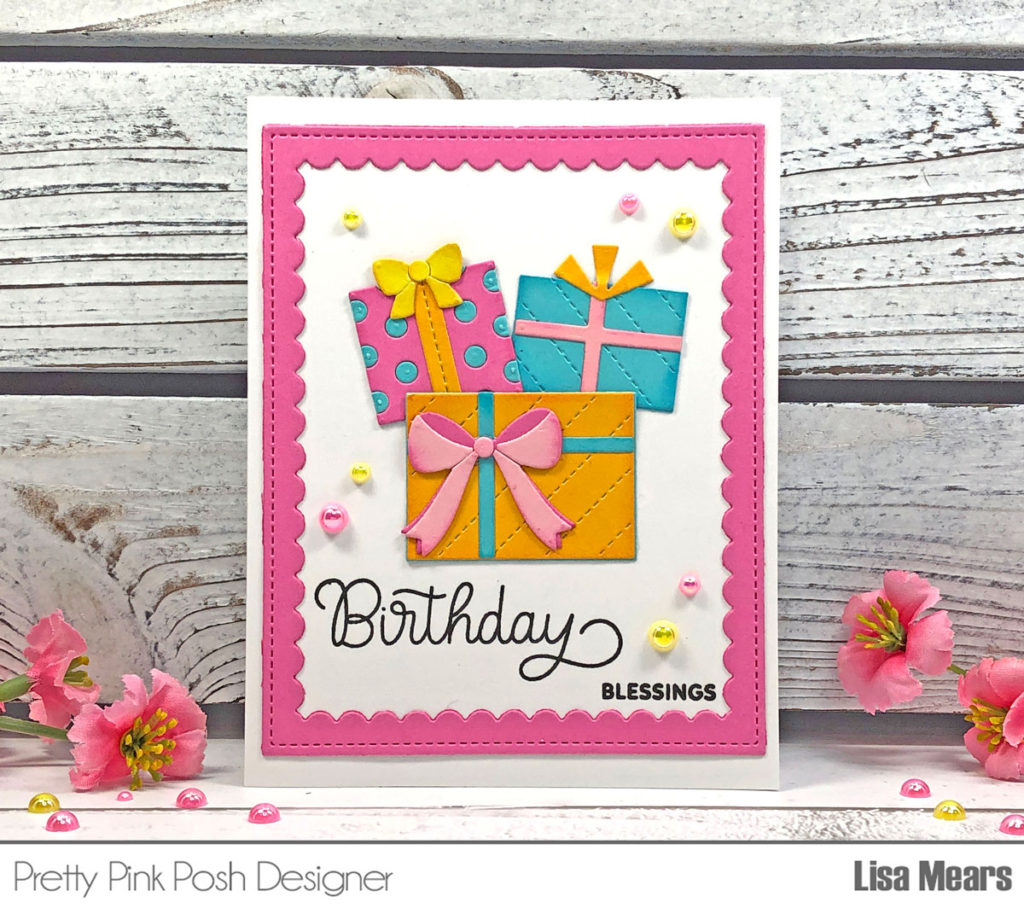
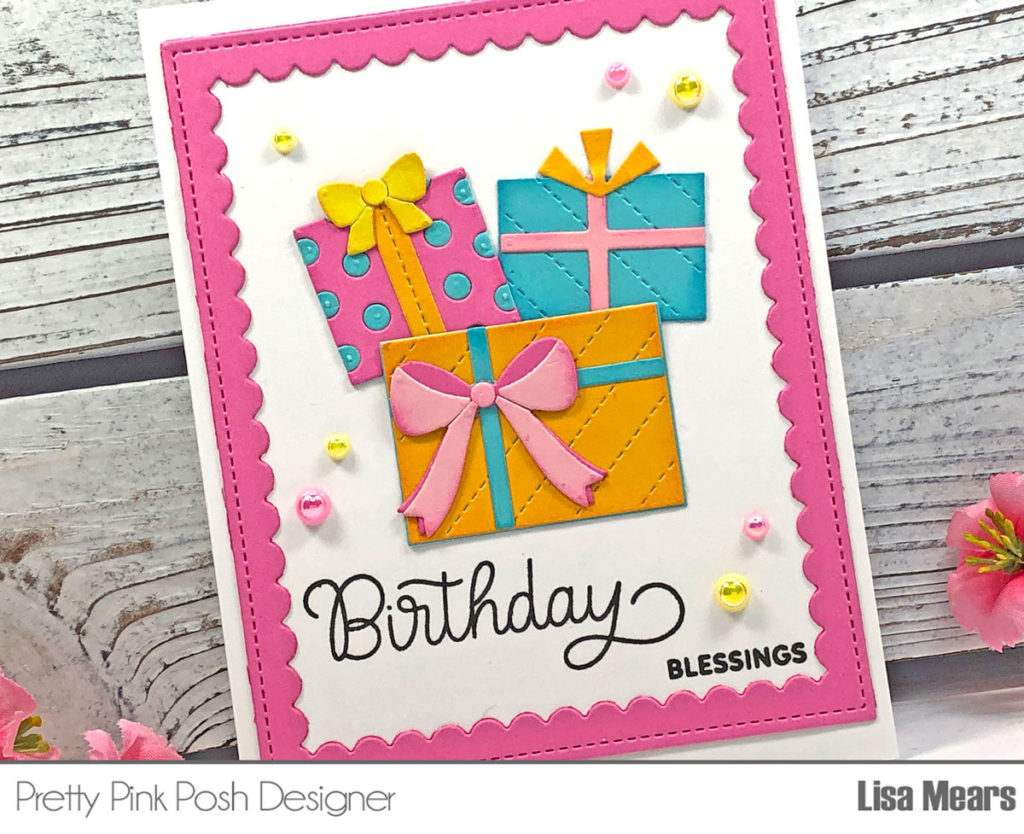
Hello crafty friends. It’s Lisa Mears here. Today I’m sharing an easy birthday card I made using the Build A Gift Die Set from Pretty Pink Posh. If you like die cutting, then this set is definitely for YOU!
This die set comes with 12 dies to make gifts with ribbon and bows.
I die cut the rectangle and square gift dies using pink, teal, and orange cardstock. I die cut the ribbon dies and the bow dies as well. After die cutting all of my pieces, I glued them together. After all of my gifts were put together, I stamped the sentiment onto the front of an A2 white card base. The sentiment is from the Birthday Scripts Stamp Set.
I used aScallop Frames Die from pink cardstock and adhered to the front of an A2 white card base. Next, I arranged my three gifts on the front of the card and added Flamingo Pearls and Sunshine Pearls to the card.
Thank you so much for stopping by today. Have a wonderful day!