Father’s Day Records Card
Hello, Gemma here. I love the new Layered Music Notes stencil. I made a Father’s Day card and improvised some vinyl records to continue the musical theme.
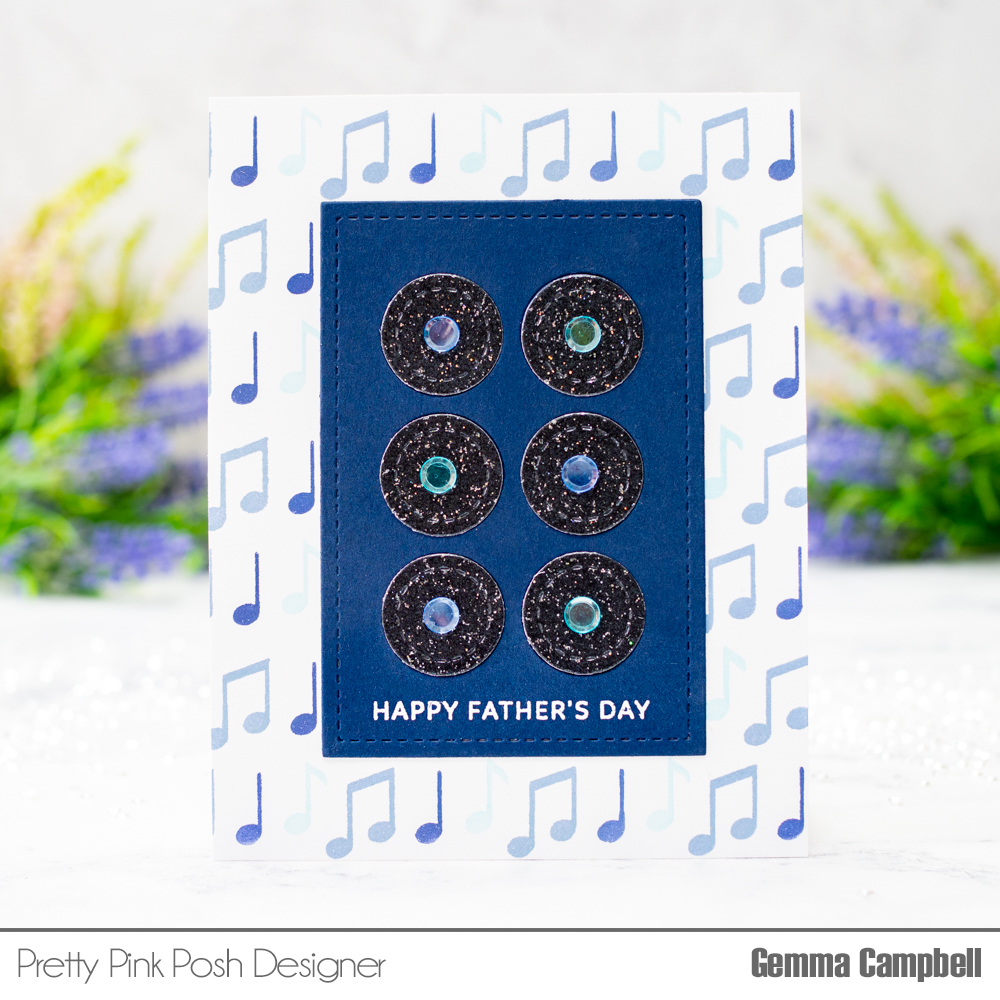
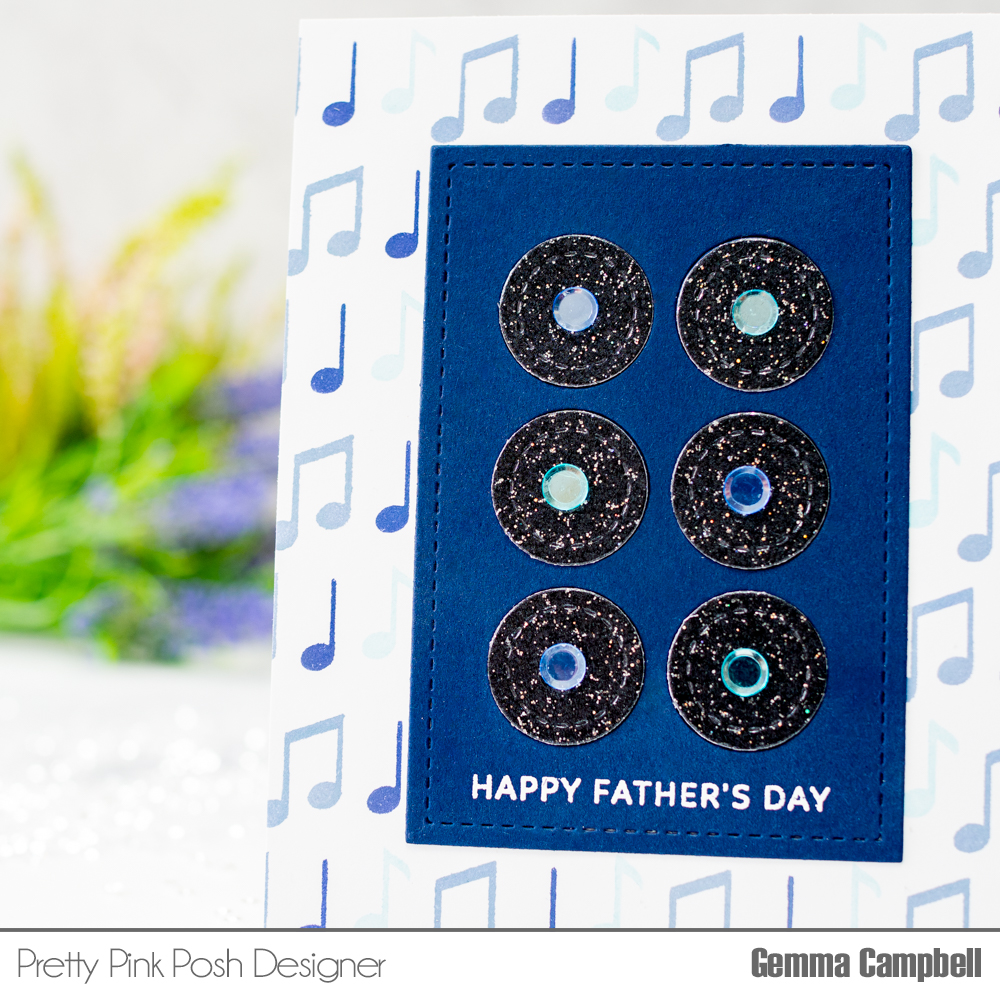
I chose an ombré of blue distress oxide inks for my background – tumbled glass, stormy sky and chipped sapphire. I trimmed down the panel and adhered to a top folding A2 card base.
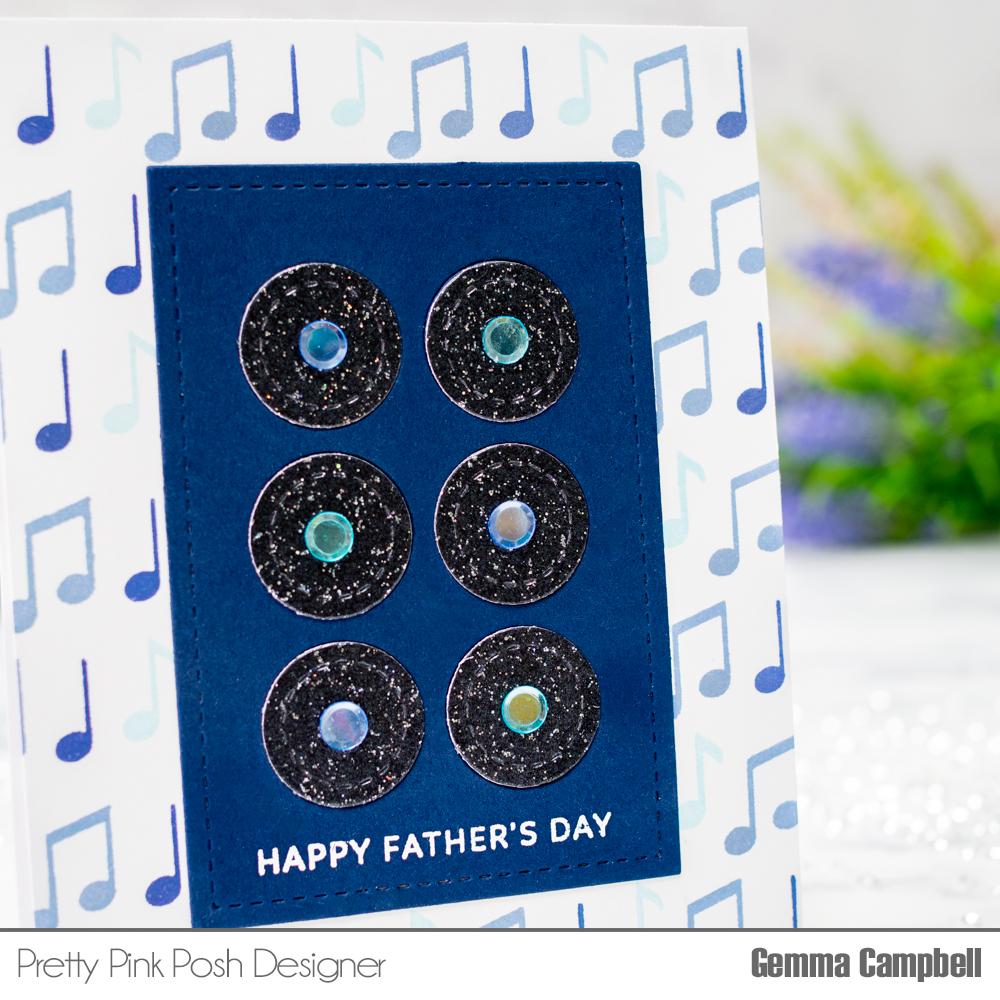
Next, I die cut the Stitched Duo 2 die from both navy blue and pearl black sparkle card stock. This die cuts a stitched rectangle panel with 6 stitched circles. I’ll only use the circles from the black stitched duo 2 die cut, but can keep the panel for another card.
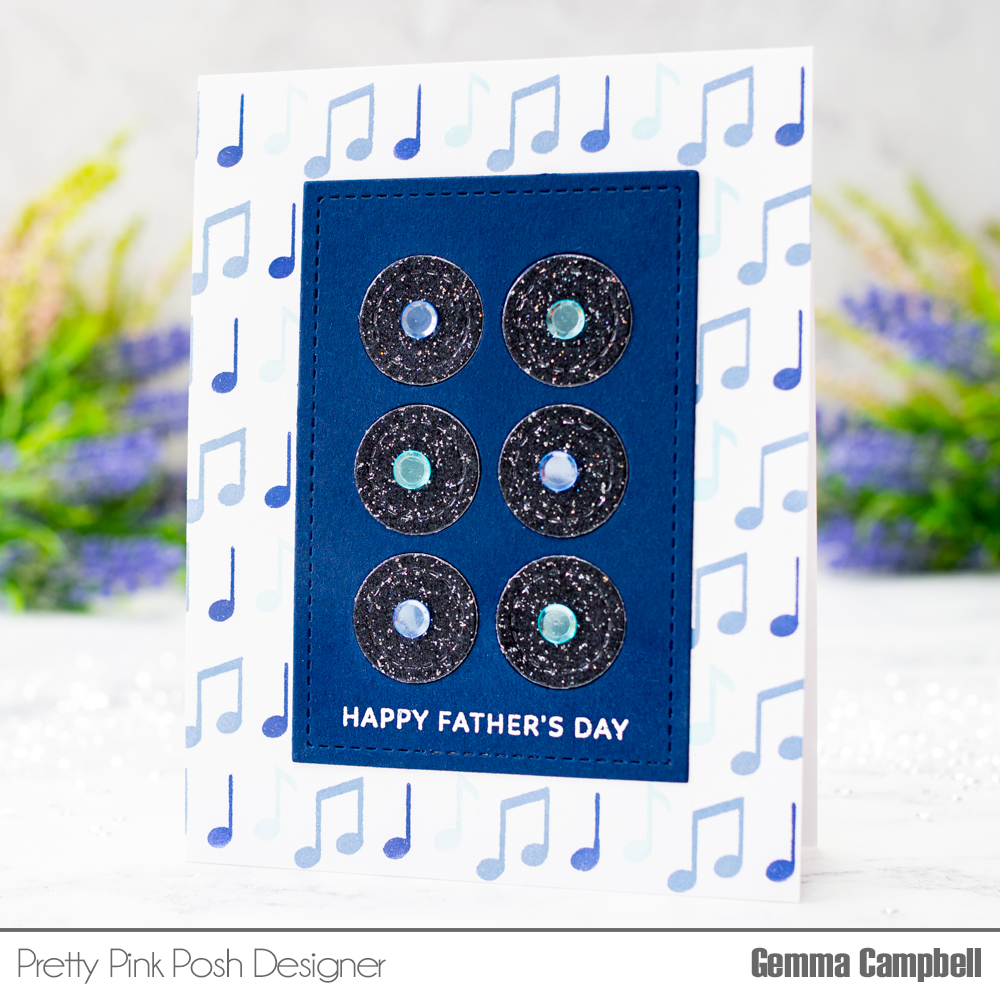
On the bottom edge of the navy blue die cut panel, I white heat embossed a father’s day greeting from the Dad stamp set. It fits perfectly in this space.
I adhered the navy panel and circles to the centre of my stencilled panel. I then adhered the black sparkle circles on top, to be my records.
To complete the look, I adhered some of the new Aqua Shimmer and Blue Shimmer to the centre of the circles. You could also use normal sequins, to give the hole in the centre, but I really wanted to use these beautiful new shimmer confetti mixes on my card today.
Thanks for joining me today! I hope you were inspired by this card idea!