Valentine Ghost Box Card
Hello, Debbie here with the adorable Valentine Ghost Friends in a box card. How cute are they!?
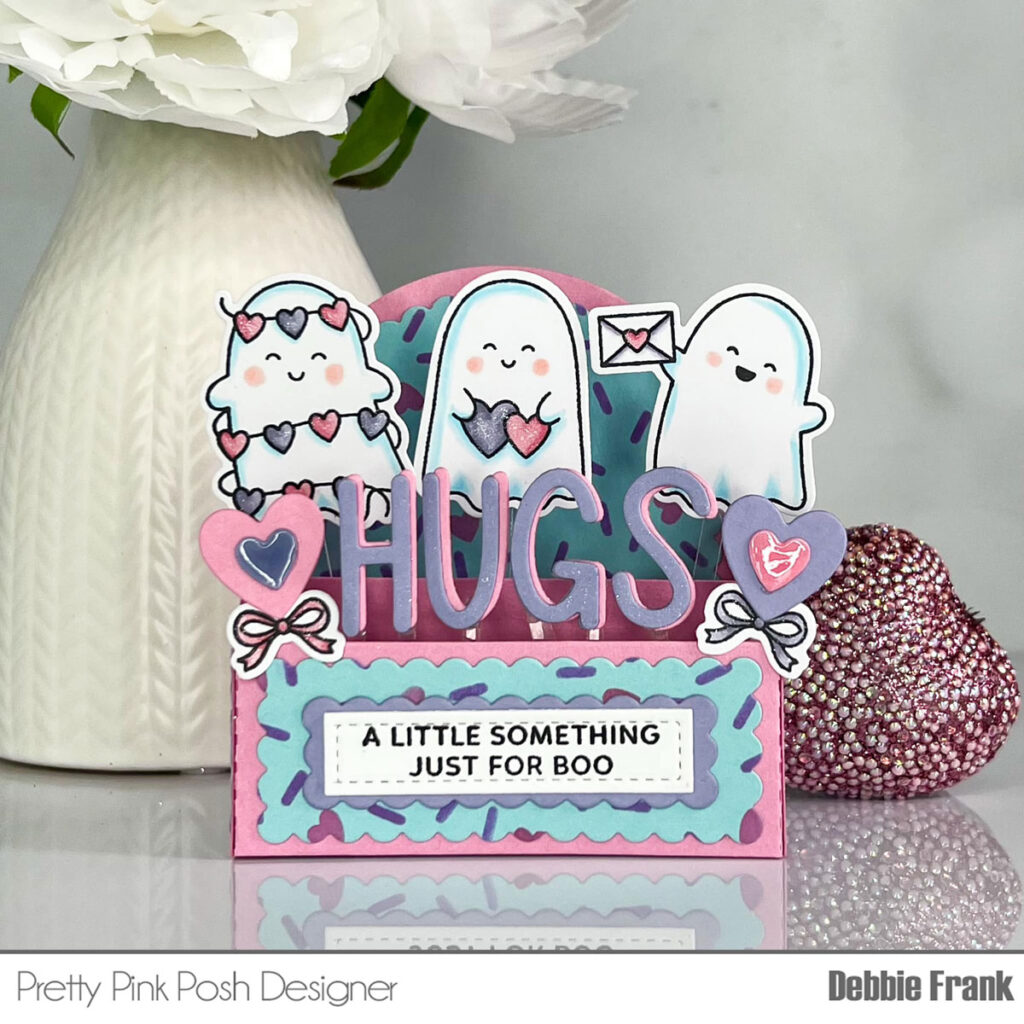
First up was to build the box from Scallop Box Card Die with a pink card stock. You can make a couple of the layer shelves in the box card if you want. With the Layered Heart Sprinkles Stencil, ink blended on SSS- Lilac ink on a light blue card stock. I found that Distress Oxide Spun Sugar ink was the best for the hearts. That was over a pink die ink that wasn’t showing up. Die cut it out from the scallop dies from the Scallop Box Card Die Set.
Copic colors: B00, B000, R20. Hearts- R81, R83, R85, V22, V25, V28
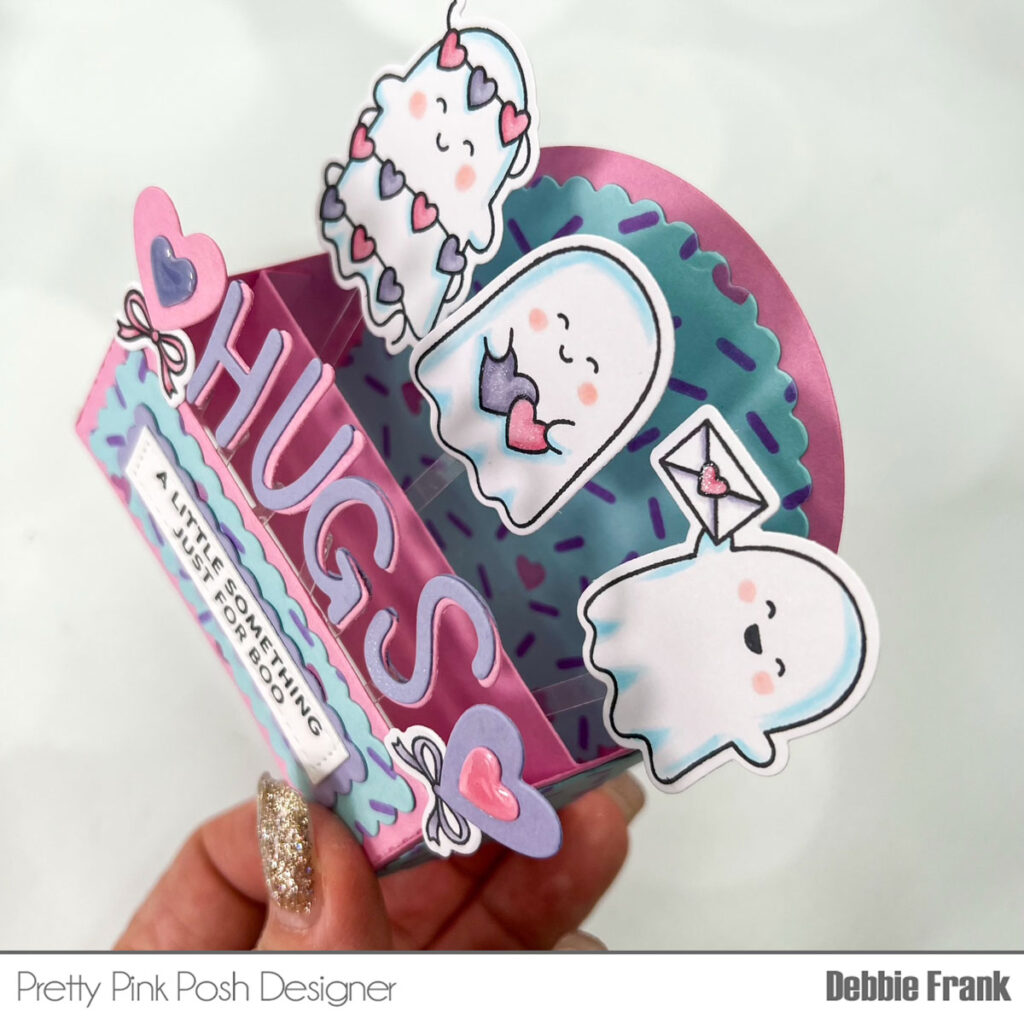
Stamp out the needed ghosts from Valentine Ghost Friends stamp set. Once colored in die cut out them with the coordinating dies.
Next is the Hugs and hearts from the Valentine Bucket Additions Dies. The Hugs was die cut out from Lavender and the pink card stock the box and attached off set. Adhere together the hearts and add Glossy accents to the smaller hearts, set to the side to dry.

To make the ghosts fly and the “Hugs” stand up I used Acetate. Die cut acetate from the cake pop sticks from the Valentine Cake Pop die set and the smaller ones are from the Valentine Bucket Additions Dies. Use glue dots to adhere the acetate pics to the images and to the box.
I stamped out the sentiment then with the Sentiment Strips Dies it out, also a lavender scallop from the set to mat it.
Thanks for stopping by and stay crafty my friends!