Blog Hop

| |

Day 3: October Blog Hop + New Release Now Available

If you missed Day 1 CLICK HERE //  If you missed Day 2 CLICK HERE

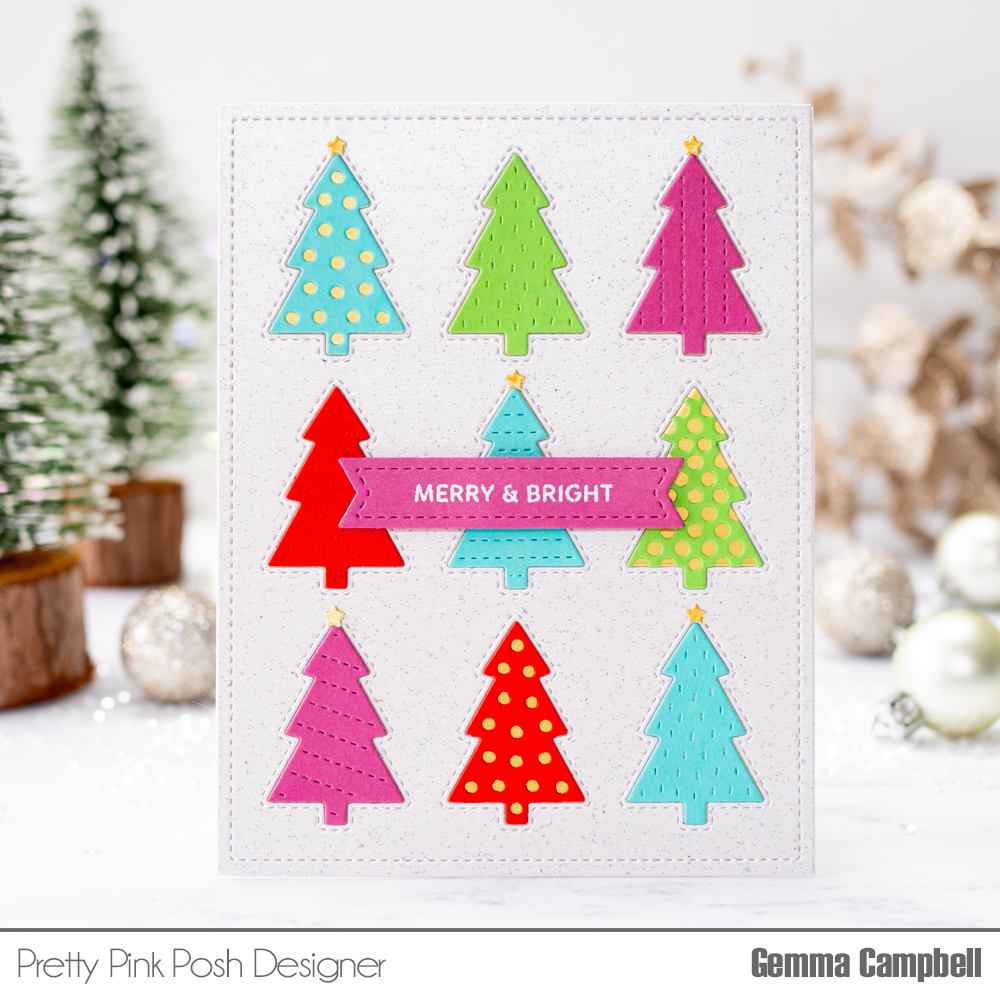
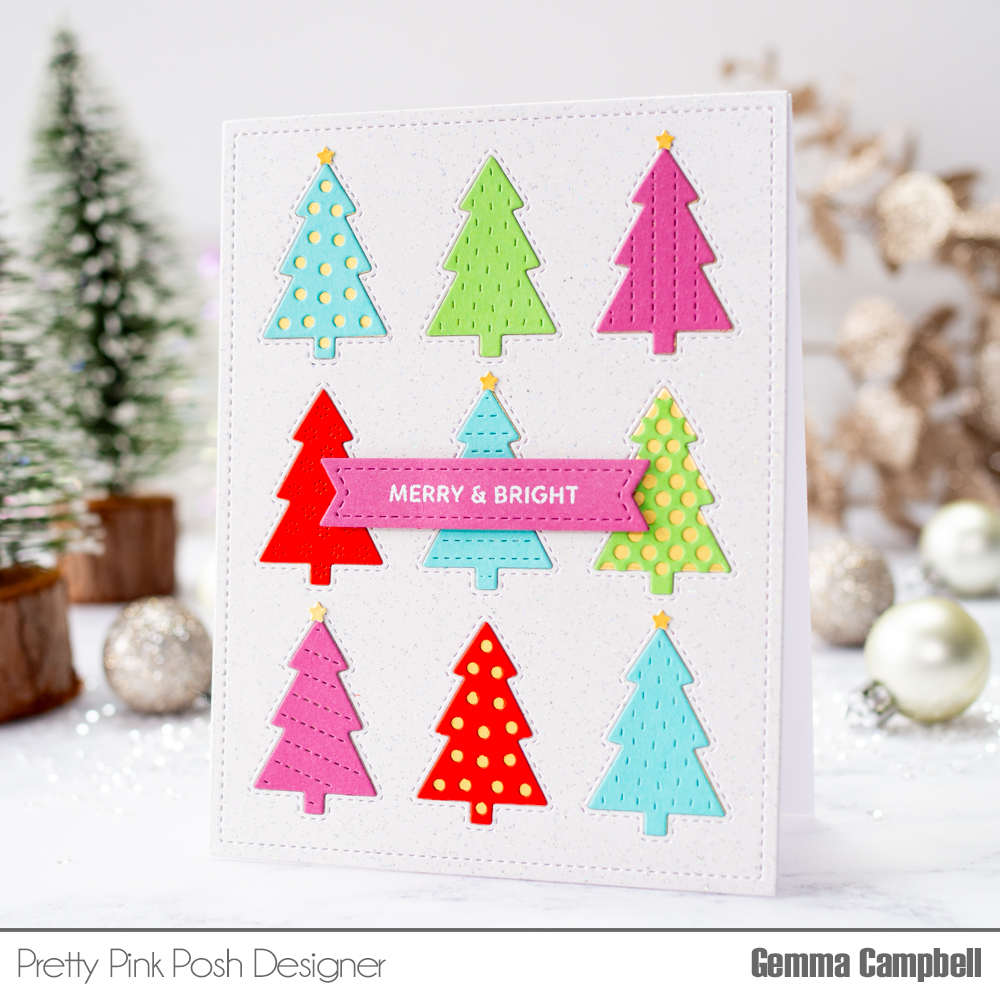
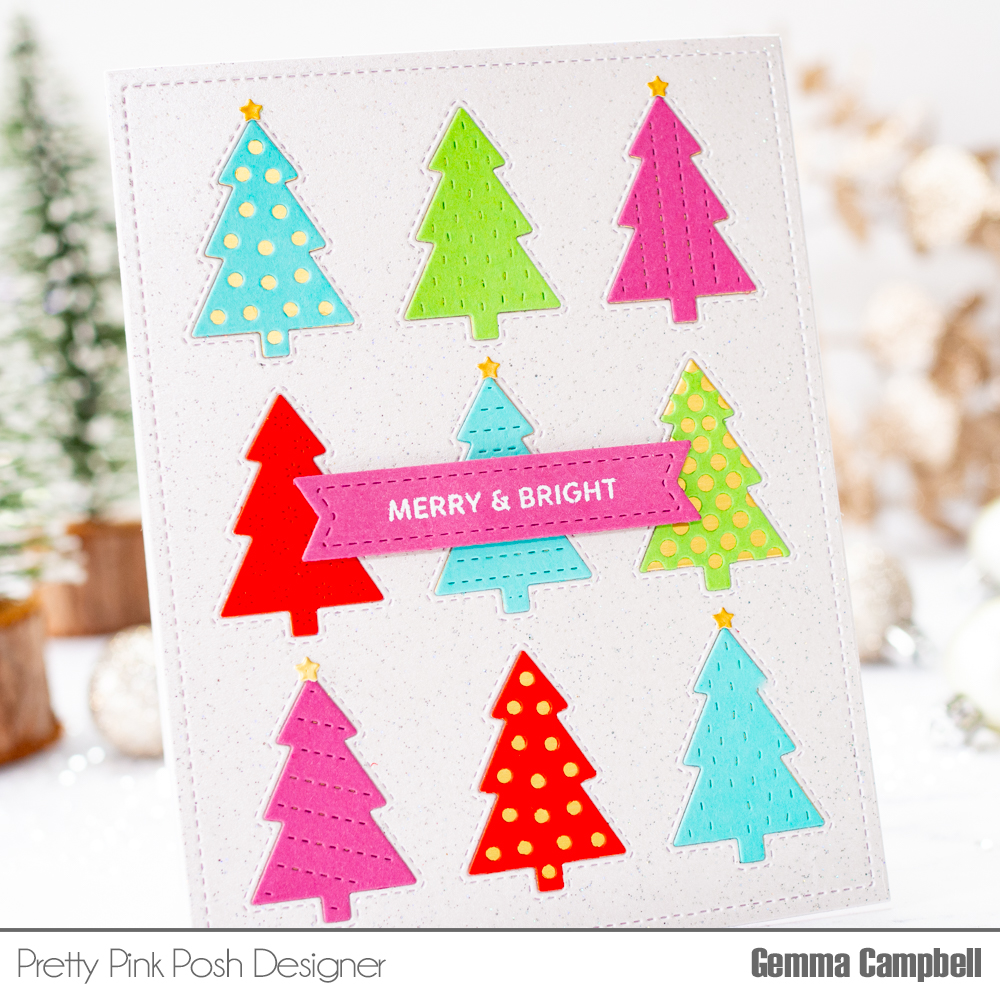
Hello, Gemma here today sharing a merry & bright Christmas tree card, using the new Tree Cover Plate.

I began by die cutting the Tree Cover Plate from pearl white sparkle card. I also die cut it from four bright colours of card for the decorated trees, along with satin gold mirror card to get nine of the solid trees.

I adhered the pearl white sparkle card background to an A2 card base, followed by the gold trees. Not all of these will be seen, but it means that they all have the same dimension.

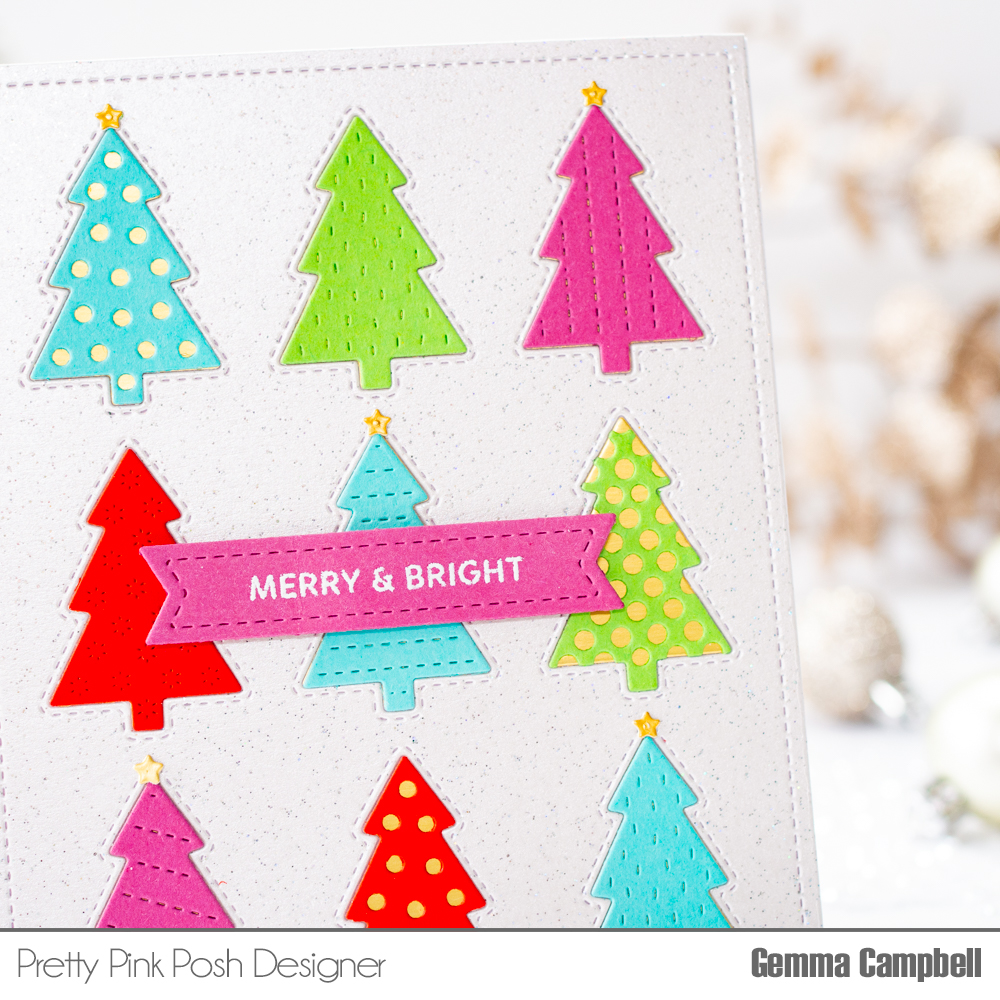
Next, I added the brightly coloured trees on top, alternating the colours. The gold underneath will show through the holes in three of the trees.

For the sentiment, I white heat embossed a greeting from the Sentiment Strips: Christmas stamp set on pink card. I die cut this using one of the dies in the Sentiment Strips set, then popped it up on the card with foam tape.

To finish, I added some little stars to the tops of some of the trees. This star die is one of the small decoration pieces included in the Tree Cover Plate.

PRIZES: be sure to leave comments on each stop. We are giving away 4 $30 gift certificates to four random comments (1 winner each day) left before October 19, 2023 at 11:59 PM PST. I’ll be announcing the winners next week, so be sure to return and see if you are one of the winners.

Pretty Pink Posh blog << you are here
Cathy Zielske
Wanda Guess
Barbara Tarayao
Jeanne Jachna
Dana Kirby
Mindy Eggen

We hope you were inspired by today’s projects. Thanks for stopping by!

| |

Day 2: October Blog Hop + New Release Now Available

Day 2: October Blog Hop + New Release Now Available

If you missed Day 1 CLICK HERE 

Hi friends, it’s Lindsey here. My favorite crafty thing to make during the holidays is actually not cards. It’s tags! I try to make special tags for my family every year, and my children and nieces have started using them as tree decorations.  

Day 2: October Blog Hop + New Release Now Available

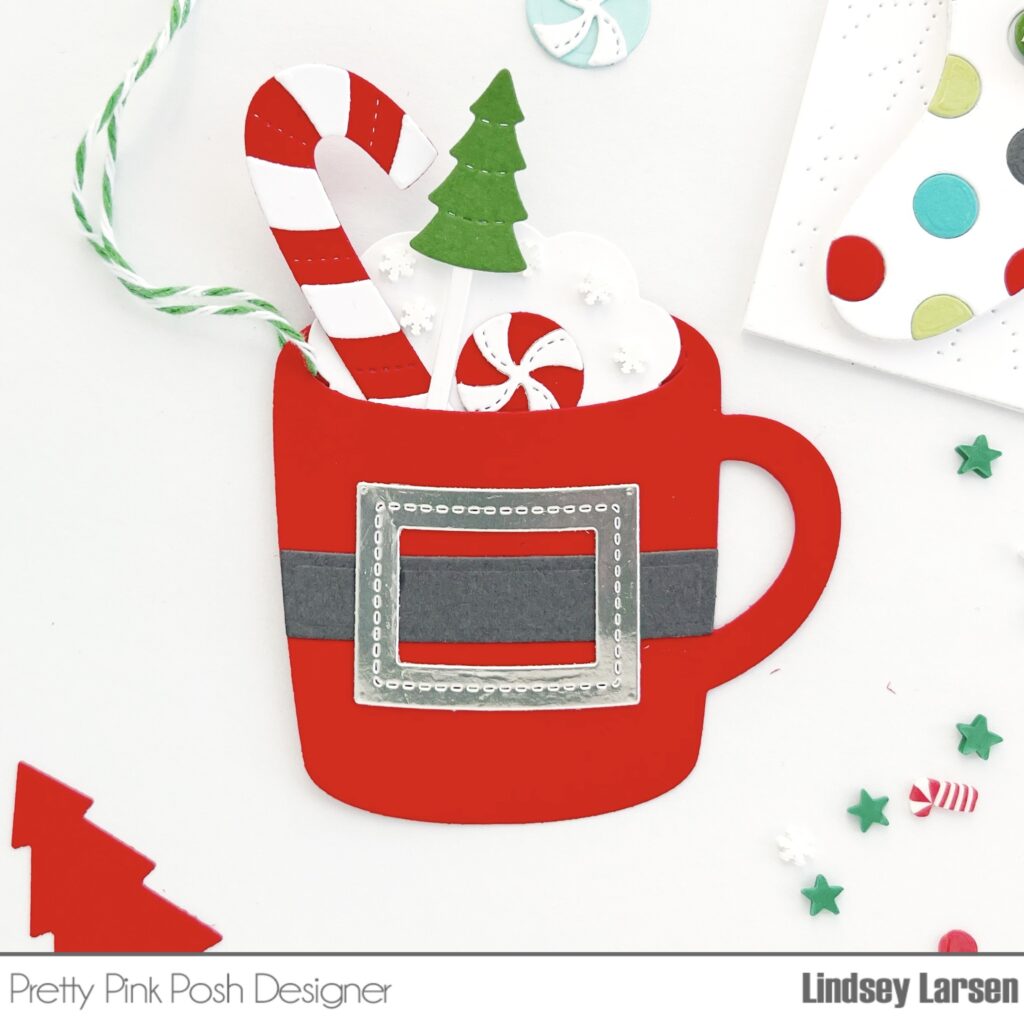
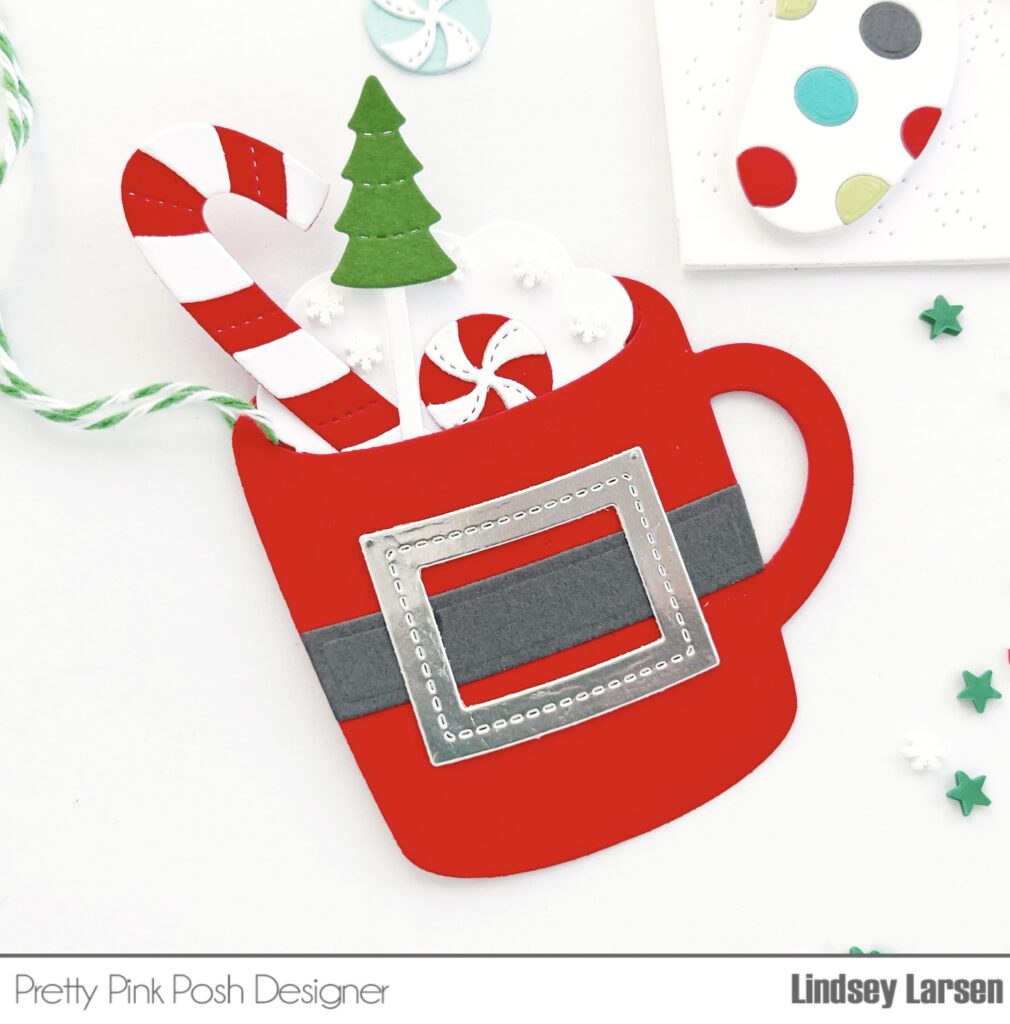
I pulled out my much-loved Winter Mug and used the Holiday Mug Additions to dress it up. Inside the mug I tucked in the little tree stick and peppermint from the new dies and a candy cane from the Winter Mug dies

Day 2: October Blog Hop + New Release Now Available

I also sprinkled on some snowflakes from the new Candy Cane Lane Mix. Oh, and that wonderful puff of whipped cream is actually Santa’s beard (a die in the Holiday Mug Additions) that I adhered upside down. 

Day 2: October Blog Hop + New Release Now Available

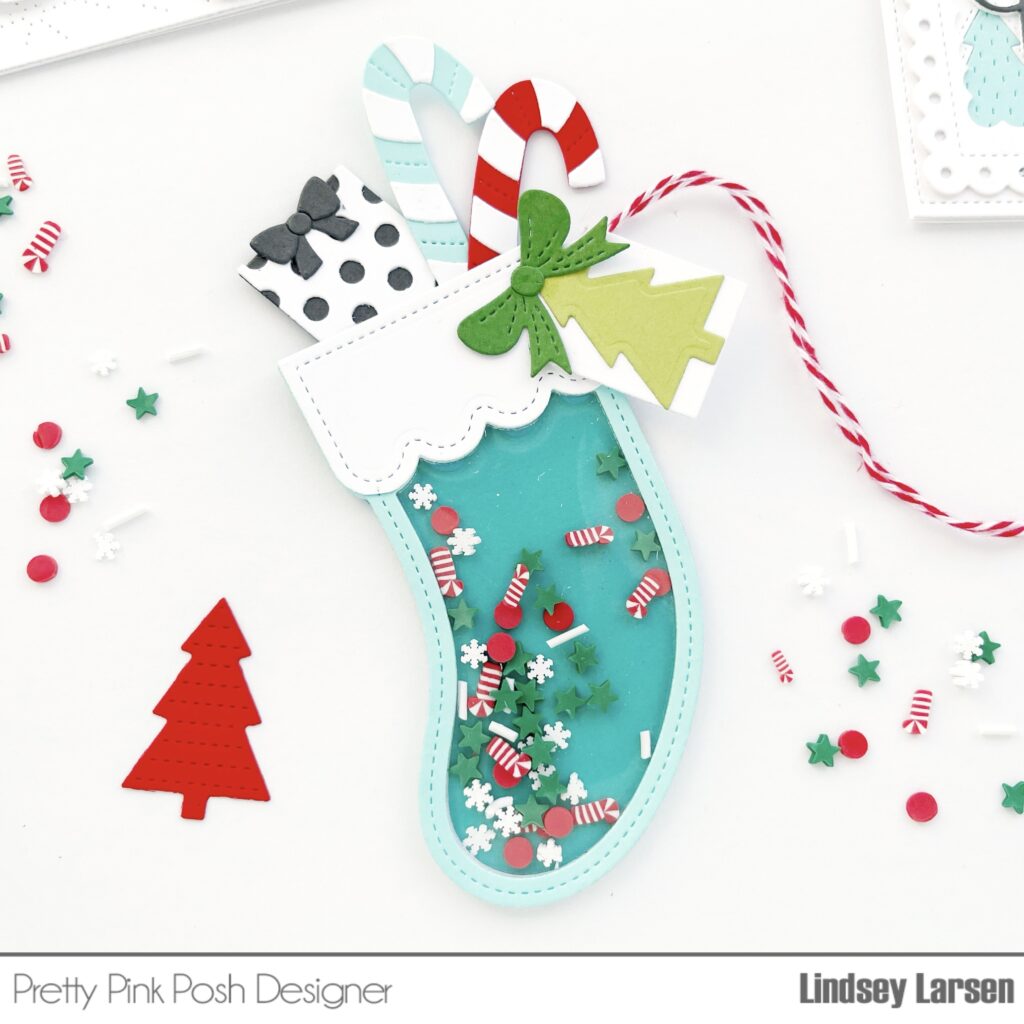
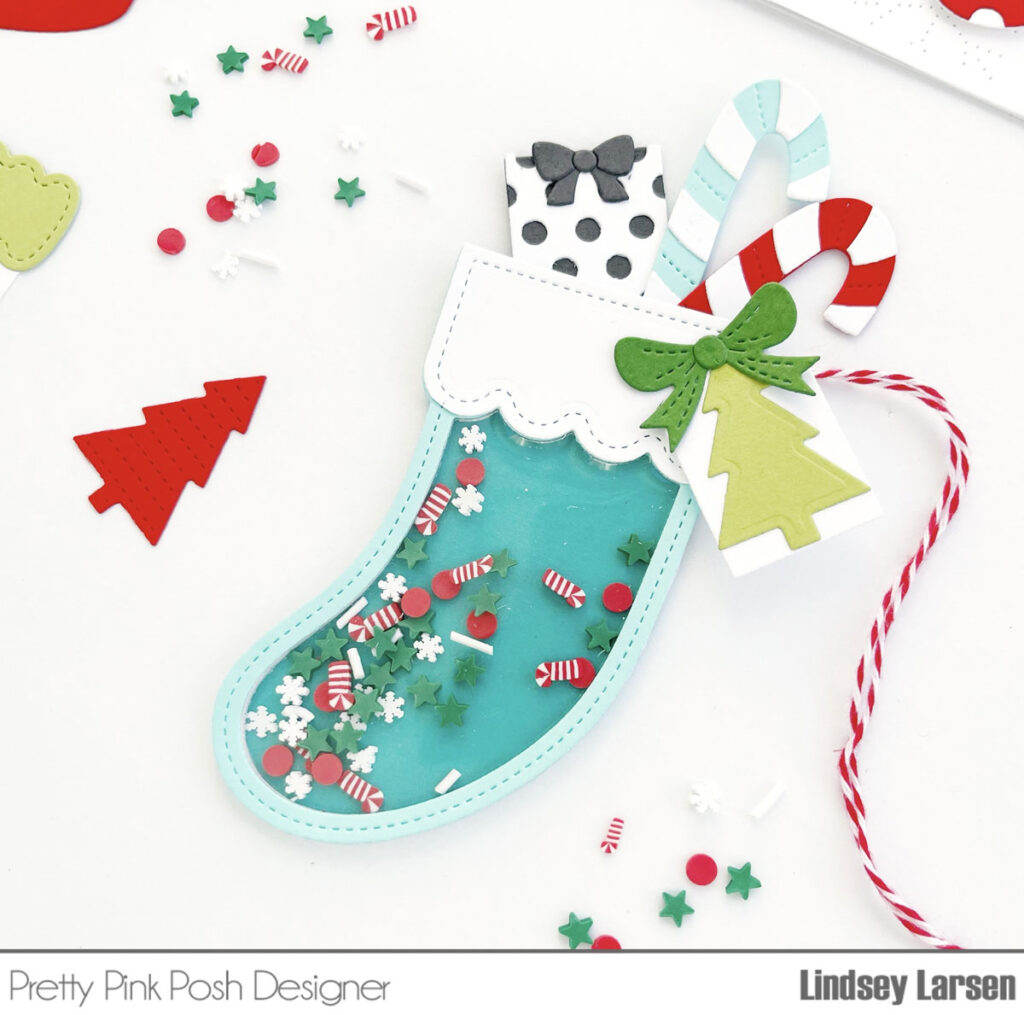
My final project is a large tag made from the new Stocking Shaker die. I filled it with Candy Cane Lane Clay Confetti Mix. Then, I tucked in some candy canes (Winter Mug dies) and a gift (Build A Gift Dies). 

Day 2: October Blog Hop + New Release Now Available

The final touch was a little tag made using the Holiday Mug Additions and Stocking Shaker Die

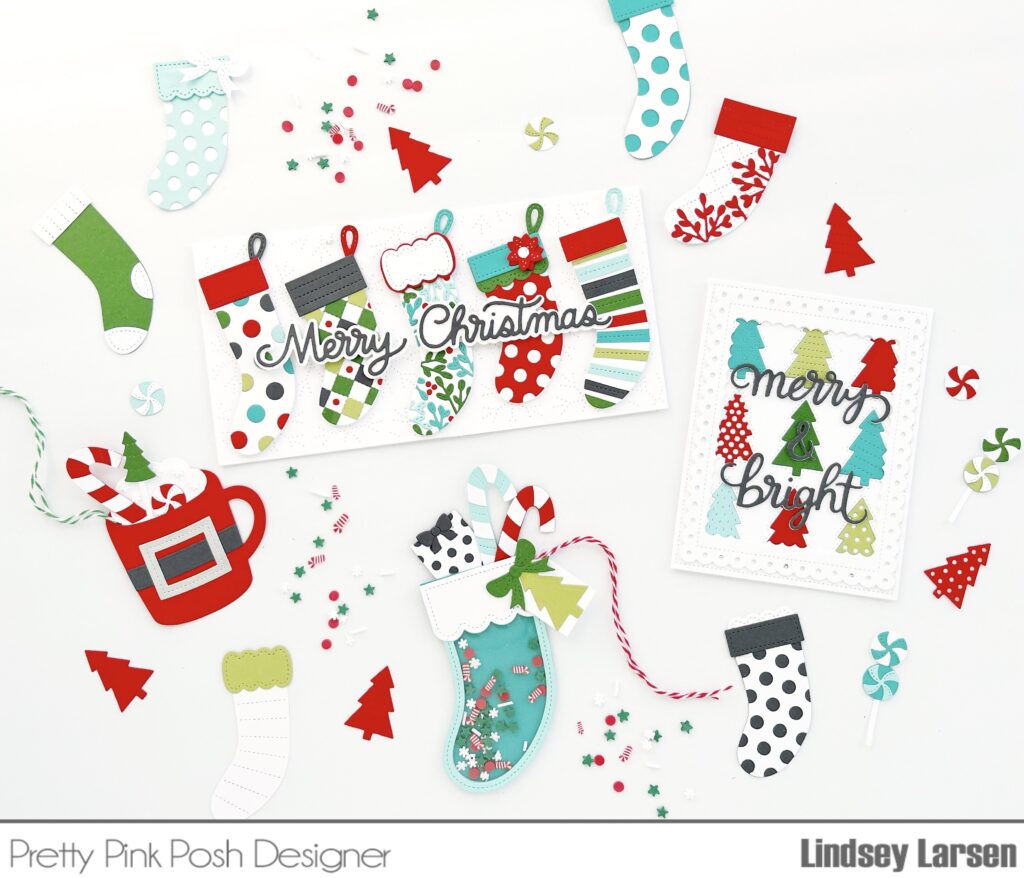
To give you some perspective of size and scale, here is everything I made recently all together…happy sigh. :)

Day 2: October Blog Hop + New Release Now Available

PRIZES: be sure to leave comments on each stop. We are giving away 4 $30 gift certificates to four random comments (1 winner each day) left before October 19, 2023 at 11:59 PM PST. I’ll be announcing the winners next week, so be sure to return and see if you are one of the winners.

Pretty Pink Posh blog << you are here
Nichol Spohr
Amy Rysavy
Marine Simon
Leica Palma
Kristie Marcotte
Lisa Mears

Be sure to leave comments on all the stops- we’ll be randomly picking comments to win gift certificates. Thanks for joining us!

| | |

Day 1: October Blog Hop + New Release Now Available

Day 1: October Blog Hop + New Release Now Available

The October 2023 Release is now available in the Pretty Pink Posh Shop and select retailers that carry our products. If you missed our post yesterday, we revealed all of the products in picture form, but if you would like to see them in a video, Mindy has that for you today!

Watch the video above  I  Watch the video in HD on YouTube

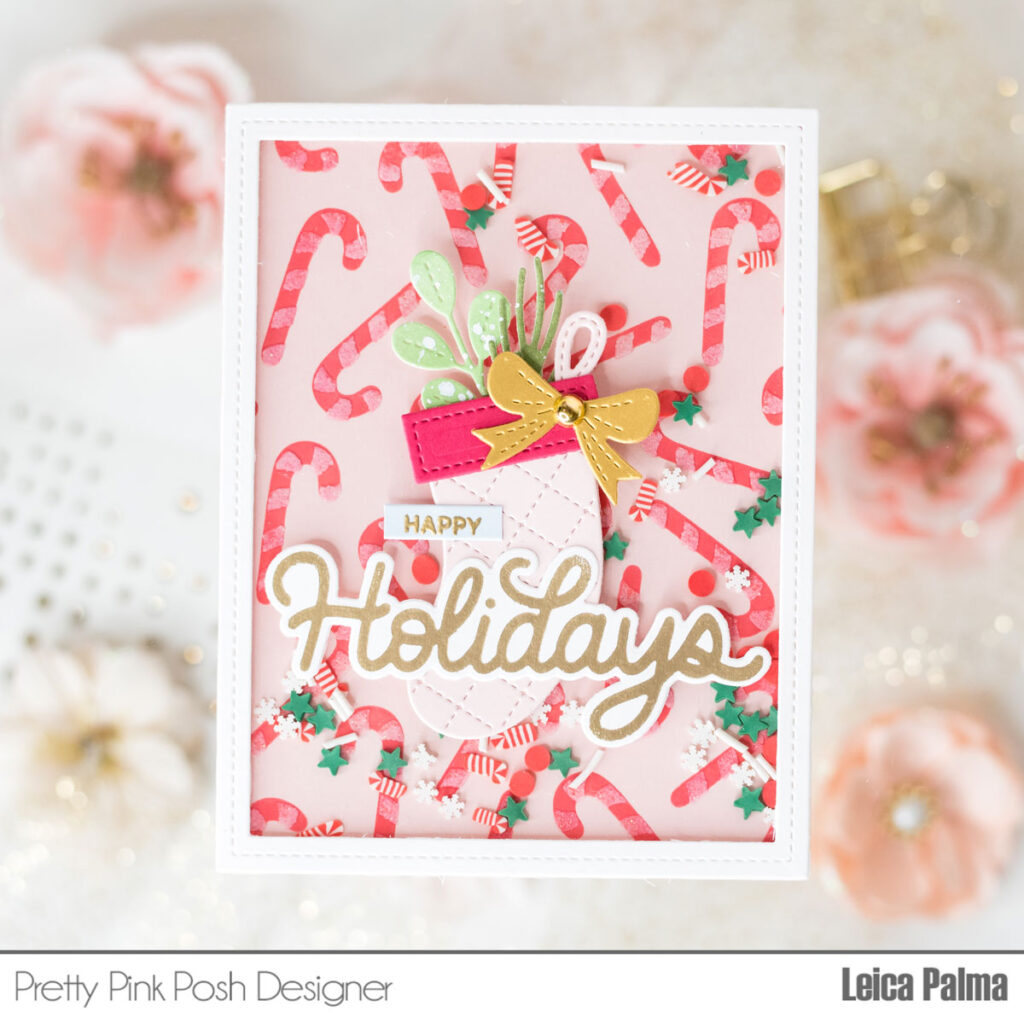
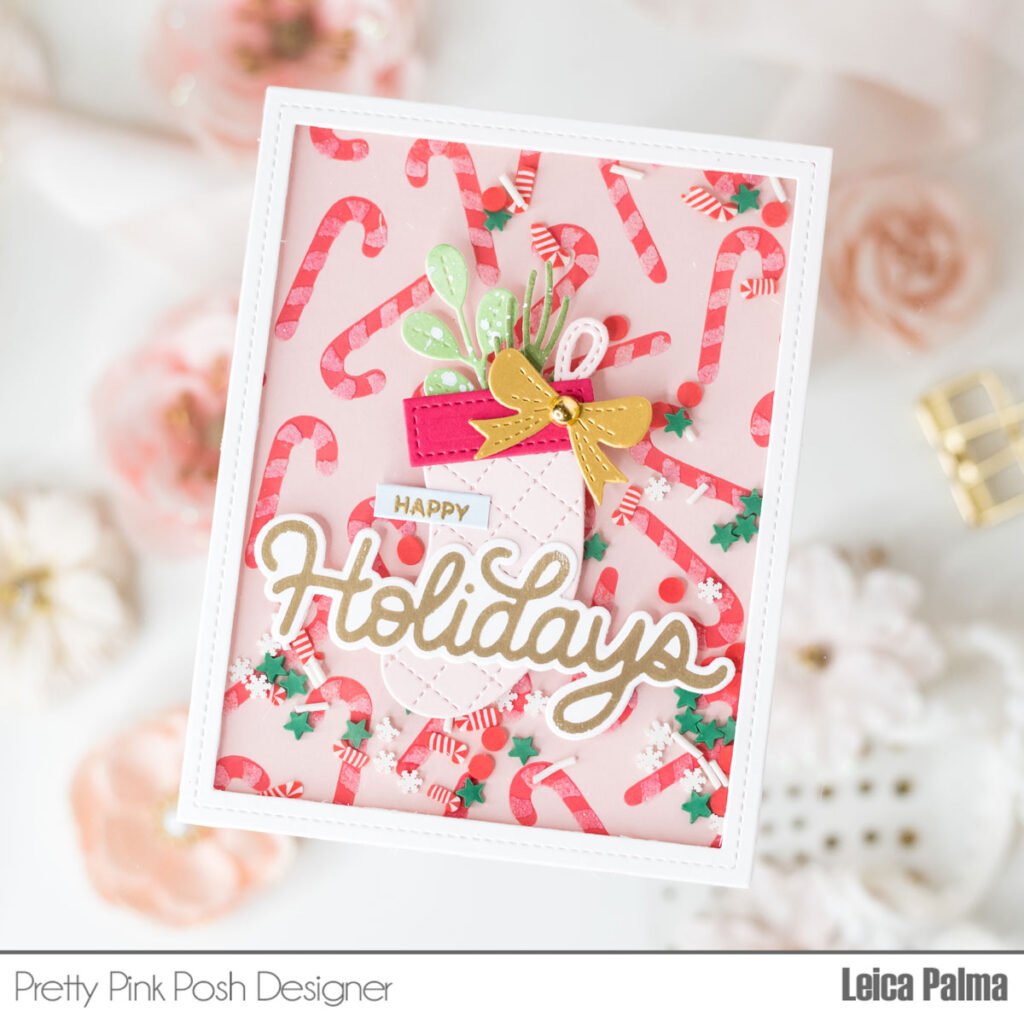
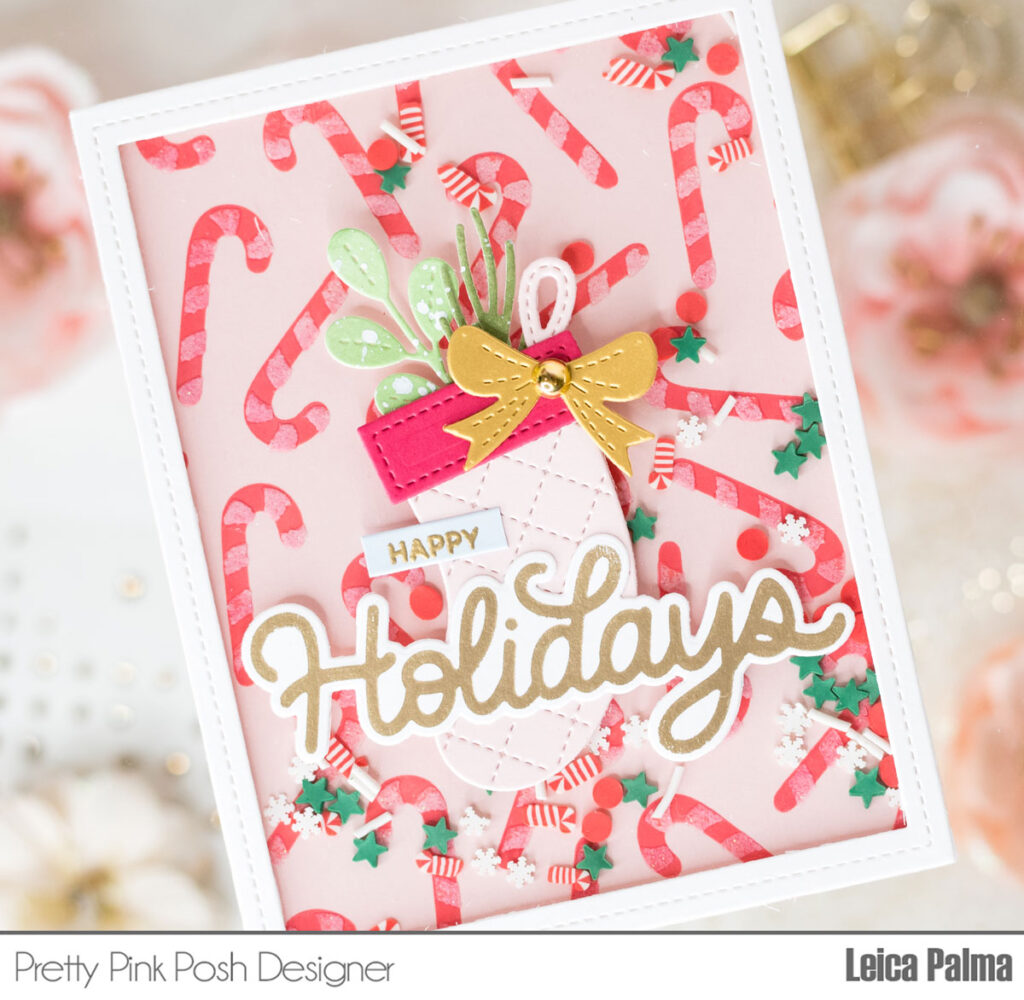
Hello crafty friends! Leica here, and I’ve got a joyful holiday shaker card to share with you to kick off the blog hop.

To get things rolling, I took an A2-sized piece of pink cardstock and gave it a candy cane print background using the Layered Candy Canes Stencils. For Layer A, I used Festive Berries Distress Oxide Ink, and for Layer B, I applied Finnabair Snowflake Paste.

I created a frame from white cardstock using the Fancy Cake Dies and glued a piece of acetate on the back of the frame. Then, I surrounded the frame with foam tape, and for the shaker fun, I filled it up with the Candy Cane Lane Mix.

For the main attraction of my card, I added a stocking using the Build A Stocking die set. I incorporated some greenery from the Winter Foliage Dies and adorned it with a gold ribbon from the Holiday Mug Additions, topped with a Metallic Gold Pearl.

To make the sentiment pop, I hot foiled the “Holidays” in gold and cut it with the Happy Holidays Shadow die. I then heat embossed “happy” on a strip of blue cardstock in gold and placed it just above the “Holiday Shadow.”

Finally, I glued the card panel onto an A2-sized card base. And there you have it, my lovely shaker card. I hope you’ll give shaker cards a whirl for your loved ones this holiday season.

PRIZES: be sure to leave comments on each stop. We are giving away 4 $30 gift certificates to four random comments (1 winner each day) left before October 19, 2023 at 11:59 PM PST. I’ll be announcing the winners next week, so be sure to return and see if you are one of the winners.

Pretty Pink Posh blog << you are here
Carissa Wiley
Caly Person
Ardyth Percy- Robb
Lauren Taylor
Leanne West

Thanks so much for stopping by today, we hope you were inspired. Join us tomorrow for another day of fun!

|

September Blog Hop Winners

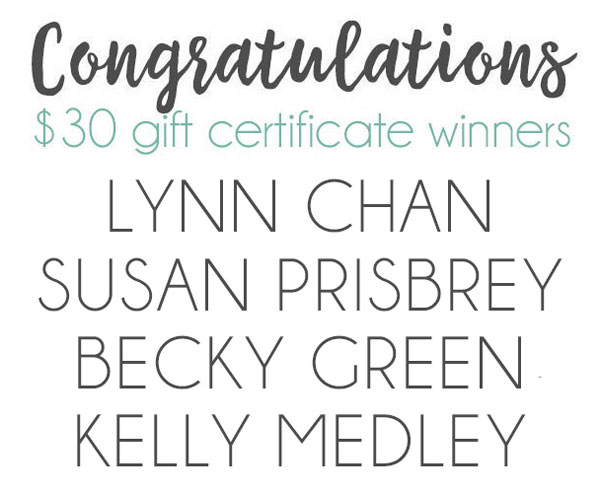
Hello! It’s time to announce the three winners of the September blog hop posts HEREHERE, and HERE. Here are the lucky winners of the $30 gift certificates…

September Blog Hop Winners

Winners, email me within 7 days to claim your prize! 

If you would like even more inspiration with the new release and are on Instagram, we also have a four day Instagram hop with four more chances to win a $30 gift certificate if you leave a comment before September 26th!

We hope you were inspired by all the inspiration from the hops!

| |

Day 3: September Blog Hop + New Release Now Available

If you missed Day 1 CLICK HERE //  If you missed Day 2 CLICK HERE

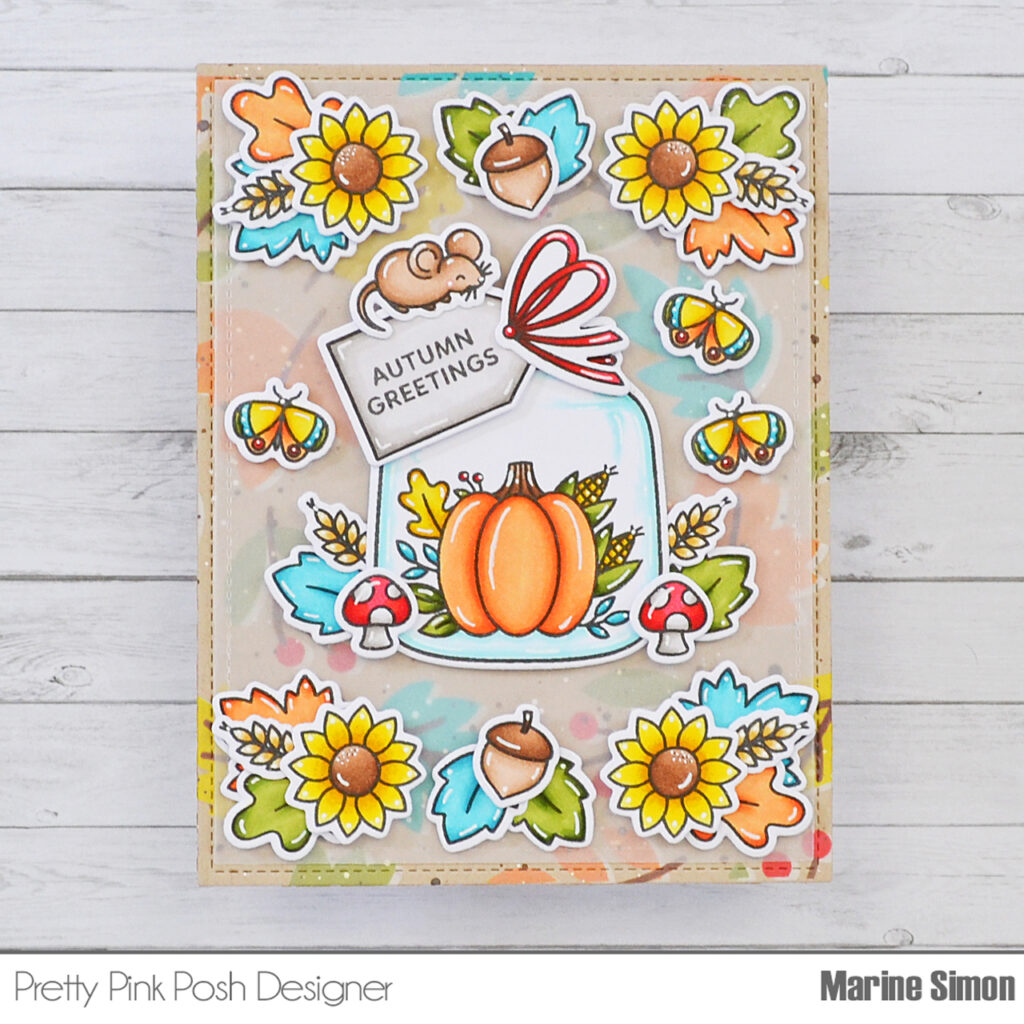
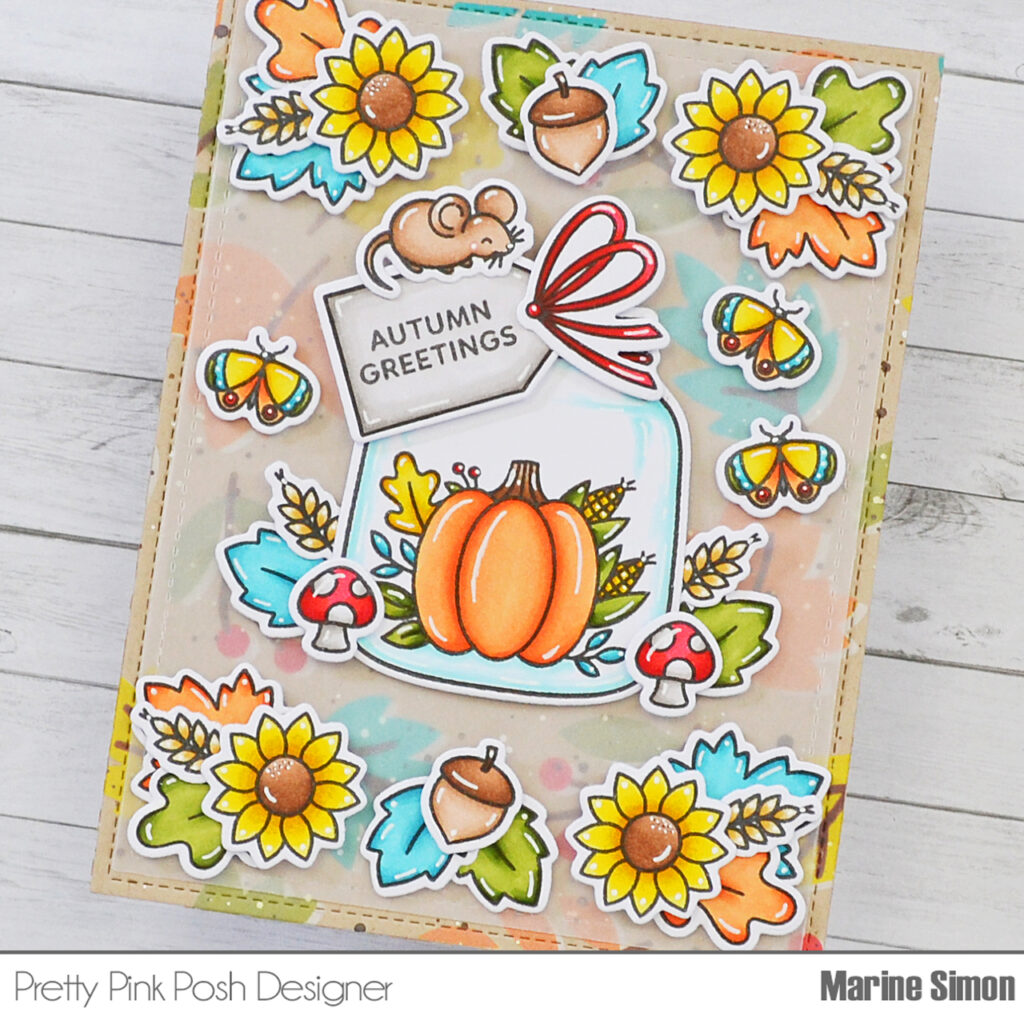
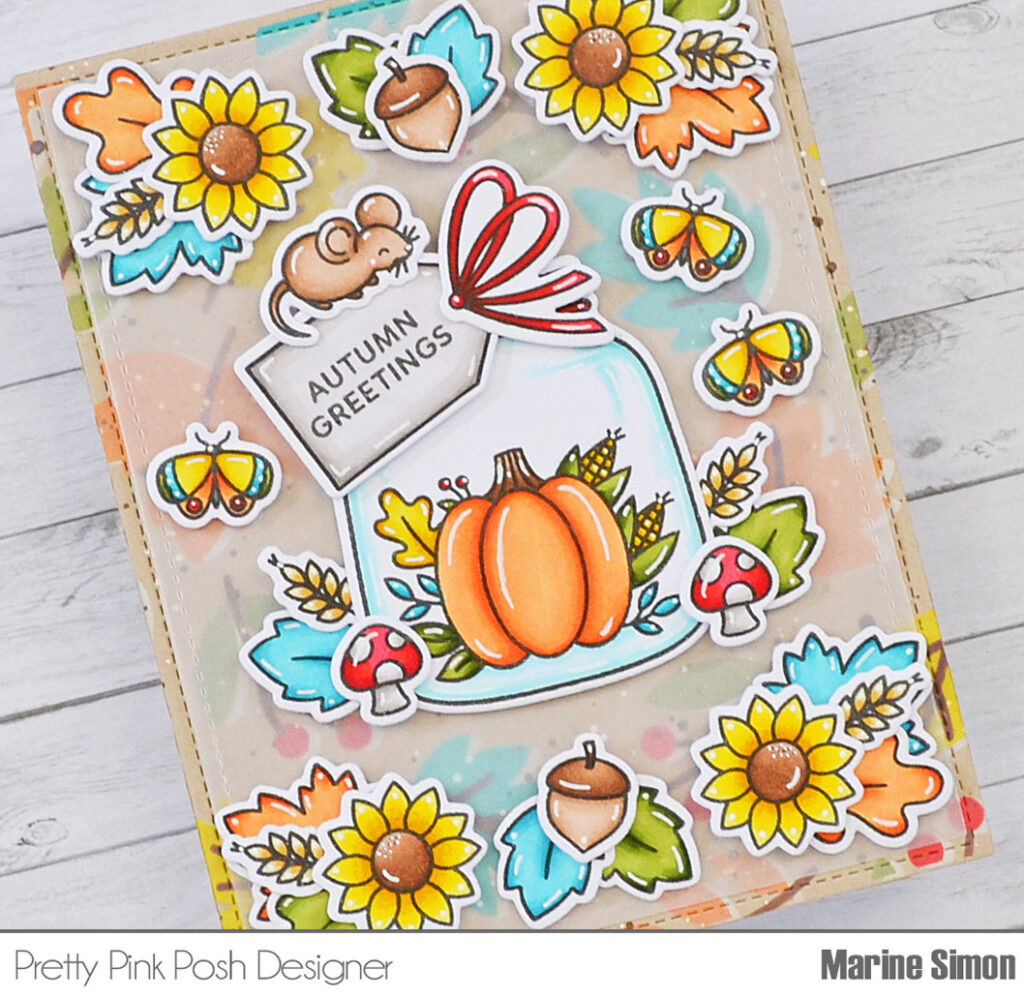
Hello crafty friends, Marine here, I’m so happy to share with you this lovely autumn card showcasing the Fall Jar stamp set and Layered Fall Wreath stencils, two brand new items from the Fall 2023 release.

I started off by stamping the images from Fall Jar on Transotype perfect coloring paper using an alcohol marker friendly black ink, I cut them all using the coordinating dies, and then colored everything using my Spectrum Noir Illustrator markers and Graph’it brush markers.

I like to create small clusters of images on my cards, so among all the new products, this stamp set is my favorite because it includes many individual images, which allowed me to make clusters around the jar to frame it nicely. And to color everything, I chose an orange + yellow + brown + khaki green + turquoise color palette, which is one of my favorite color combos for the Fall season.

Next I used the Layered Fall Wreath stencils and some oxide inks to create a beautiful autumn background on a 5,5 x 4,25 inches kraft panel. Here are the oxide inks I used: mustard seed, peacock feathers, spiced marmalade, peeled paint, candied apple and vintage photo. Next I mixed a little bit of ground espresso oxide ink with water and used a small brush to make splatters on the panel, and I did the same with white ink.

I set the panel aside to dry, and cut a slightly smaller one out of vellum. I attached all the images on the vellum panel using foam squares, and then stuck my vellum panel on the kraft panel, making the glue invisible by adding dots of liquid glue at the back of the vellum panel, behind the images.

Finally I added highlights and details to the images using a white gel pen, and attached my panel to an A2-sized kraft card base. And that’s it! I hope that my card will inspire you to use small images to create your own clusters of images.

PRIZES: be sure to leave comments on each stop. We are giving away 3 $30 gift certificates to three random comments (1 winner each day) left before September 19, 2023 at 11:59 PM PST. I’ll be announcing the winners next week, so be sure to return and see if you are one of the winners.

Pretty Pink Posh blog << you are here
Gemma Campbell
Lynn Put
Dana Kirby
Rebecca Keppel
Melody Rupple
Carly Minner
Amanda Wilcox

We hope you’ve been inspired by the three days of projects. We’ll kick off our four day IG hop on Monday that will feature even more inspiration!

| |

Day 2: September Blog Hop + New Release Now Available

If you missed Day 1 CLICK HERE

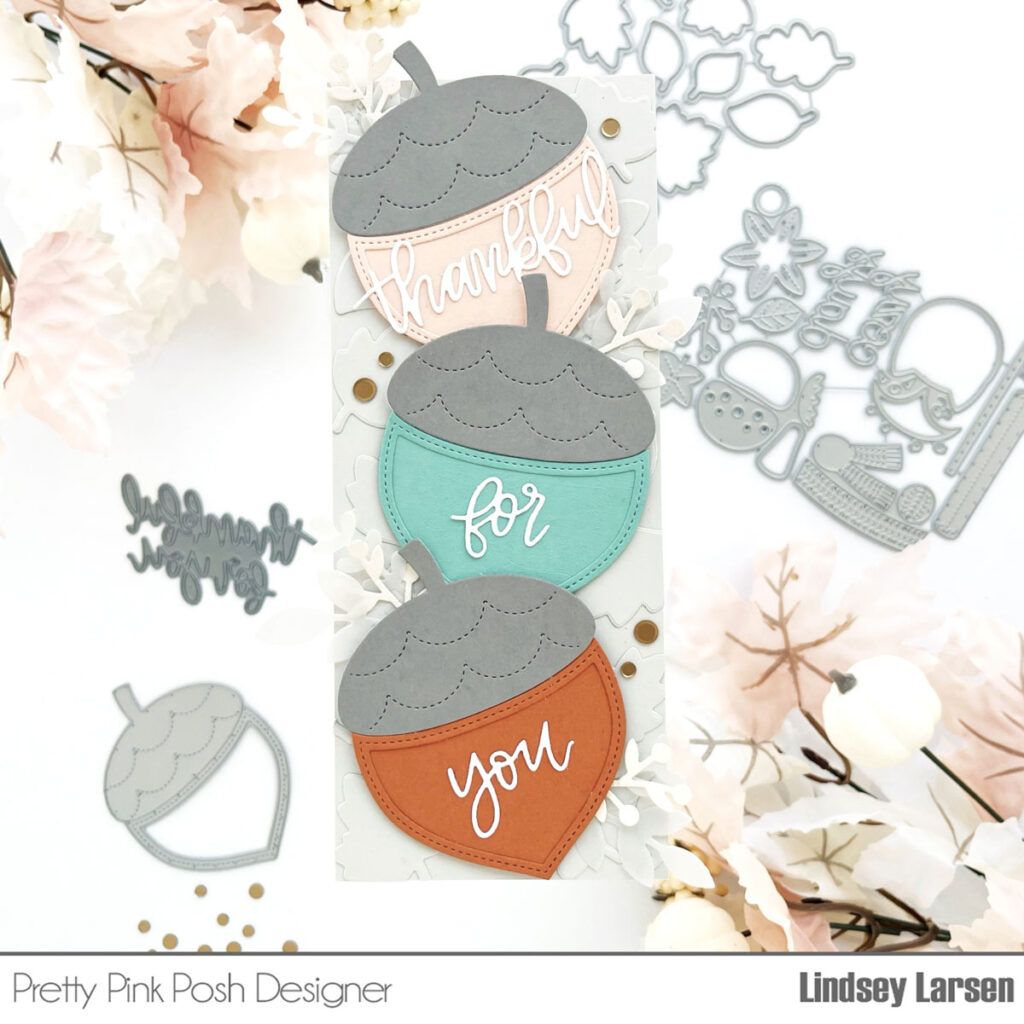
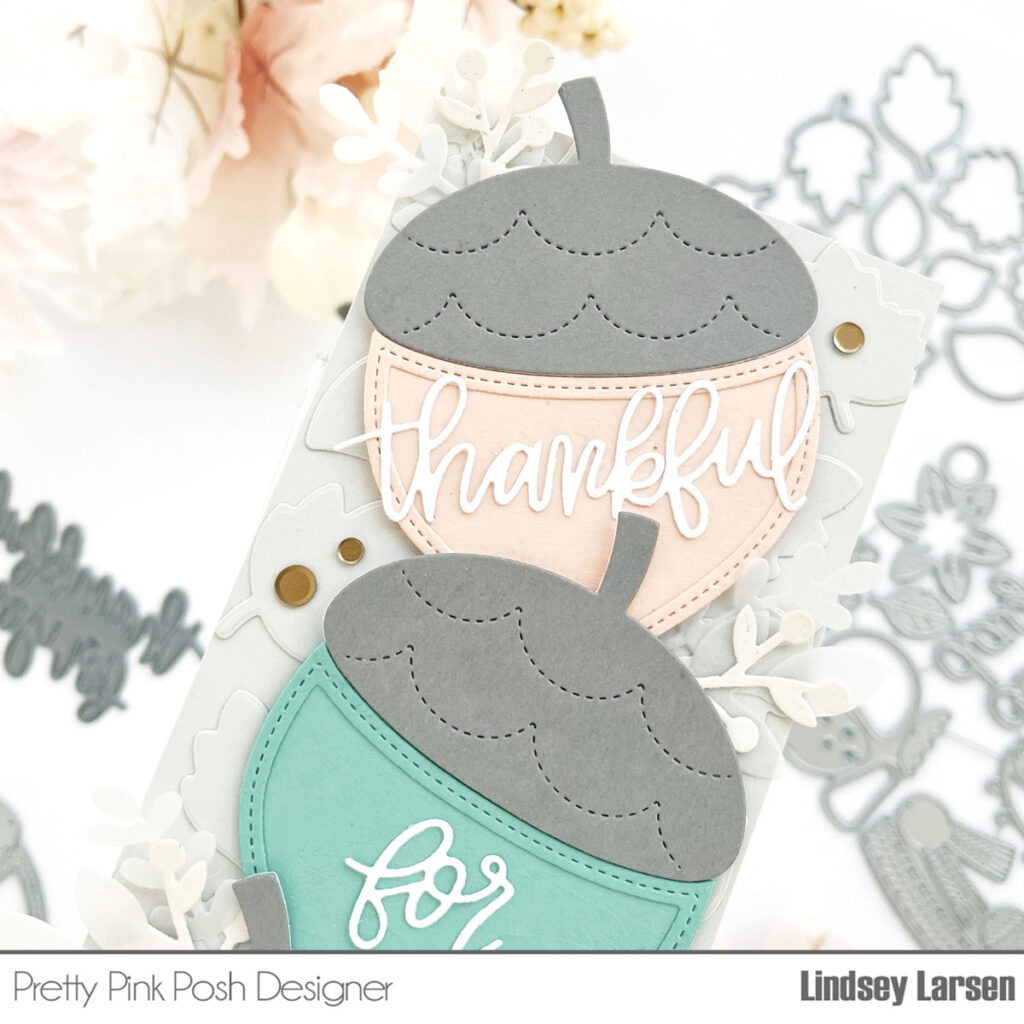
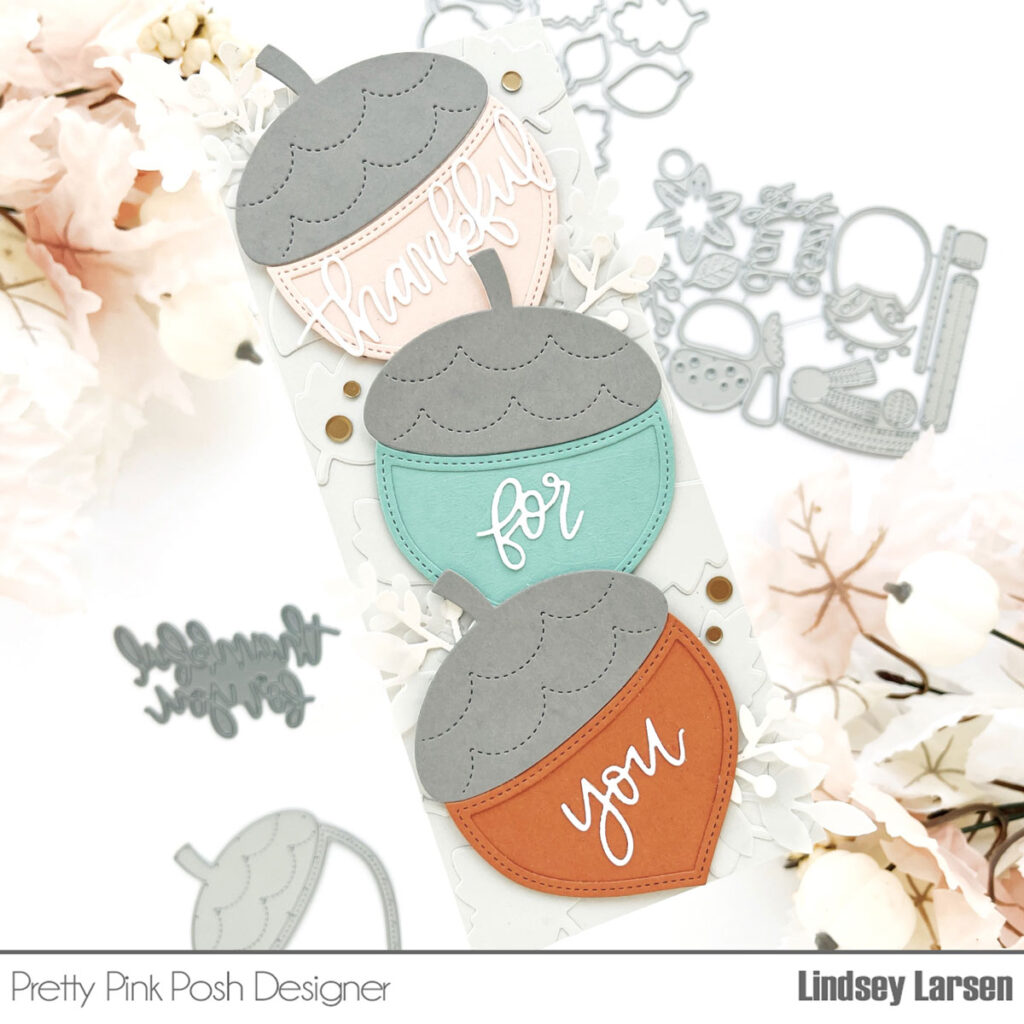
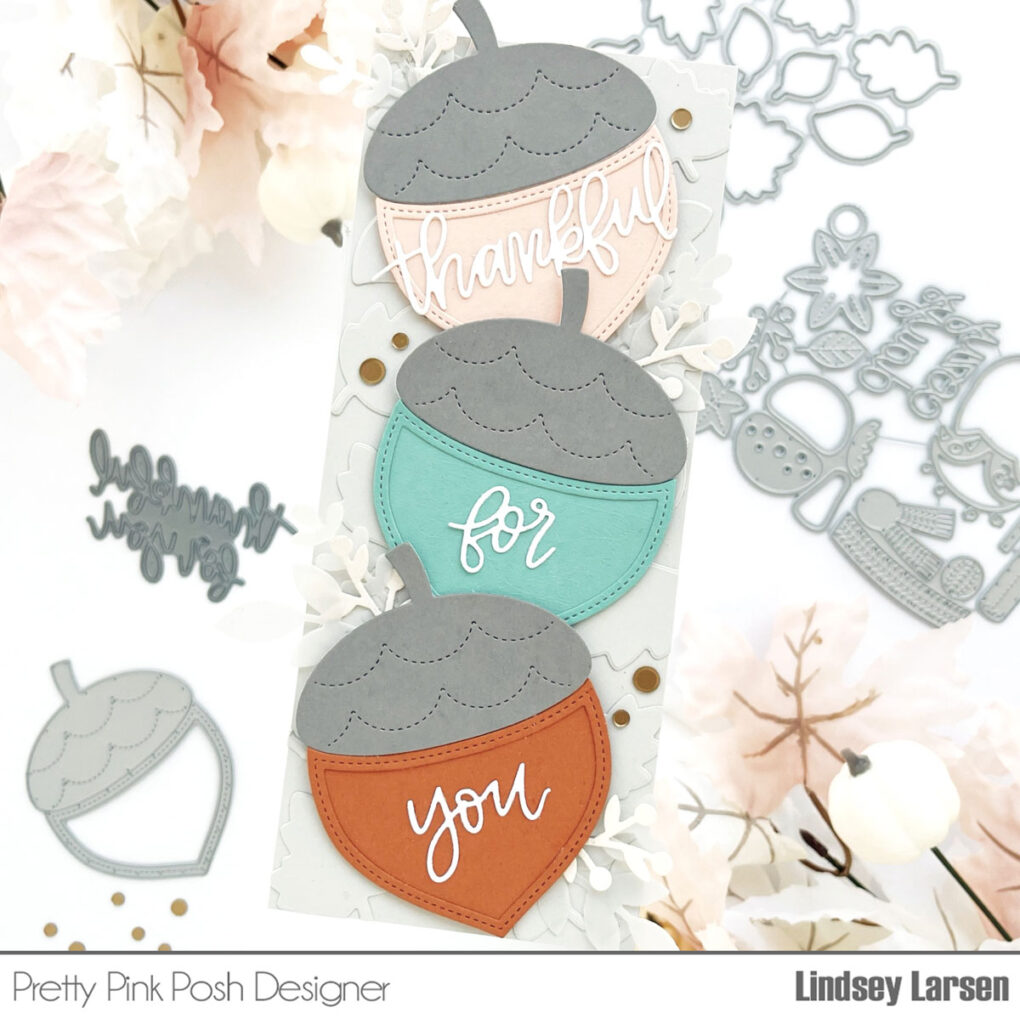
Good morning! It’s Lindsey here and I’m excited to share a card with you today that combines several of my favorite things. First up is the amazing new Acorn Shaker Die. I love all the shaker dies because of their larger size and because they look fantastic even if you choose not to fill them. I also happen to have a special fondness for acorns, so this die made me smile from the moment I saw it. 

One acorn certainly wouldn’t suffice, so I created a stack of them on a slimline card using a few of my favorite colors.  Then I added one word to each acorn using the Thankful For You Script Dies.  

For my background, I die cut several of the leaves from the Falling Leaves coordinating dies in the same color as my card base. This added texture and interest but in a non-competing way.  

Once I had all my acorns stacked up, I tucked in a little vellum and cream foliage from the new Fall Mug Additions Dies and the Fall Foliage Dies (a long-time favorite of mine). I added a touch of Matte Gold Confetti Mix (because I can’t stop using it!) and my card was complete.

PRIZES: be sure to leave comments on each stop. We are giving away 3 $30 gift certificates to three random comments (1 winner each day) left before September 19, 2023 at 11:59 PM PST. I’ll be announcing the winners next week, so be sure to return and see if you are one of the winners.

Pretty Pink Posh blog << you are here
Amy Rysavy

Wanda Guess
Laurie Willison
Leica Palma
Jeanne Jachna
Amy Tsuruta
Lauren Taylor

Be sure to leave comments on all the stops- we’ll be randomly picking comments to win gift certificates. Thanks for joining us!
| | |

Day 1: September Blog Hop + New Release Now Available

Day 1: September Blog Hop + New Release Now Available

The September 2023 Release is now available in the Pretty Pink Posh Shop and select retailers that carry our products. If you missed our post yesterday, we revealed all of the products in picture form, but if you would like to see them in a video, Mindy has that for you today!

Watch the video above  I  Watch the video in HD on YouTube

Hey, friends! Leica here with a Thanksgiving card to share. I’m so excited about how this turned out, and I got to use the latest stencils and dies from Pretty Pink Posh.

Day 1: September Blog Hop + New Release Now Available

To get started, I cut a 5-inch square white cardstock. I used some inks and the Layered Woodland Stencils to make a fall-themed background. The inks I used are Antique Linen, Dried Marigold, Mowed Lawn, Ripe Persimmon, Twisted Citron, and Vintage Photo Distress Oxide Inks.

Next up, I used the Winter Mug Dies to cut out a mug shape from cream cardstock. I added a nice pattern to it using the Deco Leaves Stencil and Vintage Photo Distress Oxide Ink. For the other elements, I used the Fall Mug Additions and Fall Cornucopia Dies, cutting them from various colored cardstock from Spellbinders.

Day 1: September Blog Hop + New Release Now Available

I stamped a sentiment from the Sentiment Strips: Fall stamp set and used a scallop rectangle die from the Sentiment Strips Dies to cut it out.

To make things stand out, I added a vellum layer between the die-cut elements and the background. This softens the background and makes the elements pop and stand out. Lastly, I glued the card panel onto a 5-inch square card base.

Day 1: September Blog Hop + New Release Now Available

PRIZES: be sure to leave comments on each stop. We are giving away 3 $30 gift certificates to three random comments (1 winner each day) left before September 19, 2023 at 11:59 PM PST. I’ll be announcing the winners next week, so be sure to return and see if you are one of the winners.

Pretty Pink Posh blog << you are here
Caly Person
Nichol Spohr
Mindy Eggen
Sindhu Prajay
Lisa Mears
Kristie Marcotte
Stefanie Loh

Thanks so much for stopping by today. Join us tomorrow for another day of inspiration!

| |

Day 3: August Blog Hop + New Release Now Available

Day 3: August Blog Hop + New Release Now Available

If you missed Day 1 CLICK HERE //  If you missed Day 2 CLICK HERE

Hello, everyone! It’s Leica here. Today I want to share a fun 3D project using the Stitched Pumpkins dies from Pretty Pink Posh. This set comes with three pumpkin sizes that create adorable 3D pumpkins. They’re perfect for place card holders or as a festive centerpiece for Halloween and Thanksgiving.

Day 3: August Blog Hop + New Release Now Available

For this project, I used 29 lb cardstock from Michaels and I cut 4 sheets at once, which saves a lot of time since we need many pieces. The more pieces you cut, the fuller the pumpkins will look.

The process is straightforward, though it may take some time to assemble. You can cut just four pieces to make a stand-alone pumpkin. You can experiment with heavyweight cardstock or colored and patterned paper too.

Day 3: August Blog Hop + New Release Now Available

Once you have all the pieces, fold them in half and use a binder clip to hold them together. Apply glue to the spine of the pumpkins and let them dry. Then, attach the stem using the die provided or find something suitable in your garden. I used Helmar glue to adhere the stem to the center of the pumpkins.

For the leaf, I cut the die in green cardstock and added some interest with Mowed Lawn and Rustic Wilderness Distress Oxide Ink.

Day 3: August Blog Hop + New Release Now Available

I made several pumpkins in different sizes to use as centerpieces for Thanksgiving. However, you can also use these dies for cards, not just 3D projects. They’d make beautiful focal pieces for cards too.

Day 3: August Blog Hop + New Release Now Available

I hope my 3D pumpkin projects have inspired you to create your own. It’s a fun activity suitable for everyone. Both grown-ups and children can do this project together. Include the kids and create many 3D pumpkins.

PRIZES: be sure to leave comments on each stop. We are giving away 3 $30 gift certificates to three random comments (1 winner each day) left before August 15, 2023 at 11:59 PM PST. I’ll be announcing the winners next week, so be sure to return and see if you are one of the winners.

Pretty Pink Posh blog << you are here
Rachel Alvarado
Dana Kirby
Kristie Marcotte
Rebecca Keppel
Zsofia Molnar
Stefanie Loh
Tammy Stark

We hope you’ve been inspired by the three days of projects. We’ll kick off our four day IG hop on Monday that will feature even more inspiration!

| |

Day 2: August Blog Hop + New Release Now Available

Day 2: August Blog Hop + New Release Now Available

If you missed Day 1 CLICK HERE

Hello! It’s Lindsey here today I have had so much fun creating with the August Release! I shared a few projects earlier during the sneak peeks and am excited to share more with you today.  

Day 2: August Blog Hop + New Release Now Available

I’m a big fan of Halloween but only the cute Halloween stuff, so this release is right up my alley. The new Halloween Mug Additions definitely fit the cute bill, so I used them to create a fun stack of mugs. 

Day 2: August Blog Hop + New Release Now Available

Let’s start at the top. Do you remember the original Winter Mug die set? Not only did it include the mug that we’ve all grown to love, but it also had some fun extras including the cute little ghost I used on my card.  

Day 2: August Blog Hop + New Release Now Available

The new Halloween Mug Additions have so many creative options, and I started with the cat. Next, I made the pumpkin mug. There is a jack-o-lantern face in this die set, but I wanted a really big smile, so I used the largest jack-o-lantern face from the Stitched Pumpkins Dies.

Day 2: August Blog Hop + New Release Now Available

Finally, I created a Frankenstein mug. He’s my favorite. :) You can create a surprising amount of expressions for him.  He can look more stern/grumpy/scary or cute and happy like I did here depending on how you position his mouth.  

The sentiment was created with the Sentiment Strips: Halloween Stamps and the Sentiment Strips Dies. Love, love, LOVE!!! The Sentiment Strip Dies are an amazing addition to your crafty supplies. They work with pretty much every Pretty Pink Posh stamp set and are so versatile. They immediately jumped to my list of all time favorite products!

The final touches were some Spider Webs and a starry background using a tiny star stamp from the Ghost Friends stamp set.

PRIZES: be sure to leave comments on each stop. We are giving away 3 $30 gift certificates to three random comments (1 winner each day) left before August 15, 2023 at 11:59 PM PST. I’ll be announcing the winners next week, so be sure to return and see if you are one of the winners.

Pretty Pink Posh blog << you are here
Amy Rysavy
Cathy Zielske
Leica Palma
Channin Pelletier
Jeanne Jachna
Lisa Mears
Carly Minner

Be sure to leave comments on all the stops- we’ll be randomly picking comments to win gift certificates. Thanks for joining us!
| |

Day 1: August Blog Hop + New Release Now Available

The August 2023 Release is now available in the Pretty Pink Posh Shop and select retailers that carry our products. If you missed our post yesterday, we revealed all of the products in picture form, but if you would like to see them in a video, Mindy has that for you today!

Watch the video above  I  Watch the video in HD on YouTube

Hello, it’s Barbara here and I’m happy to be sharing a card using the new release. I love guesting for Pretty Pink Posh! If you want to see more of my guest designer projects, visit me on Instagram!

Day 1: August Blog Hop +New Release Now Available

I began with an A2 size card base made from smooth white cardstock. I then trimmed down another piece of white cardstock to leave a bit of a border to create my background panel. Using distress oxides inks I created a spooky night sky starting with the lightest color in the center of panel and then blended darker ink from the corners to towards the center.

Day 1: August Blog Hop +New Release Now Available

I die cut the Spooky Wishes Shadow out 110lb white cardstock and fun foam for dimension. I used liquid glue to add to the center of the ink blended panel.

Copies used: Y08, Y15, YR04, YR07, V04, YG23 and 100 black
Distress Oxide inks: Twisted Citron, Mowed Lawn, Uncharted Mariner, Black Soot

I then die cut the ghost, pumpkin, bat, cat, star and moon images from the Halloween House die set out of white cardstock. I colored the images using copic markers. I arrange them all around the Spooky Wishes Shadow. I added a few more stars and some white dots with acrylic paint and a stylus.

PRIZES: be sure to leave comments on each stop. We are giving away 3 $30 gift certificates to three random comments (1 winner each day) left before August 15, 2023 at 11:59 PM PST. I’ll be announcing the winners next week, so be sure to return and see if you are one of the winners.

Pretty Pink Posh blog << you are here
Caly Person
Nichol Spohr
Mindy Eggen
Marine Simon
Wanda Guess
Gemma Campbell
Lauren Taylor

Thanks so much for stopping by today. Join us tomorrow for another day of inspiration!