video

| | | |

April Product Release Blog Hop- Day 2

Check out Day 1 of the blog hop HERE

Hello, Pretty Pink Posh’ fans! This is Yana Smakula. In this video, I’m sharing a very easy method to create money holder greeting cards. You won’t need any specialty dies or supplies for this type of card and you should be able to create a card design like this using most of your Pretty Pink posh stamps and coordinating dies.

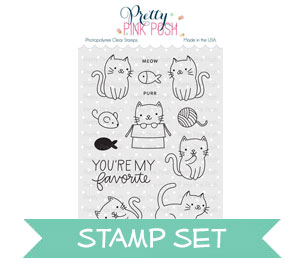
I started by stamping some images in black Copic marker friendly ink onto white paper. The size of the images you pick is the only thing that matters as you’ll want to use something that’s big enough to hide a folded bill behind it. So a small critter stamp, for example, is not going to work. But a cute giraffe, like the one I’m using here and also a gorgeous floral arrangement will. Both of these images are from Pretty Pink Posh and come from the Animal Signs and Mother’s Day stamp sets respectively.

Watch my video tutorial below to learn how I made this card.

Watch the video above  I  Watch the video in HD on YouTube
 

Next, I quickly colored these using Copic markers. Nothing fancy, just some quick strokes of color to bring these images to life. I used YG03, YG17, RV34, RV11, RV10, Y11, Y35, Y17, BV11, BV00, and BV000 markers. To color the giraffe I used E37, E33, E31, R0, and E51.

I wanted to combine these two images and have my critter holding a floral bouquet and not the frame. I did some fussy cutting to eliminate the image parts I didn’t need and using foam adhesive squares I foam mounted the flowers onto my critter, added front legs and the tail.  Super cute! and it wasn’t hard to do at all.

Next, I’ve done some partial die cutting using a coordinating die. To make the partial cut I only covered the part of the die that I wanted to cut into the paper and left the other part of the die free. This allowed me to do partial die cutting and only die cut the top part of my giraffe.

I also wanted to add some dry embossing to the background. I used a new Wide Stripes stencil and dry embossed on the background. I love the result! It looks very clear and simple, yet there’s pretty linear texture in the background!

I trimmed this panel down to 4” x 5 1/4”, I also made an A2 card base using hot pink cardstock. I folded the money bill and inserted it into the partially die cut panel. Next, I added foam adhesive around it making sure not to touch it. I wanted to block the bottom part of the panel so that I didn’t have stuff falling down into the card and making it impossible to get it out.

I also used my anti-static powder tool to eliminate any of the residual stickiness on the foam tape so that nothing would stick to it. Once done, I adhered the panel onto a card base, foam mounted the critter, added the bill and dressed up this card using pink stamped stars and Pearl white jewels.

I also made one more card to share, this one is for Graduation and it uses the same concept and almost same supplies.

I used a different stencil for the background, Graduation, and blended some pastels over it to give it some color and help highlight the embossed areas.

Next, I stamped, colored and cut out an adorable elephant from the Animal Signs stamp set. I used W5, W3, W1 and R20 markers. I also stamped a graduation cap and a scroll from the Congrats Grad stamp set and colored those images using Copic markers as well. I used RV34, RV11 and RV10 colors along with C9, C7, and C5 markers.

I foam mounted this darling baby elephant onto the background matching him with the partial cut already made. Next, I added his graduation cap and a scroll using foam adhesive. I foam mounted the entire panel onto a light pink card base and also embellished it with a few stamped & die cut stars and pretty white jewels.

While the slits in these cards are relatively small you should be able to tuck any folded currency bill inside or tuck a little handwritten note if you like.

PRIZES: be sure to leave comments on each stop. I’m giving away 4 $25 gift certificates to four random comments (2 winners each day) left before May 8, 2019 at 11:59 PM PST. I’ll be announcing the winners next week, so be sure to return and see if you are one of the winners!

Pretty Pink Posh blog <<you are here
Angelica Conrad
Megan Quinn
Ardyth Percy- Robb
Sharna Waksmulski
Nicky Meek
Eloise Blue
Jacquie Dean
Alix Davis
Joni Nina Andaya
Mindy Baxter
Rina Galit
Yoonsun Hur

Be sure to leave comments on all the stops- we’ll be randomly picking comments to win gift certificates. Thanks for joining us!

| |

April 2019 Release Now Available!

The April 2019 Release is now available in the Pretty Pink Posh Shop and select retailers that carry our products. If you missed our post earlier, we revealed all of the products in picture form, but if you would like to see them in a video, Ardyth has that for you today!

Watch the video above  I  Watch the video in HD on YouTube

Hello, Gemma here today with a card to share using some fabulous products from the Pretty Pink Posh April release.

I was so excited to use the new Lattice Background die. I am a huge fan of cover dies. I think they are fantastic for adding interest to clean and simple cards. The Lattice Background die is so gorgeous, it’s definitely a must have.

I began by cutting a piece of blue pattered paper to fit my A2 card base, adhering it with liquid glue. I then die cut the Lattice Background die from white card and layered it over the top.

To create an area in the centre of the card, I die cut the Storybook 1 die from white card, trimming it down to give a small border and adhering to my card.

Before adding the panels within the Storybook 1 frame, I blended on a light ombré of Tumbled Glass Distress Oxide Ink.

I chose two elephants to feature on my card. The elephant holding the sign is from the new Animal Signs stamp set. The elephant and the star balloon are from the new Elephant Friends stamp set. I love that the greeting from the Elephant Friends set fits perfectly on the sign.

I coloured the images with copic markers, then die cut them with the coordinating dies.

I used foam tape to adhere them to my card, then added some glossy accents to the balloon and a few Sea Glass jewels around the images as a finishing touch.

Thank you for joining us today. I hope you enjoyed today’s card and were inspired.

| | |

Tutorial: Easy Masking and Copic Coloring

Hi everyone, it’s Ardyth and I have a colourful spring card to share today!

Watch the video above  I  Watch the video in HD on YouTube

I started by cutting 12 stitched circles using a die from Stitched Essentials. I stamped 11 of them with the single flower stamps from Spring Wreath and the 12th with a sentiment from Everyday Greetings.

I cut masks for the flowers and blended blue ink over the circles. When I removed the masks, I coloured the flowers with Copic markers.

For the sentiment, obviously, I didn’t have a matching die, so I used a circle die that fit just inside the stitching, so that the sentiment circle would have a blue border and a similar look to the rest of them.

I popped up the 12 circles on a white panel cut with the stitched rectangle from Stitched Notes and then added some Party Mix Jewels to a couple of the flowers.

I hope you enjoyed the card and video. Have a great weekend!

| | |

Tutorial: Shaker Cards with Distress Oxide Inks

Hi Everyone! It’s Rina and I wanted to play with some sparkly sequins today. I used the Cuddly Cats stamp set to make 2 shaker cards.

Watch the video above  I  Watch the video in HD on YouTube

I created my card front with the Scallop Ovals, Hugs Shaker and Scallop Borders 2 die sets. The card front was inked with a combination of distress oxide ink colors in: Abandoned Coral/Antique Linen and Picked Raspberry/Old Paper.

Here are the copic markers used:

  • Gray – N1, NO
  • Light Orange – YR000, YR00, YR01
  • Pinks – RV00, RV02, RV11, RV13
  • Green – YG13, YG23
  • Light Brown – E30, E31

Embellishments use: Holiday Shimmer Mix, Sparkling Clear Sequins Mix, 3mm Sparkling Clear Sequins, Silver Mini Stars, Metallic Silver Confetti

I love mixing and playing around with the different sizes and colors of the sequins, so this was a super fun project to do.

Embellishments use: Blush Seed Beads, Rose Pink Seed Beads, Gold Mini Stars, Iridescent Mini Stars, Sparkling Clear Confetti

I hope you enjoyed watching my shaker cards and give this a try. Thanks for stopping by!

Rina

| | |

Spring Butterflies + Three Day Sale!

Hello friends, Eloise here and today I have a card featuring the Beautiful Butterflies Stamp Set along with the Bold Butterflies Dies (both are 30% off this weekend!), since they layer so nicely and then I brought in the Spring Frame Die since again, these products work so nicely together and it fit with the design of my card.

Watch the video above  I  Watch the video in HD on YouTube

To start off I cut out the Spring Frame Die and Bold Butterflies Dies from vellum and set them off to the side for later. I then used my MISTI to stamp out my butterflies from Beautiful Butterflies. I used a smaller and larger one since they layer the best and then I coloured them in with Copic Markers. I used a colour combo from Pinterest which is two shades of Pink, a green and blue to help colour these in as well. Once they were coloured in, I cut them out using the coordinating dies.

Copic Markers Used: R30, R81, R83, R85 / RV10, RV13, RV25, RV19 / YG01, YG03, YG07, YG09 / YG61, YG63, YG67, G28 / BG10, BG11, BG13, BG49 / C00, C0, C1, C3

Now that all my elements were ready to go, I added adhesive to the middle of the butterflies and adhered them on top of the vellum ones. For my background I water-coloured some stripes in coordinating colours and dried them off with a heat tool.

To finish up, I used the Stitched Notes Die Set and cut the frame from a piece of blue cardstock. I used the outer frame and added adhesive onto the back and adhered it to the vellum Spring Frame. I then added foam tape onto the back and adhered it over my water-coloured panel. I cut apart the ‘Flying By To Say Hello’ sentiment from Beautiful Butterflies and stamped that onto the background using my MISTI and black ink.

I adhered my butterflies into place and then scattered some Wisteria Blossoms Confetti Mix around the card.

Thanks for stopping by today, I hope you enjoyed, and I’ll see you all next time.

Eloise

| | |

Tutorial: Peek-A-Boo Easter Card

Hello friends, Eloise here and today I have an Easter project to share with you all. I used the Easter Eggs stamp set along with the Bunny Friends stamp set to create a peek-a-boo card.

Watch the video above  I  Watch the video in HD on YouTube
 

I started off with stamping out my eggs onto a white piece of cardstock with black ink. I used four different styles of eggs and arranged them in my Mini MISTI stamping tool. I left a gap between the top and bottom rows for a sentiment, too. Once they were stamped, I cut apart the sentiment ‘Happy Easter’ and stamped them next to each other using my MISTI once again to stamp them between the eggs. Next, I used the Bunny Friends stamp set, stamped out a few of the images with my MISTI as well. I then coloured in everything with Copic Markers.

Copic Markers Used: RV10, RV13, RV25, RV19 / B63, BV02, BV04, BV08 / YR00, YR02, YR12, YR18 / B21, B24, B26, B39 / Y11, Y13, Y15, Y19 / YG01, YG03, YG07, YG09 / BG10, BG11, BG13, BG49 / E41, E42, E43, E44 / W00, W0, W1, W3 / 0

Now to create the ‘peek-a-boo’ element. I took the coordinating die and placed it over top of the egg, just like I normally would. I then placed the piece of cardstock into my die cut machine and covered ¾ of the bottom of the egg, leaving the top bit without a plate covering. I then ran through the piece and removed the die. This allows the egg to be folded upwards and to reveal the inside. I repeated this for the rest of my eggs and set off the piece to the side. I then cut my bunnies out with their dies as well.

I then took a white card base and covered it with a piece of blue patterned paper. I placed my peek a boo panel over top and traced around the inside of the eggs on my card base with a pencil. I adhered my bunnies and flowers on the insides of each of the eggs with foam tape and then erased the pencil lines. I added a double layer of foam to the back of my peek a boo panel and adhered it over the same spot.

That finished up my Easter card for today, I hope you enjoyed and got inspired. See you all next time!

Eloise

| | |

Tutorial: How to Make An Inlaid Shaker

Hello friends, Eloise here and today I have a video sharing how to make the peacocks feathers from the Peacock Friends into a mini shaker. This is quite a long process, but the end look is super fun!

Watch the video above  I  Watch the video in HD on YouTube
 

To begin, I stamped out my images from Peacock Friends and coloured them all in with Copic Markers. I then die cut them all out using the coordinating dies.

Copic Markers Used: YG01, YG03, YG07, YG09 / BG10, BG11, BG13, BG49 / B32, B24, B26, B39 / YR00, YR02, YR12, YR18 / Y11, Y13, Y15, Y19

Once they’re all die cut out, I took the peacock image and used an exacto knife plus some detail cutting scissors to cut around each of the feathers. I made sure to leave the white border intact as well. Once I’ve cut around all the feathers, I made sure to keep the detail areas in case I needed them later.

Next, I took my Mini MISTI stamping tool, Staz On Ink and some acetate and stamped another of the same peacock image on it. I didn’t die cut this out, I left it on a larger piece of acetate until I needed to cut it down later. I added adhesive to the coloured peacock and adhered it over the acetate stamped one.

I then took another piece of white cardstock and cut the coordinating peacock die in the middle. I then added adhesive to the backs of the single feathers and adhered them at the top left and bottom right of my panel. I also stamped the ‘You Are Special’ sentiment onto the bottom of the card with black ink as well. I flipped over the panel, added adhesive around the die cut peacock and adhered the acetate piece into place. I cut off the excess and added foam tape all along the back.

I then pulled out some Navy Cardstock and cut it down to a card base. I then pulled some Mermaid Mix and Spring Meadow Mix Sequins since they matched the colours I used well and added them into the centre of the card base, took of the backers from the foam tape and adhered the panel into place.

That finished up my card for today, I hope you enjoyed, and I’ll see you next time

Eloise

| | |

Tutorial: Heat Embossed Spring Card

Hi everyone it’s Ardyth and and I’m back with a pretty, spring card today on the Pretty Pink Posh blog and YouTube channel!

Watch the video above  I  Watch the video in HD on YouTube

I used the Darling Dragonflies set. I love how cute these guys are with their happy smiley faces. I wanted a more elegant look, though, so after I stamped them, I filled in their heads and bodies using a Versamark marker before heat embossing them with a sparkly embossing glitter.

I added some ‘iridescent’ colour to the dragonflies’ wings with pale pink and blue Copic markers, flicked in each wing, close to the body. I created a lovely spring background with some simple ink blending – blue for the sky and spring green for the ground. And then I added some ‘grass’ by using the leaves from Crocus Flowers, pale grey ink and a green Copic marker.

I trimmed the panel with the stitched rectangle die from Stitched Notes and then I stamped the sentiment from Simple Sayings: Courage, using a grey ink, rather than black. I felt that black would be too harsh against my soft spring scene. I popped the panel up on a plain white card base.

As a finishing touch, I added a few Sparkling Clear Jewels.

Thank you so much for stopping by today, I hope you enjoyed the card and video.

| |

March 2019 Release Now Available

The March 2019 Release is now available in the Pretty Pink Posh Shop and select retailers that carry our products. If you missed our post yesterday, we revealed all of the products in picture form, but if you would like to see them in a video, Ardyth has that for you today!

Watch the video above  I  Watch the video in HD on YouTube
Hello, Gemma here today to share two cards featuring the new Bold Butterflies die set. I love the detail of these pretty butterflies and they are perfect for creating die cut inlay cards.

I began by creating my rainbow panel. I cut a piece of white card, approx. 3 x 3 1/8 inches. I took some scraps of paper in rainbow colours, cutting thin strips and adhering them with liquid glue to the panel until it was covered.

From this panel, I die cut the smaller of the Bold Butterflies dies, making sure to keep all the pieces. I also die cut the butterfly from plain white card. I adhered the rainbow panel onto my card base, then added the white die cut butterfly within the panel. In the spaces in the butterfly, I adhered the rainbow die cut pieces, filling it in like a puzzle.

The lovely thing about die cut inlay is you can make another card with the extra piece, in this case the rainbow butterfly I die cut from the panel.

For my second inlay card, I followed the same steps but added score lines to my white card panel instead, to match the rainbow stripes on the butterfly. To finish both cards, I stamped the sentiment from the Beautiful Butterflies stamp set.

Enjoy browsing the Pretty Pink Posh Shop full of the new products. There will be more inspiration with the new release in a two day blog hop filled later this week. We hope to see you there!

| | |

Tutorial: Pinata Birthday Shaker Cards

Hello! Rina here with you today. I loved working with the Piñata Party set and knew instantly that I wanted to pair it with the Celebrate Shaker Die.  I am doing a rainbow theme and the Party Mix Jewels were perfect for this design.

Watch the video above  I  Watch the video in HD on YouTube
 

I made a simple striped watercolor background using Dr. Ph Martins Hydrus watercolor, but any watercolor would do.  I made a skinny striped background along with a wider striped background in rainbow color order.

While my backgrounds dried, I colored the images using Copic markers.

Copic Markers Used:  R20, R22, R25 / YR01, YR02 / Y000, Y11 / G00, G02 / B00, B02 / V01, V05 / C1, C3

To make the shaker I cut my panels to standard card size and used the Celebrate Shaker die to cut out the shape in the middle of the panel.  I used the Celebrate Shaker die to cut out glitter paper.  I used the die cuts from the glitter paper to inset into the panel and adhered with tape.  I adhered acetate to the back of the panel and created the shaker well using 2 layers of double sided foam tape.  I added the shaker bits into the well and used a ton of Pretty Pink Posh sequins and confetti.  Here is what I used for the shaker bits:

Party Mix Jewels

Silver Mini Star Confetti

Blush Seed Beads

3mm Sparkling Clear Sequins

Sparkling Clear Confetti Mix

10mm Sparkling Clear Sequins

I adhered a backer sheet to cover the sequins.  I stamped a sentiment to the front of the card and then placed the images.  Finally I adhered the card front to a top folding card base.

I hope you enjoy and try out this colorful card!

Rina