It’s Justine again with a new video process tutorial. Today I’m using my prismacolor pencils to colour on a dark background in order to make an elegant Christmas card. These coloured pencils are so highly pigmented that they showed up on black cardstock. If you would like a true colour from your pencil, colour in white first, then colour overtop with the colour of your choice.
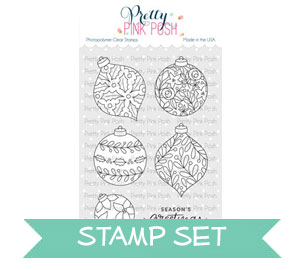
I used the Decorative Ornaments stamp all over the background and I embossed it using gold embossing powder. I coloured in all of the little elements. I tried my best to switch up the five colours on the background and I think leaving some in black really made the colours pop.
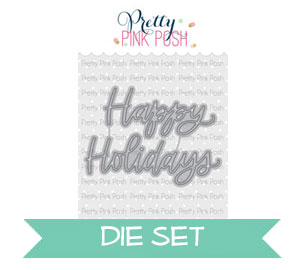
Lastly, I die cut the Happy Holidays Script die and embossed it three times in gold embossing powder to make it more like chipboard rather than a paper die. In such a busy background, I wanted to make sure the sentiment didn’t get lost nor take away from the background so this was a perfect choice.
I hope you enjoyed today’s video and technique. Thanks for stopping by and joining us today!
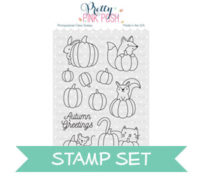
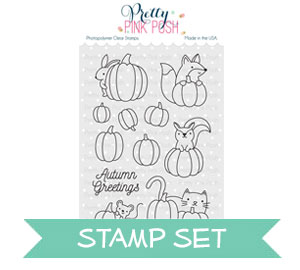
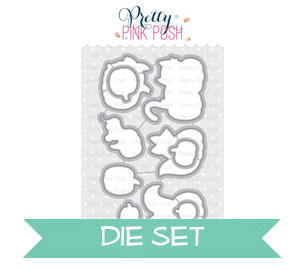
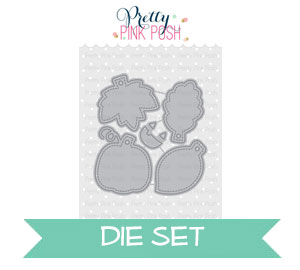
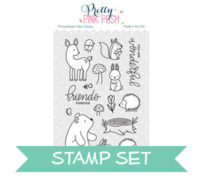
The Pumpkin Patch Critters stamp set features adorable critter peeking from behind various size pumpkins. I thought they would make a great focal point for simple, easy to make Fall greeting cards for family & friends.
Watch my video tutorial below to learn how I made this card.
I made 4 cards to create a set, all feature the same layout and supplies and are very easy to make – you just need a handful of things. I started working on these by stamping the sentiment “Autumn Greetings” in the center of 4 1⁄4 x 5 1⁄2” panels. Next, I stamped a pumpkin and critter above the sentiment in Copic-marker friendly ink.
Once my stamping was done I used Copic markers (as I consider them to be a quick and efficient way to color) to color. I used:
YR07, YR04, Y17 and Y15 for the pumpkins;
YG95 and YG99 to color stem of the pumpkins;
W3 and W 1 to color bunny and cat;
E79, E37, E33 and YR04 to color the fox and squirrel.
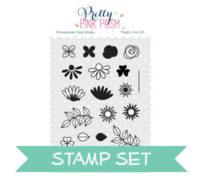
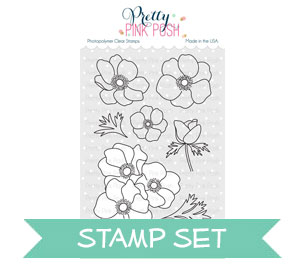
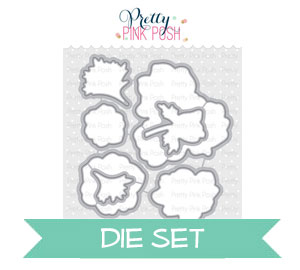
I wanted to add something else to my projects, so I decided I’d stamp tiny florals. I used the Bold Blooms stamp set for this. This is a smaller set with a bunch of beautiful flowers that work really great as little accents on cards. In my recent video, featuring the Happy Mail stamp set and seasonal Happy Mail cards, I used the same flowers to dress up a mail box and they made my cards that much more beautiful and complete.
I used the same marker colors here as before plus a few yellow makers – Y35 and Y13 and once I had all of these colored I used my coordinating dies and cut these out in my die cutting machine. I did keep some of the flowers almost white by coloring them using a W1 marker for a little bit of shading.
Next, I tied gold thread into a messy bow and adhered under the stamped pumpkins. My idea was to have gold thread sticking from behind the tiny floral cluster that I foam mounted on top.
Once everything was done I trimmed my panels down to 4” wide as the stamping seemed a bit off to me, so by trimming the panel I made sure the stamping was centered. I adhered my panels onto A2 light brown woodgrain card bases and used Metallic Gold Jewels to dress these cards up. Gold seems like the perfect option for Fall, it complements the warm Autumn colors beautifully.
I also added some subtle stamping onto some of the panels using yellow ink and images from the Holiday Greetings stamp set.
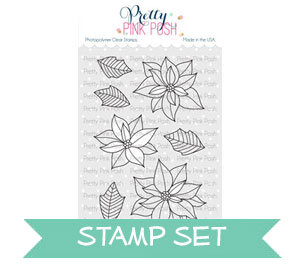
Hello, it’s Mindy here with a new video. This release is over-the-top amazing! Today, I’m sharing a card featuring the Poinsettias stamp set. I also have created a video showing how I created it that you can watch down below.
I stamped all the images from this set onto Bristol Smooth cardstock and embossed with white embossing powder. Then I ink blended Festive Berries and Spun Sugar Distress Oxide Inks. For the leaves, I ink blended Cracked Pistachio and Peacock Feathers Distress Oxide which is such a gorgeous combo for leaves. Then I die cut using the coordinating dies.
I attached my flowers and leaves onto a 3 3/4″ x 5″ piece of Fog Cardstock and trimmed off the over hanging pieces. I layered my card with White cardstock an Cherry Red cardstock for a base. The banner with my sentiment is heat embossed with white embossing powder onto Black cardstock using the Angel Friends stamp set. This banner is such a perfect way to add a sentiment.
I finished off the card by adding Silver Moondust Nuvo Drops to the centers of the flowers and some Jewels around the empty spaces. Have you seen the new jewel mixes? They are so gorgeous!
Hi friends, it’s Rina here today. I am loving the new holiday release from Pretty Pink Posh. I have been obsessed with ink blending from light to dark so I thought I would play with the new release and try this technique out.
Today I am using the Penguin Pals and the oldie but goodie Happy Snowman stamp sets. I am also using the latest script dies which are so beautiful. I absolutely loved how they looked on my finished cards. I used the Season’s GreetingsScript and Happy Holidays Script dies. I also had to try out the Pine Sprigs dies and they are so elegant and delicate.
I cut a 4 ¼ by 5 ½ inch panel and cut it twice using the Scallop Borders 2 dies to create hills. I adhered them to my card base and arranged the images, pine springs and script die cuts.
Welcome to a super special event that Pretty Pink Posh is participating in! Save the Crafty YouTuber, created by our own video member, Justine Hovey, is an event where many videomakers come together to help support, promote and introduce new craft channels to the crafting community. In addition, this is Day 2 of our Thanksgiving Theme Week!
Don’t forget to comment for a chance to win over 100 prizes, subscribe to show your support and come back and visit these channels in the future. Pretty Pink Posh is sponsoring 8x $25 gift certificates to help support the event, so be sure to go to YouTube to watch the video and comment (comments left on the blog will not qualify). You have until November 7th to leave a comment and winners will be announced on November 10th on Justine’s Blog!
The theme today is quick cards and videos so Justine created a quick card and showed off how she embosses die cuts to make fun backgrounds! The background uses the Fall Tags dies randomly all over. The card is then topped off with the Thanks Leaf Shaker die in a stunning gold to make it pop!
Sometimes white gets a little bit washed out so by switching up the colours and filling in the negative space of the dies with some red cardstock, truly makes an entirely new and fresh looking card. Thanks for watching and supporting the Save the YouTuber event!
Hi crafty friends, Eloise here and today I have a simple window card to share with you all using the SmallStitched Foliage Die Set as well as some jewels.
To begin I die cut theSmall Stitched Foliage from a square piece of white cardstock. I then used that piece as a mask to trace out the leaves on a card base, so I knew where to adhere the jewels. I picked four colours of jewels that I thought were the most fall like and used those to “colour” my leaves.
I laid down strips of thin adhesive and adhered down my jewels over each of the leaf shapes. I used all random sizes to get them to fit the best. I then added foam tape around the jewels and onto the back of my window die cut and adhered them down onto the card base.
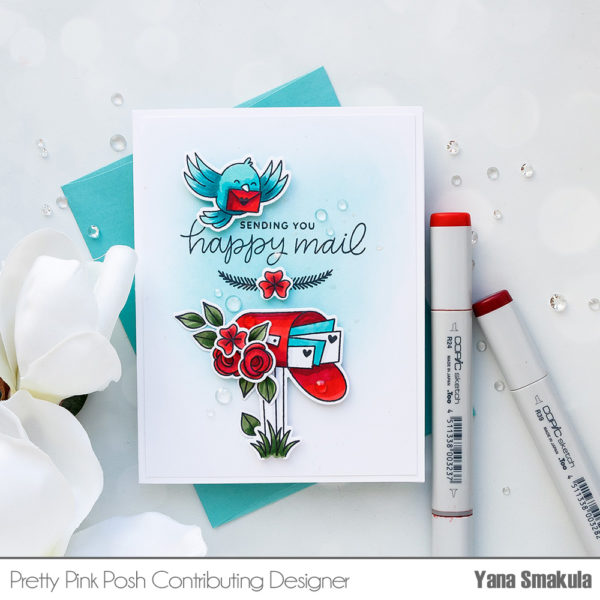
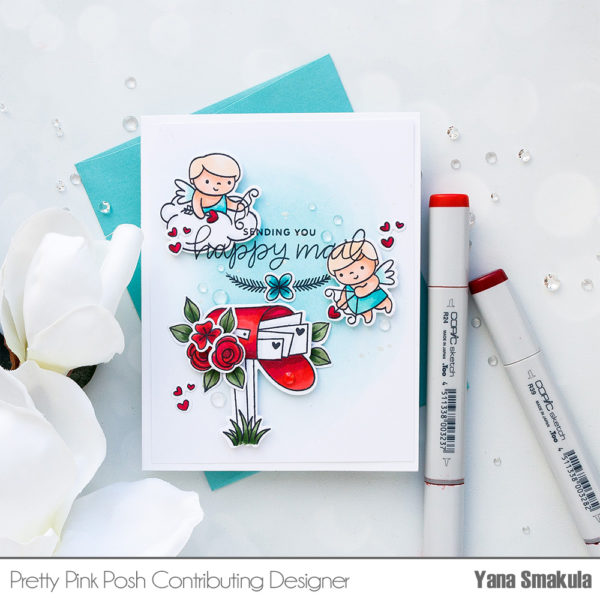
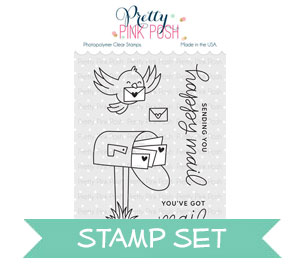
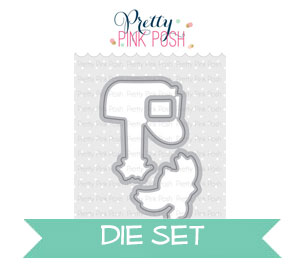
Hello Pretty Pink Posh fans! This is Yana and today I have several seasonal cards to share featuring the Happy Mail stamp set. This is a smaller set that features an adorable mail box, a little bird carrying a letter, one additional letter image and two sentiment – Sending You Happy Mail and You’ve Got Mail. There are also coordinating dies available that will cut all of the images in this set out.
It’s a fun and playful set that can be used to create everyday cards. This set has also impressed me as an all year round set as I feel it works well for every season and can be adapted to just about any holiday. In this video I’ll show you how I used it along with other set from Pretty Pink Posh to create 4 cards for different seasons.
Watch my video tutorial below to learn how I made this card.
Greens: YG67, YG63 (I usually add a YG03 to this combo, but I need to refill it)
Teals: BG18, BG15, BG32
Orange: YR07, YR04, Y17
I cut all of my stamped images out in my Platinum die cutting machine and used to create 4 cards. See details for each below.
Everyday Floral Mailbox Card
I blended Maliblue ink from Simon Says Stamp to create a background and added splatter using Hero Arts White Iridescent Shimmer ink. Stamped “Sending You Happy Mail Sentiment” in black ink along with two branches from the Holiday Greetings set.
I blended Orange Slush ink from Simon Says Stamp to create a background and added splatter using Hero Arts White Iridescent Shimmer ink. Stamped “Sending You Happy Mail Sentiment” in black ink along with two branches from the Holiday Greetings set.
Foam mounted the mailbox. I stamped, colored and cut out additional images – mushrooms from the Woodland Critters set, leaves from the Autumn Blooms set and used them to set a Fall scene. Dressed the card up with the help of Sparkling Clear Jewels.
Holiday Mailbox Card
Again, I blended the same Maliblue ink from Simon Says Stamp to create a background and added splatter using Hero Arts White Iridescent Shimmer ink. Stamped “Sending You Warm Winter Greetings”, I made sure to use sentiment that had a word “SENDING” in it as I think it associates well with the mailbox and letters.
I also used holly leaves instead of flowers and mushrooms I colored my bird as a Robin bird and colored some of the letters green to to with the Red, White and Green color combo. All of the additional images I used here came from the Holiday Greetings stamp set. Dressed the card up with the help of Sparkling Clear Jewels.
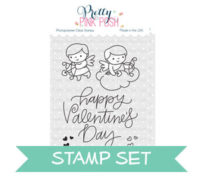
Valentine’s Day Mailbox Card
And last but not least I have a card for Valentine’s Day! Here I once again used lots of flowers (these are from the Bold Blooms set), but I also added two little cupids above the mailbox. They are shooting their arrows and sprinkling lots of hearts around. These images came from the Cupid Friends stamp set.
Conclusion
The Happy Mail stamp set can be easily incorporated into other seasons and occasions. If you swap flowers for easter eggs and add an easter bunny you can use it for an Easter card, Add more flowers and a Mother’s Day sentiment and you’ve got a card for mom and so on.
For my background, I also use a piece of Bristol Smooth cardstock and lightly ink blend Twisted Citron Distress Oxide in the middle making my way out towards the outer edges of the card panel.
It’s Justine here again with a monthly video tutorial for you. Today I explored the world of no-line colouring which I have only done a few times and thought I would try it out using some fall colours on kraft cardstock. Kraft cardstock is a staple in my craftroom in the fall because I think it coordinates perfectly with red, yellow, orange and brown.
Pencil Colours: Scarlet Lake, Crimson Red, Chestnut, Dark Chocolate, Chocolate, Light Umber, Goldenrod, Yellowed Orange, Yellow Ochre, Cadmium Orange Hue, Orange, Spanish Orange, Metallic Gold, Beige Sienna, Clay Rose
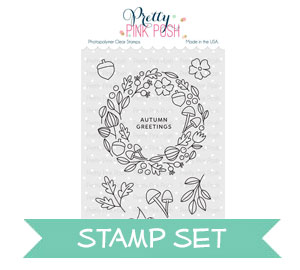
I used the Autumn Wreath stamp set from the latest release since I wanted small, manageable images to colour. Each time I saw a small dot where I was to colour, I embellished it instead with Espresso and Marigold jewels to add more interest and to save on some of the colouring. I used my Prismacolor pencils to colour this image.
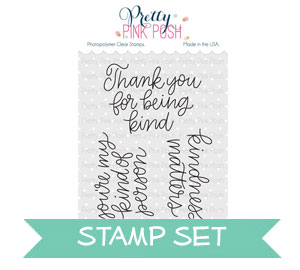
I finally embossed the sentiment using Penny embossing powder and the Simple Sayings: Kind stamp set. I mounted my card panel onto some white cardstock to add a frame around my card and add some brightness for a finished look.
I hope you enjoyed today’s video and technique. Thanks for stopping by and joining us today!
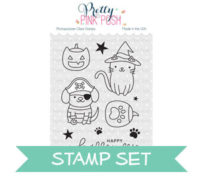
Hi friends, Eloise here today with another video over on the YouTube channel. I’ll be using three of the brand new stamp sets; Halloween Pals, Pumpkin Patch Critters and Cuddly Cats to create three grid design cards. I love using this layout to use many images at once, and to also create quick and easy cards that you can mass produce easily. I’ll be using the same supplies and the same concept for each card as well to make them quicker to make, as well.
To begin my cards today I started off with stamping out all my images. I used Copic Friendly black ink and Neenah Solar White cardstock. I stamped out a ton of the images, enough to make a grid on each of my cards and then coloured them in with Copic Markers.
Now that all my images are coloured, I used the coordinating dies to cut them all out. I then set them off to the side in their groups and worked on my card bases. I used some green cardstock to create two regular sized card bases and one square card base for all three of my projects,
I then used the Dotted We R Memory Keepers Embossing Folder to emboss on all three of the card fronts, to just give them a little extra detail. I then added foam tape onto the backs of all my images and arranged them onto my card bases.
Now that all my images were adhered to my card bases in their grid design, my last finishing touch was to add the sentiments. I used the sentiments from each stamp set and white heat embossed them onto strips of black cardstock. I then added more foam tape behind the sentiments and adhered them into place onto my cards.
So that finished up my projects today, super simple and easy to create. Of course, you could go more elaborate on the backgrounds and make them all look more different, but this is just a super simple way to create these simple cards.
Thanks so much for stopping by today, I hope you enjoyed, and I’ll catch you all next time.


 It’s
It’s