Sneak Peek: School Friends
Hello everyone! Alix here as a guest designer sharing products from Pretty Pink Posh upcoming June release. I have been a Pretty Pink Posh super fan for quite a while and I am so honored to start this exciting moment with you.
To begin with my card, I first stamped the images from School Friends stamp set on a piece of cardstock paper and cut them with School Friends coordinating dies. Then I colored them with my trusty copic markers and set aside.

I wanted the have the main focus on my shaker window, so I decided to keep the card base almost pure white. For inked background, I ink blended background using distress ink oxide in Tattered Rose, Abandoned Coral and Candied Apple, then I stamped sentiment that comes with this stamp set with some Watermelon Jewels to embellish.

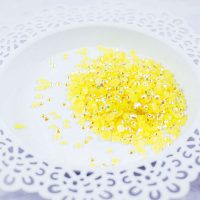
To create the shaker window, I cut the frame for 5 times using the Scallop Ovals, then I glued 4 of them together sandwiched with a piece of acetate paper and the last frame die cut. Before I closed up the top, I poured some Iridescent Mini Star Confetti and 3mm Sparkling Clear Sequins. When its ready, I attached the window onto a A2 base card front.

I arranged all colored images around the window using glue and double sided foam squares to create some dimensions. At last, I scattered 4mm Sparkling clear sequins and 6mm Sparkling clear sequins onto the bottom of this card.

For Copic coloring references for this card:
Girl
Hair: E31, E23
Skin: E000, E00, R20
Backpack G00, BG10
Clothes and Skirt: RV13, RV13, R14, R22
Boy
Hair: N2, N4, N6
Skin: E000, E00, R20
Clothes: B21, B23
Pants: E31, E34
Shoes: N4, N6
Apples
YG03, YG23, R14, R27
When you are holding a cute and lovely stamp set, there is no way that you could only make one card. So this second card idea came up very quickly. The scene I wanted to create is that a nerdy boy who likes to bury himself in a library with tons of book. A shy girl who had crush on him expressed her feeling with full courage.

I started to ink blended distress oxide in Peacock Feathers, Twisted Citron and Cracked Pistachio onto a piece of watercolor paper. I sprayed water over inked background and removed all wet spots with a piece of paper towel. When it dried, I splattered a mixture with ink and water over upper portion of background to add some interest.

While I was waiting for background to dry completely, I cut my white frame using the Scallop Frames and I popped them up using double sided foam squares to create dimension. I did my pick and choose for the best images to create my ideal scene and colored them with copic markers. Then I arranged them inside of the frame I created.

I stamped sentiment that comes with this School Friends Stamp set with very black dye ink since my background is in slightly darker color. I also stamped mini hearts around them and added 1/4″ Iridescent star confetti to create lobe sparkles between them.
Face: E00, E00, R20
Clothes: R02, R20, G000, G00
Shoes: N00, N02
Backpack: B0000, B00
Case: YG21, YG23
Apple: R14, R27, YG21, YG03
Boy
Face- E000, E00, R20
Hair: E19, E39, E29
Shirt: N00, N02
Books
Y11, Y13, G000, G00, B000, B00, R02, R20, YG21, YG03
I hope you enjoy my projects and thank you for stopping by. Don’t forget to come by tomorrow to see more sneak peeks!


 After I finished watercoloring as shown in the picture above, I added more details on those blossoms by using
  Just compare the two photos of before and after adding pencil detailing. It is always fun to look how the images come to life by a little bit of pencils touch.
 After coloring was done, I added splatters of dark watercolor ink and white acrylic ink onto the panel and let them dry. In the mean time, I diecut
 That’s it from me today. Thank you so much for visiting and reading this post.