Cards

|

Sneak Peek: Darling Dragonflies + Simple Sayings: Miss You

Good morning Pretty Pink Posh friends! Heather here this morning with a peek at some of the upcoming Pretty Pink Posh Release! I get to share a sneak peek with you featuring the CUTEST little dragonflies ever – as well as a fabulous new sentiment set! On my second card I also used a few of the new colors of seed beads that are part of this fabulous release!
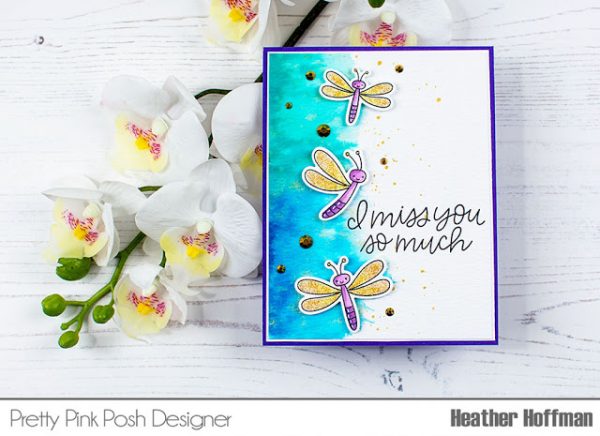
First up, I created this watercolor card, using the colors I think of when dragonflies come to mind. I used my Peerless watercolors to create a pretty ombre watercolor background, then added some gold splatters with my Gansai Tambai Starry Colors Palette.
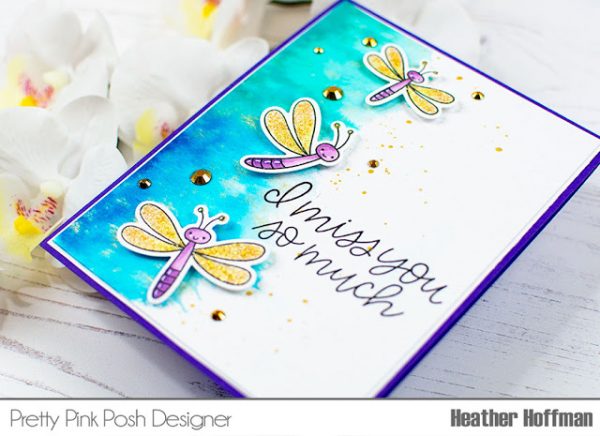
I stamped and colored the adorable dragonflies from the new Darling Dragonflies stamp set, then cut them with the coordinating Darling Dragonflies coordinating dies. I added some Nuvo Honey Gold Glitter Drops to the wings for some extra sparkle as well!
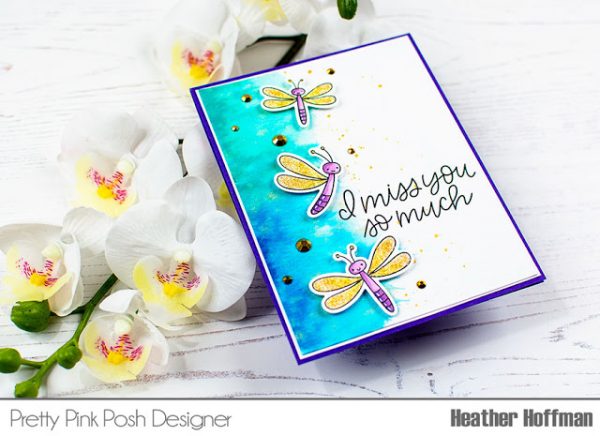
I stamped my sentiment from the new Simple Sayings: Miss You, then mounted the dragonflies around it with foam adhesive. I matted that panel with a bit of white cardstock, then mounted on a cardbase made with deep purple cardstock. Finished off with a few Metallic Gold Jewels – the perfect finishing touch!
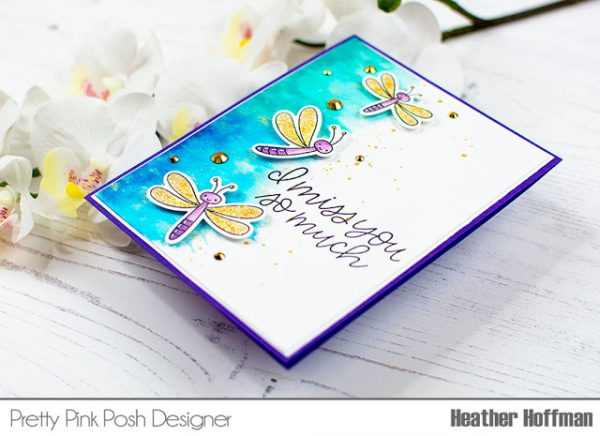
Next up, I pulled out an older die, Stitched Film Strip, and created a fun little scene with some of the additional images in the stamp set – and turned it into a shaker card filled with some of the pretty new seed beads!
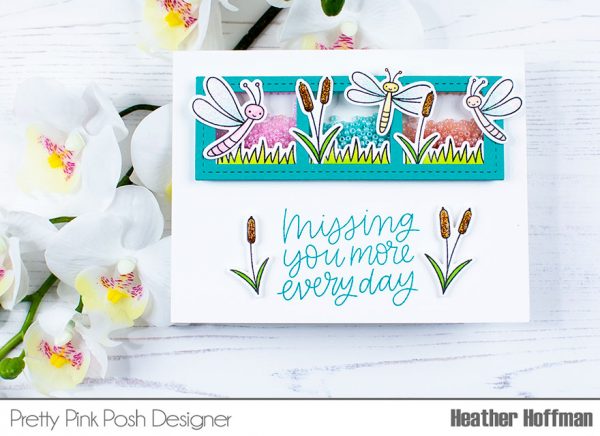
I love the little grass and cattail stamps in Darling Dragonflies – so cute for scene building! And the grass fit PERFECTLY behind each of the windows on the Stitched Film Strip. I separated each window of the die to create the shaker element, and filled each window with a different color of beads (Cotton Candy, Aquamarine and Blush).
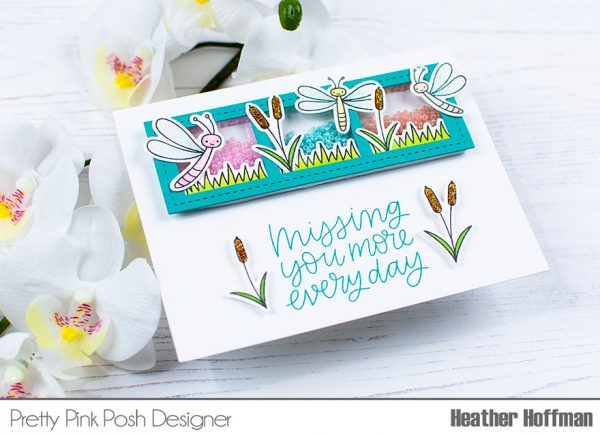
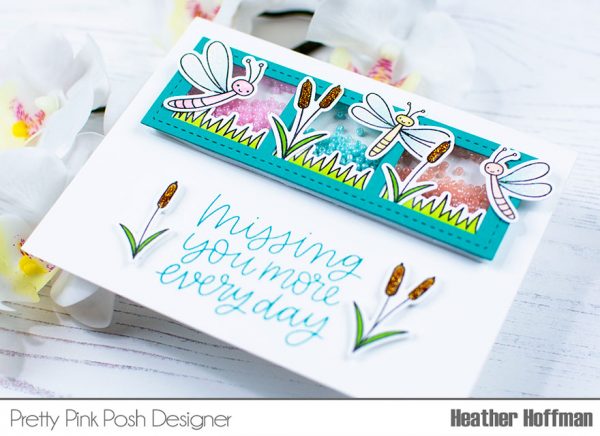
I stamped my sentiment underneath, again from Simple Sayings: Miss You using an aqua ink that coordinated with the Stitched Film Strip, and added a couple extra cattails next to the sentiment. Finished off with some Golden Sunset Nuvo Drops on the cattails, and some White Blizzard Nuvo Drops on the wings for lots of sparkle!
Hope you enjoyed today’s sneak peek! Join us tomorrow for another sneak peek of the June release!

|

Cherry Blossoms & Hummingbirds

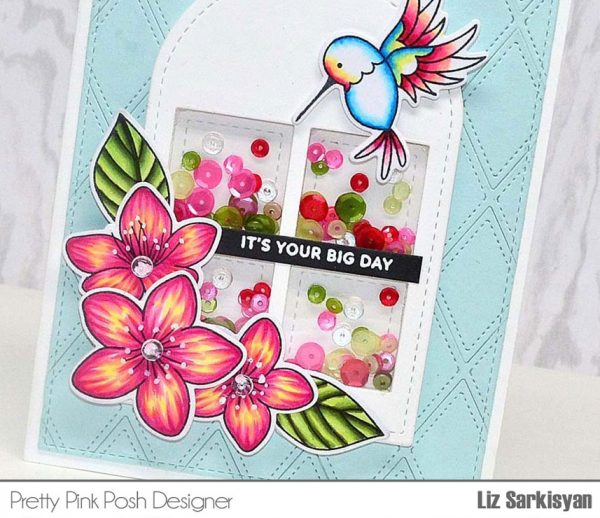
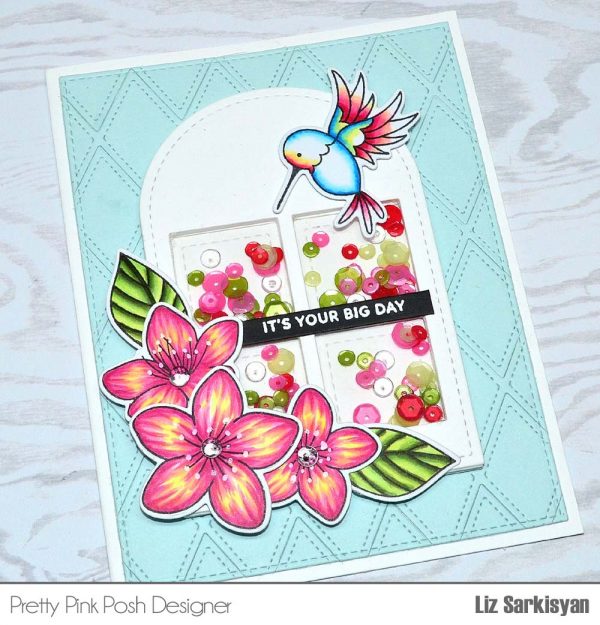
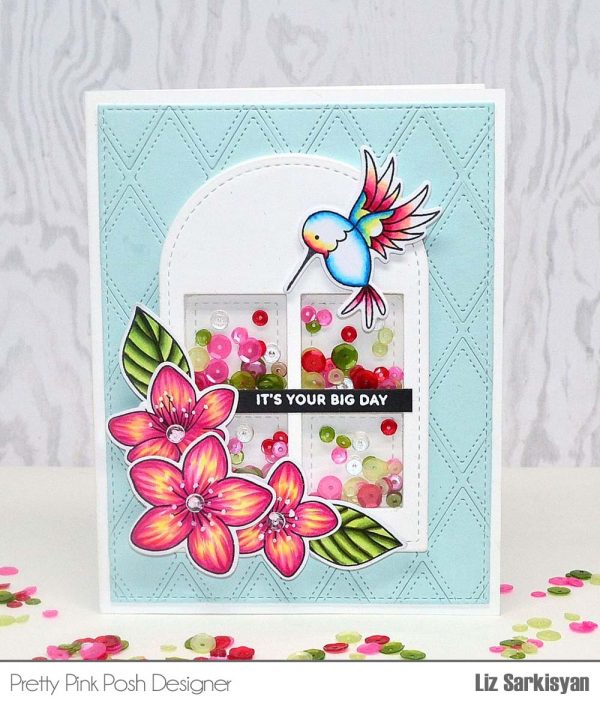
Hi there, Liz here. I absolutely love these Cherry Blossoms flowers from Pretty Pink Posh and couldn’t resist but to make a birthday shaker card to make someone smile.

To get this card started, I decided to create the background first using the Stacked Edges 2 die and use the diamond shape border for the design. Therefore, I die cut several rows using the same color and placed them together onto a piece of card stock. Later, I ran it through the die cut machine for the size I wanted and to press more firmly all together.


Next, I moved onto the shaker portion of the card where I used one of my favorites, the Stitched Duo 3 and added this wonderful Berry Bright Mix of sequins which has an array of sizes including 4mm, 6mm, and Clear Droplets. Plus, I love the color combination of pinks, reds, green, and clear.

Moving on, I stamped several flowers and leaves from the Cherry Blossoms set and colored them using my copic markers and reached for the coordinating die to help me cut them out. Next, I colored this gorgeous hummingbird from the Hummingbird Thanks set along with using the coordinating die.

Afterwards, I thought it would be great to add a sentiment so I pulled out the Everyday Greetings since it has a combination of big and small fonts. For this card, I used the smaller font “It’s Your Big Day” and embossed it using white embossing powder.

To finish this card, I added some Clear Droplets in the center from the sequins mix and used some foam mount tape to pop the big flower up and hummingbird. Love how the clear droplets sparkle and adds to the detail.

I hope you enjoyed this post. Join us tomorrow for the start of sneak peeks of our June release!

|

No-Line Coloring Flourishing Fuchsias

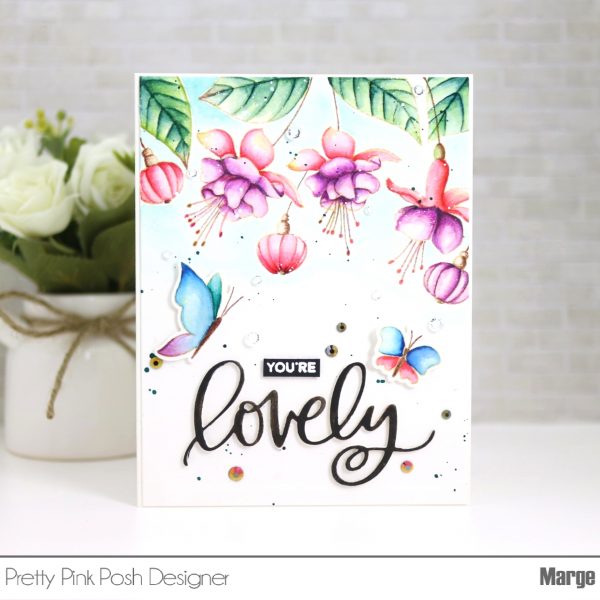
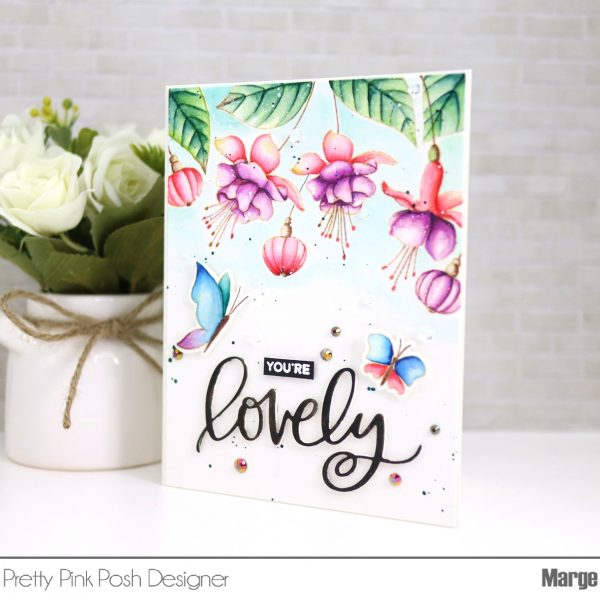
Hi, everyone! It’s Marge here and I’m sharing a no-line watercolor floral card with you, featuring some of the items from the May release.

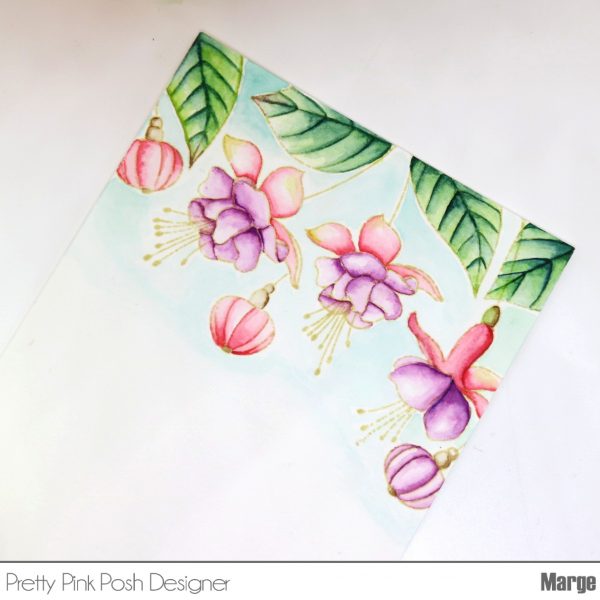
To begin my card, I stamped floral images from Flourishing Fuchsias stamp set on A2 size cold press water paper using Distress ink Antique Linen. I ​also stamped butterflies from Butterfly Friends stamp set on separate watercolor paper. Then I watercolored them using my Daniel Smith Watercolor paints (Quinacridone Coral, Rose of Ultramarine, Quinacridone Gold, Sap Green, Prussian Green, Ultramarine Turquoise, and Burnt Umber).

After I finished watercoloring as shown in the picture above, I added more details on those blossoms by using Polychromos colored pencils. I cut butterflies using the Butterfly Friends coordinating dies.
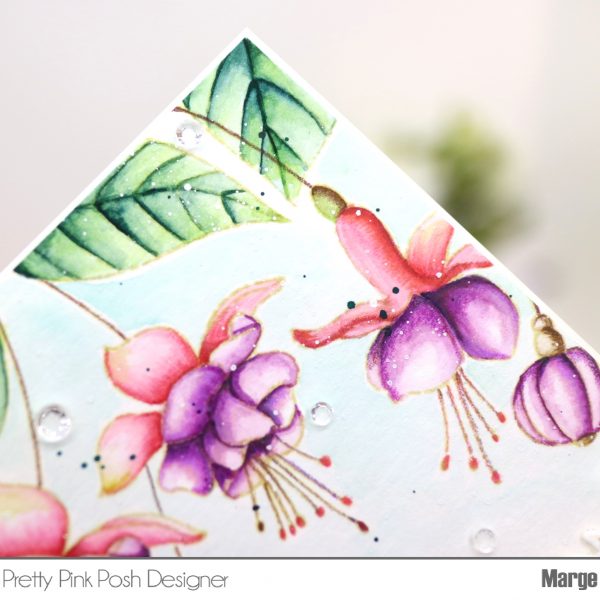
Just compare the two photos of before and after adding pencil detailing. It is always fun to look how the images come to life by a little bit of pencils touch.
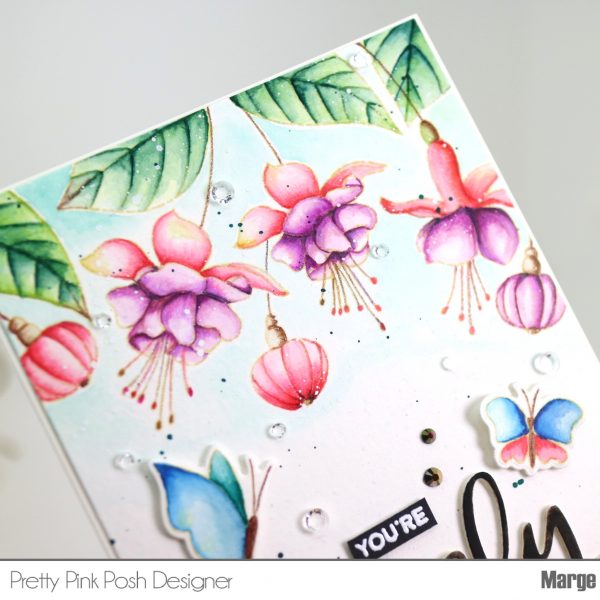
After coloring was done, I added splatters of dark watercolor ink and white acrylic ink onto the panel and let them dry. In the mean time, I diecut Lovely Script Die from watercolor paper three times, then I glued them top on top to give the script some dimension. I colored the top surface with black watercolor ink. Sentiment “You’re” is from Bear Hugs stamp set.
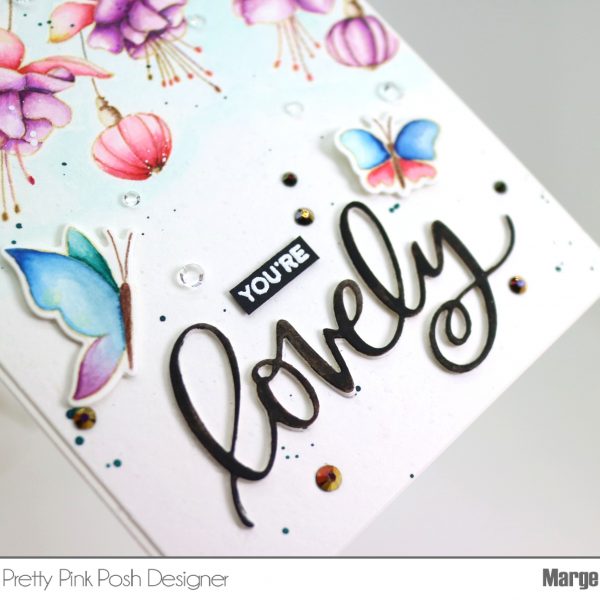
Next, I adhered sentiments and butterflies onto the panel using glues and foam tapes. To finish, I adhered the panel onto A2 card base, then I embellish the card by adding some Jewels. For this, I used Metallic Rose Gold Jewels and Sparkling Clear Jewels.

That’s it from me today. Thank you so much for visiting and reading this post.
Marge

| |

Everyday Playful Puppy Cards

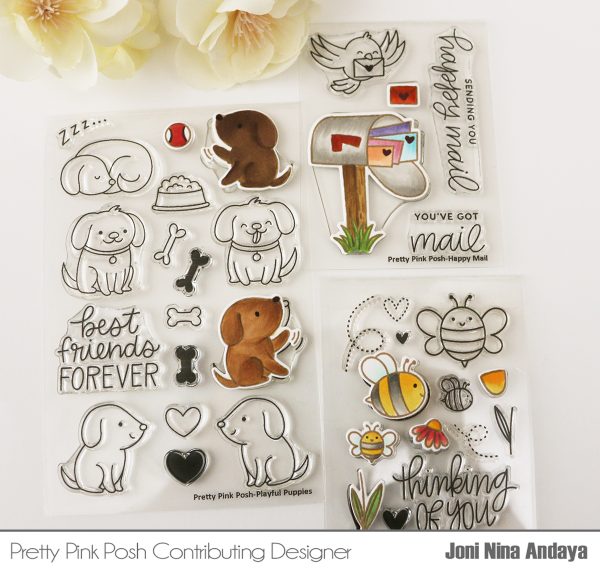
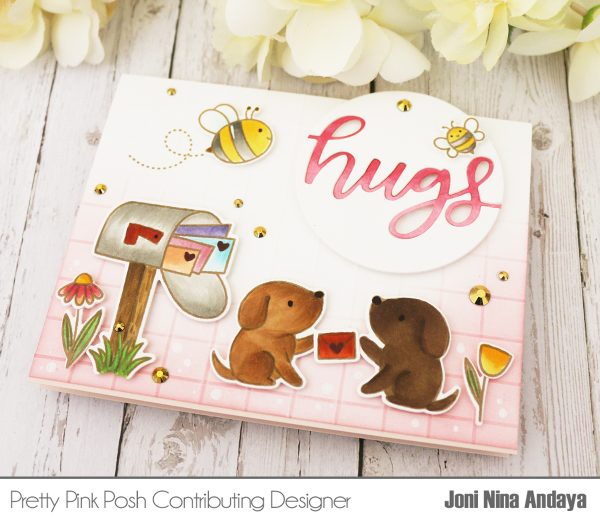
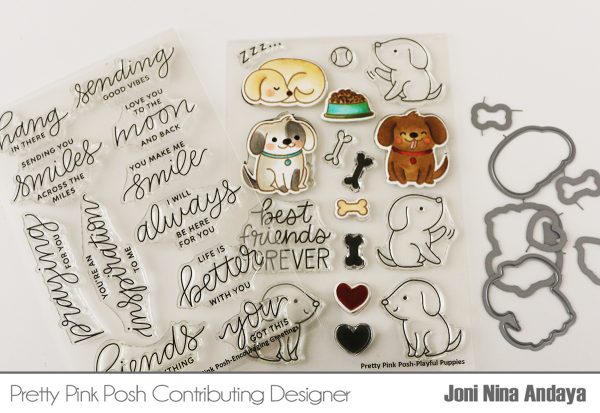
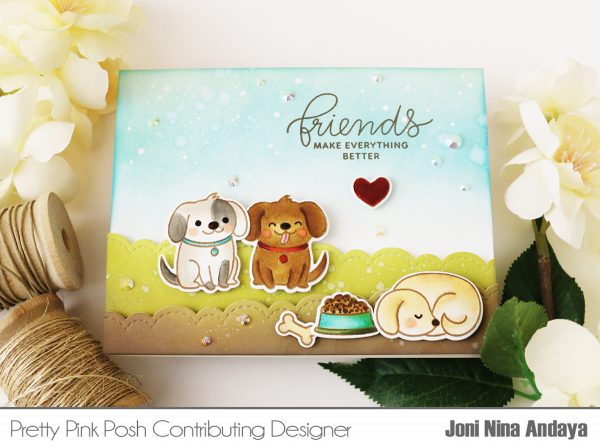
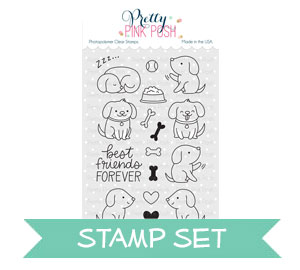
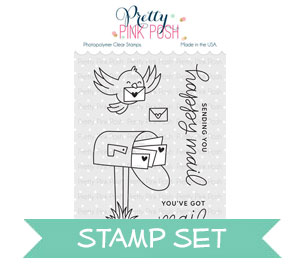
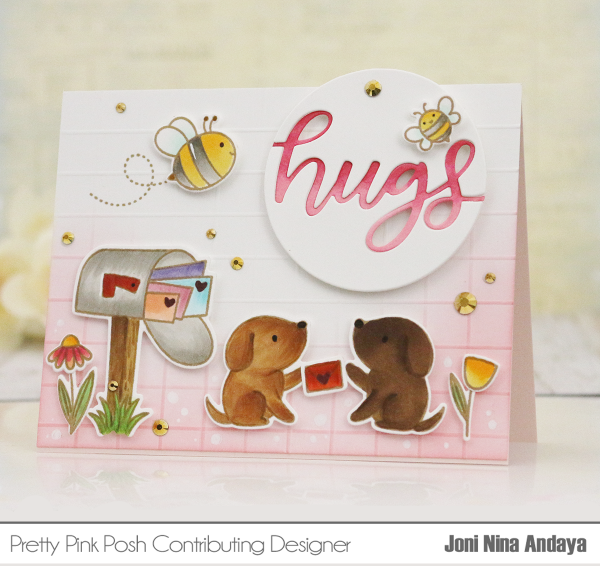
Hello everyone, Joni here sharing my take on the new released Playful Puppies stamp set and the Playful Puppies coordinating dies. I also used the new Happy Mail stamp set, Happy Mail coordinating dies along with the oldie but goodie Bee Friends stamp set and Bee Friends coordinating dies.

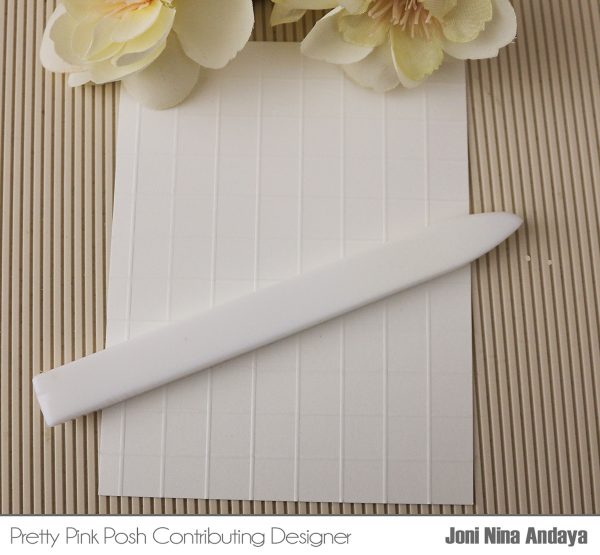
To start my project I first scored my white card panel to create interest on the background with less bulk.

Next, I stamped and die-cut my pieces from the Playful Puppies stamp set with the Playful Puppies coordinating dies, Happy Mail stamp set, Happy Mail coordinating dies, Bee Friends stamp set, and Bee Friends coordinating dies.

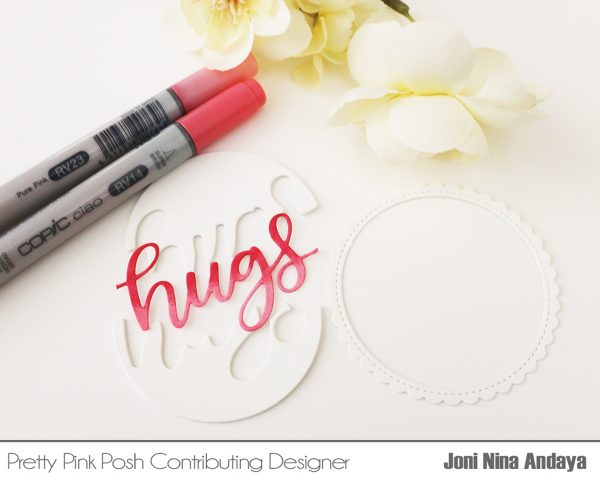
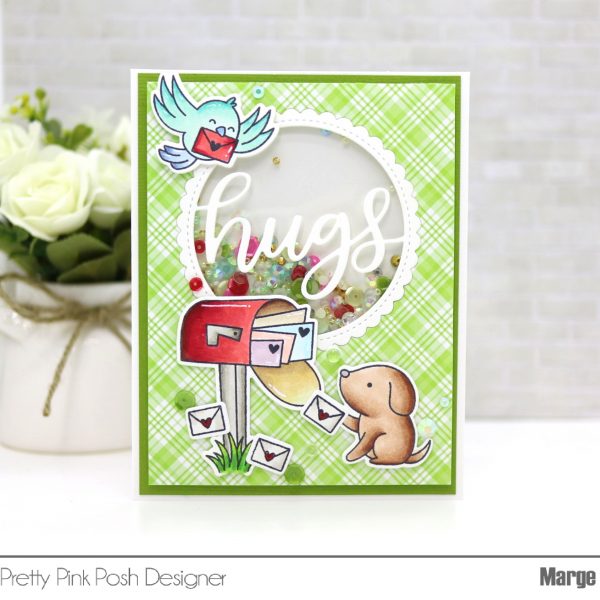
Next, I die-cut the new Hugs Shaker Die, but left off the scalloped circle. I also did cut 3 times then stacked the pieces and Copic color the “hugs”. I also sandwich the hugs in between to give that interest on the die-cut.

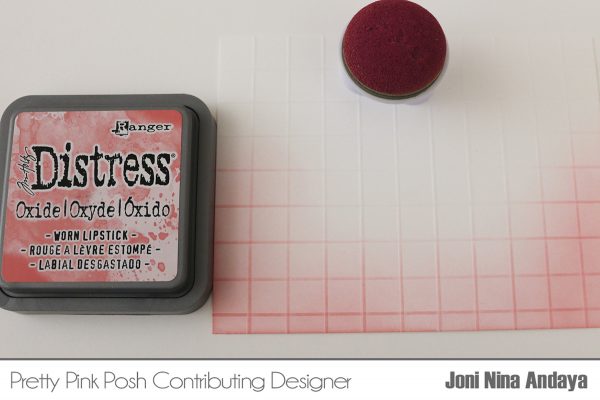
I also distressed the panel with Distress Ink Oxide.

Here’s the final piece, I literally adhered everything with foam tape for dimensions. I also incorporated the new Metallic Gold Jewels to give it bling.

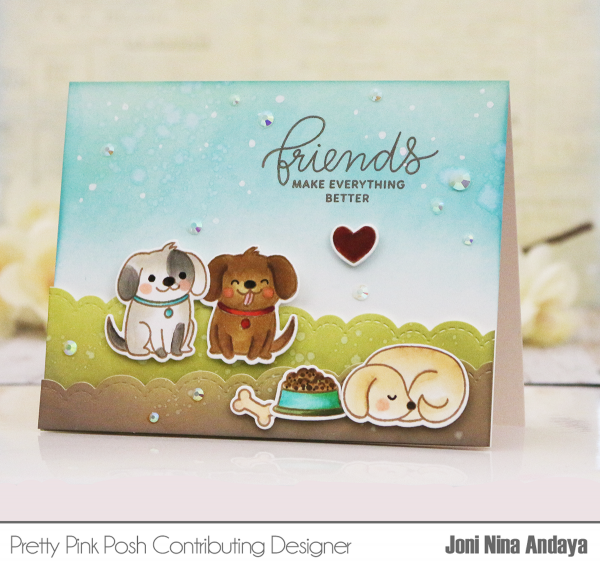
For this next card, I completely used Playful Puppies stamp set and its coordinating Playful Puppies Die set.

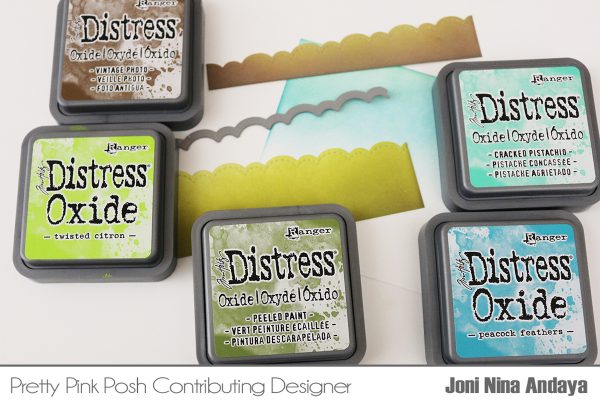
Next, I distressed the white panel with different colors of blues and greens using Distress Oxide. Then die-cut with Stitched Borders 3 Dies.

Then, I stamped, colored, and die-cut them. I also used the sentiment from Encouraging Greetings stamp set.

I also incorporated the new Ivory Jewels to finished off the card.

I hope I have inspired you! Have a wonderful week 😊

| | |

Tutorial: Creating With Stencils & Stamps + Video

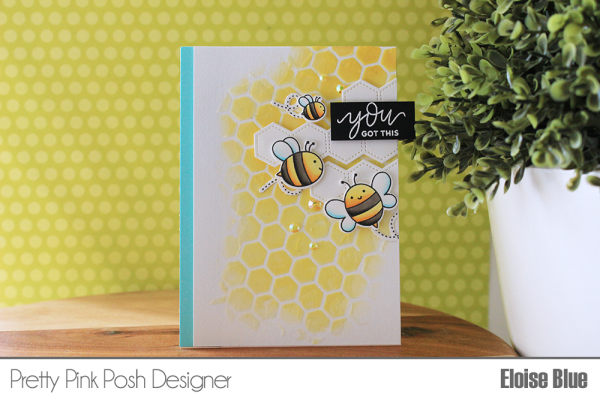
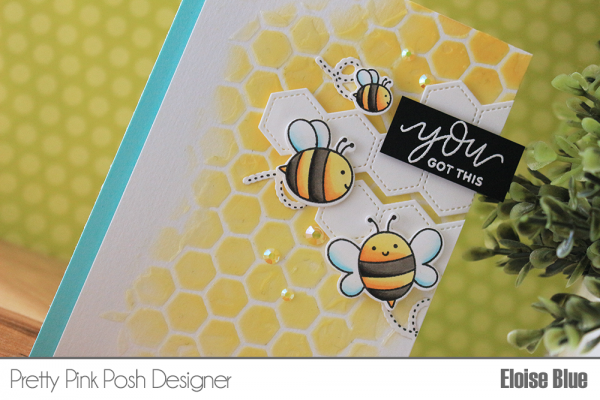
Hi everyone, Eloise here and today I’ll be using the older Bee Friends stamp set, along with a few newer items; Encouraging Greetings Stamp Set and Stacked Edges 2 Dies to create an encouragement card. I’ll be pulling in a honeycomb stencil and some texture paste to create a glossy stenciled background which fits my theme perfectly.

Watch the video above  I  Watch the video in HD on YouTube
 

To begin, I first started off with a piece of watercolour paper, taped it down onto a craft sheet and laid over my Tim Holtz stencil at an angle. I then ink blended some Squeezed
Lemonade and Fossilized Amber Distress Oxide Inks over the top. While blending, I was careful to not go over the harsh edges, because this stencil is so skinny, I really wanted there to be full hexagons rather than half hexagons from the edges, so I was just super careful. Then once I was finished blending on that area, I carefully moved the stencil over a little and ink blended a little more so it was wider. Now that I ink blended over the stencil, I wiped it clean and used some Transparent Texture Paste and added it over top using some palette knives. Once it was over the stencil, I removed the stencil and set the panel off to the side to dry.

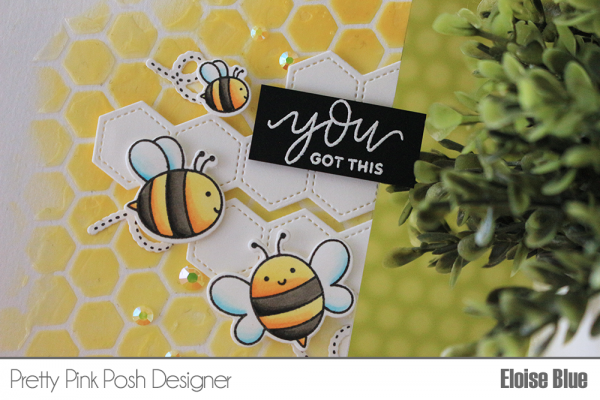
Next, it was time to colour my images. I used some Copic Markers and the images from Bee Friends. I stamped them down, then coloured them in and cut them out using the coordinating dies. I set them off to side once they were cut, and dried off the rest of my panel with a heat tool just to make sure it’s super dry. Now, I used the hexagon border from Stacked Edges 2 Dies and cut that three times from some white cardstock, I popped them up on foam tape and adhered them to the edge of my coloured panel. Making sure they were staggered so they looked a little more random. Next, I added more foam tape to my bee images and adhered them down around also. Making sure to adhere their trails behind them flat onto the background.

Copic Colours Used: B0000, B000, B01 / Y11, Y35, Y38 / W5, W7, W9 / 0

Now that my card was almost complete. I used the Encouraging Greetings stamp set and white heat embossed the sentiment ‘You Got This’ onto strip of black cardstock. I also popped that up on foam tape and adhered it to the right hand side of my card hanging off the edge a little. Lastly, I added some Lemon Drop Jewels onto my card, scattered around my images. I then popped up the entire panel onto a white card base that had a little strip of blue cardstock on the left.

So that finishes up my card today, I hope you enjoyed the project and feel inspired. Thanks so much for stopping by today and I’ll catch you all next time.

Eloise

| |

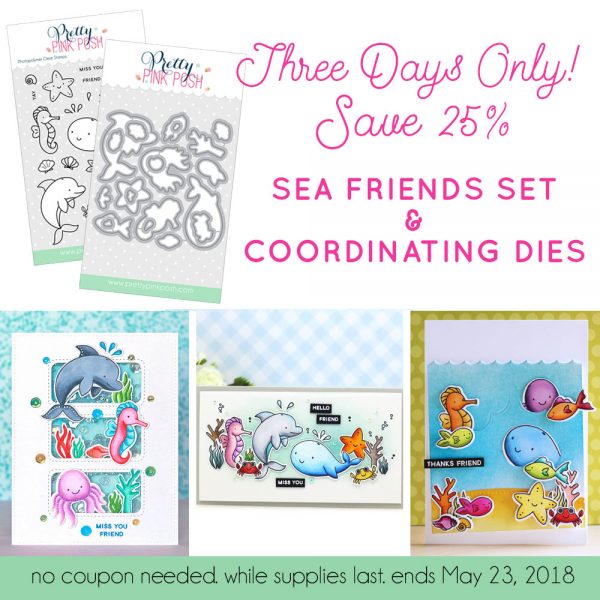
Dive Into 25% Savings!

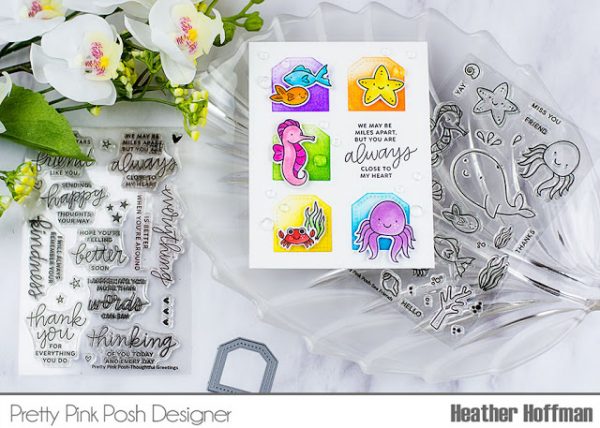
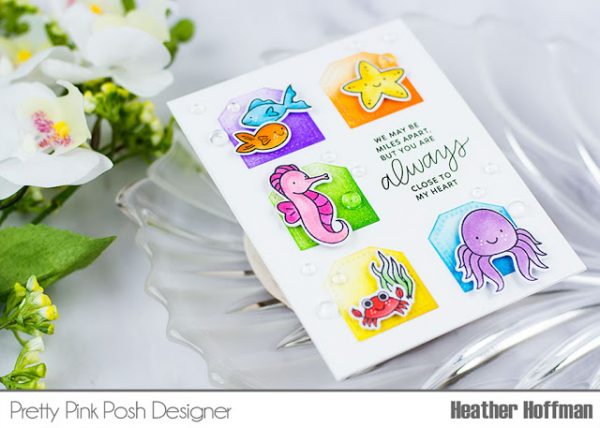
Good morning Pretty Pink Posh friends! Heather here this morning with a fun tutorial showing you how to I made this bright and colorful sea creature card! Plus, this stamp and die set is 25% off for the next 3 days! 

The Sea Friends stamp set is so fun for all sorts of projects and works well with a LOT of Pretty Pink Posh products! Be sure to follow us on social media to see a great assortment of cards from the team using this set the next few days!

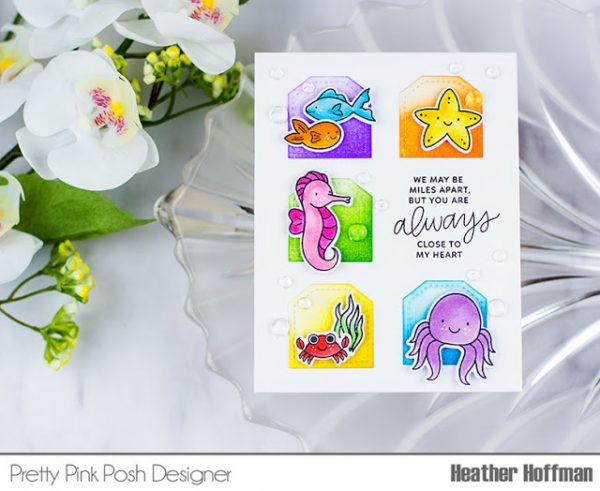
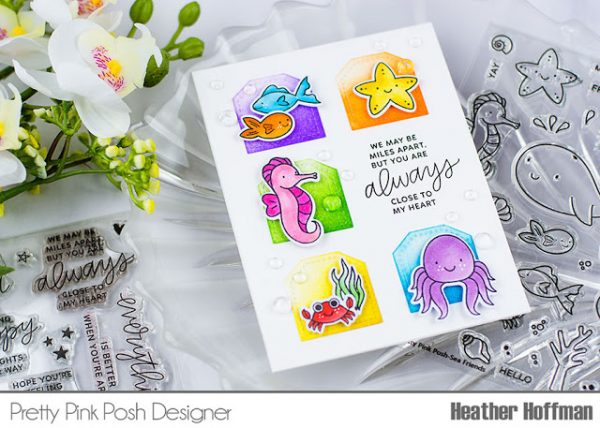
I love how well older Pretty Pink Posh products – like the older Mini Tags die set – work so well with newer products.  And I always love using some of the smaller images from a stamp set that are often overlooked – and making them the star of the show instead – like these adorable creatures from the Sea Friends stamp set! And of course, I LOVE a good sentiment – and Thoughtful Greetings is one of my all time favorites.

First off, I chose several smaller images from Sea Friends and die cut them with the coordinating Sea Friends Dies.

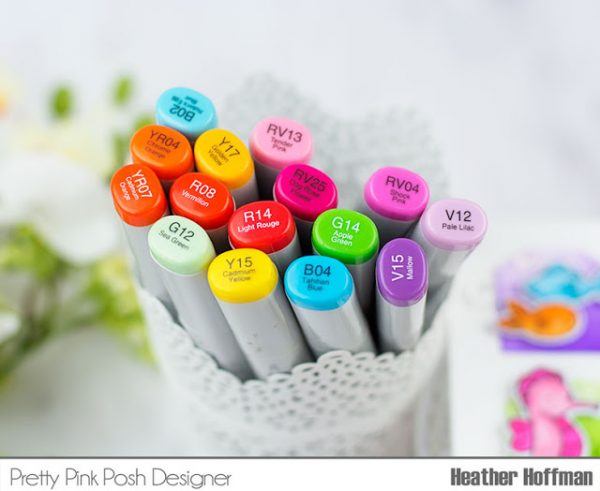
I then colored them up with Copics – here are the colors I used:

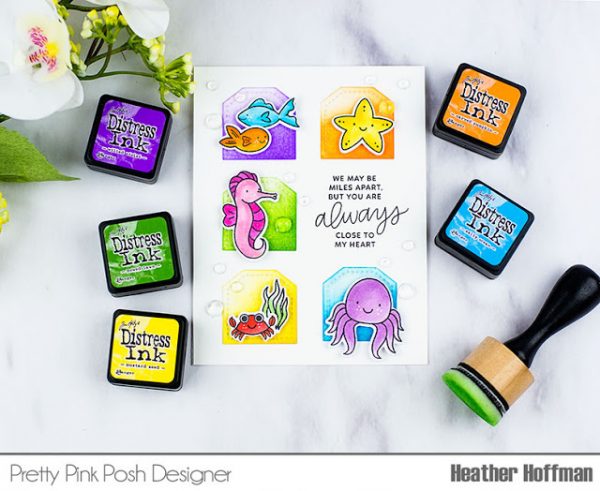
Then I die cut several tags using Mini Tags die set, layed out my sea creatures how I wanted them to be, and then chose some distress ink colors to make each image pop and balance out the card. You may notice that I tried to place some of the colors opposite each other – such as the yellow of the starfish and the yellow tag in the opposite corner, or the purple octopus and the purple tag in the opposite corner. This helps provide balance to the colors on the card.

Finally, I stamped my sentiment on my cardbase, adhered the tags around it, then added lots of 4mm Clear Droplets and 6mm Clear Droplets for bubbles! Also added a few white dots with a white gel pen on the critters cheeks – I love doing this for a tiny finishing touch that adds SOOO much!

Thanks so much for stopping by today! Hope you are having a wonderful day!

| | |

Tutorial: Sparkle Dot Birthday Card + Video

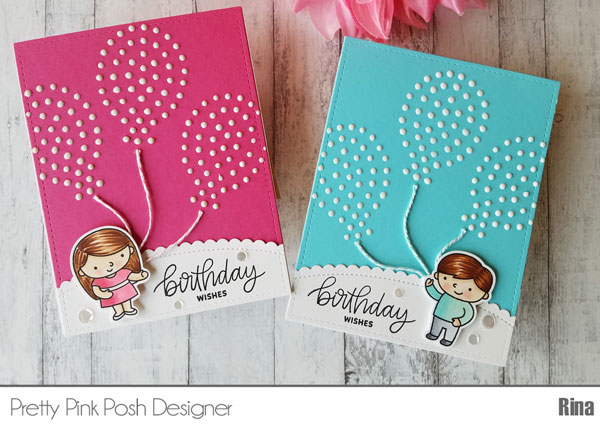
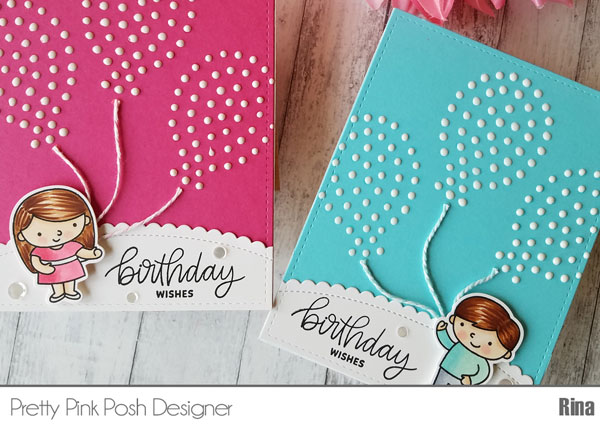
Rina here and for today’s cards I wanted to use the Sparkle Dot Patterns 2 stamp set to create giant balloons with Nuvo Crystal Drops Gloss in Simply White.  This was my first time trying this technique and the verdict is in – THIS WAS SO FUN!  The stamp creates dots where a variety of materials can be adhered to create an image.  I used Nuvo drops, but anything can be used such as sequins, confetti, stickles, etc.  I cannot wait to figure out what to do next with these fun stamps!

Watch the video above  I  Watch the video in HD on YouTube

In addition to using the Sparkle Dot Patterns 2 stamp set, I am also using “Birthday Friends” for the girl and boy image.  I created a hill using the Scallop Borders 2 Dies.

I colored the images using copic markers and here are the colors I used:

Skin: E21, E50, R20

Hair: E34, E35, E37, E29

Pink: RV13, RV25

Blue: BG10, BG53

Grey: C1, C3, C5

I used Versamark ink to stamp the balloon 3 times into colored cardstock.  I placed the Nuvo Drops on each circle of the stamped image.  This was really fun and satisfying.  Once you get the hang of it, you will want to do this all day!   I used twine to create a string from the balloon to the stamped image.  If you do not have twine, you can simply draw the balloon strings in.  I stamped the sentiment Birthday Wishes from the Birthday Friends stamp set.  I added the stamped image so the image looks like it is holding the balloon strings.  To finish off the card I added Sparkling Clear Confetti near the sentiment and then adhered my card front to a 4 ¼ x 5 ½ inch card base.

I hope you enjoyed these cards, the Sparkle Dot Patterns stamps sets are super fun and a great new technique to try out. Thanks for stopping by!

Rina

|

Playful Puppies

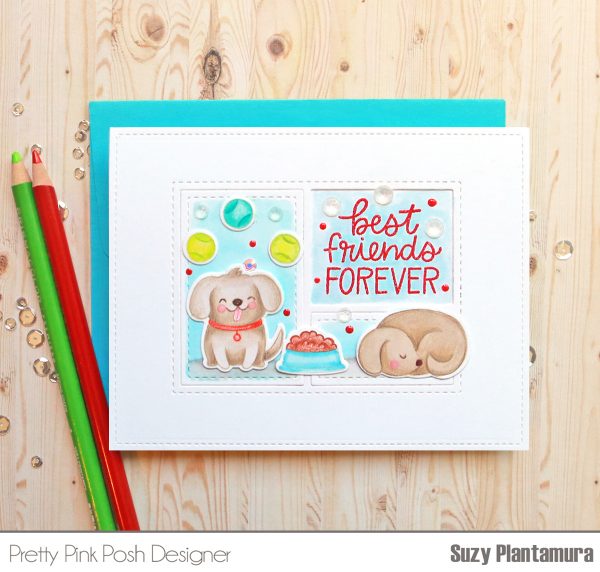
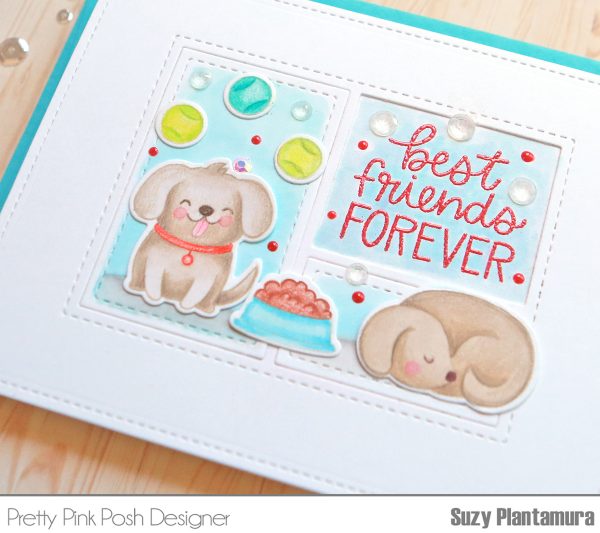
I hope by now all of you Pretty Pink Posh lovers have seen their newest product release. What is your favorite product? My favorite stamp set is definitely the Playful Puppies as I am a big time dog lover and have two (Maltipoo and Cockapoo). I have two cards using this set to share with you today. I have another three on my blog, so come visit to see my “one stamp, five ways” blog post.
I used the very first Storybook 1 die for this card and it still remains my favorite of them all. The sentiment in the Playful Puppies set fits perfectly in one of the windows. I die-cut it from white cardstock and attached two of the three inside pieces to my card base. I stamped the sentiment with red embossing powder in the other opening.

I stamped all of my images with a natural color of ink and then colored them in with Copic Markers. I added details and shading with colored pencils. I love layering different coloring mediums. I also like to outline my images with colored pencils so they have a soft colored outline. I colored the background of each of the openings with blue Copic markers and used a warm gray for the ground. I then attached the die-cut images over the background. I added some of my new favorite jewels in Sparkling Clear. I also added some red Tonic Nuvo Drops.

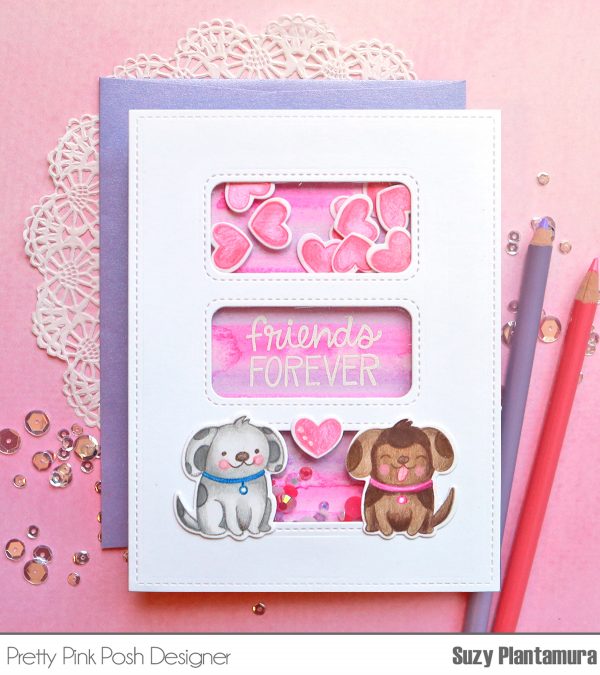
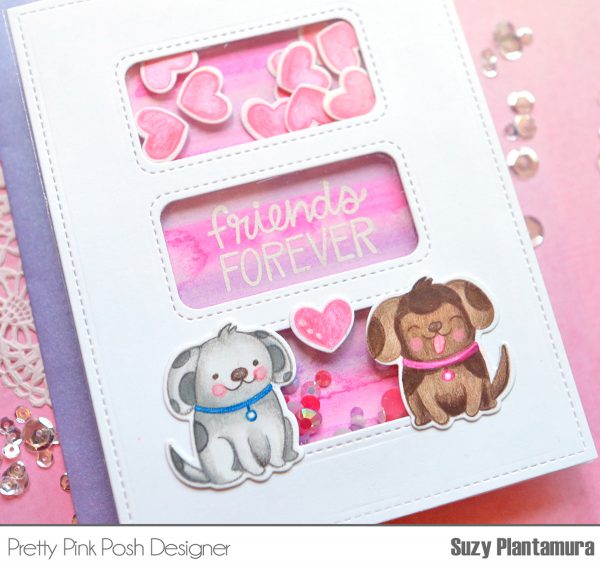
Next I made a shaker card using the Stitched Pieces die. I watercolored some purple and pink stripes on watercolor paper to use behind the openings. I added foam tape behind the front of the card so each of the openings is a separate pocket. I filled the top pocket with stamped hearts from the Playful Puppies set. I filled the bottom opening with Jewels in Pearl White, Watermelon, and Pansy Purple.
I stamped the puppies on white cardstock with a natural ink and then colored them in with Copics and colored pencils again. I attached them over the bottom pocket with another heart. I stamped the sentiment in the center opening with white embossing powder.

Thanks for visiting the PPP blog today. I hope you are leaving inspired to use this Playful Puppies stamp set!

Suzy

| |

May Product Release Blog Hop- Day 2

Check out Day 1 of the blog hop HERE

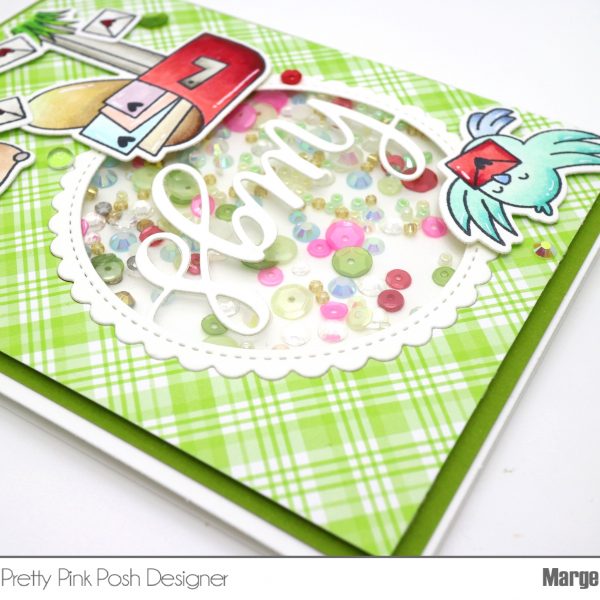
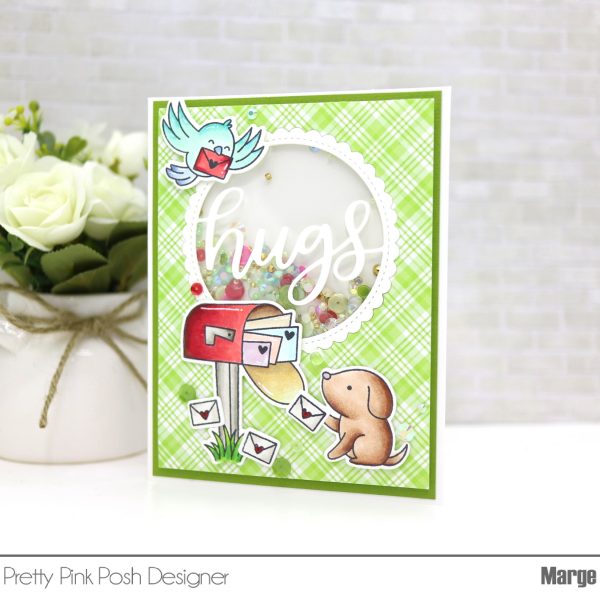
Hi, there! It’s Marge here with you and I’m sharing two shaker cards featuring the new Hugs Shaker Die from Pretty Pink Posh. I’m so glad to share these as I really had fun playing with the shaker die along with other new products from the May 2018 Release.

I started my cards by diecutting Hugs Shaker Die out of heavyweight white card stock . I also cut lovely pastel colored pattern papers to use as front panels of the cards. Then I adhered acetate film on the back of front panel, and then adhered Hugs Shaker Die cut onto the front surface of acetate film.

For the first card, I mixed several of my favorite jewels/sequins/ seed beads  to make shakers , which is my favorite moment. I usually use bunch of embellishment to give visual interest to my shakers. It is just so fun ! Here, you could see Sea Glass JewelsMetallic Gold JewelsIvory JewelsSparkling Clear JewelsBerry Bright MixGold Shimmer Seed Beads, Spring Green Seed BeadsLilac Seed Beads, and Daffodil Seed Beads in just one shaker.

I added colored images from Playful Puppies stamp set and Happy Mail stamp set, which were colored using copic markers and then were cut using Playful Puppies Coordinating Dies and Happy Mail Coordinating Dies.  To embellish the card, I added Sparkling Clear JewelsSparkling Clear Sequins Mix and Berry Bright Mix sequins here and there.

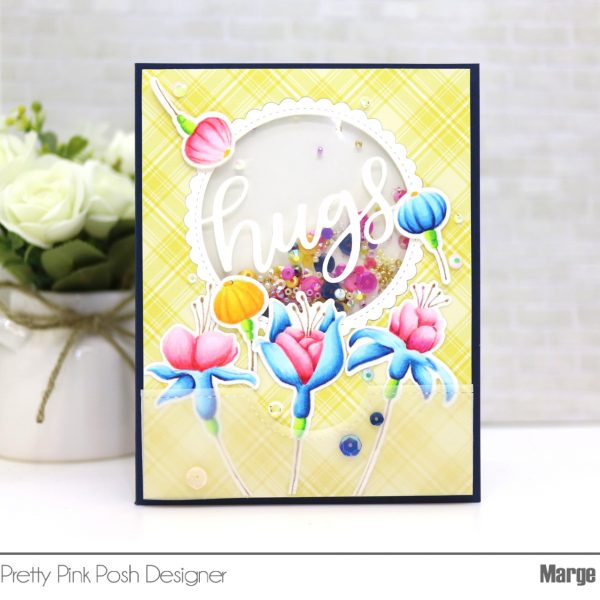
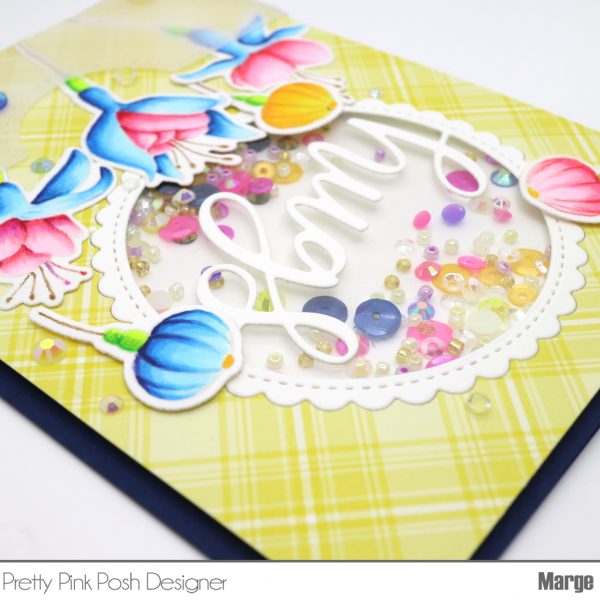
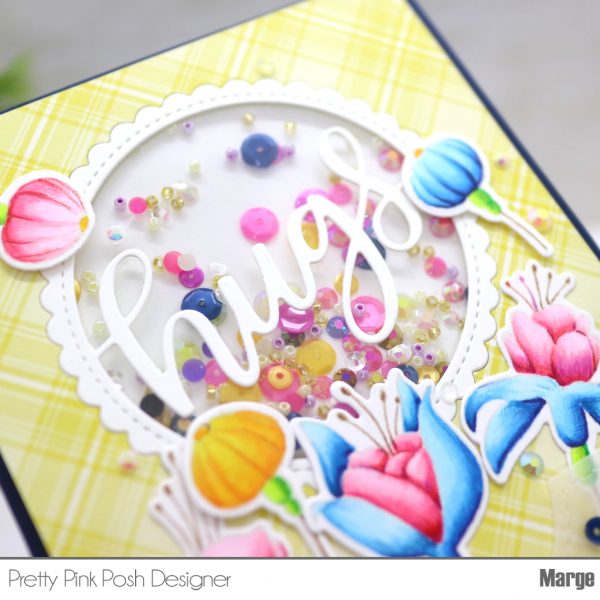
For the second card, I stamped Flourishing Fuchsias Stamp set onto 80lb Neenah White paper using light grey dye ink, then I did no-line coloring using copic markers and cut them all using Flourishing Fuchsias Coordinating Dies.

Copic marker numbers I used are as below.

Blue : B39-B06-B04-B02-B00

Pink : RV25-RV23-RV21-RV10

Green : G14-YG03-YG01

Next, I added more details with my Prismacolor Polychromo pencils and then I placed them around the Hugs Shaker Die frame using glue & foam tapes.

I wrapped a vellum sleeve that I had cut using Pocket Border Die around the lower part of the panel, and then I assembled shaker. I put in blue ,pink and yellow colored sequins/jewels/ seed beads : Sparkling Clear JewelsIvory JewelsLemon Drop JewelsAmethyst JewelsWatermelon JewelsParty Time Mix sequins3mm Sparkling Clear sequinsGold shimmer Seed Beads, Lilac Seed Beads, and Daffodil Seed Beads.

As a final touch, I added Sparkling Clear JewelsLemon Drop Jewels, Party Time Mix sequins, and Champagne sequins.

Now I finished my two cards. As Pretty Pink Posh provides us all colors of beautiful sequins, jewels, and seed beads, I always enjoy making my own assortment according to the color schemes of my cards.

PRIZES: be sure to leave comments on each stop. I’m giving away 4 $25 gift certificates to four random comments (2 winners each day) left before May 14, 2018 at 11:59 PM PDT. I’ll be announcing the winners next week, so be sure to return and see if you are one of the winners!

Pretty Pink Posh blog << you are here
Kelly Latevola
Yana Smakula
Laurie Willison
Suzy Plantamura
Melody Rupple
Alexandra Stapleton- Smith
Jessica Frost- Ballas
Heather Hoffman
Crystal Thompson
Joni Andaya
Lydia Fiedler
Mindy Baxter
Yoonsun Hur

We hope that you enjoyed the blog hop these last two days. Be sure to leave comments on all the stops- we’ll be randomly picking comments to win gift certificates.

| |

May Product Release Blog Hop- Day 1

Check out Day 2 of the blog hop HERE

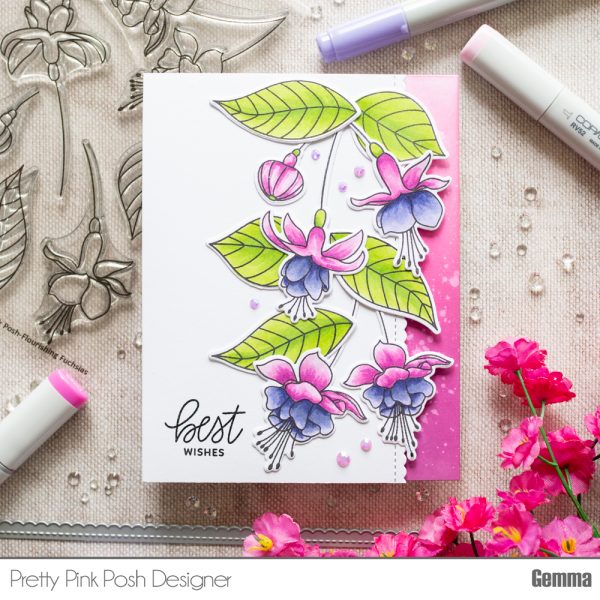
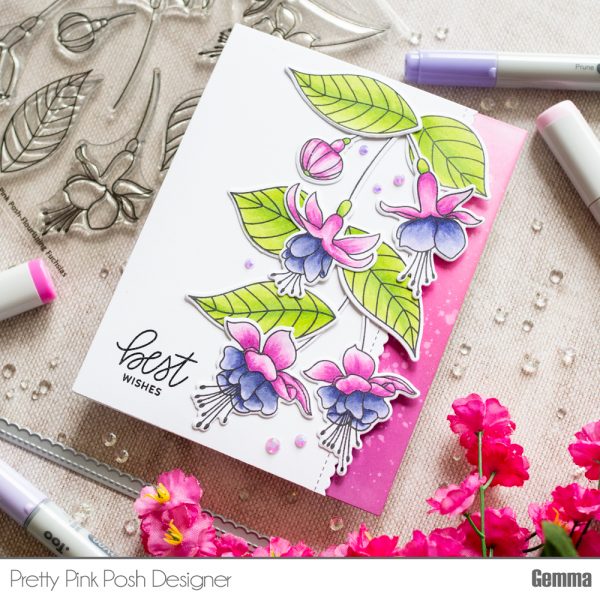
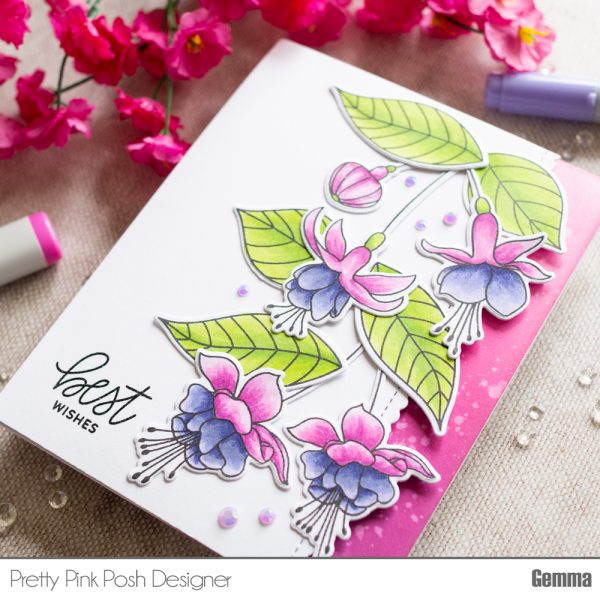
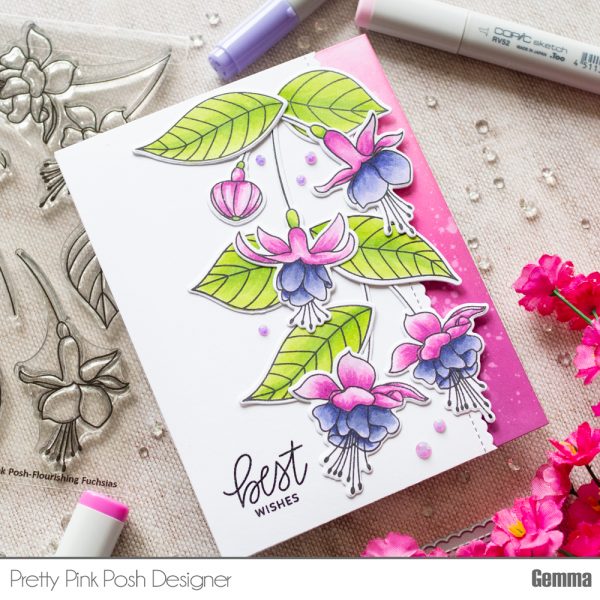
Hello, Gemma here today to share a card for the May blog hop. When I think of fuchsias, I think of the classic pink and purple flowers so I chose this colour scheme for my card today.

I began by stamping out lots of images from the Flourishing Fuchsias stamp set. I coloured them with copic markers, then cut them out with the coordinating dies.

Next, I blended on some distress oxide inks in Picked Raspberry and Seedless Preserves on the right hand side of a white card base. I flicked it with water for distress details. I then used a Scallop Border die to trim down another panel of white card, which will sit on top of the card base and allow the pop of colour to show at the edge.

I planned out my layout of flowers and leaves to help me figure out the best placement for my sentiment. I then chose a sentiment from the Everyday Greetings stamp set, stamping it in black versafine ink and heat embossing with sparkle embossing powder.

I added the panel to the card base with some foam sheet behind, which adds some nice dimension. I then adhered the flowers and leaves on top, using a mix of liquid adhesive and foam squares.

I finished the card with a scattering of Pansy Purple jewels, which fit the colour scheme perfectly.

Ready to hop along and see LOTS more fabulous inspiration with this new release?

PRIZES: be sure to leave comments on each stop. I’m giving away 4 $25 gift certificates to four random comments (2 winners each day) left before May 14, 2018 at 11:59 PM PDT. I’ll be announcing the winners next week, so be sure to return and see if you are one of the winners!

Pretty Pink Posh blog << you are here
Jennifer McGuire
Justine Hovey
Kay Miller
Jeanne Jachna
Laura Bassen
Lexa Levana
Cathy Zielske
Eloise Blue
Shannon McComb
Lea Lawson
Thi Lam
Amy Yang

There is so much amazing inspiration today, I hope you enjoy it all! Be sure to leave comments on all the stops- we’ll be randomly picking comments to win gift certificates. See you tomorrow!