Cards

|

Valentine Theme Week- Day 6
It’s Valentine Theme Week at Pretty Pink Posh and I’m excited to share a super sweet card with lots of sparkle and shine! The hardest part about making a card for this event was deciding what to use. There are so many beautiful dies and stamps in the store that I love!
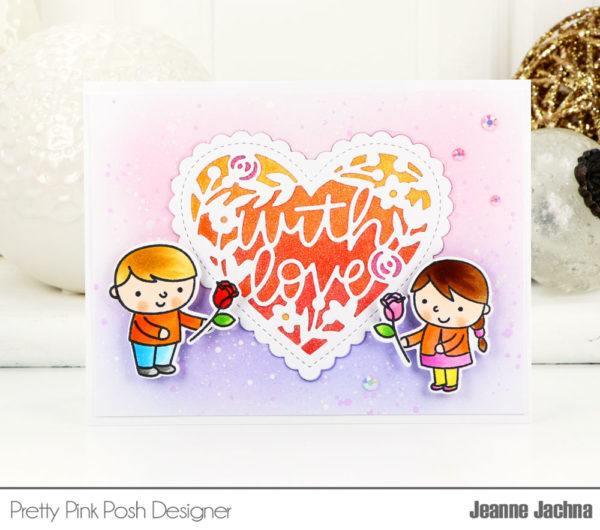
I’m mixing a little old with the new. Because all the items in the shop are from the same designer, you know everything is going to coordinate perfectly.
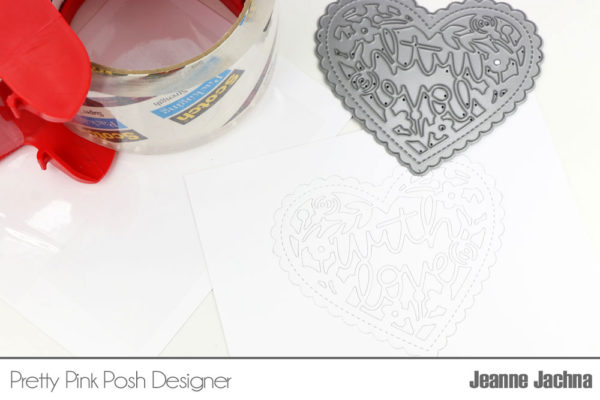
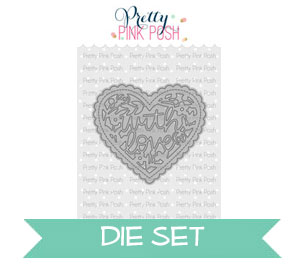
I started my card by cutting the new With Love Shaker die into a panel of white card stock.  I didn’t want it to cut all the way through so I attached some packing tape to the back of the panel before running it through my die cut machine.   The extra thickness from the tape prevents the die from cutting all the way through.
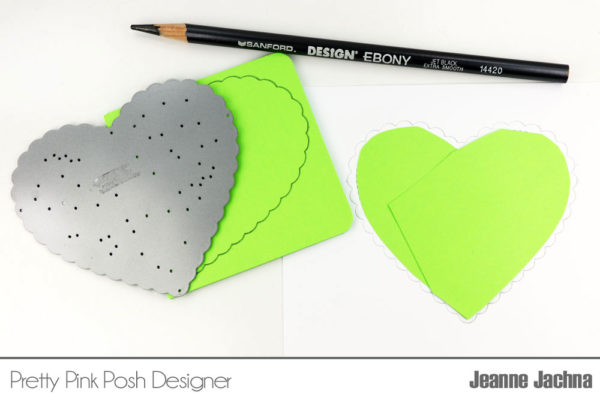
Next I created a mask to cover the heart.  I traced the die on a sticky pad one half at a time.  I cut the paper inside the line so the mask is smaller than the die cut design. Don’t worry if the scallops are exposed, you just want to protect the inside of the heart.
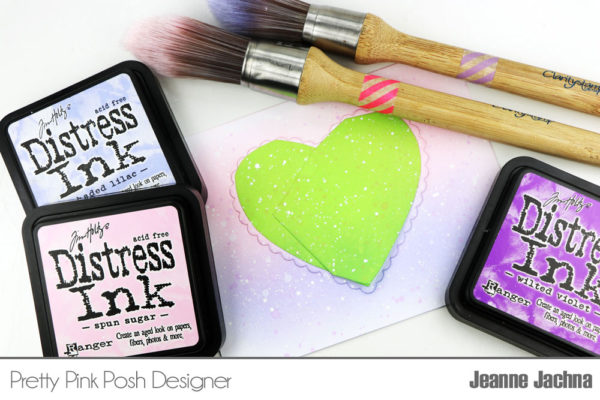
I applied Distress ink in Spun Sugar and Shaded Lilac using a stencil brush so there would be no hard lines.  I splattered the panel with water, some watered down Wilted Violet distress ink, and some white ink. I love Dr. Ph. Martin’s Bleed Proof White Ink.
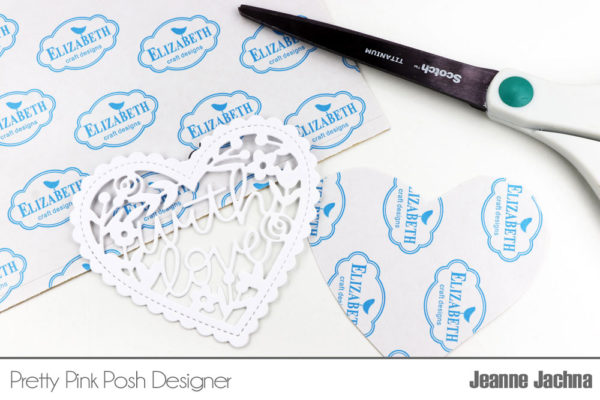
While that’s drying, I cut the With Love Shaker from white card stock and then cut a piece of double sided adhesive to fit under the heart.  Again, don’t worry about the scallop edges, the double sided adhesive should cover the interior decoration of the heart.
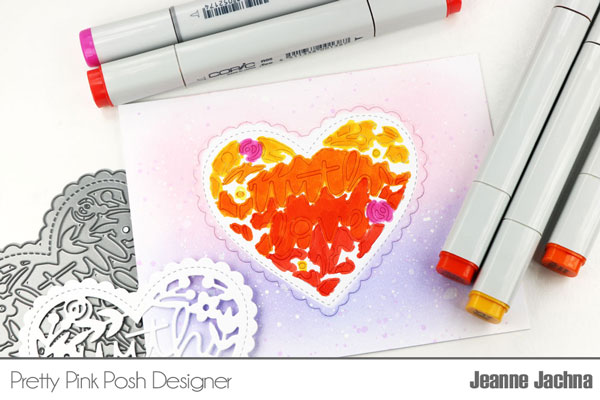
I removed the mask from the card panel and color the inside of the heart with markers. I used Copics, but ANY markers are fine. Use darker shades of ink for more color, and don’t worry about staying in the lines.
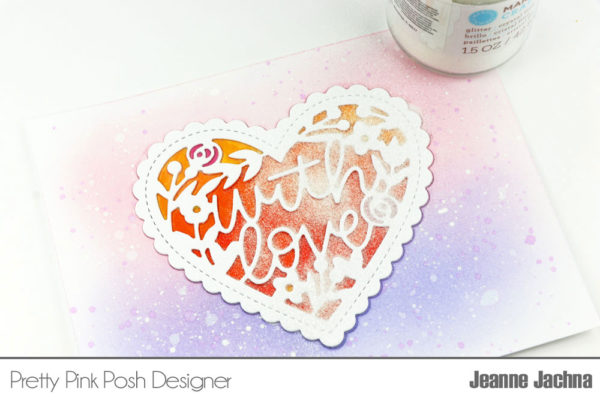
Attach the double sided adhesive sheet to the colored die cut.  Position the white die cut With Love Shaker over the die cut heart and press it in place.  The double sided adhesive will secure it. Lastly pour crystal fine glitter over the heart. Press it into the adhesive with your finger and shake off the excess.
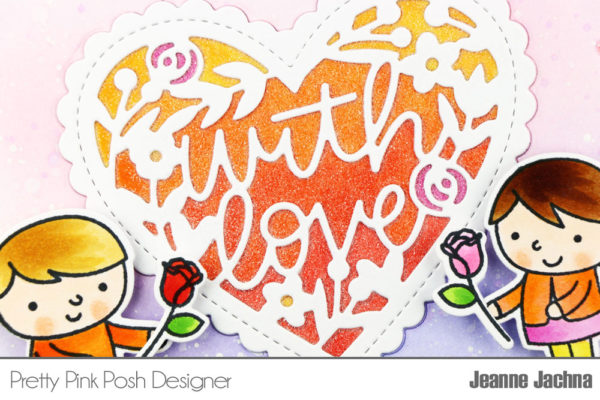
I embellished the card with stamped, colored, and die cut Friends Forever.  I thought they were adorable the first time I saw them, and I still love them today.
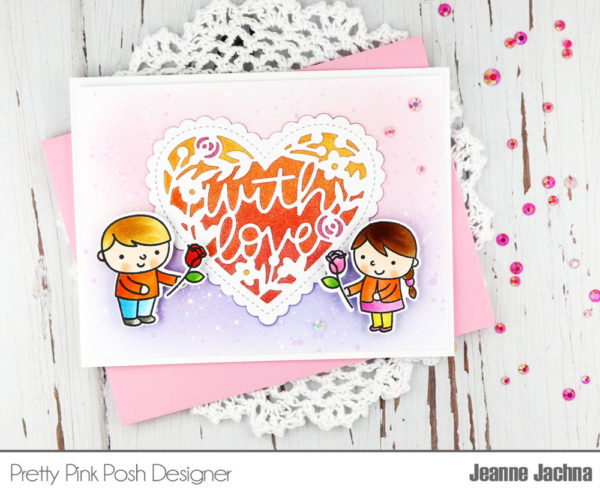
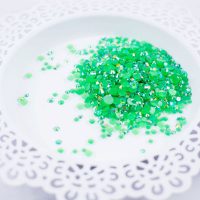
The finishing touch was a little bling!  The Pink Blush Jewels come in lots of different colors so you’re sure to find something to match your project.  I added Pink Blush and Pansy Purple Jewels to the distress ink background.
Whatever your style you’ll find the perfect Valentine makes at Pretty Pink Posh!

|

Valentine Theme Week- Day 5

Hi Everyone! It is Melody here on the blog today. Welcome to another day of Valentine Theme Week! I have a Valentine card to share with you that would be perfect for your older daughters or girlfriends. I still enjoy sending Valentines to my daughters even though they are young adults now.

Save 15% off items in the Valentine section during our Valentine Theme Week!

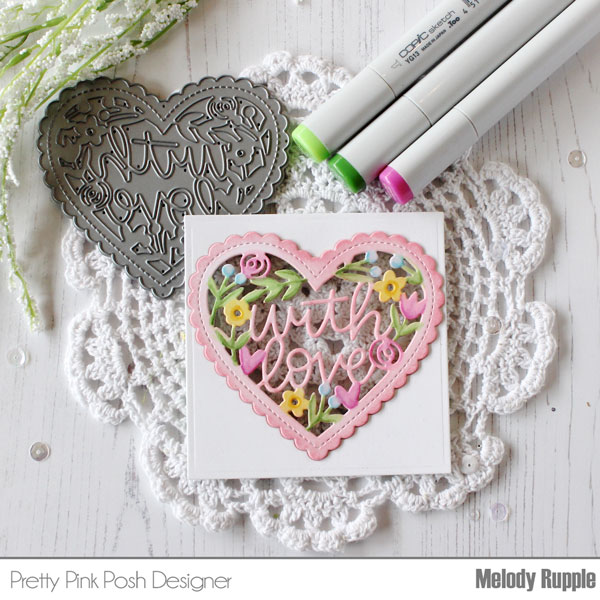
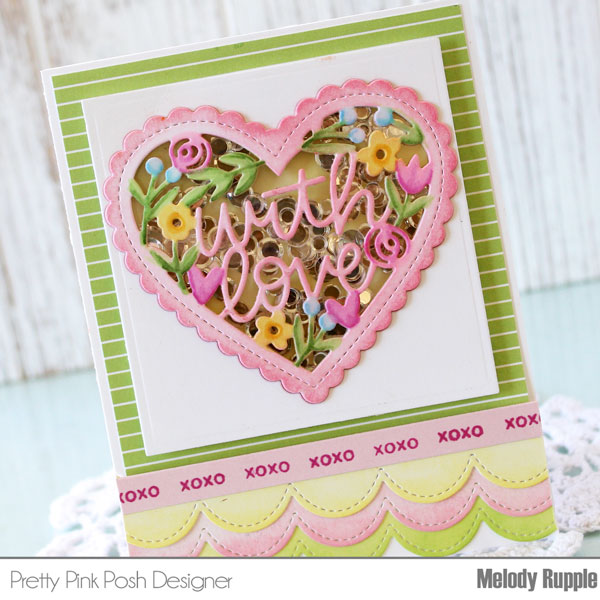
I started by cutting the With Love Shaker Die from white cardstock and adding color with Copic Markers. You could use a number of options to add the color, colored pencil, inks, and watercolors.  I cut a square of white cardstock and cut the With Love Shaker Die directly in the center of the square. I inlayed the colored heart in the white square. On the backside I added clear acetate and foam tape to form the shaker.

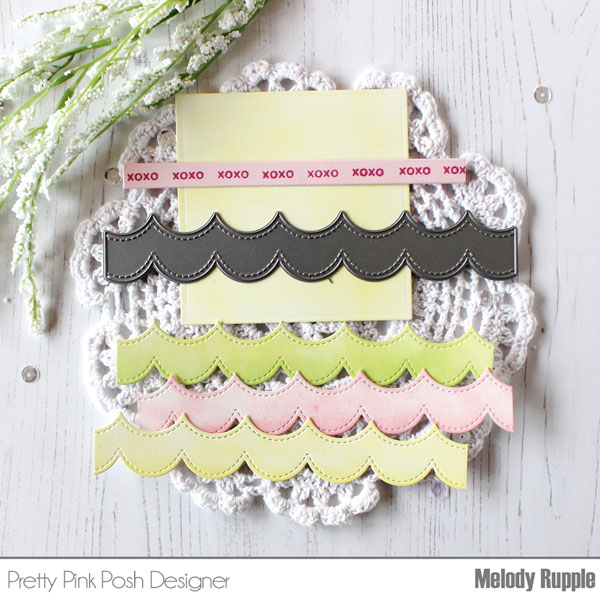
Here are the other pieces I created to add to my card. I cut another square of white cardstock, brushed on Distress Ink in Squeezed Lemonade. This square covers the back of the shaker after the sequins are dropped in. Next I cut a strip of pink cardstock and stamped a sentiment from the Floral Hearts Stamp Set across the strip. I cut three scalloped borders with the Stacked Edges 1 Dies and sponged on Worn Lipstick, Squeezed Lemonade, and Twisted Citron Distress Inks.

I used the Sparkling Clear Confetti Mix for the shaker. Since I used a lot of different colors and patterns on my card I decided the clear confetti would look the best.

There are so many fun possibilities with these products.

Thanks for stopping by today. I hope we have inspired you to starting creating your Valentines! Join us tomorrow for another day of inspiration!
|

Valentine Theme Week- Day 4

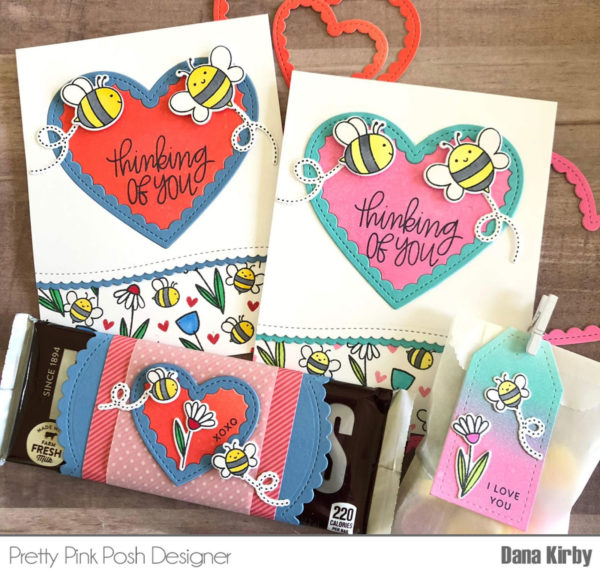
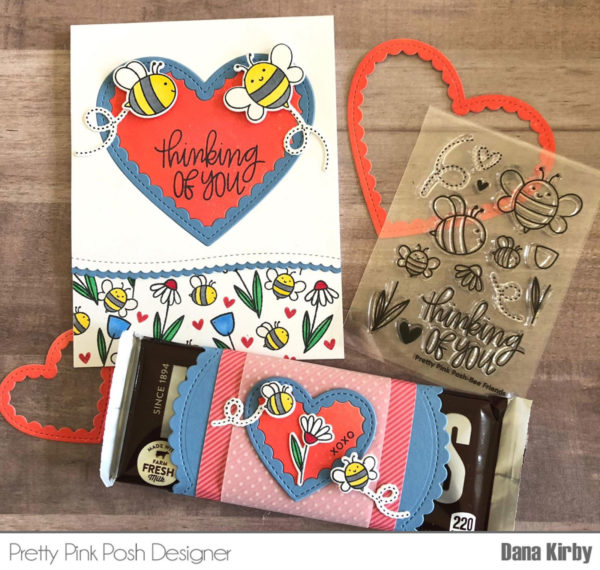
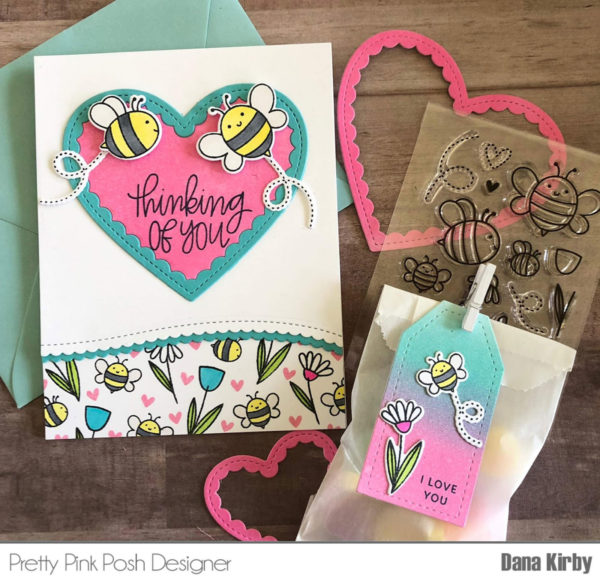
Hi Friends! Dana here today and I am excited to be sharing two Valentine’s Day cards and treats with you all. I love Valentine’s Day and all the fun crafting that goes along with it! I used the Bee Friends stamp set for all of my images and incorporated many other wonderful dies from the Pretty Pink Posh Shop.

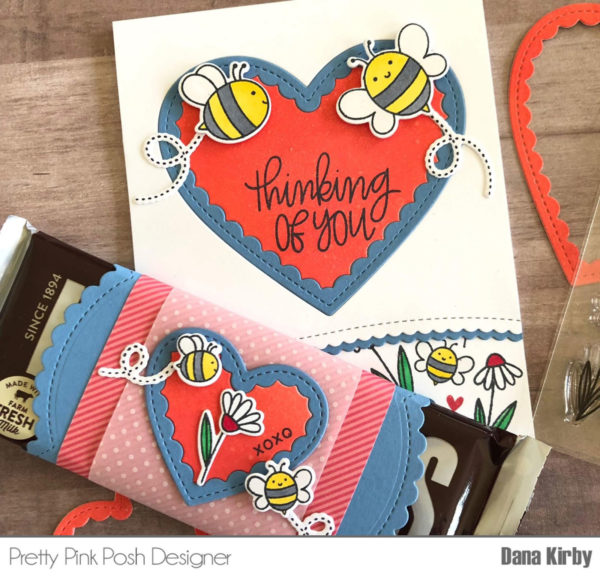
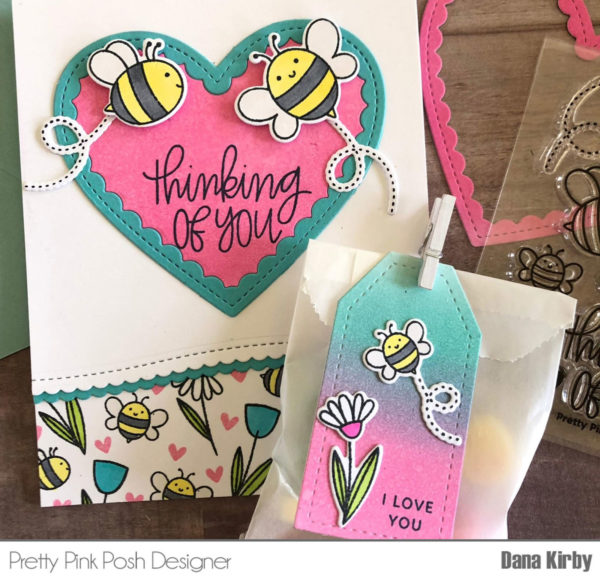
On my first card, I started by stamping the small bees and flowers onto the bottom of my card panel. I used a Copic friendly ink, and colored all of the images with Copic markers. Next, I stamped and colored the larger bees from the stamp set. I then used the Bee Friends coordinating dies to cut the bees out.

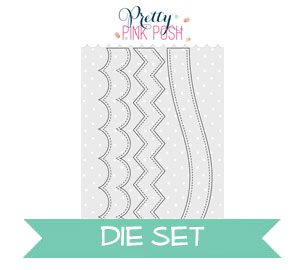
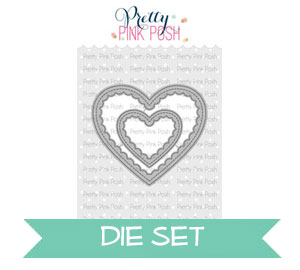
For my center heart, I used the new Scallop Hearts die set. I began by using Candied Apple Distress Oxide Ink to ink blend my background. I then ran it through my die cut machine. Next, I stamped the Thinking of You sentiment from the Bee Friends stamp set. To finish my card, I used the Scallop Borders die set to create my decorative edge.
I thought it would be fun to also create a candy bar wrap. I used the same stamp set and supplies so that it would coordinate with my card. For my sentiment, I used the Floral Hearts stamp set. I love the fact that this stamp set included a variety of smaller sentiments that fit perfectly in small spaces!!

On my next set, I followed the same format as above. Though this time, I used Picked Raspberry Distress Oxide Ink for my ink blending.

For my treat bag, I began by die cutting the Stitched Tag Die. I ink blended Distress Oxide Ink in Picked Raspberry and Peacock Feathers onto my tag. Next, I added the small bee and flower and another small sentiment from the Floral Hearts stamp set. To finish my treat bag, I filled a small glassine bag with Conversation Hearts and attached my tag with a small clothespin.

I hope I inspired you to create a few Valentine treats for your friends and family! Join us tomorrow for another day of Valentine inspiration!

Stop by the Pretty Pink Posh Store this week and you will receive a 15% discount on all items in the Valentine’s Day section!

Dana

| | |

Valentine Theme Week- Day 3

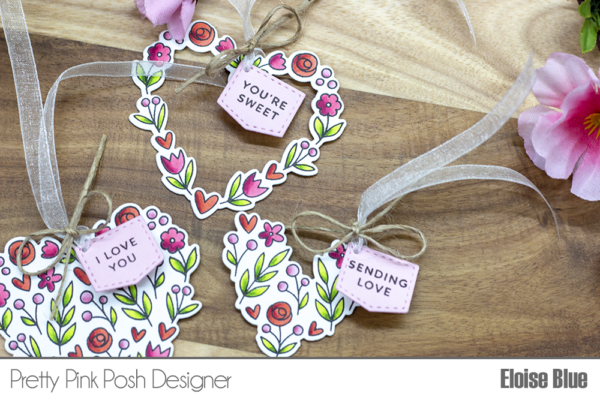
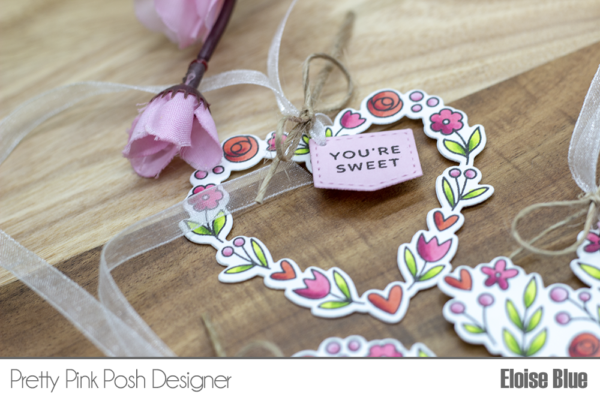
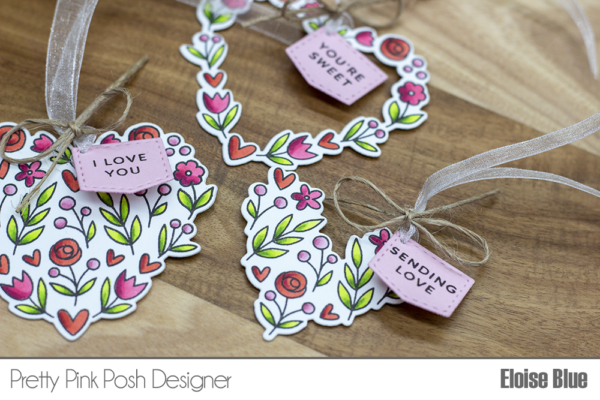
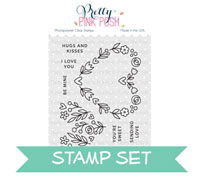
Hello friends, Eloise here and today I have some Valentine’s tags to share with you all using the brand-new Floral Hearts stamp set. I honestly love this small set so much. There are endless possibilities with these hearts and along with the coordinating dies there are multiple ways to cut them as well. I’ll be using them to create styles of tags today for all different sizes of gifts.

Watch the video above   I  Watch the video in HD on YouTube
 

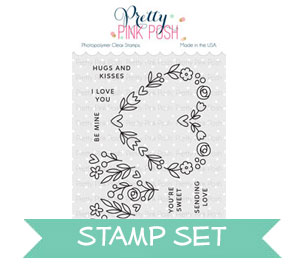
To start off I stamped these hearts out using my MISTI. I stamped the wreath + inside heart first, creating a full heart. I then stamped the wreath and inside heart piece separately as well. I then used my Copic Markers to colour them all in the same way.

Copic Markers Used: R81, R83, R85 / RV13, RV25, RV19 / R14, R24, R29 / YG01, YG23, YG17 / 0

Once they were all coloured, I die cut them out using the coordinating dies. The dies can create all three styles of hearts – a wreath, a large full heart and a small full heart creating lots of possibilities. I decided to take advantage of that and create three styles of tags. I then die cut plain white die cuts and adhered them on the back so you would have a clean place to write your message.

I then punched a small hole in the tops of each of the tags for a place to thread through the ribbon. I pulled in the Stitched Notes Dies and cut the small banner from light pink cardstock. I took three of the sentiment stamps from the same Floral Hearts stamp set and stamped them onto each of the banners. I punched a hole through those as well and threaded them onto my tags with ribbon. Lastly, I tied a bow with hemp cord at the top of each of the banners and my tags were complete.

Thank you so much for stopping by today, I hope you enjoyed my simple Valentine’s tags.

Eloise

|

Valentine Theme Week- Day 2

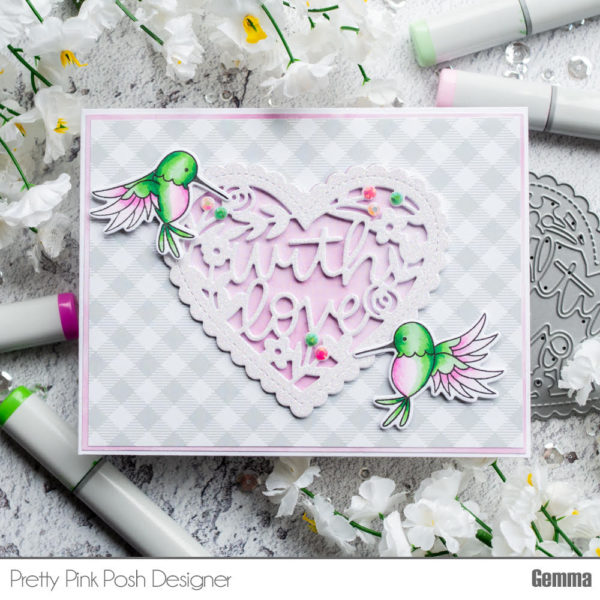
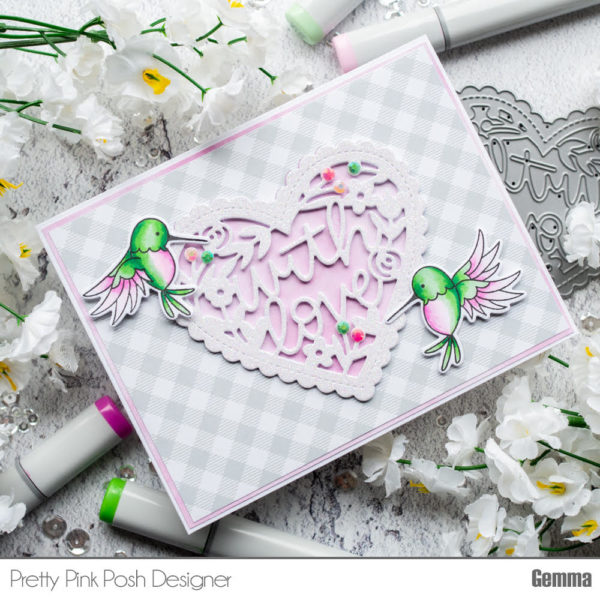
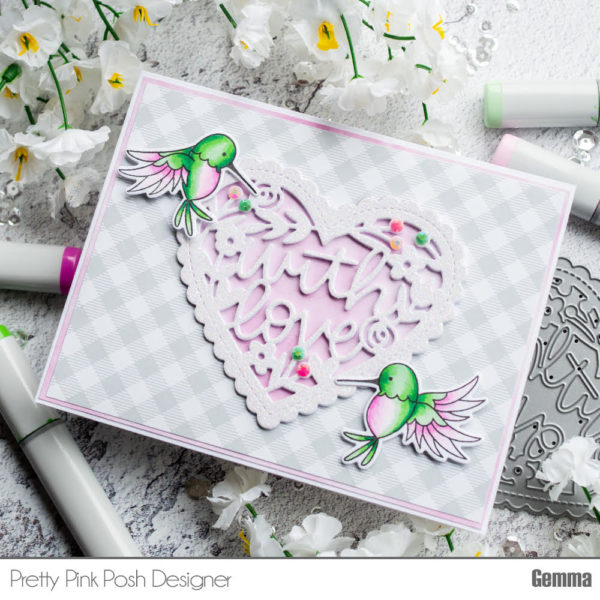
Hello, Gemma here today to share a card for Valentines, using some new and older released Pretty Pink Posh products.

Save 15% off items in the Valentine section during our Valentine Theme Week!

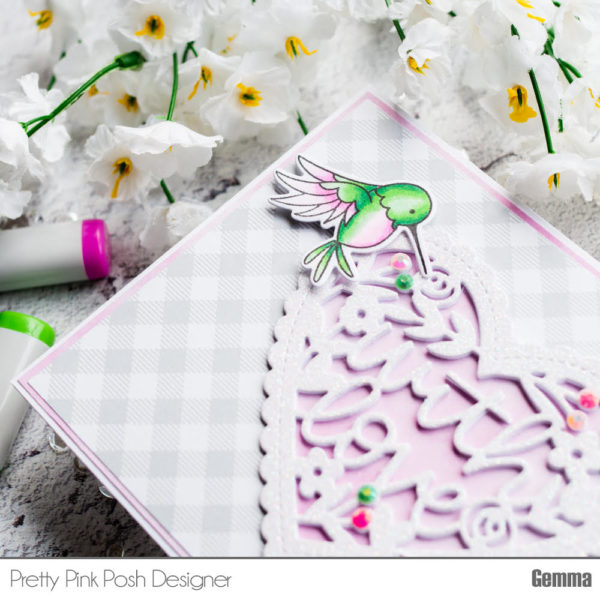
I love the paper cut look of the new With Love Shaker die, so decided to make this the focus of my card. I die cut it from white card 3 times and adhered them together. I then die cut it once from white glitter card and added it on top for a lovely dimensional die cut.

On my card base, I layered a piece of pink patterned paper. Next, I cut a piece of grey gingham paper and die cut the With Love Shaker die from the centre. I adhered the grey paper on top of my card, then added the dimensional With Love Shaker stacked die cut in the gap.

The Hummingbird Thanks images are the perfect accompaniment to this new die. I stamped out two hummingbirds and coloured them with the following copic markers: G12, G14, G17, RV00, RV52, and RV55.

I die cut the hummingbirds with the coordinating dies, then used foam tape to adhere them to my card. For a pretty finishing touch, I added some Shamrock, Pink Blush and Watermelon jewels to the stacked die cut, matching the colours of the hummingbirds.


Thanks for stopping by! I hope you enjoyed this Valentine’s Day card! Join us tomorrow for another day of inspiration!
|

Valentine Theme Week- Day 1

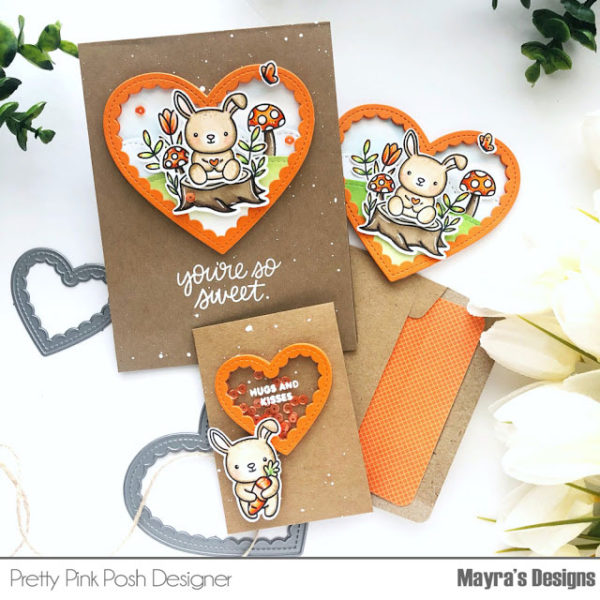
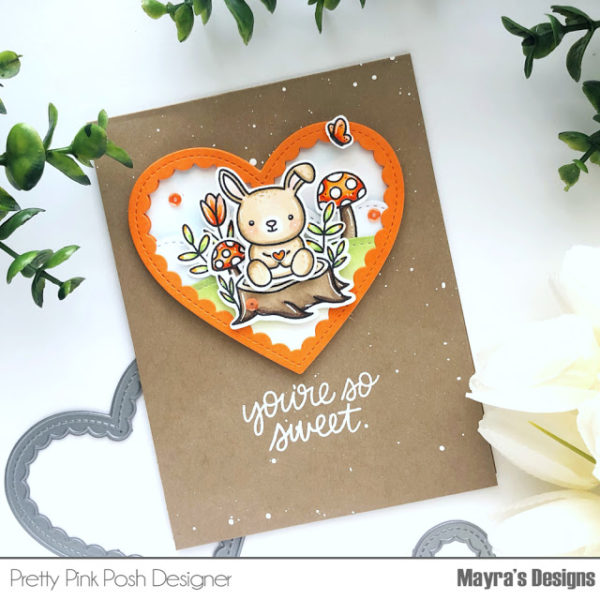
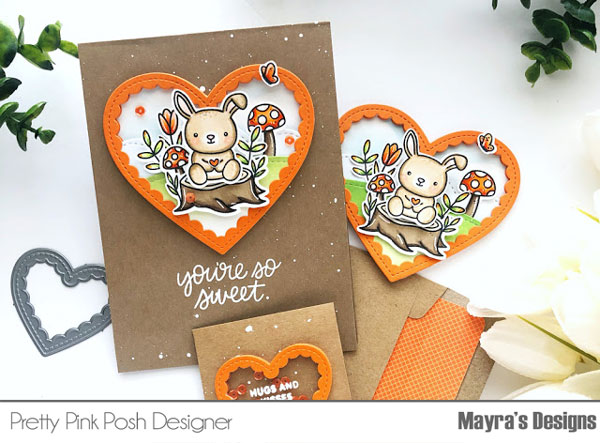
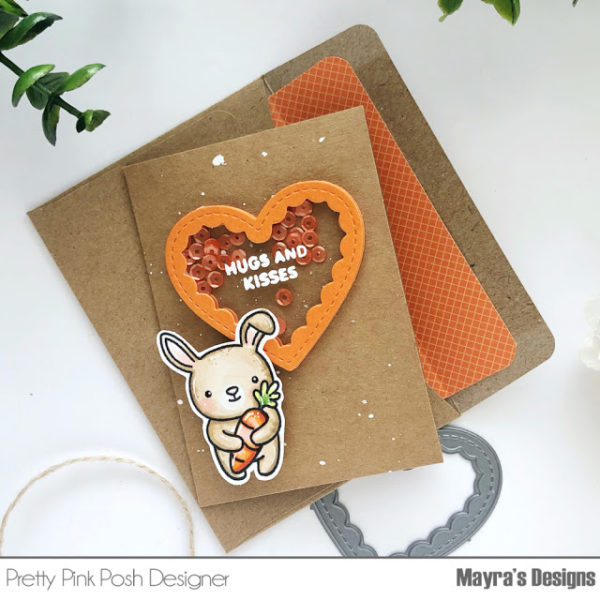
Hello everyone, it’s Mayra here with you today! This week we will be sharing Valentine themed projects with you. I created a fun set of non-traditional Valentine cards using the adorable Bunny Friends stamp set. This set also has the coordinating dies here.

If you don’t own any of these sets yet you’re in luck! Pretty Pink Posh has 15% off items in the Valentine section!

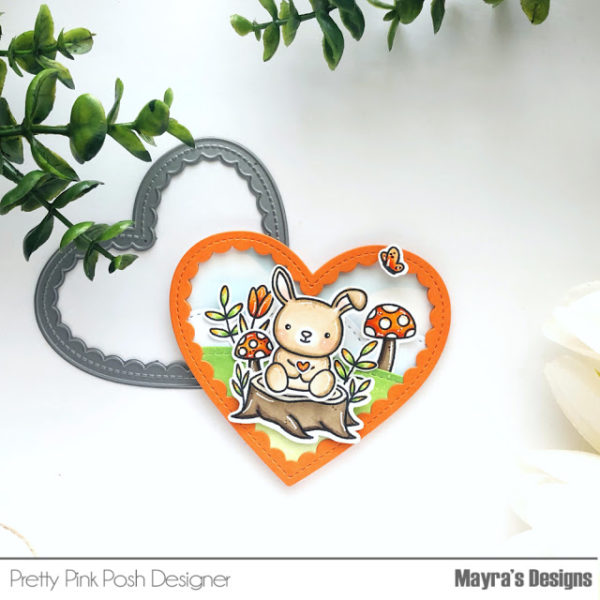
I LOVE the brand new Scallop Hearts dies and knew they would be perfect for this theme. The idea for my card began with the largest heart which I thought it would be perfect for creating a mini scene.

To get ideas for what I would be creating I started by looking through my PPP sequins. I went through my stamps and chose the images I would be using to create the scene inside the heart.

The wood stump, mushrooms, and tulip are from the Woodland Critters set the dies are also available here.

I then colored the images using Copic markers.

For the bunnies, I used E40, E41, E55, E43.

For all of the orange areas, I used YR09, YR18, YR15, and YR12.

For the greens, I used YG01 and YG17.

Next, I used the Stitched Borders 1 and Stitched Borders 2 to create the clouds and grassy hill. I applied Mowed Lawn Distress Oxide ink to the hill and Tumbled Glass to the cloud border.

I also used the smaller scalloped heart to create a mini shaker for the mini Valentine card set. The sentiments are from the Cupcake Critters and Floral Hearts sets.

I hope you enjoy the projects I created to share with you today and feel inspired to create. Thank you very much for taking the time to stop by!

| | |

Creating A Birthday Shaker + Video

Hi everyone it’s Ardyth and today is my very first time on the Pretty Pink Posh blog and YouTube channel! I have a video tutorial to share using the new Pinata Party set.

Watch the video above   I  Watch the video in HD on YouTube

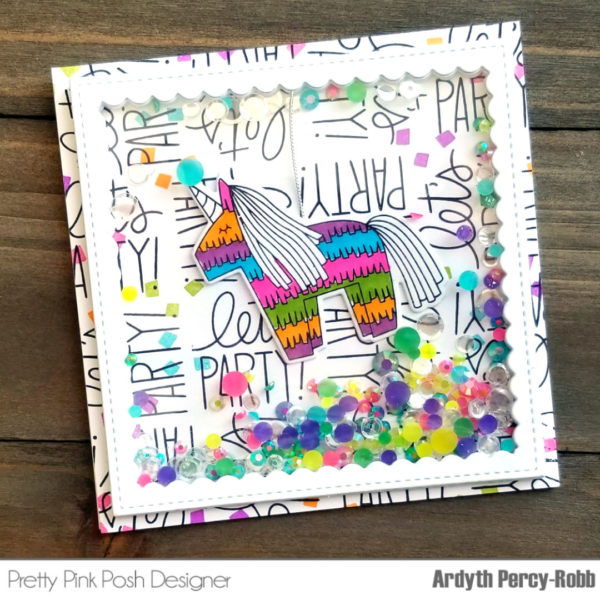
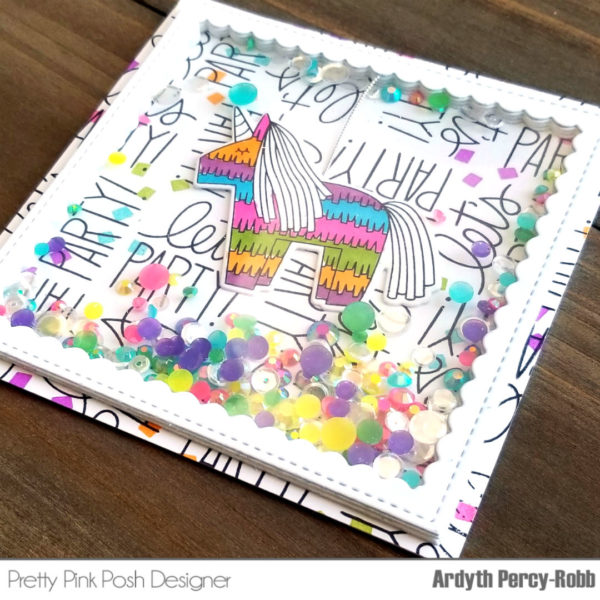
I used the Pinata Party set to make a fun shaker card with a special feature! The Pinata is hanging on some twine, so he can swing inside the shaker among all the fun jewels and sequins!

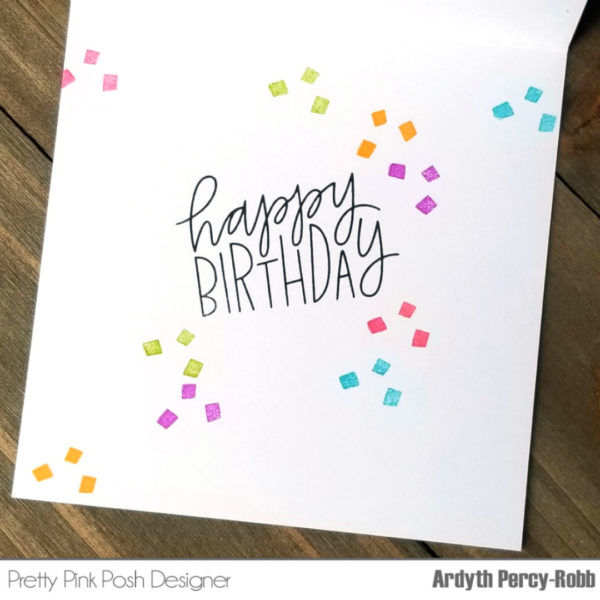
I started by stamping the background – I used one the Let’s Party sentiments from the set and created a grid by stamping it, turning the stamp and then stamping again. I added some colourful stamped confetti to the background, so that when all the jewels and sequins settle, there are still bright happy colours all over the card!

I built my shaker frame with 6 layers of the large Scallop Square die cut. This seemed to work fine, but I still think that next time, I’ll use 7 to give my shaker fillers a bit more room. I put acetate behind the top layer of the shaker frame, and I glued the silver twine to the second layer of the frame, so that the pinata could swing from that. I used some anti-static powder on the acetate so he could swing freely without getting stuck on the acetate.

Then I used some of the new Party Mix jewels and Sparkling Clear Confetti Mix as my shaker filler. I stamped another sentiment and some confetti on the inside of the card as well. I love how it looks like the pinata has already exploded, and the party is ready to start!

Thank you so much for stopping by today, I hope you enjoyed the card and video.

|

Crocus Flowers Shaker

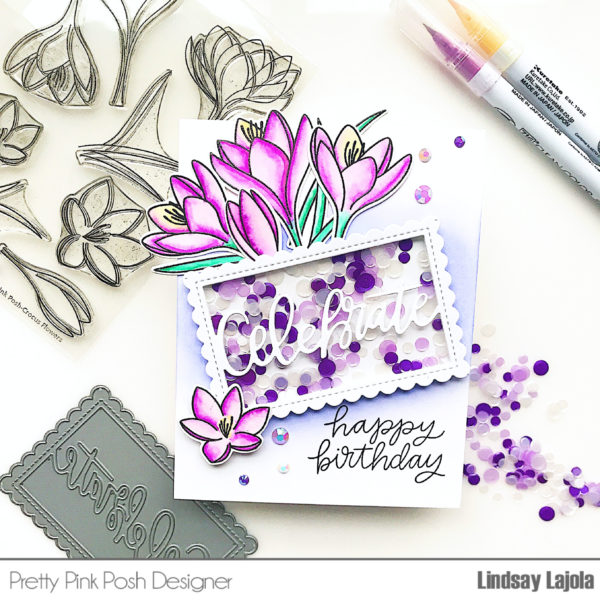
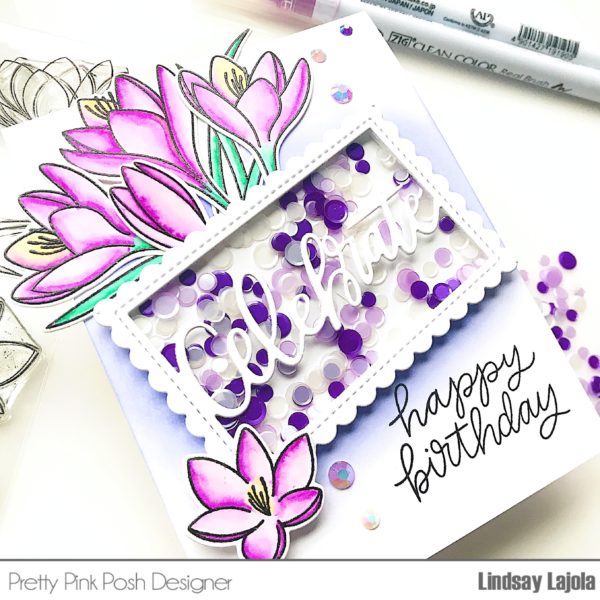
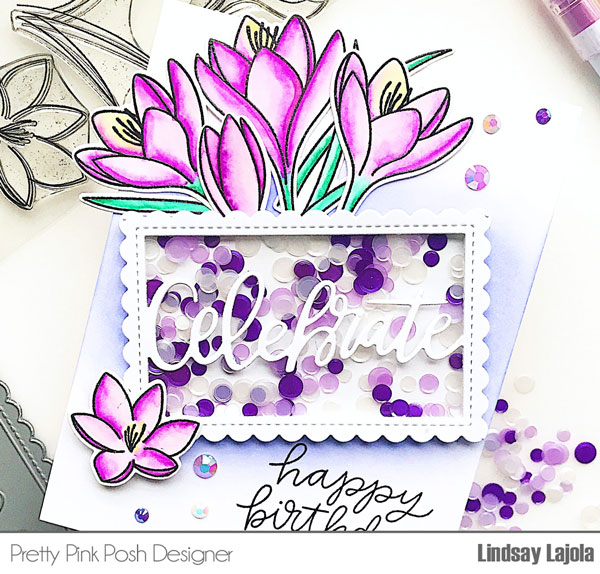
Hey there everyone, it’s Lindsay! I’m sure you all are really enjoying the new release! I’m loving all the birthday and celebration themed items since I’m always running low on birthday cards. For today’s card, I paired the Crocus Flowers stamp set and coordinating die set with the Celebrate Shaker Die to make a festive shaker card.

I started with coloring in the images from the Crocus Flowers stamp set with Zig Clean Color Real Brush Markers and blending out the color with a waterbrush.  After die cutting the flowers, I got to making the shaker.

I wanted the shaker element to be an embellishment on its own and really pop. So I started with cutting out 3 of the Celebrate Shaker Die pieces and gluing them together. I then added an acetate sheet behind all 3 layers of the Celebrate Shaker Die. To that, I put foam tape around all the edges of the shaker piece and added in lots of confetti from the Sugar Plum Confetti Mix. I then cut out a rectangle piece just perfect to fit behind the shaker die and adhered that to the foam tape.

I then had my Celebrate Shaker all ready to go. I played with the layout for a while, finally deciding the background needed some ink blending. I added a bit of Shaded Lilac Distress Oxide Ink to the background to make the shaker really pop. I arranged my flowers from the Crocus Flowers stamp set all around the shaker, added a sentiment from Cupcake Critters stamp set and finished it all off with some Sugar Plum Jewels.

Hope you all have a great day!

Lindsay

| |

5th Birthday Celebration Blog Hop- Day 3

If you missed Day 1 CLICK HERE //  If you missed Day 2 CLICK HERE

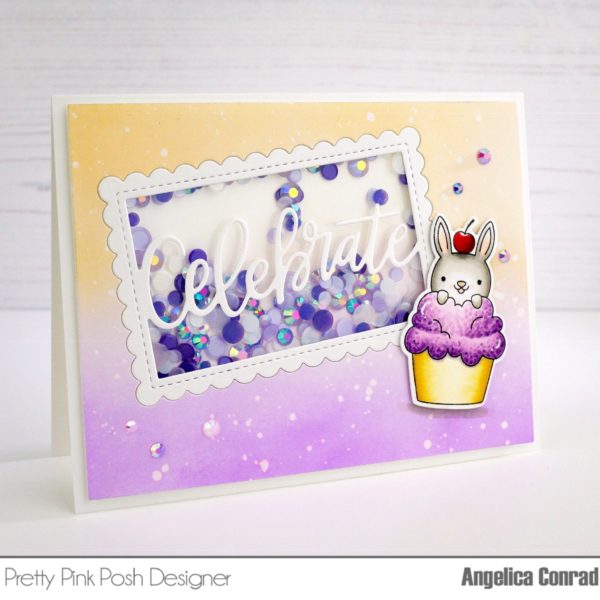
Hi friends, Angelica here and today I’m sharing a fun shaker card using new products from the Pretty Pink Posh January release. I am so in love with the new Cupcake Critters stamp set, and the images pair perfectly with the new Celebrate Shaker die.

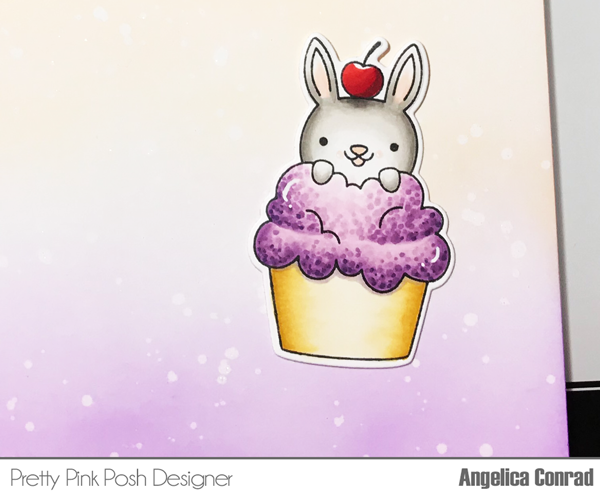
My first step was coloring the cupcake critter. I stamped the image onto white card stock with Copic-friendly ink. I then colored the image with Copic Markers. I started with the bunny:  W5, W3, W1, W00, R00. For the frosting, I used V00, V01, V12, V15. I colored the frosting with V00, did a little shading with V01, then did little dots of colors to finish the rest of shading, and to add texture. For the wrapper, I used Y21, Y23, Y26, Colorless Blender, and V91 for the drop-shade under the frosting. Lastly, the cherry I colored with R24, R27, R29, and R59. I used each marker to draw a line, leaving white space around the stem.

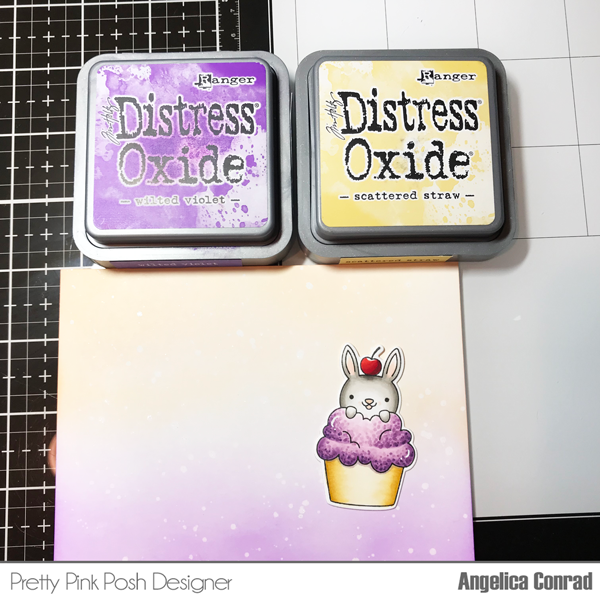
My next step was inking the card front. I used Scattered Straw and Wilted Violet Distress Oxide Inks to blend onto Neenah Solar White 80 lb card stock. I started at the top with the Scattered Straw, blending ink down towards the middle of the card front. I blended the same with the Wilted Violet, blending the ink up towards the middle. I didn’t want the inks touching too much. When I was finished, I tapped shimmer water all over the paper. I let the water sit for about 15 seconds, then dabbed the water up with a paper towel. This left shimmery drops all over paper.

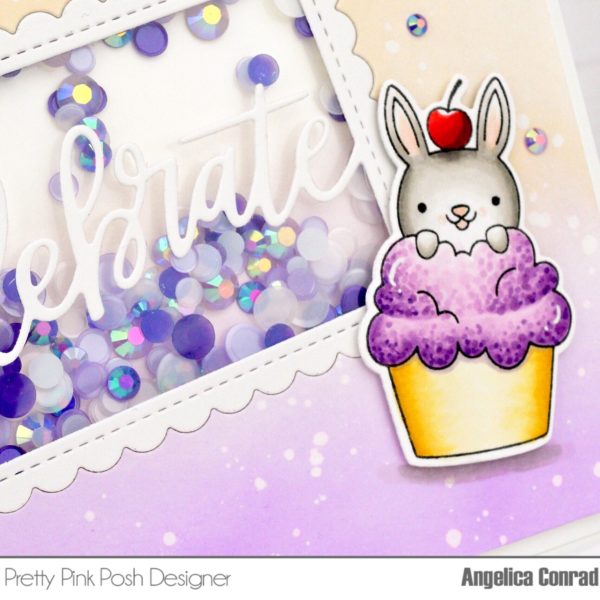
To make the shaker element, I ran the card front through my die-cut machine with the Celebrate Shaker die. I then closed the window from the backside with a piece of acetate and 1/8 inch Scor Tape. I die-cut Celebrate again out of white card stock that I had added Stick It Adhesive to on the backside. This made it really easy to attach the die cut to the front of the shaker window. I flipped the card front around to the backside and added Darice Double-sided Adhesive Strips to all four sides of the window. I filled the window with Sugar Plum Jewels and Sugar Plum Confetti, then closed the window with another piece of acetate. I added foam tape to the rest of the back and attached the card front to an A2 size card base. I used thin adhesive squares to add the Cupcake Critter, then used W3 and W1 Copic markers to draw a quick shadow under the cupcake. My final touch was adding a few Sugar Plum Jewels using Ranger Multi Media Matte.

No party would be complete without guests, gifts and a party favor, right? During the celebration, save 10% off your order using the coupon code provided below.

For the celebration, I brought along some very special guests to celebrate with us. Be sure to leave them lots of comments on their blogs and check out their amazing projects!


We have lots of amazing designers in today’s blog hop sharing new inspiration. Be sure to leave them lots of love- I’ll be giving away prizes to some comments left on their blogs!

PRIZES: We’ll be giving away 3 $25 gift certificates to random comments left on the different stops every day! That’s right, we’re giving away a total of NINE $25 gift certificates over the three days! Comments must be left before January 17th at 11:59 PM PST. I’ll be announcing the winners next week, so be sure to return and see if you are one of the winners!

Thank you for celebrating with me. I’m looking forward to the upcoming year and bringing you new products and inspiration. Have a great weekend!

| |

5th Birthday Celebration Blog Hop- Day 2

Hello and welcome to Day 2 of the Pretty Pink Posh 5th birthday celebration! If you missed Day 1, click here.

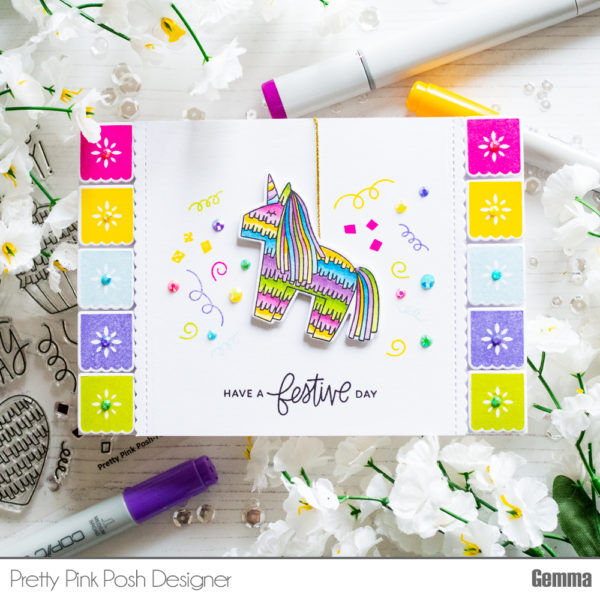
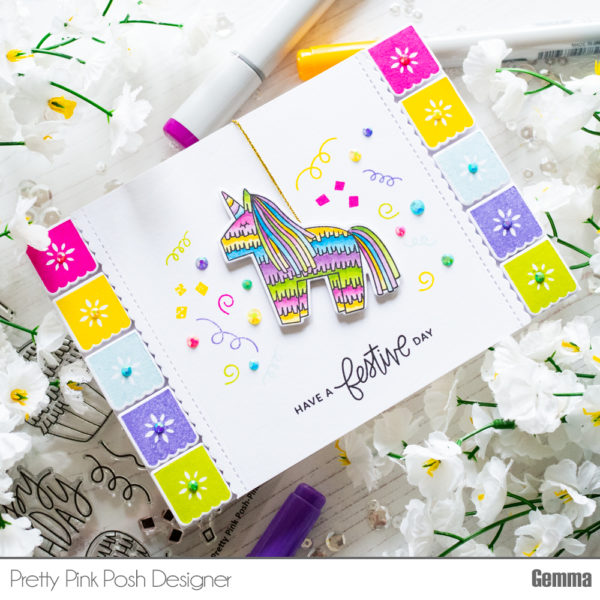
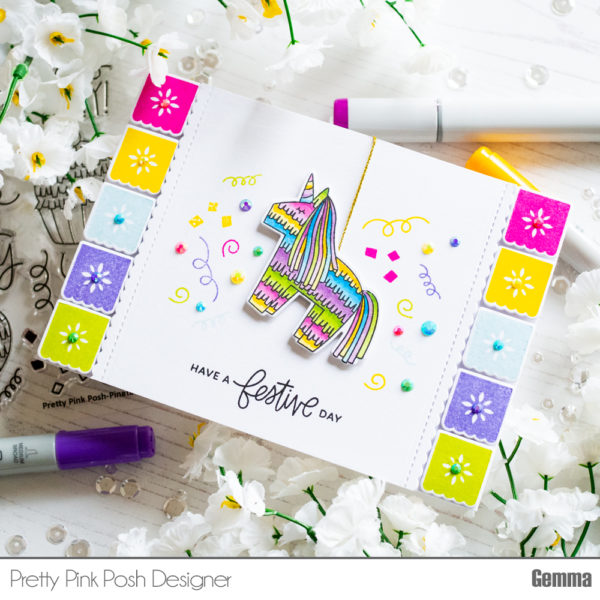
Gemma here and today I’m sharing a card using the new Pinata Party stamp set. I absolutely love this set!! The images are so much fun and the sentiments are perfect!

I began by working on the background. I stamped the solid pennant image with dye inks, choosing colours to match the new Party Jewels Mix. I stamped two per colour, die cut them out with the Pinata Party coordinating die, then used foam tape to create vertical borders on both edges of my card base.
I measured the gap in between the borders and cut a piece of white card to fit the gap. I used one of the Scallop Borders dies to add a decorative edge to each side. I then stamped a greeting from the Pinata Party stamp set with Versafine Onyx Black ink.

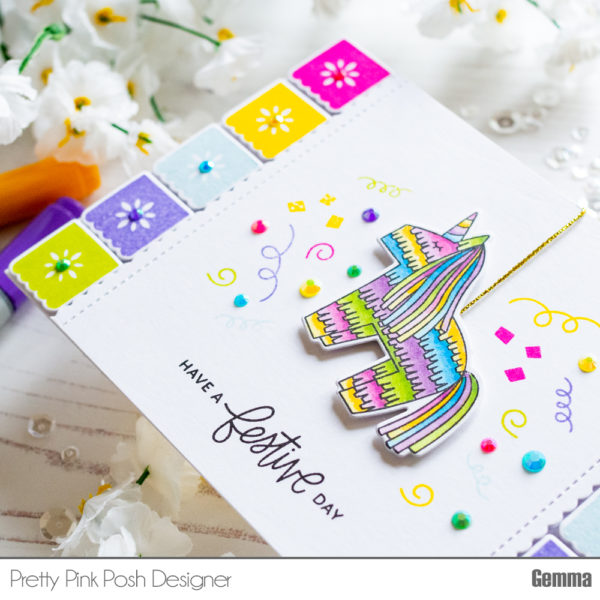
Next, I stamped and copic coloured the unicorn pinata image and die cut it with the coordinating die. I used a clear glitter pen all over it for lots of sparkle.

I cut a piece of gold thread to add to the back of the pinata, then used foam tape to add the unicorn to the white card panel. I tucked the end of the gold thread behind the panel, then added it to the card base with lots of foam tape.

Using the same ink colours as I used for the pennant images, I stamped some confetti images around the unicorn. I then finished with some jewels from the new Party Jewels Mix, adding them around the unicorn and also to the center of the pennants.

No party would be complete without guests, gifts and a party favor, right? During the celebration, save 10% off your order using the coupon code provided below.

For the celebration, I brought along some very special guests to celebrate with us. Be sure to leave them lots of comments on their blogs and check out their amazing projects!


PRIZES: We’ll be giving away 3 $25 gift certificates to random comments left on the different stops every day! That’s right, we’re giving away a total of NINE $25 gift certificates over the three days! Comments must be left before January 17th at 11:59 PM PST. I’ll be announcing the winners next week, so be sure to return and see if you are one of the winners!

Thank you for celebrating with me today and for all the love! I’ll see you bright and early tomorrow for day #3 of the birthday celebration. I hope you have a fabulous day!