It’s Justine and thank you so much for joining me for my first ever video for Pretty Pink Posh! I am hosting a very large event today called Save the Crafty YouTuber and Pretty Pink Posh is sponsoring 6x $25 gift certificates in today’s video! So be sure to head to video directly on YouTube so you can leave a comment.
I am hosting this event with over 55 videomakers that have come together to help out some of the crafters just starting to make videos. YouTube has changed some rules about who is allowed to earn money from their channels and many are at risk so I put together a hop with plenty of prizes to help increase views and subscribers before the end of February. There are 120 prizes being given away throughout the video hop, so the more videos you click and comment on, the more chances you have to win! You can see the whole list of videos on my blog!
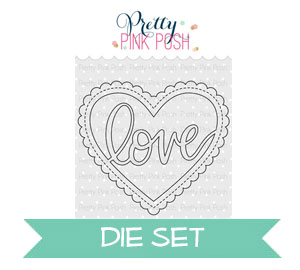
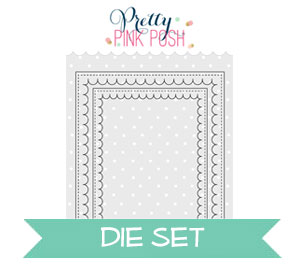
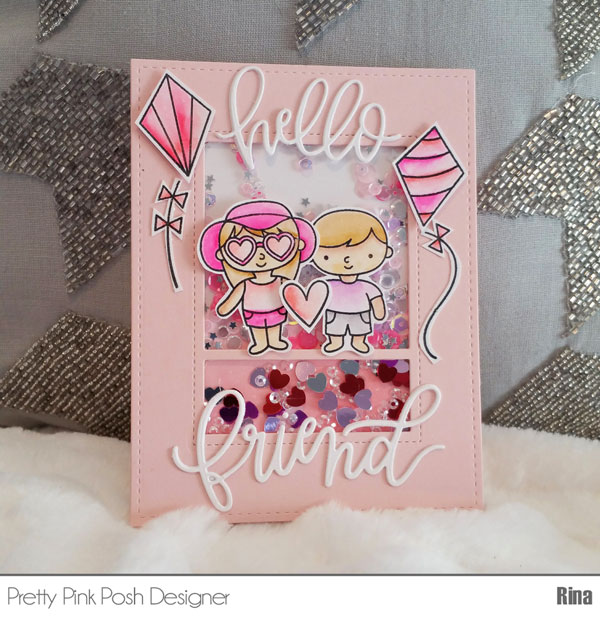
For today’s video, I wanted to make a mix of masculine and feminine love cards since Valentine’s Day is quickly approaching. The Love Shaker Die combined with the Scallop Frames made such perfect accessories to create these quick cards. Did you know that two inked up 4×5 ¼ pieces of cardstock produced four cards!? I die cut each piece of coloured cardstock with the dies and saved all of the “waste”, then I die cut two pieces of white cardstock in the same way and added the wasted scraps into the card.
For the batch of pink cards, I used Candied Apple, Picked Raspberry and Wilted Violet Distress Oxide inks for the background. I blended them on the cardstock and added water to see the oxidized effect occur. My tips for perfect blending are: Don’t put too much pressure on the handle and allow the colour to build up slowly, start off the paper and work your way into it, move the colour around in a circular motion to avoid harsh lines.
For the batch of blue cards, I used Peacock Feathers, Broken Glass and Salty Ocean Distress Oxide inks for the background. I blended them on the cardstock and added water to see the oxidized effect occur. The nice thing about the oxides is that they are much more user friendly for blending than the originals.
Thanks so much for joining my for this fun event everyone! And thank you to Pretty Pink Posh for having me on the video team and sponsoring this event!
I enjoy creating for holidays and crafting for Valentines Day is super fun. I love all the fun colors and bling. I thought I would kick start Valentines Day crafting with some fun shaker cards. I have been obsessed with shaker cards lately and definitely put my Pretty Pink Posh sequins to work for this project.
One of the things that I try to do is to mix my old and new stamp sets together. I do like to stretch my stamp investment by finding new ways of pairing my stamp sets. This forces me to have a new take on my stamp sets, be more creative and make something unique to me.
I wanted to stick to a Valentines Day theme so I pre-selected the colors I would be using. I am using Zig Real Clean Color Brush pens today because I wanted to achieve a soft, easy, watercolor look. I found great success in using Bristol Smooth cardstock along with Versafine Onyx Black ink in conjunction with the Zigs. I used a water brush to push the color around and had a dish of clean water and a paper towel handy to clean between colors. To create the background I used Distress Oxide inks in Worn Lipstick and Wilted Violet. I used the Distress Sprayer to create white splotches in the background.
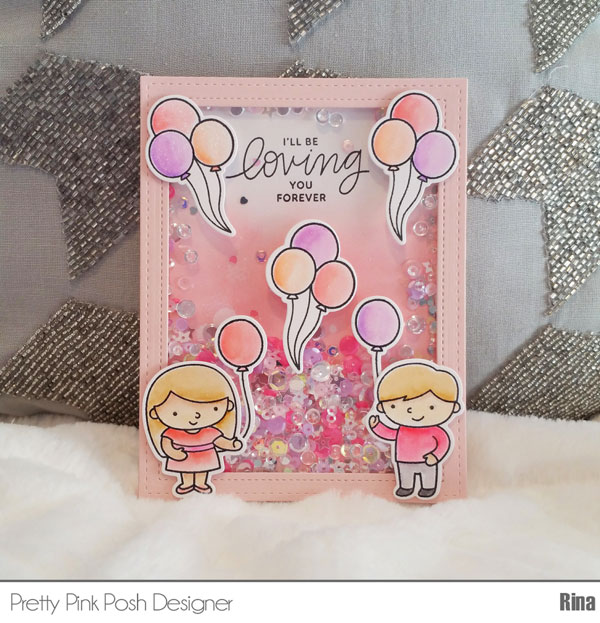
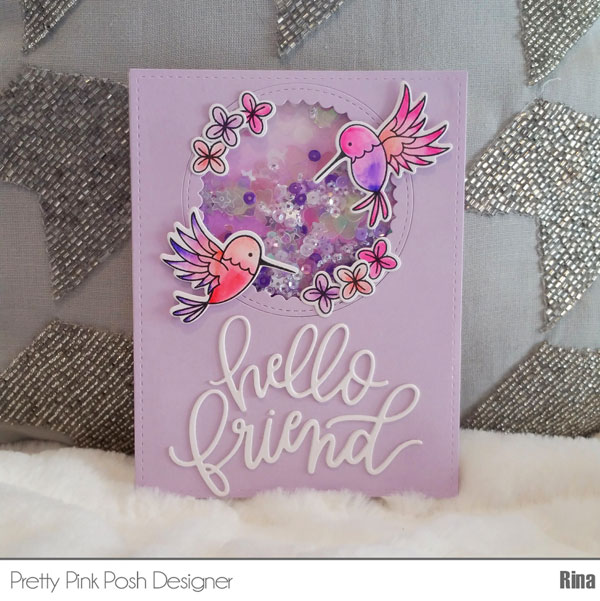
I played with my stamp sets and came up with a couple of designs incorporating two stamps sets together or repurposing a themed stamp set and thinking of other ways to use it. I paired Hummingbird Thanks and Bold Blooms together and made a lilac card. I used my Summer Friends images along with Fly a Kite; I thought the heart sunglasses on the girl image were perfect! Finally I used Birthday Friends images as Valentines Day images. The Birthday Friends set is one of my favorites and my favorite part is the balloons. I plan on using these balloons with animal images on a future card, so it appears the animals are being carried up. I love that the Pretty Pink Posh sets coordinate so well with each other.
Here are the basics of making a shaker card:
Cut out a window on a card front
Place acetate behind window using glue – I used Glossy Accents
Line the back of the window with two layers of foam tape (One layer of foam tape if you would like to use less sequins or reduce bulk)
Make sure there are no empty spaces when adhering the foam tape, you do not want any of the sequin yumminess to escape!
Powder tool around the inside tape of the frame to prevent sequins sticking to the side of foam tape (I do not powder as I do not mind the sticking)
You can use the Pretty Pink Posh sequins mixes as is because the mixes are super colorful and sparkly or you can add more sequins to match the color and mood of your project. For this project I wanted over the top “bling” for my Valentines Day themed shakers so I achieved this with adding my all time favorites.
Here is a list of the sequins I used and some of my favorites to mix up. In general, I will add gold colored sequins to warm toned cards and silver colored sequins to cool toned cards.
For this project I used these sequins as my base color:
Then I added some of my favorites, this is optional. I decided to mix in some of these in because I wanted to match the lightness of my images. Here is what I normally use to mix, of course I do not use all of these the same time, I just pick and chose which ones will be best to achieve the look I would like.
For finishing touches I added the Wink of Stella in clear on the stamped images. I finished the insides of the cards with sentiments from the Love Sentiments stamp set. I had extra colored images, which I added to the inside of the card, these included hearts and flowers. I also made sure to layer my die cut sentiment “Hello Friend” to ensure the die cut popped and had a lot of dimension.
I hope you enjoyed these cards and give it a try! Thanks for stopping by!
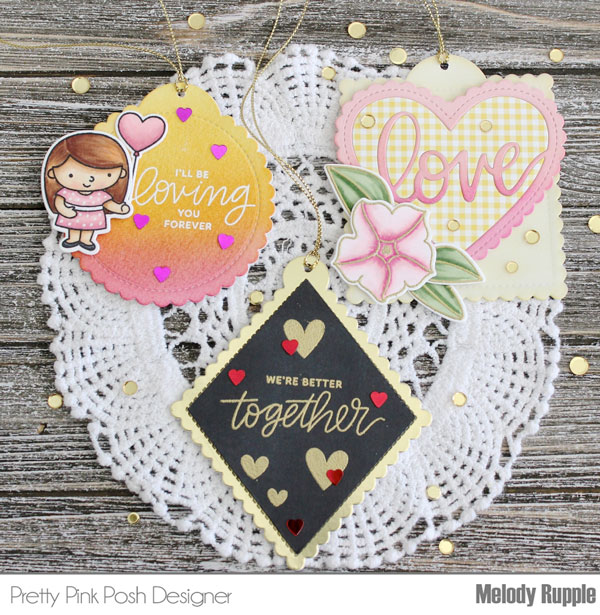
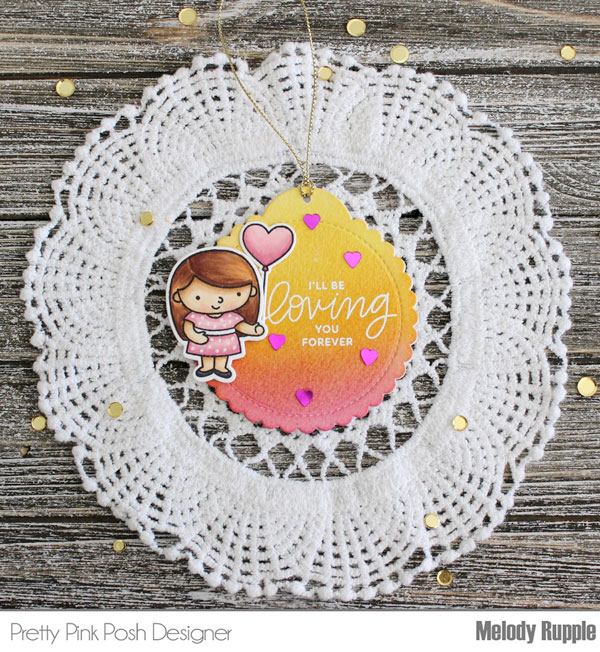
Hi everyone! It’s Melody here today and I have some ideas for Valentine’s Day Tags to share with you for everyone on your list. I create a masculine tag for my husband, a tag for a special little girl, and a tag for one of my daughters.
I like having tags ready to go in my stash. A handmade tag dresses up the simplest package!
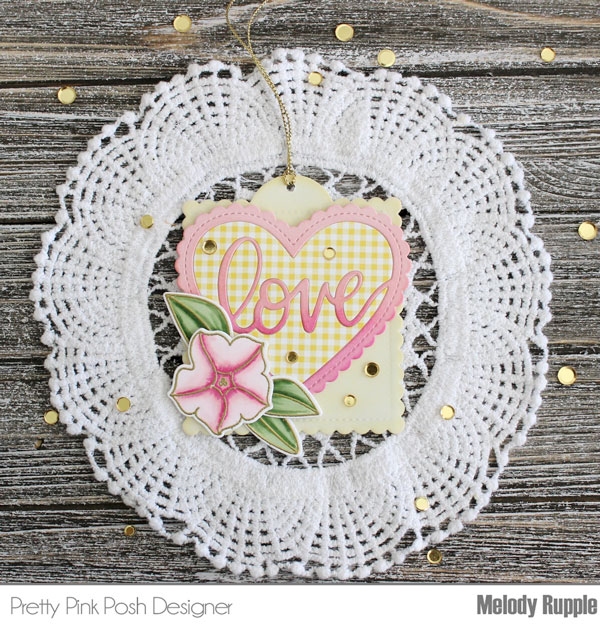
My first tag is for one of my daughters who is a young adult. For the base of the tag I used the largest die in the Scallop Square Tags Dies. Next I die cut the Love Shaker Die twice, once from pink cardstock and once from patterned paper. I inlayed the pattern paper into the pink heart and used double sided tape to hold the pieces in the heart and then attached the heart to the tag. The flower is created with the Pretty Petunias Stamp Set and the Pretty Petunias Coordinating Dies. The last step is to attached a few sequins from the Metallic Gold Confetti Mix.
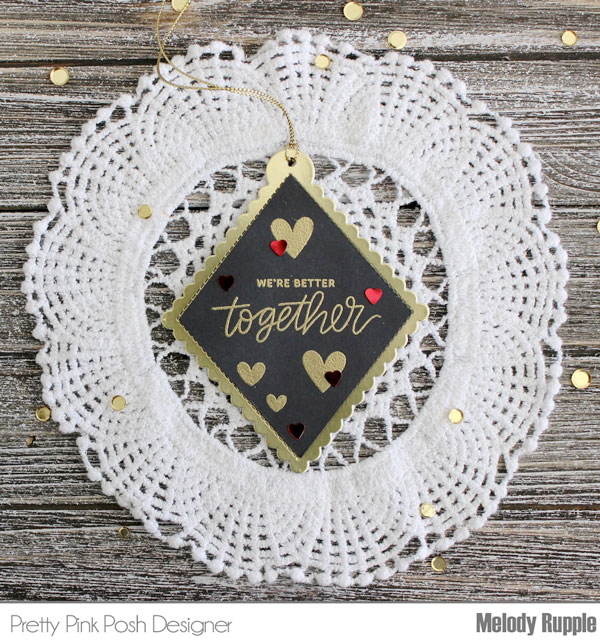
My next tag was created with my husband in mind. Valentine’s Day always includes a box of his favorite Sees Candies and this tags will be perfect attached to the box. I used the Scallop Diamond Tags Dies as the base for the tag. I stamped the sentiment and the hearts with the Love Sentiments Stamp Set in gold ink and embossed with gold embossing powder. The final touch is a few red heart sequins from theAssorted Heart Confetti Mix.
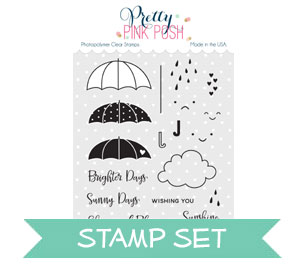
Good morning! Heather here this morning, and I’m excited to be starting off the new year with a new tutorial theme – Something Old, Something New! I thought it would be fun to mix together both some brand new products, and some older ones – to show how AMAZINGLY well Pretty Pink Posh products work together! Today I’ve paired up the darling new Birthday Friends stamp setandcoordinating dies, withRainy Days,Rainy Days Additions, and Rainy Days Dies– as well as some of the classic Scallop Frames!
While these cute little friends are designed perfectly to hold the balloon image in theBirthday Friends stamp set, I thought it would be perfect for them to hold an umbrella as well!
Next up, I did the same with the top of the umbrella from Rainy Days Stamp set, and used the coordinating Rainy Days Dies to cut the handle of the umbrella from a dark brown cardstock. I also adhered the handle onto the post of the umbrella.
Next, I heat embossed part of my sentiment from Rainy Days Additions on a thin strip of the same dark brown cardstock, and also die cut the largeScallop Oval in the same color.
Then it was just a matter of putting all the elements together! I used some creme cardstock to adhere the frame, stamp the rest of my sentiment fromRainy Days Additions in a dark brown ink, and add the fun friends at the bottom. The only thing I adhered with foam adhesive was the top of the umrella to give it the feeling of coming out over the top of them. I tucked the handle between there hands so it looked like they were sharing holding it!
It felt like it STILL needed a touch more, so I added some layers of torn vellum on the bottom so it looked like they were standing in a huge puddle (I live in the Pacific Northwest – so this is VERY realistic! Haha!) – and then added a Scallop Frame cut in white around the edges before mounting on a card base made with the same dark brown cardstock.
A few 4mm and6mm Clear Droplets are the perfect finishing touch – feels just like huge raindrops falling from the sky!
Thanks so much for stopping by today! Have a wonderful day!
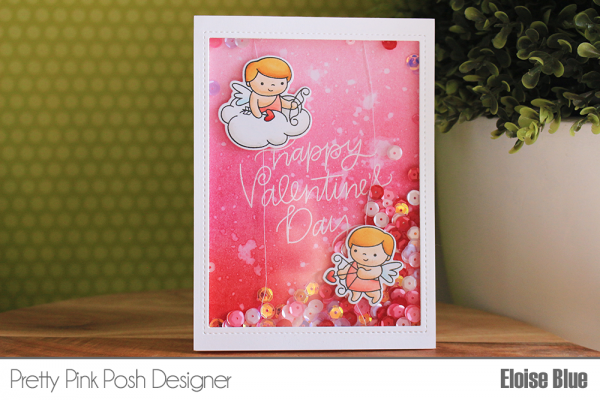
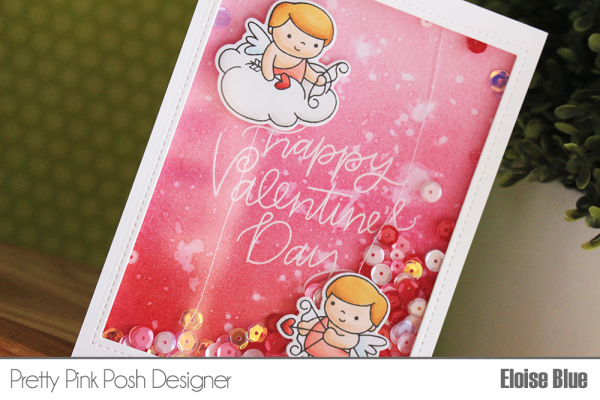
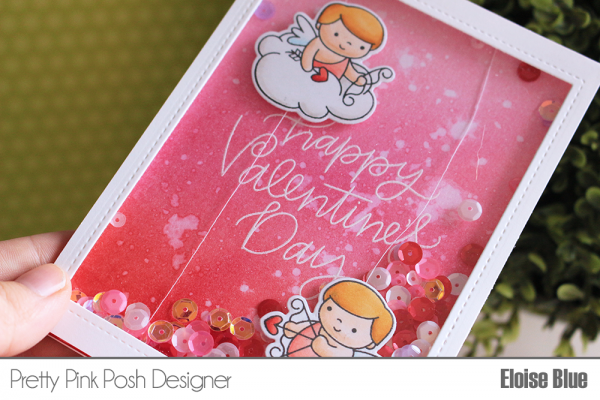
For my first card, I’ll be creating a full card shaker, with some images floating inside. So, to begin, I stamped out the two cupids from Cupid Friends and coloured them in with Copic Markers. Once I finished colouring them in, I went ahead and cut them out using the coordinating dies. I set those off to the side so I could work on my shaker pocket. I took a white piece of cardstock, cut it down to 4” x 5 ½”, then used the large rectangle die from Stitched Notes Dies and cut that out of the centre. This created a frame for my full card shaker. I then added adhesive on the back of the frame and adhered a piece of acetate to the back.
Next, I took a piece of watercolour paper, cut it down to slightly smaller than 4” x 5 ½” and used the ‘Happy Valentine’s Day’ sentiment from Cupid Friends and white heat embossed it into the centre of my card stock piece. I then used some Festive Berries, Picked Raspberry and Spun Sugar Distress Inks to create a blended gradient effect. Then splattered some water over top to create a water splotch effect. I dried it off with a heat tool and could start to assemble my shaker card.
I went ahead and added some white thread onto the backs of my angels, then took the ends of the thread and adhered them directly to the ink blended panel using some scor-tape. Then, I added in some Sweetheart and Spring Blooms Sequin Mixes in the middle of the panel. Lastly, I added two layers of foam tape behind my white frame from earlier and adhered that over my card base directly. That finished up the first card, let’s move onto the second card.
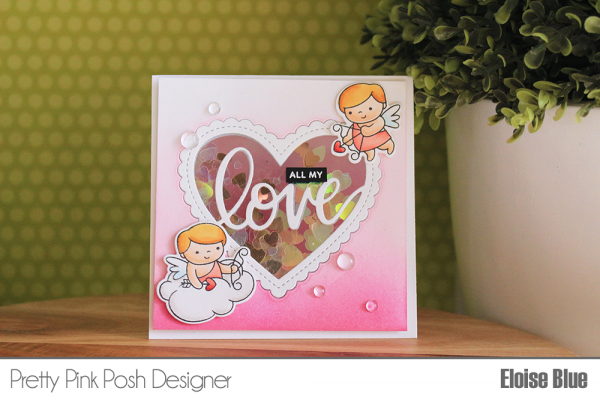
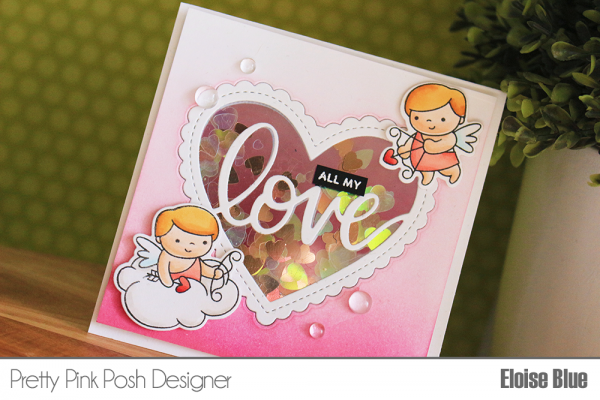
For the second card, I wanted to create a see-through shaker design. To start up, I coloured the same two angels the same way I did for my first card and then cut them out using the dies. Next, I cut a card base to 4 ½” x 9”, scored at 4 ½” to create a square card. Then, cut down an additional white panel to 4” x 4” to create my shaker in. I then took the Love Shaker die and cut it out of the centre of my panel. Once that was cut through, I lined up the cut panel over top of my card base, then pressed in the Love Shaker die so I could cut it from the right place in my card base also. Once they were both cut, I set them off to the side to create a stencil. I cut the same die from some thin acetate, so I could ink blend through it.
To line up my stencil on the inside, I first closed my card, placed the ‘Love’ positive piece inside the negative piece, held down the inside of the love piece with my fingers, then opened the card base, adhered the stencil over top making sure all the grooves lined up with each other. Then, adhered down all three sides and made sure the front of the card lined up with the inside, it did so I began ink blending. I used Picked Raspberry and Spun Sugar Distress Ink to ink blend on the inside of my card. Once I ink blended that I went ahead and ink blended my front panel with the same two colours. I then added adhesive onto the back of my front panel and adhered down a piece of acetate over top, then repeated the same steps for my card base. I then added adhesive onto the back of my love frame piece and adhered it on top of the acetate and also did the same thing for the inside of my card, except I added adhesive on the front of the piece and not the back so everything lined up.
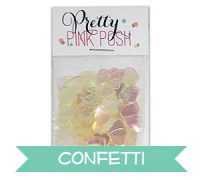
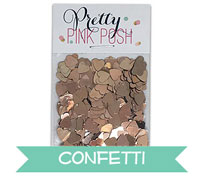
Lastly, I added some Rose Gold Heart Confetti and also some Iridescent Heart Confetti to the inside of my shaker, added a layer of foam tape and adhered my panel over top. I also added my Cupid images with more foam tape and scattered around some Clear Droplets too. To finish up my card completely, I cut apart the ‘All My Love’ sentiment from Love Sentiments and white heat embossed the ‘All My’ sentiment onto some black cardstock. I cut that down into a strip and adhered that onto my card also and that finished up my second card.
Thanks so much for stopping by today, and I’ll catch you next time.
To begin, I die-cut the “love” from the Love Shaker Die keeping only the love die after fussy cutting. For this card I wanted to create a bold background.
Next, to create my background I used the Distress Ink from Tim Holtz in Stormy Sky and Black Soot to create a dramatic effect.
Before adhering the love die I first splatter the background with white watercolor paint for added interest. Next, I stamped the cherub on a white cardstock and colored them with Copic Markers. The sentiment “happy valentine’s day” is also part for theCupid Friends stamp set as well as the tiny bitty hearts. After coloring I die-cut the cherubs with its coordinating die set and the sentiment then I fussy cut.
I adhered every die-cut with foam tape for dimension and addedSparkling Clear sequins for interest.
I hope you enjoyed my take on these products. Join us tomorrow for another day of Valentine inspiration.
Hello, there! It’s Marge here with you today. I’ve already shared a few Valentine cards so far, but today I’m going to share somewhat different technique from my usual styles. But don’t worry, it’s easy, clean and simple to make, as always.
To make Valentine themed cards, I wanted to make bold and bright red colors, so I decided to use alcohol inks this time. Do you feel comfortable using alcohol inks? Unfortunately, I’m don’t. As a mother of two young children, keeping and using flammable materials in the house is not easy at all. So I try to use alcohol inks as simply as I can! If you are feeling the same way, I hope today’s post will help you a little as I’m a beginner, too.
Here are what I used for making alcohol inks background. You only need some colors that you want and Yupo paper. I used Watermelon as a main red color, and some other colors: Mountain Rose(coral), Sunset Orange(orange), Purple Twilight(violet), Sunshine Yellow (yellow), and Hazelnut (brown).
To begin, I opened the ink cap, and just dropped several drops here and there on Yupo. I repeated the process using the same or different colors. Then I wait while the drops spread and fuse each other and finally covered the entire panel. (See the photos in clock-wise direction)
If you want to make some patterns, brushing or sponging using pure alcohol or blending solution will help. I just wanted to let you know dropping inks only will work or you may tilt the panel before inks are dryup, so the fluid can flow on one side and make some patterns. Again, my point is that you don’t have to buy all those supplies they say to enjoy alcohol inks.
Here are three panels I made in just 3 minutes. I used several inks listed above for the two panels, then I used only Watermelon for the last.
After the panels are dried up, I trimmed them into 4×5.25 inches size. Once you have done with your own alcohol background, the next steps are pretty easier. Here I’m showing you 3 cards made from a single alcohol panel.
For the first one, I die cut the panel using Love Shaker Die, then used the remaining panel as a front cover.
I die cut one moreLove Shaker Die from white glitter paper to use as a window frame.
The shakers background is also made of white glitter paper which I used in the first card. Then I put colored images I made using Cupid Friends Stamp Setwith Coordinating Dies, stamped a sentiment from Love Sentiments Stamp Set. Because I used other colors of alcohol inks like brown or purple, you can see some color gradation on the die cut, and I was very satisfied with this random effect.
In the third one, I used negative cut pieces from the Love Shaker Die to make a clean and simple card.
To give them more dimension, I used two layers of pieces. I would also recommend to use another diecut frame as a guidance in order to arrange negative pieces in right position.
I’ve shown how to make a couple of simple designed cards from just one alcohol ink panel! So excited, isn’t it? I’m showing you one more card for your interest.
Here, I used another panel made of only Watermelon ink as the background. To make a heart shaped frame, I cut out the “Love” script from the diecut. The gold glitter “Love” script was made using the same way. The front panel is from Knit Picky paper pack. Then I finished off the card by putting Metallic Gold Confetti Mix.
Thank you so much for reading this post. I hope you enjoyed it, and I hope for some of those who are unfamiliar with alcohol inks like I am, this post will help you and that you give it a try. Have a wonderful day!
Hi there Pretty Pink Posh fans! Crystal here with the continuation of the Valentine’s Day week here on the PPP Blog. I wanted to create something that would utilize the beautiful “love” word from the Love Shaker die.
Let’s start by gathering our materials, for this card I used the following Pretty Pink Posh products :
With our Love shaker, I have die cut 4 “love” words from Melon Mambo cardstock and have trimmed off the heart. To save paper, I cut strips just wide enough to fit the “love”.
Once those were trimmed out, I glued the “love” on top of each other to create a thick die cut.
From the Love Sentiment stamp set, I used the “All My Love”. I masked the “love” from the set with washi tape, inked the stamp, then removed the washi tape. I stamped the sentiment on the card base above of where I plan to place the die cut “love”.
Now it’s time to work on the card panel. First I wanted to stamp the darker of my ink colors, so using the solid hearts from Cupid Friends with Melon Mambo, which will coordinate with the “love” die cut.
For the larger hearts from the Love Sentiments set, I have stamped those in the following ink colors. SU Powder Pink, SU Melon Mambo, Pink Shimmer Delicata, Altenew Blush and Altenew Soft Lilac.
I felt this card needed some touches of gold, so I heat embossed the heart outlines from Cupid Friends in gold embossing powder. Since the gun was hot and the powder was out, I decided to create a dipping effect on the love die cut.
This was super simple, as I tapped the half of the die cut in embossing ink, covered with powder and heat set. To finish the card, I added a strip of gold washi and added a few Sparkling Clear Sequins.
I hope you like the simplicity of this card! I certainly did! The colors could easily be changed and the sentiments from Love Sentiments could also be easily interchanged.
Have a fabulous day! Join us tomorrow for another day of Valentine inspiration!
For this card, I started off by creating the shaker to place in the center using theStitched Duo 3. For the sentiment on top, I embossed the “SENDING YOU” using theRainy Days Additions stamp set using white embossing powder and cut the word “LOVE” using theLove Shaker die.
TIP: To cut just the word out, I cut rectangles 2 3/4″ x 1 5/8″ and placed over just the word before die cutting.
To have the word pop up, I cut the word out three times and glued them together. To fill in this shaker, I used a combination of sequins from the Sweetheart Mix and a splash of the Marshmallow Confetti Mix. Love how they look together.
Last but not least, added some foam mount tape underneath the images before adding them to the shaker card.
Be sure to join us tomorrow for another fun day of Valentine inspiration!
Hello everyone, Gemma here. It’s great to be on the Pretty Pink Posh blog today to share a card with you all.
I’ve always loved the look of shape dies with words within, so was thrilled to see the new Love Shaker die is the latest release. It made me think of the Love Heart sweets that we have in the UK (my home country), so I thought it would be fun to create a card version. It was a quick and simple card to make.
First, I ran a standard size card base through my die cutting machine with a circle die. By placing the circle die just off the top of the folded edge, it retains that edge and makes a circle card base. I then die cut a second circle, the same size, from a separate piece of white card and adhered it to the card base. This gives the card an uninterrupted circle shape at the front.
Next, I die cut two Love Shaker hearts from pink cardstock, and layered them together on the card base for some dimension. I couldn’t resist adding some iridescent heart confetti to finish this card. I think circle cards are such fun! They stand up very well and, if you make it from a standard size card base, it will fit in a standard envelope too.


 A few
A few