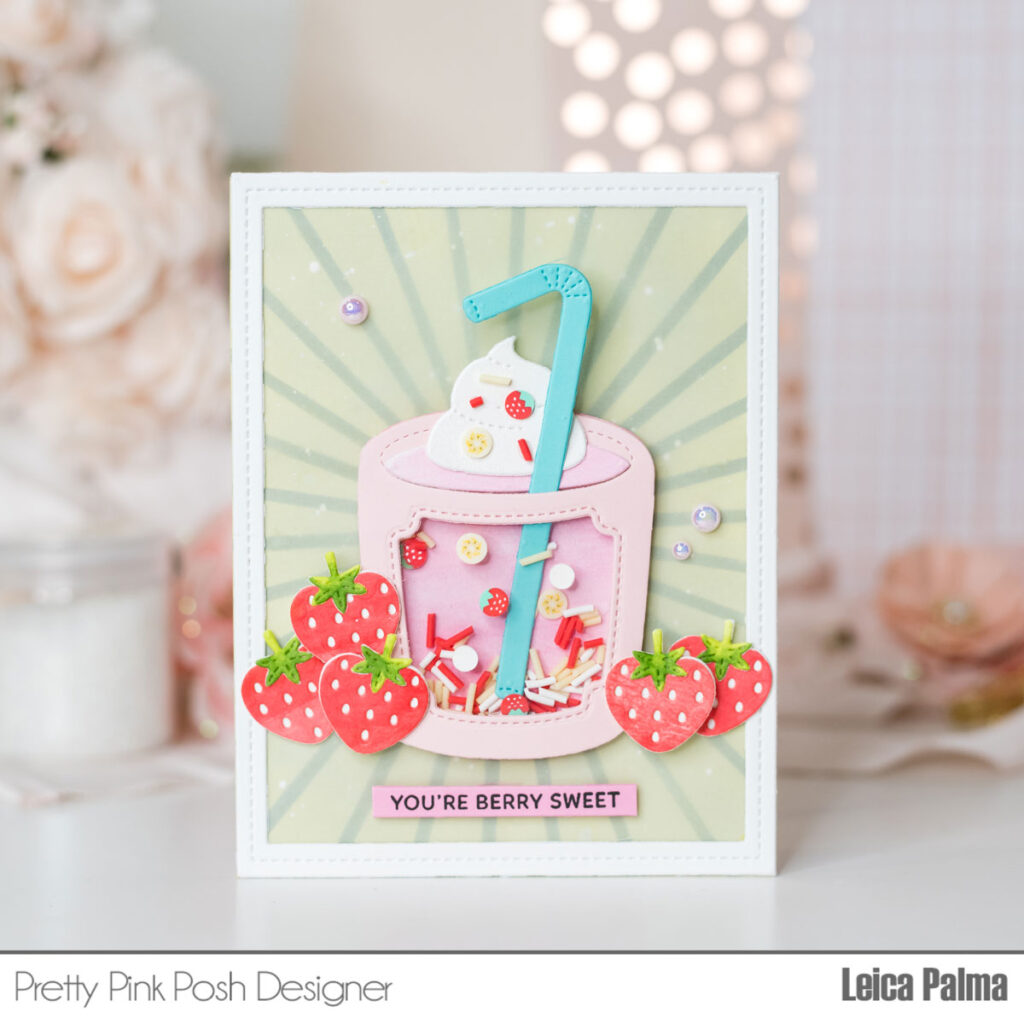
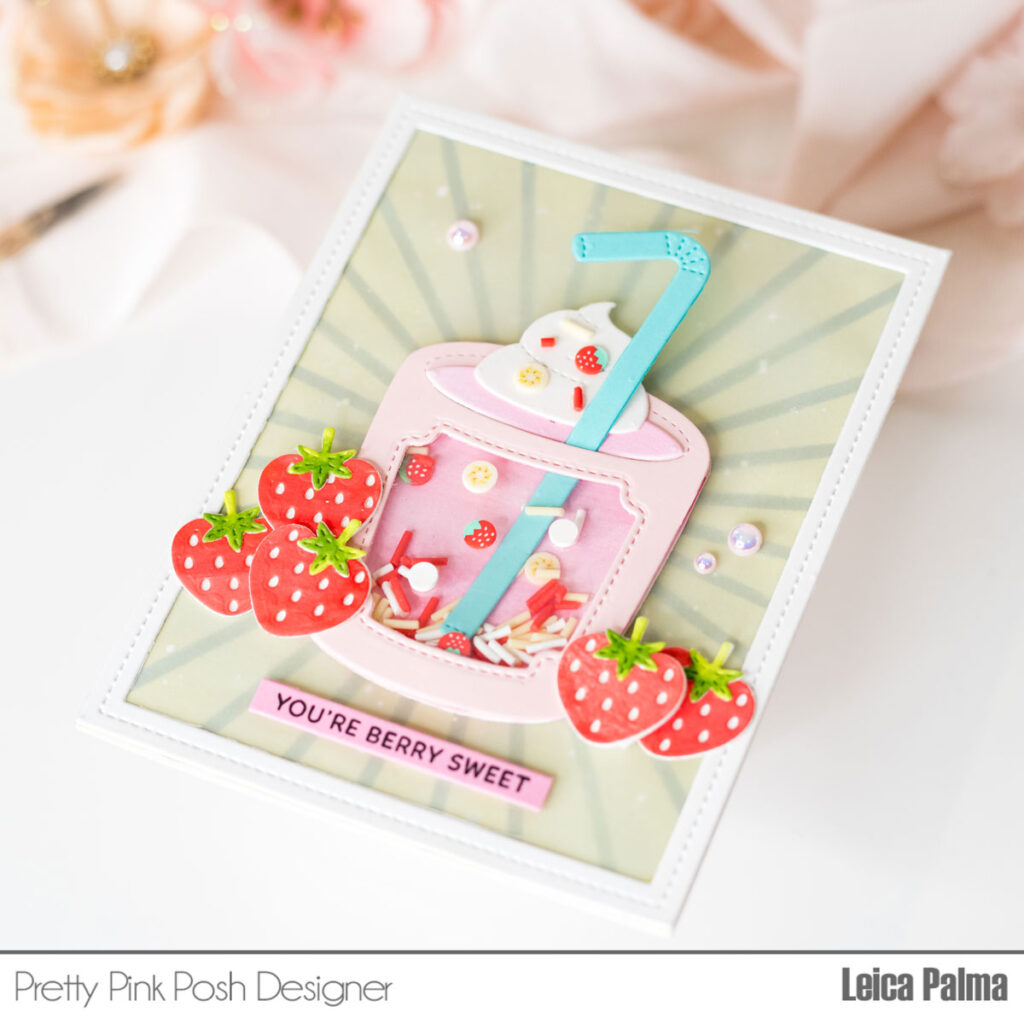
Paloma Summer Mug
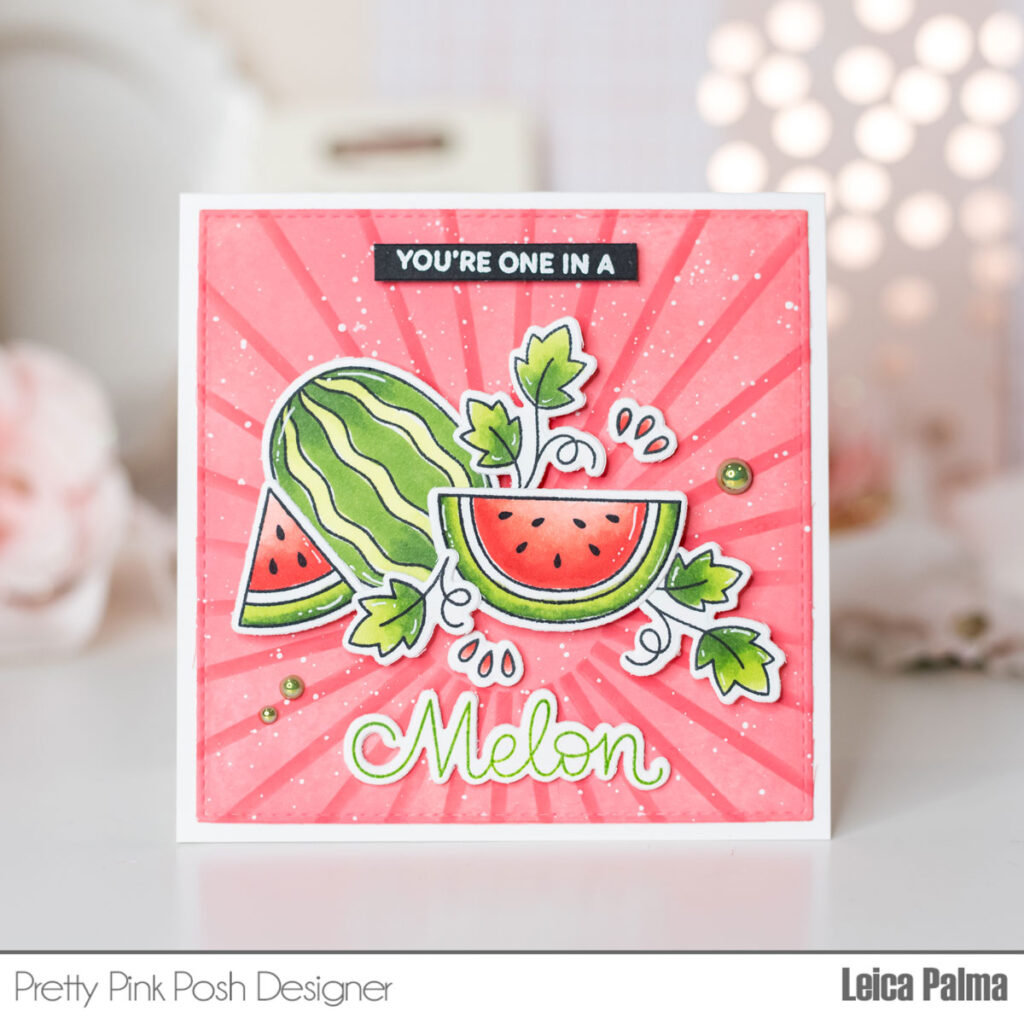
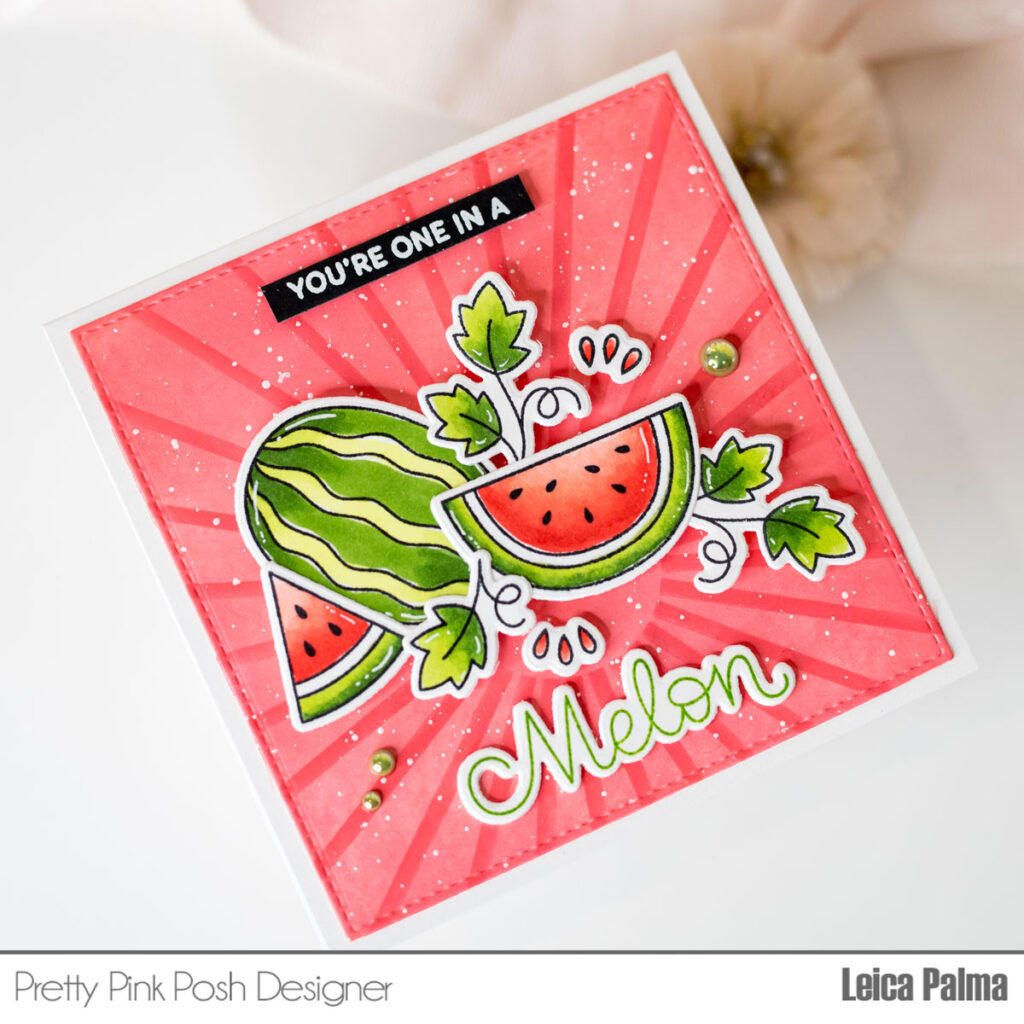
Hey there, crafty friends! It’s Leica, and I’m excited to share a fun card with you today using the Fruit Mug Additions Dies. I decided to create a card featuring my favorite cocktail, the Paloma. It’s a refreshing mix of grapefruit and Tequila. If you haven’t tried it yet, I highly recommend it if you enjoy cocktails. But for now, let’s dive into the card!
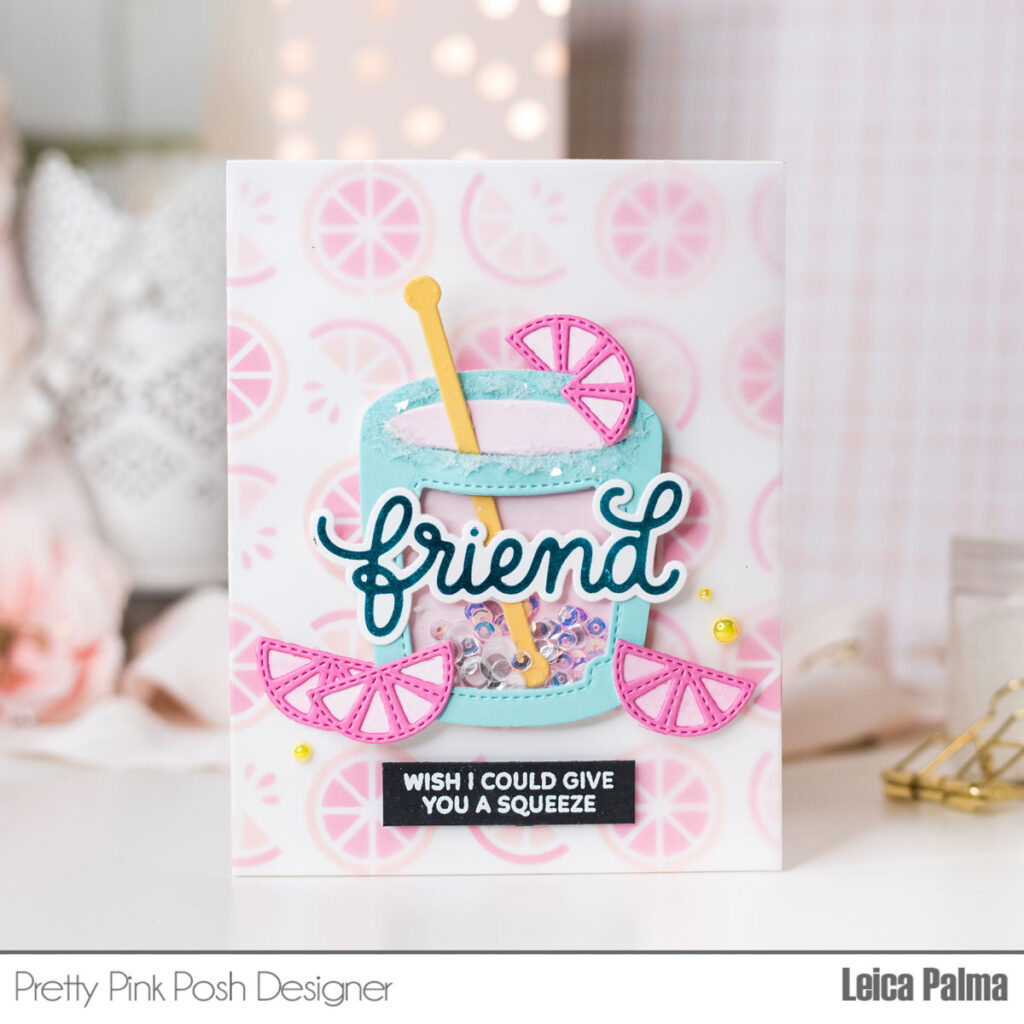
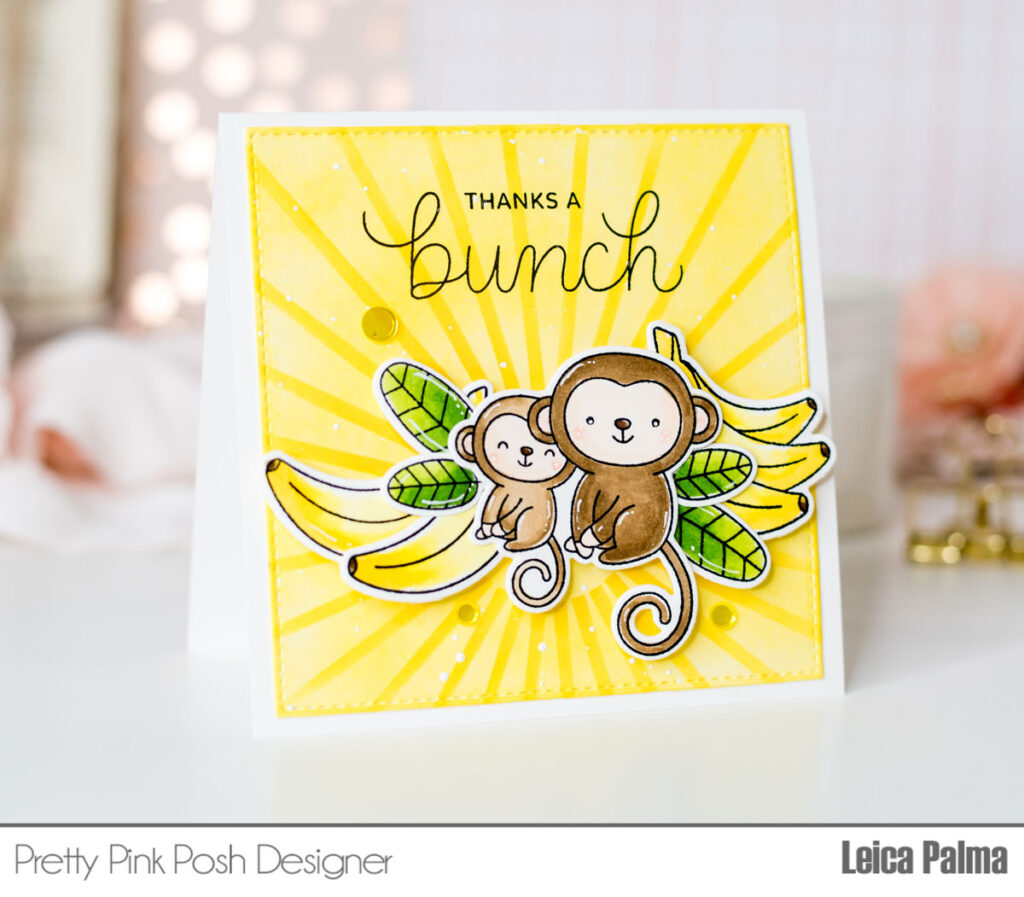
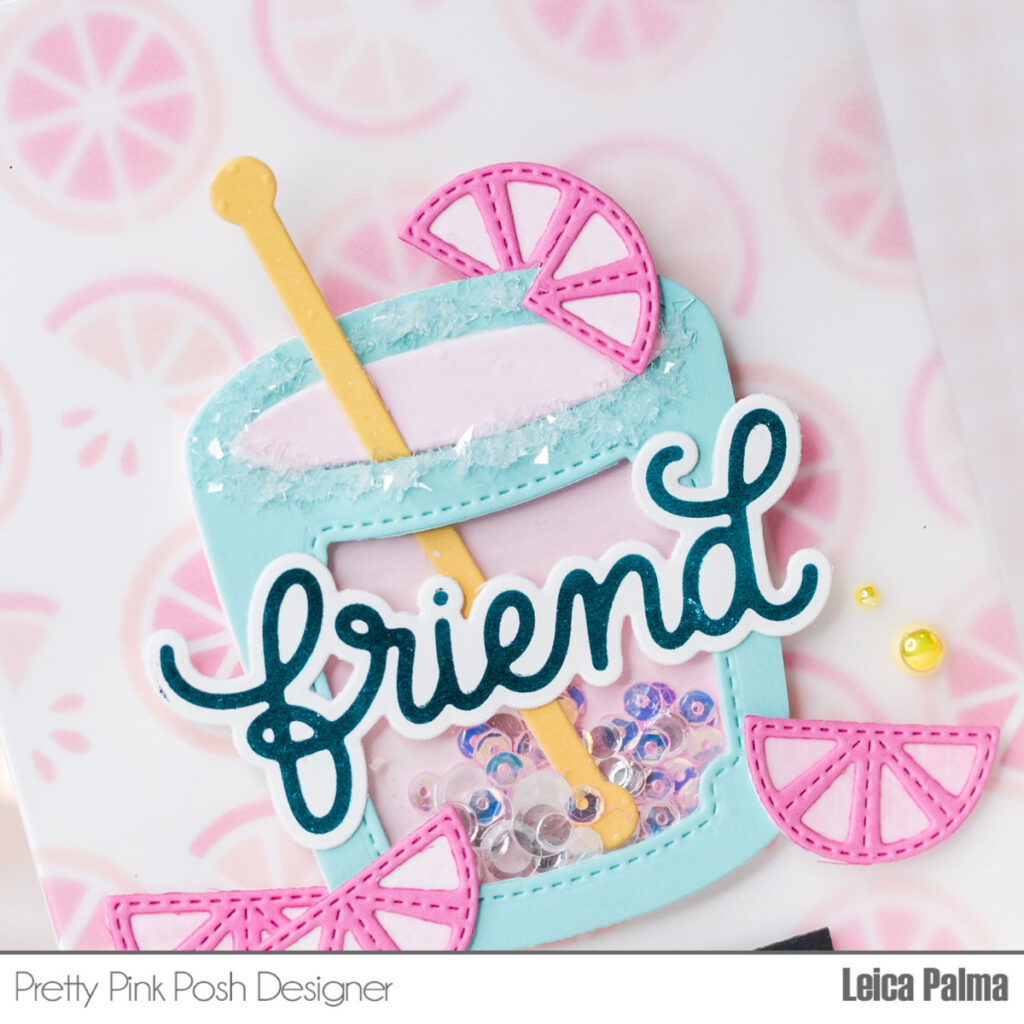
To start, I used a A2-sized white card base and inked it up with some pretty colors using the Layered Citrus Stencils and Distress Oxide Inks in Spun Sugar and Kitsch Flamingo. This stencil makes it super easy to create a fun background.

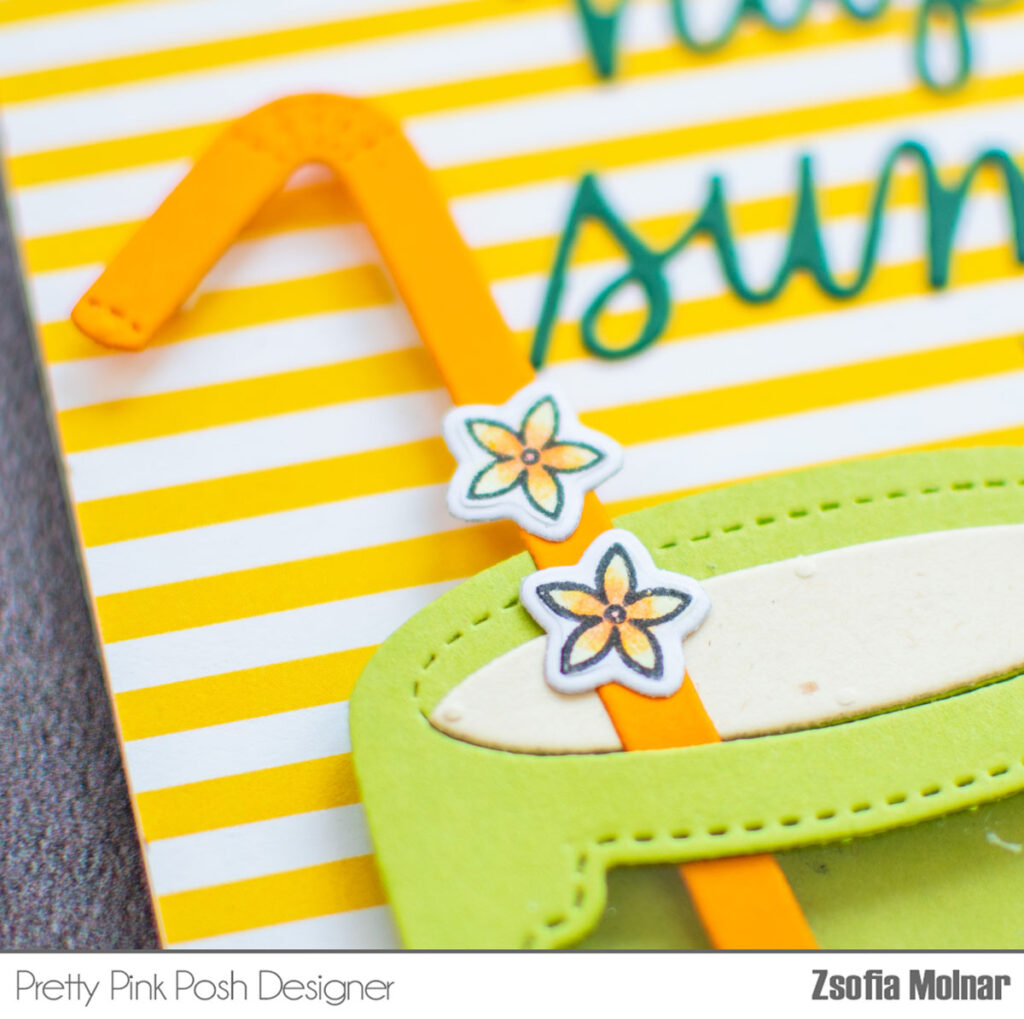
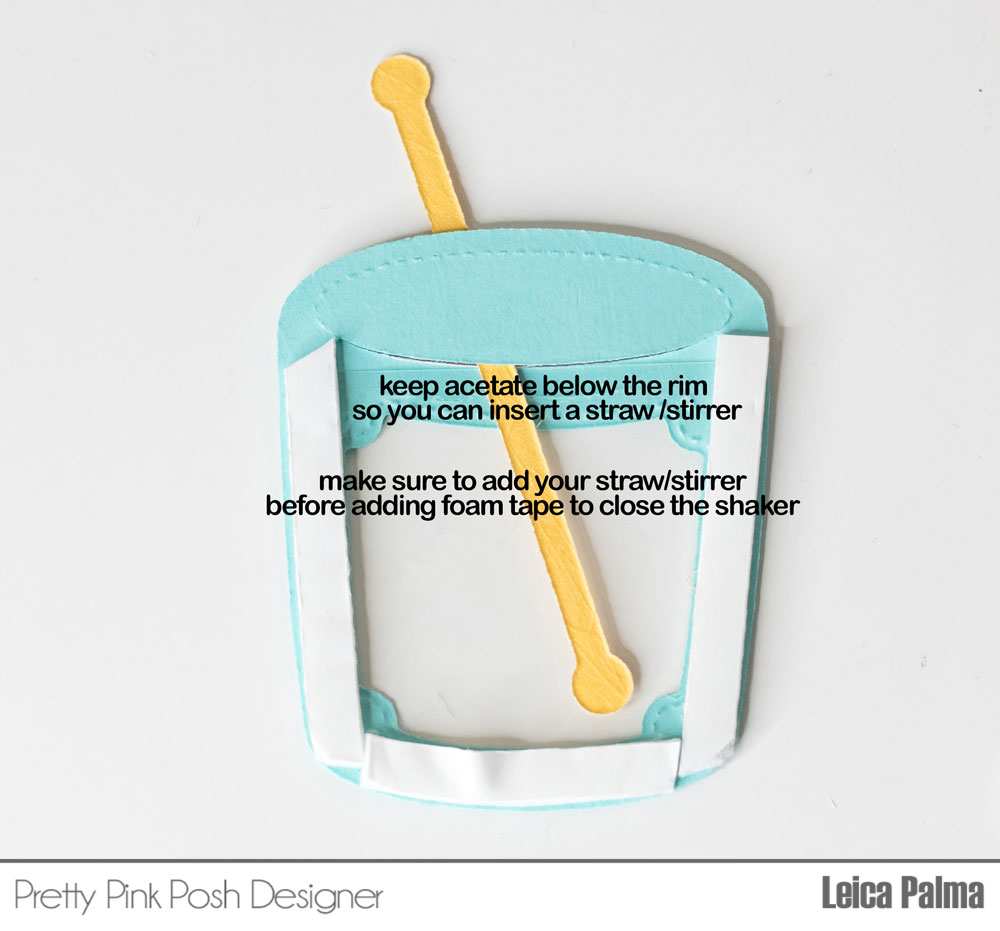
Next, I used the Winter Mug Dies to cut out the shape of a mug and created a shaker element by adding a window with the Fruit Mug Additions Dies. I turned the mug into a short glass by removing the handle. To make the shaker, I attached a clear plastic sheet to the back of the mug, just below the rim. Make sure the plastic stays below the rim so you can add a stirrer or straw. I added foam around the mug’s frame to create space for the shaker, and I filled it with Ballerina Pink and Sparkling Clear Confetti Mix. To make it more realistic, I cut out grapefruit slices from pink cardstock and glued them onto the card, including one on the rim of the glass. For a finishing touch, I added salt around the rim using Diamond Dust and used Nuvo Crystal Drops as glue.
Before attaching the mug to the card, I added a sheet of vellum to create a softer background.
For the sentiment, I used teal foil to hot foil the “Friend” script and cut it out using the Friend Shadow Dies. I absolutely love that PPP now offers hot foil scripts. They add a special and fun detail to my cards. I also heat embossed a sub-sentiment on a strip of black cardstock and mounted it below the glass using foam tape. To add some extra sparkle and interest, I included some Sunshine Pearls.
I hope you like my card! I had so much fun creating it. You could say I had a Happy Hour in my craft room. Teehee!