I hope that you have enjoyed all the sneak peeks leading up to the June 7th release. Today we’re revealing all the individual products that will be available and for those who want to order the bundles, those are available now- a day early!
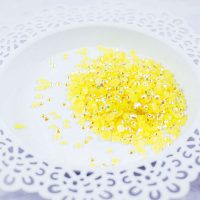
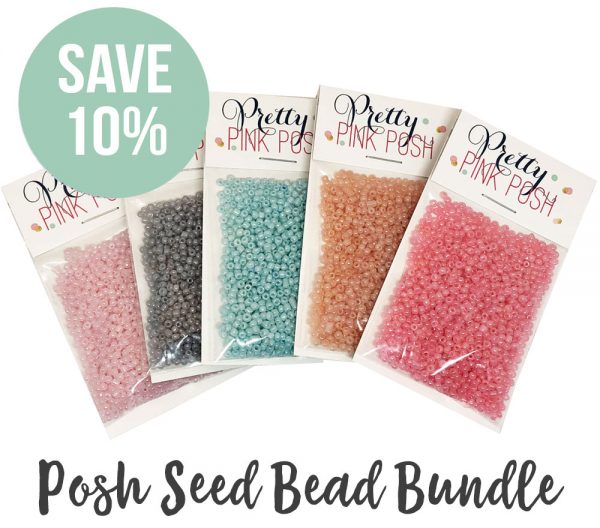
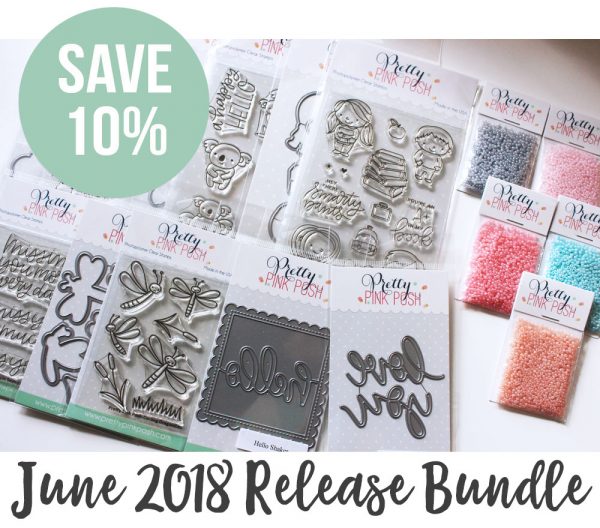
This month we have five brand new seed bead colors: Aquamarine, Blush, Cotton Candy, Pewter and Rose Pink.
If you want to purchase them all, I have created a bundle so you can get them all in one click. Plus, if you purchase the bundle, you’ll save 10%!
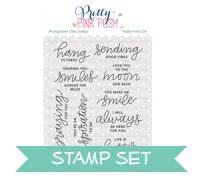
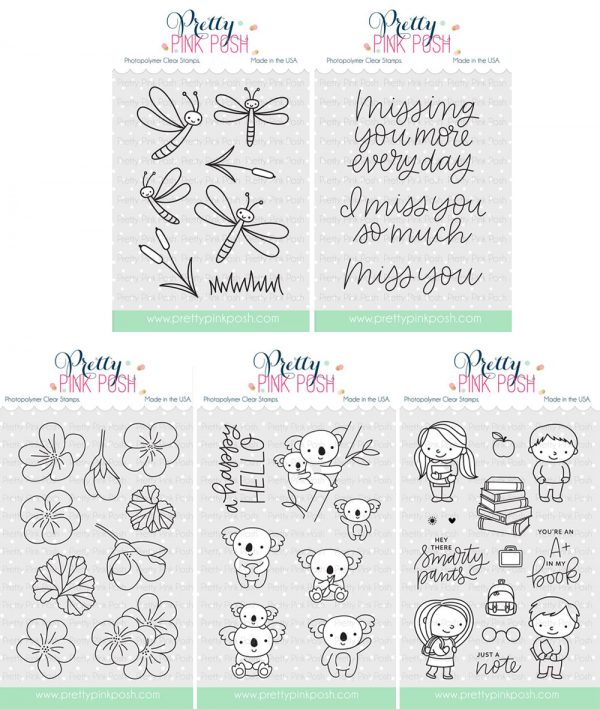
Here’s a look at the five new stamp sets that will be available for purchase: Darling Dragonflies, Geraniums, Koala Friends, School Friends and Simple Sayings: Miss You.
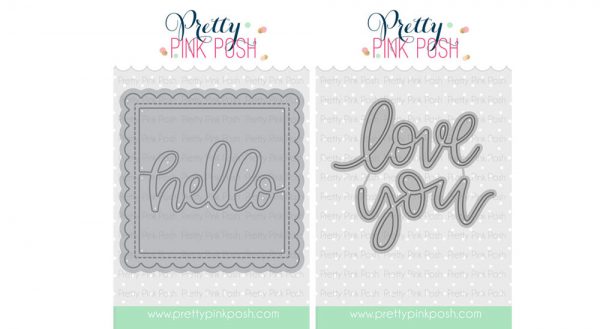
Here are the two new individual dies that will be available: Love You Script and Hello Shaker.
I have a limited amount of bundles available where you can buy the whole collection in one easy click. Plus, you’ll get 10% off and the free gift from this month automatically!
Lastly, here’s a look at the free gift that will be included with orders starting today, June 6th. Remember, these are while supplies last (I did order quite a bit, but cannot guarantee they will last through the end of the month).
We will see you tomorrow as we show you the new products in a video, the individual products go live in the shop and we’ll have a card sharing some of the new products!
Hello, Gemma here sharing about the fabulous new release arriving on June 7th. I paired the fun Love You Script with the Darling Dragonflies. This has to be one of my favourite sets and an absolute must have!
For my card today, I began by die cutting a stitched rectangle from light blue card, using the Stitched Notes die set. I stamped the reed images in a light blue ink at the bottom of the panel. I then added a slight blend of the same colour to add some constrast to the panel, before adhering it to a white card base.
I die cut the new Love You Script die from blue glitter paper, adding it to the panel in the center.
Next, I stamped some dragonflies, then coloured them with copic markers. I die cut the, with the Darling Dragonfliescoordinating dies, and added some Wink of Stella clear glitter to the wings. I then adhered them to the card with foam tape for the larger ones, and the smaller one with liquid glue.
Lastly, here’s a look at the free gift that will be available once the new release goes live. These are while supplies last.
Be sure to join us tomorrow as we reveal all the new products and our June 2018 Release Bundle goes live.
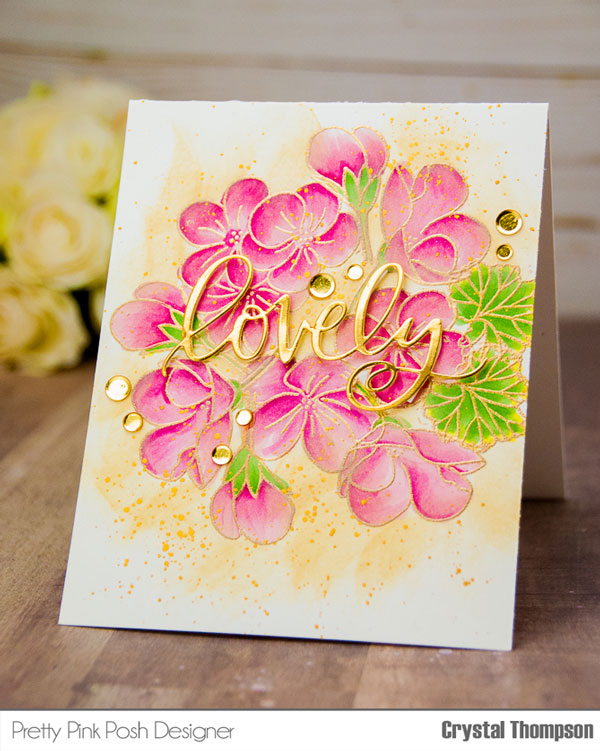
Hi crafty friend, Crystal here today sharing a sneak peeks of the June Release! I have the honor of creating with the stamp set called Geraniums. You will absolutely fall in love with this newest floral stamp set from PPP.
For today’s post I have created a sweet and delicate floral card that is perfect for any occasion.
To make this card, I stamped and heat embossed the Geraniums and leaves with gold embossing powder. I did not mask any of it, just stamped the flowers in a round pattern.
Next, I colored each petal of the Geraniums with Copic numbers. I used RV17 for my darkest shade and RV10 for my lightest shade. The leaves were colored with YG13 (lightest) and YG17 darkest shade. You will notice, I am only using two markers, for that medium shade I do a “kissing” technique where the lightest marker tip kisses the darkest. Then feathering up from the dark to light on the actual petal or leaf.
Once my Geranium was colored, I moved on to shade the edges of the entire floral bundle. Using Distress Ink in Antique Linen, I blended starting at the edge of the petal and moving down careful not to color the interior of the petal.
Now onto that gorgeous sentiment! For this I used theLovely Script die released in May! Ran that die through my gemini on a piece of gold foil cardstock. I then trimmed tiny pieces of foam adhesive and added those to the die.
Hello everyone, Joni here sharing a sneak for the new upcoming June 2018 release. The cute Koala Friends stamp set and Koala Friends die set are a must have.
To begin my card I first stamped and die-cut my pieces. Then colored them with Copic Markers.
Next, I distressed my card panel with Distress Oxide and then splattered them with water. I also used the stitched scallop from Stitched Borders 2.
Then, I also stamped the sentiment from the same stamp set Koala Friends using Platinum embossing powder after distressing a white piece of cardstock. Then, I die-cut the piece withStitched Borders 1.
To finish the card I adhered everything with foam tape for added interest. I then finish the card by added Ivory Jewels.
For my second card, I used the new Hello Shaker die to coordinate with the Koala Friends.
To start my second card, I distressed a white cardstock also using Distress Oxide inks and splattered with water.
Then, I die-cut the Hello Shaker 3 times and adhere with glue on top of the other for a thick look.
I also added the strip of black and white strip of paper and I also added some Ivory Jewels to finish off the card.
Thank you so much for visiting! Stay tuned for more sneak peeks in the next few days!
Hello everyone! Alix here as a guest designer sharing products from Pretty Pink Posh upcoming June release. I have been a Pretty Pink Posh super fan for quite a while and I am so honored to start this exciting moment with you.
To begin with my card, I first stamped the images from School Friends stamp set on a piece of cardstock paper and cut them with School Friends coordinating dies. Then I colored them with my trusty copic markers and set aside.
I wanted the have the main focus on my shaker window, so I decided to keep the card base almost pure white. For inked background, I ink blended background using distress ink oxide in Tattered Rose, Abandoned Coral and Candied Apple, then I stamped sentiment that comes with this stamp set with some Watermelon Jewels to embellish.
To create the shaker window, I cut the frame for 5 times using the Scallop Ovals, then I glued 4 of them together sandwiched with a piece of acetate paper and the last frame die cut. Before I closed up the top, I poured some Iridescent Mini Star Confetti and 3mm Sparkling Clear Sequins. When its ready, I attached the window onto a A2 base card front.
When you are holding a cute and lovely stamp set, there is no way that you could only make one card. So this second card idea came up very quickly. The scene I wanted to create is that a nerdy boy who likes to bury himself in a library with tons of book. A shy girl who had crush on him expressed her feeling with full courage.
I started to ink blended distress oxide in Peacock Feathers, Twisted Citron and Cracked Pistachio onto a piece of watercolor paper. I sprayed water over inked background and removed all wet spots with a piece of paper towel. When it dried, I splattered a mixture with ink and water over upper portion of background to add some interest.
While I was waiting for background to dry completely, I cut my white frame using the Scallop Frames and I popped them up using double sided foam squares to create dimension. I did my pick and choose for the best images to create my ideal scene and colored them with copic markers. Then I arranged them inside of the frame I created.
I stamped sentiment that comes with this School Friends Stamp set with very black dye ink since my background is in slightly darker color. I also stamped mini hearts around them and added 1/4″ Iridescent star confetti to create lobe sparkles between them.
Good morning Pretty Pink Posh friends! Heather here this morning with a peek at some of the upcoming Pretty Pink Posh Release! I get to share a sneak peek with you featuring the CUTEST little dragonflies ever – as well as a fabulous new sentiment set! On my second card I also used a few of the new colors of seed beads that are part of this fabulous release!
First up, I created this watercolor card, using the colors I think of when dragonflies come to mind. I used my Peerless watercolors to create a pretty ombre watercolor background, then added some gold splatters with my Gansai Tambai Starry Colors Palette.
I stamped and colored the adorable dragonflies from the new Darling Dragonflies stamp set, then cut them with the coordinating Darling Dragonflies coordinating dies. I added some Nuvo Honey Gold Glitter Drops to the wings for some extra sparkle as well!
I stamped my sentiment from the new Simple Sayings: Miss You, then mounted the dragonflies around it with foam adhesive. I matted that panel with a bit of white cardstock, then mounted on a cardbase made with deep purple cardstock. Finished off with a few Metallic Gold Jewels – the perfect finishing touch!
Next up, I pulled out an older die, Stitched Film Strip, and created a fun little scene with some of the additional images in the stamp set – and turned it into a shaker card filled with some of the pretty new seed beads!
I love the little grass and cattail stamps in Darling Dragonflies – so cute for scene building! And the grass fit PERFECTLY behind each of the windows on the Stitched Film Strip. I separated each window of the die to create the shaker element, and filled each window with a different color of beads (Cotton Candy, Aquamarine and Blush).
I stamped my sentiment underneath, again from Simple Sayings: Miss You using an aqua ink that coordinated with the Stitched Film Strip, and added a couple extra cattails next to the sentiment. Finished off with some Golden Sunset Nuvo Drops on the cattails, and some White Blizzard Nuvo Drops on the wings for lots of sparkle!
Hope you enjoyed today’s sneak peek! Join us tomorrow for another sneak peek of the June release!
Hi there, Liz here. I absolutely love these Cherry Blossoms flowers from Pretty Pink Posh and couldn’t resist but to make a birthday shaker card to make someone smile.
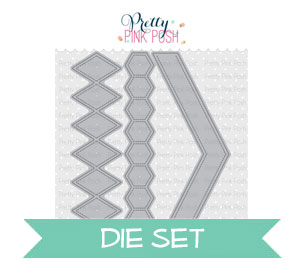
To get this card started, I decided to create the background first using the Stacked Edges 2die and use the diamond shape border for the design. Therefore, I die cut several rows using the same color and placed them together onto a piece of card stock. Later, I ran it through the die cut machine for the size I wanted and to press more firmly all together.
Next, I moved onto the shaker portion of the card where I used one of my favorites, theStitched Duo 3 and added this wonderful Berry Bright Mix of sequins which has an array of sizes including 4mm, 6mm, and Clear Droplets. Plus, I love the color combination of pinks, reds, green, and clear.
Moving on, I stamped several flowers and leaves from the Cherry Blossoms set and colored them using my copic markers and reached for the coordinating die to help me cut them out. Next, I colored this gorgeous hummingbird from the Hummingbird Thanks set along with using the coordinating die.
Afterwards, I thought it would be great to add a sentiment so I pulled out the Everyday Greetings since it has a combination of big and small fonts. For this card, I used the smaller font “It’s Your Big Day” and embossed it using white embossing powder.
To finish this card, I added some Clear Droplets in the center from the sequins mix and used some foam mount tape to pop the big flower up and hummingbird. Love how the clear droplets sparkle and adds to the detail.
I hope you enjoyed this post. Join us tomorrow for the start of sneak peeks of our June release!
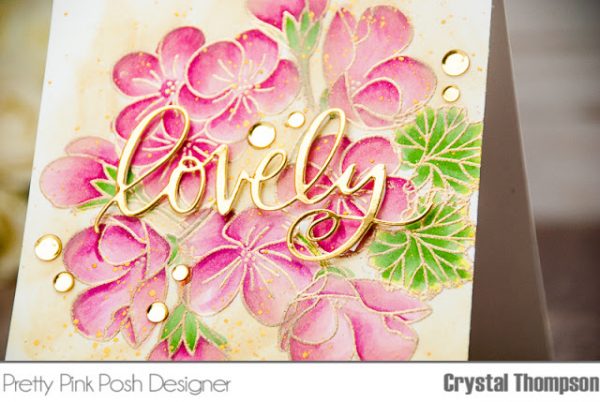
Just compare the two photos of before and after adding pencil detailing. It is always fun to look how the images come to life by a little bit of pencils touch.
After coloring was done, I added splatters of dark watercolor ink and white acrylic ink onto the panel and let them dry. In the mean time, I diecut Lovely Script Die from watercolor paper three times, then I glued them top on top to give the script some dimension. I colored the top surface with black watercolor ink. Sentiment “You’re” is from Bear Hugs stamp set.
Next, I adhered sentiments and butterflies onto the panel using glues and foam tapes. To finish, I adhered the panel onto A2 card base, then I embellish the card by adding some Jewels. For this, I used Metallic Rose Gold Jewels and Sparkling Clear Jewels.
That’s it from me today. Thank you so much for visiting and reading this post. Marge
Next, I die-cut the new Hugs Shaker Die, but left off the scalloped circle. I also did cut 3 times then stacked the pieces and Copic color the “hugs”. I also sandwich the hugs in between to give that interest on the die-cut.
I also distressed the panel with Distress Ink Oxide.
Here’s the final piece, I literally adhered everything with foam tape for dimensions. I also incorporated the new Metallic Gold Jewels to give it bling.
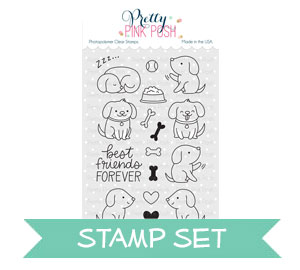
For this next card, I completely used Playful Puppies stamp set and its coordinating Playful Puppies Die set.
Next, I distressed the white panel with different colors of blues and greens using Distress Oxide. Then die-cut with Stitched Borders 3 Dies.
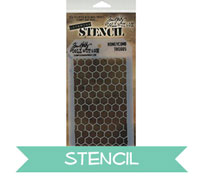
To begin, I first started off with a piece of watercolour paper, taped it down onto a craft sheet and laid over my Tim Holtz stencil at an angle. I then ink blended some Squeezed
Lemonade and Fossilized Amber Distress Oxide Inks over the top. While blending, I was careful to not go over the harsh edges, because this stencil is so skinny, I really wanted there to be full hexagons rather than half hexagons from the edges, so I was just super careful. Then once I was finished blending on that area, I carefully moved the stencil over a little and ink blended a little more so it was wider. Now that I ink blended over the stencil, I wiped it clean and used some Transparent Texture Paste and added it over top using some palette knives. Once it was over the stencil, I removed the stencil and set the panel off to the side to dry.
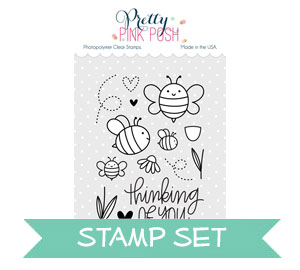
Next, it was time to colour my images. I used some Copic Markers and the images from Bee Friends. I stamped them down, then coloured them in and cut them out using the coordinating dies. I set them off to side once they were cut, and dried off the rest of my panel with a heat tool just to make sure it’s super dry. Now, I used the hexagon border from Stacked Edges 2 Dies and cut that three times from some white cardstock, I popped them up on foam tape and adhered them to the edge of my coloured panel. Making sure they were staggered so they looked a little more random. Next, I added more foam tape to my bee images and adhered them down around also. Making sure to adhere their trails behind them flat onto the background.
Now that my card was almost complete. I used the Encouraging Greetings stamp set and white heat embossed the sentiment ‘You Got This’ onto strip of black cardstock. I also popped that up on foam tape and adhered it to the right hand side of my card hanging off the edge a little. Lastly, I added some Lemon Drop Jewels onto my card, scattered around my images. I then popped up the entire panel onto a white card base that had a little strip of blue cardstock on the left.
So that finishes up my card today, I hope you enjoyed the project and feel inspired. Thanks so much for stopping by today and I’ll catch you all next time.


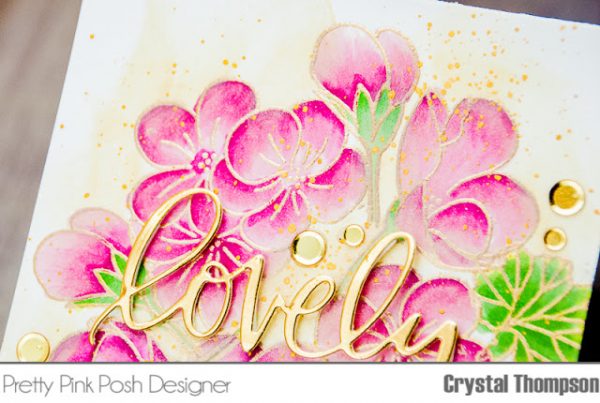

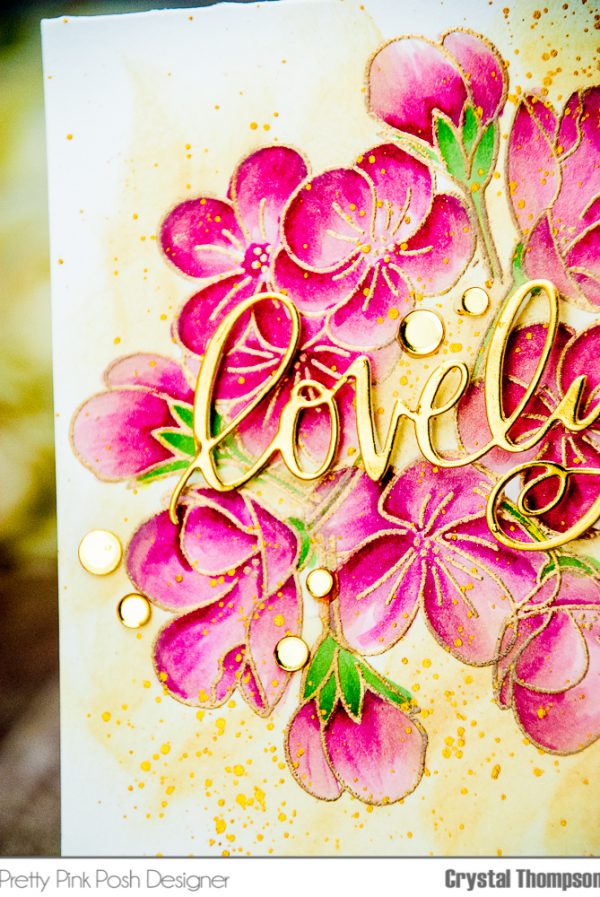


 After I finished watercoloring as shown in the picture above, I added more details on those blossoms by using
  Just compare the two photos of before and after adding pencil detailing. It is always fun to look how the images come to life by a little bit of pencils touch.
 After coloring was done, I added splatters of dark watercolor ink and white acrylic ink onto the panel and let them dry. In the mean time, I diecut
 That’s it from me today. Thank you so much for visiting and reading this post.