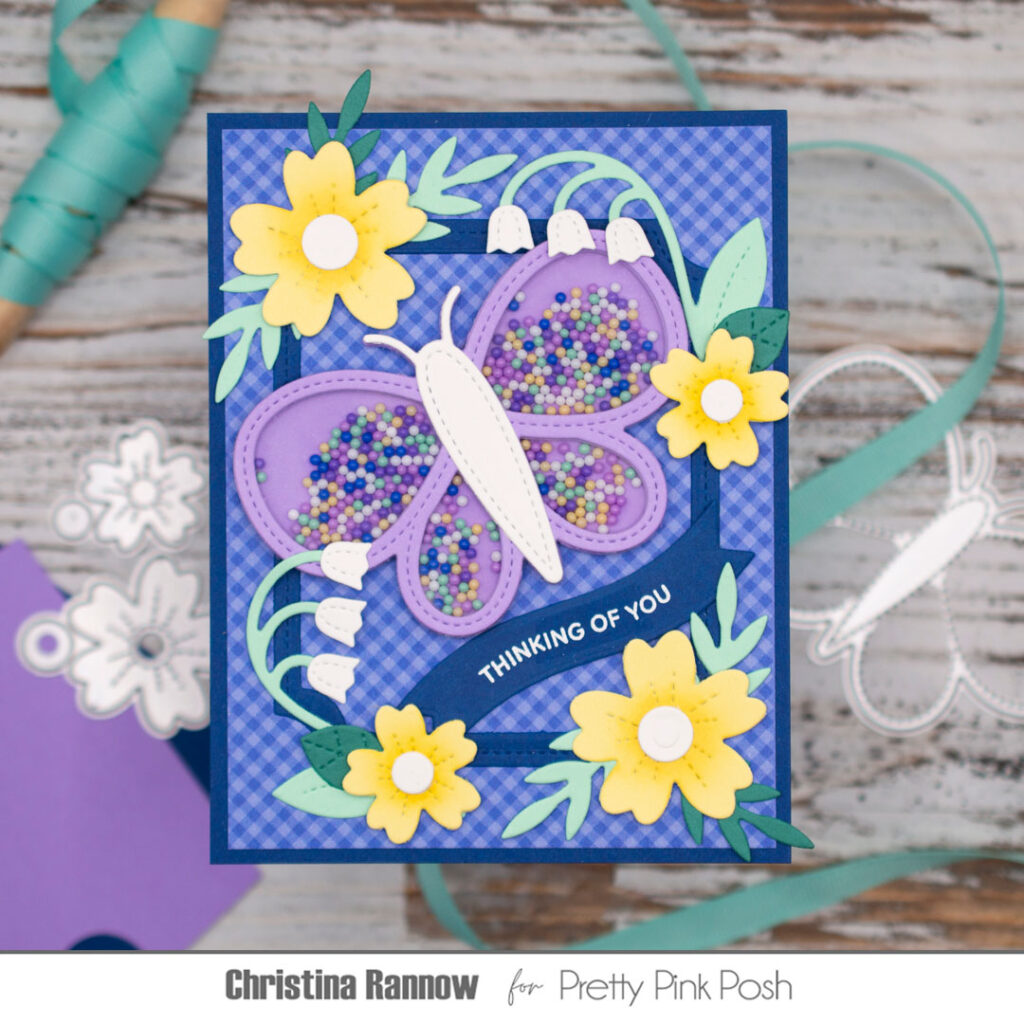
Spring Butterfly Shaker
Hi friends! It’s Christina, fluttering in to share a shaker card featuring the beautiful Butterfly Shaker Dies and some pretty Spring Florals. My color palette was inspired by the colors of the Serene Shaker Beads that I used to fill my shaker, and the sentiment I chose makes this card design perfect for any occasion. Take a peek at my supplies and then we’ll get started on this striking design!
Butterfly Shaker Dies
Notched Rectangle Dies
Banner Greetings 1 dies
Spring Floral Dies
Floral Wreath Builder Dies
Hummingbird Floral Stamp Set – sentiment
Serene Shaker Beads
Let’s start with the background panel. I trimmed a piece of blue gingham patterned paper slightly smaller than 4.25 x 5.5 and layered it onto a blue A2 cardstock panel. Before moving on, I added a blue Notched Rectangle to the center of the panel.
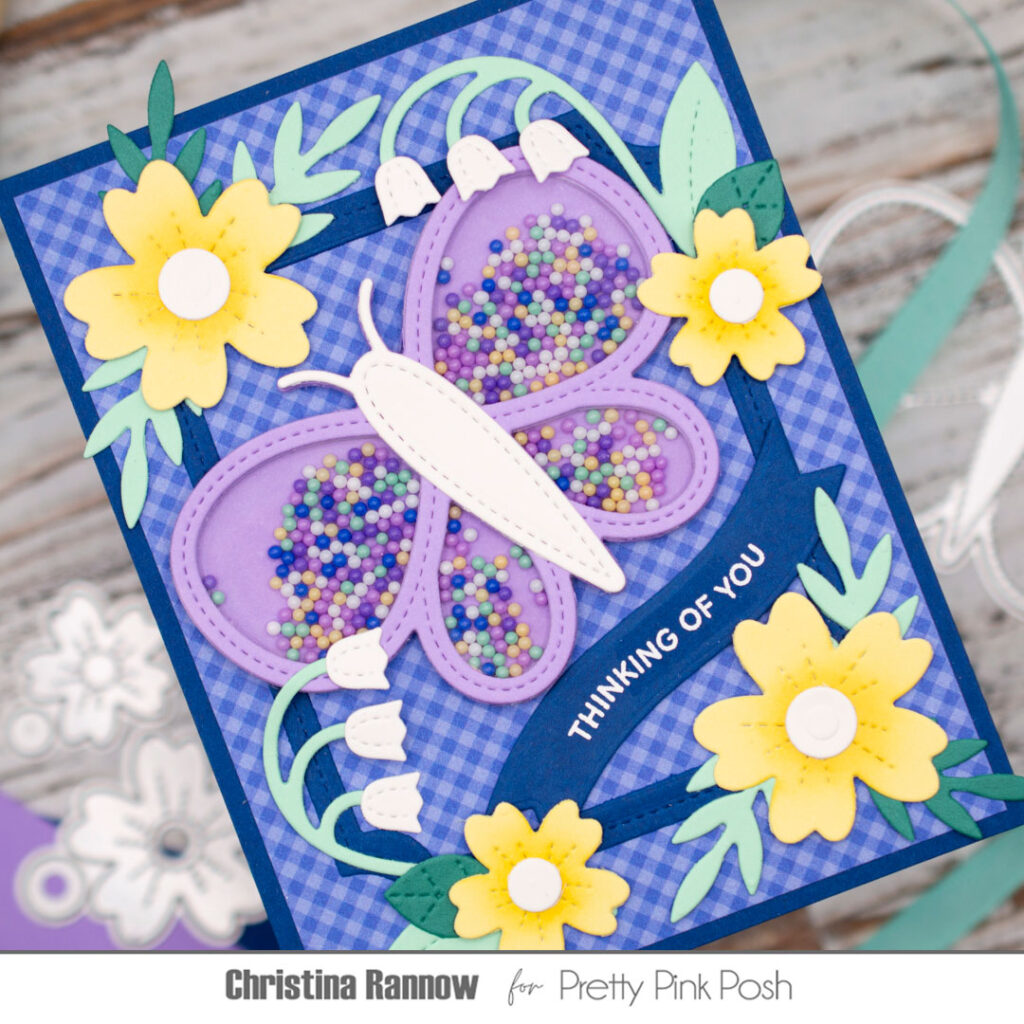
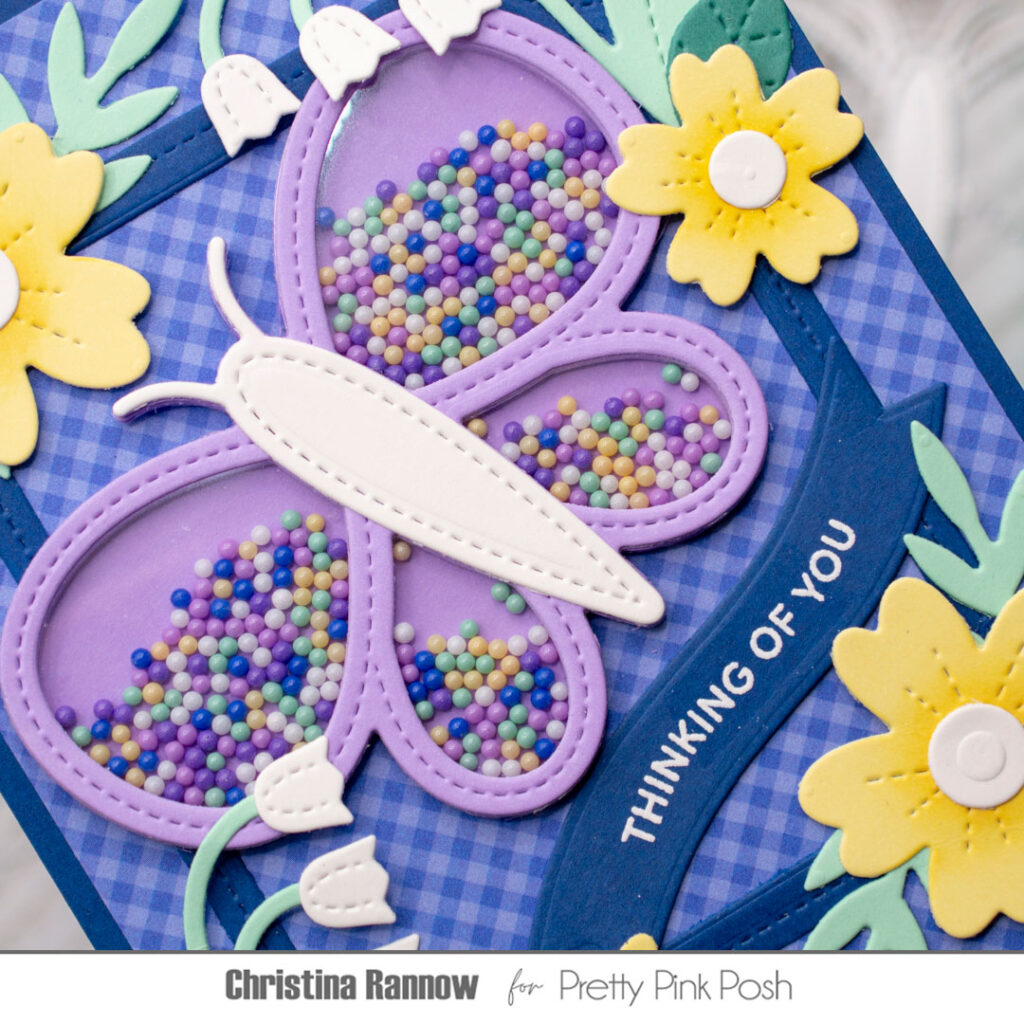
Next, I created the Butterfly Shaker element. I used lavender cardstock and die-cut the backer piece once and the butterfly frame piece seven times. To create the walls of the shaker, I stacked and secured the frame pieces with glue, sandwiching a piece of die-cut acetate between the top two layers to be the window. Then I filled the shaker with Serene Shaker Beads and secured the backer piece onto the stacked frames. To finish the shaker, I die-cut the butterfly body piece from white cardstock and attached it to the front of the shaker.
With the shaker element done, I moved on to die-cutting the florals for my design. I started with colored cardstock, choosing mint and clover green for the leaves and pale yellow for the larger flowers. I chose white cardstock for the small flowers and the centers of the yellow flowers. Before assembling them, I added a darker yellow ink to the centers of the yellow flowers for some dimension.

Now it’s time to put it all together. First I attached the Butterfly Shaker to the background panel and then created a frame of pretty florals around the butterfly, following along the Notched Rectangle. Then I tucked a wavy banner with a white heat-embossed sentiment under the butterfly and slightly behind some of the flowers. The last step was to attach everything to a card base.
Thank you so much for checking out this shaker card featuring the beautiful Butterfly Shaker Dies! See you again soon!