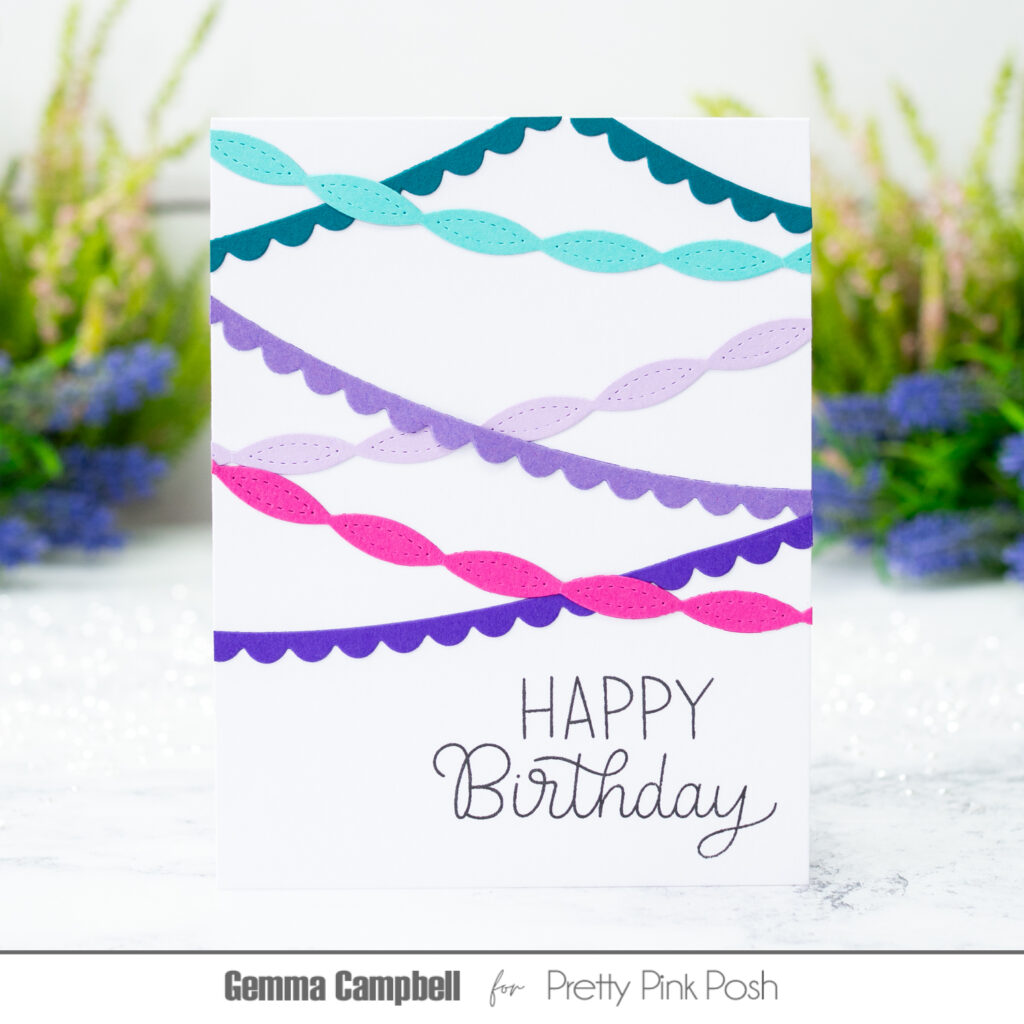
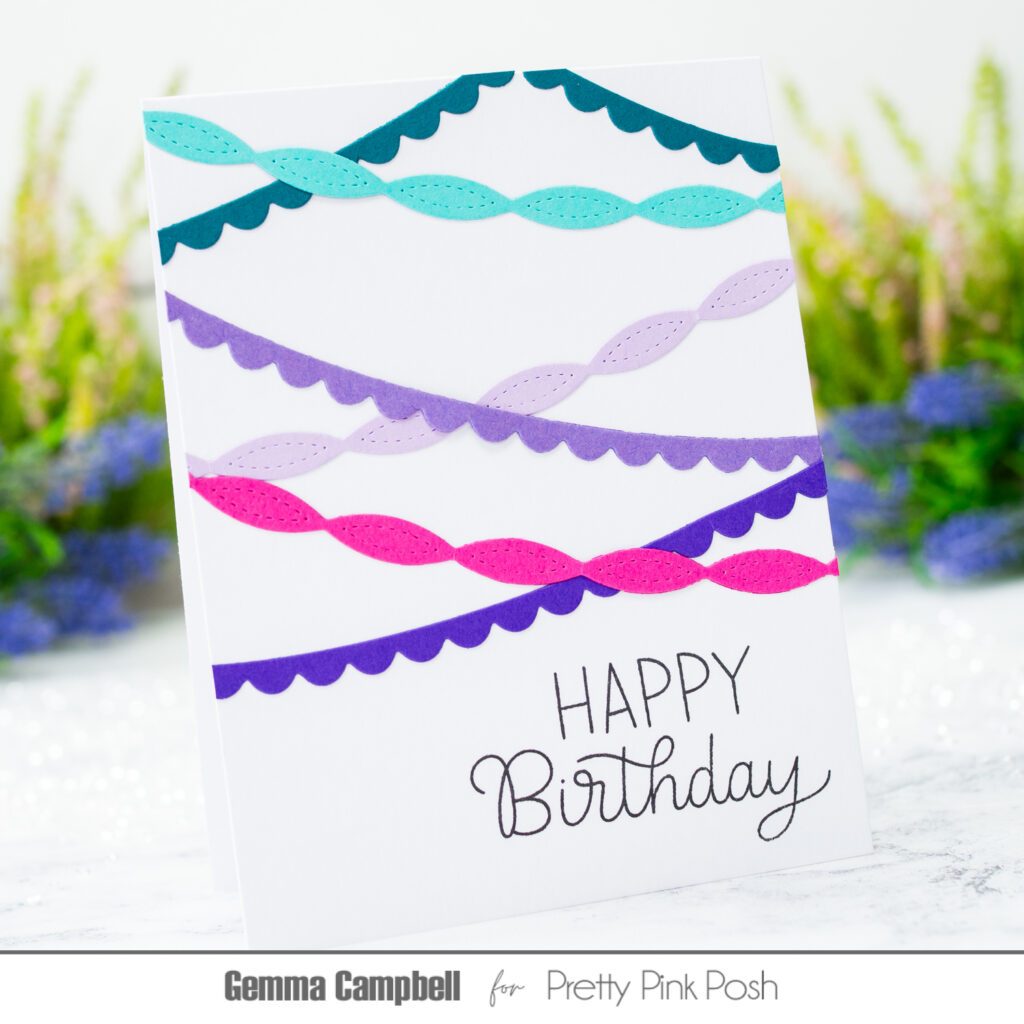
Hello, Gemma here today to share a card featuring the Streamers die set. This is such a fun set for quick and colourful birthday cards, and I made multiple of this card in no time.
Next, I chose a selection of card stock, and used two of the dies in the Streamers setto die cut out multiple from each colour.
I arranged 6 streamers on the card, then added washi tape over the ends on both sides to keep them in position. If you have press ‘n seal, you could use that instead of washi tape.
I flipped the streamers over and added liquid adhesive to the back. I then used the washi tapes as handles to flip the streamers back over and adhere to the card base.
I trimmed away the edges of the streamers, then added one of the cut off pieces to fill a space on the top right to finish.
Thanks for joining me today. Be sure to check back on the blog later this week- sneak peeks will start for the May 7th release!
Hi crafty friends! Rebecca here with with a shaker card made with the Tulip Shaker Dies. The great thing about Pretty Pink Posh releases is that many of the sets work so well together!
So I started by cutting out the Grass Border Die. Then I cut the Tulip Shaker Dies out of a piece of A2 blue cardstock. Next, I adhered a piece of acetate to the back. I added foam tape in a rectangle around the tulip window. I poured Sugar Pop Shaker Beads into the rectangle then removed the foam tape backing pieces and placed a white A2 piece of cardstock on top to trap the shaker beads inside.
I cut the tulip out of pink and green cardstock and created frames to adhere on top of the window. I popped up the grass on top of the bottom of the tulip stem.
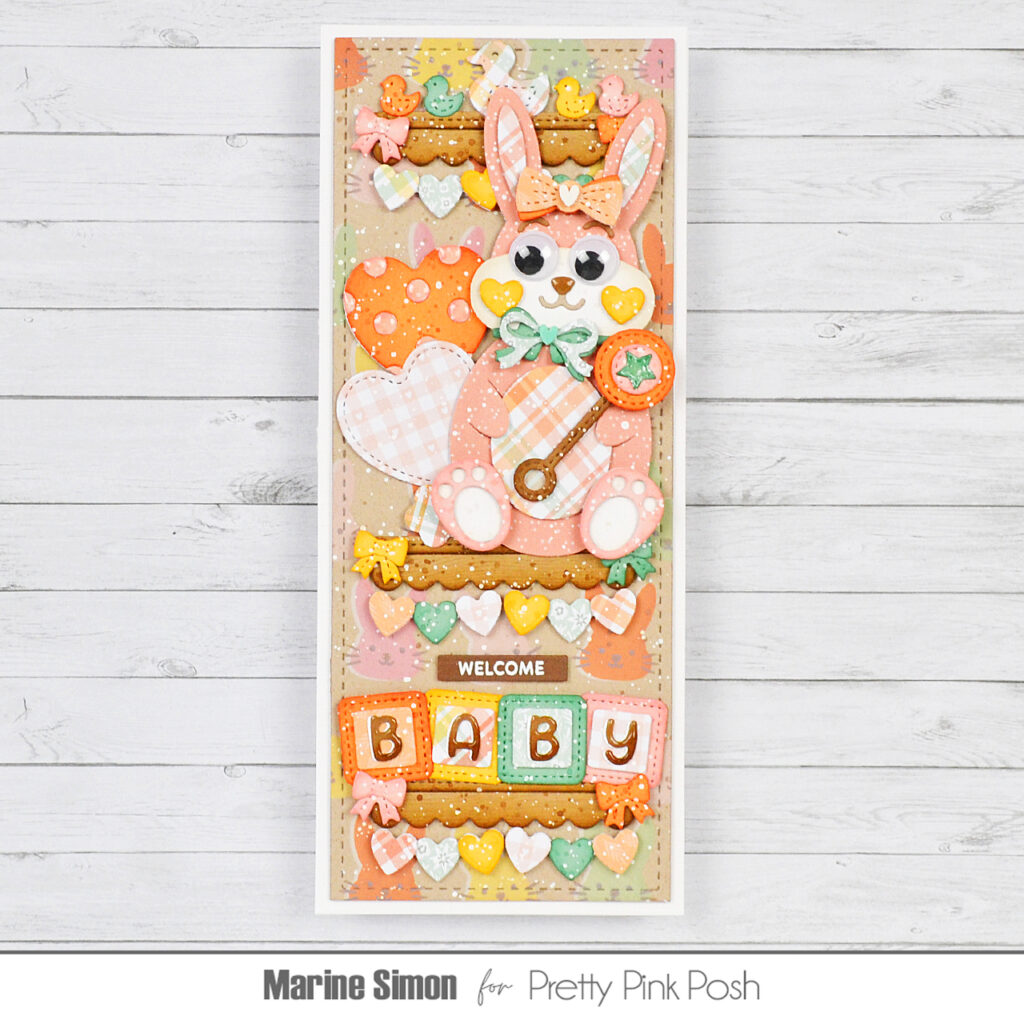
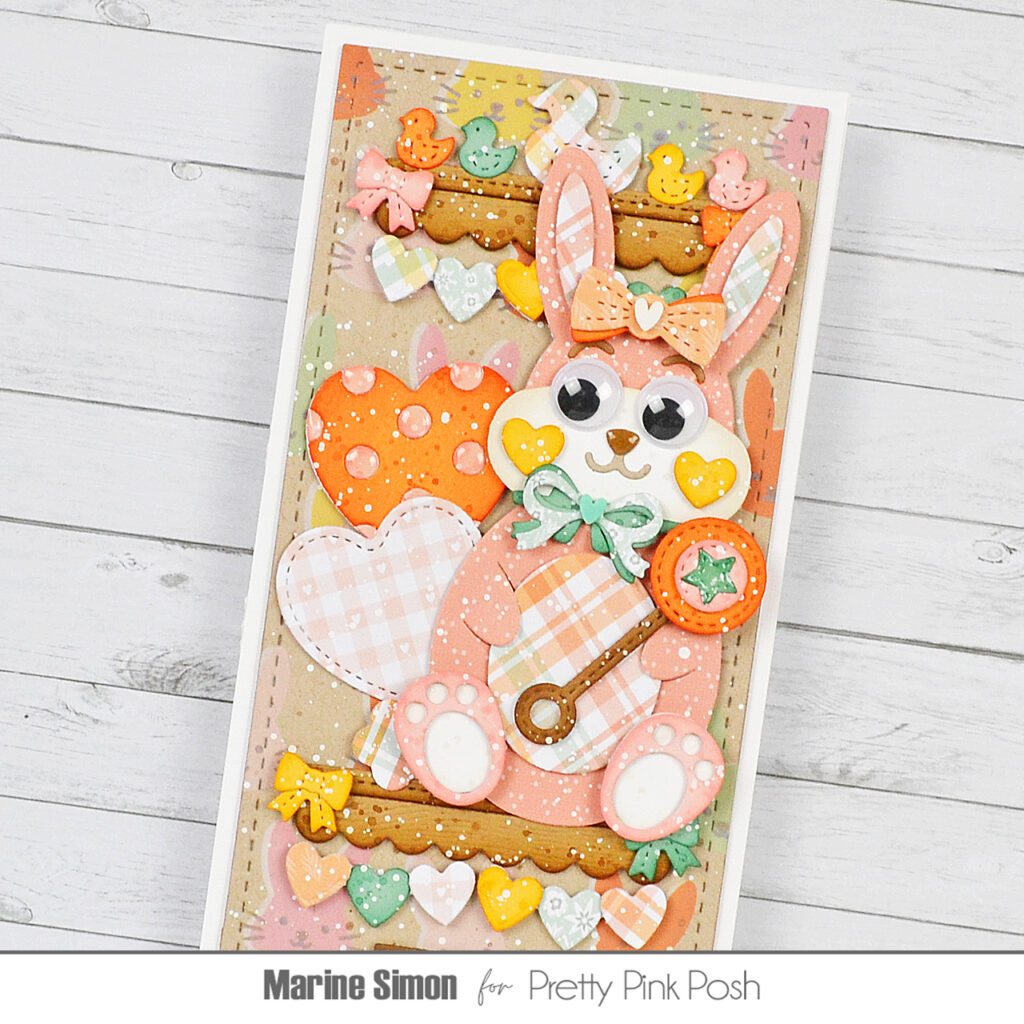
Hello crafty friends, Marine here, I’m closing the stencil week with this lovely slimline baby card I created with a whole bunch of dies from various sets. Mixing and matching items from different years/seasons is definitely what I like the most, and to make the background behind my three shelves I went for a bunny theme and used the Layered Bunny Faces stencils to create a colorful and playful wallpaper.
And speaking of which, I started off by making the background and first cut a slimline panel out of kraft cardstock using the largest Slimline Peekaboo Windows die. When I stencil on kraft cardstock, most of the time I like to create a white base first, so this is what I did using the Layered Bunny Faces stencil #1 along with white pigment ink. I then used that same stencil again but shifted it a little bit to the right, and created colorful bunny faces using oxide inks: rusty hinge, fossilized amber, bundled sage, saltwater taffy and tattered rose. And by shifting the stencil, it created a white border around the bunny faces, and I’ve always loved this effect.
Next I used stencils #2 and #3 along with frayed burlap oxide ink to add eyes, noses and whiskers to the bunny faces. I mixed a bit of copic opaque white ink with water and used a slim brush to add splatters all over the panel, and did the same with vintage photo distress spritz.
While my Layered Bunny Faces panel was drying, I cut all the bits and pieces out of colored cardstock, woodgrain cardstock and pattern papers. On the colored cardstock and woodgrain cardstock pieces, I added matching distress ink splatters to those elements, as well as ink on the edges, to make them less flat, and then white ink splatters. And on the pattern paper pieces, I only added white ink splatters.
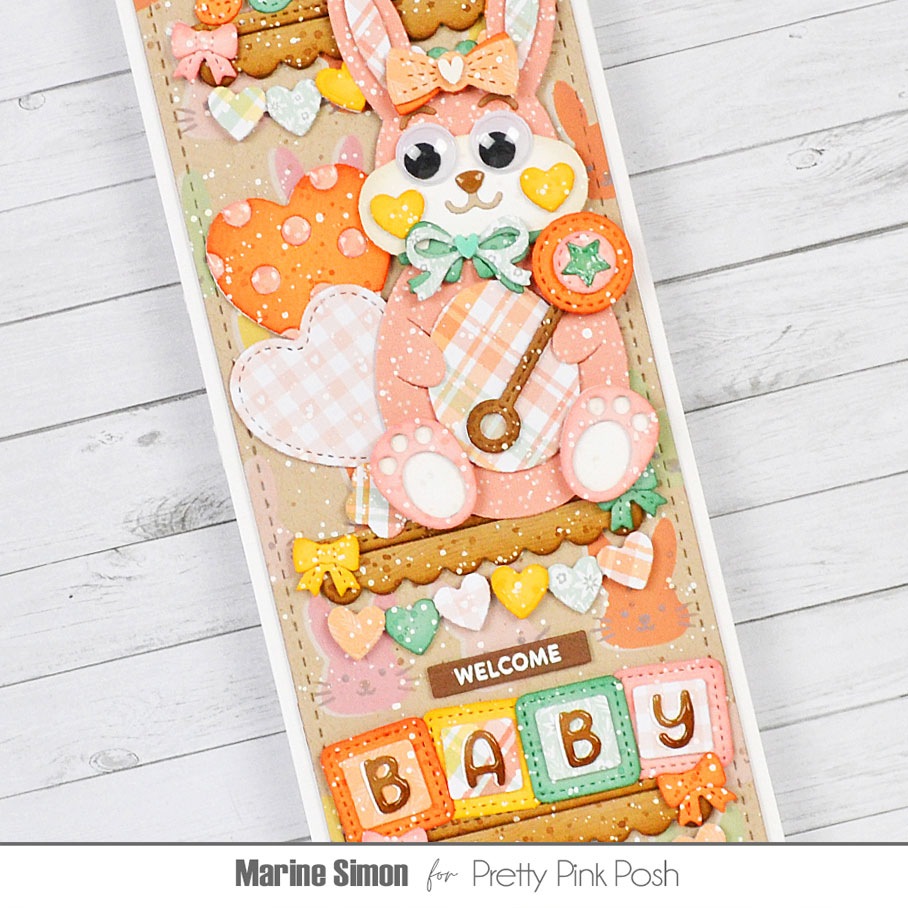
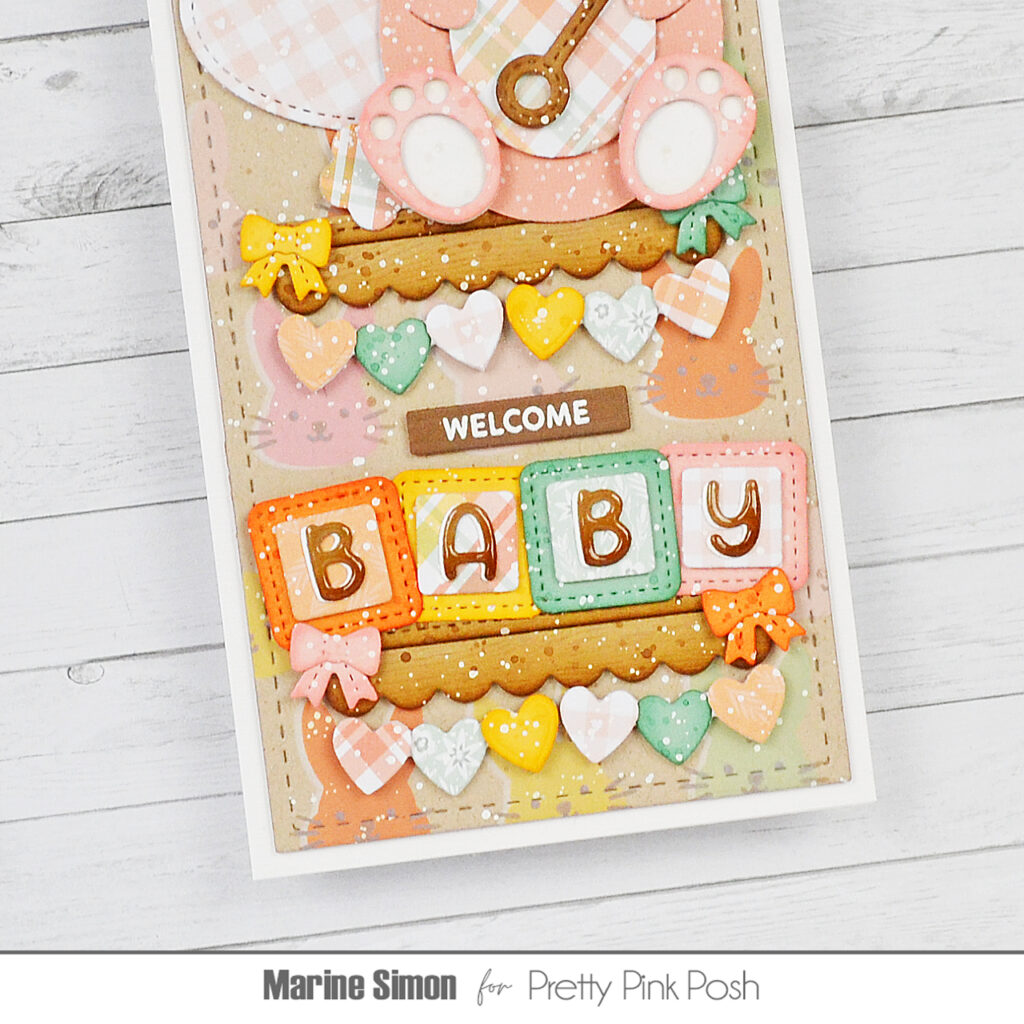
I assembled the bunny, the rattle, the heart banners and the cubes using foam squares and liquid glue, and then attached everything to my panel using 1mm and 2mm foam squares. I purposely left some space above the cubes to add “Welcome”. It is from Baby Animals, I white heat embossed it on dark brown cardstock, cut it into a slim banner using a Sentiment Strips die, and attached it to my panel using 1mm foam squares.
To finish my card, I gave the bunny a pair of large wiggle eyes to make him/her extra cute, applied glossy accents to the nose, to the “Baby” letters on the cubes and to the star on the rattle. I cut an 8,5 x 3,5 inches textured white panel, attached it to a slimline card base using liquid glue, and then my panel on top using 1mm foam tape.
And that’s it! I hope that this card has inspired you to maybe create your own baby cards using the super cute Holder and Baby collections. Thanks so much for stopping by, and see you next time!
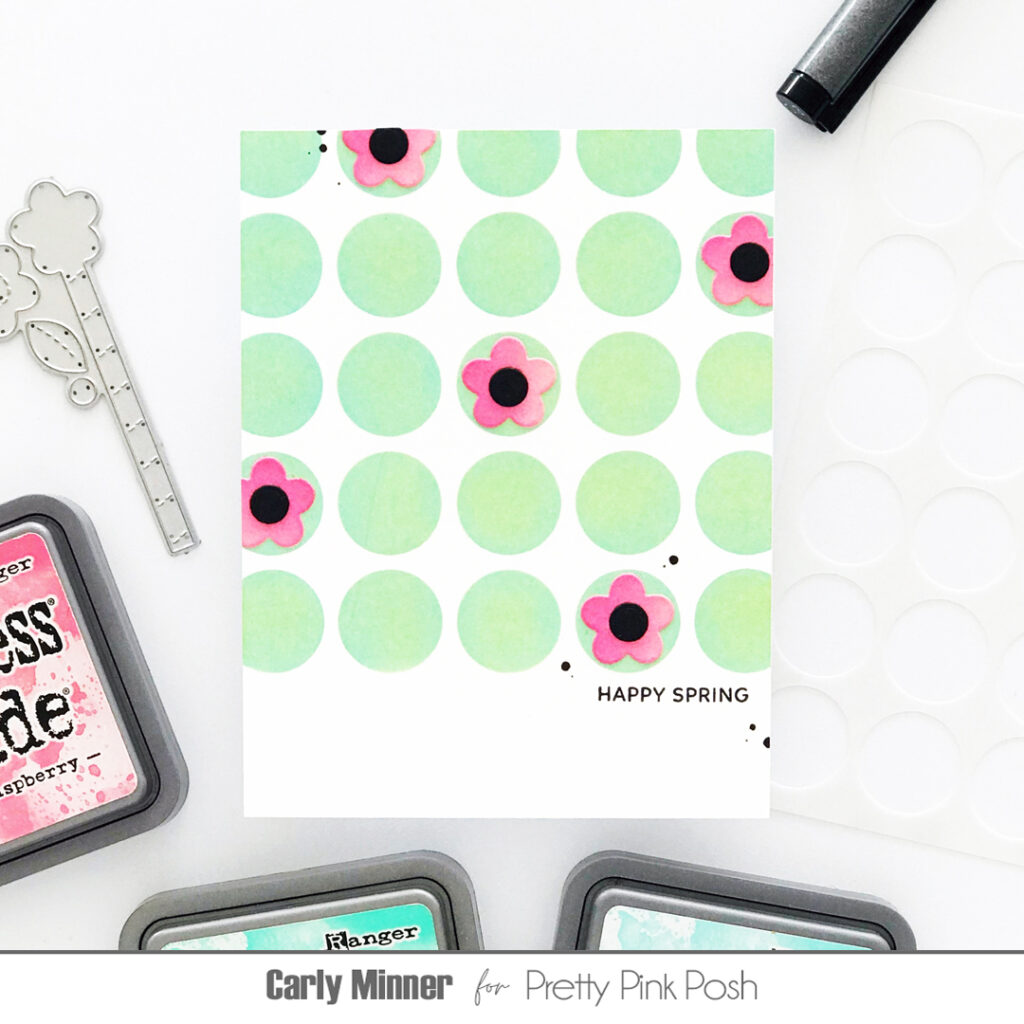
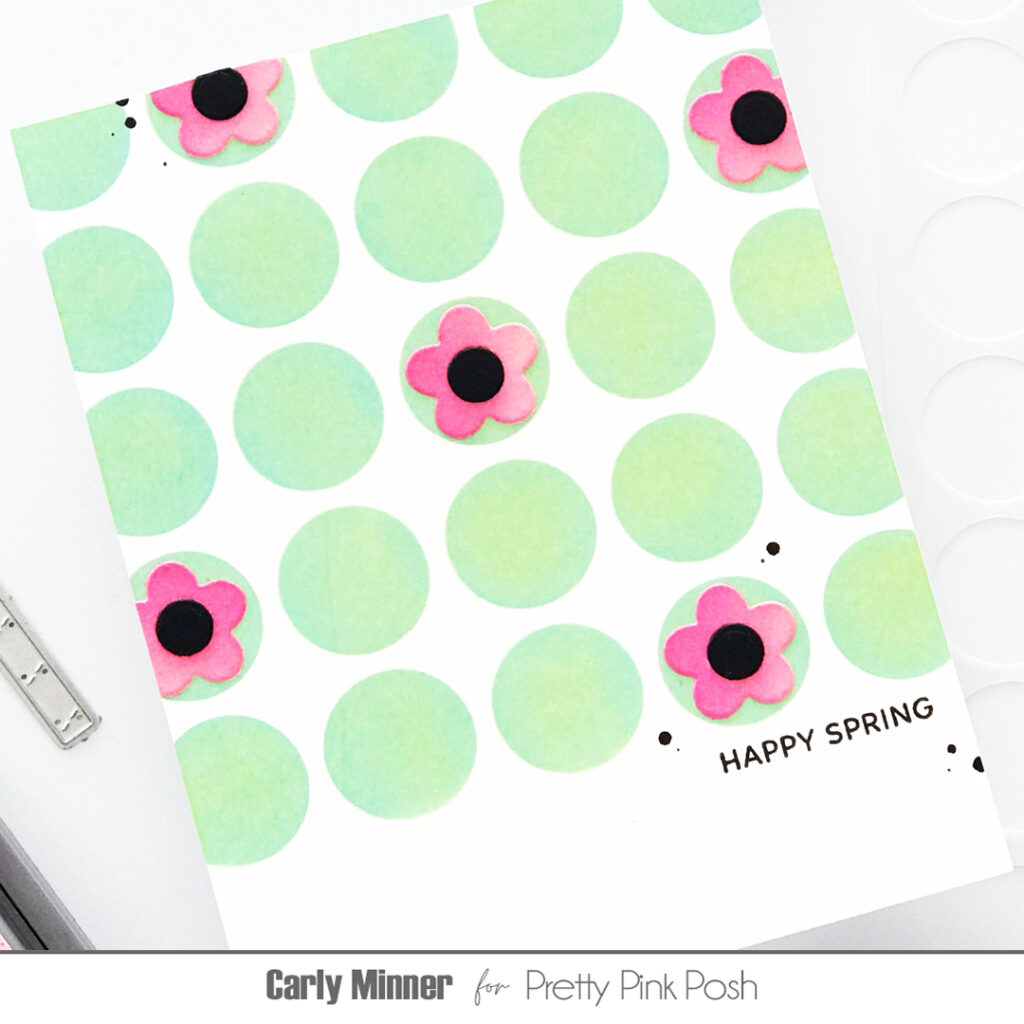
The Circle Grid stencil is basic (in a good way, lol) because it is so incredibly versatile! Let me show you what I mean…
A little ink blending through the stencil on 3/4 of your card front and it makes a killer background for any number of cute die cuts! I used a combo of Distress Oxide colors (Cracked Pistachio & Salvaged Patina) and then topped a few of the circles with the adorable die cut flower from the Get Well Mug Additions.
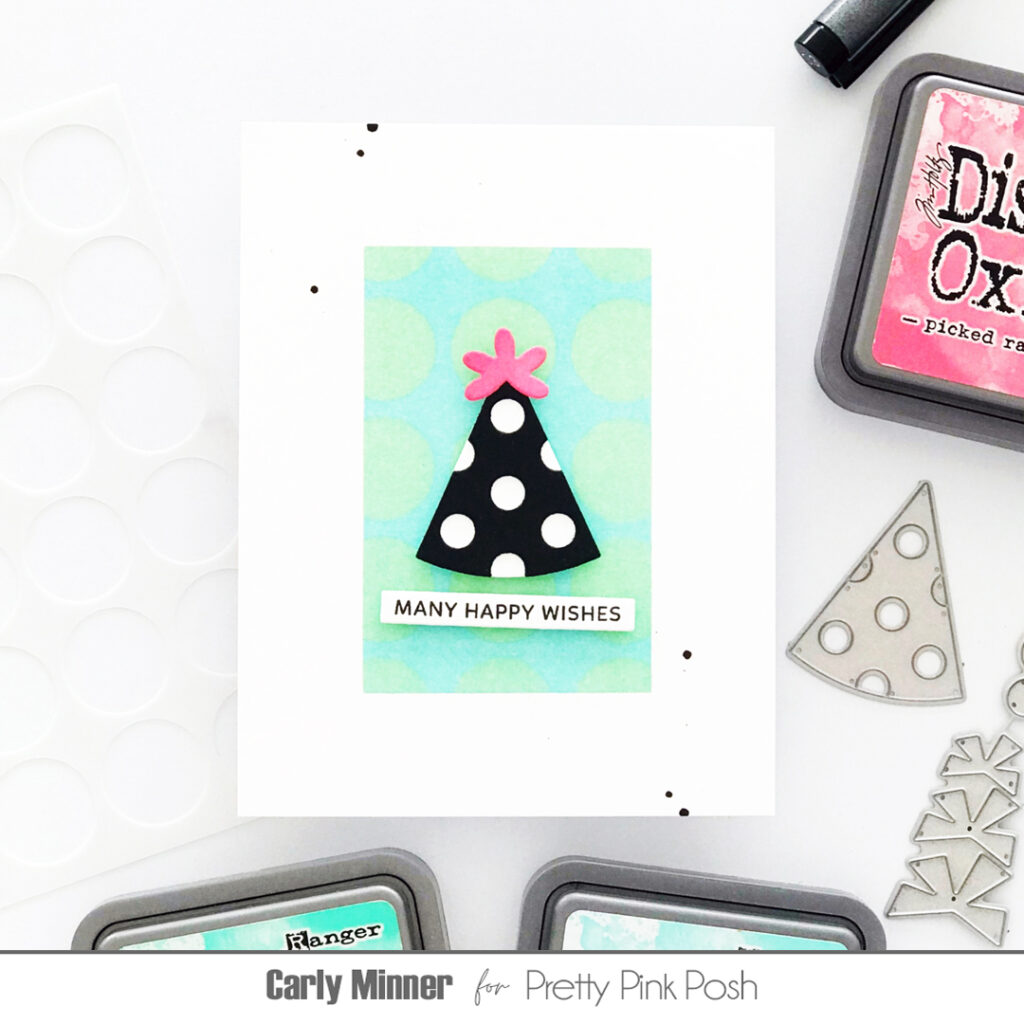
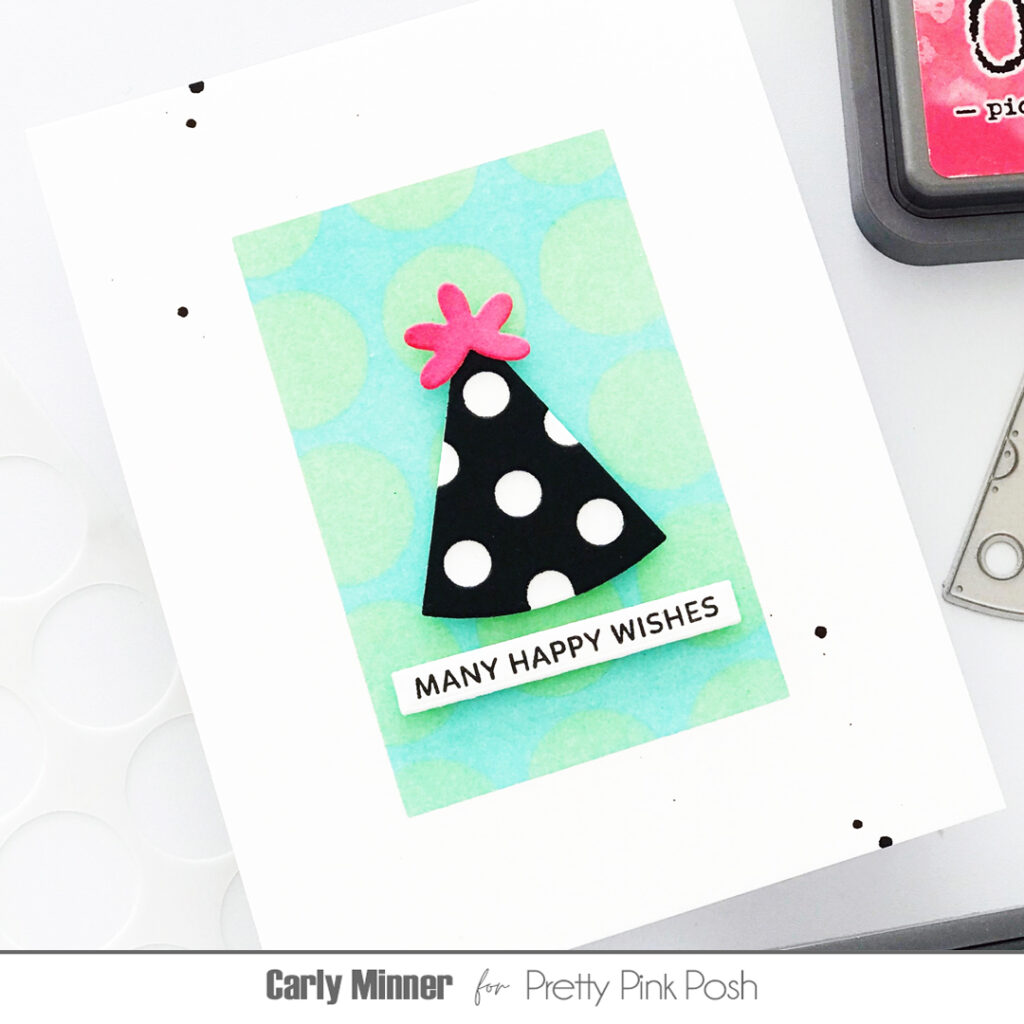
With a little masking tape, you can also create a custom pattern!
For this card I applied low-tack tape along all four sides, leaving a rectangle in the middle. I applied Distress Oxide Salvaged Patina to the rectangle with a blending tool. Then with the tape still in place, I put the Circle Grid stencil down and applied Distress Oxide Cracked Pistachio through the stencil.
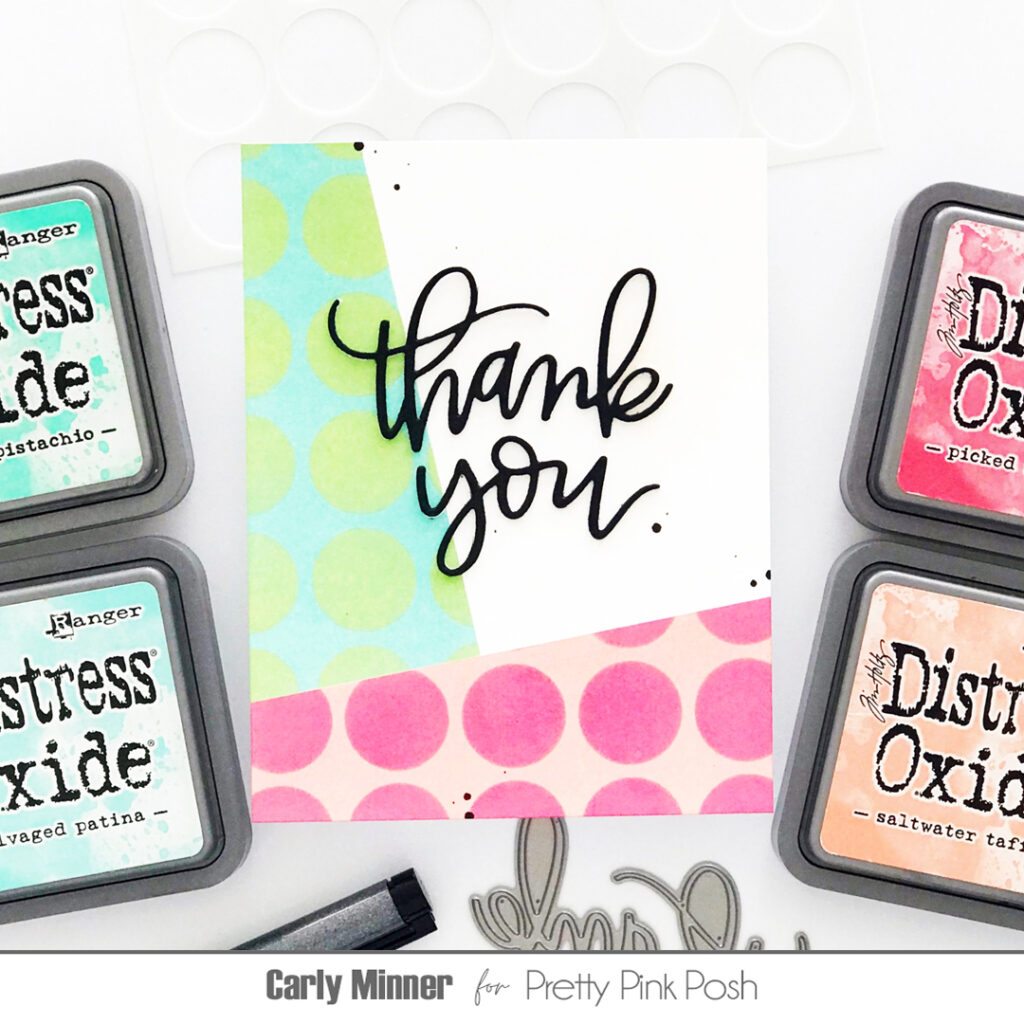
And you can expand the custom patterns to be more of the star while still being a background!
For this card I masked a section at the bottom with low-tack tape and added Distress Oxide Saltwater Taffy. Then I put the Circle Grid stencil down and applied Distress Oxide Picked Raspberry through the stencil.
Then I masked another section on the side of the card and repeated the process with Distress Oxide Salvaged Patina and Cracked Pistachio/Twisted Citron.
It made the perfect background for the Thank You Scriptbut so many of Pretty Pink Posh’s adorable script dies would work!
Thanks for stopping by. Join us tomorrow for the last day of stencil theme week.
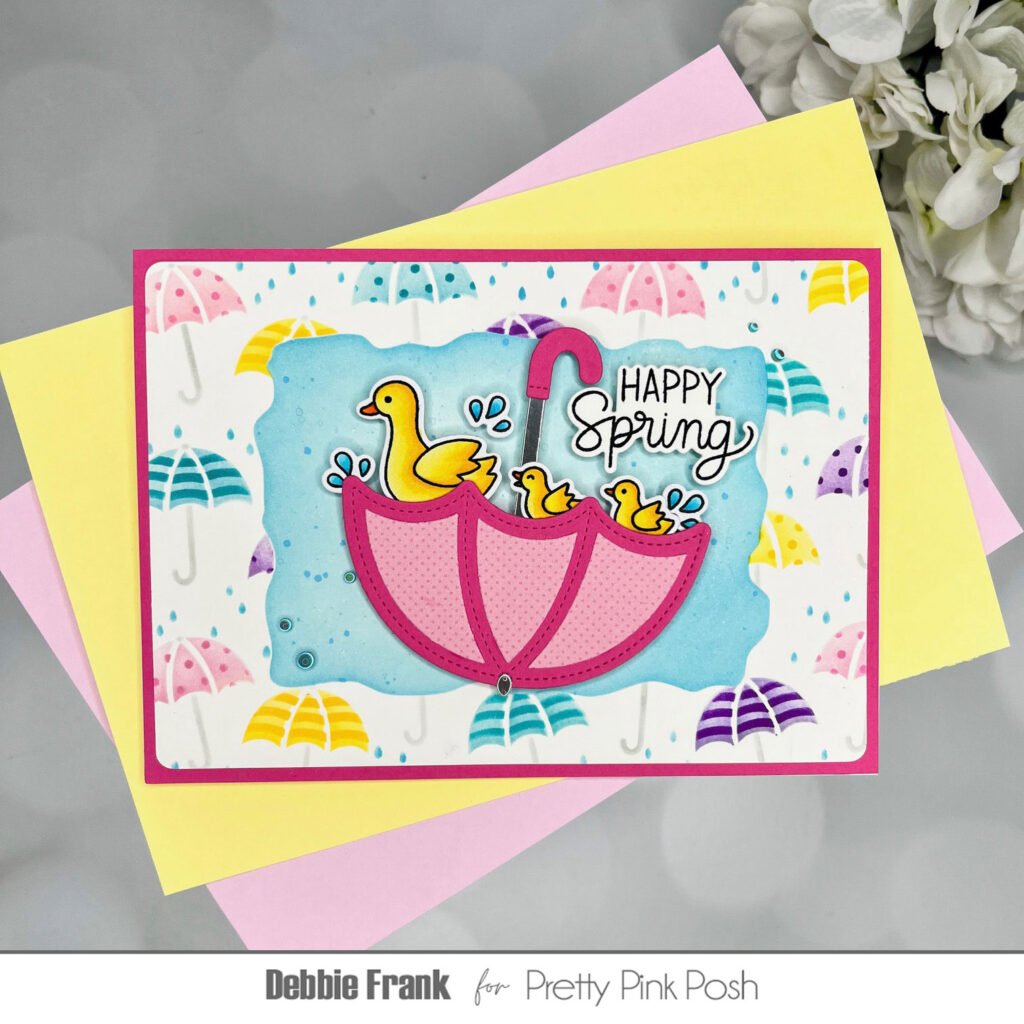
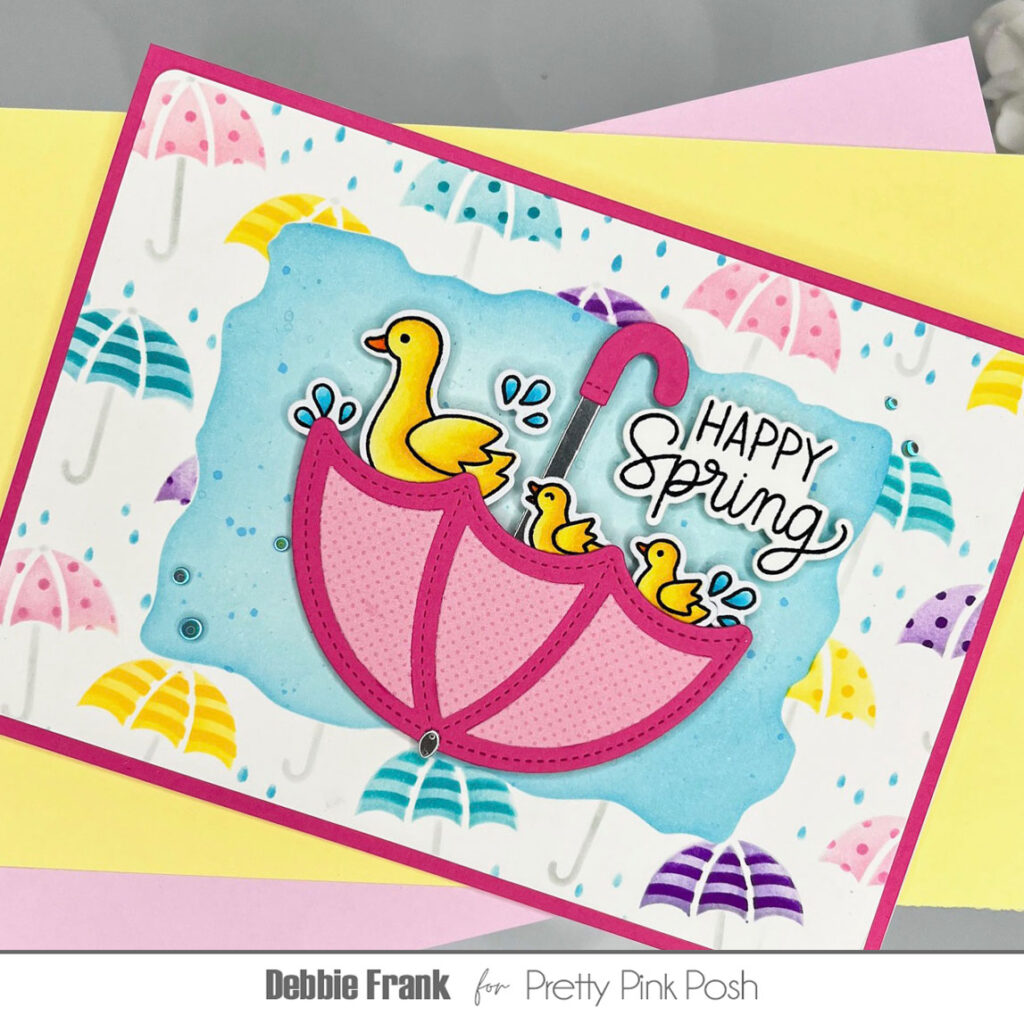
I started off with a 5X7 inch panel on a grip mat, placing the Watercolor Rectangle Stencil over the center and ink blended on Marine Blue Ink. Then I took the mask for the rectangle and sprayed on some Pixie Spray so it will hold in place over the inked watercolor panel. Then placing on the layer A over and with a small ink brush I blended on colors – Light pink, light yellow, light teal, and violet. I didn’t find it necessary to mask off each area with the small brush. Because it was a 5X7, I did some creative stenciling. But this was really easy to do! I slide the stencil over and with the last umbrella that was inked up on the right, had another umbrella over it but not perfectly aligned. Next was the Layered Umbrella Stencil B, aligned up and add a slightly dark ink of the same colors. Layer C was the umbrella handle so I used a light gray. Then with the last layer D I did a teal for the water drops.
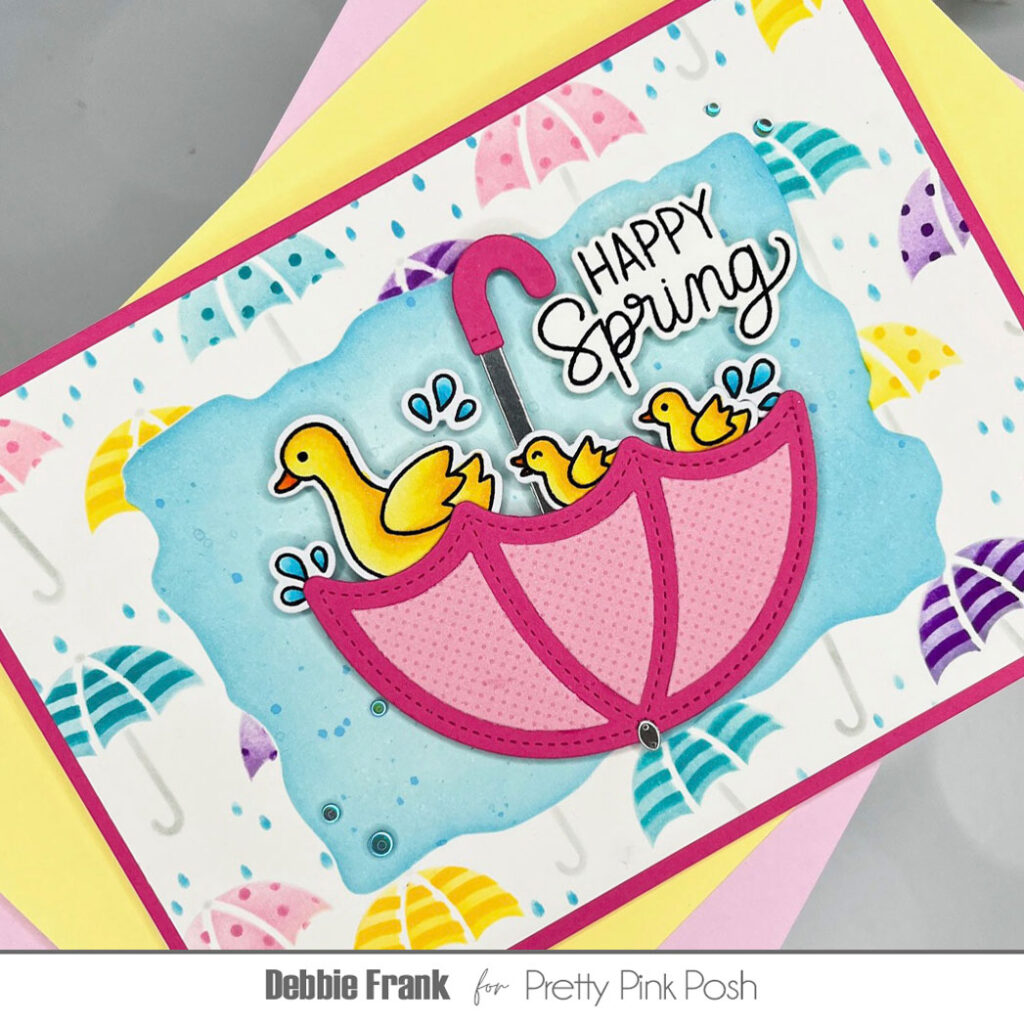
I then decided I wanted in the blue rectangle some darker blue splatter on it. So I placed the Watercolor Rectangle stencil back over and splattered on along with Pixie Dust for some shimmer.
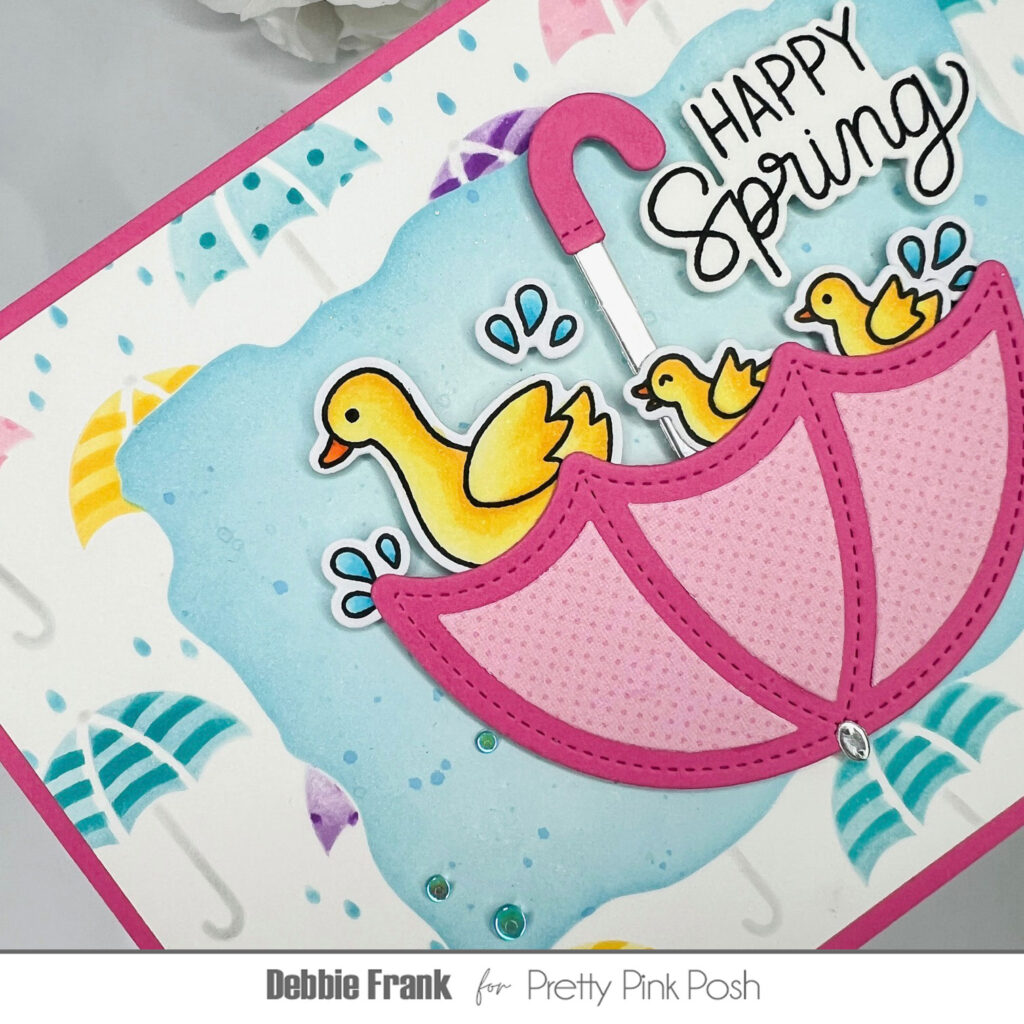
Then, I die cut out the Umbrella Shaker Die from a solid pink and pattern paper. I knew that I wanted to have the umbrella turned over to add the adorable ducks from the Baby Animals stamp set. So I stamped them up and copic colored the images. And then die cut them out with the coordinating dies.
Of course the duckies would be splashing some water out of the umbrella. I found the perfect droplets from Spring Chicks Stamp Set. Colored the water up and with the coordinating dies die cut them out.
Trimmed the panel down so it could be matted, and had a little mishap with the trimmer. It has been a while since I’ve used a punch, but I had to use a rounded corner punch. Adhered it all down, with the images popped up with foam squares.
Thanks for stopping by and stay crafty my friends!
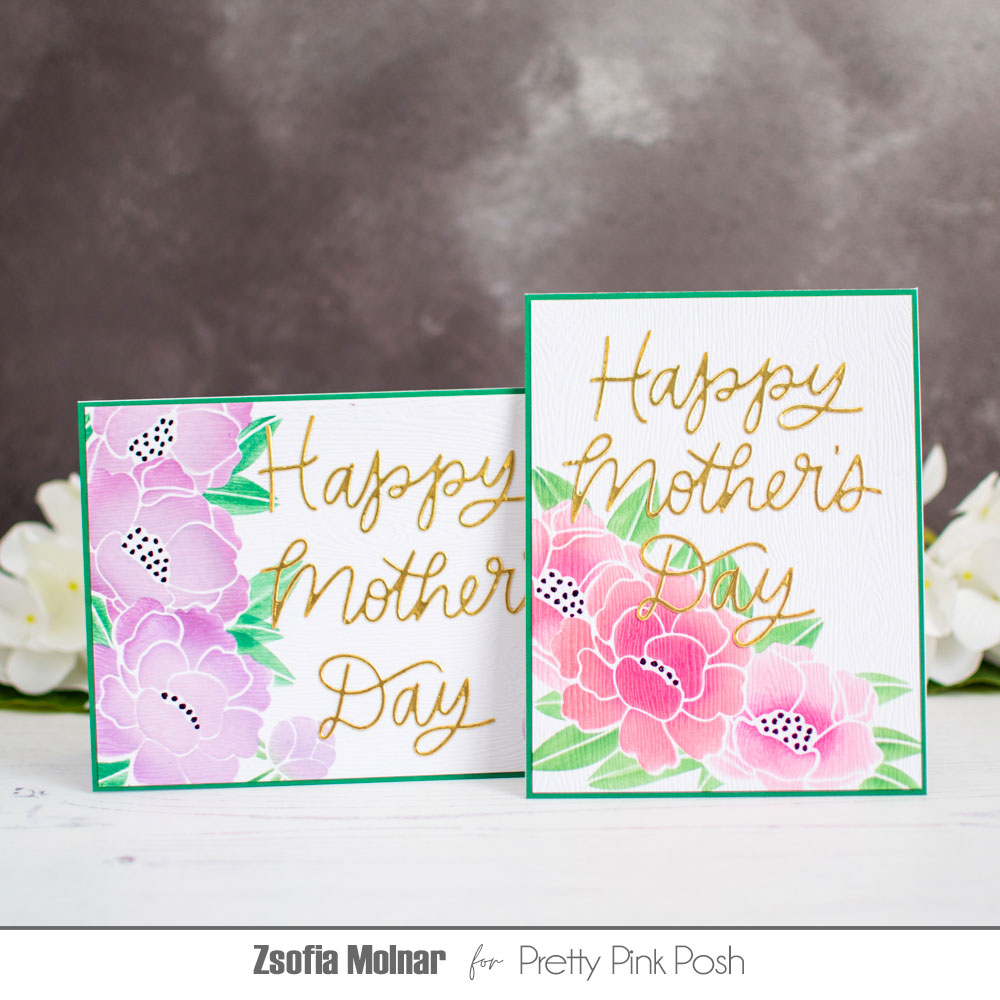
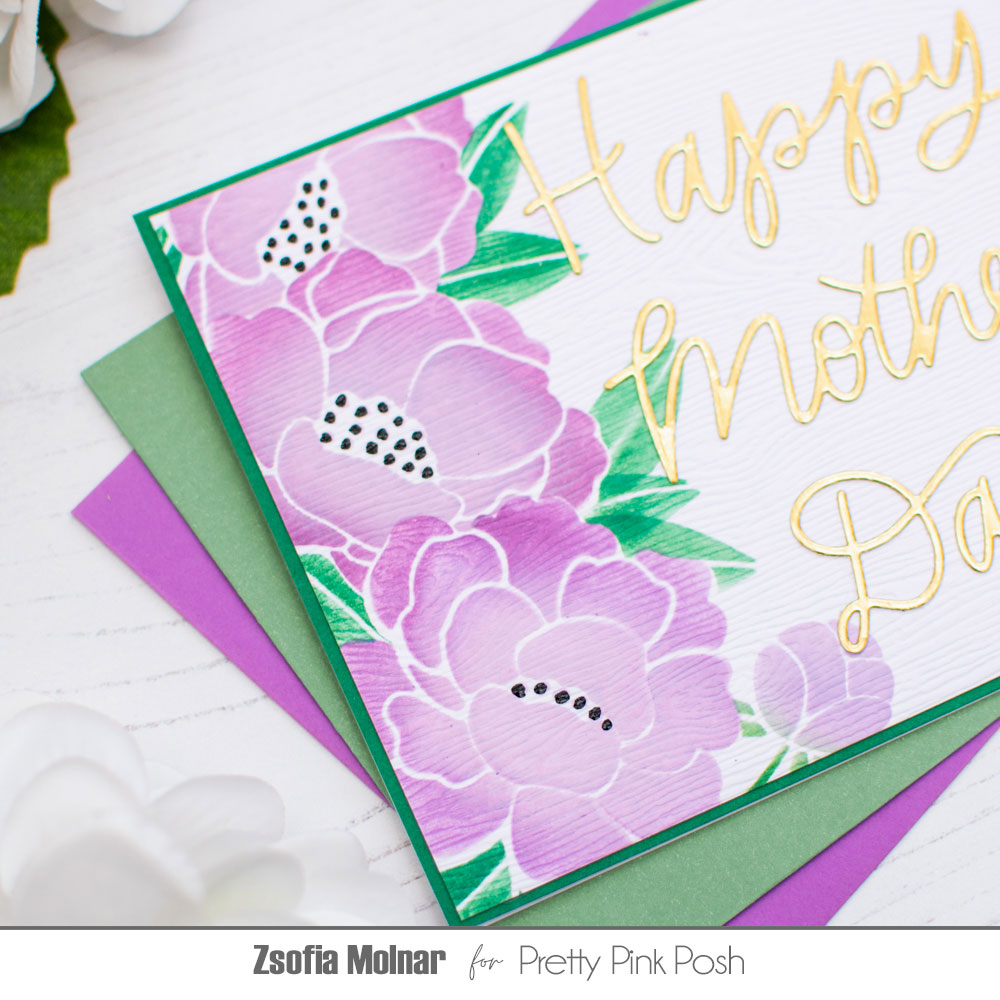
Hello Everyone! Welcome to Day 4 of Stencil Theme week! It is Zsofi here today with a delicate design for Mother’s Day, but if you change up the sentiment it can fit any occasions. Let me show you how you can achieve a layered look with one single stencil.
For today’s technique I chose the Peonies stencil as it has a few flowers and leaves all in one. To lift it to the next level, I used woodgrain cardstock as the base, so it will have a texture after applying the colours. Before starting the stenciling, I created some masks for the flowers: I simply stencilled them with any ink on masking paper and cut around the edges with my scissors. I usually keep these masks together with my stencils for future cards as they can be reused many times.
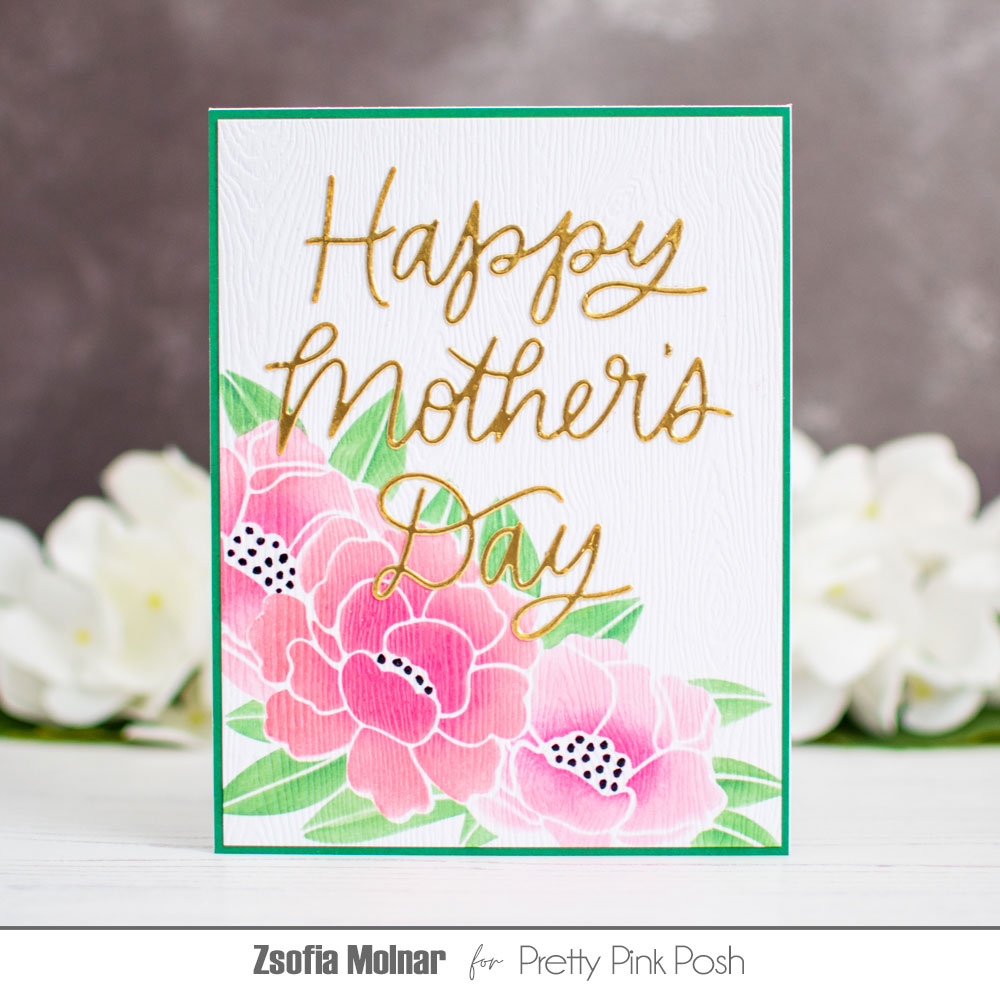
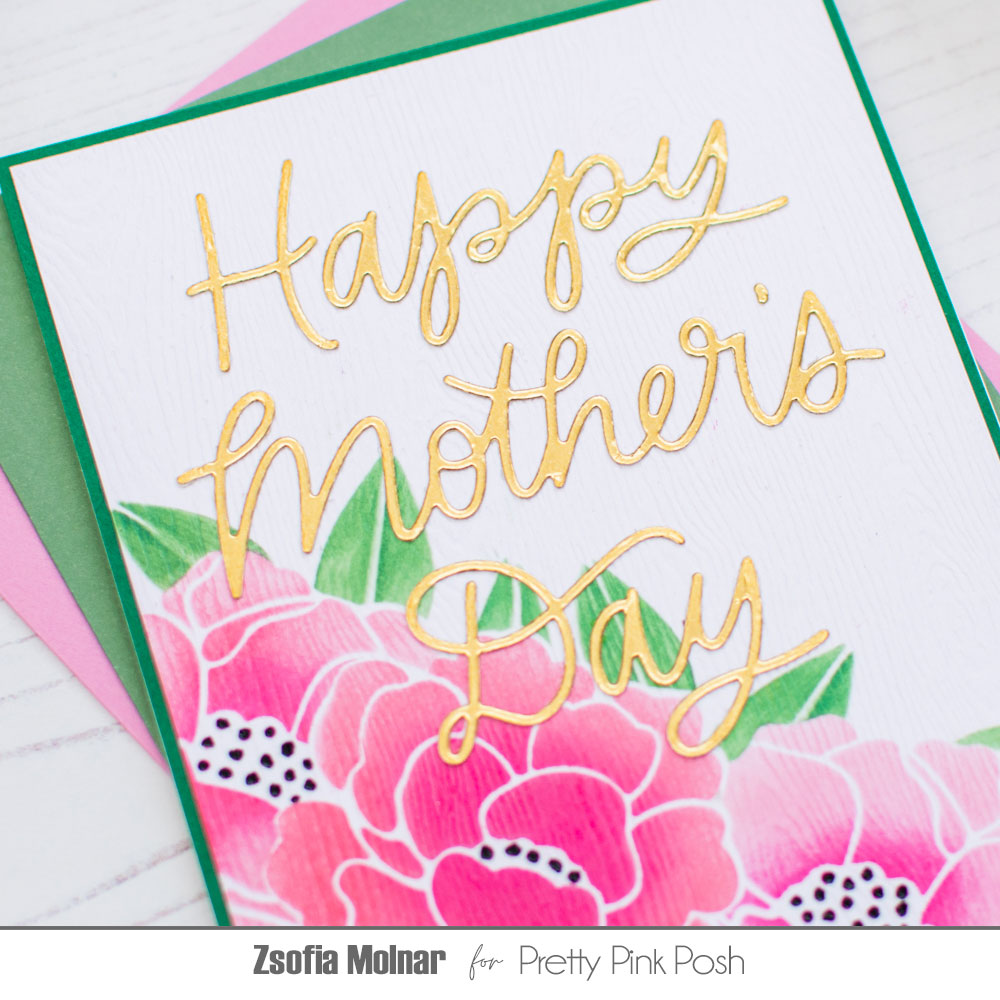
For the first card I used Pink Raspberry and Worn Lipstick Distress Oxide inks for the peonies and Rustic Wilderness for the leaves. I wanted a vertical design and used only the 3 big flowers, masking each after applying the colour. I started with the one in the middle, inkblended the stencil then removed it, covered the flower with the mask, placed the stencil back and added the second flower and so on. When all 3 were covered, I used the leaves parts of the stencil to add the greenery.
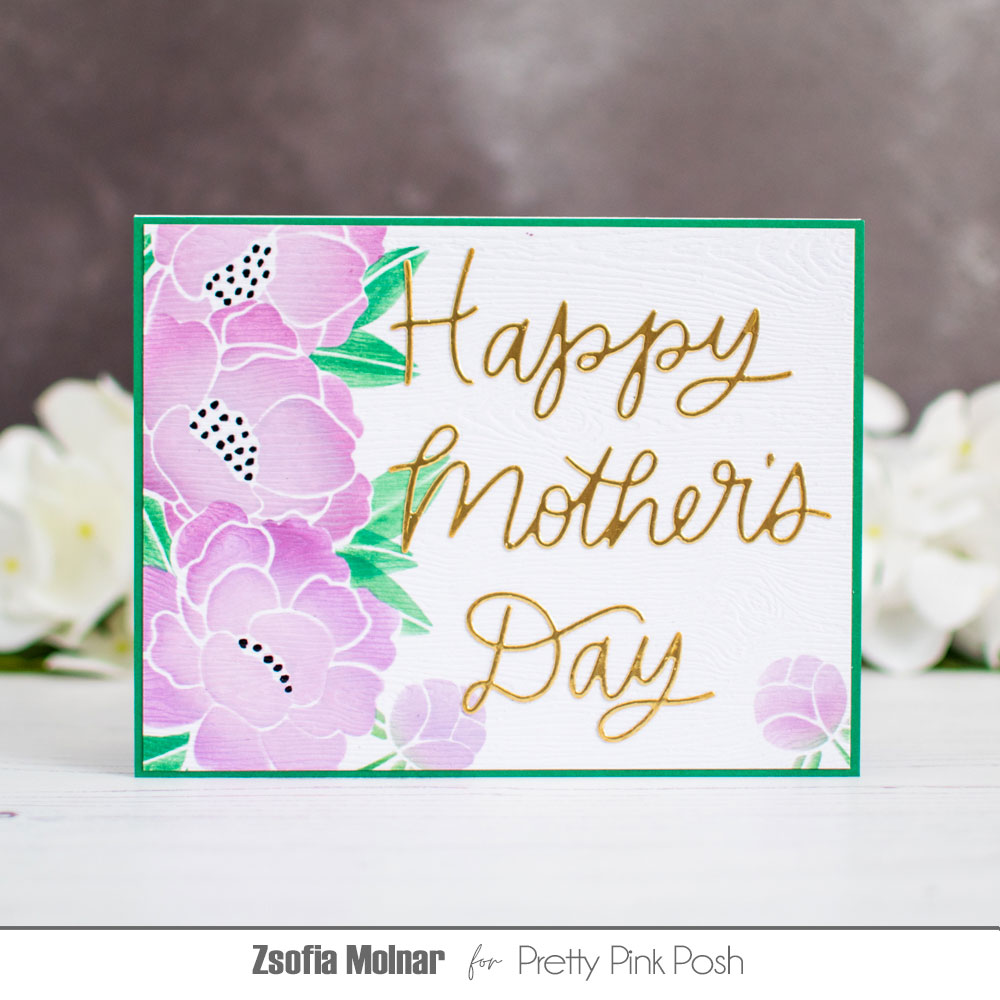
For the second card I went with a horizontal layout, used the 3 big flowers the same way as above just with Milled Lavender and Dusty Concord Distress Oxide ink. I also added the little buds to the corners. For the leaves I blended in Pine Needles Distress Oxide ink. The best part of this masked stencil technique is when you remove the masks to reveal your flower arrangements. So pretty!
I cut both panels down to be a bit smaller than an A2 sized card front and gave them a dark green mat. For the sentiment, I used the Mother’s Day Script die and cut it from gold metallic cardstock. I used liquid glue with a precision tip to adhere them on the card fronts.
As a finishing touch I went over the dots of the flower centres with a black glaze pen, it makes them shiny and slightly 3D.
I hope you liked this card idea and got inspired. Thanks for stopping by and hope to see you soon, Zsofi
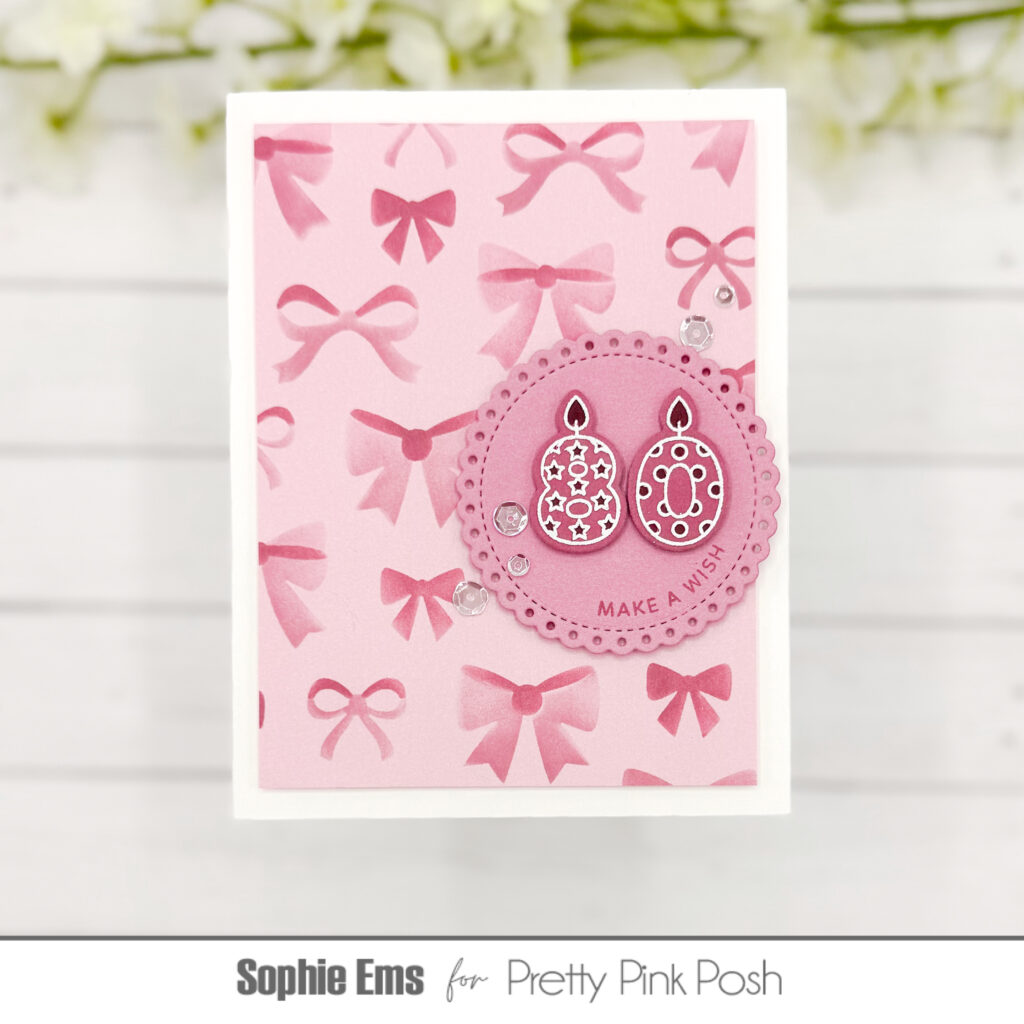
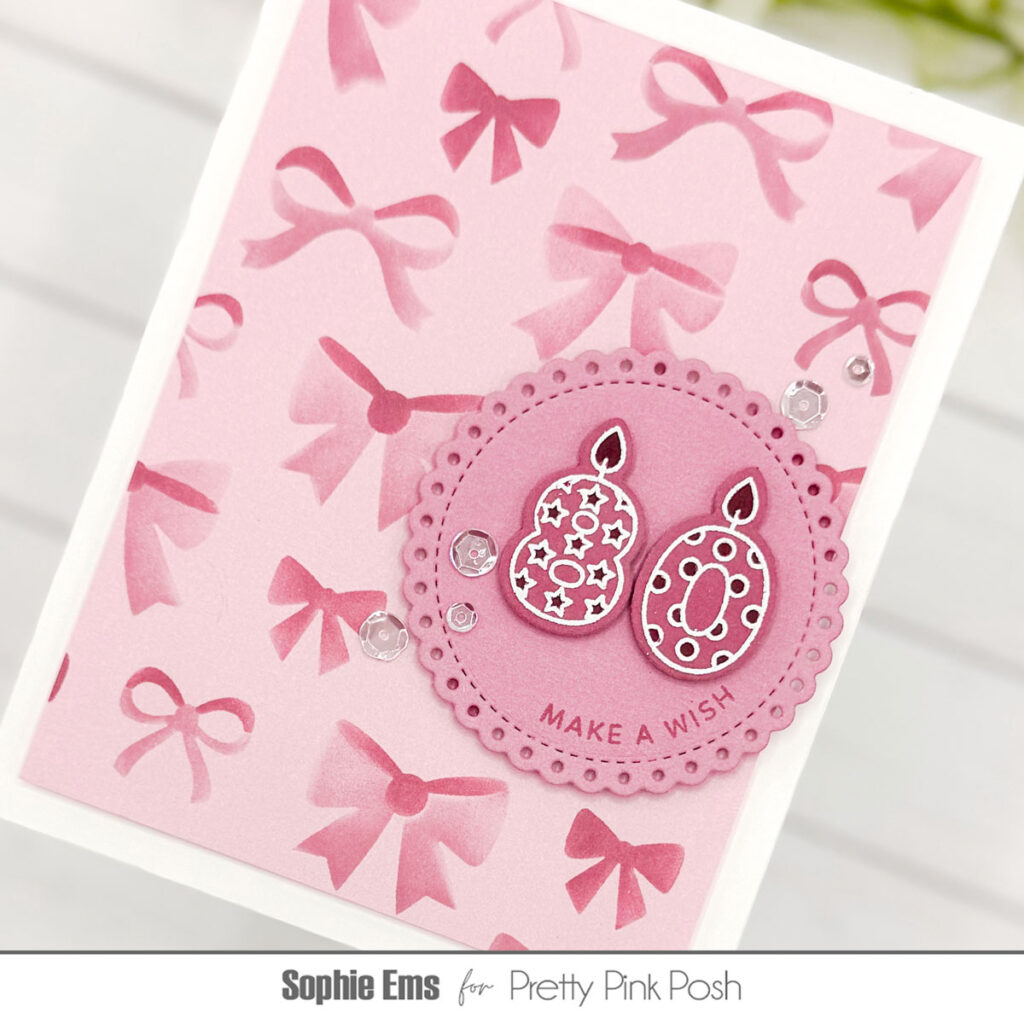
Hi friends! Sophie here and today I am celebrating stencil week with a card featuring the Layered Bows stencils. Bows are *so* my thing and this makes a beautiful layered bow pattern! Let’s dive in.
I decided to try something new for me – a monochromatic color palette. For my card I used the stencil set on pink cardstock with coordinating pink ink. I am making this card for my grandmother’s birthday later this year and she is turning 80 so I used the Number Candle stamps and dies to add a special touch. I love this set because you can customize cards for the recipient and it makes it feel extra special.
For the “Make a Wish” sentiment I pulled out an oldie but goodie set calledSimple Sentiments. There is such a wide array of sentiments on this set it is a go-to for me! The circle comes from the Eyelet Circles set. To finish off my card I used a scattering of my favorite Sparkling Clear sequins!
I hope this was inspiring for you! I’d love to know below – do you like stenciling? Bye for now! :)
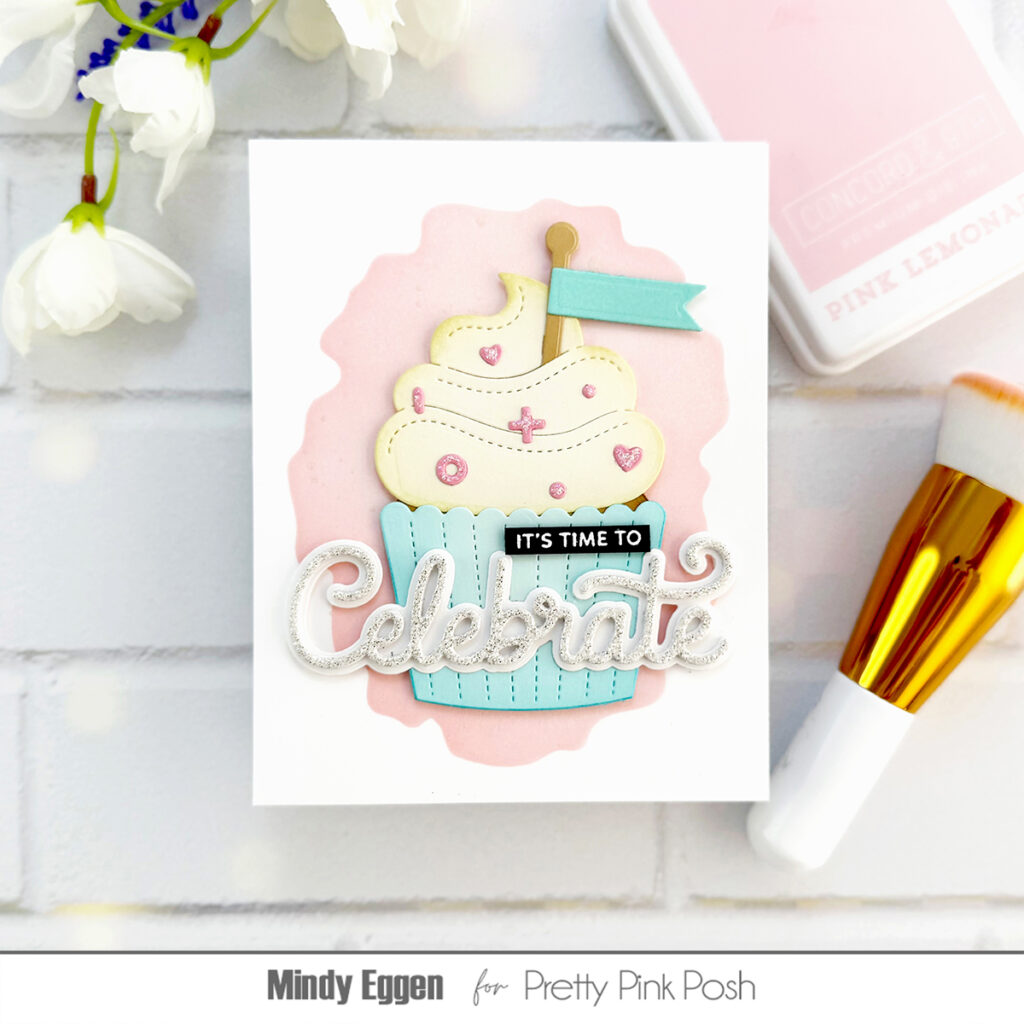
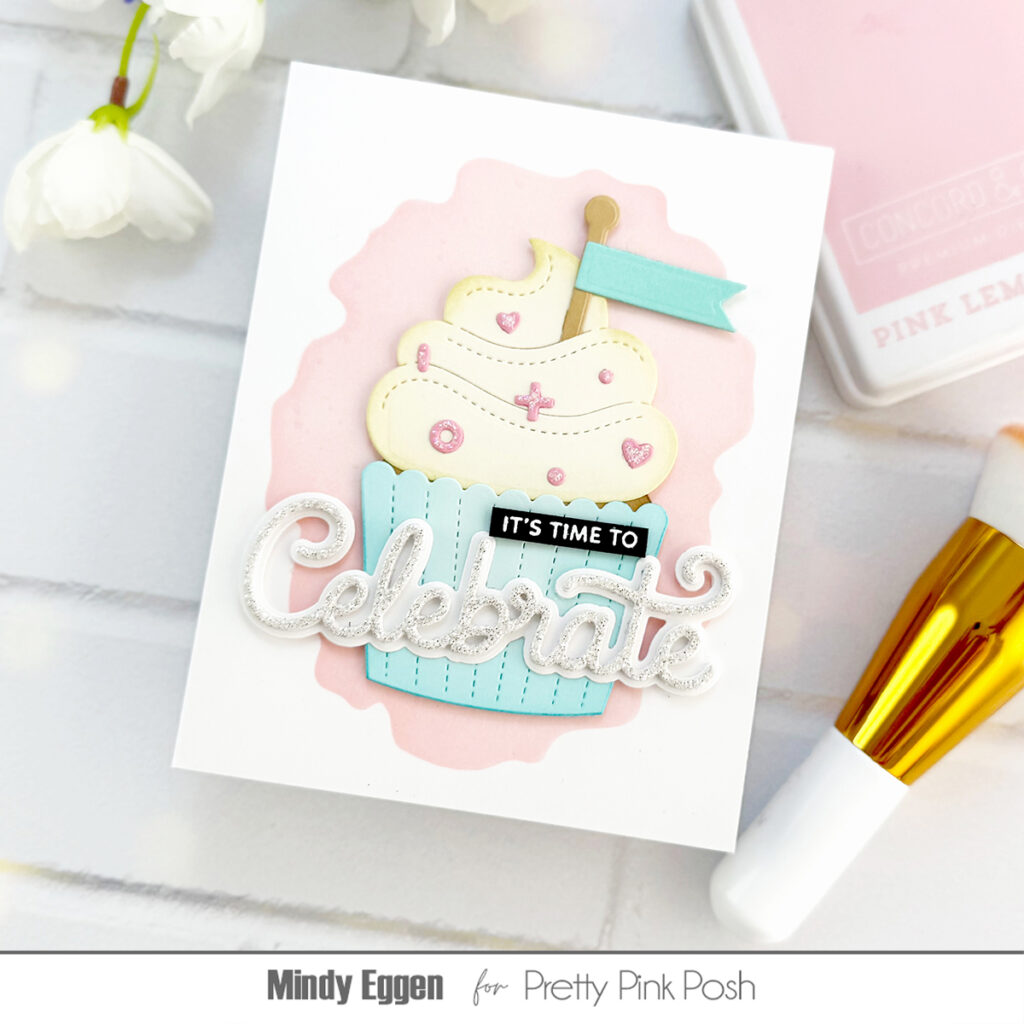
Hello friends! It’s Mindy here, and today I’m excited to share a fun birthday project featuring the new Watercolor Oval stencil. I love how versatile this stencil is — it’s perfect for almost any theme you can dream up, and I can’t wait to show you how I used it to create a bright and cheerful birthday card!
I thought using it as a soft, colorful background for a yummy birthday cupcake would be the perfect way to kick things off — and it adds just the right touch of fun and celebration!
I started by placing the stencil over an A2-sized card front and softly ink blending with a light shade of pink ink, but you could definitely have fun and use multiple colors for a more playful look too!
Leaving the stencil in place, I added some texture by splattering Distress Spritz in Antique Linen and Kitsch Flamingo over the background for a fun and playful effect.
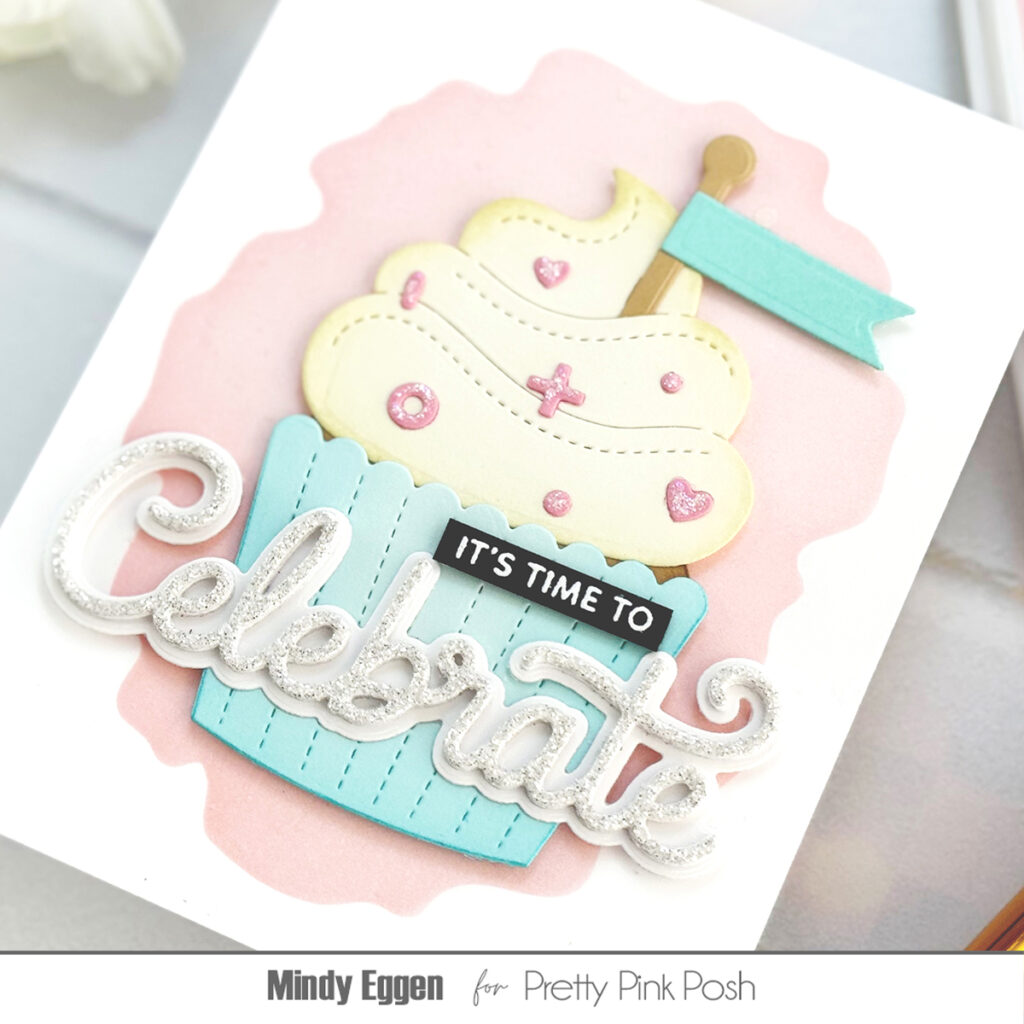
Next, I created a sweet cupcake using a mix of the Big Valentine Cupcake and Big Birthday Cupcake die sets, adding a touch of ink blending to the die cuts for a little extra depth and dimension.
I popped the cupcake up with foam tape and added a touch of Star Dust Stickles to give it a sparkly, festive finish!
For the sentiment, I combined the large “Celebrate” die cut from glitter cardstock with a smaller heat embossed sentiment from the Party Time stamp set for a fun, festive touch!
What a great way to draw attention to the focal point of our card! It really helps everything come together and makes the card feel extra special!
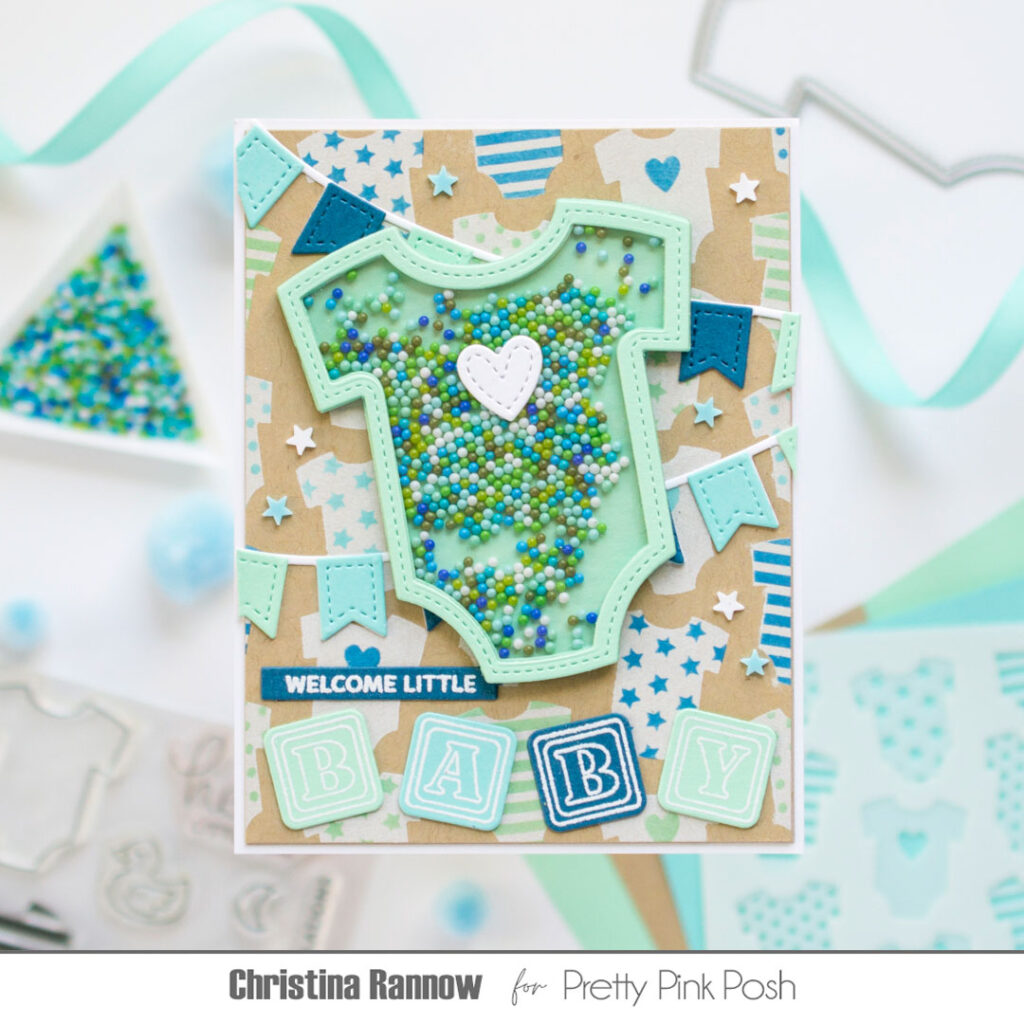
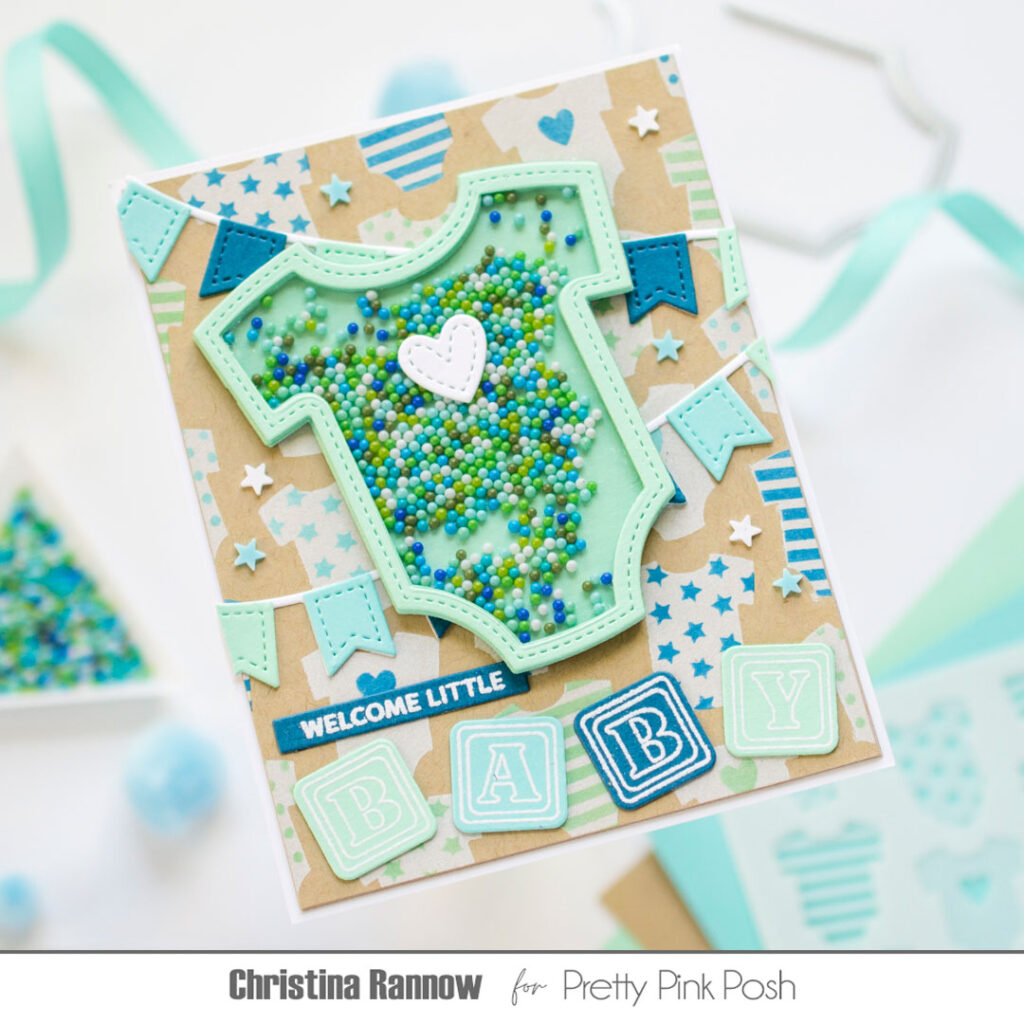
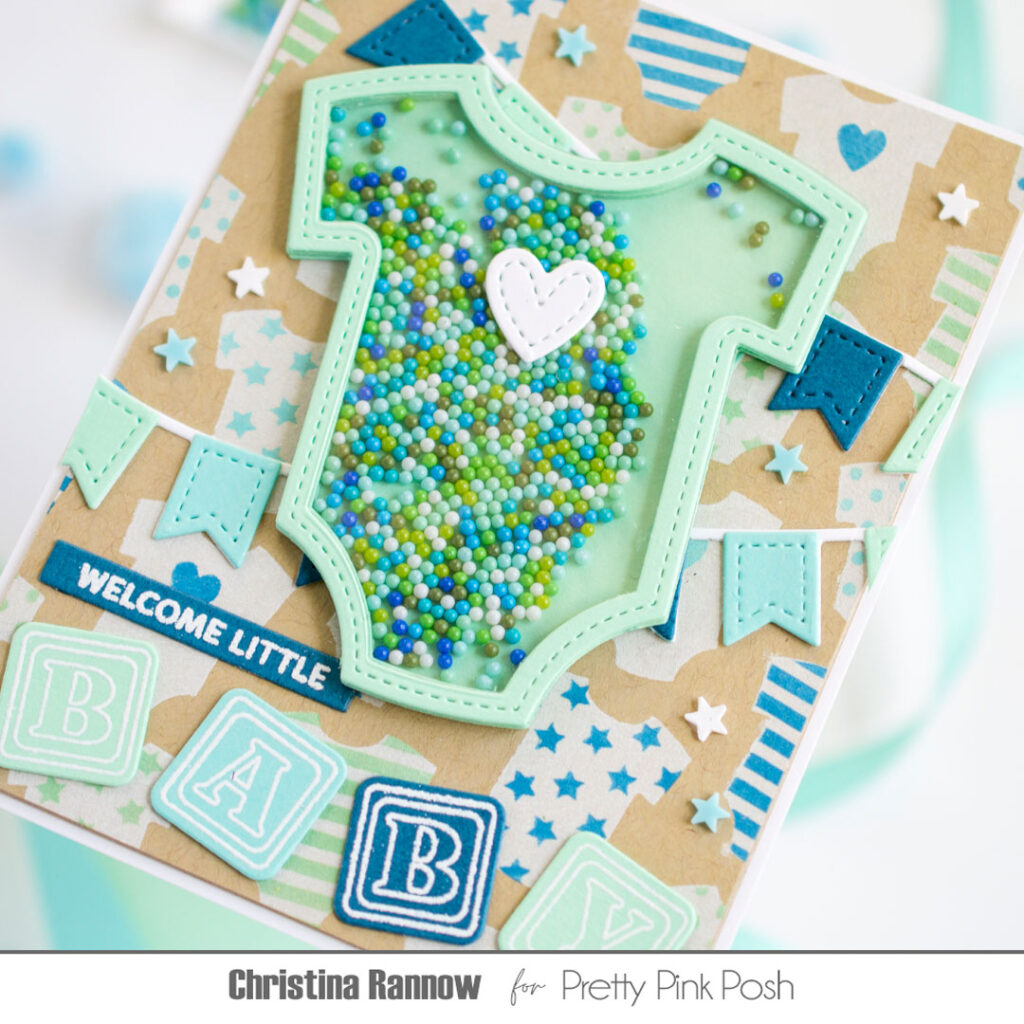
Hi friends, it’s Christina! Today is day one of Stencil Theme Week here at Pretty Pink Posh, and I have an adorable inspiration project to share with you. I chose one of my all-time favorite stencils for this project, the Layered Onesies. Those little white onesies on kraft cardstock are just the cutest!
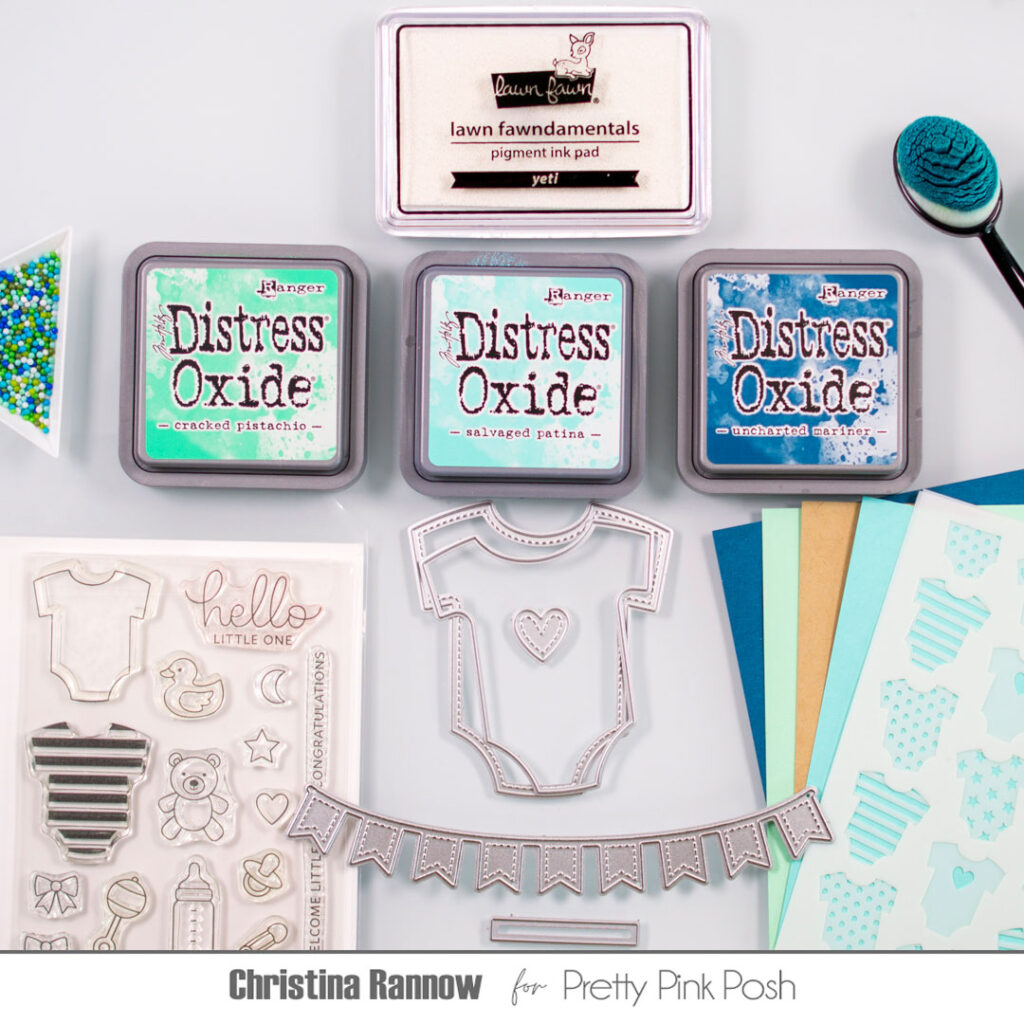
Let’s start with the background. On a kraft cardstock panel measuring 4 x 5 ¼ inches, stencil the onesies. Use a white pigment ink for the first layer, let that dry for a little while, and then use Distress Oxide Inks for the second layer. The colors I used were Cracked Pistachio, Tumbled Glass, and Uncharted Mariner. I alternated colors for each row of onesies.
Next, die cut the fishtail banner streamer from theStreamer die set from white cardstock two times. Then die cut the coordinating banner pieces from mint green, light blue, and navy cardstock. Assemble these and attach them to your background panel.
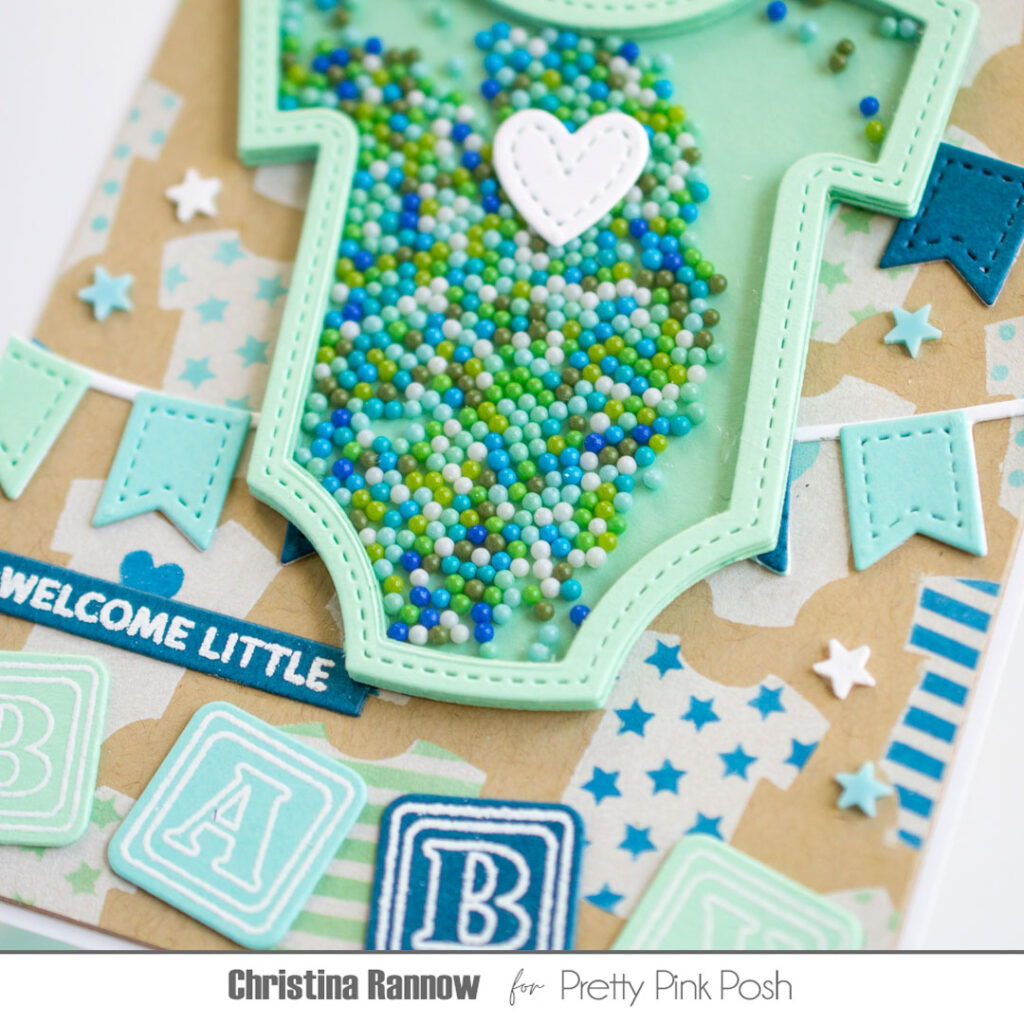
Time to create the shaker! This is an easy shaker assembly. Die cut the Onesie Shaker frame eight times from mint cardstock. Die cut the whole onesie once from mint green cardstock for the base of the shaker and once from clear acetate for the shaker window. Sandwich the acetate between two of the onesie frames, securing with liquid adhesive, and stack the remaining frames behind it to create the walls of the shaker. Fill the shaker with shaker beads and attach the base to complete the shaker. Easy! Secure the shaker on your background panel right over the streamers and add a white heart detail.
Let’s finish up this shaker card! Stamp the baby blocks from theBaby Basics set on the coordinating cardstock colors with clear embossing ink and heat emboss with white embossing powder. Die cut them and attach them to your card panel. I attached each of my blocks slightly offset for a whimsical touch. Next, heat emboss the partial sentiment “welcome little” from the same set with white embossing powder on navy cardstock. Die cut it with a sentiment strip and attach it above the blocks to complete the sentiment for the card. Finally, add a few clay stars for embellishment.
And that completes this new baby shaker card featuring theLayered Onesies Stencils set. Be sure to check out all the incredible inspiration during Stencil Theme Week here on the blog!
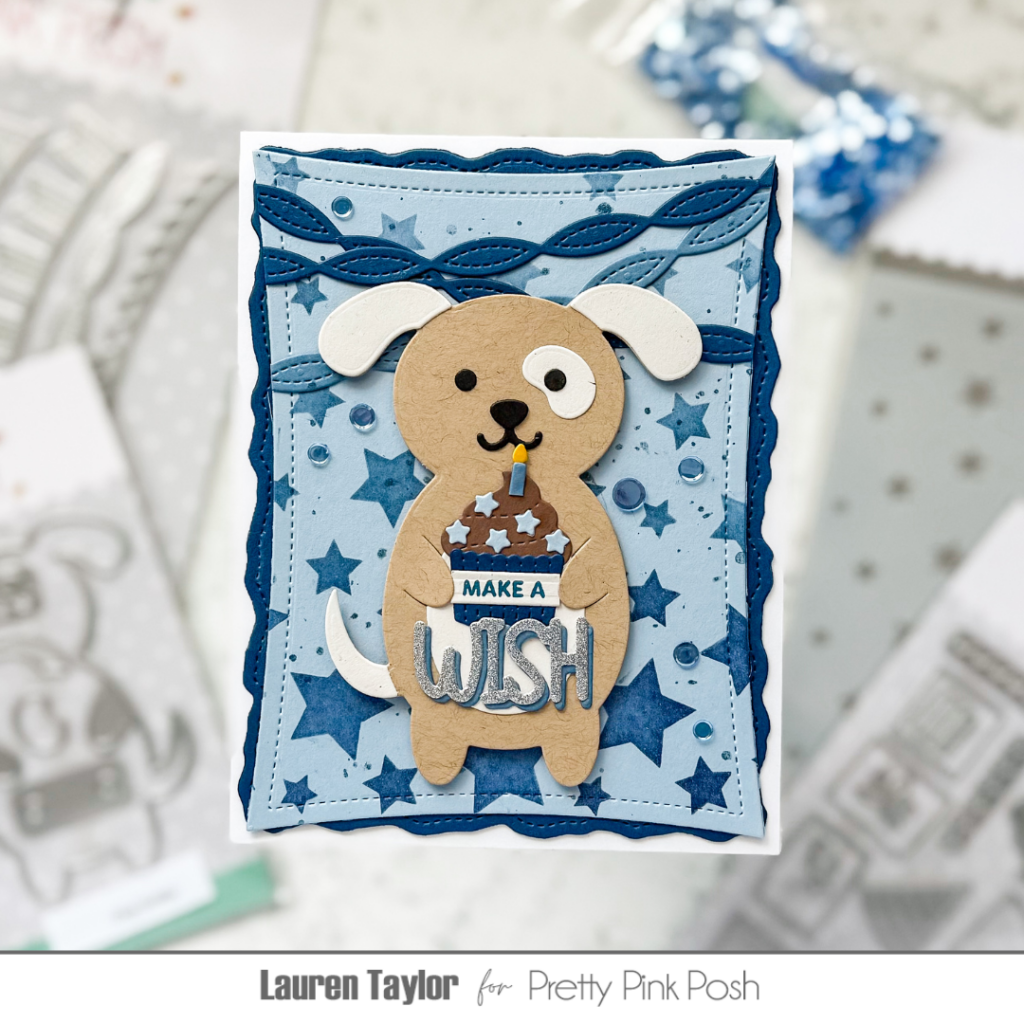
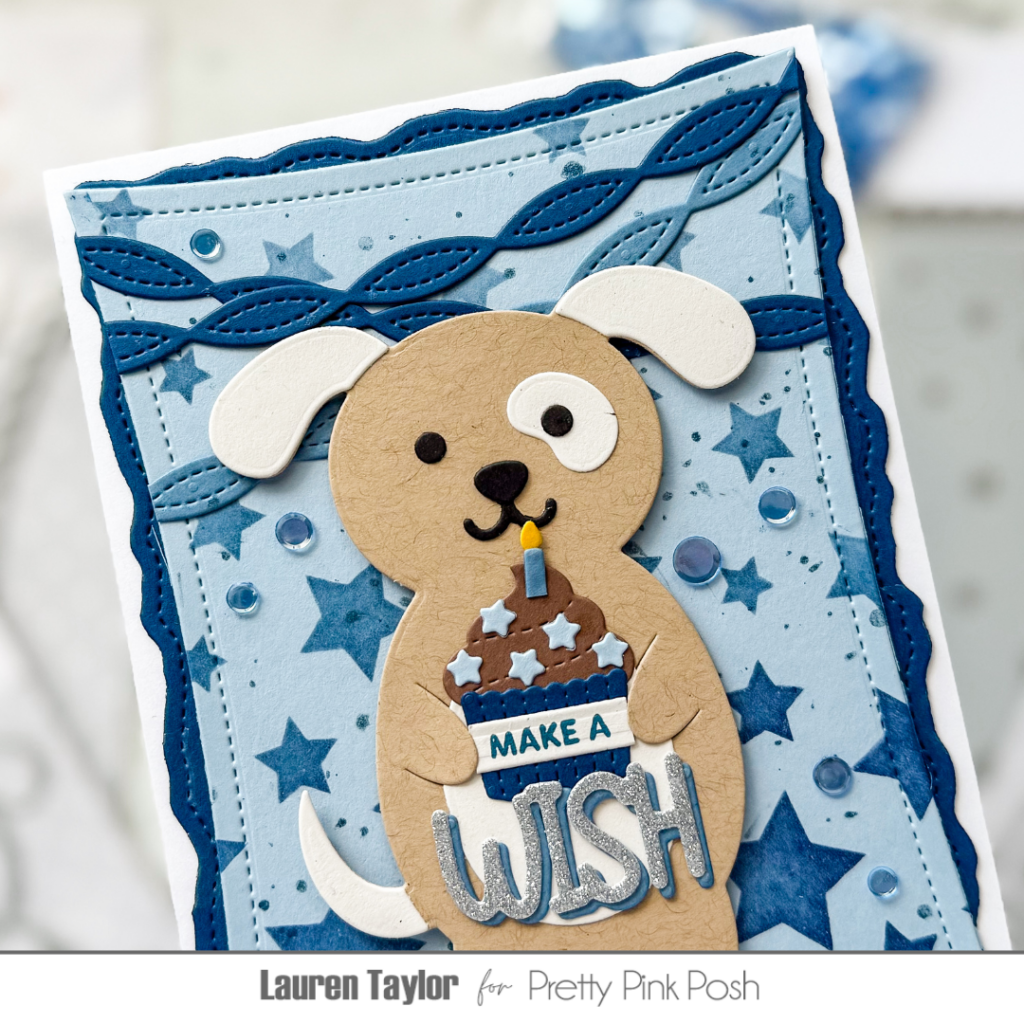
To create this card, I began by die-cutting various elements from blue and neutral craft cardstock. The background was stenciled using the Cascading Stars Stencil and Distress Inks in Stormy Sky, Faded Jeans, and Chipped Sapphire, creating a stunning gradient effect. I assembled an adorable dog using the Dog Holder Dies. The Birthday Holder Additions Diescontributed a charming cupcake and candle, while the Streamer Dies added a party flair. The “wish” sentiment was die-cut from sparkly silver cardstock with a blue drop shadow, and “make a” was stamped onto a sentiment strip.
Layering was key to this design. I adhered the stenciled background to a dark blue stitched torn rectangle, then added the streamers, ensuring they aligned with the wonky stitched rectangle. To add a touch of shine, I splattered Faded Jeans Distress Spritz onto the background. The dog and cupcake were popped up with foam adhesive for dimension. I adorned the card with Blue Shimmer Confetti, strategically placed to cover any accidental smudges.
I’m absolutely in love with the tone-on-tone look and the playful pup that takes center stage! If you’re eager to see all the details and follow along step-by-step, be sure to watch the YouTube video. You’ll witness the magic of these Pretty Pink Posh products and discover how to create a card that’s sure to bring joy. Happy crafting!