
Christmas Theme Week: Day 6

**All items in the Christmas section are 15% off during theme week**
Hi, friends! It’s Lauren and I am back with a new video today. I have a simple, faux embossed Christmas card to share with you! My card has a tone on tone look using die cuts which gives the card a look and feel like an embossing folder was used.
Watch the video above I Watch the video in HD on YouTube
I started with die cutting the pine needles (all three sizes) from the Holiday Wreath Builder Dies – each die four times from white cardstock. I cut a panel of white cardstock to 4×5-¼” and glued the pine needle die cuts around the panel. When the glue was dry, I trimmed off any of the small die cuts that extended past the panel. I used an iridescent glitter spray on top of the panel to give it some shine and make sure all of those pieces were glued down.
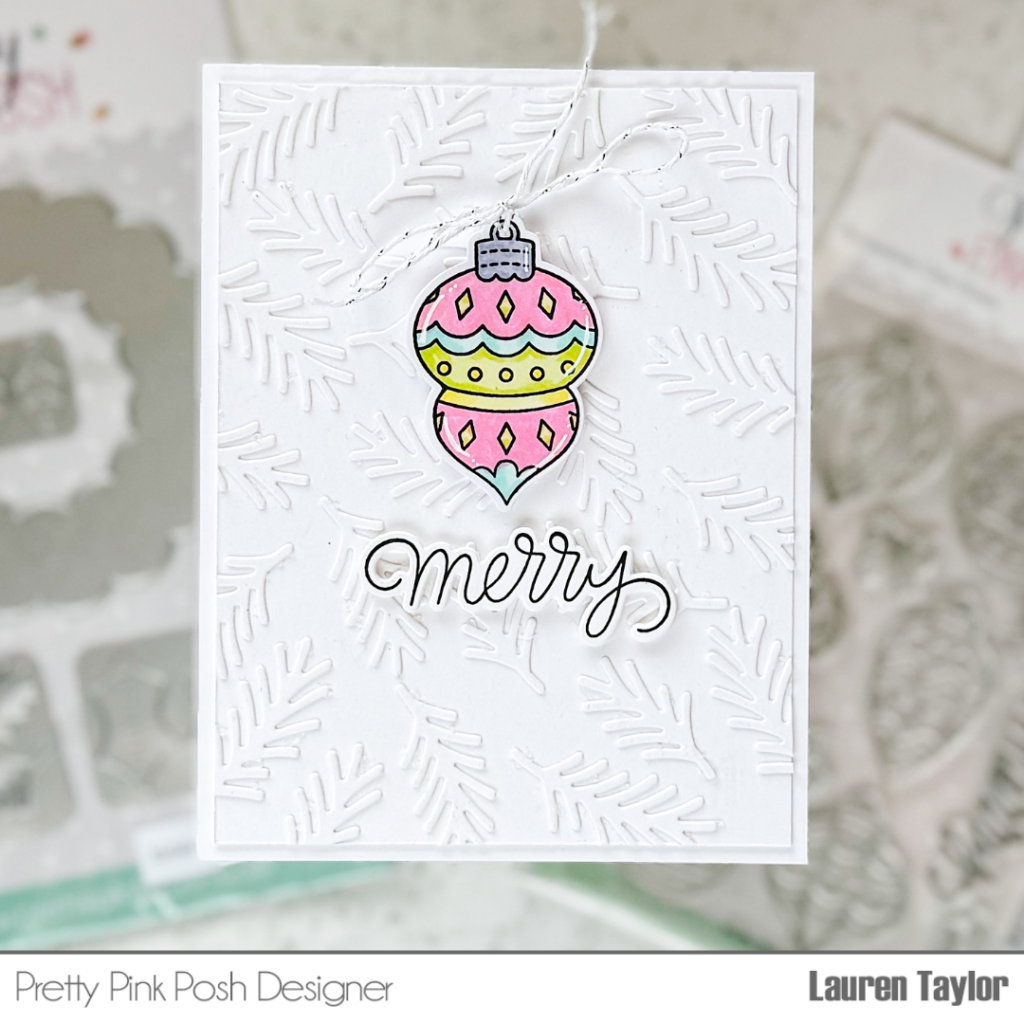
Next I stamped my favorite of the vintage ornaments from Holiday Ornaments Stamp Set and colored it in with alcohol makers. I also stamped the “merry” sentiment and used the Coordinating Dies to cut them both out. I used a small hole punch to add a hole to the top of the ornament and tied a bow with baker’s twine.
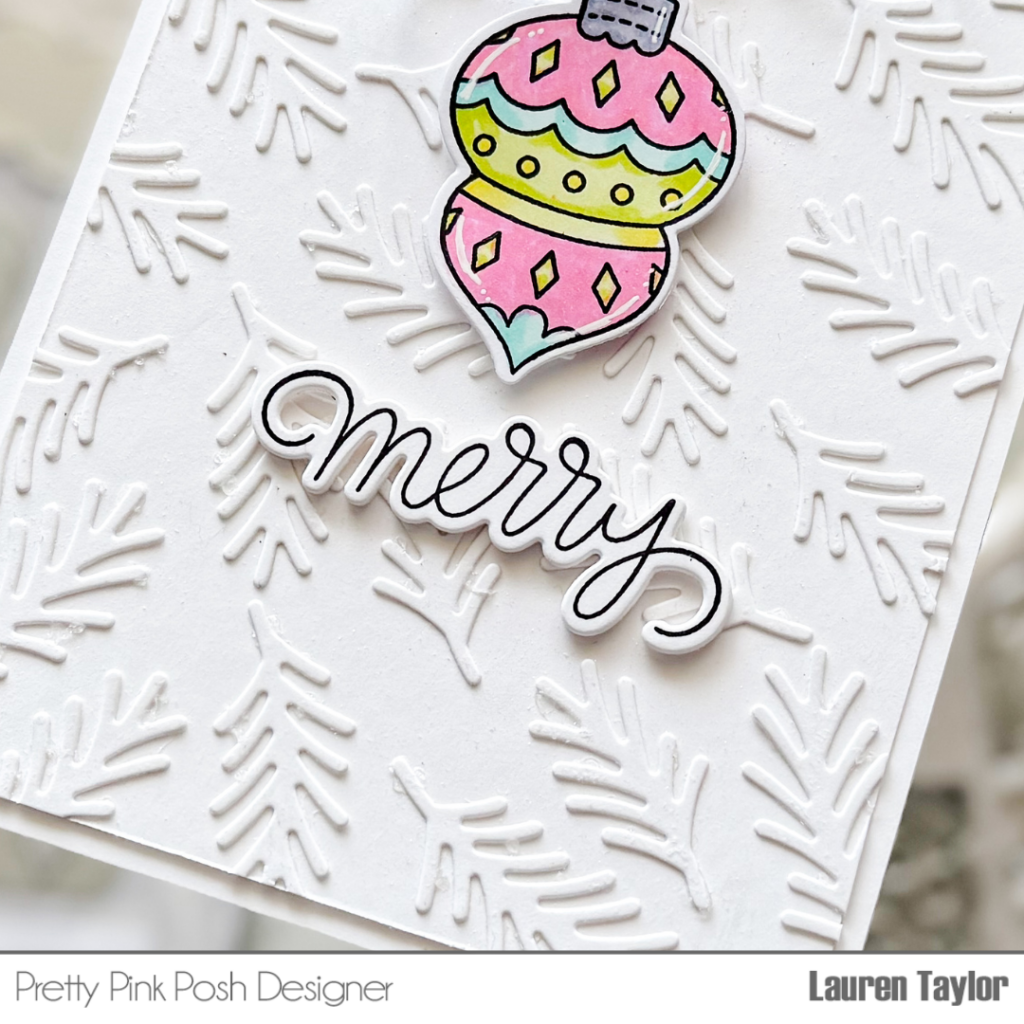
I adhered the ornament to the center of the card and the sentiment just below it. To give the sentiment dimension without foam, I cut the “merry” three more times out of scrap white cardstock and layered them all together before attaching to the card.

I hope this simple card brings a smile to your face today!
Love the CAS look 😍