Cards

| |

Tutorial: Canvas Backgrounds

canvasHello, Pretty Pink Posh fans!

This is Yana and I’m excited to share a simple card tutorial today. I love to create cards that incorporate both a bit of stamping and a little bit of die cutting. When it comes to die cutting, I enjoy using various mediums, not just paper. For the card I’m sharing today I’m using canvas; it adds a nice texture to the background and makes my project pop.

yana-smakula-2016-Pretty-Pink-Posh-You're-The-Best-1SQW

Canvas can be difficult to die cut and you won’t be able to die cut it like paper, detailed intricate shapes most likely will not cut, but it doesn’t mean you can’t use canvas for simple shapes like rectangles or circles.

yana-smakula-2016-Pretty-Pink-Posh-You're-The-Best-4W

I find I’m able to get best results when die cutting canvas when I have an additional layer with it when I send it through my die cutting machine. Simply adding a layer of paper or cardstock can help a great deal, however you will still have a few uncut fibers you’ll have to trim with your scissors.


adhesive1 adhesive2

To create the card I’m sharing in this blog post begin by adhering a sheet of Scrapbook Adhesives Adhesive to the back of your canvas. This will make it easier to cut it and it will allow us to adhere our canvas onto a cardstock panel to make it sturdy. If you don’t have Adhesive Sheets from Scrapbook Adhesives you can also use Stick It from Ken Oliver or any other thin double sided adhesive in sheets or tape.

Pretty Pink Posh: Tutoria- Canvas Backgrounds

Once you’ve adhered it go ahead and die cut your canvas using a rectangle die from the Stitched Duo 2 set. You’ll also need to die cut an identical panel out of white cardstock and make it slightly smaller (about ⅛ smaller on each side). Alternatively, you can cut the panel using your paper trimmer, it doesn’t matter, you don’t need to faux stitching on it.

Pretty Pink Posh: Tutoria- Canvas Backgrounds

Once you have both of these cut go ahead and adhere canvas onto cardstock. Because the cardstock panel is slightly smaller it should remain invisible from the side.

Because our canvas is a lot more sturdy now go ahead and foam mount it onto a card base. I love to use foam adhesive as it helps me to add dimension to my cards and I also believe it helps the die cuts to stand out. I used woodgrain textured cardstock to create a base for my card, but plain white card should also work great.

Pretty Pink Posh: Tutoria- Canvas Backgrounds

We will also need to create a frame for our project so go ahead and die cut the smaller circle from the Scallop Circle Dies set 3 or 4 times out of white cardstock. You can die cut more layers if you want the final piece to be thicker. Use glue, I used Multi Medium in Matte and adhere the layers together to create one thick dimensional element.

Pretty Pink Posh: Tutoria- Canvas Backgrounds

Stamp several leaves from the Holiday Pals stamp set using green ink and die cut those out using a matching die. You’ll also need to die cut a small tag from the Mini Tags Die set out of white cardstock.

yana-smakula-2016-Pretty-Pink-Posh-You're-The-Best-2W

To finish this card you’ll need to stamp, color and die cut an adorable little owl (or any other cute creature) from the Holiday Pals stamp set, heat emboss a You’re The Best sentiment in white embossing powder onto black cardstock and also die cut several hearts using a tiny heart die from the Mini Tags Die set.

Pretty Pink Posh: Tutoria- Canvas Backgrounds

Adhere the elements onto a yellow canvas rectangle, foam mount the sentiment and the tag and embellish your card using a few 6mm sunshine glow sequins.

Happy cardmaking!

| |

May Product Release Blog Hop

Pretty Pink Posh: May 2016 Blog Hop

Hello, sweet friends!

It’s time for the Product Release Blog Hop for the May 2016 release. Many of you have already placed orders, but for those who were wanting for more inspiration, today the design team and special guests have all sorts of inspiration to share!

Today we have a special treat- a card by new PPP designer, Jeanne. I simply adore her style and as you’ll see from this card, she is super creative!

Pretty Pink Posh: May 2016 Blog Hop

For Jeanne’s card, she used the Birdie Friends stamp set to create her darling scene. I love how she made the birdie peek out from the Storybook 4 die set (like a window).

The bright pink cardstock was cut using the Stitched Borders 4 die set and made to look like curtains. How creative is this?!

Pretty Pink Posh: May 2016 Blog Hop
Look at the creative way she used the branch and leaves from the set- so genius! I love that she stamped/ die cut some of the leaves, but on some leaves, she just used the die cut. To finish off the scene, she added a sprinkling of the Summer Flowers Mix. These little flowers go with the leaves perfectly!
Pretty Pink Posh: May 2016 Blog Hop

In this photo you can really see the stitching detail that goes around the Storybook dies. It’s such a simple element, but it adds so much to your projects!

Pretty Pink Posh: May 2016 Blog Hop

Ready to hop along and see LOTS more fabulous inspiration with this release?

PRIZES: be sure to leave comments on each stop. I’m giving away 2 $25 gift certificates to two random comments left before May 16, 2016 at 11:59 PM PDT. I’ll be announcing the winners next week, so be sure to return and see if you are one of the winners!

Pretty Pink Posh: May 2016 Blog Hop

I truly hope you enjoyed the blog hop. Be sure to leave lots of love for the design team and guest designers!

Thank you all for your enthusiasm about the new dies and sequins. I can’t wait to start seeing your creations with the new products in blog and social media land!

| |

Window Friends Card Duo

Hello crafty friends! It’s Vera Rhuhay here sharing a set of cards featuring the new release from Pretty Pink Posh – Storybook 4 die set.

Pretty Pink Posh: Window Friends Card Duo

Love this Storybook 4 die set so much! Here I combined with Birdie Friends Stamp Set along with the coordinating die cut and also use cute bunnies from Pix’s Favorites – Mama Elephant. I stamped the images with Versafine Vintage Sepia on Bristol paper and colored it with alcohol marker.

Pretty Pink Posh: Window Friends Card Duo

Pretty Pink Posh: Window Friends Card Duo

I die cut the branch and leaves from Birdie Friends Coordinating dies on watercolor paper and then I paint with watercolor. The curtains are made using Stitched Borders 4 die cuts.

Pretty Pink Posh: Window Friends Card Duo

Don’t you love the Metallic Rose Gold sequins? 

Here’s the video on how I created my cards…
Pretty Pink Posh: Window Friends Card Duo
Thank you so much for joining with me today, Have a wonderful day!
PRETTY PINK POSH SUPPLIES :
| |

Tutorial: Rose Gold Birdie Shakers

Good morning Pretty Pink Posh friends!

Heather here to share another duo of cards – this time using the GORGEOUS new Rose Gold sequins (SOOOO pretty!!!) and the newest addition to the line of Storybook dies – Storybook 4 – all paired up with a couple older stamp and die sets!

Pretty Pink Posh: Birdie Shakers

I started off by choosing a couple pattern papers, die cutting my Storybook dies from white cardstock, then trimming the sides down with my paper trimmer. I then used the Scallop Frame dies, and the negative center piece die cut out of vellum – this will provide the backer to the shaker portion.

Pretty Pink Posh: Birdie Shakers

Added an acetate window, then trimmed down strips of foam adhesive to form the portion that will be filled with sequins. Don’t remove the backing to the foam adhesive yet though!

Pretty Pink Posh: Birdie Shakers

Next up, I chose a couple sentiments from Birdie Friends stamp set, stamped them in coordinating ink on some Stitched Speech Bubble dies.

Pretty Pink Posh: Birdie Shakers

The little birdie from Birdie Notes stamp set was stamped, colored with Copics to match the color schemes, and then die cut with the coordinating Birdie Notes Dies.

Pretty Pink Posh: Birdie Shakers

Next, I filled up my shaker windows with a mix of 4mm and 6mm Rose Gold sequins – normally I put my sequins on the backing of my shaker, but since I was using semi-transparent vellum, I filled the window portion – then I could still see through the vellum enough to make sure I was adhering it on squarely.

Pretty Pink Posh: Birdie Shakers

These were really fun to pick up and shake around at this point too by the way! Felt like a little rhythm instrument! :) Anyway, a bit of good adhesive hid around the outside edges easily attached it at this point to my pattern paper for my card front.

Pretty Pink Posh: Birdie Shakers

Finished off by attaching the sentiment and birdie to each card.

Pretty Pink Posh: Birdie Shakers

Here is a closer look at those lovely new sequins and that die! Aren’t they a perfect match?!?!?

Pretty Pink Posh: Birdie Shakers
And a closer look at each of the cards:

Pretty Pink Posh: Birdie Shakers

Pretty Pink Posh: Birdie Shakers
bird2bird3
Thanks so much for stopping by today! Have a wonderful day!!!
| |

May 2016 Release

The May release is now live in the shop and let me tell you, I am so very excited to finally be sharing these products with you all. When I am prepping for upcoming releases, many of the products are “in the works” for 6-12 months. Whether it be in the design process, being manufactured for testing or inspection, or me just waiting until a I think it’s the perfect time to release a product. When I finally get to share them with you, I feel like I can finally spill a long-time secret!

DIE SETS

Pretty Pink Posh: May 2016 Release
Today’s card shows off the new Storybook 4 die set in a different way. Instead of showing all of the open areas, I decided to just have the corners peek out in the form of shakers. I, of course, had to pair it with the Sparkling Clear Mix (my favorite go-to pack)! With the dual stitching on the dies, you get to see that nice stitching around on the shapes, which I think really enhances the look on your cards.

Pretty Pink Posh: May 2016 Release

For my focal point, I used the birdie from the Birdie Friends stamp set and paired it with one of the bows from the Twine and Bows die set. I knew that I wanted something eye catching in the center, so I die cut one of the Scallop Circles in some glitter cardstock. I think I may need an intervention soon- I’m so in love with glitter cardstock in all colors!

To finish off the card, I added some Lavender Moon sequins in both the 4mm and 6mm size to the corners. Sweet and fairly simple, but I know the recipient will love getting a card like this in the mail!

Pretty Pink Posh: May 2016 ReleaseIn the past, I’ve done videos to show each of the new products and I really wanted to do this again this month. This is a fun way for me to share stories behind the products, some different ideas and also the cards I made from this release.

Watch the video above   I Watch the video in HD on YouTube  border
I wanted to make things super easy for you. Below are the direct links to all the new products in the Pretty Pink Posh Shop:

Storybook 4
Stitched Essentials 1

4mm Strawberry Burst sequins
4mm Lavender Moon sequins
4mm Bermuda Blue sequins
4mm Ballerina Pink sequins
4mm Peridot Mist sequins
4mm Sunshine Glow sequins
4mm Blue Lagoon sequins
4mm Fairytale Fuchsia sequins
4mm Ocean Spray sequins
4mm Peacock Feather sequins

4mm Metallic Rose Gold sequins
6mm Metallic Rose Gold sequins
10mm Metallic Rose Gold sequins

Wisteria Blossoms Mix

Starry Colors watercolors

Who is ready to do some shopping? I cannot wait to pick your orders and see what items caught your eye. Thank you to everyone who has shown your love, support and encouragement. Happy shopping!

Please note: orders placed April 30- May 3 will begin to ship on May 4th. 


| | |

Peekaboo Animals

Pretty Pink Posh: Peekaboo Animals

Hello everyone, it’s Nina-Marie here with you today with a fun peek-a-frame card to share with you featuring new sequins and dies from Pretty Pink Posh!

Pretty Pink Posh: Peekaboo Animals

Pretty Pink Posh: Peekaboo Animals

I love using the Storybook die collection that Pretty Pink Posh is known for (along with lots of other fabulous products!) and the new Storybook 4 die is great addition! I thought this would be a fun die to use with a bunch of little critters peeking out from each little rectangle.

Pretty Pink Posh: Peekaboo Animals

Pretty Pink Posh: Peekaboo Animals

For this card, I have used the new Cuddly Critters stamp set from Simon Says Stamp and a sentiment from the Birdie Friends set. I also used quite a few different colors of the new iridescent 4mm sequins from Pretty Pink Posh, with match the fabulous 6mm iridescent sequins that were previously released… I LOVE that they are a new addition to the Pretty Pink Posh store because one can never have too many sequins, right?

Pretty Pink Posh: Peekaboo Animals

If you enjoy, please give it a “thumbs up” and subscribe to our channel; we post new videos often!

Watch the video above   I Watch the video in HD on YouTube  border
stamps animals
tweezers watercolors scissors

borderPretty Pink Posh: Mini Tag Shakers

If you have any questions about this post, feel free to leave it in the comments! Thanks for stopping by and spending some time with me… see you again soon! :)

xoxo, Nina-Marie

|

More Sneak Peeks…

Hello!  Amy K. here sharing a few cards using the new release that’s set to hit the Pretty Pink Posh shop on May 1st!  There are some beautiful new stitched dies that you will want to check out.

For my first card, I wanted to focus on the newest addition to the Storybook dies……..Storybook 4. There are so many uses for these dies but I love using them for shaker cards.  I’ve paired the Storybook 4 die with the Scallop Frame Dies to ”frame” in my shaker.  To embellish my shaker, I’ve stamped and fussy cut the gorgeous blooms from Peony Bouquet from Altenew.  (BTW–their inks are amazing!)

Pretty Pink Posh: More Sneak Peeks

To my shaker, I’ve added some of the new 4mm Sunshine Glow and 4mm Ballerina Pink sequins along with a mix of Sparkling Clear sequins and Iridescent Mini Heart Confetti.  I love how they all look mixed together!

Pretty Pink Posh: More Sneak Peeks

To “back” my shaker, I’ve added a layer of polka dot vellum for some interest.  You can see it better in this photo.

Pretty Pink Posh: More Sneak Peeks

For my next card, I’ve used one of the new Stitched Essentials 1 Dies and added a sweet trio of Copic colored birdies from the Birdie Friends set.  I love how these new tags don’t have a “hole” so you can either add it or leave it without BUT Paulina included a decorative hang tag if you want to use like I did! I stamped my sentiment, also from Birdie Friends,  right above my trio of birdies.

Pretty Pink Posh: More Sneak Peeks

A piece of paid paper was die cut using the curved die from Stitched Borders 1 and added to a top folding note card.  I added my finished tag and added some of the new 4mm Strawberry Burst sequins.

Pretty Pink Posh: More Sneak Peeks

Pretty Pink Posh: Mini Tag Shakers

Be sure to check in the next few days- there will be more sneak peeks and the May release goes live on Sunday!

Thanks so much for sharing a part of your day with me!

| |

New Products Coming Soon…

Good morning Pretty Pink Posh friends!

Heather here to share a couple cards I made using some of the BRAND NEW goodies that are releasing May 1st! So exciting, right?!?!? I’m also sharing a tutorial for these cards with a mini shaker tag!

Pretty Pink Posh: Mini Tag Shakers

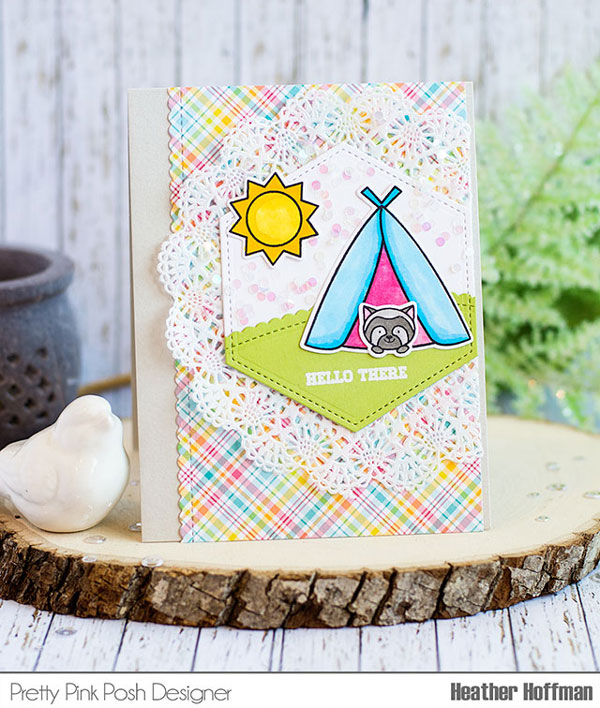
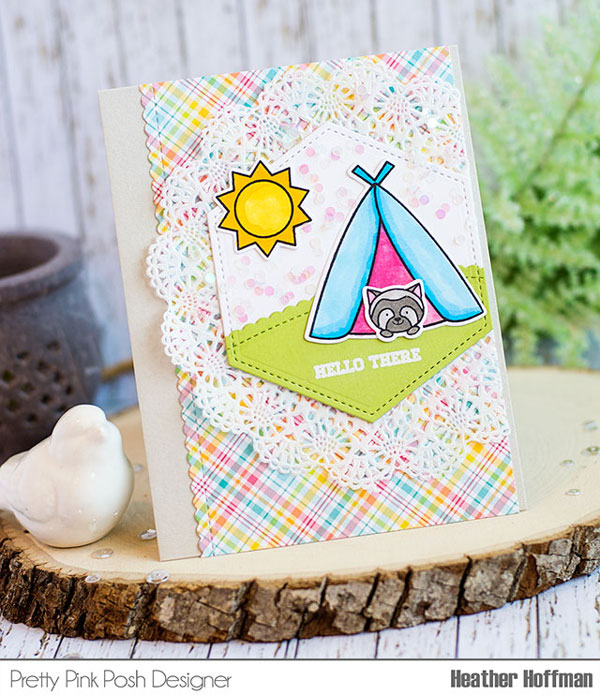
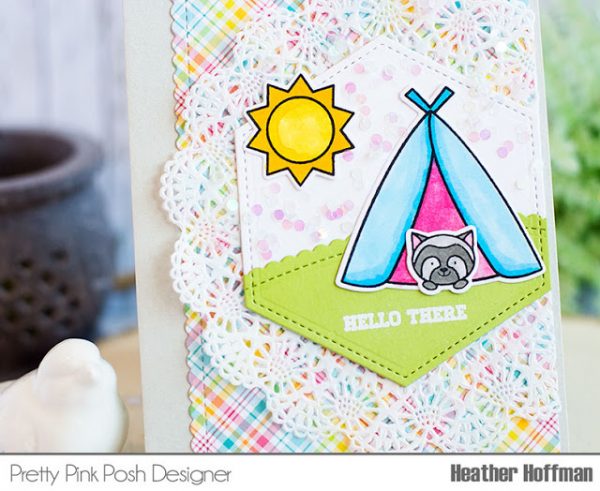
A sweet friend recently gifted me with these adorable plaid papers (she obviously knows me well!!!) – so I had to pull them out to use on these cards! Those new tag dies are part of the new release – as are those lovely sequins – 4mm sizes of the popular Iridescent sequins! Squeal! So cute!!!

Pretty Pink Posh: Mini Tag Shakers

These tag dies come with smaller size dies that fit perfectly inside, or can be used separately – I used a couple of them to create the windows in my tags for the shaker element.

Pretty Pink Posh: Mini Tag Shakers

I also love using doilies on my cards – these are some that I purchased off of Etsy – they are 5 inch rounds – so I fold them around the front of my pattern paper to help them fit my card size better without having to trim anything off.

Pretty Pink Posh: Mini Tag Shakers

Next, I used some sturdy adhesive to attach acetate to my little windows.

Pretty Pink Posh: Mini Tag Shakers

I *should* have stamped and heat embossed my sentiments before adding the acetate – but since this was acetate that was safe to heat emboss on (and therefore wouldn’t melt with the heat gun) I went ahead and did it now using the adorable Birdie Notes stamp set. I DID learn that embossing powder heads right toward the acetate like a MAGNET and is HARD to get off! So on the second one, to save frustration, I placed some Post-it tape over the acetate while embossing, then was able to easily remove it.

Pretty Pink Posh: Mini Tag Shakers
Next I chose a couple of the little critters from the Darling Friends set, stamped them twice, and colored with Copics. Notice on the second one of each I only colored their feet? There’s a reason for that!
Pretty Pink Posh: Mini Tag Shakers

I fussy cut them out, then added a *tiny* dot of glue to the front bottom of the critters, and attached them BEHIND the acetate window. Added tiny dots of glue to the front feet, and attached them on the FRONT of the tag.

Pretty Pink Posh: Mini Tag Shakers

Do you see them here? How it looks like they are actually peeking through the window?

Pretty Pink Posh: Mini Tag Shakers

Add some trimmed down strips of foam tape to the back to hold the shaker portion of the sequins.
Pretty Pink Posh: Mini Tag Shakers

Next I punched tiny holes in the tops of the tags (they also come with a tiny punched hole, but I wanted them to be smaller – LOVE that they are separate and versatile that way!) and added some Hemptique twine.

Pretty Pink Posh: Mini Tag Shakers

And then for the sparkly goodness – I mixed two colors of the new 4mm Iridescent sequins on each card, coordinating them with my pattern paper, then adhered my tags by the foam adhesive over the top.

Pretty Pink Posh: Mini Tag Shakers

I love the feel of the free strings on the tags, but it drives me nuts when they don’t stay where I want! So I arranged them in a pretty sweeping patter, then added a tiny staple to one spot to hold them in place.

Pretty Pink Posh: Mini Tag Shakers

Finished off by attaching the entire front panel to my card base, then rounding off a couple corners.

Pretty Pink Posh: Mini Tag Shakers

Here are the finished cards:

Pretty Pink Posh: Mini Tag Shakers

And a closer peek at the tiny shaker!

Pretty Pink Posh: Mini Tag Shakers

The other color:

Pretty Pink Posh: Mini Tag Shakers

And a closer look at this one too!

Pretty Pink Posh: Mini Tag Shakers

Pretty Pink Posh: Mini Tag Shakers

Thanks so much for stopping by today! Have a wonderful day!!!

| |

Tutorial: Ice Cream Shaker Card

Hello Everyone, Joni here back with another card sharing the new upcoming Storybook 4 die set. For this project I created a shaker using the new 4mm iridescent sequins in Strawberry Burst, Fairytale Fuchsia, and Ballerina Pink (all new products release on May 1st).
Pretty Pink Posh: Ice Cream Shaker Card

To begin, I die-cut a window panel using the new Storybook 4 die set. Then I distressed the card base with Distress Ink. Next, I die-cut the top panel for the window with fuchsia paper adhered the sentiment “Let’s Celebrate” from Mama Elephant Say What stamp set. The sentiment was gold heat embossed on a white cardstock. The stamp images I used was from Lawn Fawn Here’s the Scoop stamp set, they were watercolored and fussy cut.

set say

Pretty Pink Posh: Ice Cream Shaker Card

Next, I adhered the clear acrylic plastic at the back of the window die-cut.
Pretty Pink Posh: Ice Cream Shaker Card
Next, I adhered some foam tape on top of the distressed panel and added the sequins. Then, I adhered the top of the window panel.

Pretty Pink Posh: Ice Cream Shaker Card

To finish off the scene, I added the top fuchsia panel using the scallop from the Stitched Borders 4 and placed the ice cream images with foam tape.

Pretty Pink Posh: Ice Cream Shaker Card

I hope you enjoyed the sneak of the new upcoming products coming your way on Sunday, May 1st. Below is a sneak peek that Paulina posted on Instagram of the pretty new iridescent sequins in the 4mm size.

Pretty Pink Posh

Be sure to join us all week; there are more sneak peeks and we’ll be announcing the new design team. Thank you for stopping by! Have a wonderful week!!!

sig name

| | |

Tutorial: Fuse Tool + Giveaway

Pretty Pink Posh: Fuse Tool Tutorial

Hi everyone, it’s Nina-Marie here with you today! I’m going to share some inspiration and tips for using the We R Memory Keepers Fuse Tool with your Pretty Pink Posh products to create an easy and fun shaker card!

Pretty Pink Posh: Fuse Tool Tutorial

I love making shaker cards and prior to the Fuse Tool, most of us were making our shakers using LOTS of foam tape. While that works well, I have found that the Fuse Tool makes shaker cards not only easier to create but there are other benefits as well…

  1. The sequins and other shaker elements do not get stuck to the sides of your shaker because there is no foam tape for them to stick to
  2. There is less bulk because we do not need to create a dimensional well to allow the shaker bits to move around.
  3. Purchasing inexpensive photo sleeves to use for your shakers is more cost effective then using a lot of foam tape.

Pretty Pink Posh: Fuse Tool Tutorial

These are just some of the benefits I have found so far with the Fuse Tool; honestly, I’m questioning myself as to why I hadn’t gotten this tool when it first came out!

Pretty Pink Posh: Fuse Tool Tutorial

Pretty Pink Posh: Fuse Tool Tutorial

For this card I’ve created, I used a few different stamp and die sets; all the products are listed at the bottom of the post. I felt that the darling little elephant from WPlus9’s Unforgettable stamp set would be a perfect for a “welcome baby” card.

For the main piece, I started out with the Scallop Frames die and had that be the inspiration I based my whole card around. For the shaker part, I filled it with the Sweet Pea Mix, Gold Stars, 8mm Sparkling Clear and 10mm Sparkling Clear.

Pretty Pink Posh: Fuse Tool Tutorial

I colored the elephant with Copics and use him to create an extra interactive element on this card… watch the video to find out! I’ll also be talking more in-depth about the Fuse Tool in the video. I hope you enjoy and get some inspiration for using the Fuse Tool in your upcoming projects!

Pretty Pink Posh: Fuse Tool Tutorial

Thanks for stopping by and watching today’s tutorial… please give the video a “thumbs up” and subscribe to our channel for more inspiration, techniques and more!

Watch the video above   I Watch the video in HD on YouTube  
border

Pretty Pink Posh: Fuse Tool TutorialPretty Pink Posh: Fuse Tool TutorialPretty Pink Posh
Pretty Pink PoshPretty Pink Posh Pretty Pink Posh

border

We also wanted to have a giveaway in this post for the Fuse tool, along with a $50 Pretty Pink Posh gift certificate (so you can fill those shakers up)! Enter the giveaway below…

a Rafflecopter giveaway

If you have any questions about this post, feel free to leave it in the comments! Thanks so much for stopping by and spending some time with me; I’ll see you again soon!

xoxo, Nina-Marie