Hello everyone, Joni here sharing my take on the Summer Coffee Lovers Blog Hop using the new Summer Friends stamp set and Summer Friends coordinating dies (releasing on July 10th).
To begin, I drew pencil lines to create sand and sea as a background.
Next, I colored the pencil lines with Copic markers.
Next, I drew a half circle with a pencil mark and Colored it with Copic. Then, I added both sun ray images from Rainy Days Additions stamp set to create the sun for the background.
Next, I colored and die-cut the images from the new Summer Friends. I colored the frapp images to fit the challenge.
Then, I die-cut the whole background with Stitched Notes die set. I used the frame and adhere it with foam tape for dimensions
Then, I stamped the sentiment “happy summer” also from Summer Friends stamp. Next, I added some of the new Mermaid Sequins Mix. I put all my die-cut images on a foam square for dimension.
I hope you enjoyed this cute new Summer Friends stamp set coming soon! Until next time, have a great day!!!
Good morning! I’m dropping by today to share a card using some the same stamp and die sets, and similar layout, but creating a scene that is both a day and night version!
For both cards I stamped several images from the adorable Woodland Critters, colored them with Zig markers, and die cut with the coordinating Woodland Critters Dies.
The nighttime version I used some deep gray cardstock, and heat embossed my sentiment from the darling Thoughtful Greetings Stamp set. I also heat embossed some of the stars from that set in gold on there as well as a perfect fit for the sweet sentiment.
For this one, I also added some pretty Gold Mini Star Confetti to carry through the nighttime theme. I mounted this one on a nice soft blue cardbase, and then tied some jute twine around the top of them both to finish off!
Thanks so much for stopping by today! Hope you are having a wonderful day!
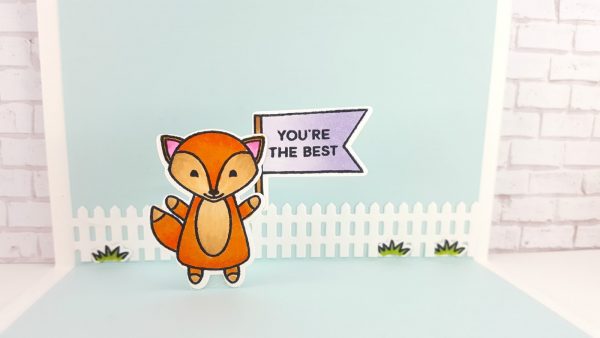
Hi Pretty Pink Posh friends! Shannon here today to share a pop up card with you! I kept the outside of the card clean and simple and put a cute pop up scene on the inside. I often focus my attention on the outside of the card and neglect the inside so this is a way to change that for me.
I started by creating a card base like usual with light blue card stock but cut it slightly smaller than an A2 sized card. I then put my card into my paper trimmer at 1 and 1/2 inches and cut a slit up to the 1 ” mark. I moved my card into the trimmer touching the 2” mark and again cut a slit down to 1”, this is how I created the slit in my card to allow the pop up piece.
I used the Picket Fence die and and adhered into my background under the pop up piece and also added some blades of grass from the Camping Friends stamp set. I then stamped my fox and flag from the Fox Friends stamp set, colored in with Copic markers and cut out using the coordinating dies. I adhered my flag behind my fox and cut an additional fox die cut out from white card stock to adhere onto my stamped fax just to make that piece a little more sturdy for my pop up. I then Adhered my fox onto my pop up piece and adhered my blue card base inside a white card piece creating my pop up when you open the card.
For the outside of card I kept it very simple stamping my images from the Camping Friends stamp set and coloring in with Copic markers. I then cut some blue clouds using the Rainy Day Coordinating dies and added some 3mm Sparkling Clear Sequins on them.
Decorating the inside of the card was fun and I must do it more often.
Thanks for stopping in! We hope you enjoyed today’s fun card.
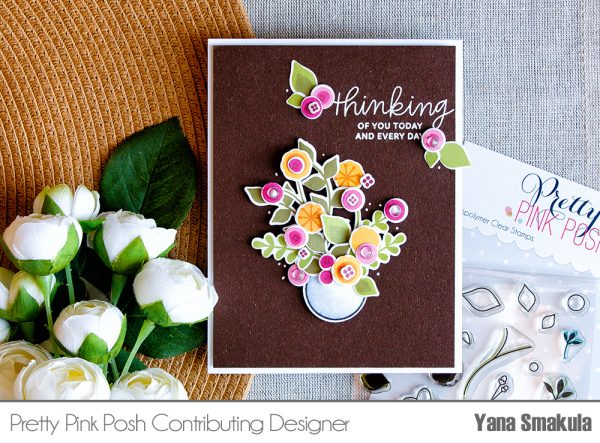
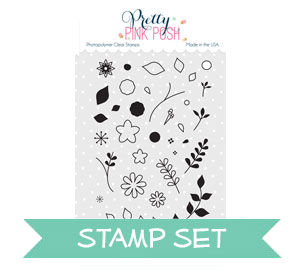
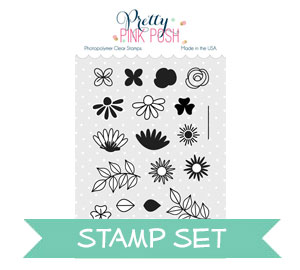
Hello, Pretty Pink Posh fans! This is Yana and today I want to share a floral card using the Build A Bloom stamp set.
This set features a number of parts and pieces to create your own unique flowers, leaves and floral arrangements. There are outline and corresponding solid images and also just outline and just solid images that don’t necessarily go together. So with this set you can chose to stamp your flowers and leaves outlines and color them using your favorite coloring mediums or stamp solid images using colored ink and have instant flowers and leaves. You can also combine a lot of these to have an outline and solid stamped color.
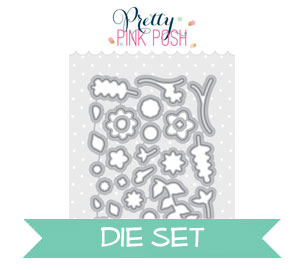
So quite a lot you can do and many different looks you can have. There is a set of coordinating dies available and these cut pretty much each and every shape out.
Watch my video tutorial below to learn how I made this card.
I started working on my card by die cutting the shapes out first. With tiny dies like these I prefer to keep them connected and cut them all at once first and do my stamping later. I feel this way I am saving a lot of time as for me it is easier to align a stamp over a small die cut shape versus align a die over a small stamped image.
I die cut a number of shapes out, I think I cut all of them 2 or 3 times and later had additional florals cut to have more flowers for my card.
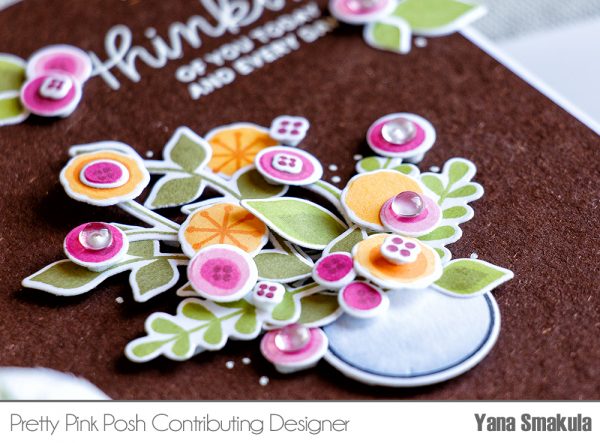
Next I used various colors of ink and stamped my images. I picked 2 shades of green, 2 shades of yellow and 3 shades of pink for my stamping. I first stamped layers using lighter color of ink and later came in added a detail layer onto some of my images using a darker shade. So in a way this stamp set can be used as a color layering one where you build your flower using individual layers and different colors of ink.
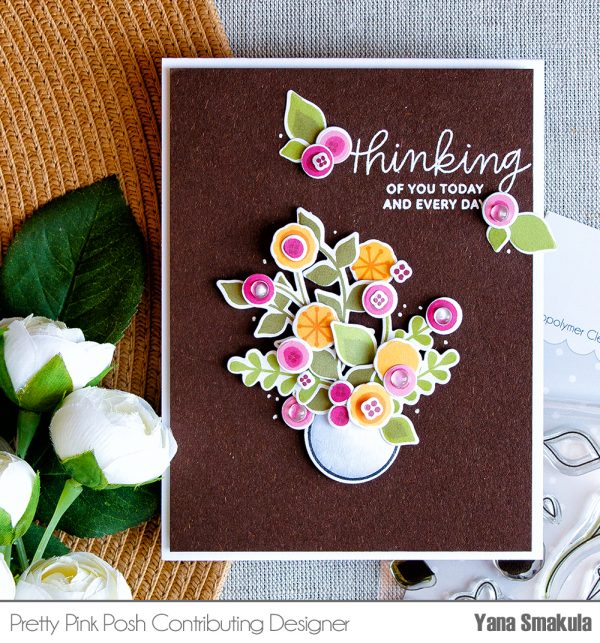
To create a vase for my floral arrangement I used a Christmas ornament from the Winter Friends stamp set. I turned it upside down and colored using C3, C1 and colorless blender Copic markers.
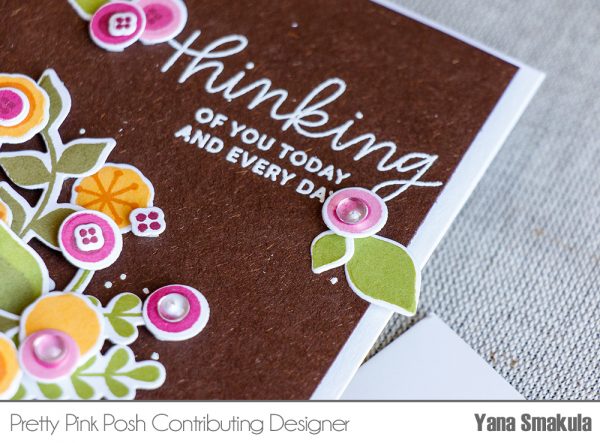
I made my floral arrangement heavy on one side as I wanted to add a sentiment to the other side. I went with “Thinking Of You Today and Every Day”from the Thoughtful Greetings stamp set, but of course you can go with any other message you like.
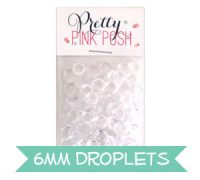
Next I foam mounted my panel onto an A2 top folding card base and since I had some additional die cuts left I used them to add some flowers and leaves around the message. I also used small clear droplets and adhered those onto some of the flower centers for additional interest.
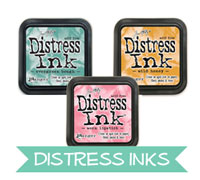
To begin, I first cut the 8 ½ x 11 cardstock to 5 ½ x 11. Then, score it 2 times using the Martha Stewart large score board. I scored it from 3 ½ and 7 ¼. Then distressed the inside using Tim Holtz Peacock Feather Distress Ink Pad. I also used the scallop from Stitched Borders 3 dies to cut the distressed strip of paper for the ground. I bottom was distressed with Tim Holtz Crushed Olive.
Next, I also stamped both cloud images from Rainy Days stamp set.
Here’s the look of having them placed all together on the scene. I stamped the sentiment using Everyday Greetings stamp set. Then, splattered it with Gansai Tambi Pearl Colors from the set I used the White Gold and Pearl Cobalt Blue.
For the front of the card here’s the look. Its the same concept as above except I added two strip of the scallop instead of one. For the front I also used the girl from Friends Forever stamp set and Friends Forever Coordinating die set. I also added some Sparkling Clear only on the front to finish the card. I did not add any sequins on the inside to avoid bulkiness when folded.
I hope you guys enjoyed! Thank you so much for stopping by!
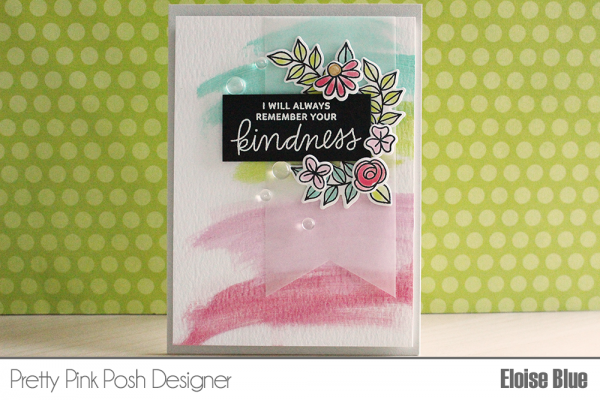
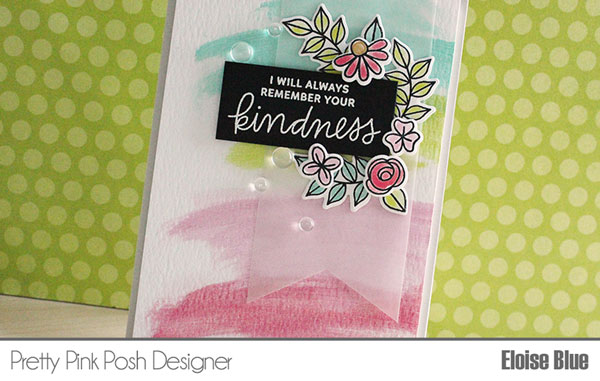
To begin my card today I first decided to do my background. I took four colours of my Nuvo Mousses – Aquamarine, Peony Pink, Pink Flambe and Citrus Green and then some sponges. I just used the foam ink blender sponges, but make-up sponges or anything like that would work. I dipped in my sponge into the mousse and then spread it across the top of my cardstock panel. I then repeated the steps with the other three colours to create my swiped coloured background. A little bit of a different background for me, but I love the swiped painted look it gives and these mousses have the best shimmer to them!
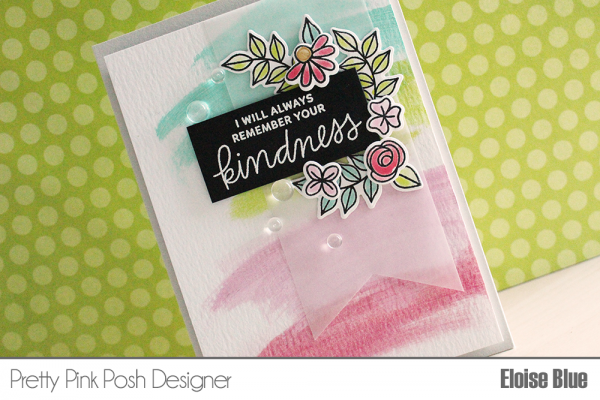
Next up I stamped out my images from the Bold Blooms stamp set onto some more watercolour cardstock. I used Versafine Onyx Black Ink and then clear heat embossed the images so it would be easier to watercolour them. To mix up my paint, I used a palette knife to take out a little colour out of each of the jars, popped it into a palette and sprayed the colour with water and mixed it around with a paint brush. This mixed up the colour nicely and it keeps that shimmer which is amazing.
I water coloured in my images like normal with each of the colours of mousse. I also pulled the Antique Gold colour to colour in the centre of the flowers. I loved water-colouring with these as it was so super easy, they moved just like regular watercolours and really the only thing you don’t get is the shading but, like I mentioned before – the shimmer is amazing, so it makes up for it! It’s like using metallic watercolours. I could have done that, but I like getting many uses out of my products. Once all my images were coloured and dried I die cut them out using the coordinating dies.
Next up I white heat embossed a sentiment from the Thoughtful Greetings stamp set onto some black cardstock and trimmed it out into a rectangle. I also used the Scallop Hexagon Dies to cut a banner edge into a piece of vellum. I first adhered down the sentiment strip onto the banner, overhanging the edge a little and then arranged my flowers around it, popping some of them up and leaving some flat. I then adhered my banner down to the coloured panel I created earlier.
To completely finish up the card I adhered my panel onto a grey card base with some fun foam and then scattered some 4mm Clear Droplets and 6mm Clear Droplets to finish it up.
Thanks so much for stopping by today and I hope you got inspired.
Today I am showcasing the two new floral stamp sets called Bold Blooms and Build A Bloom. They coordinate so perfectly together to form floral wreaths. I’ve tried a circular and oval wreaths, but this time I used the new Scallop Hexagon Dies as my shape.
I die-cut the Scallop Hexagon Die from the top center of a white card front. I used a transparency on the inside of the hexagon shape so you can see the sentiment on the inside of the card. I stamped all of the flowers and leaves with colored inks. For the stamps that have base stamps, I used two-step stamping. Whenever I use this technique, I stamp the outline stamp with the ink first and then I stamp the inside piece with the same ink color, but stamp it on scrap paper first (called second generation stamping). That way it is lighter than the outline, but still matches perfectly.
Next, I arranged all of the flowers and leaves around the hexagon shape leaving the scallops visible around the edge. I overlapped them and tucked leaves under some of the flowers. I also added some 4mm Aquamarine, Lemon Meringue, Pink Peonies and the Fresh Garden sequins around the wreath to fill in any open spaces. I stamped the sentiment on the inside of the card using the new Thoughtful Greetings Stamp Set. The sentiment fit perfectly inside the window. I used some teal twine on the bottom of the card to give it more dimension.
I hope you enjoyed this card today and find many wreath shapes to make with your flower stamp sets. Have a great day and thanks for visiting the Pretty Pink Posh blog today!
Hi Jeanne here today! Have you noticed all the flowers everywhere? Yes! Summer is on it’s way! I’m so excited about the Pretty Pink Posh Bold Blooms clear stamp set with coordinating dies.
The very first thing I did when I got this set was to cut lots of the dies and stamp them in different floral shades. The images are easy to align on the die cut shape without any stamping tool. I recommend stamping the outline image and then the solid image.
Next I arrange the flowers into different patterns that appeal to me. The combinations and colors are endless! I adhered this floral arrangement over a Stitched Duo 1 die. I wanted to mimic the appearance of a flower box. The frame on the die cut reminded me of a window.
To draw your eye along the length of the card I added a Stitched Border. Maybe it is a curtain inside the window?
The beautiful script sentiment is from the Everyday Greetings stamp set! It fits perfectly on the top of the tag! Who doesn’t love flowers? I just know you’re going to love this stamp set!
I hope you enjoyed today’s post. Thanks for stopping by the Pretty Pink Posh blog!
For my card today I’m going to be using the watercolour stamping technique with Distress Inks to create a fun wreath using the flowers in both of the new stamp sets.
To begin my card today I first stamped out all my outline images with Versafine Onyx Black Ink onto some watercolour paper. I stamped out a ton of images since my wreath that I’m going to be making is going to be super full. I then pulled some colours of Distress Inks out and began my watercolour stamping. I first found the coordinating solid stamp, pressed it down into the ink pad and then spritzed it with a little water to reactivate that ink and then stamped it down onto the coordinating image. I repeated this step until I had coloured all my images. I love this technique, it’s super fast and I love how it never looks the same. You get dark and light spots, spots that aren’t always covered completely, it’s really fun!
Now that all my images had been stamped and dried completely, I cut them out using both sets of coordinating dies and set them to the side for later. I then took a piece of watercolour cardstock, and die cut the edge of it using the rounded die in the Scallop Border 2 die set. The mini scallops are so cute!
Now my panel was ready to assemble. I first traced around a circle (I used a bowl) with a pencil so it was easier to make my wreath circular. I then laid down all my images around the circle to make my wreath. When arranging all the images I worked in odd numbers and a triangle pattern, to make it appealing to the eye. It’s rule of thumb that things looks better in odd numbers and threes, so that’s what I went for. Once all my images were laid out around my wreath with all the colours spread out evenly, I could stamp my sentiment. I needed to lay down all my images first to see how much space I had left. I used the Thoughtful Greetings stamp set and used the sentiment ‘Thank You For Everything You Do’ and stamped it in the center of my wreath with Versafine Onyx Black Ink. Now my sentiment had been stamps, I could adhere down my images. For all my leaves I used liquid adhesive and then used the foam tape for the flowers.
Once everything was adhered down I took a piece of yellow patterned paper and adhered it to the bottom of my card base. I then took a piece of fun foam and adhered it down to my panel and then to my card base so it could have some dimension. To finish up my card completely I used some Wink of Stella in the clear and also some Clear Droplets in the 4mm and 6mm size.


 The nighttime version I used some deep gray cardstock, and heat embossed my sentiment from the darling


 I used the