I decided some shaker clouds would be fun so I started my creating my main panel with my shaker elements.
I used a piece of Fog cardstock and used the the cloud dies to cut the clouds out of my background. I then adhered acetate onto the back and used some thin foam tape around my clouds to create the dimension for the shaker elements. If you don’t have skinnier foam tape you could always cut in half length wise, I found it much easier to manipulate around the cloud area.
I then filled my shaker clouds with the Sunny Days Sequin Mix. I kept my clouds that were cut out of my background an decided to use them for added in interest. I adhered them slightly over my shaker clouds and trimmed off any excess hanging over the sides and decided to stamp my sentient onto the middle cloud. I adhered this panel onto an A2 sized card base.
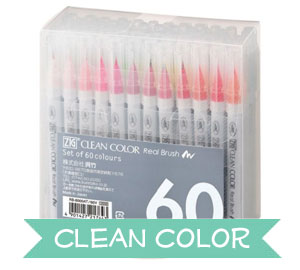
For my kites, I stamped them on watercolor paper and colored in with Zig real brush markers and cut all the pieces out with the coordinating dies and adhered them onto my card!
That finishes my card off! Hope you enjoyed this cloud shaker!
If you missed yesterday’s blog hop post, click here.
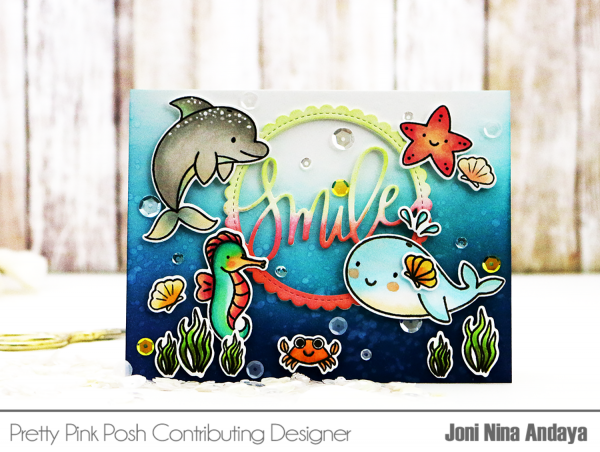
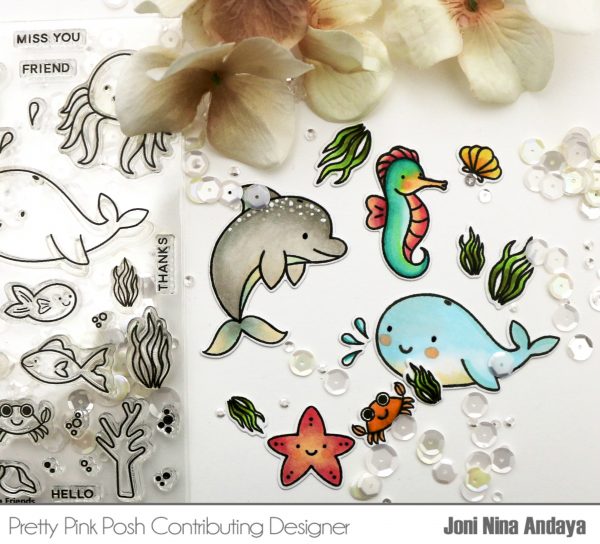
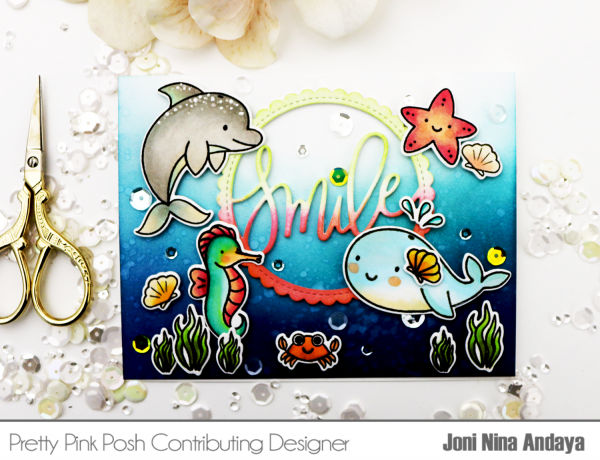
Suzy here with you today and we have a brand new batch of inspiration. One of the things I love the most about Pretty Pink Posh stamp sets is how they all go so well together! Today I have a card to share with you that uses three of the new sets to form a beach scene.
To make the background for this card, I started with a stitched rectangle (full card size) die-cut from watercolor paper. I then die-cut the new largest Stitched Diamond die from the center of this piece. I used a wet on wet technique to add pink watercolor just around the outside edges of the diamond. I embossed the sentiment from the Summer Friends stamp set on the top of the inside rectangle. I attached both pieces to a pink card base.
Next was the fun part – creating a little beach scene on this background. I stamped images from three stamp sets – Summer Friends, Sea Friends, and Fly A Kite – on white cardstock with a natural color ink. I colored all of the images in with Copic markers and used glitter pens to outline them and add details. I love the look of no-line coloring, but I always end up adding outlines after I’m done coloring them!
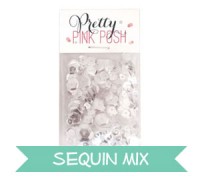
I arranged all of the images onto the card background overlapping them to fit them all on. I added some sequins from the Mermaid Sequin Mix around the images to finish the card.
Ready to hop along and see LOTS more fabulous inspiration with this release?
PRIZES: be sure to leave comments on each stop. I’m giving away 4 $25 gift certificates to four random comments (2 winners each day) left before July 18, 2017 at 11:59 PM PST. I’ll be announcing the winners next week, so be sure to return and see if you are one of the winners!
I hope you enjoyed this card today. I can’t stop creating with all of the new PPP products. Each release is even better than the last! Thanks so much for visiting the blog today!
Hopped along in Day 1? Be sure to hop along HERE for Day 2!
Hello, Pretty Pink Posh sweet friends!
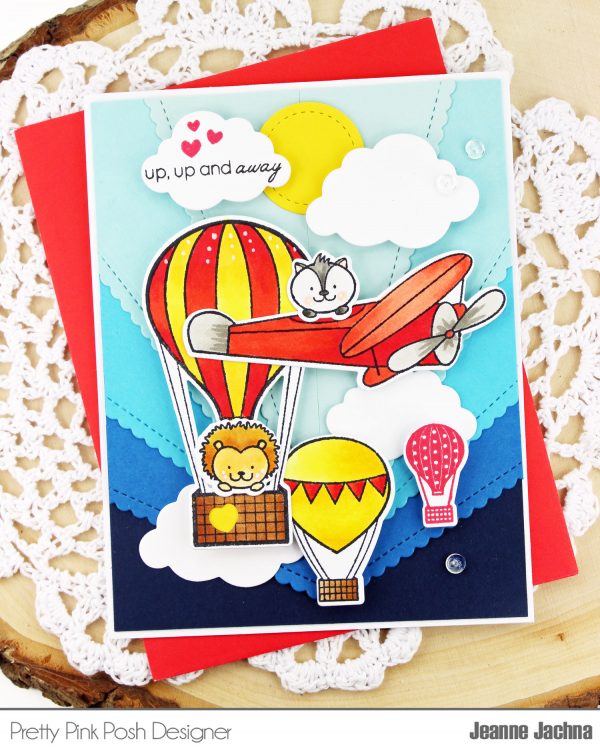
It’s time to start our two day Product Release Blog Hop for the July 2017 release. Many of you have already placed orders, but for those who were waiting for more inspiration, today and tomorrow the design team and special guests have all sorts of inspiration to share. Today we have Joni sharing a sweet card using the Fly Away Friends stamp set and Fly Away Friends Coordinating Dies.
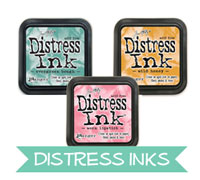
To begin, I first distressed to white card panel with Tim Holtz Distress inks in Twisted Citron and Peacock Feathers. Then die-cut the Twisted Citron distressed panel using the scalloped die from the Stitched Borders 2 Dies. For the second panel after distressing it with Tim Holtz Peacock Feathers. I then splattered it with water for added interest and let it dry.
For more added background effect I used the Uni-Ball Signo Broad White pen to create some white background dots. This helps if you don’t have white watercolor paint in your stash to use for splattering. Next, I stamped the sentiment using the Thoughtful Greetings stamp set.
For the images, I stamped with a brown ink and colored the images with Copic Marker. Then die-cut with its coordinating die-set.
Here’s just the close-up. I adhered my image and scallop piece with foam tape for dimensions. I also added some new upcoming Mermaid Sequins Mix to finish off the card.
Ready to hop along and see LOTS more fabulous inspiration with this release?
PRIZES: be sure to leave comments on each stop. I’m giving away 4 $25 gift certificates to four random comments (2 winners each day) left before July 18, 2017 at 11:59 PM PST. I’ll be announcing the winners next week, so be sure to return and see if you are one of the winners!
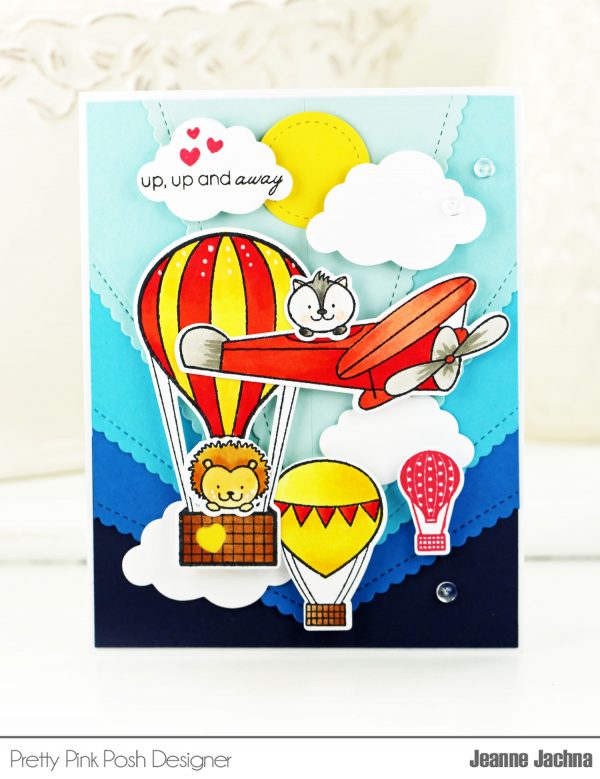
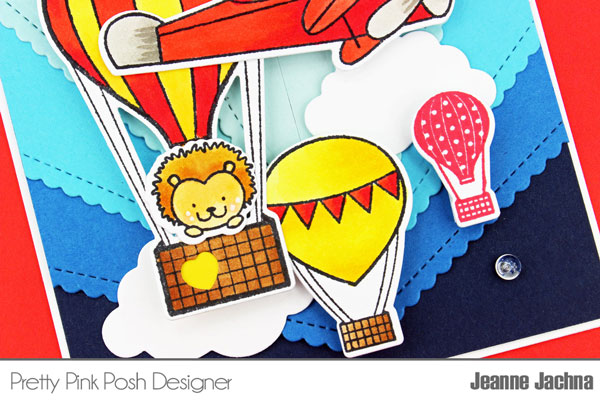
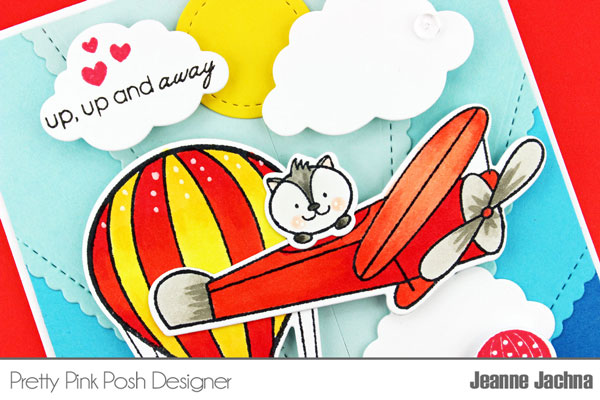
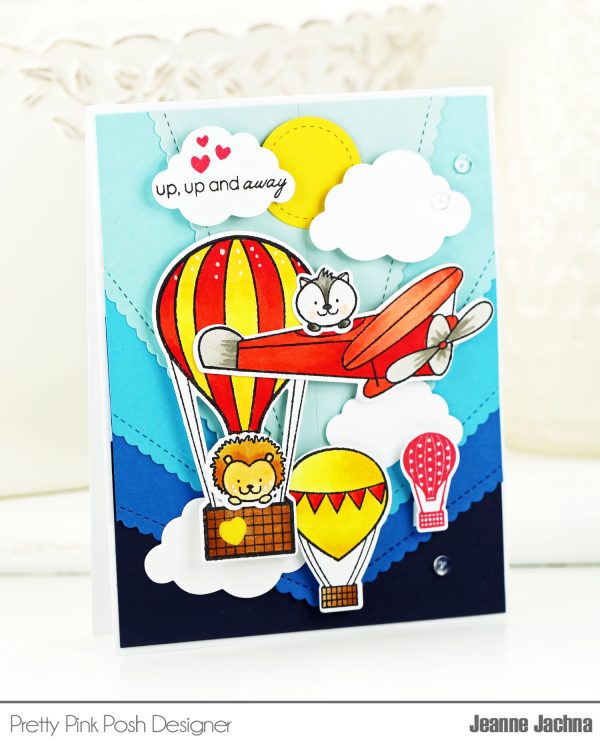
Ready for the new Fly Away Friends stamp set that releases on July 10th? You’re going to flip when you see these cuties! The set includes two little critters ready to take off on an aerial adventure! And of course there is a coordinating die set to make arranging scenes easy as pie!
I stamped the images in Memento Tuxedo Black ink and colored them with Copic Markers.
The hot air balloons and airplane scream for a sunny sky! I created a cardstock color block background using the straight die from the Scallop Borders 1 die set. I cut the scallop borders from ombre shades of blue card stock. Next I trimmed the strips to 5 x 1 ¾”. Then I cut the strips diagonally corner to corner. I arranged the triangles in a fan shape before trimming them to fit the front of my A2 size card.
To begin, I first stamped my images on a white cardstock and colored them with Copic markers. Then die-cut using the coordinating dies.
Next, I created my under the sea background. I used the Distress Ink in Chipped Sapphire at the very bottom of my white card base. Next I used the Peacock Feather and a little of the Cracked Pistachio on the top. Then, I splattered the card base with water using my paint brush and let it dry.
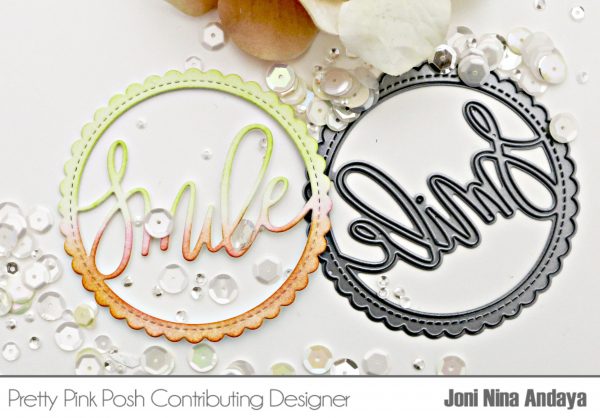
Next, I die-cut the Smile Shaker die 4 times and distressed the top portion. Then adhered with Multi Medium Matte.
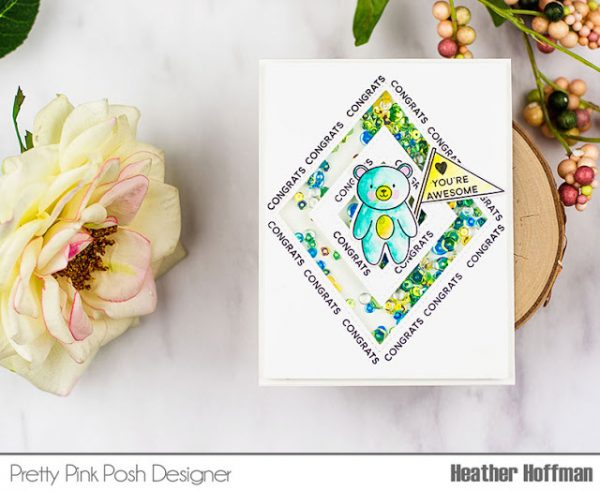
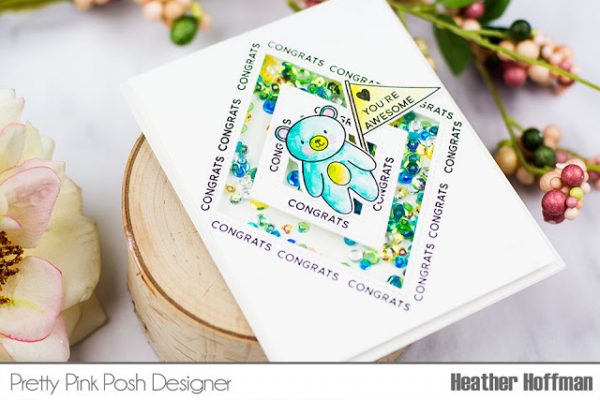
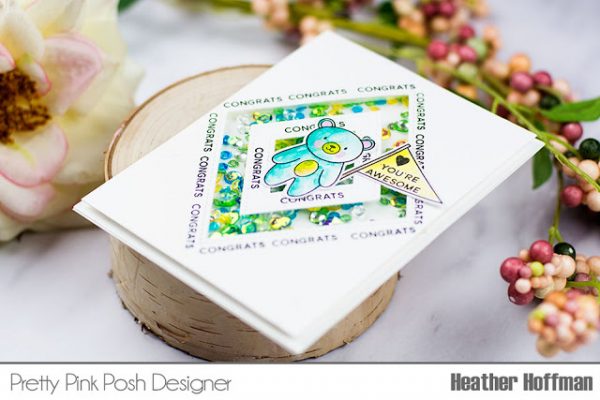
Good morning Pretty Pink Posh friends! Heather here this morning – to show off some of the gorgeous new product coming very soon! I used the adorable new 3 x 4 Bear Hugs set and coordinating dies, as well as a new stand alone die, and one of the fun new sequin mixes!
I wanted to create a shaker card, but decided to try to make it a little more interested. I die cut the gorgeous new Stitched Diamond Dies(without cutting them apart!) from white cardstock and out of the center of a panel of white cardstock. I decided to inlay one of the smaller diamonds inside – and to make it a little more fun, I stamped one of the tiny sentiments from Bear Hugs around the edges. As you can see, it was the perfect size!
Next I stamped and colored the bear and banner with Zig Watercolor markers and die cut with the coordinating dies. I used two layers of foam adhesive for my shaker to give it lots of room to move, then filled it with the gorgeous new Mermaid Mix(which even has 4mm Clear Droplets in it! So fun!). Finished off by adhering the bear and banner to the front!
Thanks so much for stopping by today! Hope you are having a wonderful day!!!
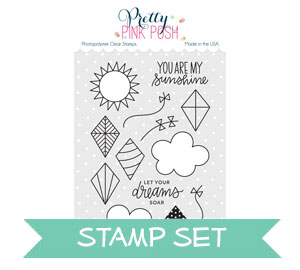
Hello Pretty Pink Posh friends! Suzy here today introducing one of the brand new stamp and dies sets called Fly A Kite. I also am showing off the new sequin mix called Sunny Days and one of the new die sets called Stitched Diamonds. I have two cards to share with you today.
I made this shaker card using the two smaller diamonds from the stand alone die-set called Stitched Diamonds as the window openings. I filled them both with the new Sunny Day sequin mix.
I stamped the darling images from the Fly A Kite stamp set on white cardstock with a light color of ink and colored them in with Copic Markers for a no-line coloring look. I added outlines and details with glitter pens and a white gel pen. I attached the sun, clouds and kit over the top diamond opening on my card.
I also added the little boy from the new Summer Friends stamp set so he could hold the kite string. I stamped the sentiment from the Fly A Kite stamp set on the bottom of the card and embossed it with blue embossing powder. I added three sequins from the Sunny Day sequin mix to finish the card.
I used the Fly A Kite stamp set to create a random stamped background for this card. I started with a piece of watercolor paper and I stamped all of the images with a light color ink for a no-line stamping look. Next, I watercolored them all in with watercolors.
After I painted the background blue, I outlined all of the images with glitter pens and filled in some areas with a white gel pen to make them stand out more. I then stamped the sentiment from the Fly A Kite stamp set on a stitched rectangle from the Mini Storybook 1 die set and yellow cardstock. I embossed it with white embossing powder. I added some more of the Sunny Day Sequin mix around the sentiment.
I hope you enjoyed my two cards today using the Fly A Kite stamp and Fly A Kite die set. There are so many possibilities to use this set for with the large cloud and sun images and all those cute kite designs! See you back soon for some more of the new Pretty Pink Posh release!
Hello everyone, Yoonsun here sharing the upcoming 4 x 6 stamp set called Summer Friends that will be available on July 10th.
I started by stamping sandcastle, beach ball, bucket from the Summer Friends set on watercolor paper in black pigment ink. I then watercolored them with Distress markers, die cut them with the matching dies. For the beach scene, I created clouds using the Stitched Borders 2 dies(I used the scallop border die as a stencil), sandy beach using Distress markers, then trimmed the paper down using stitched rectangle panel die in the Stitched Notes die set. For the sentiment, I used the Summer Friends and the Camping Friends stamp sets. I mounted the background panel on pale blue card base using double-sided tape first, and then added images on it using foam tape. For my second card, I stamped all images from the Summer Friends set on watercolor paper in pigment black ink, then colored them with Distress markers. Once the panel was completely dry, I die cut it with an A2 sized rectangle panel die. For the sentiment, I heat embossed it on blue card stock in white, then cut the small banner. I mounted the watercolored panel on white card base using double-sided tape first, and then added the sentiment banner on the bottom right corner of the card front using foam tape.
I hope you enjoyed this preview of some of the new products. Join us tomorrow for a look at another one of the new sets!
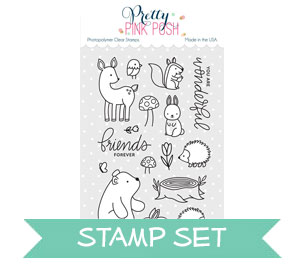
Hi everyone, Eloise here and today I have another 3 cards 1 stamp set video for you all. It was a big hit last time and people seemed to really enjoy it so I thought I would do another one using the Woodland Critters stamp set which definitely seemed to be a favourite from the May release!
To begin my cards today I first stamped and coloured in all my images in with Copic Markers and used the coordinating dies to cut them out.
To begin my first card I pulled out the Stitched Borders 1 dies and used the curved stitched border to cut out two sections of my white cardstock panel. I only needed the top and bottom of my panel left so the middle section could be open for colour and my scene. I then took another piece of cardstock and blended some Broken China and Peeled Paint Distress Oxide Inks onto the background, to make sky and land. Once I blended on my colour I sprinkled over some water and heat set it with my heat tool.
I then added adhesive to the back of the inked panel and adhered it down to a scrap piece of paper cut to the same size as my final panel. I then added foam tape onto the back of my white panel piece and adhered it to the same scrap paper piece leaving the opening for the colour to show through. I then added adhesive onto the back of my critters that I was using and added them into the scene. I stamped the ‘Friends Forever’ sentiment from the set with some black ink onto the top right hand side of my panel and finally adhered my panel to a kraft card base.
For my second card I pulled the Storybook 1 die to use as the focal point on my card. I then took the same Stitched Borders 1 dies and used the same curved die to cut a piece of green cardstock. Once my piece was cut I also grabbed some blue cardstock and cut it down to size. I used some Mowed Lawn Distress Ink and ink blended a little on the top of the green cardstock piece to give it some shading and used Broken China Distress Ink to ink the blue piece the same way. This is a way to give a little extra to your flat colours of cardstock. I then die cut the Storybook die from some white cardstock.
I then adhered together my background and hill piece and then adhered down the Storybook frame onto my panel. I used foam tape and flat adhesive to adhere down all the critters I chose to use also. I then stamped the ‘You Are Wonderful’ sentiment onto the bottom of the panel and finally adhered the piece to a white card base.
For my final card I used the Scallop Circle Tags dies to cut a white tag. I then used a circle die to also cut out an additional two circles to fit inside my tag. I cut one circle down to a small hill and coloured that using Mowed Lawn and then used Broken China for the full circle. I adhered the two together and then used foam tape to adhered the coloured circles to my tag. I arranged a small scene using a few of the critters that were left onto the circle and adhered them down into place. For my background of my card I used some plaid paper from Lawn Fawn and adhered it down to a white card base. Then to make the tag feel like it fit with the card I poked a hole through the top centre of the card and also cut a slit in the fold of the card so I could thread some hemp cord through and tie it in a bow, anchoring the tag to the card.
I added some adhesive to the back of the tag so it would sit in place instead of moving around and then for the sentiment I white heat embossed the ‘Friends Forever’ sentiment onto some black cardstock, heat set it, trimmed it down and foam mounted it onto the bottom right hand side of the card.
To completely finish off all the cards, I pulled some Sparkling Clear Sequins out of my stash and scattered them around each of my cards to pull them altogether.
Thanks so much for stopping by today, I hope you enjoyed the three cards I made today. I always have a lot of fun making these videos as I love to create multiple cards especially when you have most of the supplies out already. They’re all quite simple cards, but have a similar vibe I feel.
Anyway, thanks again, I hope you got inspired and I’ll catch you all next time!
Good morning! Heather here to share a tutorial on these two cards on which I attempted to create a background for my card similar to a Batik fabric (if you have no idea what that is, click HERE or HERE to see a couple examples, or do a quick search on Pinterest!) The two different methods I tried gave me two slightly different results – one a bolder look, and one a softer effect. I can’t decide which one I like better!
I started off by picking two shades of distress ink, and applying it to my backgrounds – first the lighter shade, then the darker. I purposely went fairly random in my patterns going for an “imperfect” look intentionally.
Next, I added some flicks of water to react with the distress ink for more texture. At this point I heat set the entire panel. IMPORTANT: You want it to be NICE and dry after this step – so either give it lots of time to dry or zap it good with a heat gun!
Now to add the leaf images to the background. I picked several of the solid images from the new Build a Bloom stamp set – including some of the single little leaves to fill in the holes. The softer one on the right I stamped with Clear Embossing ink and heat embossed with Clear Embossing Powder. The bolder one on the left I stamped with both shades of the same distress ink I used on the background, deliberately layering and overlapping the leaves on that one. I then quickly sprinkled on some embossing powder on that one so it stuck to the newly stamped leaves. The distress ink stays wet long enough to do that if you work quickly. THIS is why you wanted those backgrounds thoroughly dry so that the embossing powder doesn’t stick anywhere that you don’t want it too!
Finally, I applied some more distress ink to the softer colored one – the way the colors overlap it gives two tones of color the the card exactly like I was hoping! On the darker bolder card, I applied a little white pigment ink on some spots to add some more texture and color variation.
Next I built the sentiment portion using the gorgeous new sentiment kit, Thoughtful Greetings, and the fun new addition to the scallop dies, Scallop Hexagons! The sentiments I heat embossed in white on some soft gray cardstock, and framed them with the white scallop frames.
Finished off by mounting those sentiment panels with foam adhesive, then added some Sparkling Clear Confetti Mix. Here is a closer look at the softer one – can you see the shine from the embossing powder?
And then here is the bolder one:
This was so much fun to create – and I can imagine so many different color combinations that would be fun too!
Thanks so much for stopping by today! Have a wonderful day!


 Ready for the new Fly Away Friends stamp set that releases on July 10th? You’re going to flip when you see these cuties! The set includes two little critters ready to take off on an aerial adventure! And of course there is a coordinating die set to make arranging scenes easy as pie!