
Sneak Peek: February 2024 Stencils
Hi, friends! It’s Lauren and I am so excited to be sharing a sneak peek at two of the new stencils that will be released. It was hard to pick which two to create with first, but I absolutely love the new Half Stars Stencils and Layered Birthday Wreath Stencils so here are two cards with these stencil sets to inspire you today!
New release will be available February 7th
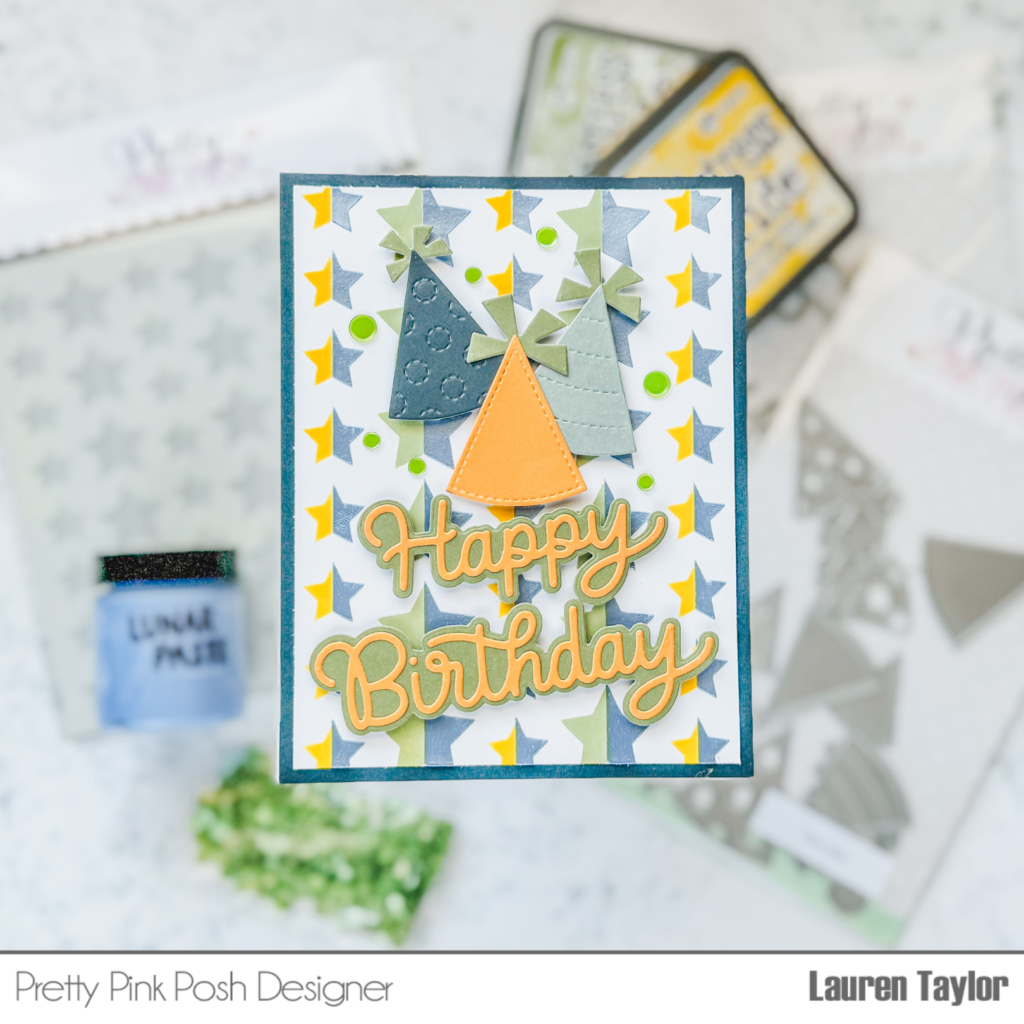
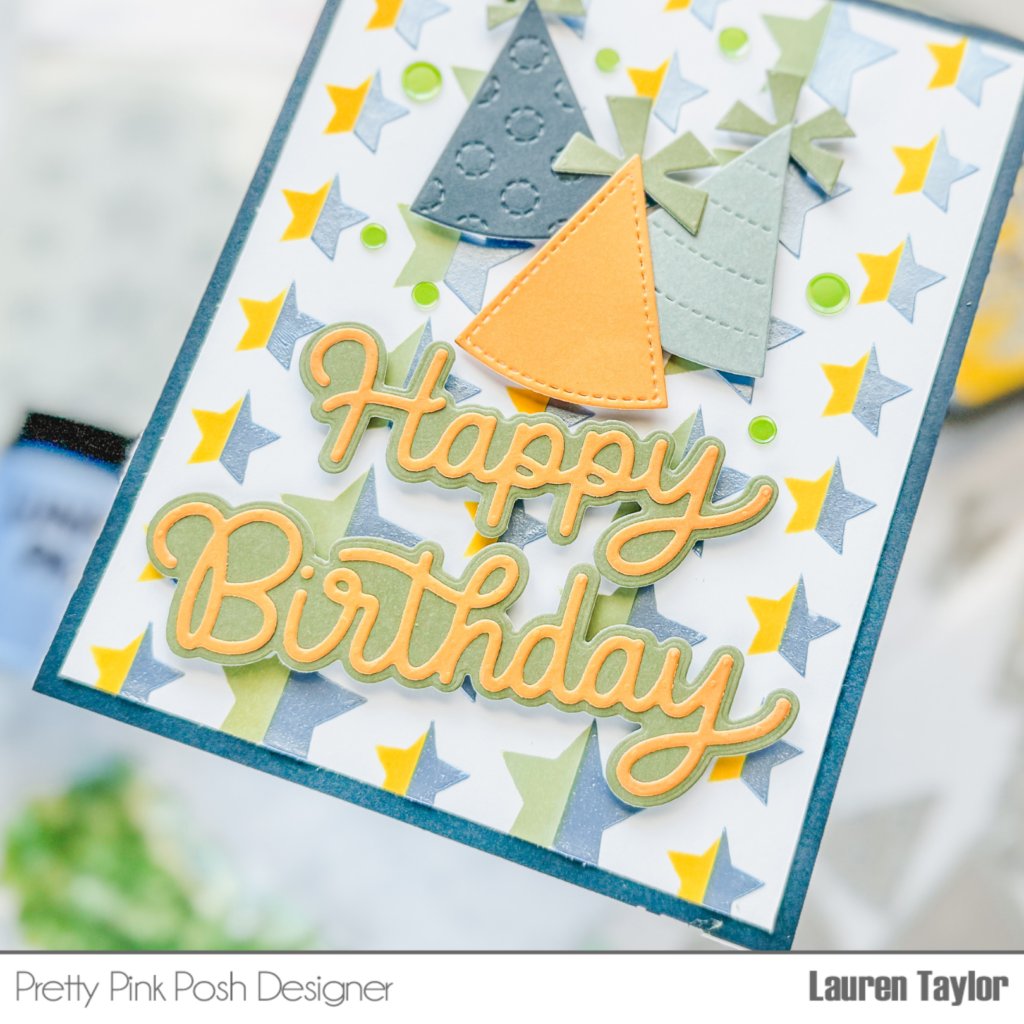
For the first card, I knew I wanted to use the Half Stars Stencils as I loved sharing the Half Hearts Stencils last month! I wanted to go with Earth tones for this card, so for the (A) stencil I did every other column of stars with Distress Oxides in Mustard Seed and Peeled Paint. Then I used Breakup Blue Lunar Paste for the (B) stencil.
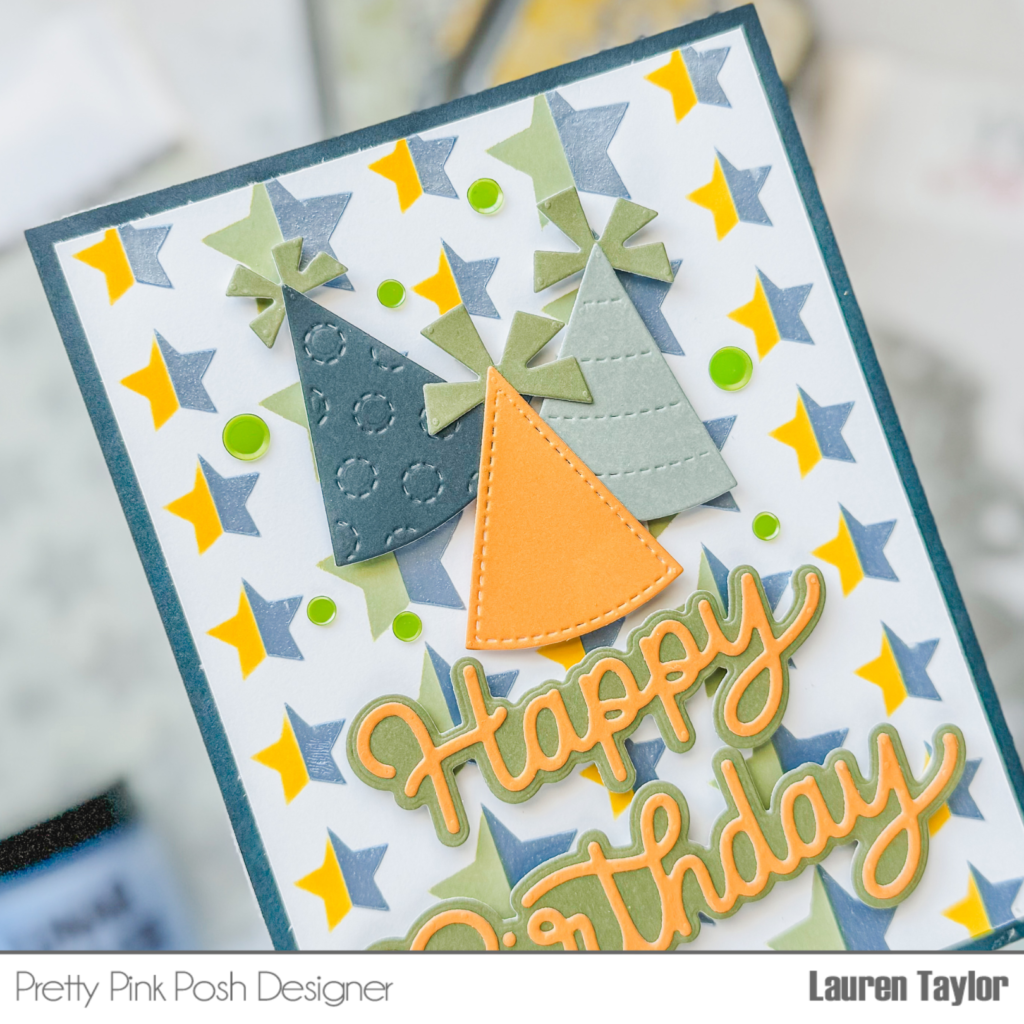
When the stenciled stars were dry, I trimmed the panel to 4×5-1/4” and adhered it to a panel of dark blue cardstock cut to A2 in size, 4-1/4×5-1/2”. I used new dies from this upcoming release, Party Hats Dies and Happy Birthday Shadow Dies, to add some fun birthday elements to the card in coordinating colors. For some extra shine, I used some Mossy Green Confetti around the party hats!
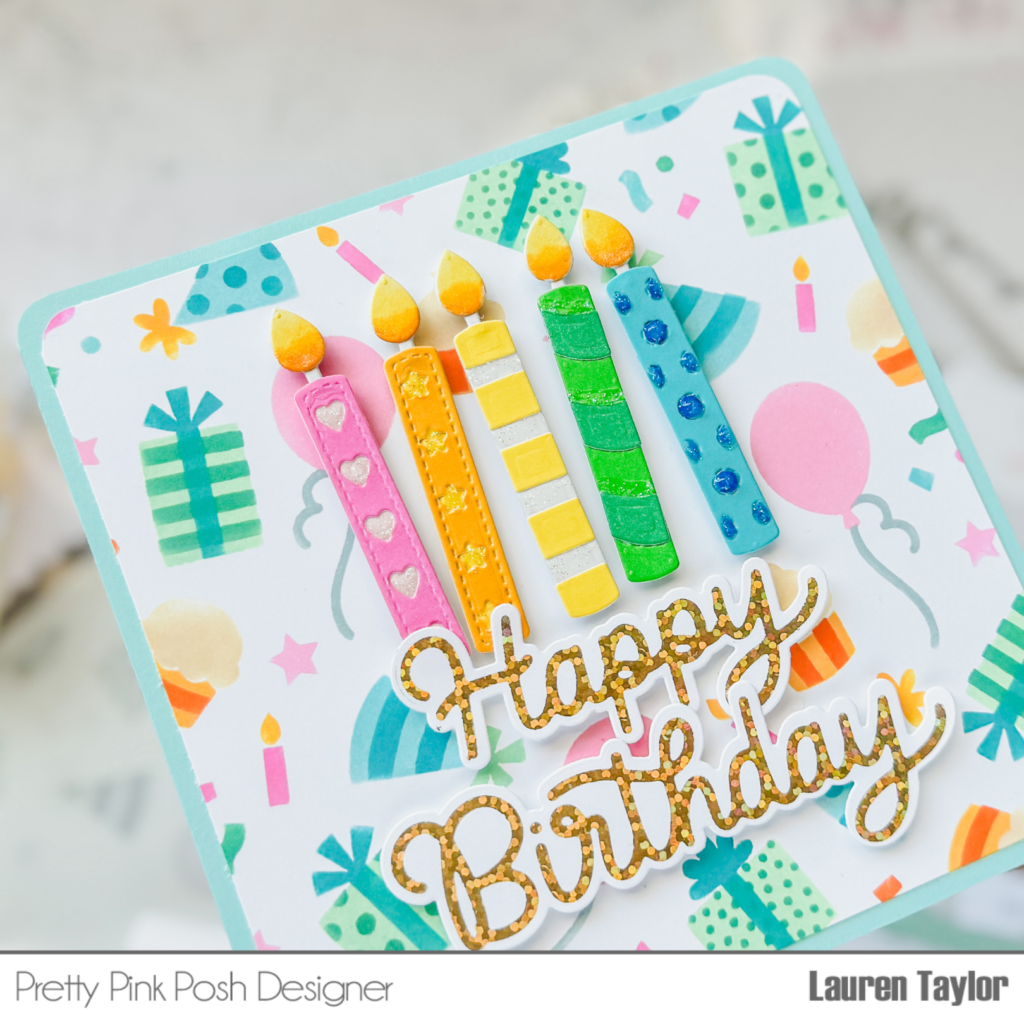
Onto the brighter, second card! I couldn’t figure out the color scheme I wanted to use to stencil the Layered Birthday Wreath Stencils, so I just used all of them! For all three layers of the stencil, I used pinks, oranges, yellow, greens and blues of Distress Oxides. I used small brushes for the tinier details and masked when I needed to to get all the details colored in.
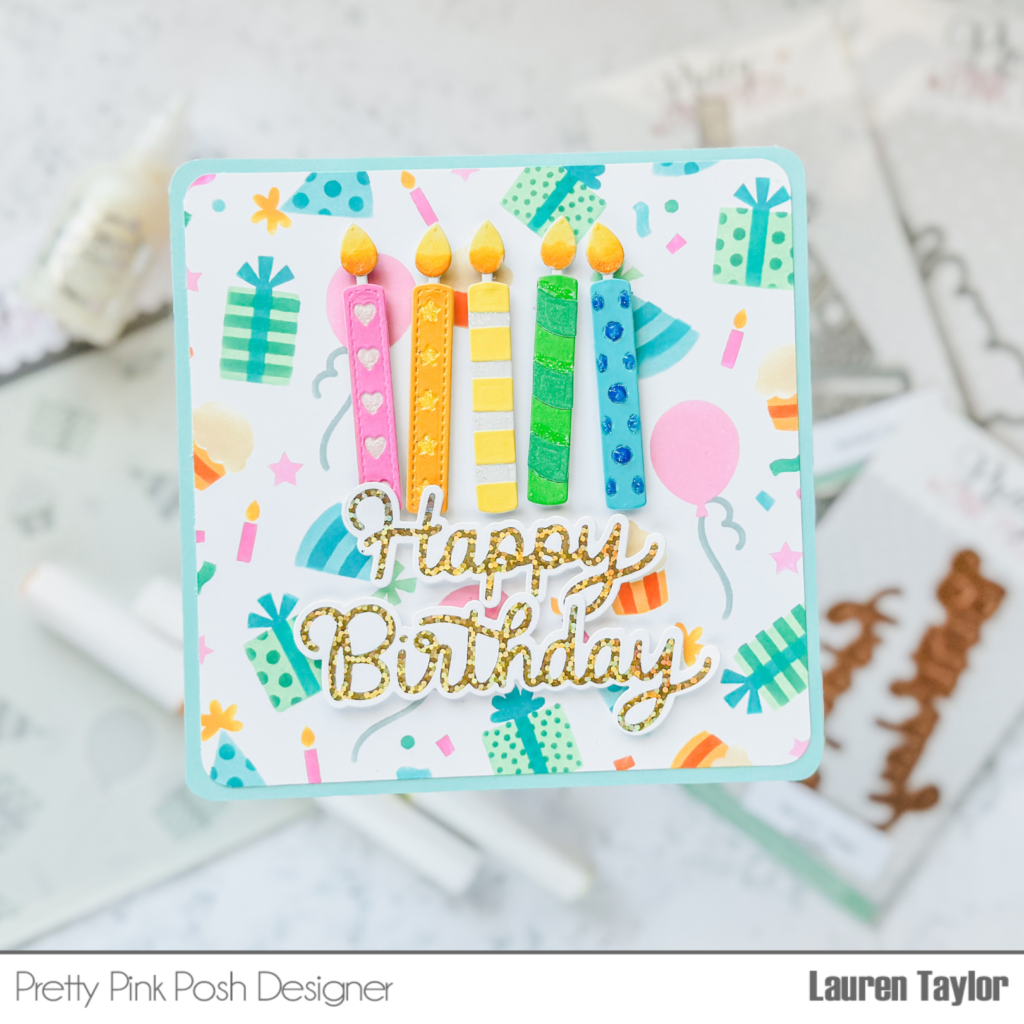
I really could not bear to cut any part of this stenciled wreath away, so I made a big card! My card base measures 5-1/2×5-1/2” and I used a 1/4″ corner rounder. I layered on a piece of blue cardstock with the same dimensions, before adding my stenciled panel. I trimmed it down to 5-1/4×5-1/4″ and used the same corner rounder.
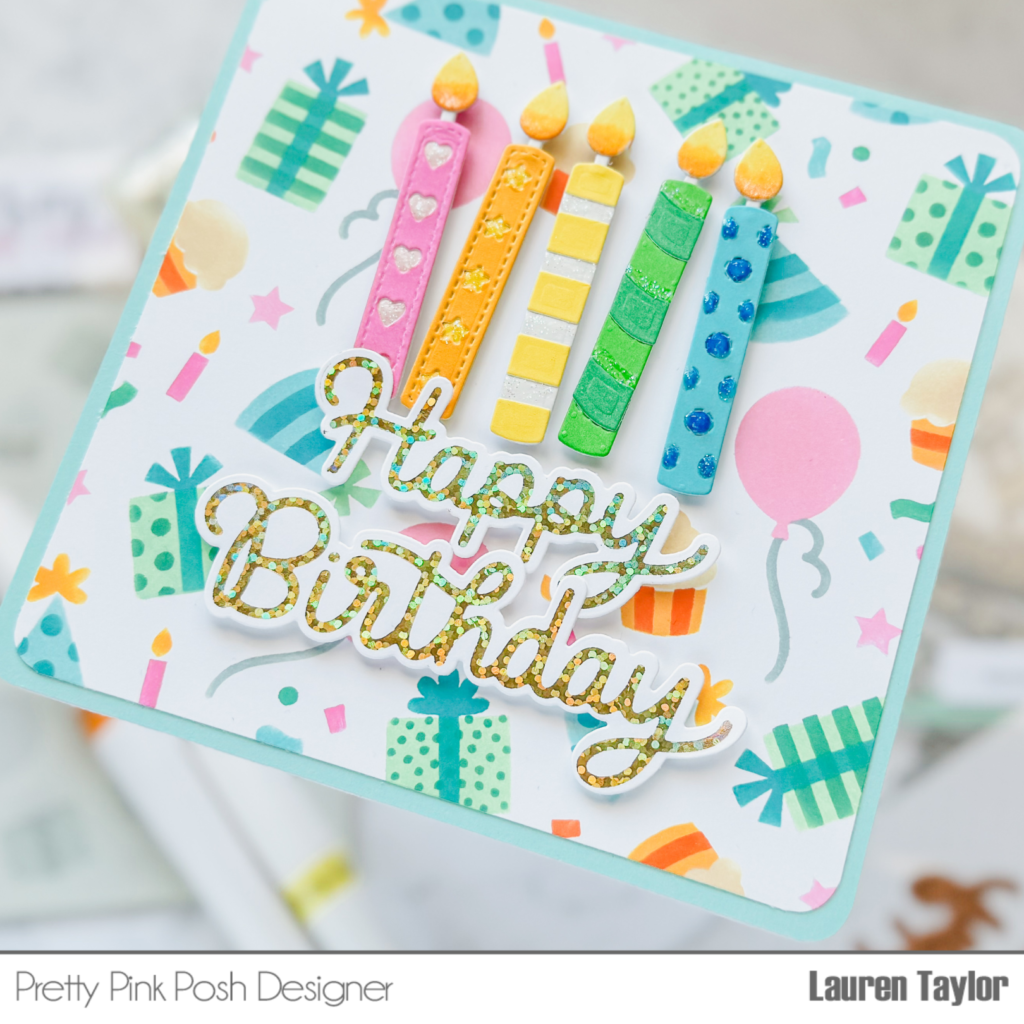
Using coordinating colored cardstock, I cut out Birthday Candles and layered them together onto the card with foam adhesive. I also hot foiled the Happy Birthday Hot Foil Plates with gold foil and used the coordinating Happy Birthday Shadow Dies to cut the sentiment out. The sentiment was also popped up with foam adhesive under the candles.
I hope you enjoyed this sneak peek of the new Half Stars Stencils and Layered Birthday Wreath Stencils. I hope you’re excited for this new release just as I was to receive these stencils to give you inspiration today!
Both stencils look fantastic! Thanks for sharing these awesome cards!!
Lori S in PA
Such cute cards, Lauren. The blue and gold Birthday Party Hats would be so perfect for a boy, and the Birthday Candles in the brights for a girl. I think they just scream F-U-N, and really could be used for child, teen, or adult. Thank you for sharing.
I love your 2 sample cards, Lauren!! Gorgeously done and love the color combos!! The first with the blue, grey yellow and green and stenciled stars was beautiful! The second with more glitz and glam! Love everything!!
I just love the birthday card! Your color choices of cardstock are bright and colorful. A card that can be made for a girl or a boy. The greeting just pulls everything together!
Such fun stencils! They are my favorite crafting product these days!