
Party Cake Shaker + Video
Hello crafty friends. It’s Lisa Mears here. Today I’m sharing a fun birthday shaker card I made using the Party Cake Die Set.
**The new release has been selling like hotcakes! For the first time ever, we are offering pre-orders on some of the sold out items. You can find all of those products HERE. **
Watch the video above I Watch the video in HD on YouTube
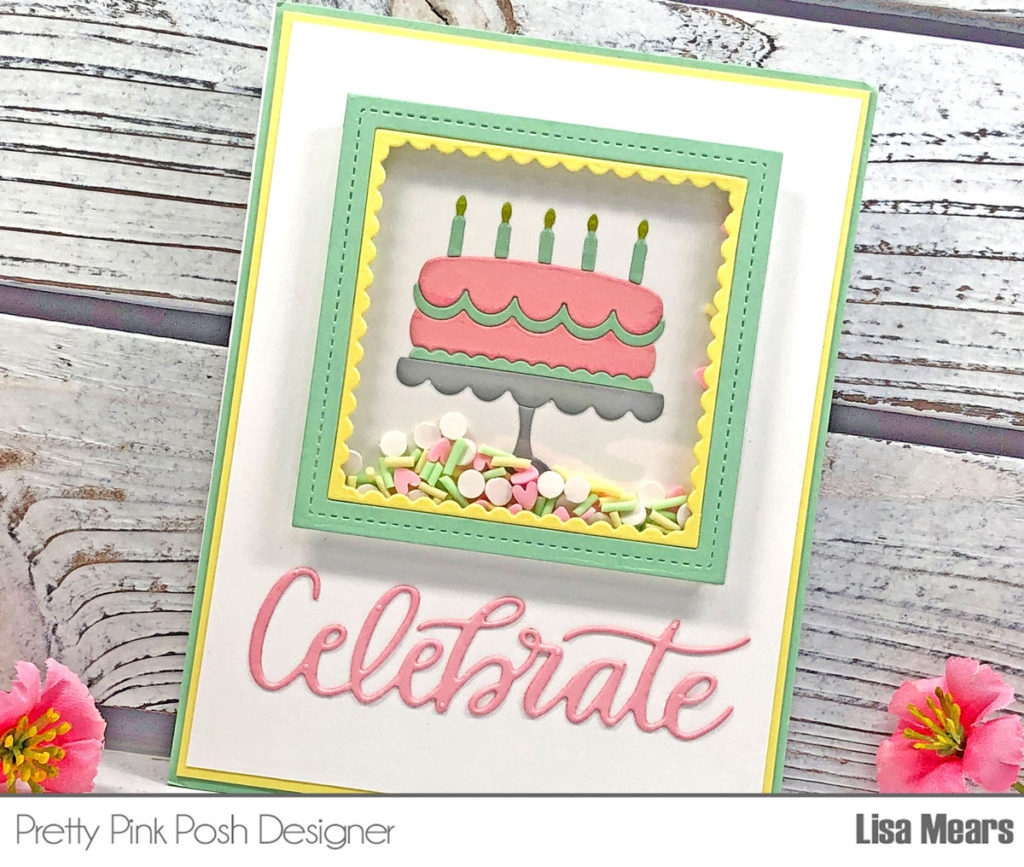
This die set comes with a square frame that you can use with or without the inside scalloped edge. It also comes with a cake die. You can use the dies alone or you can use them together to frame the cake like I did in my card.
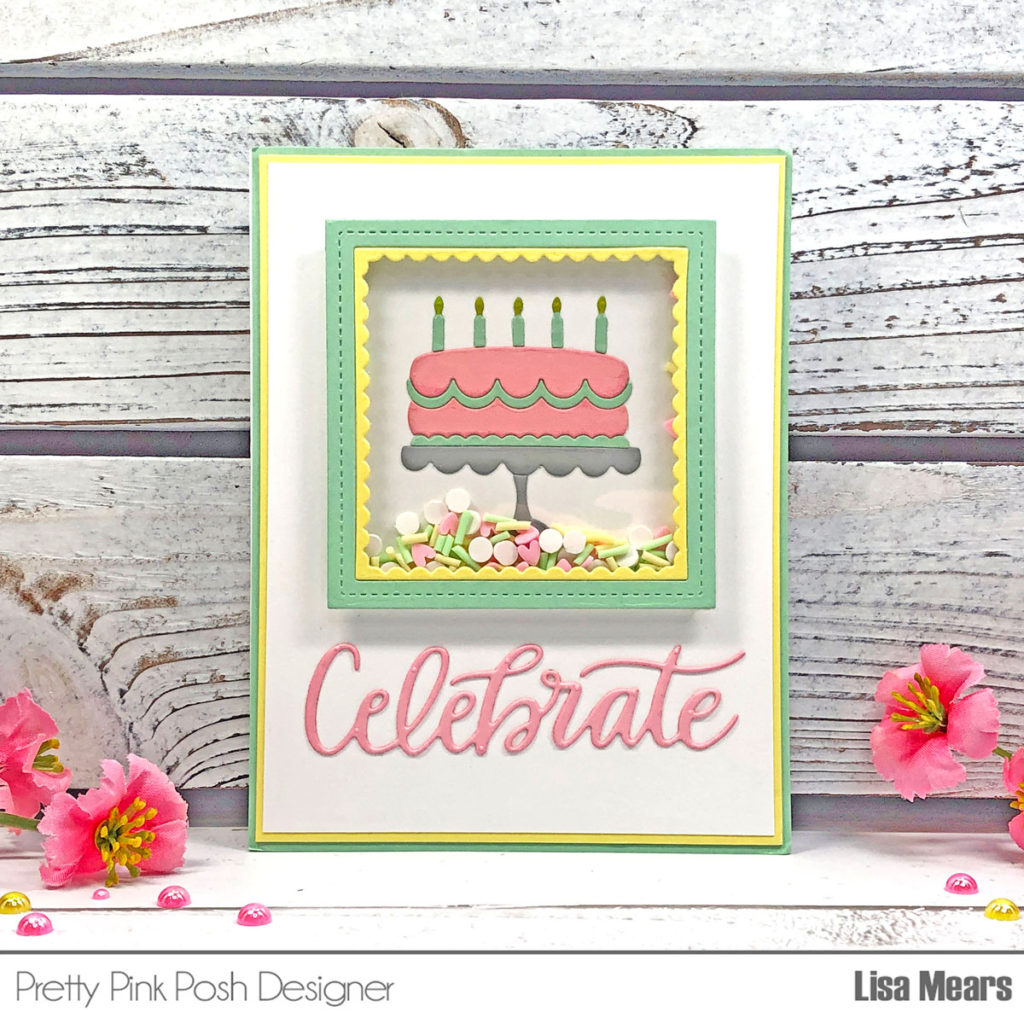
I started off by using the frame die to die cut a piece of green cardstock and a piece of yellow cardstock. I used the green cardstock piece for the square frame and the yellow cardstock piece for the inside scalloped edge. I added those diecuts to a piece of acetate. On the reverse of the frame, I added double-sided adhesive foam to outline the square frame and then I set it aside.
Using the cake die, I die cut three pieces of cardstock – gray, pink, and green. I assembled the cake starting from the bottom to top onto a piece of white cardstock that measures 3” x 3”. I added the 3” x 3” piece with the cake assembled to the top middle of a piece of white cardstock that measures 4” x 5 1/4”.
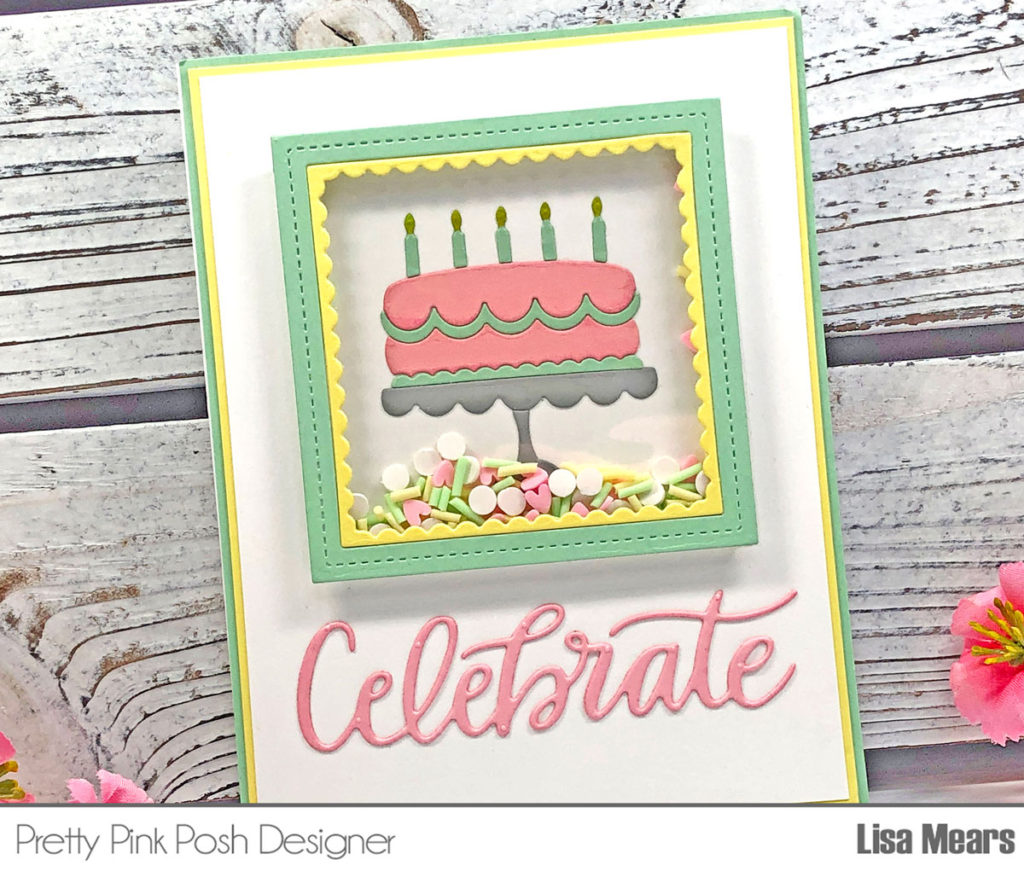
Next, I added Sherbert Clay Confetti to the center of the cake and then added the frame to the top to seal in the confetti pieces.
I die cut the Celebrate Script word die with pink cardstock and added it beneath the frame on the card front.
Next, I added the white card panel to a piece of yellow cardstock that measures 4 1/8” x 5 3/8”. I added the yellow panel to a piece of green cardstock that measures 4 1/4” x 5 1/2”. I added the final layer to an A2 white card base.
Thank you so much for stopping by today. Please leave a comment and let me know what you think of my card.
Happy Crafting!
Lisa, it’s a beautiful cake card!
Anny
Love how you matched the colors of the diecut with the confetti!
So sweet and I have birthdays coming up.
This is so pretty! I really like the color combo and I love the shaker element!