
Layered Birthday Candles
Hi crafty friends! It’s Leica here today with a birthday card to share with you all. For this square-shaped card, I used the new Layered Candles Stencils to make a fun background. Let’s get started!
**The new release has been selling like hotcakes! For the first time ever, we are offering pre-orders on some of the sold out items. You can find all of those products HERE. **
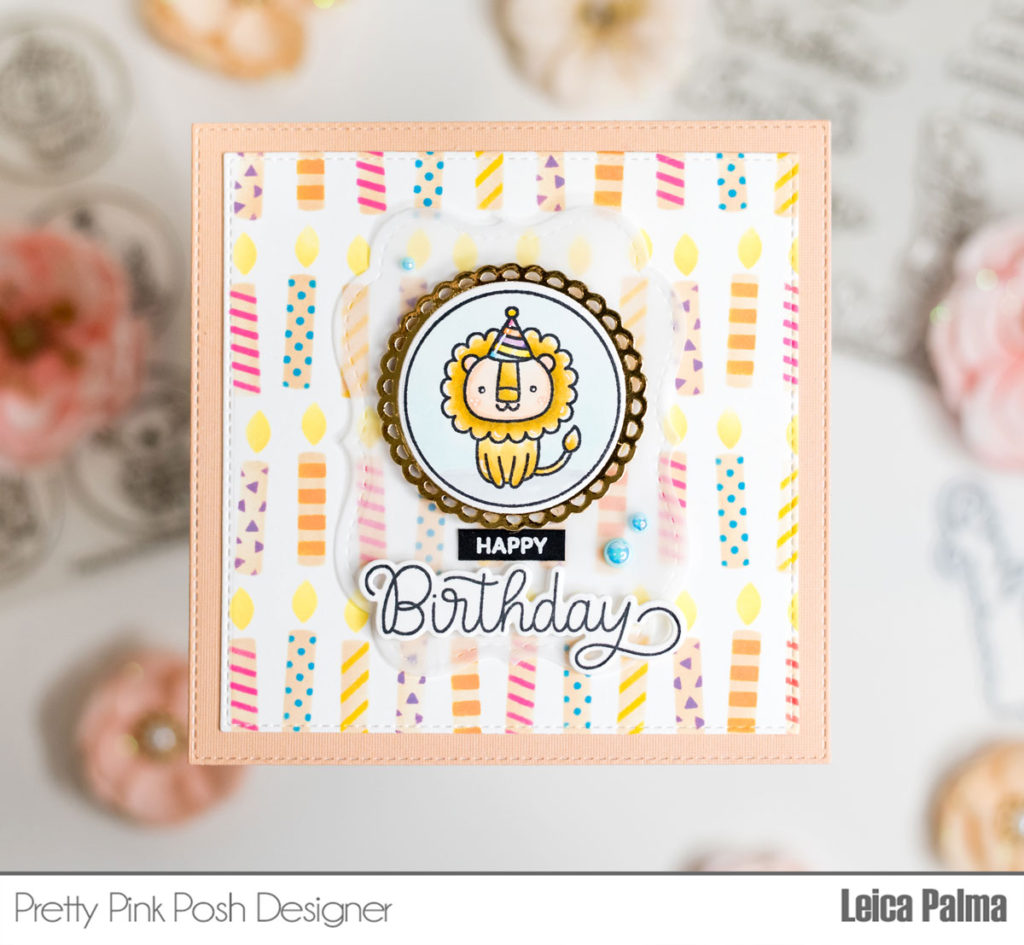
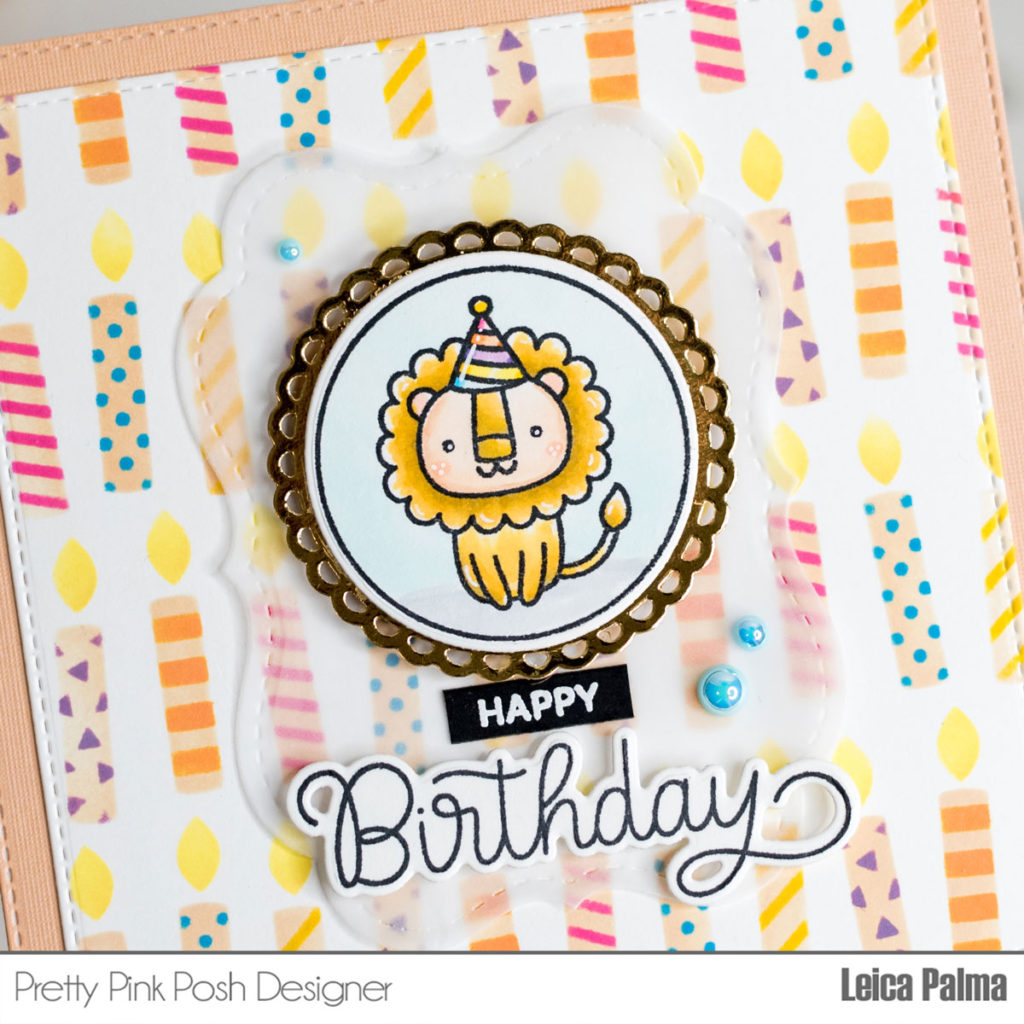
I first cut a 4.5″ square panel in white cardstock and used the A layer to make the candles by inking through it with the Gina K. Warm Glow ink. I then inked through the C layer with Distress Oxides (Peacock Feathers, Picked Raspberry, Salty Ocean, Seedless Preserves, and Spiced Marmalade). Next, I inked Squeezed Lemonade Distress Oxide Ink through the B layer. To add another layer of color, I adhered the panel onto a 5″ square in orange cardstock.
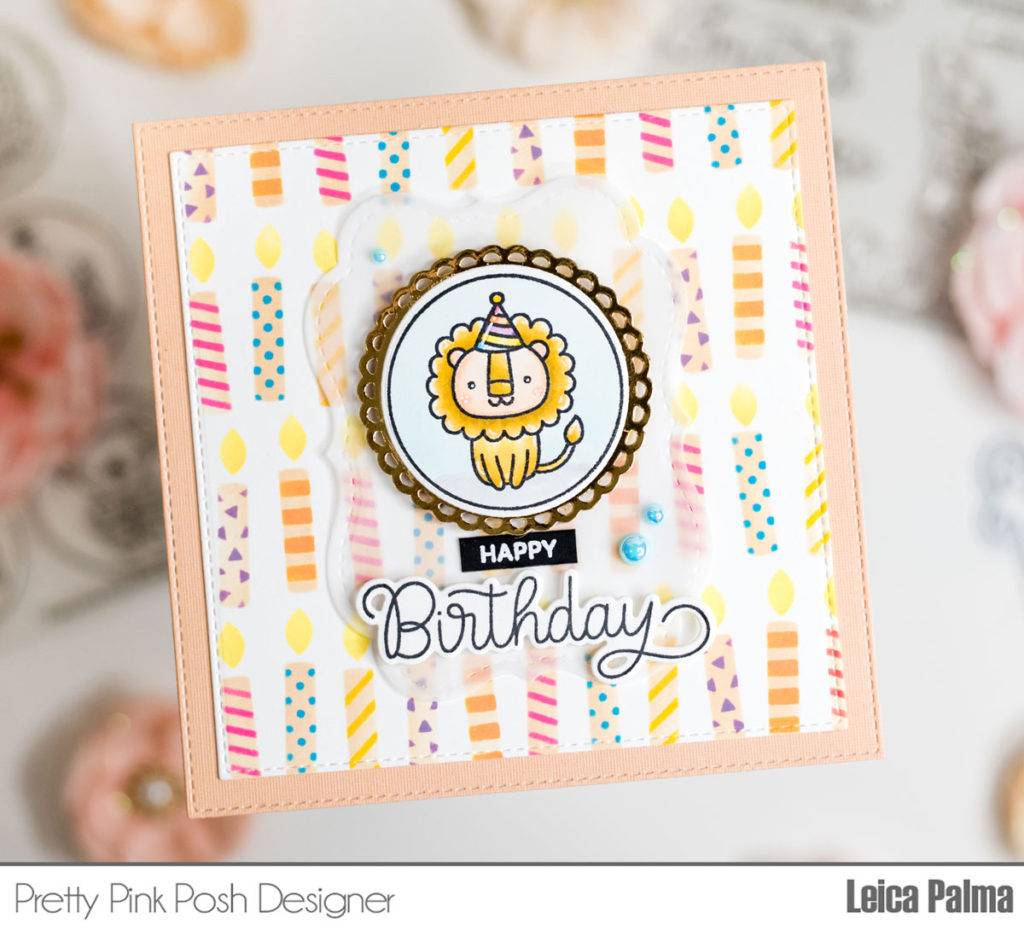
In vellum, I cut the ornate panel from the Fall Circles dies and added an image from the Birthday Circles stamp set that I layered with a gold border using the scallop circle die from the Winter Circles dies. I foam mounted the circle on the panel. For the sentiment, I used the Birthday Scripts stamp set. I also added some pearls in Blue Sky. Lastly, I adhered the panel onto a 5″ square card base.
Thanks so much for stopping by today! I hope that I’ve inspired you to make birthday cards with these new stencils.
Oh, gosh!! Leica, this is ADORABLE!!! I will try to emulate this because I love it so much!! TFS –
Lori S in PA
Love your beautiful card Leica! Gorgeous array of colors with that fabulous candle stencil!! And loving that adorable lion!!!