
Happy Birthday Presents
Hello, Gemma here today sharing a card using some new products from the February Birthday release – Build A Gift die set and the Layered Presents stencil set. Using a neutral colour in the background really makes the bright presents pop on this card.
**The new release has been selling like hotcakes! For the first time ever, we are offering pre-orders on some of the sold out items. You can find all of those products HERE. **
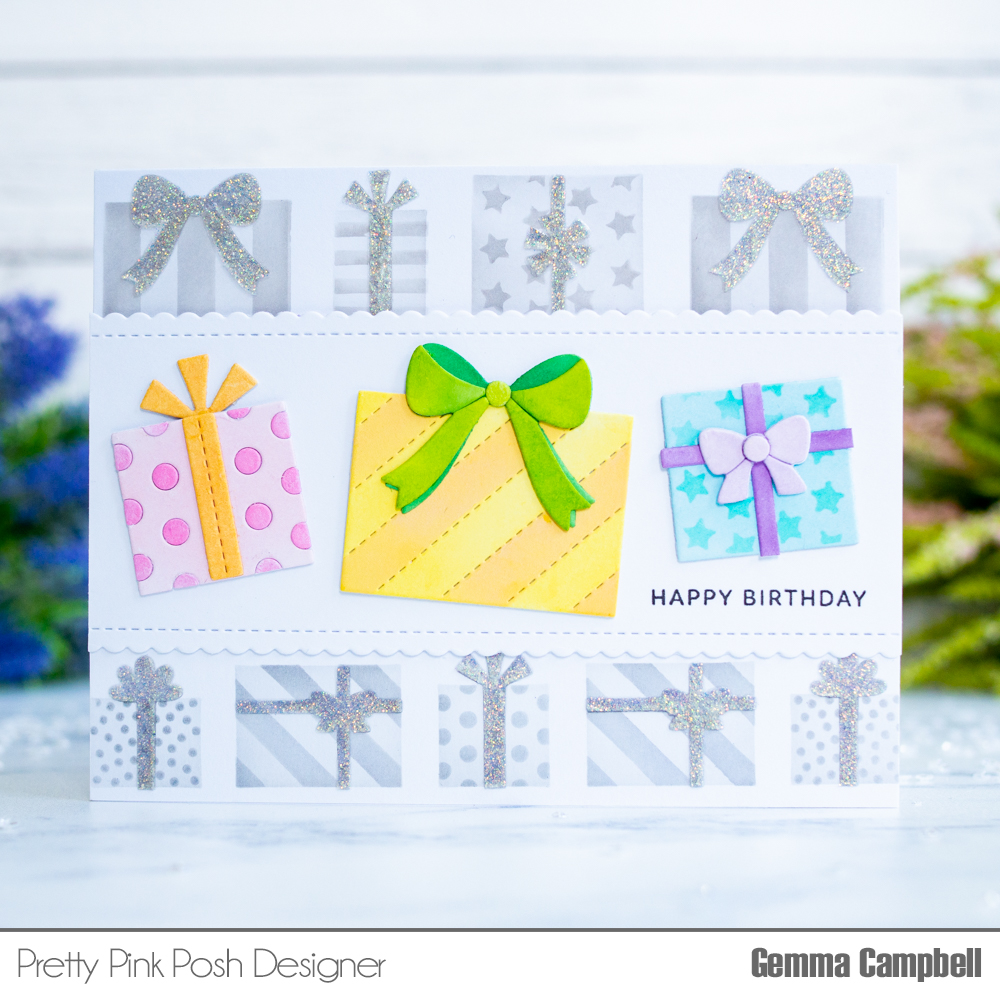
I began with the background. Over a white card panel, in turn I lightly inked over the stencils from the Layered Presents set. For the final layer, I also used some glitter embossing paste for a touch of sparkle, then set it aside to dry.
Next, I die cut the Build A Gift die set from white card. I used distress oxide inks to add colour to the presents, then assembled them with liquid glue.

Once my background panel was dry, I cut it with a trimmer to get two borders. I adhered these to my card base, then added a strip of card across the centre, die cut with a scallop border die to add interest. This strip covers the gap on my background and gives me a place for my presents and sentiment to sit.
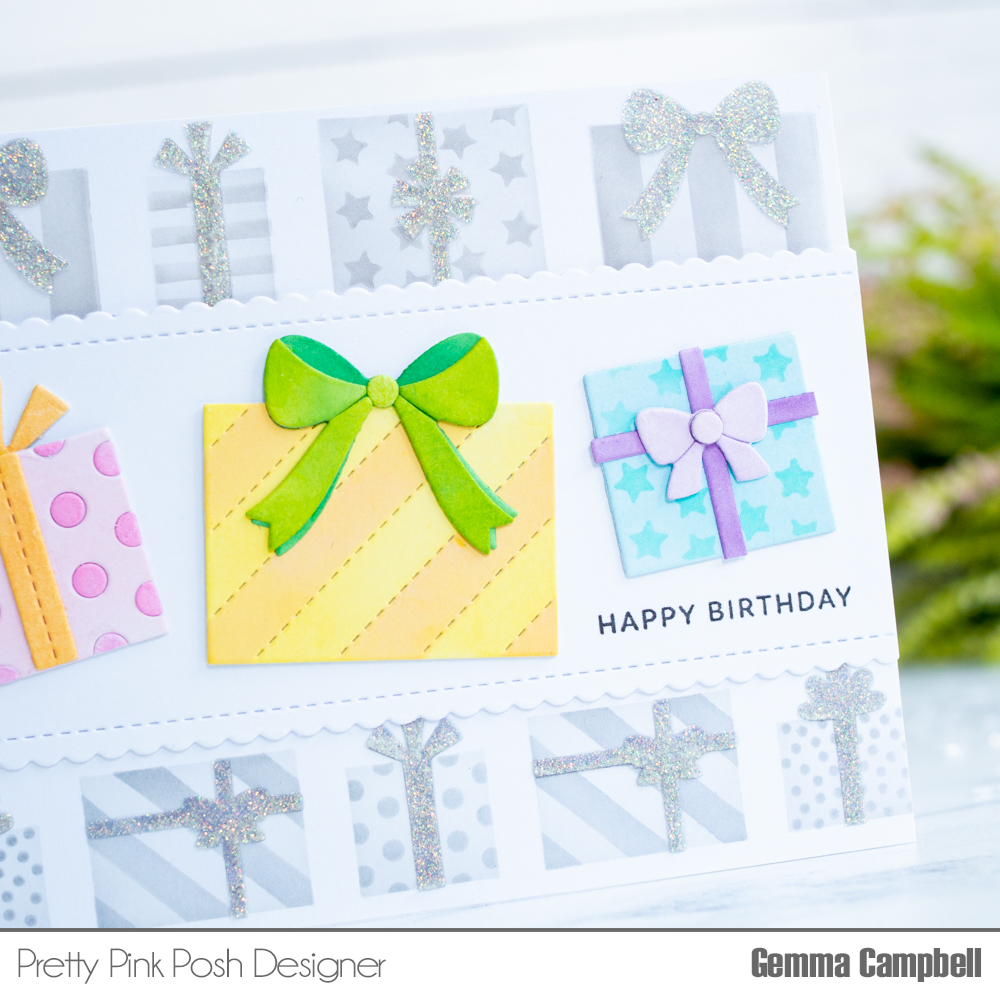
I stamped a sentiment from the Simple Sentiments stamp set, then adhered the Build a Gift presents to finish.
If you missed the news, we’re celebrating turning 8 with a free gift offer and coupon code. Hurry and take advantage of both while you can!

See you tomorrow for another day of inspiration + a video tutorial.
Can’t wait to get my hands on this stencil when it comes back in stock!
What a wonderfully different card 😍 waiting for the stencil and die to come back in stock 😁