Hello everyone, Joni here sharing a sneak for the new upcoming June 2018 release. The cute Koala Friends stamp set and Koala Friends die set are a must have.
To begin my card I first stamped and die-cut my pieces. Then colored them with Copic Markers.
Next, I distressed my card panel with Distress Oxide and then splattered them with water. I also used the stitched scallop from Stitched Borders 2.
Then, I also stamped the sentiment from the same stamp set Koala Friends using Platinum embossing powder after distressing a white piece of cardstock. Then, I die-cut the piece withStitched Borders 1.
To finish the card I adhered everything with foam tape for added interest. I then finish the card by added Ivory Jewels.
For my second card, I used the new Hello Shaker die to coordinate with the Koala Friends.
To start my second card, I distressed a white cardstock also using Distress Oxide inks and splattered with water.
Then, I die-cut the Hello Shaker 3 times and adhere with glue on top of the other for a thick look.
I also added the strip of black and white strip of paper and I also added some Ivory Jewels to finish off the card.
Thank you so much for visiting! Stay tuned for more sneak peeks in the next few days!
Hello everyone! Alix here as a guest designer sharing products from Pretty Pink Posh upcoming June release. I have been a Pretty Pink Posh super fan for quite a while and I am so honored to start this exciting moment with you.
To begin with my card, I first stamped the images from School Friends stamp set on a piece of cardstock paper and cut them with School Friends coordinating dies. Then I colored them with my trusty copic markers and set aside.
I wanted the have the main focus on my shaker window, so I decided to keep the card base almost pure white. For inked background, I ink blended background using distress ink oxide in Tattered Rose, Abandoned Coral and Candied Apple, then I stamped sentiment that comes with this stamp set with some Watermelon Jewels to embellish.
To create the shaker window, I cut the frame for 5 times using the Scallop Ovals, then I glued 4 of them together sandwiched with a piece of acetate paper and the last frame die cut. Before I closed up the top, I poured some Iridescent Mini Star Confetti and 3mm Sparkling Clear Sequins. When its ready, I attached the window onto a A2 base card front.
When you are holding a cute and lovely stamp set, there is no way that you could only make one card. So this second card idea came up very quickly. The scene I wanted to create is that a nerdy boy who likes to bury himself in a library with tons of book. A shy girl who had crush on him expressed her feeling with full courage.
I started to ink blended distress oxide in Peacock Feathers, Twisted Citron and Cracked Pistachio onto a piece of watercolor paper. I sprayed water over inked background and removed all wet spots with a piece of paper towel. When it dried, I splattered a mixture with ink and water over upper portion of background to add some interest.
While I was waiting for background to dry completely, I cut my white frame using the Scallop Frames and I popped them up using double sided foam squares to create dimension. I did my pick and choose for the best images to create my ideal scene and colored them with copic markers. Then I arranged them inside of the frame I created.
I stamped sentiment that comes with this School Friends Stamp set with very black dye ink since my background is in slightly darker color. I also stamped mini hearts around them and added 1/4″ Iridescent star confetti to create lobe sparkles between them.
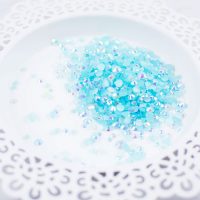
Good morning Pretty Pink Posh friends! Heather here this morning with a peek at some of the upcoming Pretty Pink Posh Release! I get to share a sneak peek with you featuring the CUTEST little dragonflies ever – as well as a fabulous new sentiment set! On my second card I also used a few of the new colors of seed beads that are part of this fabulous release!
First up, I created this watercolor card, using the colors I think of when dragonflies come to mind. I used my Peerless watercolors to create a pretty ombre watercolor background, then added some gold splatters with my Gansai Tambai Starry Colors Palette.
I stamped and colored the adorable dragonflies from the new Darling Dragonflies stamp set, then cut them with the coordinating Darling Dragonflies coordinating dies. I added some Nuvo Honey Gold Glitter Drops to the wings for some extra sparkle as well!
I stamped my sentiment from the new Simple Sayings: Miss You, then mounted the dragonflies around it with foam adhesive. I matted that panel with a bit of white cardstock, then mounted on a cardbase made with deep purple cardstock. Finished off with a few Metallic Gold Jewels – the perfect finishing touch!
Next up, I pulled out an older die, Stitched Film Strip, and created a fun little scene with some of the additional images in the stamp set – and turned it into a shaker card filled with some of the pretty new seed beads!
I love the little grass and cattail stamps in Darling Dragonflies – so cute for scene building! And the grass fit PERFECTLY behind each of the windows on the Stitched Film Strip. I separated each window of the die to create the shaker element, and filled each window with a different color of beads (Cotton Candy, Aquamarine and Blush).
I stamped my sentiment underneath, again from Simple Sayings: Miss You using an aqua ink that coordinated with the Stitched Film Strip, and added a couple extra cattails next to the sentiment. Finished off with some Golden Sunset Nuvo Drops on the cattails, and some White Blizzard Nuvo Drops on the wings for lots of sparkle!
Hope you enjoyed today’s sneak peek! Join us tomorrow for another sneak peek of the June release!
Jeanne here today and I can’t tell you how excited I am to be sharing in the sneak peeks of the Pretty Pink Posh May Release! You know I love dies and I bet you do too! I’ve got some new ones to show you today!!
The new Get Well Soon Script Die makes a big impression! For this card I inked up a background of clouds and then die cut the panel with the sentiment. What I love about this die (beyond the beautiful handwritten font) is that the three words are together on one die (they’re not meant to be cut apart) so you do an inlay technique they’re perfectly positioned with one run through your die cut machine. These three aren’t going to fall apart after you use them a few times like others I’ve had.
I chose the Playful Puppies for this get well card because no one misses me more when I’m down than my dog. She’s always ready to play or go for a walk, and if I’m under the weather there are two of us that aren’t happy!
I love making scenes with dies! The Scallop Borders 1 make a wonderful grassy yard, and the Picket Fence make it more like home!
I paired the Hugs Shaker die with the new Happy Mail stamp set. I filled it with my own mix of sequins from the store including Lemon Drop, Lemon Meringue, Sunshine Glow. If you look close, there’s another new surprise….Metallic Gold Jewels. They’re gorgeous! They look like diamonds dipped in gold!
Again I started this card with a distress inked sky. This time I cut a Stitched Borders 1 grassy hill for the Happy Mail mailbox. I stamped a sentiment on the green cardstock and attached it to the cloudy panel.
The Summer Flower sequins are the prefect embellishment for adding flowers to scenes. The size of the flowers is in proportion with the stamped images. It’s going to be a nice day!
I put yellow card stock behind the Hugs Shaker die so it looks like a sun in the blue sky! Everybody loves a little happy mail!
I hope you enjoyed today’s cards and look at some of the new dies. Join us tomorrow as we reveal the whole May 5th release!
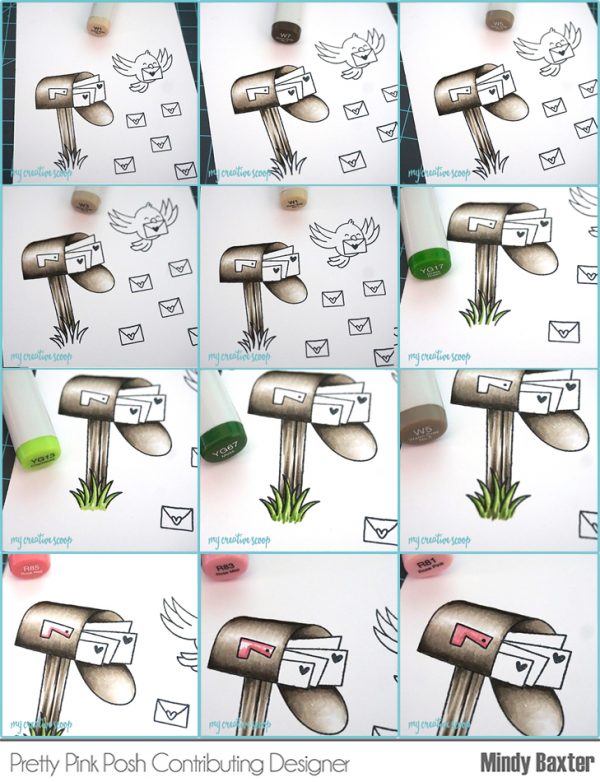
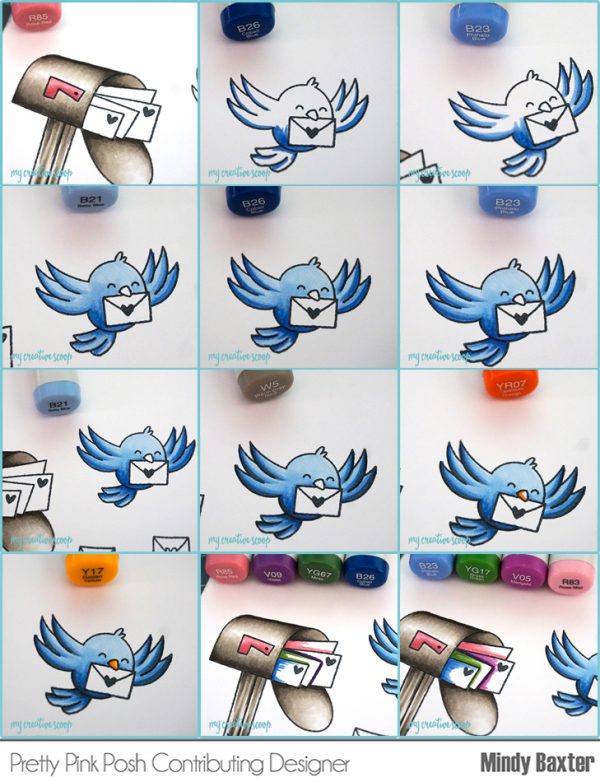
Hi! It’s Mindy from My Creative Scoop! I’m here to share a little sneak peek of the new release. This stamp set is called, ‘Happy Mail’. I love how all the stamps from this release and previous releases will coordinate perfectly with this stamp set. You can make the cutest little cards with this mailbox. I’m also using the Scallop Borders Dies and Rainy Days Die Set.
I have a step by step tutorial of how I colored this entire scene. How fun right!
I hope you enjoyed the tutorial and today’s inspiration – I know you can’t wait to get your hands on these stamps.
Have a wonderful day. Make sure you visit tomorrow for some more inspiration!
Hello everyone! Amy here sharing a sneak peek of the new upcoming May 5th release. For my two projects today, I’m highlighting the adorable Playful Puppies stamp set and Playful Puppies coordinating dies.
To begin, I colored the stamped images with Copic markers and cut them out with the coordinating dies.
I created the patterned panel by stamping the two solid bone stamps with white pigment ink on A2 sized kraft card stock. After, I die-cut the panel with the frame die from Stitched Notes for the beautiful stitched detailing on the card. I stamped the sentiment with dark brown dye ink.
To finish, I foam mounted the images as shown and adhered the front panel to a top folding card base.
For the second card, I created a fun scene using the puppies. I colored the stamped images with Copic markers again and cut them out with the coordinating dies.
I trimmed Smooth Bristol paper to 5″x 3.75″. I create the clouds using an acetate stencil I made using the cloud shaped die from Stitched Borders 2 and Tumbled Glass Distress Ink. Once again, I stamped the sentiment with dark brown dye ink.
I die-cut natural card stock with a Picket Fence die and adhered the fence to the cloud panel. Then, I die-cut Smooth Bristol card stock with a die from Stitched Borders 4 to create the lawn the puppies are sitting on. I inked it with Mowed Lawn Distress Ink. To finish, I foam mounted it to the top of the fence and adhered the puppies as shown.
I hope you enjoyed my projects; thank you for stopping by. Join us tomorrow for another sneak peek!
Good morning Pretty Pink Posh friends! Heather here this morning with a peek at some of the newest goodies from Pretty Pink Posh! You may remember the butterflies from the Butterfly Friends set that was the free-with-purchase set for the January release. It will now be available for purchase on it’s own! I paired it up here with the new Simple Sayings: Life– a sweet little sentiment kit for this rainbow butterfly cards! I also managed to sneak on a few of the new colors of jewels that will be releasing!
I played with some 3D effects for the butterflies using the coordinating dies. For this first card, I used some of the simple outline butterfly images I was going to color them, but ended up liking them clean and crisp and white so well that I left them that way. I did cover them with a sparkly coat of Nuvo clear glitter drops to help them pop a little.
I used some pretty rainbow pattern paper for the base of my card. I stamped the sentiment and butterflies on the white layer, then die cut the butterflies with the coordinating dies. I adhered the white panel to the rainbow layer, then adhered the butterflies just on the body portion, leaving the wings loose and curling them up once my adhesive dried. I finished off with a few of the Sparkling Clear Jewels.
For these next two cards I used the same technique, just changed up the colors on each one!
I stamped one of the large butterflies from the set, then die cut it with the coordinating dies. I then used the coordinating dies to cut the same butterfly again (without stamping) out of a rainbow of colored cardstock. I colored the stamped butterfly to coordinate with my layers of cardstock. I glued them all together in the centers, allowed to dry, then curled up all the wings for a SUPER fun dimensional effect! I also covered the wings of the top butterfly with sparkly clear Nuvo Drops as well.
I used Stitched Borders 1 to cut some pretty edges on a strip of pattern paper for the bottom of the cards, and stamped another of the sentiments from Simple Sayings: Life, then for these two cards added a few of the new Pearl White Jewels to finish these off.
So much fun- these rainbows make me so happy! And the sentiments and butterflies are both so darling together!
Hope you enjoyed today’s sneak peek! Thanks so much for stopping by today!
Hello everyone, Joni here sharing a sneak peek of the new Pretty Pink Posh floral stamp set called Flourishing Fuchsias that releases on May 5th. It’s such a pretty set and the perfect addition to the floral sets.
To begin I stamped the images on a white cardstock and colored the images with Copic Markers then I used the Flourishing Fuchsiascoordinating dies.
Next, I distressed another white cardstock using Distress Oxides then splattered with water. Once dried I then stamped the sentiment from Encouraging Greetings stamp set stamp set.
Next, I adhered the die-cuts with foam tape and added some jewels inAquamarine.
For this second card I also used the same Flourishing Fuchsiasstamp set and coordinating dies. I just changed the background color and used a different image.
For the background I distressed it with Distress Oxides and splattered it with water for interest.
I also adhered the die-cuts with foam tape for dimensions and added some Buttercream Jewels to finish off the card.
I hope you guys enjoyed these new products coming your way on May 5th. Join us tomorrow for another sneak peek of the new release!
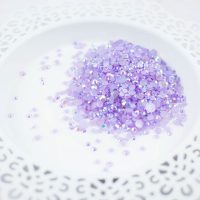
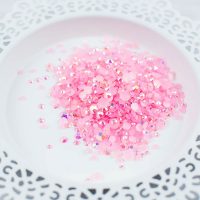
Hi everyone! Lexa here and today I’m going to show you a sneak peek of what’s coming on March 1st. Today I am featuring the super gorgeous new jewels in a variety of colors that are perfect for spring and any time of the year. If you are a fan of PPP’s sequins collections, you won’t want to miss this new product!
On my card, I am sharing the brand spanking new Bunny Friends set and the coordinating dies will be everyone’s favorite, just look how adorable they are! There are so many fun options for this set!
I stamped the images with Versafine black ink and watercolor them with Distress Markers. You must be notice the egg shaped jewels in the middle, oh yes… I use another brand new stamp set called Sparkle Dot Patterns2. I blend Squeezed Lemonade Distress Ink in the bottom part of my card to create the ground. I choose all the pastel colors that’s perfect for spring and easter. The Happy Easter Script is die cut on soft lilac cardstock that will match the rest of the card. Here’s a closer look of my card..
Here’s a look at the three colors of jewels I used on today’s project. In this release, there are a total of 10 colors!
Thank you so much for stopping by. Be sure to visit tomorrow!
Jeanne here today and I’m so EGG-cited to be sharing dies from the new release with you today! I’ve combined two of the new sets on this first colorful Easter card.
The new Stacked Layers 2 die set includes 3 stackable dies. Like the original Stacked Layers 1 you can cut the dies several times to make amazing backgrounds or use them individually as borders.
I cut the diamond pattern in a rainbow of colors before adhering the gorgeous floral, intricate cut Happy Easter Shaker die. I love the diamond pattern peeking through the die openings. This card is clean and simple but the crisp die cuts and stitched detail makes it look fussy and expensive.
The new Decorative Eggs is a set of four egg die cuts. You can use the individually “as is” or stack them as I did on my card.
I arranged the four eggs on a clean white Stitched Notes panel. To add more color to the card I cut blocks of card stock in colors matching the die cut eggs and layered them under the panel. I topped the eggs with the new Happy Easter Script sentiment die.
Notice anything else new? You’re going to love the new Jewels in the store! They’re available in a rainbow of colors and are faceted like real gems. The packages contain a generous portion of gems in different sizes that will add sparkle to all your projects!
Stop by again soon for more peeks at the new release! You won’t want to miss a thing!