Sneak Peek: June 2019 Dies
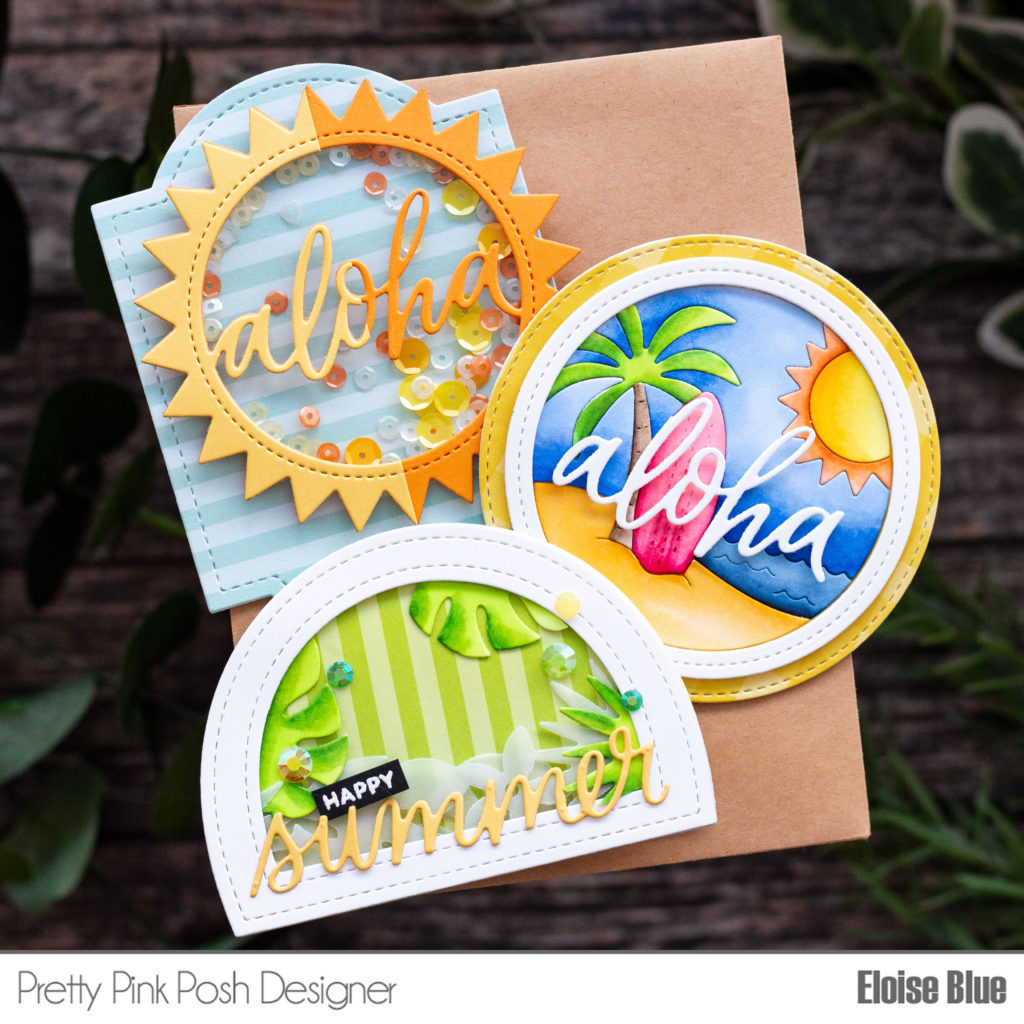
Hello friends, Eloise here and today I’m sharing some mini shaped cards using some of the brand-new items in the upcoming release. I’m using four of the brand-new dies being released as well as a couple of oldies.
Before I started making any of my cards, I die cut all of my elements first. This made creating these mini cards super-fast.
Watch the video above I Watch the video in HD on YouTube
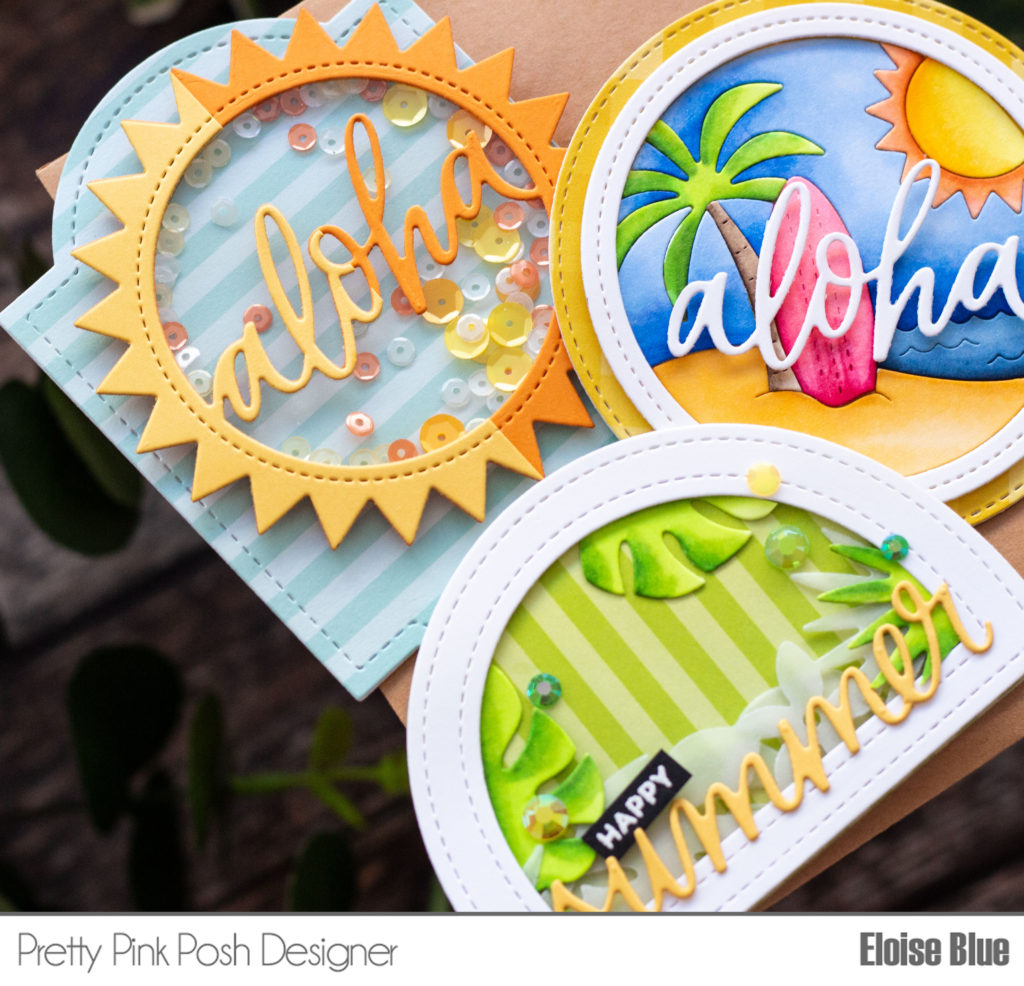
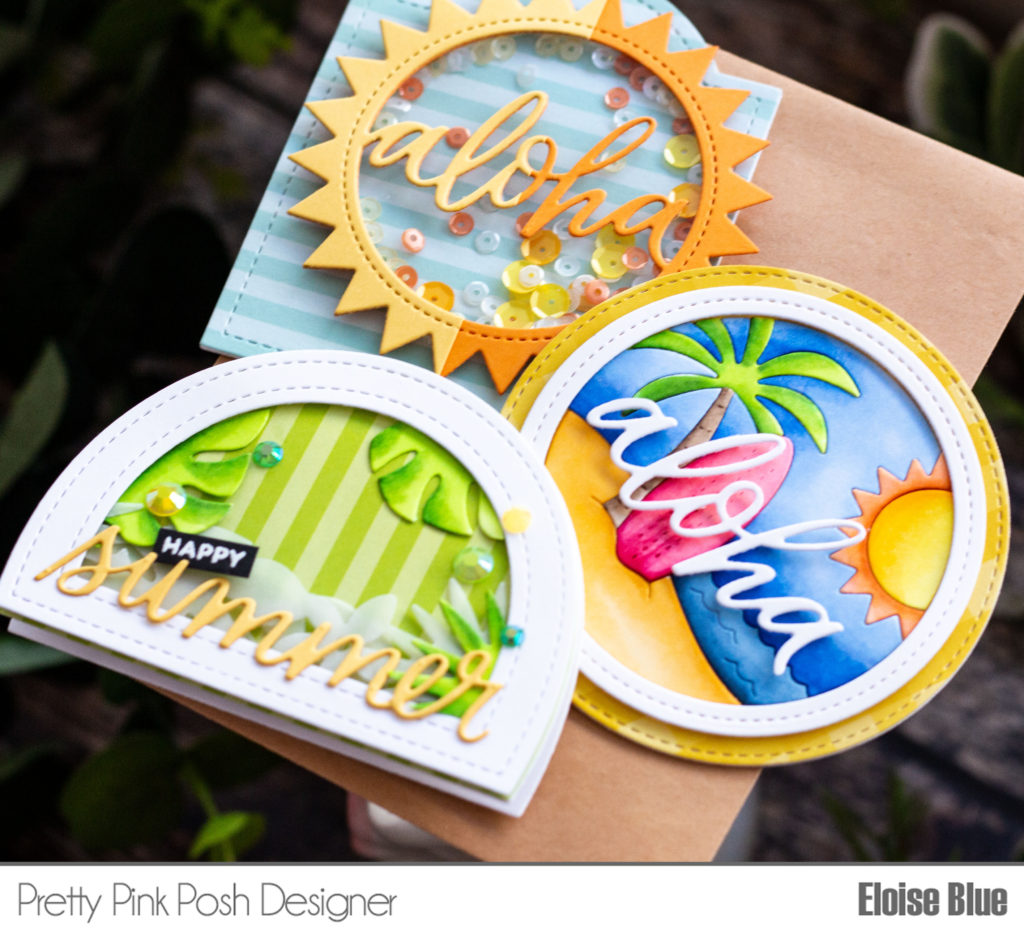
Card #1 – Aloha Shaker – 1x Yellow and 1x Orange Cardstock / Decorative Tag #2 Dies – 2x White Cardstock, 1x Blue Striped Patterned Paper
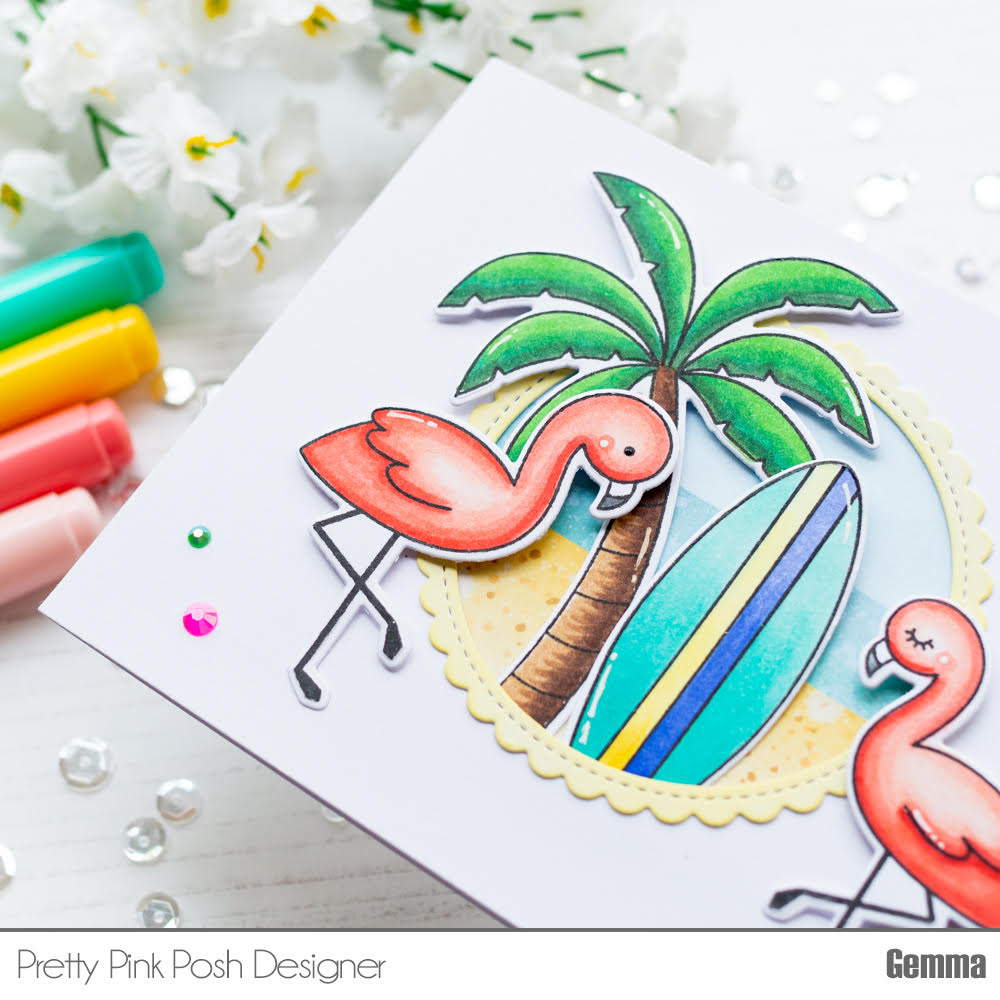
Card #2 – Beach Scene – 1x White Cardstock / Aloha Shaker – 1x White Cardstock / 2x White Cardstock and 1x Yellow Plaid Patterned Paper from a Circle Die.
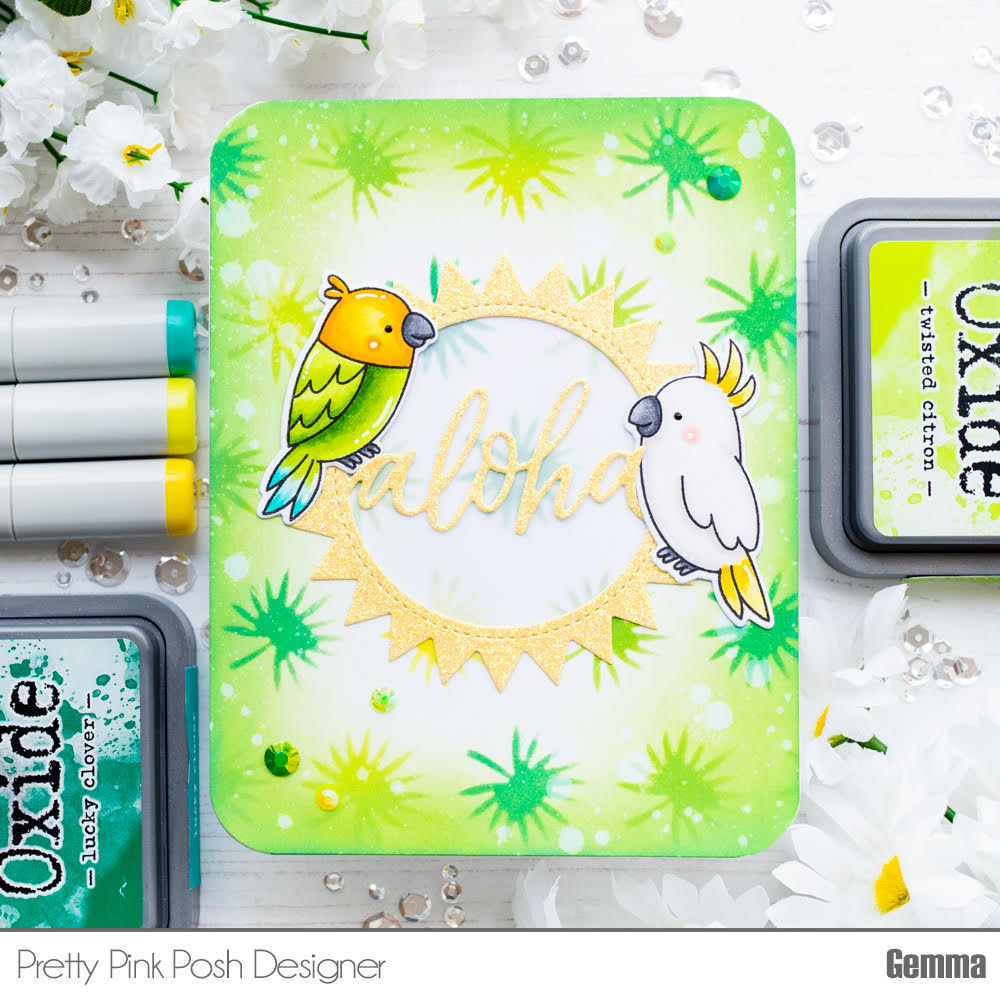
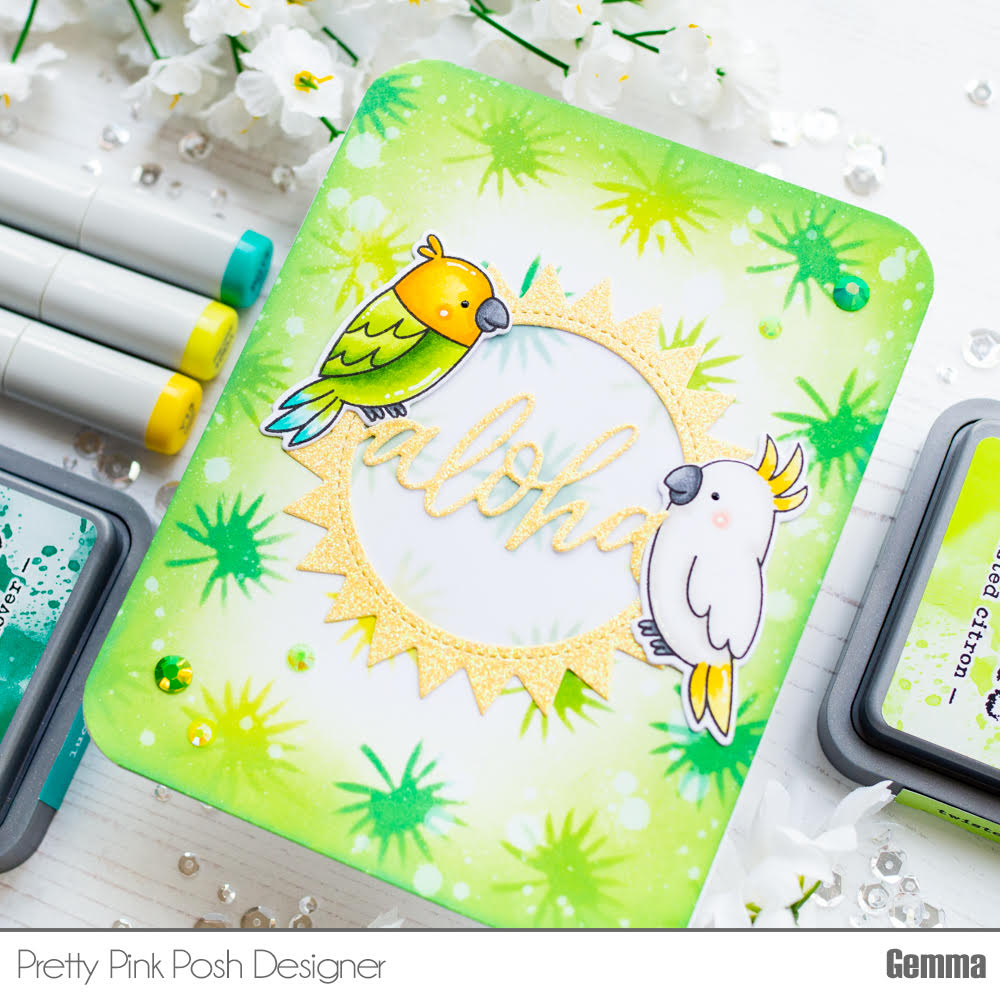
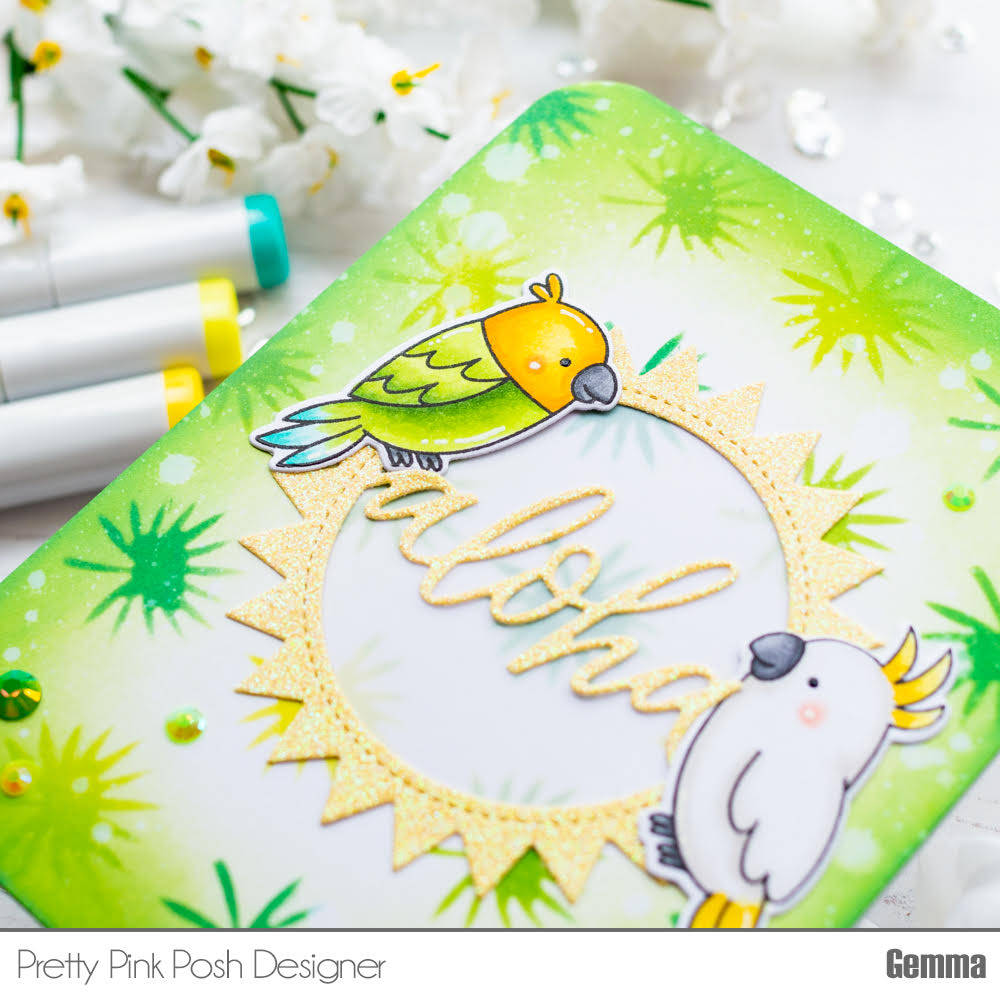
Card #3 – Tropical Frame – 1x Vellum and 1x White Cardstock / Happy Summer Script – 1x Yellow Cardstock / Window Frames Dies – 3x White Cardstock and 1x Green Striped Patterned Paper
To create the card bases, I take both of the white shaped die cuts (Decorative Tag 2, Circle and Window Frames), take one, score one side of them about ½” from the top and then add adhesive to them. I adhere the other blank panel on top to create the card bases. With the Decorative Tag 2 and Circle ones I did slice off the bottom of the back panel, so they sit correctly. Now that everything is die cut and the card bases are assembled, let’s move onto the cards.
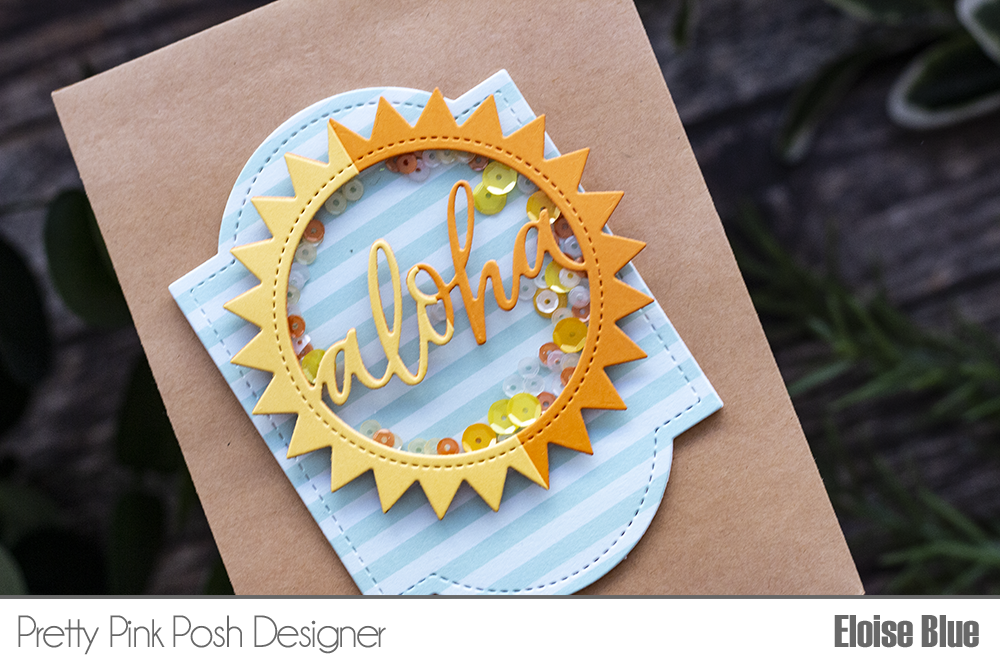
For my first card I’m using the new Aloha Shaker Die as well as the Decorative Tag 2 Dies. I adhered the blue striped patterned paper onto the card base first, I then took a piece of acetate and adhered it behind the orange Aloha Shaker Die Cut. I added a double layer of foam tape around the perimeter and then added some sequins to the card base. I removed the backers and adhered the die cut into place. I then took the yellow Aloha Shaker Die Cut, sliced it in half using my paper trimmer and adhered it on the right-hand side of my orange piece. I love this two-tone effect.
Sequins Used: Marigold, Lemon Drop, Lemon Meringue, Pumpkin and Marshmallow
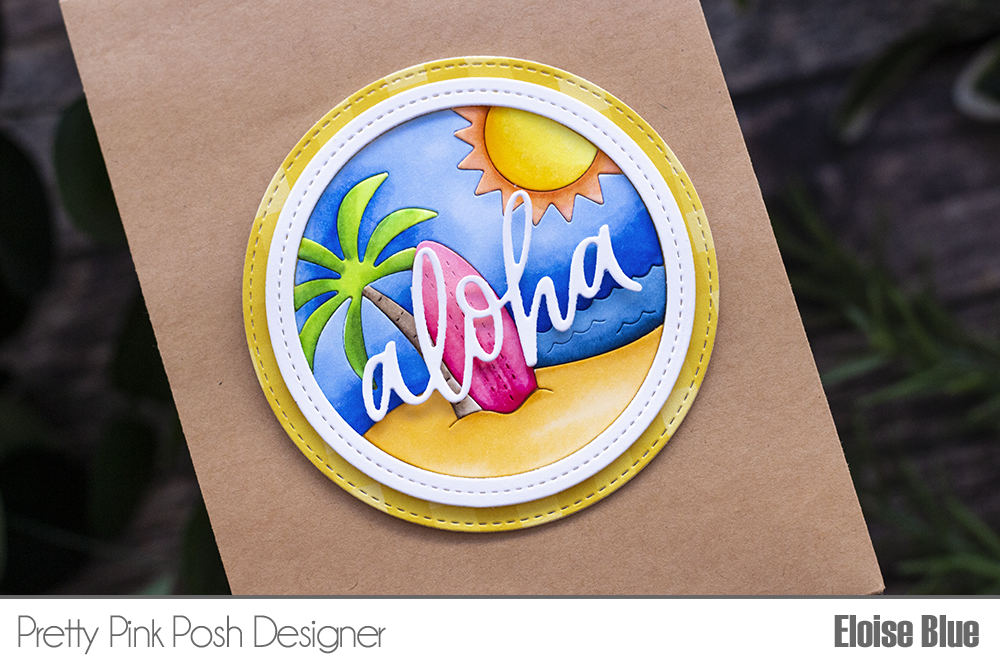
For my second card, I used the Beach Scene and Aloha Shaker Die. I started off with lightly adhering down all my pieces from the Beach Scene Die onto some black cardstock. I then coloured all the pieces in with Copic Markers. I adhered the yellow plaid patterned paper to the circle card base and adhered the white frame from Beach Scene with foam tape. I then added flat adhesive to the backs of all the pieces and adhered them into place. Lastly, I took the Aloha Shaker Die Cut, cut out the Aloha, added foam tape onto the back and adhered it into the centre of my scene.
Copic Markers Used: RV21, RV23, RV25, RV29 / YG01, YG25, YG07, YG67 / Y13, Y15, Y18, YR15 / YR00, YR02, YR12, YR18 / B21, B23, B24, B26 / B93, B95, B97, B99 / Y32, YR31, YR21, YR23 / E42, E43, E44, E47
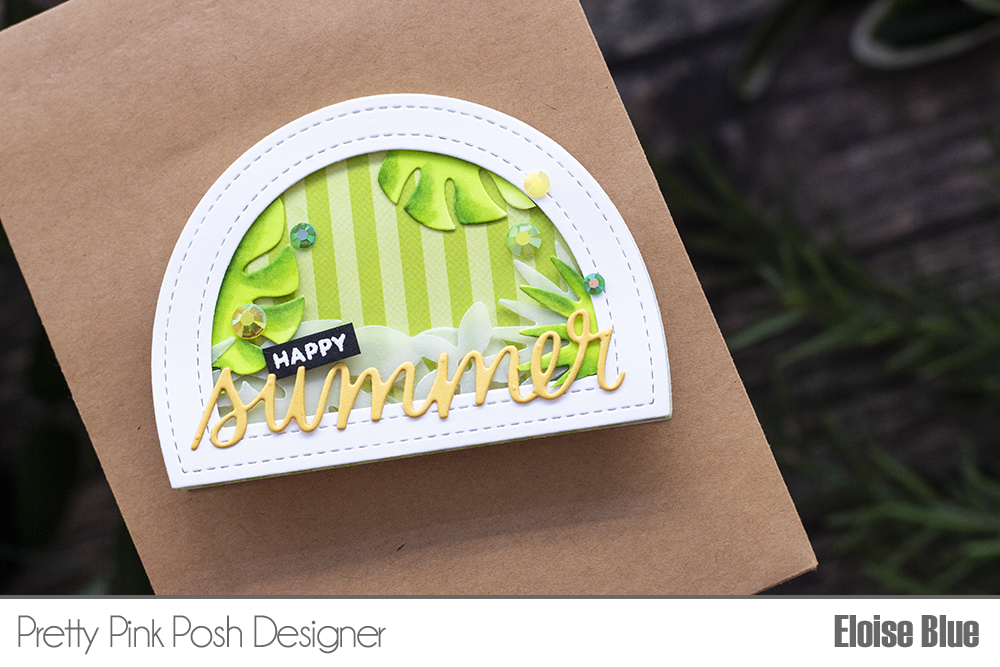
For my final card, I used the Tropical Frame Die as well as the Happy Summer Script Dies. I adhered my green striped patterned paper onto the Window Frames card base. I then took my vellum Tropical Frame and cut off the top of bottom pieces. I adhered one down directly onto my card, and then one onto the back of my extra window frame piece that had been die cut from the centre as well. I added foam tape onto the back and adhered it into place. I then took the white Tropical Frame Die and coloured in a few of the leaves with green Copic Markers. I then cut them out from the frame and adhered them randomly around the card for more interest. Lastly, I adhered the ‘Summer’ part of the sentiment onto the bottom and then used the Halloween Pals Stamp Set for the tiny ‘Happy’ which I white heat embossed onto a thin strip of black.
Copic Markers Used: YG01, YG23, YG07, YG67
Thanks so much for stopping by today. The entire release is on June 10th and be sure to visit the blog tomorrow for the full reveal and bundle information!