Pretty Pink Posh Shop

| |

Tutorial: Watercolors on Die Cuts

Hello everyone, Joni here sharing the new Stitched Foliage Dies. These dies set are not only perfect for fall but it can work for everyday use as well.
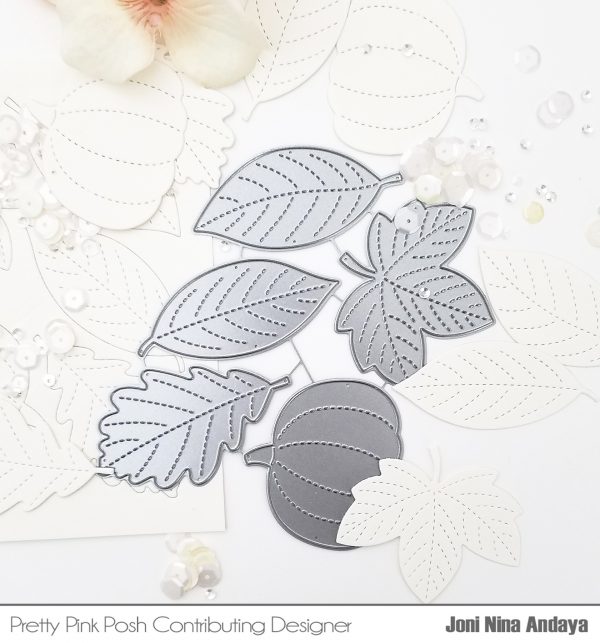
To begin, I first die-cut the pieces on a watercolor paper.
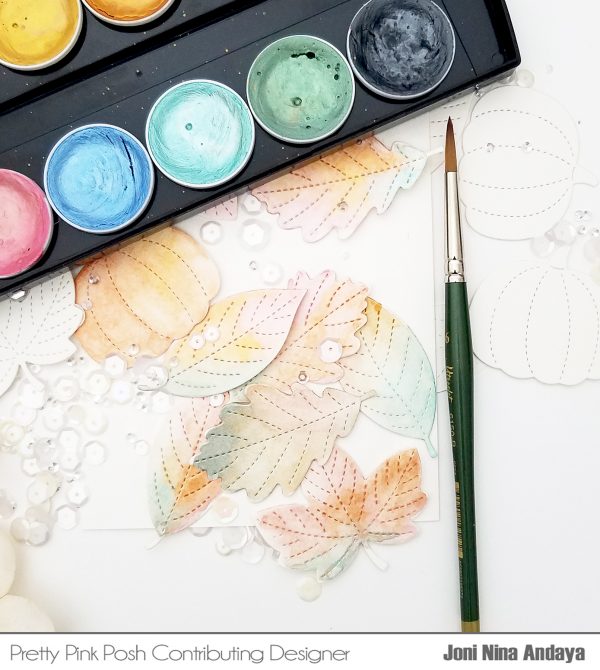
Then, I watercolored some of the pieces with Prima Marketing Metallic Semi-Watercolor Cake.
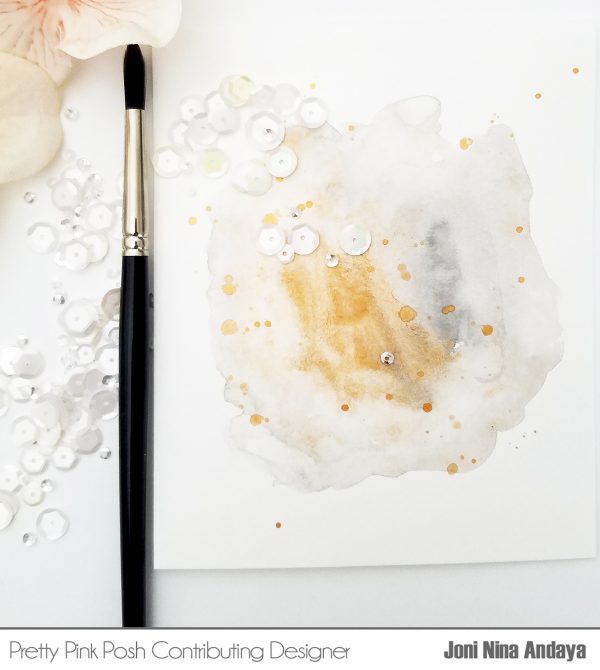
Next, I cut an A2 watercolor panel and watercolored using golden yellow and black as my background. Let it dry, then I added some watercolor splatter using the same golden yellow color and let it dry.
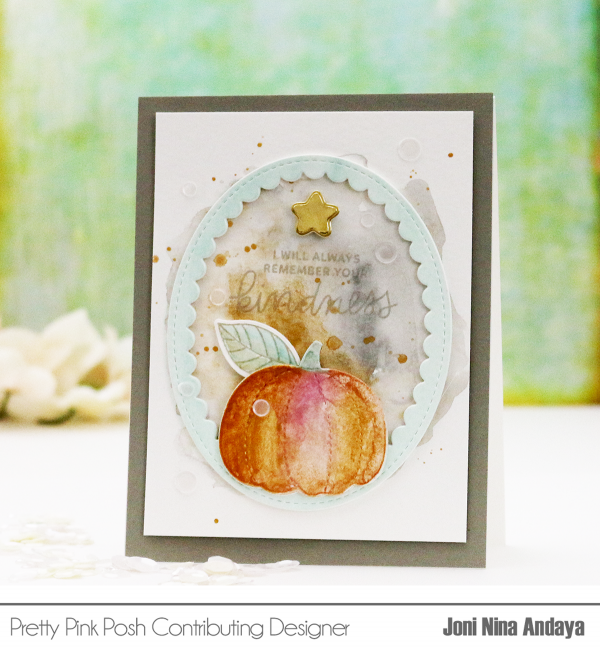
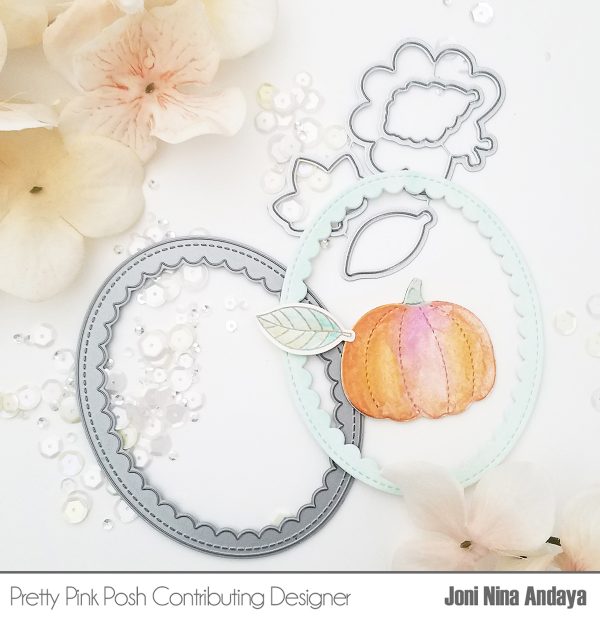
I also watercolor another A2 card with a light aqua color, let it dry and then die-cut using the Scallop Oval Dies (large oval). I then die-cut 3 more oval so I can adhere one on top of the other to make a sturdy die-cut piece. I also used the leaf from Happy Turkey Stamp set, watercolored and die-cut using the Happy Turkey Coordinating Dies.
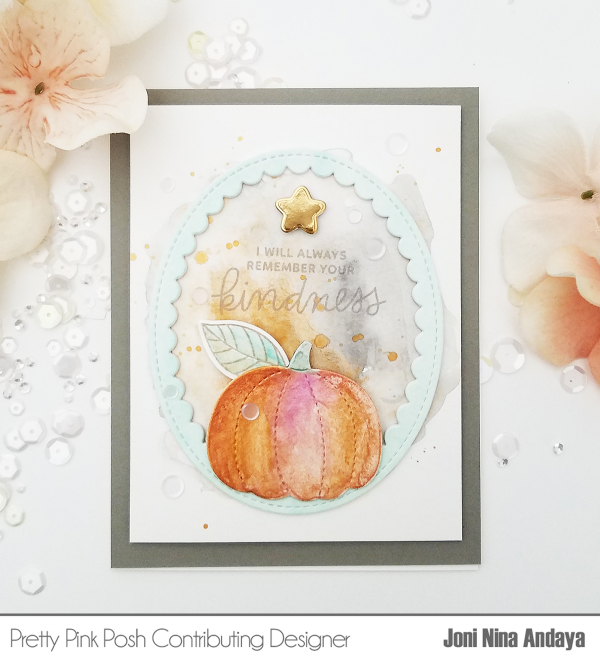
Next, I stamped the sentiment from Thoughtful Greetings on a center of my panel. Then die-cut a gold star from the new Angel Friends Coordinating Dies and adhered on the card. I also added the new Marshmallow Confetti Mix to finish the card.
Be sure to mark your calendar for later this week. We are having our two day blog hop with lots of special guests using our new release.
I hope you guys enjoyed today’s tutorial! Until next time. Have an amazing day!

|

September 2017 Release Now Available!

Hello, friends!

The September 2017 Release is now available in the Pretty Pink Posh Shop and select retailers that carry our products. If you missed our post yesterday, we revealed all of the products in picture form, but if you would like to see them also in a video, Eloise has one for you today!

Watch the video above   I   Watch the video in HD on YouTube  
We’ll have lots of posts and videos coming soon with the new products. Plus, we’ll have a two day blog hop later this week with the design team and guests with even more inspiration! Thank you to everyone who continues to support my dream. I’m so grateful for each of you!

September 2017 Product Reveal + Release Bundles

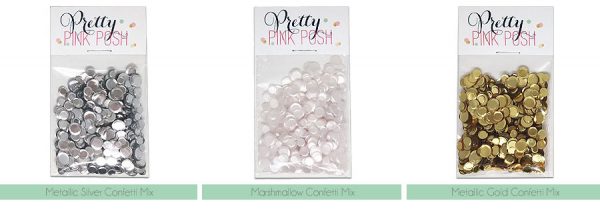
I hope that you have enjoyed all the sneak peeks leading up to the September 10th release. We are so excited about these new products! This month we have three brand new confetti mixes that feature three sizes in each package (4mm, 5mm and 6mm) in Metallic Silver, Marshmallow and Metallic Gold!

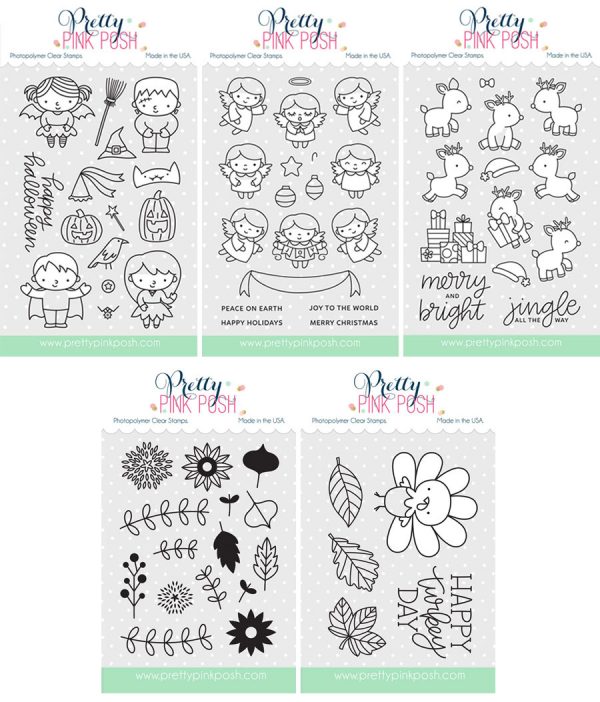
Here’s a look at the five new stamp sets that will be available for purchase- Halloween Friends, Angel Friends, Reindeer Friends, Autumn Blooms and Happy Turkey.

*Each of these also has a coordinating die set that will be sold separately.

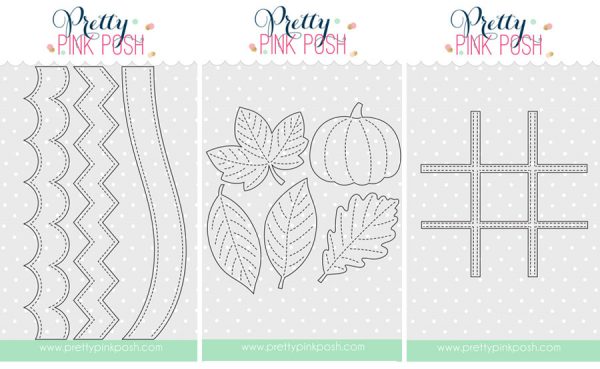
Here are the three new individual die sets that will be available- Stacked Edges 1, Stitched Foliage and our Tic Tac Toe die.

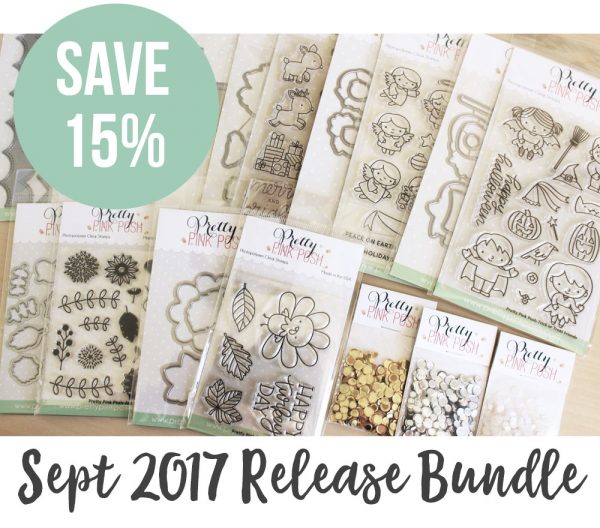
Based on requests from the last two releases, I have a limited amount of bundles available where you can buy the whole collection in one easy click. Plus, you’ll get 15% off! These are in the shop NOW!

We will see you tomorrow as we show you the new products in a video and the individual products go live in the shop!

|

Sneak Peek: Reindeer Friends

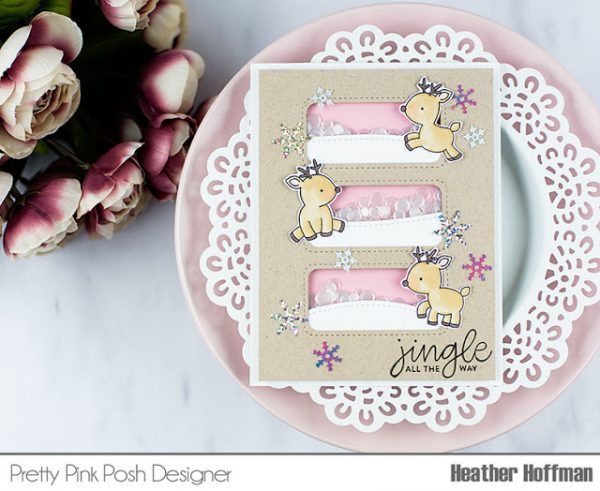
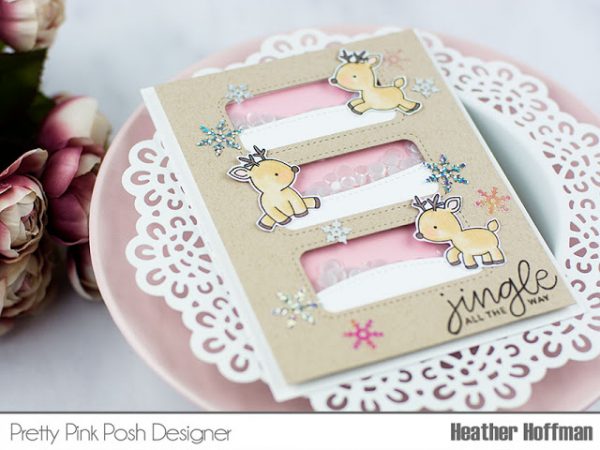
Good morning! Heather here to share a card with you using some of the BRAND NEW stamps, dies, and embellishments coming to Pretty Pink Posh in September! Seriously – there is some ADORABLE stuff coming I can’t even stand it! Today I get to reveal a look of the Reindeer Friends stamp set!

I absolutely LOVE these darling new Reindeer Friends – ACK! So much cuteness! I colored them in with Copics and then made some snowy hillsides for them to sit, walk, or jump on by using another new die – Stacked Edges 1 – paired up with the previously released Stitched Pieces die. (As always, I love how PPP products always work so well together with each other – new or old!). I filled them full of the new Marshmallow Confetti Mix, then sprinkled on a few snowflakes from last years Snowflake Sequin Mix.

I hope you enjoyed this sneak peek. Be sure to join us tomorrow as we reveal all of the new products.
|

Sneak Peek: Happy Turkey

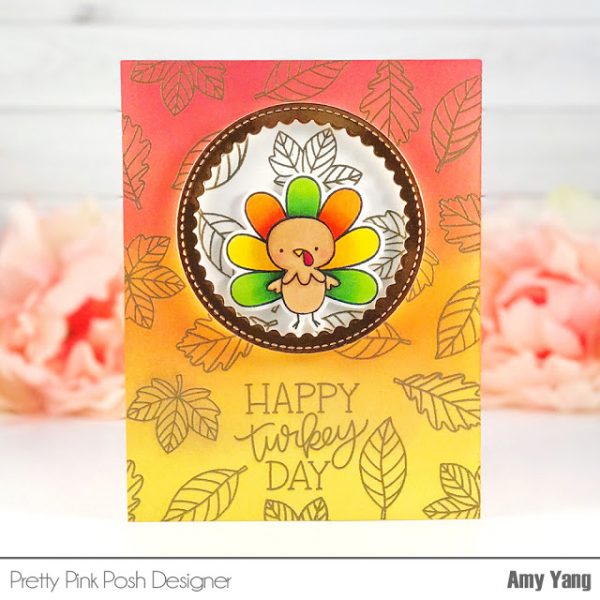
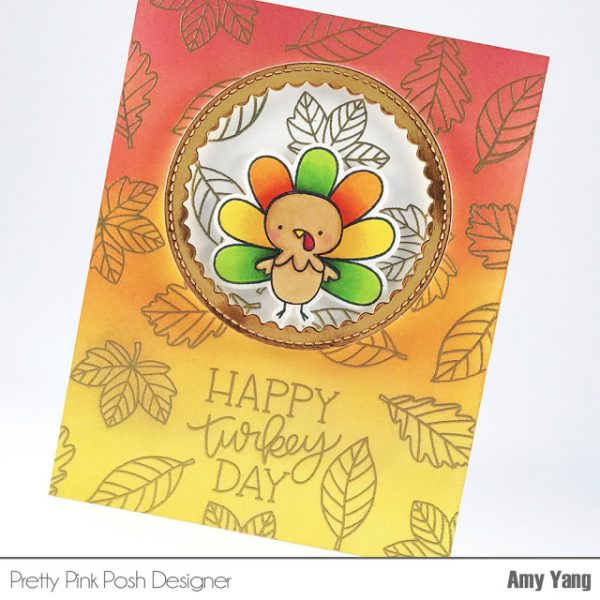
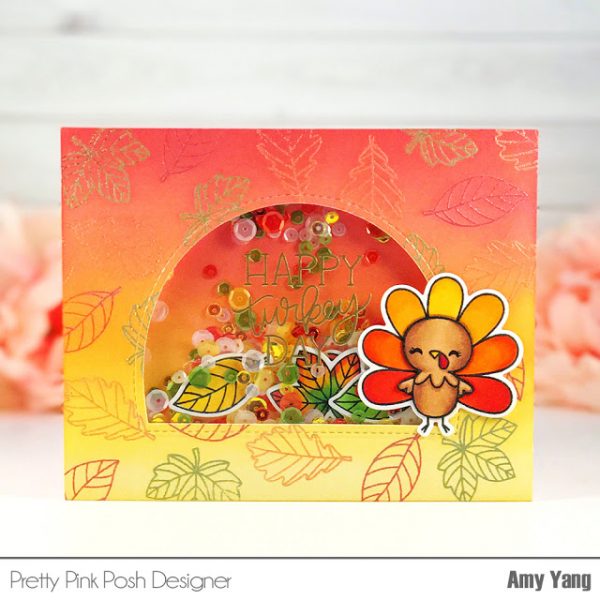
Hello everyone! Amy Y. here with two cards featuring the upcoming 3″x 4″ stamp set Happy Turkey (releasing on September 10th).

To create the background, I stamped the leaves and the sentiment included in the Happy Turkey set on an A2 Bristol cardstock with Versamark ink. I applied gold embossing powder and heat set it.

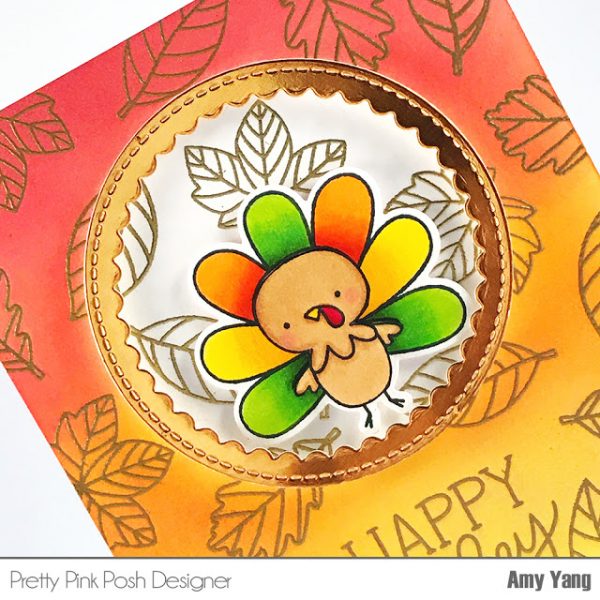
To create my focal point, I die-cut masking paper using the smaller scallop circle from Scallop Circles, and adhered it to the panel. Then, I inked the panel using Fired Brick, Abandoned Coral, Spiced Marmalade and Fossilized Amber Distress Oxides with a blending tool. After, I removed the masking paper. Using the same scallop die, I die cut gold cardstock. I mounted the die-cut circle with foam tape as shown.

I stamped the adorable turkey twice on smooth white cardstock and colored it with Copic markers. I used the Happy Turkey coordinating die to cut one of them out. With the other image, I fussy cut just the body and adhered that on top of the die-cut turkey with foam tape. This is not a necessary step, but I do this sometimes to add fun dimension to the image. Lastly, I mounted the turkey inside the circle and adhered the panel to a card base.

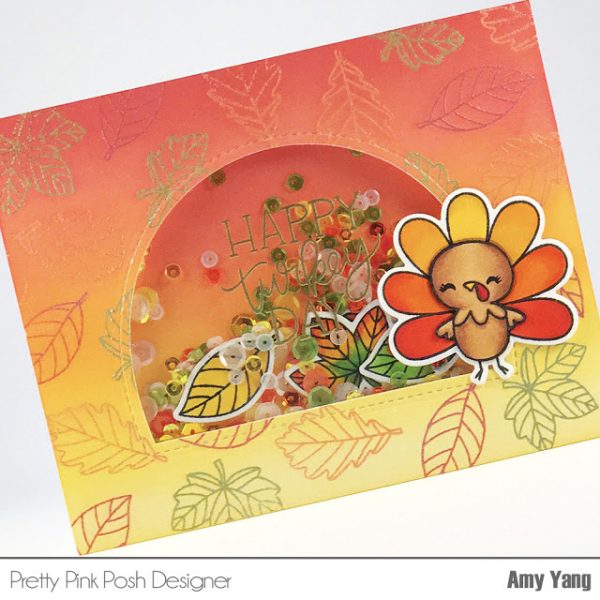
To make front panel for the second card, I stamped the leaves an A2 Bristol cardstock, using Fired Brick, Spiced Marmalade and Peel Paint Distress Oxides and applied pearl embossing powder. Afterwards, I heat set it and inked it using the same colors as the first card. To make the background panel, I inked another A2 Bristol cardstock using the same colors.

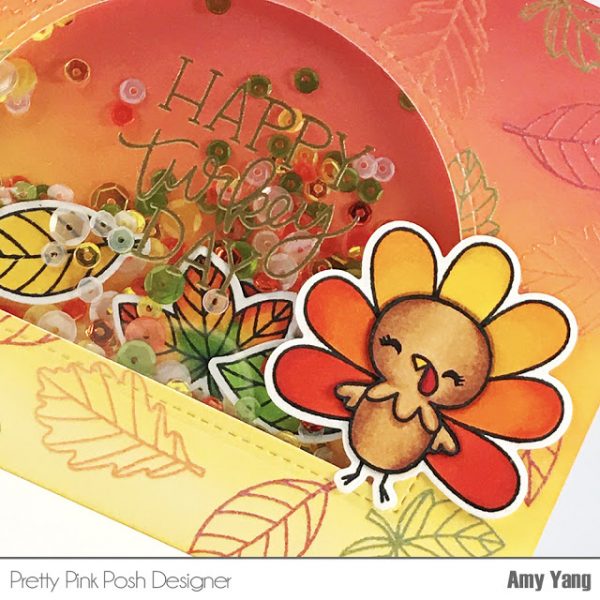
To create the window, I die-cut the front panel with the larger die from Window Frames. I heat embossed the sentiment using gold embossing powder on a trimmed heat resistant acetate, and adhered that behind the window panel. I mounted the window panel to the background panel using two layers of double sided foam tape.

Inside the shaker, I added my own mix of Pretty Pink Posh Sequins and some leaves that were colored with Copic markers and die-cut. For the turkey, I used the same process as the first card, but I made small changes to the eyes with a Copic liner. To finish, I adhered turkey to the front of the shaker window and adhered the panels to a card base.

I hope you enjoyed this sneak peek. Make sure to join us again tomorrow for a look at another new set!

|

Sneak Peek: Autumn Blooms

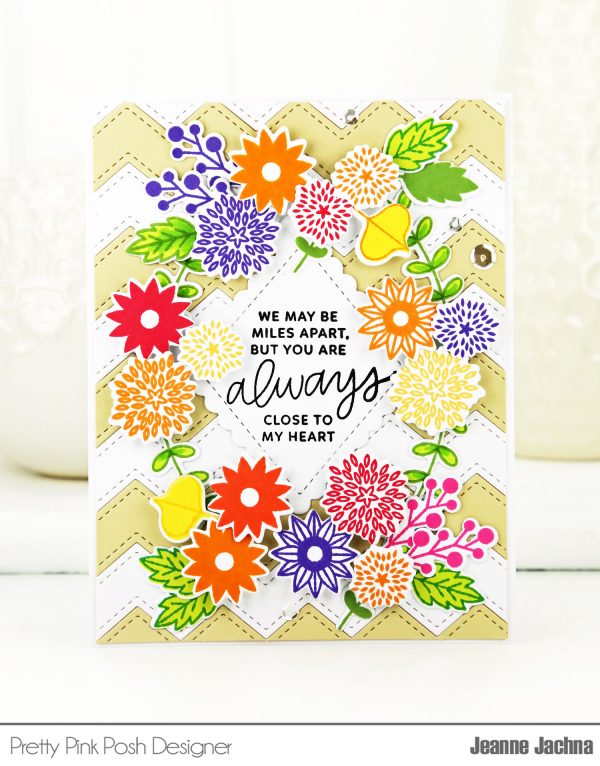
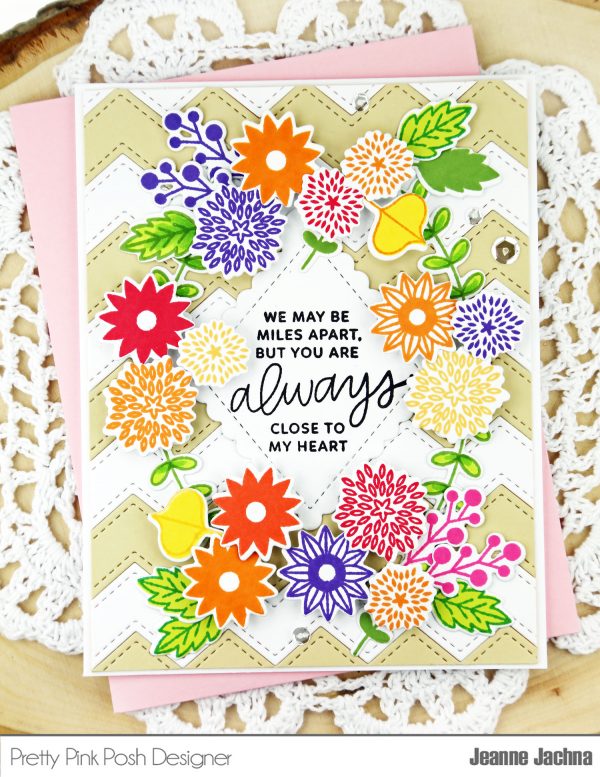
I’m so excited to be sharing the new Autumn Blooms stamp set with you today!  The set is small .. only 3×4” but don’t let that fool you!  This set has LOTS of possibilities.  The set has a mix line drawn flowers and leaves perfect for coloring (I think they look amazing “as is”, or if you like there are also solid images that you can stamp over the outlines to complete the image. Here’s what I made….

 See what I mean.. the solid flowers can be stamped over the outlines, or you can leave them separate as I did here. The only image I double stamped was the leaves.
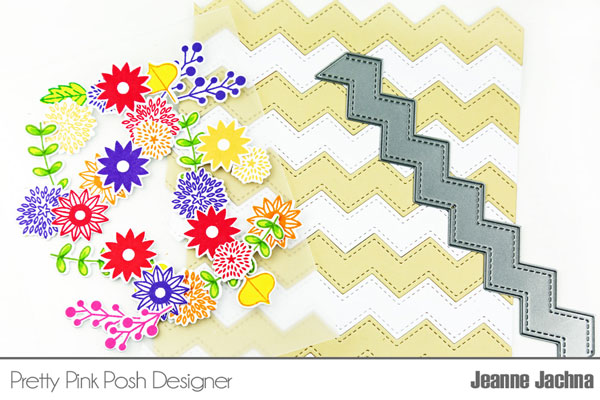
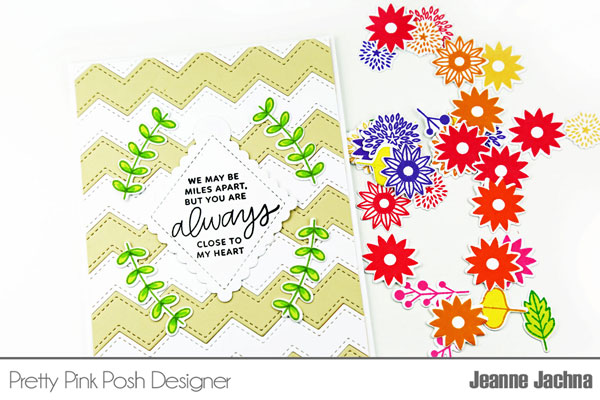
I started with a neutral background of  stitched zig zag borders from the new Stacked Edges 1 Die set.  I LOVE THIS SET. There are three dies in the set that you can use as borders or stack like I did to create an amazing background.  The color combinations are endless.  I chose neutrals for this background so it wouldn’t compete with the colorful flowers.  I find it easier to attach the die cut strips on their reverse side, vs attaching to a sheet of card stock covered with adhesive.  I feel like I can get the die cut edges together tighter for a cleaner look.

TIP:  Arrange your flowers on a clear piece of plastic to lay over different colors / background papers to help you decide what you like best..

I stamped this sentiment from Thoughtful Greetings on a Scallop Diamond Tag die cut. I’ve got fall on my mind and the sentiment makes me think of those who won’t be able to be with us this year. I placed the larger foliage fronds around the sentiment and will use this layout as my foundation. All I need to do now is add the florals to the layout.

I adhered the florals with adhesive foam tape to add dimension. The leaves are adhered flat to the card base. Check out all the detailed pieces, like the berries, and the bitty stem.

I was tempted to add some gems to the flower centers, but I didn’t want to take away from the beauty of the stamped images.  In the end I decided a sprinkle of sparkling clear sequins would add just the right amount of glam.

I’m already thinking of different ways to use this set.  Just changing the colors will give you different looks.  In fact, I think I see some pink and red poinsettias in these beautiful Autumn Blooms!

Thanks for joining us for another day of sneak peeks. We’ll see you tomorrow!

|

Sneak Peek: Trick or Treat Friends

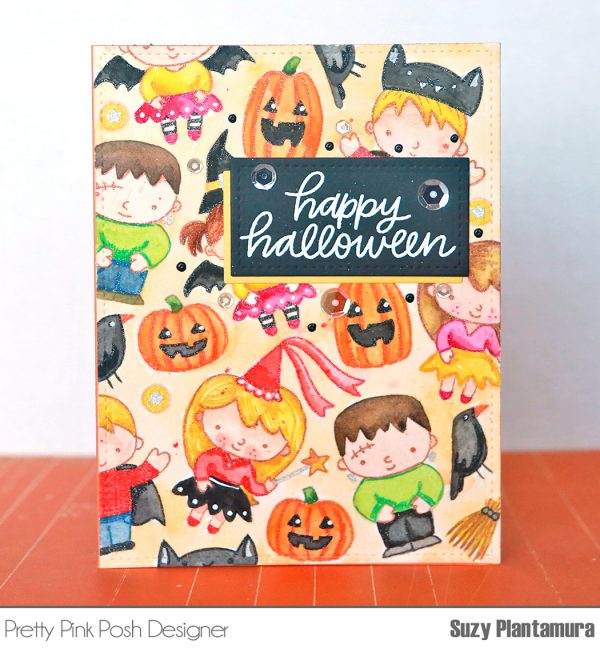
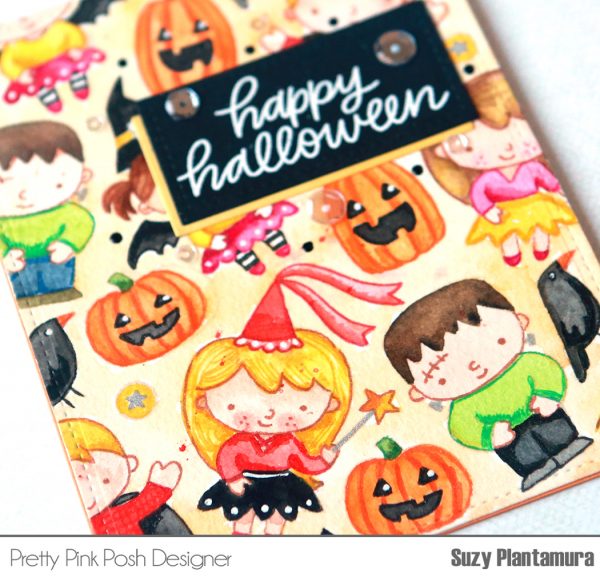
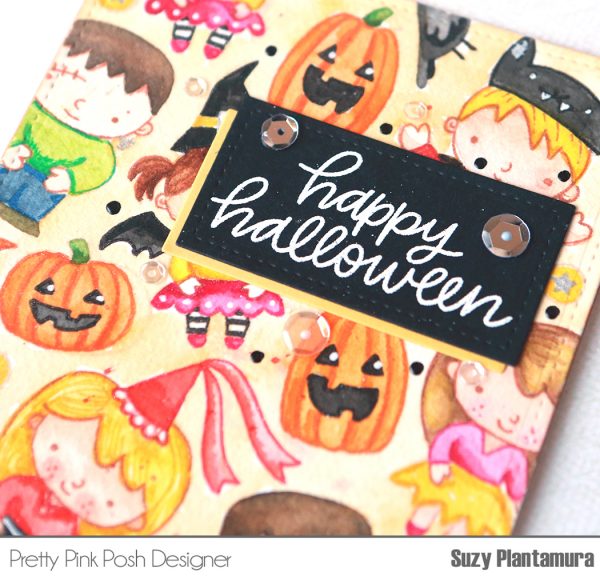
Hi friends – it’s Suzy here to show you one of the brand new stamp sets called Trick or Treat Friends (releasing on September 10th). I’m not a fan of scary Halloween images, so this one is so perfect with these darling little kids all dressed up in costumes! I love that you can add little stamped images to complete their costumes. The pumpkins are perfect for completing a Halloween scene.

Today I am using one of my favorite techniques for this card called random stamping. It works so well with the cute PPP kid images because I can fit all of them perfectly on one card front.

I started with a piece of watercolor paper die-cut in the size of a card front. I use a Misti tool to align a few of the stamps, starting in the center of the paper (you can also do this with just a stamp block, but it will take a little longer). I continue to add a few more each time aligning them together like a puzzle. I prefer my stamped images to not have black outlines, so I use a light tan ink to stamp them. I fill the entire space by stamping some images to overlap the edges of the paper.

Once all of the images are stamped, I paint them in with watercolor. I also paint the background around the images using a wet on wet technique. I wet the background and then drop in a little color here and there letting the colors blend together. Once it is all dry, I use gel pens to outline the images and add details and shading.

To complete the card, I added a sentiment on a stitched rectangle from the Mini Storybook 1 die. I die-cut one rectangle in black and another one in yellow to layer them. I embossed the sentiment from the Trick or Treat Friends stamp set with white embossing powder. I attached the rectangles to the top of the card and completed finished it off with some Sparkling Clear Sequin Mix.

These stamps are so cute it makes me wish I had little kids to dress up in real life again! Thanks for letting me guest blog today Paulina!

I hope you enjoyed this Halloween card today! Join us tomorrow as we reveal another new stamp set from our upcoming release!

Suzy

|

Sneak Peek: Angel Friends

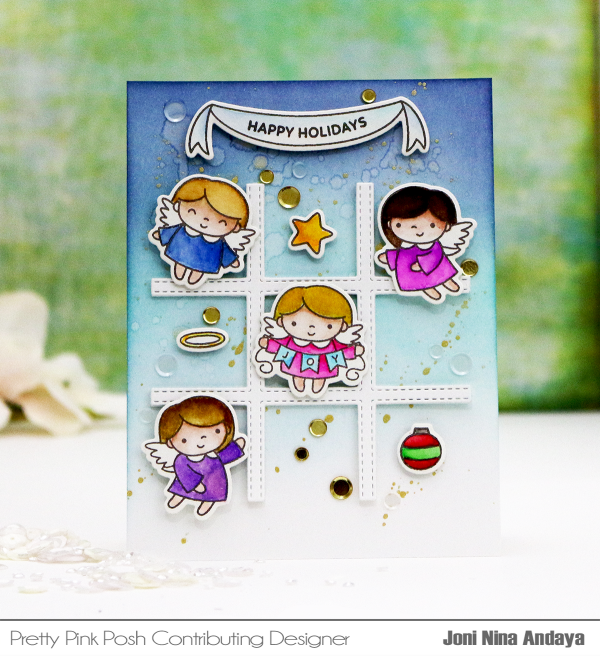
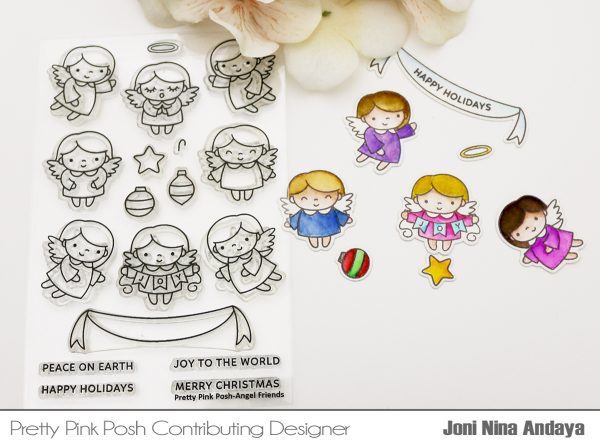
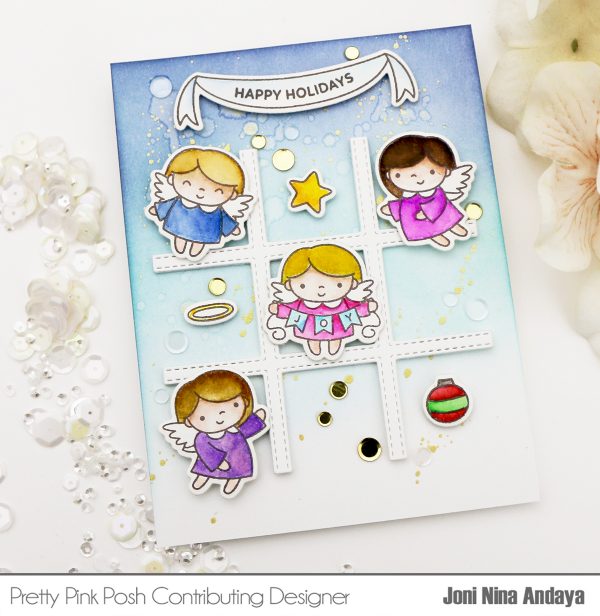
Hello everyone, Joni here sharing the new upcoming Pretty Pink Posh Angel Friends stamp set, Angel Friends Coordinating dies, and Tic Tac Toe die (all releasing on September 10).

To begin, I stamped all my images on a watercolor paper and used the Memento Luxe ink pad in Rich Cocoa. I used this color because it gives you a rich color, but you will have to let it sit for the ink to dry because it’s a pigment ink before watercoloring. After watercoloring I let the image dry and die-cut each piece using the Angel Friends Coordinating dies.

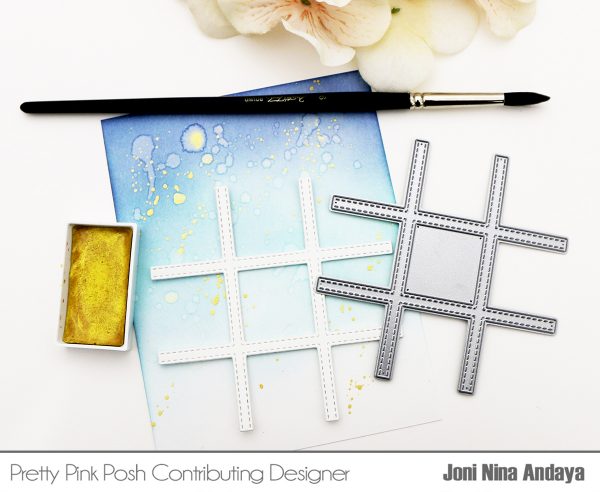
Next, I created my background using Distress Inks in Tumbled Glass and Chipped Sapphire. Then splattered it with water and the gold watercolor paint from Gansai Tambi Starry Colors to give an interest in the background. Once it dries, I added the die-cut Tic Tac Toe in white, I die-cut 4 white cardstock and glue it on top of another to make it a thick die-cut.

Then, I adhered everything together the die-cuts I used foam tape but the Tic Tac Toe I used the Multi Medium Matte to adhered on the card panel.

I also used the new Metallic Gold Confetti Mix and Marshmallow Confetti Mix to decorate the main panel.

Thank you so much for stopping by. I hope you enjoyed this sneak peek. Join us tomorrow as we reveal another new stamp set!

Labor Day Sale!

Many have been asking for a site-wide sale and in honor of Labor Day, we’ll be having a FOUR day sale on all in-stock items in the Pretty Pink Posh Shop!

Please note that whenever I have a sale, there is a huge influx of orders, so processing takes longer than usual. I package each item by hand and appreciate your patience and understanding.

Be sure to join us on Monday as sneak peeks officially start here on the blog for our new release. We’ll have Halloween, Thanksgiving, Christmas and more coming your way September 10th!


|

Creating Your Own “Stencil”

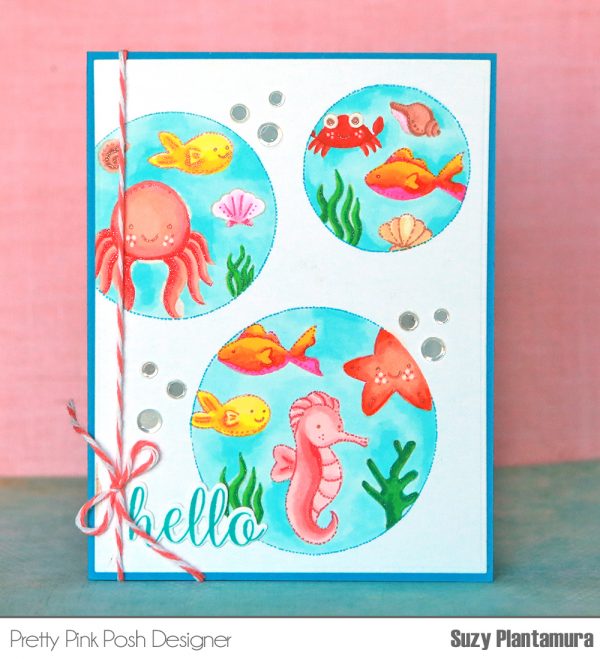
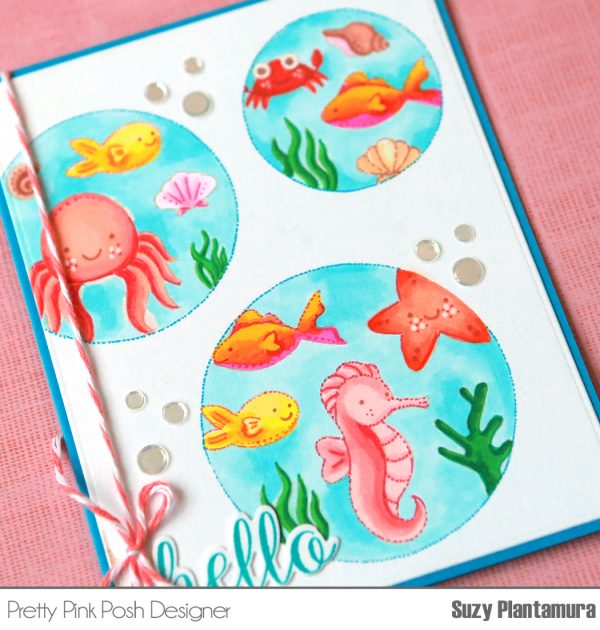
It’s Suzy here today with another card using the new stamp and die sets. I can’t wait to share this one with you as it is my favorite from the cards I have made with the new products. Today’s card highlights the Sea Friends stamp set.

TIP: I tried a new technique for this card. I die cut several size circles out of white scratch paper. I then used them to create stencils, or areas that would be shown on the card so I could stamp inside of them blocking the outside areas. I placed each circle opening on my card base and then stamped the sea friends inside of the circles overlapping the outside of the scrap paper. I used light color inks in the color of each sea animal so they would have no lines around them. I always prefer the look of no line coloring.

Next I colored all the images in with Copic markers and then outlined them with glitter gel pens. I colored in the background of each circle with blue Copics. I outlined the circles with a blue glitter gen pen in little dots.

Once the circles were done, I stamped the sentiment Hello from the Blissful Butterflies stamp set with blue ink. Then I die-cut it with the Blissful Butterflies die set. I placed that on the bottom of the card. I added some of the Sparkling Clear Confetti Sequin Mix to mimic bubbles in sets of three. I finished the card with some twine along the left side.

This card is a little different for me. I love doing random stamping and I felt this was a new approach to it by stamping PART of the background randomly, but not all of it. I want to try it with other sets and in other shapes using some of the PPP dies to block the background.

Thanks for visiting today and I hope you enjoyed my card!

Suzy