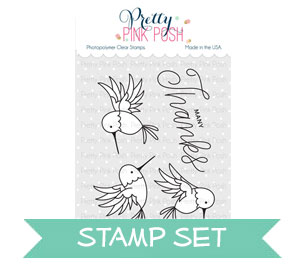
For this card, I wanted to have a lot of colour but still keep my signature white space and I was able to do that by keeping things quite simple with the rule of “threes”. Three items in a triangular pattern are pleasing to the eye. So that is why I chose to place my hummingbirds in a triangle. Not only are my hummingbirds in threes but I also chose three colours and three arrow die cuts.
I wanted to keep the colours to a light-pastel. Maybe mine are a little too dark to call them that but I’m always so inspired by the Pretty Pink Posh design team’s colour choices and thought I’d give a “lighter” look a try. I hope you enjoy this video tutorial and I will see you in August for another!
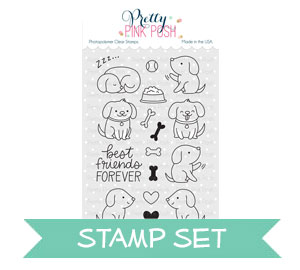
Hello Pretty Pink Posh fans! This is Yana and today I have clean & simple cards to share featuring the Playful Puppies stamp set. This stamp set is filled with images of cute little puppies and some fun accessories to go along with them.
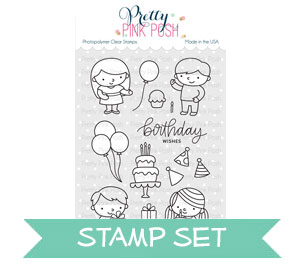
Just like always, I started working only cards by stamping all of the images in copic marker friendly ink onto white paper. I love to mix and match stamp sets and today I am mixing a few Birthday sets. I used images from the Birthday Friends set – balloons, party hats and gifts and stamped some along with my puppies.
I used the following Copic marker colors for my coloring:
E79, E37, E33 and E31 to color the dark brown puppy;
E31, E11 and E00 to color light brown puppy.
B02, B00 and B00
YG13, YG01 and YG00
Y35, Y15 Y13 and Y11
There are coordinating dies available for the Playful Puppies stamp set and also there are dies for the Birthday Friends stamp set so I used those to cut my colored images out. Next, I stamped Birthday Wishes sentiment in black ink and foam mounted images on top.
I trimmed panel to 4 x 5 1/4” and adhered it onto an A2 white side folding card base. I also used a bunch of things to embellish this card and add some details. I started with a shimmer pen to add some sparkle to the gifs and balloons. Next, I added some jewels in Sea Glass andSpring Green and lastly I used my Nuvo Drops in clear and later Glossy Accents to add some dimensional details to the dots on the party hat, gifts, balloons and puppy noses. Nuvo drops will crack if you apply they over a large area, so I used glossy accents for the balloons to prevent cracking.
Happy Birthday Card
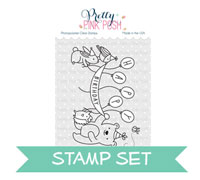
For my next project I decided to use Birthday Scene stamp set. I love Birthday banner and balloons in the background, but I wanted to switch up the critters that are holding this banner to puppies. To do that I needed to do some masking. I used masking paper and scissors and cut the part that I didn’t need masked. I only needed to be careful when cutting next the the areas where critters were holding the banner and the other areas I just cut out very loosely.
I placed my mask onto white cardstock panel and stamped the scene. Next, I stamped and colored a few more puppies and accessories to go on this card.
I decided to use different colors and make this card into a feminine one. I used: RV13, RV11, RV10 and RV00 Y35, Y15 and Y11 YG13, YG01, and YG00
I also stamped little bows using image from the Fly a Kite stamp set. I colored, cut it out and adhered onto the party hats. I used foam adhesive squares and foam mounted my images in place. Next, I trimmed my panel to 3 3/4 by 5” as my stamping was a bit off to the left and I wanted it centered on the card. I foam mounted the stamped panel onto an A2 card base and added pretty jewels in Spring Green and Watermelon, once again I used Glossy Accents to add dimensional detail to the balloons.
Best Friends Forever Card
I have one more project to share and this one features simple pattern stamping. I love to use small stamps to create my own unique patterns so I was excited to use bone images from the Playful Puppies stamp set to stamp a fun pattern for my card.
There are both solid and outline images in this stamp set so first I used the 2 solid bone images and stamped them using Khaki ink onto kraft paper creating a pattern. Next I used just one of the outline bone images and stamped it over some of the solid images in black ink offsetting it slightly. To finish this card I stamped Best Friends Forever in black ink onto white cardstock panel. This sentiment comes from the Playful Puppies stamp set and next I foam mounted the two puppies in place. This time I colored my puppies gray – one is a warm and another one is a cool gray puppy: W1, W3 and W5 C1, C3 and C5
I added a food bowl and some stamped and die cut bones to complete my scene. I also used a white pen and added some white highlights to the puppies and embellished this card using Metallic Gold Jewels.
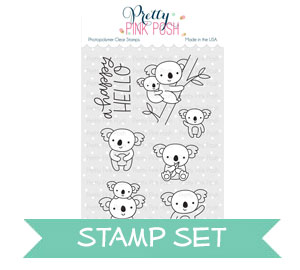
Hi everyone, Eloise here today with a new card and video. Today I’ll be using the Koala Friends stamp set along with the Hello Shaker die to create a windowed shaker card. I’ll be altering my dies to fit my card better and also to share how to stretch your dies as well.
To begin my card today I stamped out the koala’s from Koala Friends onto some Neenah Solar White Cardstock. I then used my Copic Markers to colour them in and used the coordinating dies to cut them all out. Now that I had my die cutting machine out I took the Hello Shaker Die and ran it through my die cut machine partially. Meaning, I only ran through the top half of the die. Then, I pushed down the die a little more, making sure it sits into the grooves of the last die cut area, and ran it through again. This made sure that the die cut was longer than the square it was before. Now that the die was cut, I used an exacto knife to cut away the words from the inside, so now I’m just left with a scalloped frame.
Next up I measured how large the frame turned out to be and cut the same size rectangle out of a card base. I managed to find a rectangle die that was more or less the same size, but you can use an exacto knife and a ruler. I also did the same out of a piece of patterned paper. Once they were both cut, I added a piece of acetate to my card base and then adhered my patterned paper over top to hide the adhesive. I added another piece of acetate to the scalloped frame piece and then added a layer of foam tape around it. I then adhered my Koala images to the front of the scallop frame using foam tape as well. Then to cover the adhesive from the inside, I adhered my blank die cuts to the inside.
Now that my panels were ready, I added in some sequins and seed beads onto my card base. I removed the backers off my scalloped frame and adhered it over top. To finish up my card, I used the Bear Hugs stamp set and white heat embossed the ‘Hello Friend’ sentiment onto a thin strip of cardstock and popped it up on more foam tape.
Thanks so much for stopping by today, I hope you enjoyed and got inspired. Thanks for watching and I’ll catch you all next time.
I am a huge dog lover and have three beagles of my own. I did some simple copic coloring today and my goal was to color the images like my beagles. After I colored the images, I cut them with the coordinating dies.
The card front was created by ink blending distress oxide inks about ¾ of the way down, leaving the top white for contrast. I used Picked Raspberry , Cracked Pistachio, and Fossilized Amber. I finished off the blending with a microfiber towel, then used a Distress Sprayer to create splotches for added depth. I used Kuretake Gansai Tambi watercolors to create black paint splatters. Wait for your card front to dry before die cutting the shaker frame.
I used post it notes to hold the dies in place on the shaker fronts and then adhered acetate. I used one layer of foam tape to create the shaker well and filled the shaker well with my favorite shaker bits from Pretty Pink Posh:
After filling the shaker well, remove the backers on the foam tape and adhere a card front. Make sure to press down firmly so no shaker bits escape!
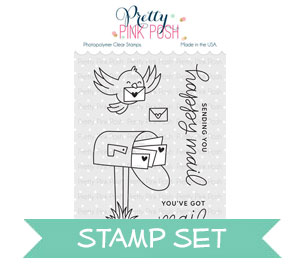
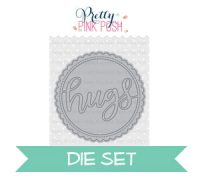
I stamped out sentiments from Happy Mail and Playful Puppies in Versafine. I used the Hugs Shaker die cut in white and adhered it to the acetate frame with glossy accents.
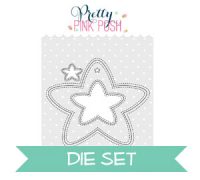
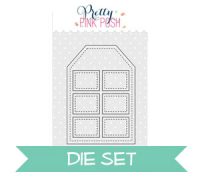
I had the inside pieces of the Window Frames die and Stitched Stars left over. I thought it would be cute to stamp “You make life fun” from the Simple Sayings: Life stamp set and use the die cut to decorate the inside of the card. I used a little red heart to embellish the remaining card.
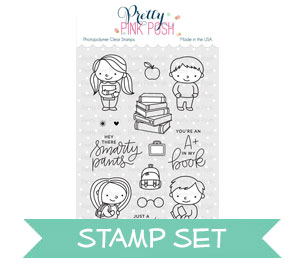
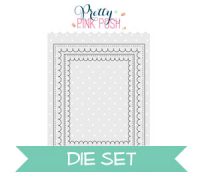
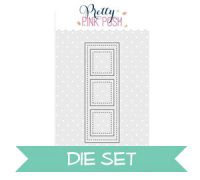
Hello everyone, Eloise here and for today’s video I’ll be sharing another 3 Cards 1 Stamp set video, using the brand new School Friends stamp set. This set was perfect because it had a ton of images and also included 3 sentiments. I also tried to keep these cards quite simple, so I just used three small die sets; Scallop Frames, Stitched Duo 1 and Stitched Film Strip and then I also just pulled in a few colours of Distress Inks to make my backgrounds as well.
To begin my cards today, I first started off with stamping, colouring and die cutting all my images. I stamped pretty much two of everything and used a colour combo I found on Pinterest for my colour inspiration. Once they were all coloured and die cut, I could assemble my cards together.
For my first card today, I die cut two of the Stitched Film Strip from some white cardstock. Then I added foam tape to the backs and set them off to the side. For my background, I used Evergreen Bough, Peacock Feathers and Cracked Pistachio and ink blended a gradient onto some watercolour cardstock. I then flicked some water onto my background, picked it up with a paper towel and dried it off with a heat tool.
Next, I arranged all my images onto the base, figured out where I wanted the sentiment and stamped the ‘Hey There Smarty Pants’ into one of the gaps with black ink. I then adhered down my frames over top and adhered the images inside with foam tape as well and that finished off my first card.
For my second card, I pulled out the Scallop Frames and cut them twice out of some white cardstock. I then adhered some foam tape onto the backs of the frames. For my background I again went for a simple ink blended look. This time I used Lucky Clover, Mowed Lawn and Twisted Citron and repeated the same steps as before. I dried it off with a heat tool and adhered my frames at an angle into place.
I then took out a few images and arranged them into place as well. I adhered them down with flat adhesive. For my sentiment I used the ‘You’re An A+ In My Book’ sentiment with more black ink onto the background as well and that finished up my second card.
For my final card, I wanted to make a mini card; something that would be perfect to put into your kids lunchbox with a little note for their day, or what have you. So I took the Stitched Duo 1 and cut out two tag shapes; one from watercolour cardstock and one from plain white cardstock. I ink blended some Carved Pumpkin and Spiced Marmalade ink onto the bottom of the watercolour tag and then ran it through my Big Shot Machine with the geometric embossing folder from We R Memory Keepers. I then took the second tag, and scored the top edge with my scoring tool. I added adhesive onto the flap and adhered it to my coloured tag and that created my mini card base.
To finish up, I adhered down the remaining images with some foam tape onto the bottom and then for the sentiment, I white heat embossed the ‘Just A Note’ sentiment onto some black cardstock. I cut it down to a strip and adhered it on the right hand side of my card and that finished off the last card.
Thanks so much for stopping by today, I hope you enjoyed and got inspired. I’ll catch you all next time.
Hi Crafters, Justine here and I’m back with you for another video tutorial this month! I hope you are loving the new release as much as I am! Today I wanted to create an elegant, yet easy card tutorial. You can use stamps and dies from this release or any of the fabulous Pretty Pink Posh stamps in your stash to try this out.
I started off by die cutting the Hello Shaker Die out in white cardstock. I grabbed some Himalayan Musk Embossing Powder by Wow and embossed the die cut three times. This creates a very thick, almost chipboard like embellishment. It’s a favourite technique of mine because you get a really smooth impression on the embossing powder.
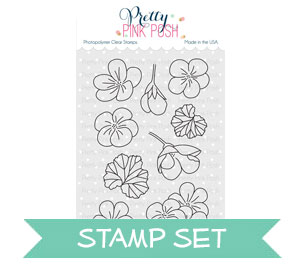
I then stamped out a background using the Geraniums stamp set in black on a white card panel. To fill in the gaps, I used a little image from the School Friends set– it was the perfect filler stamp!
I glued the die cut to another die cut (off-center) in black cardstock to make it pop off the card. You could also challenge yourself to a more complex card by turning this die into a shaker card! If you enjoyed my video, be sure to check out my personal channel for weekly videos.
The June 2018 Release is now available in the Pretty Pink Posh Shop and select retailers that carry our products. If you missed our post yesterday, we revealed all of the products in picture form, but if you would like to see them in a video, Eloise has you covered!
Hello, Gemma here today to share a card featuring the adorable new Koala Friends set. On this card, I’ve teamed this new release set with some previously released PPP products.
I began by die cutting the Storybook 1 die from white card. I adhered the frame onto a kraft card base. On the frame pieces, I added a blend of distress oxide inks in the colours Squeezed Lemonade, Wild Honey, and Candied Apple. I love the warm sunset look this gives to the card.
I found the perfect sentiment for my card in the Encouraging Greetings set, stamping it with versafine onyx black ink onto one of the frame pieces. Then I added the koala and the leaves to the card, using foam tape to pop some of the images up for dimension.
To finish my card, I chose some of the gorgeous Metallic Rose Gold jewels, which look beautiful on the sunset background.
Enjoy browsing the Pretty Pink Posh Shop full of the new products. There will be more inspiration with the new release and next week, we’ll have a two day blog hop filled with even more inspiration!
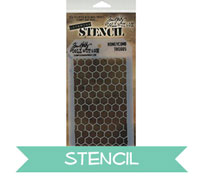
To begin, I first started off with a piece of watercolour paper, taped it down onto a craft sheet and laid over my Tim Holtz stencil at an angle. I then ink blended some Squeezed
Lemonade and Fossilized Amber Distress Oxide Inks over the top. While blending, I was careful to not go over the harsh edges, because this stencil is so skinny, I really wanted there to be full hexagons rather than half hexagons from the edges, so I was just super careful. Then once I was finished blending on that area, I carefully moved the stencil over a little and ink blended a little more so it was wider. Now that I ink blended over the stencil, I wiped it clean and used some Transparent Texture Paste and added it over top using some palette knives. Once it was over the stencil, I removed the stencil and set the panel off to the side to dry.
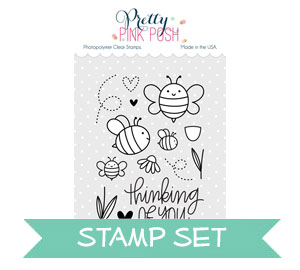
Next, it was time to colour my images. I used some Copic Markers and the images from Bee Friends. I stamped them down, then coloured them in and cut them out using the coordinating dies. I set them off to side once they were cut, and dried off the rest of my panel with a heat tool just to make sure it’s super dry. Now, I used the hexagon border from Stacked Edges 2 Dies and cut that three times from some white cardstock, I popped them up on foam tape and adhered them to the edge of my coloured panel. Making sure they were staggered so they looked a little more random. Next, I added more foam tape to my bee images and adhered them down around also. Making sure to adhere their trails behind them flat onto the background.
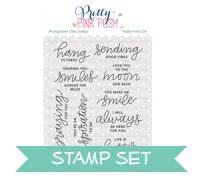
Now that my card was almost complete. I used the Encouraging Greetings stamp set and white heat embossed the sentiment ‘You Got This’ onto strip of black cardstock. I also popped that up on foam tape and adhered it to the right hand side of my card hanging off the edge a little. Lastly, I added some Lemon Drop Jewels onto my card, scattered around my images. I then popped up the entire panel onto a white card base that had a little strip of blue cardstock on the left.
So that finishes up my card today, I hope you enjoyed the project and feel inspired. Thanks so much for stopping by today and I’ll catch you all next time.
Rina here and for today’s cards I wanted to use the Sparkle Dot Patterns 2 stamp set to create giant balloons with Nuvo Crystal Drops Gloss in Simply White. This was my first time trying this technique and the verdict is in – THIS WAS SO FUN! The stamp creates dots where a variety of materials can be adhered to create an image. I used Nuvo drops, but anything can be used such as sequins, confetti, stickles, etc. I cannot wait to figure out what to do next with these fun stamps!
In addition to using the Sparkle Dot Patterns 2 stamp set, I am also using “Birthday Friends” for the girl and boy image. I created a hill using the Scallop Borders 2 Dies.
I colored the images using copic markers and here are the colors I used:
Skin: E21, E50, R20
Hair: E34, E35, E37, E29
Pink: RV13, RV25
Blue: BG10, BG53
Grey: C1, C3, C5
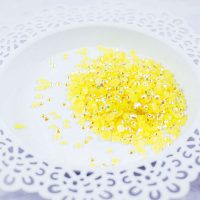
I used Versamark ink to stamp the balloon 3 times into colored cardstock. I placed the Nuvo Drops on each circle of the stamped image. This was really fun and satisfying. Once you get the hang of it, you will want to do this all day! I used twine to create a string from the balloon to the stamped image. If you do not have twine, you can simply draw the balloon strings in. I stamped the sentiment Birthday Wishes from the Birthday Friends stamp set. I added the stamped image so the image looks like it is holding the balloon strings. To finish off the card I added Sparkling Clear Confetti near the sentiment and then adhered my card front to a 4 ¼ x 5 ½ inch card base.
I hope you enjoyed these cards, the Sparkle Dot Patterns stamps sets are super fun and a great new technique to try out. Thanks for stopping by!
Rina here for a tutorial on a get well easel card. I wanted to create a fun card for someone who is not feeling so well in fun spring colors, with fun, playful images. Easel cards are great because they are great to display and they can stand up by themselves, so the recipient can see and enjoy them! A message can be written on the inside or in back of the easel card. What is also great is these cards can also lay flat and be put inside an envelope.
For inspiration I imagined that all my Pretty Pink Posh stamp sets were just one giant stamp set. I picked and chose the images that I wanted to achieve the look I was going for. Here is what I decided to use:
The images were colored in Copic Markers, here is what I used:
Blue Green – BG10, BG11, BG32
Yellow – Y00, Y13
Pinks – R11, R21, R22, R24, R32, R14
Blacks – C1, C3, C5, C7
The background was created using Distress Oxide Inks in Fossilized Amber, Broken China, Cracked Pistachio and Worn Lipstick. A distress sprayer can be used for a soft distressed look. I used the Picket Fence die to ground the bears. For small images, I used the Zots Bling Glue Dots to adhere them to the background.
Here is how I constructed the Easel Card:
Start with an A2 card base, fold the front in, mountain fold style
On the bottom of the mountain fold adhere a 4 ¼ x 5 ½ inch decorated card front (only the bottom of the fold)
On the inside of the card base, figure out where you want the card front to rest
Apply an embellishment or a sentiment on a piece of paper and double foam tape it on the inside card base to allow the card front to rest on


 I began by die cutting the
 I found the perfect sentiment for my card in the
  Enjoy browsing the