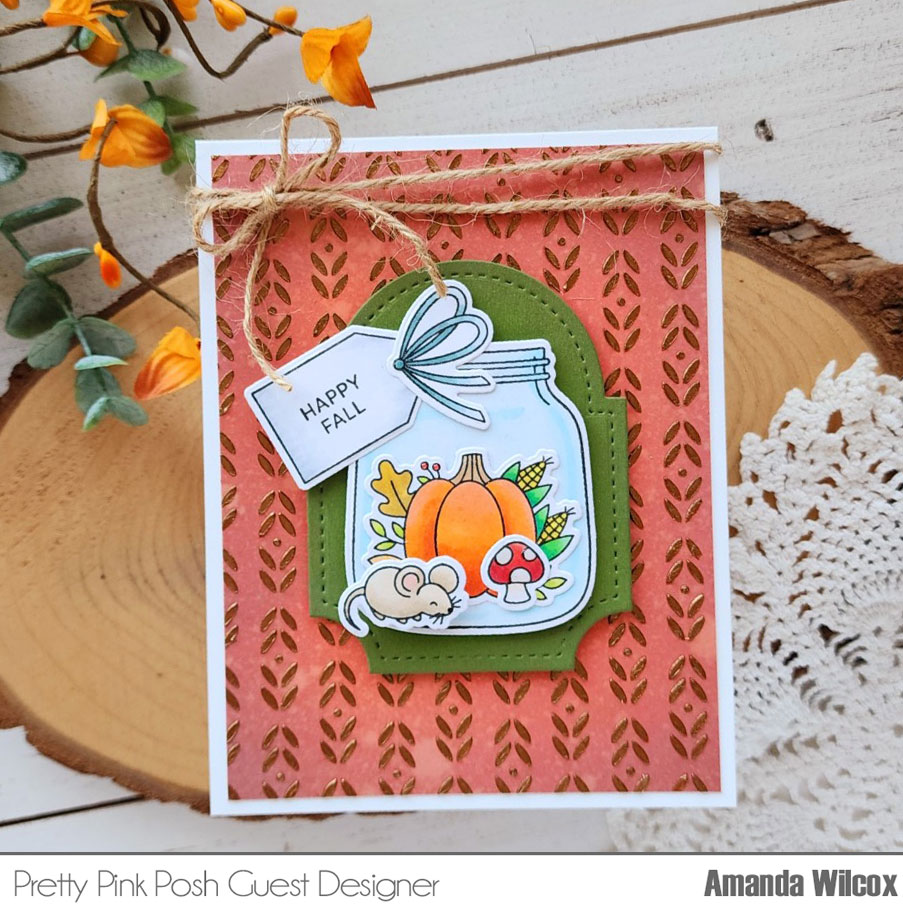
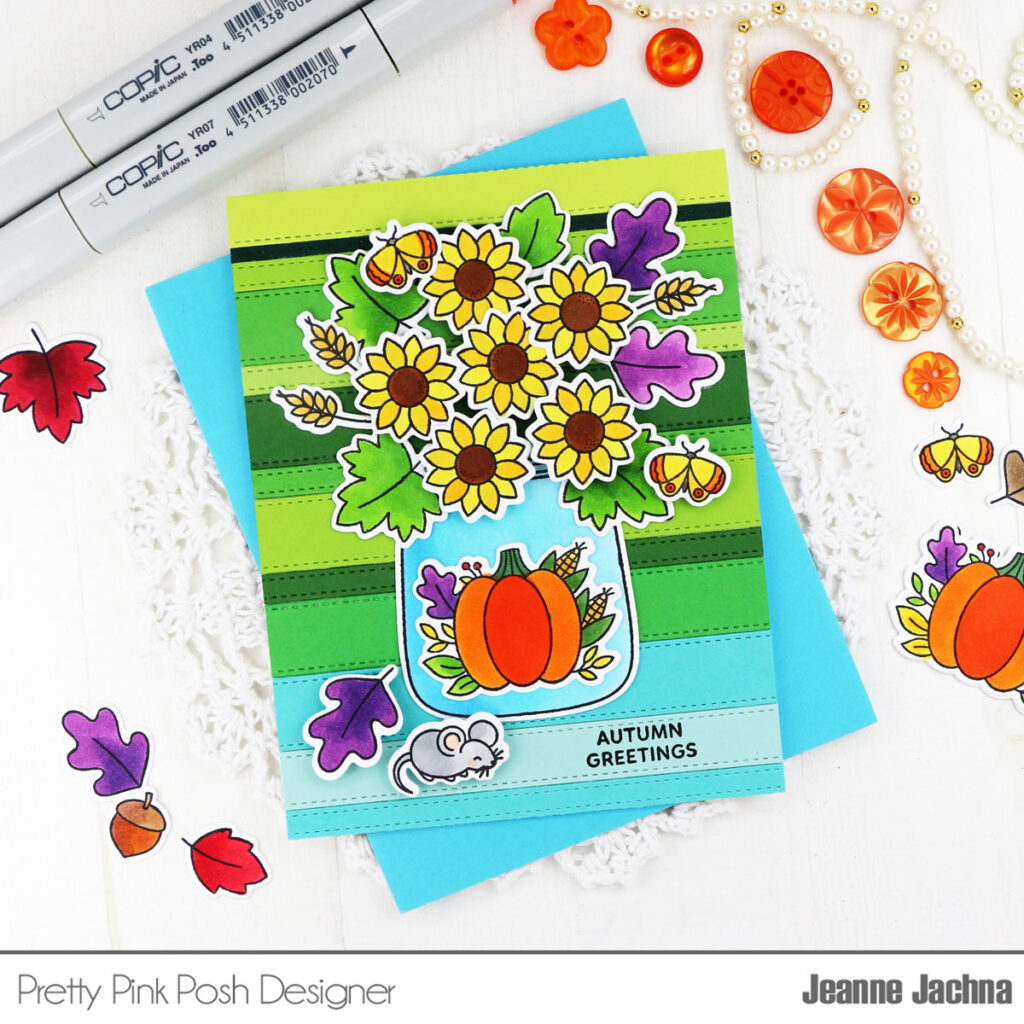
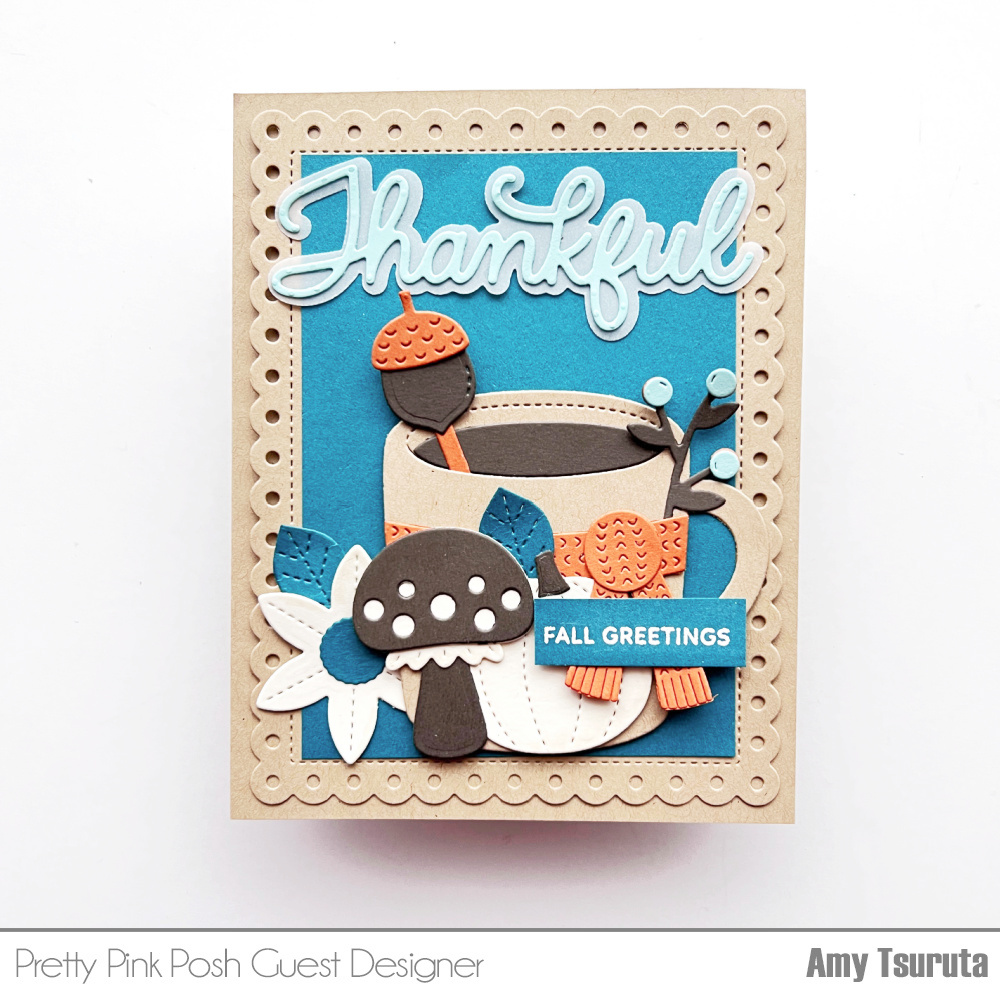
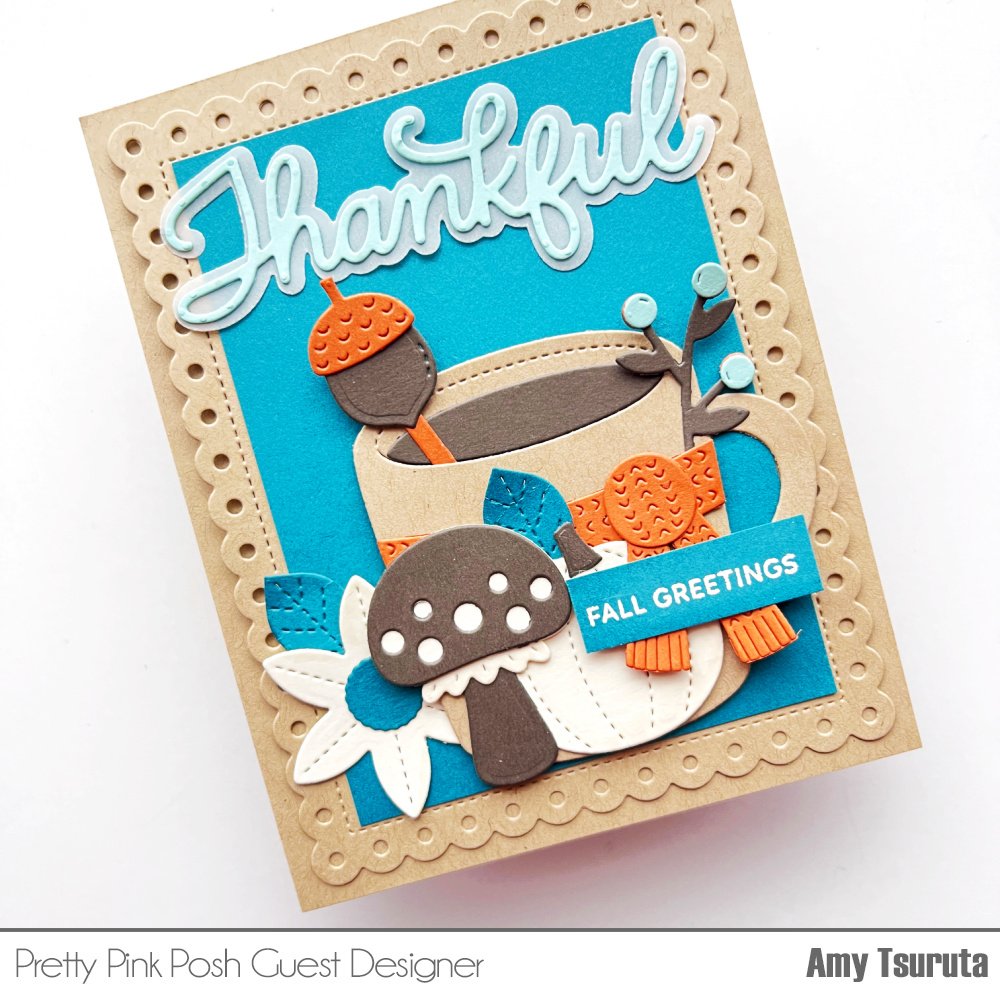
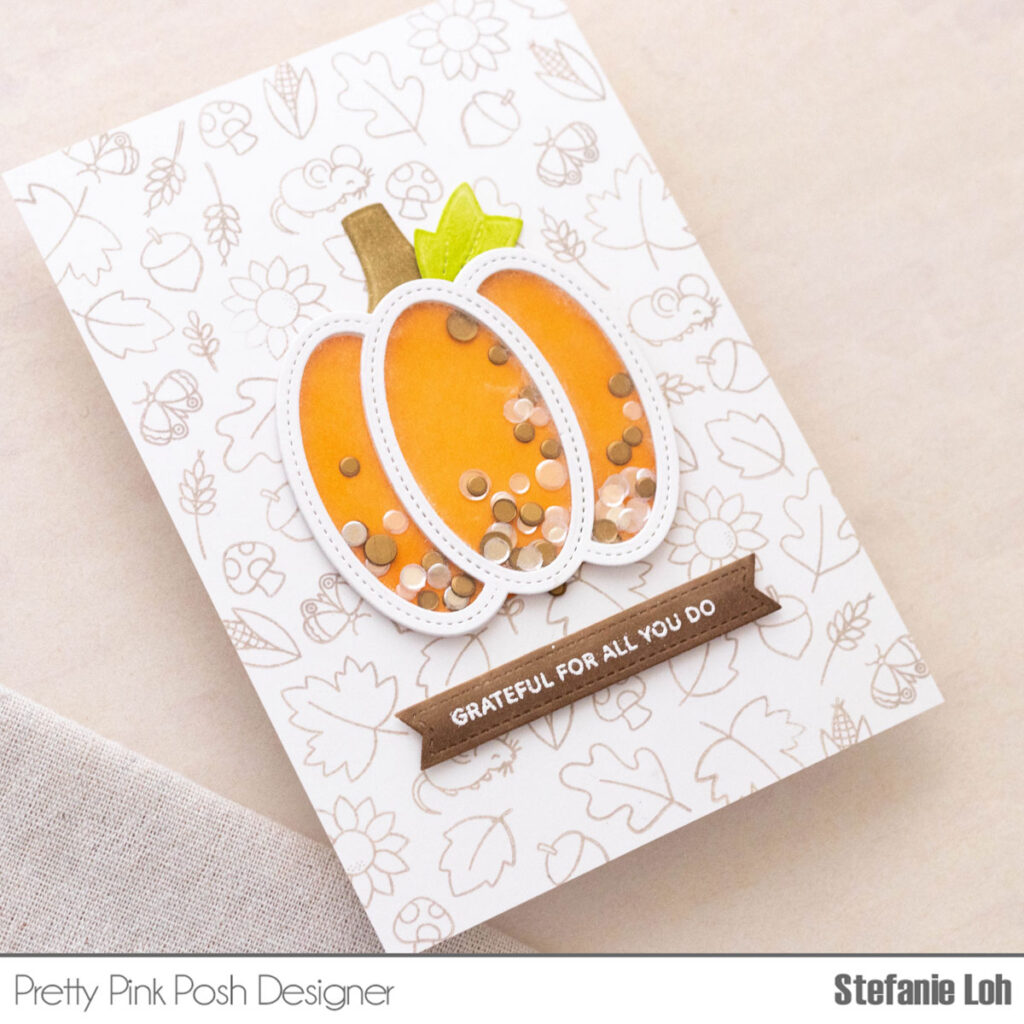
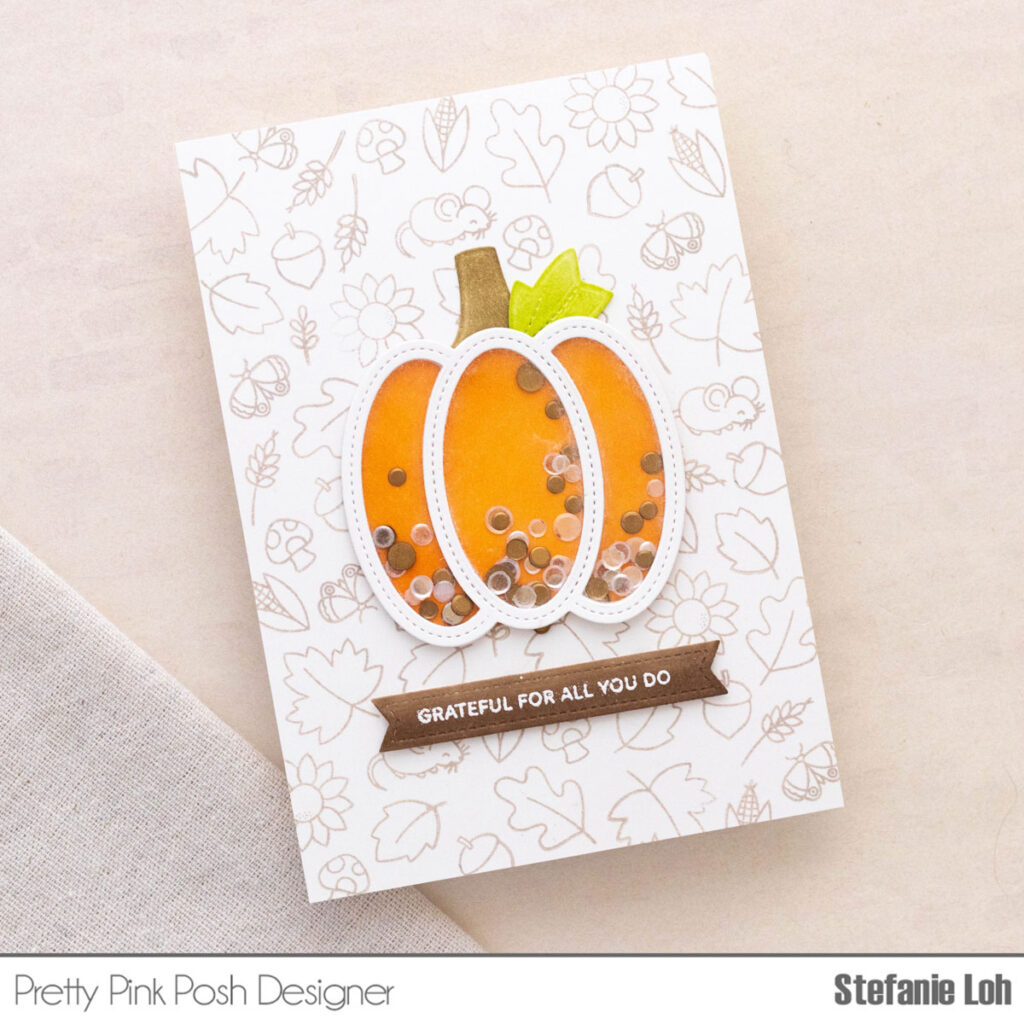
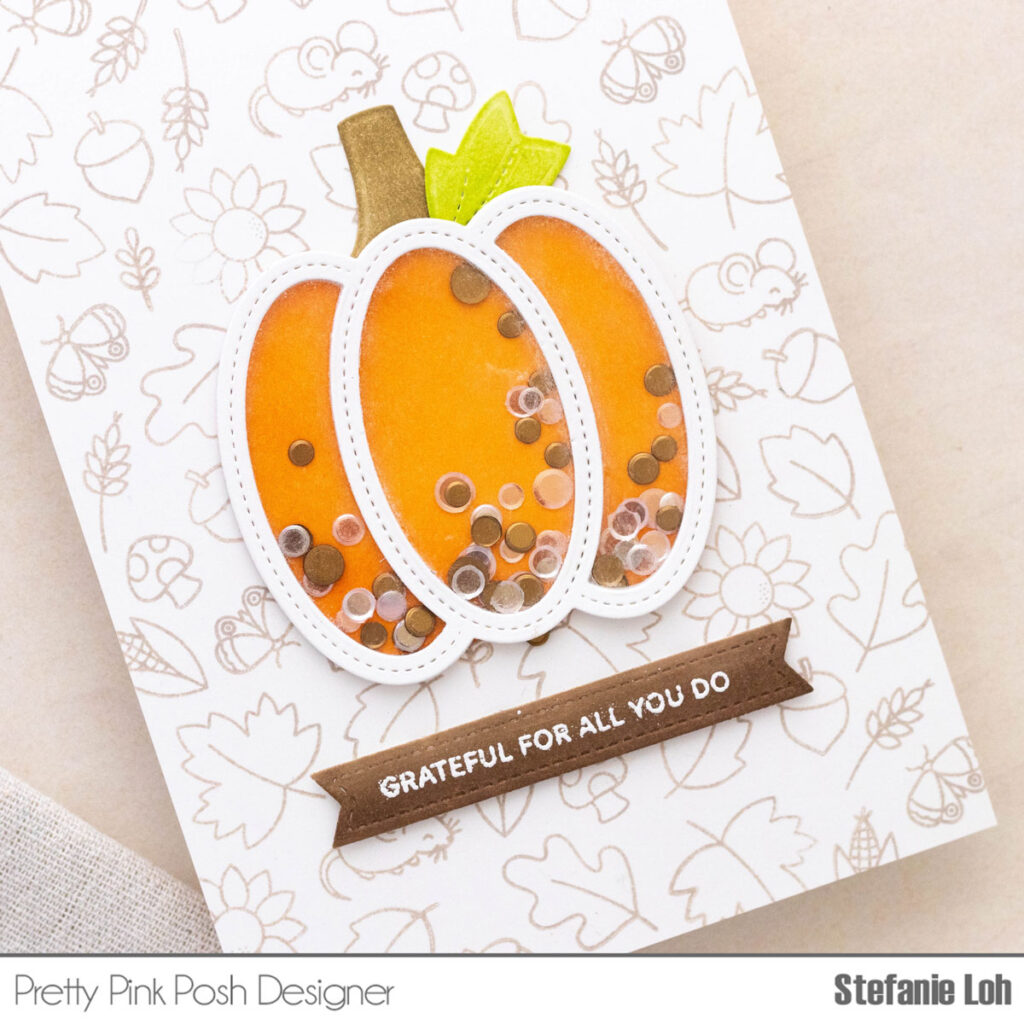
Thankful Pumpkin Kitty
Hey there, crafty friends! Leica here, bursting with excitement to share my cute autumn thank-you card with you. I used the Pumpkin Shaker Die and some other dies from Pretty Pink Posh to make this card extra special. Let’s jump right into the creative fun!
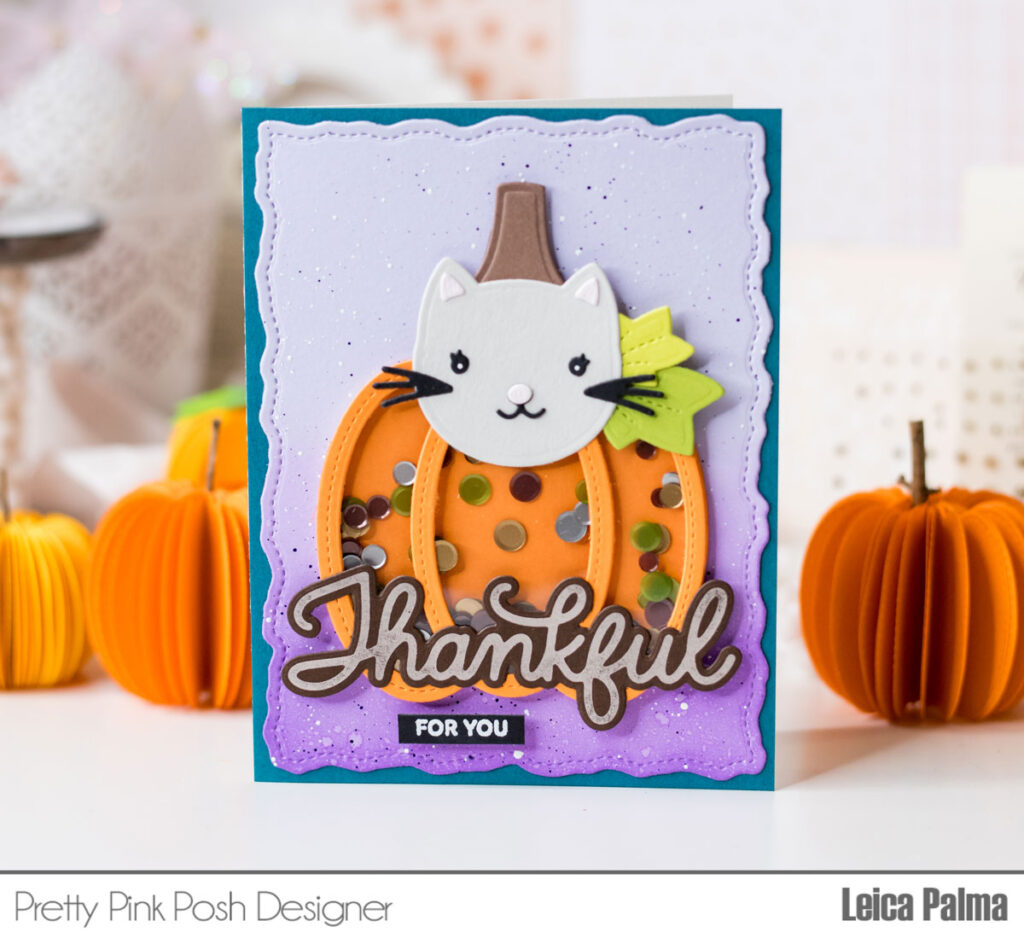
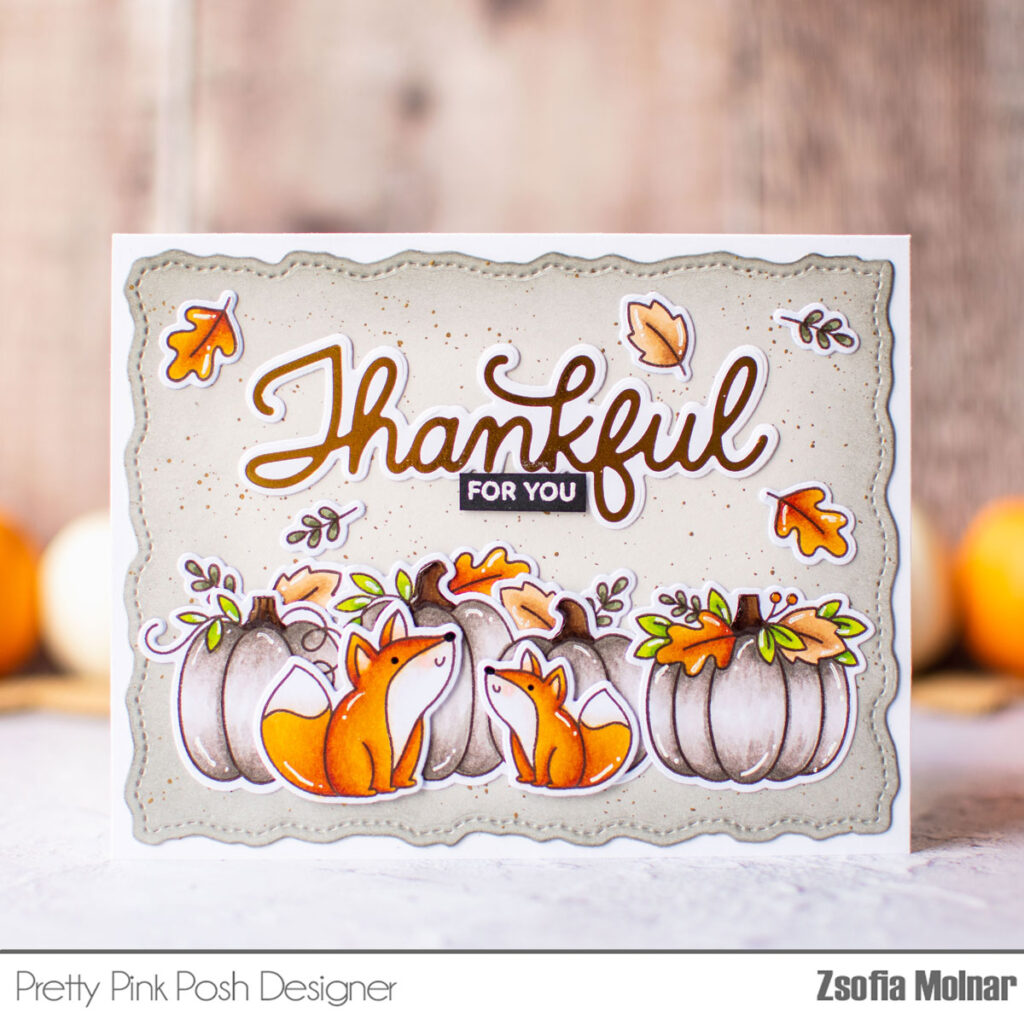
To start, I cut out the largest die from the Stitched Torn Rectangles dies using purple cardstock. Then, I used Wilted Violet Distress Oxide Ink to add a purple touch at the bottom for an ombre look. To make things interesting, I splashed on some purple watercolor and white ink.
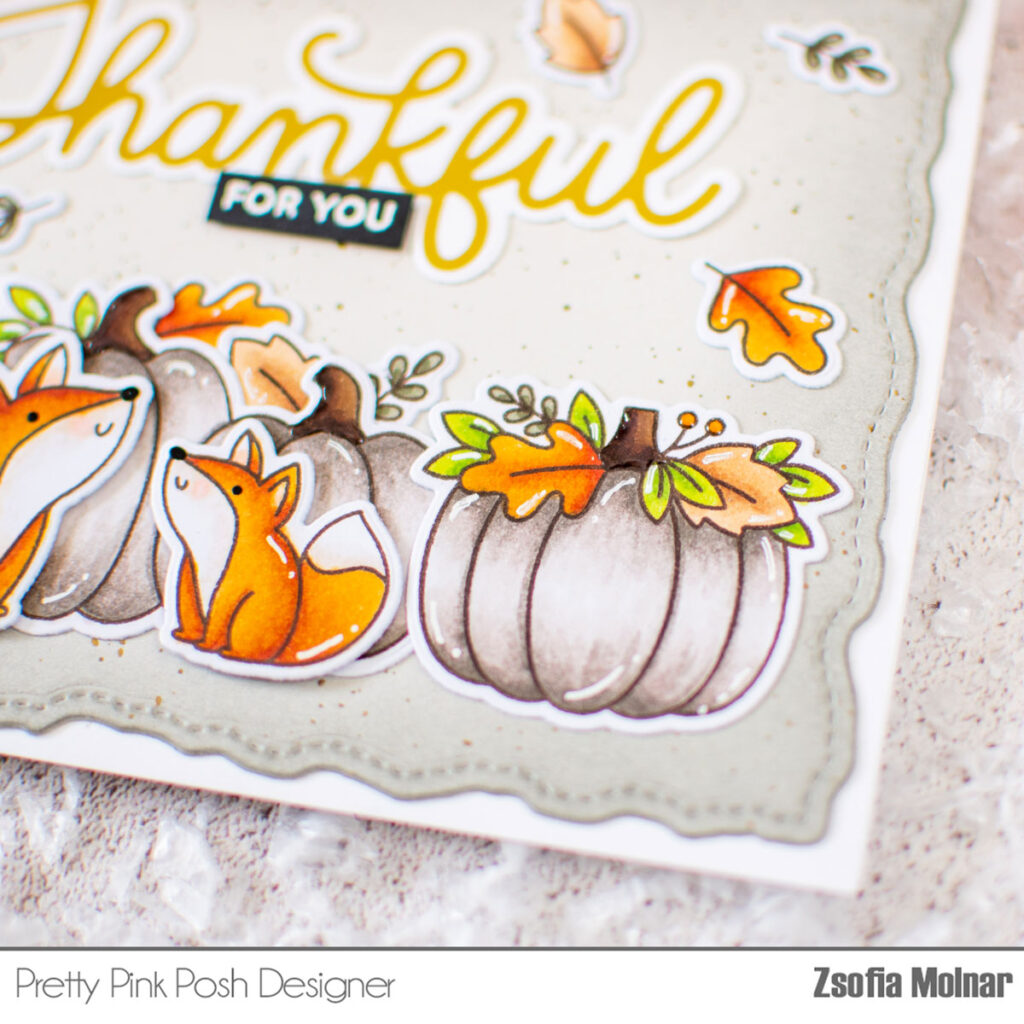
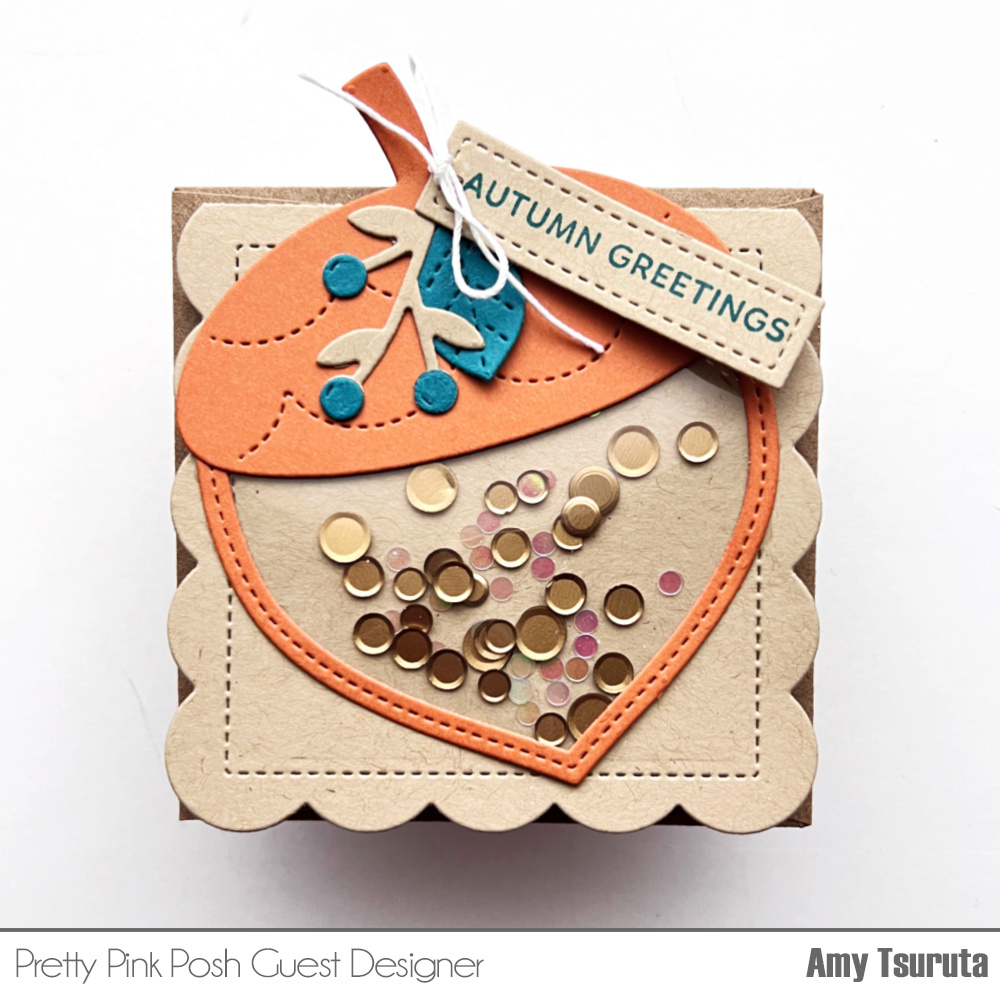
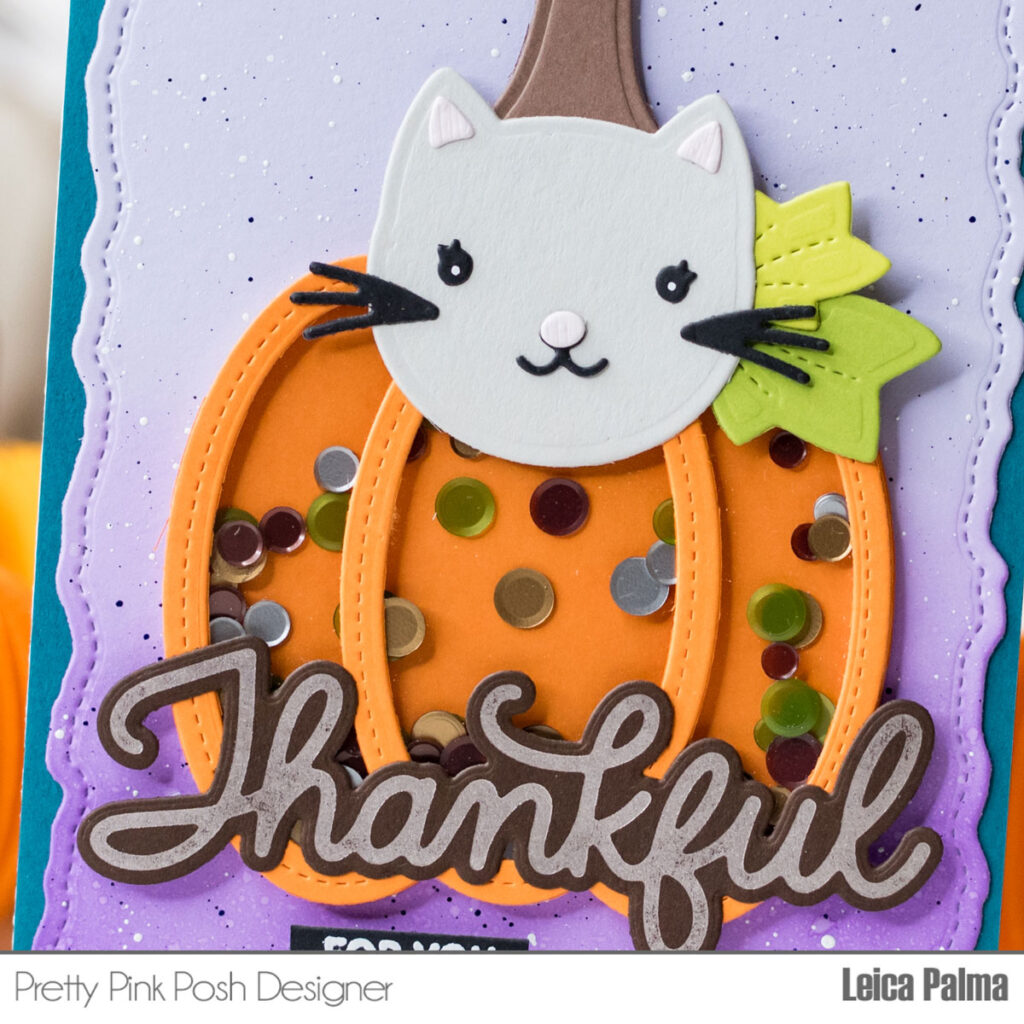
Now, the star of the show: the Pumpkin Shaker Die! I thought it’d be adorable to have a cat on top of the pumpkin. So, I mixed things up by using the fox head from the Fall Mug Additions and the whiskers from the Halloween Mug Additions dies. Super cute, right?
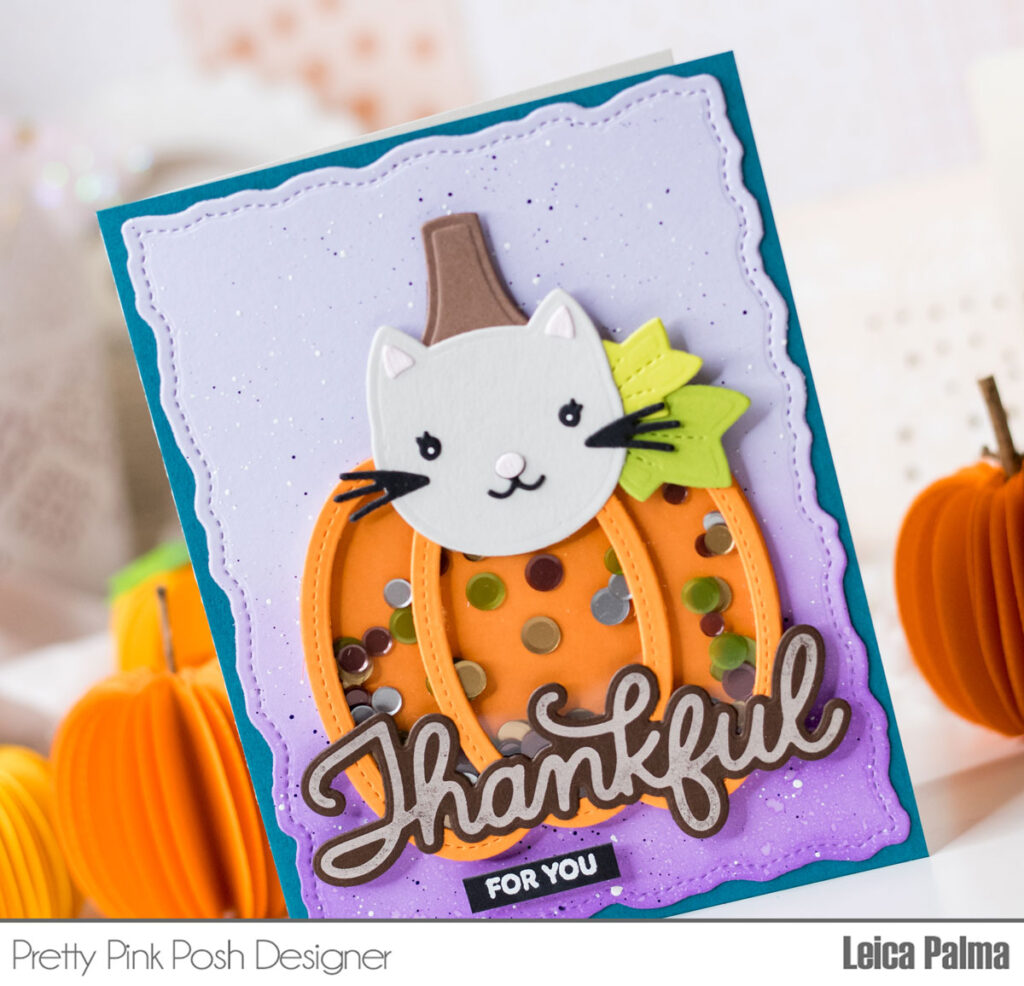
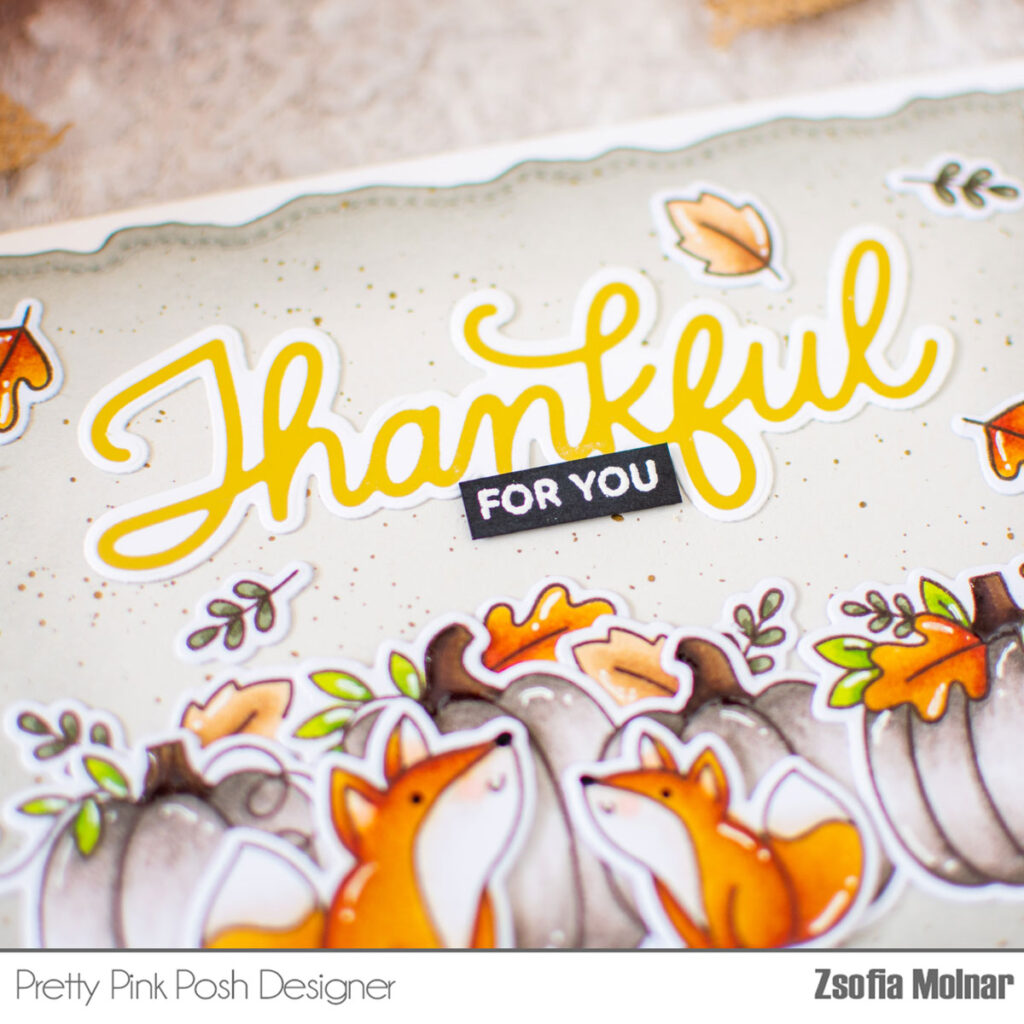
Adding a bit of elegance, I used brown cardstock to foil the Thankful Script. Then, I used the Thankful Shadow Die to make it stand out. I also heat embossed “for you” in white on a strip of black cardstock and put it just under the Thankful script. It added a cool touch!
For an extra pop, I glued teal cardstock behind the card panel. Lastly, I glued the card panel onto an A2-sized white card base.
That’s the story of my pumpkin shaker card with a sweet kitty twist. I pictured it in my mind, and I’m so glad it turned out cute. Thanks for spending time with me today! Have a fantastic day filled with creativity and smiles.