Creating A Pop-Up Card
Hi everyone, Eloise here and today I have a Pop-Up card for you guys, but this time it’s on the inside of the card. So it’s a little fun and unique for a Halloween Card! I’ll also be using the Storybook 1 Die along with a few other die sets and the new Trick or Treat Friends set for my card.


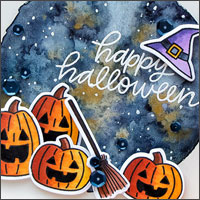
Next up I used Twisted Citron, Wilted Violet and Carved Pumpkin to ink blend each of the three pieces that came from inside the Storybook die. I then splattered them with some water, picked up the excess and dried it with a heat tool. I then stamped ‘Hi!’ from the Everyday Greetings stamp set onto the orange piece and then adhered down all three pieces inside the Storybook die. I then used some of the images I has previously cut and coloured and adhered them onto the front of my card. Then the front panel was complete. Now it was time to work on the pop-up feature on the inside.

For the pop up panel on the inside I first cut a piece of watercolour paper down to 3″ by 5 1/2″. I used the Stitched Borders 1 dies to cut the top at a curved edge. I used Twisted Citron and Mowed Lawn Distress Ink to colour the piece and then I scored it. On the long edge, I scored the piece at 2 3/4″ and on the short side I scored it at 2 3/4″ also. Then I folded the piece directly in half and cut a small triangle from the bottom to the centre score line, just so when I adhere and fold it into my card – it sits nice and flat.

I next added pieces of scor tape onto the flaps then pulled off the backers, lined up the score line on the pop up piece with the score line of the side folding card base, adhered down one side first, then folded the other side down with the flap facing up, then pressed the front of the card base down onto the flap. This ensures that everything will lay flat and work perfectly. Then I needed to work on my sentiment. I cut apart the ‘Happy Halloween’ sentiment from the Trick or Treat Friends set so it was in a line. I white heat embossed it on a strip of black cardstock that I cut each end at an angle on. Then I lined it up in my scoring tool and scored at the half way mark, which was 2 1/4″ for me. Then I flipped it over, added two small strips of acetate onto the back and then adhered it down onto my pop up grassy piece. This made the sentiment pop up as well as the hill piece.

To finish up, I adhered the rest of my images onto the inside of the card, then added coordinating colours of sequins to the front of my card.
Sequins used: 4mm Lavender Moon, 4mm Lime Sorbet, 4mm Tangerine, 6mm Amethyst, 6mm Shamrock, 6mm Pumpkin


 Hello, friends!


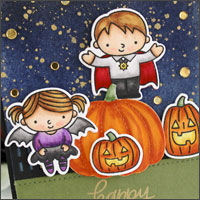
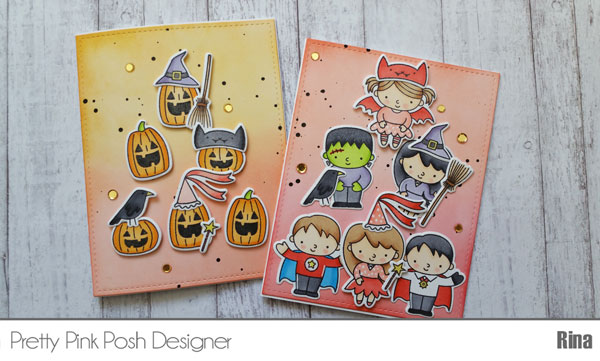 Hi everyone! Rina here with a two Halloween cards using the
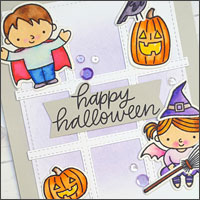
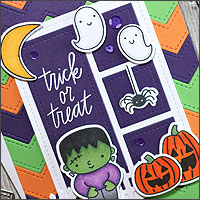
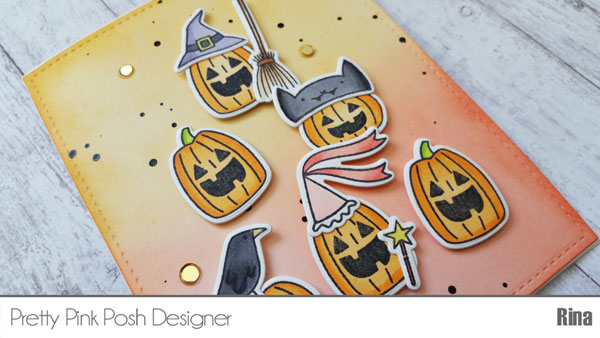 These two cards are very image heavy so I opted for quick coloring with copic markers. I used two blending colors for the images and three colors for the hair. I also made sure to use one set of colors consistent for all images of that color. For example, I used the same green combination YGO1 and YG25 for both the pumpkin stems and Frankenstein’s face.
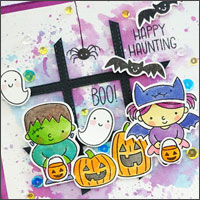
 I wanted to keep the background simple since the card would be filled with images. I opted for a light distressed ink background with Distress Ink and made two panels. One panel used
 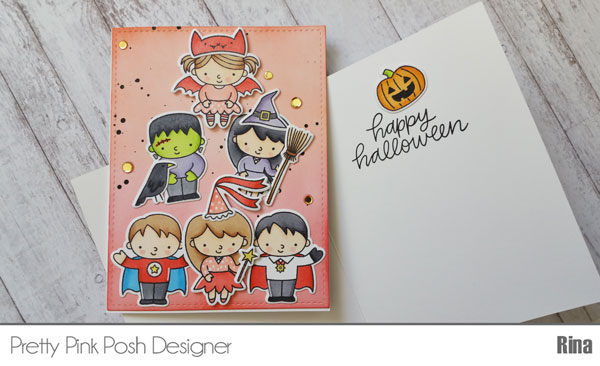 To assemble the card I adhered the accessory images to the main stamps first with Scotch Quick Dry Adhesive. When this was done, I then adhered the images to the distressed ink panels in a triangle formation. To add more sparkle, I added a scattering of Pretty Pink Posh