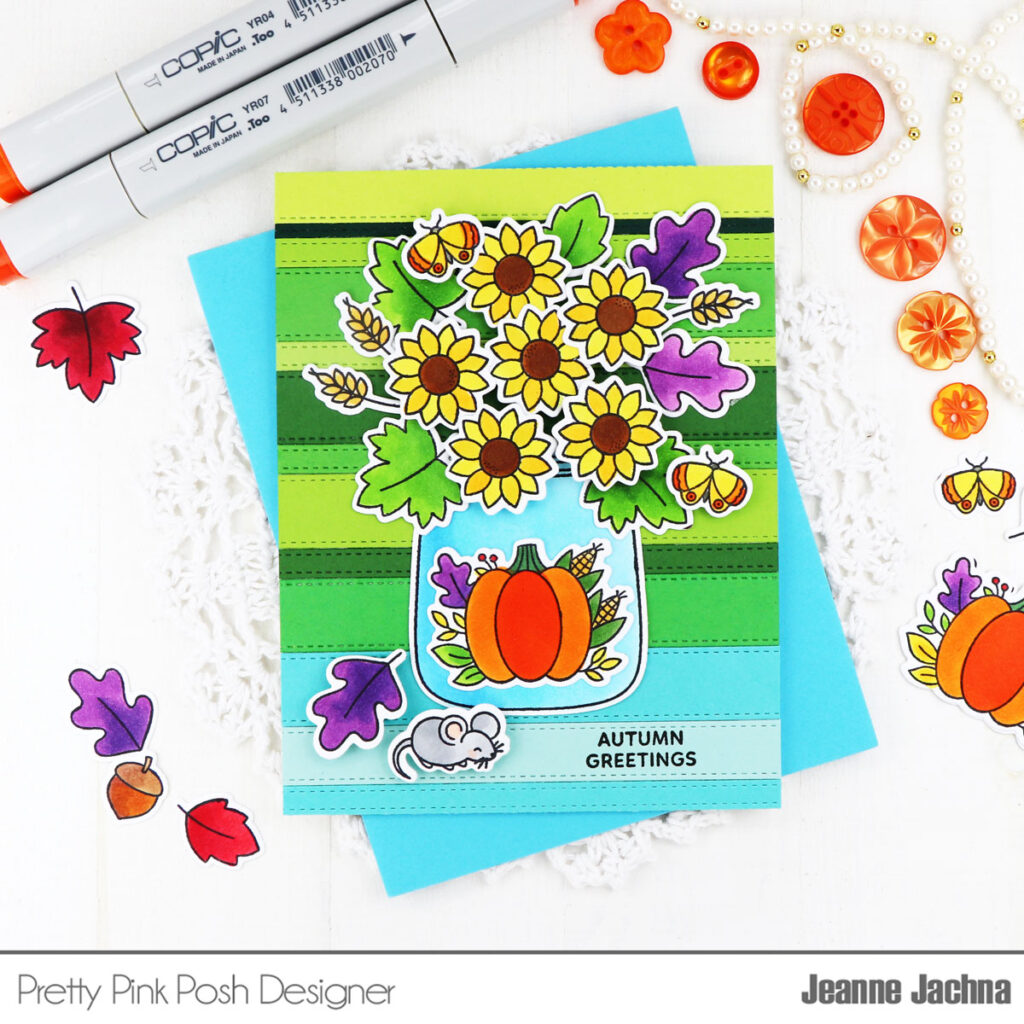
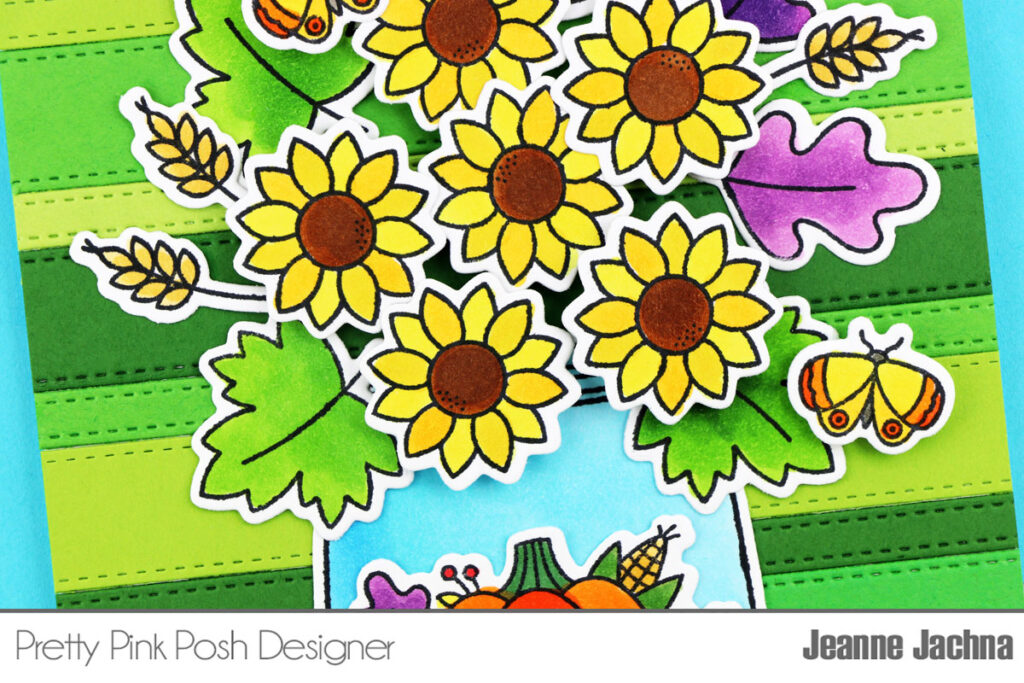
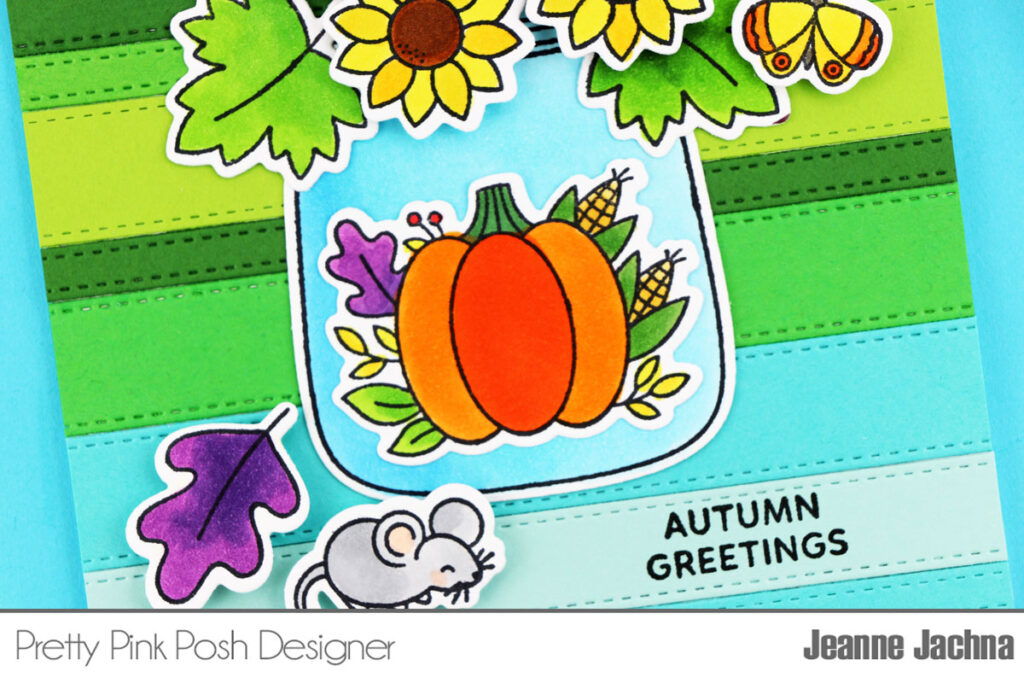
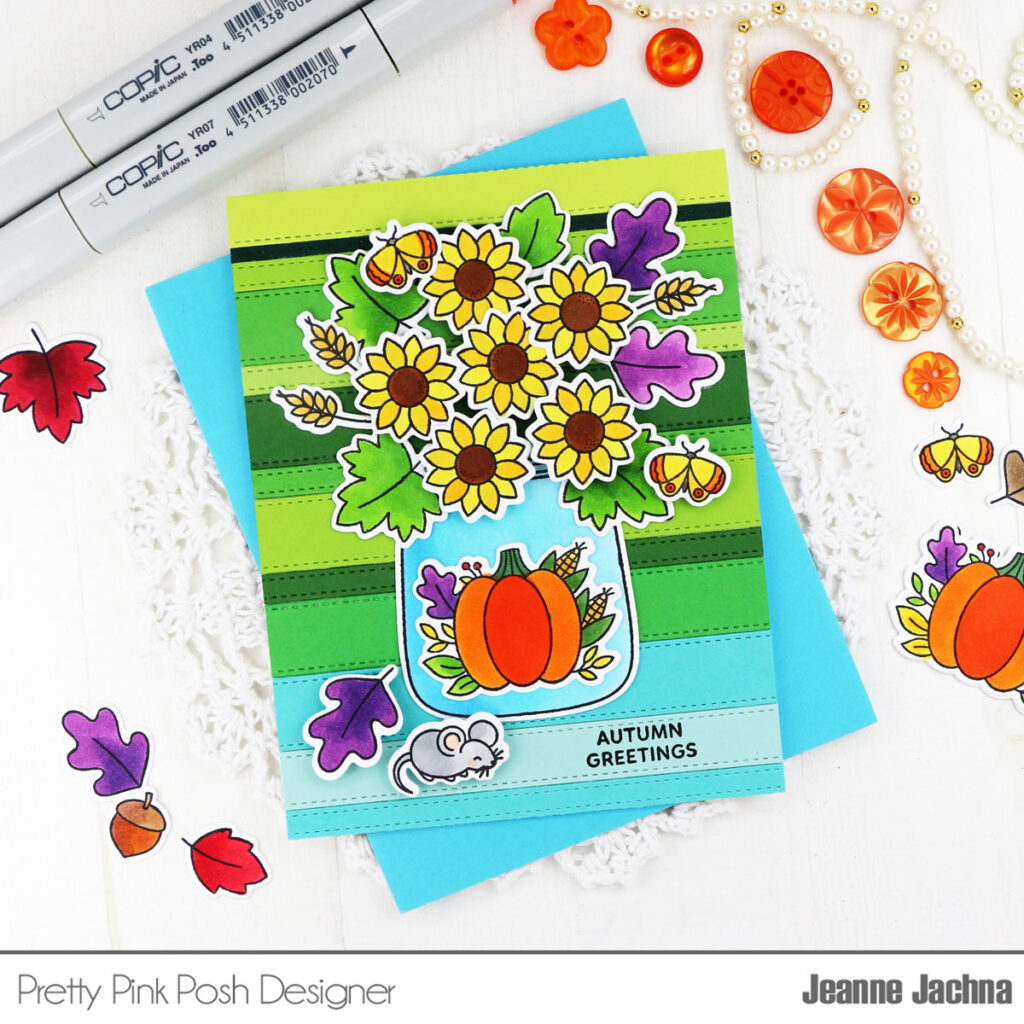
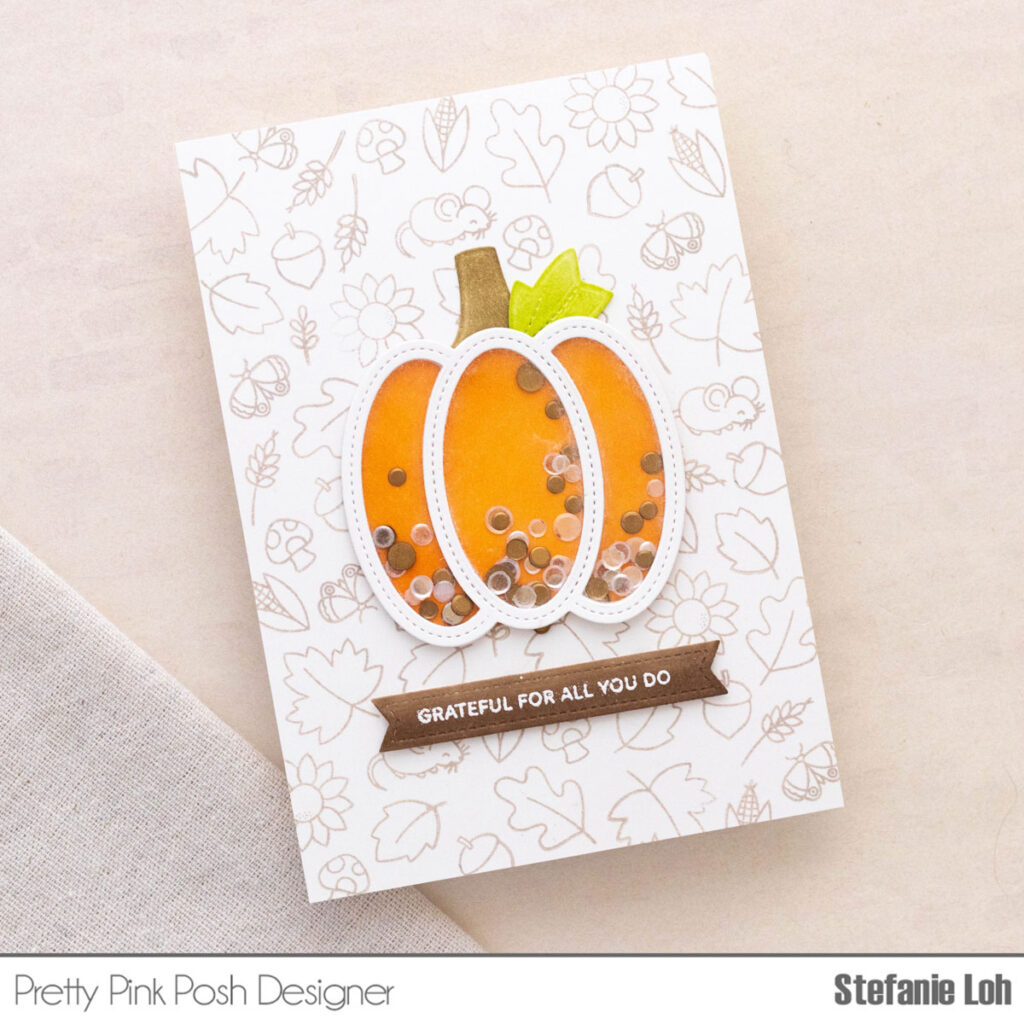
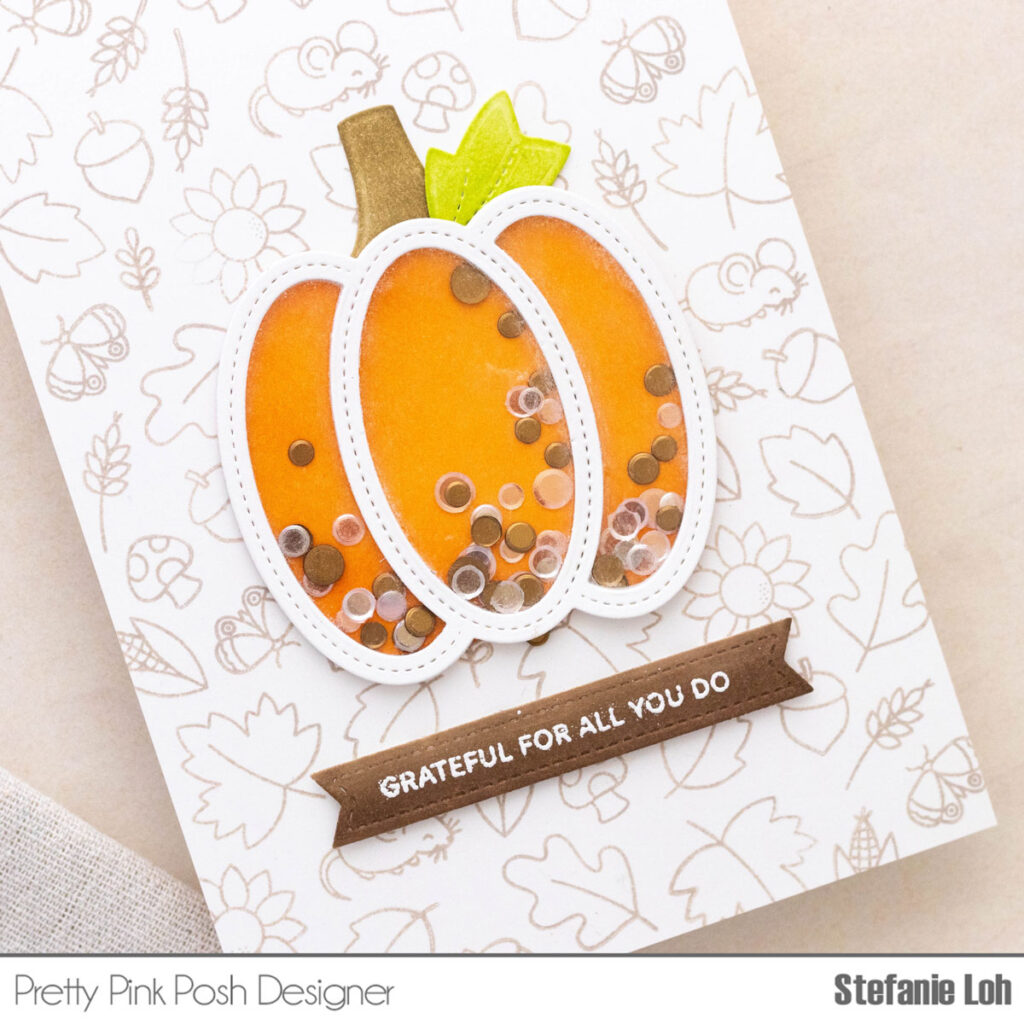
Autumn Theme Week: Day 6

Hi everyone! This is Sindhu with you today and I’m very excited to share with you a couple of fall themed cards. One is full of colour and the other is almost monochromatic.
Save 15% on all items in our Thanksgiving section during theme week!
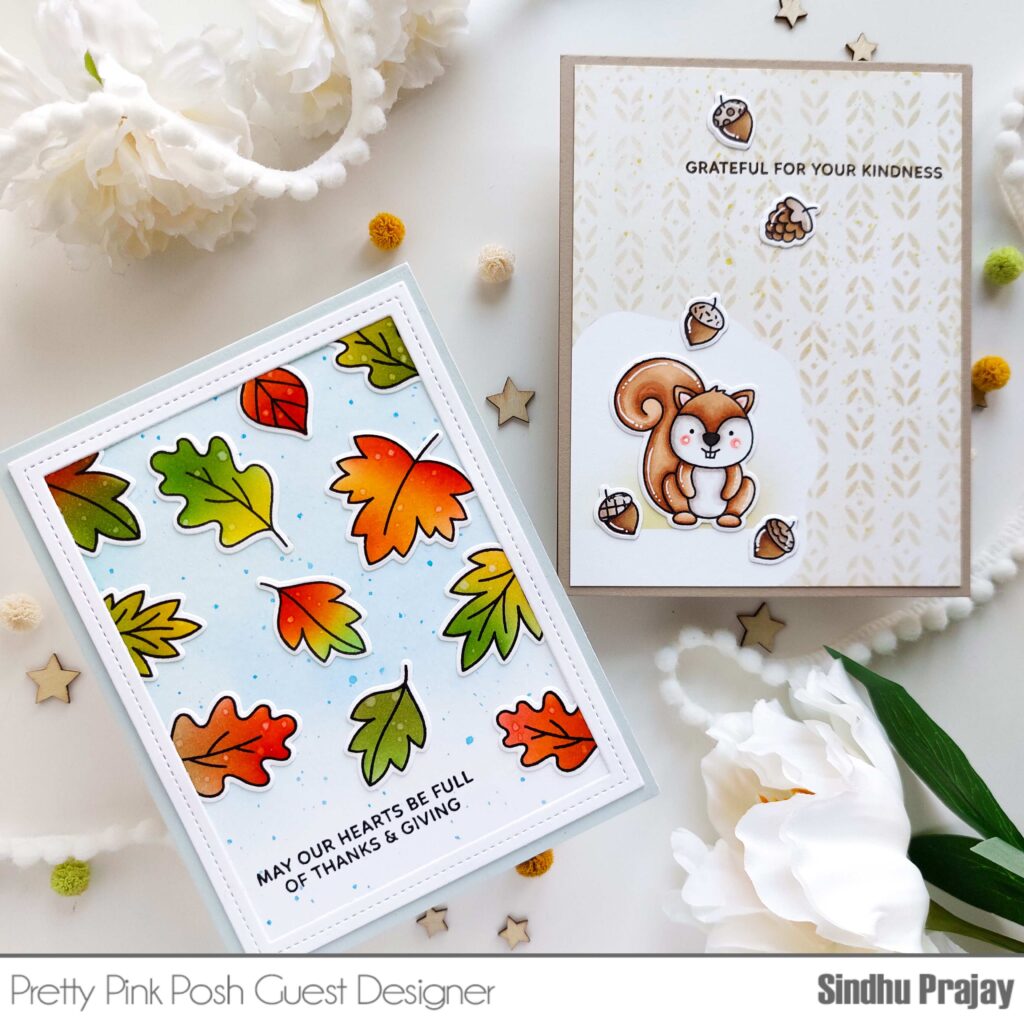
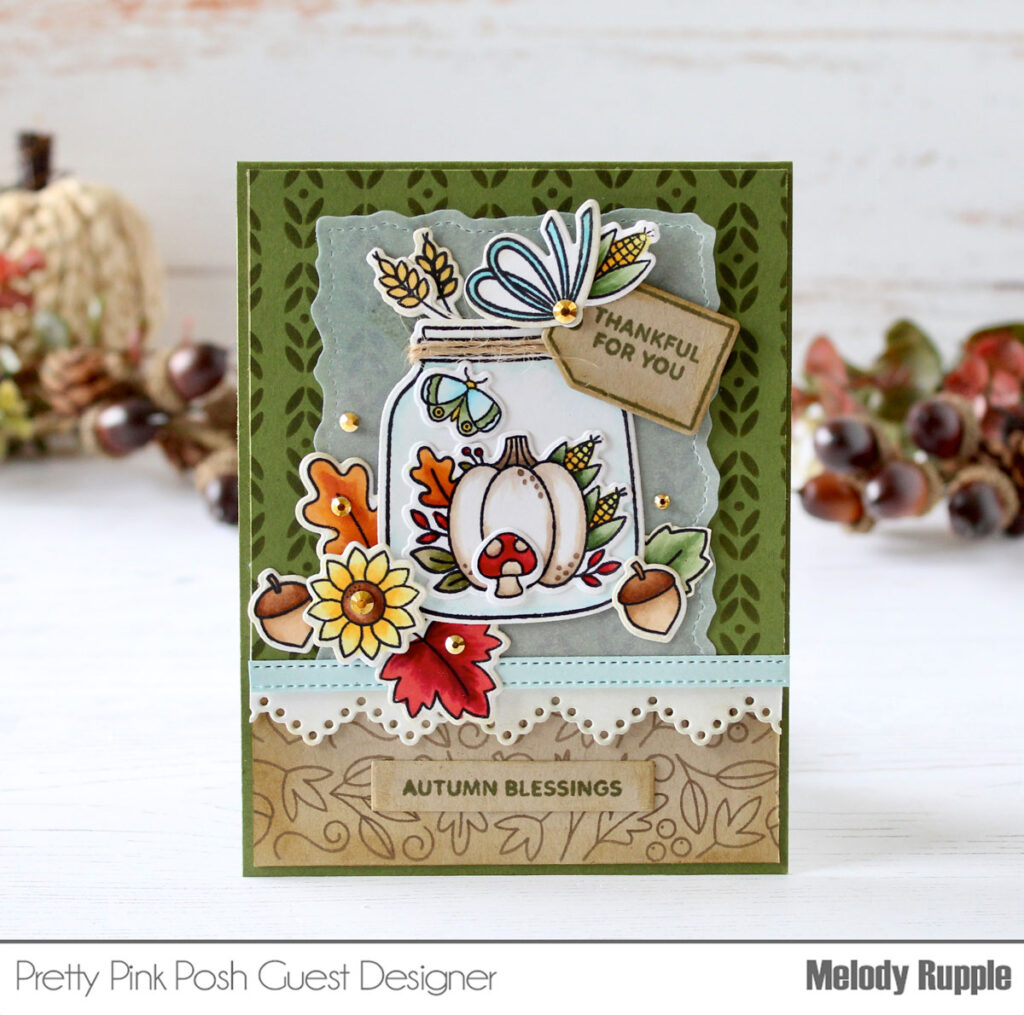
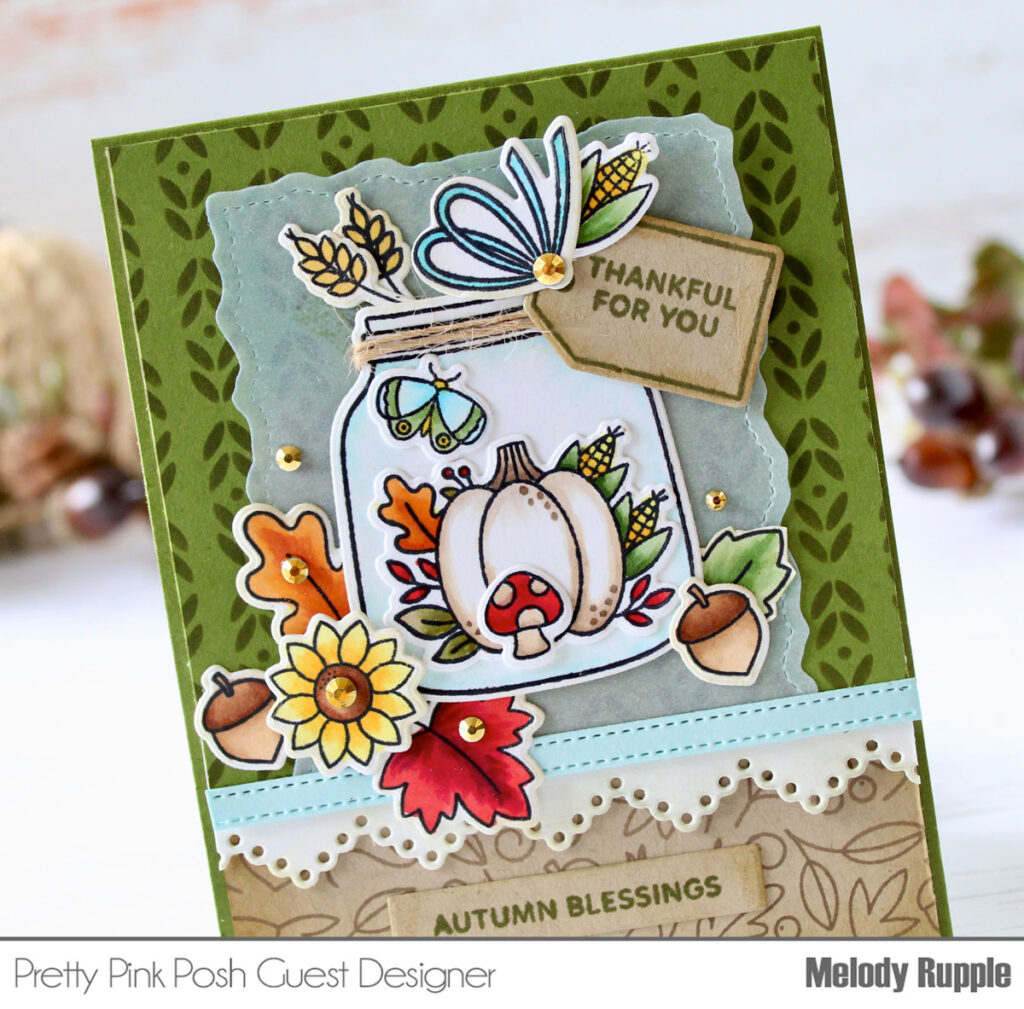
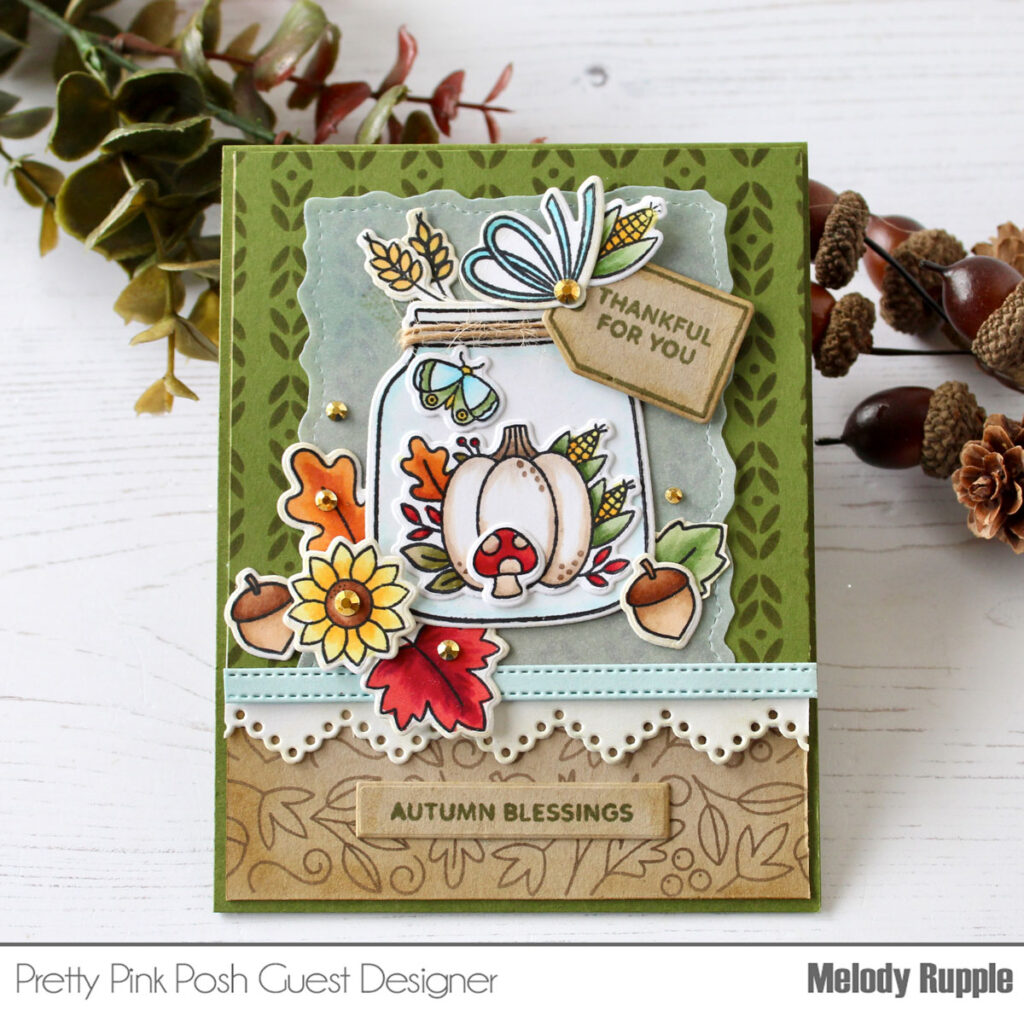
Here is the list of supplies I used to make card 1-
- Deco Leaves Stencil
- Sentiments strips- Fall stamp set
- Cozy Fall critters stamp set and coordinating dies
I started by creating a mask that I cut free hand. Instead of a perfect circle, I went for a wonky, fun look. I adhered the mask at the bottom left of the white cardstock panel that measures 4”x5.25”. Then, I lightly ink blended the whole panel with a soft kraft coloured ink. On it, I stenciled the background using the same ink with a heavier hand to achieve a slightly darker shade.
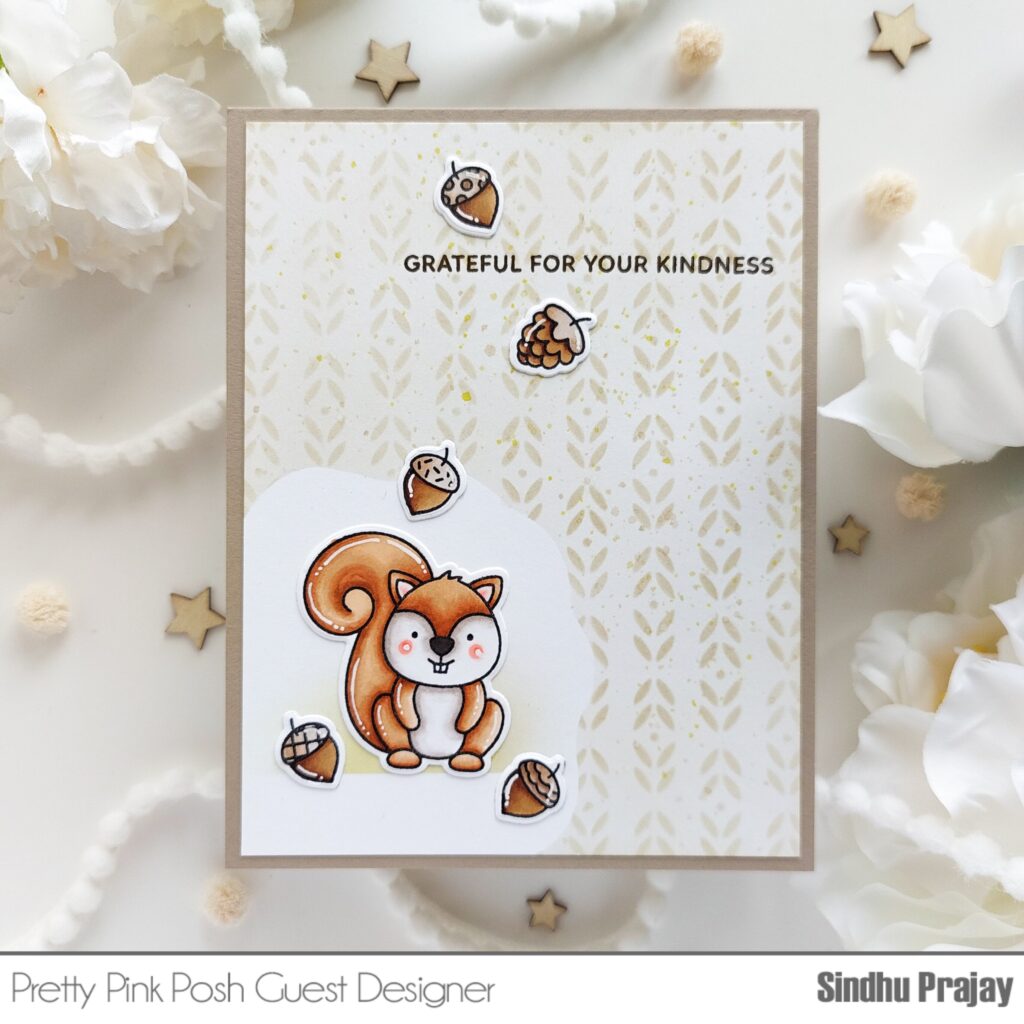
Once I was happy with the background, I splattered kraft and green inks on it and removed the initially placed mask. On a piece of Neenah Solar White 110lb cardstock, I stamped the images and coloured them with Copic markers. I used coordinating dies to cut them out.
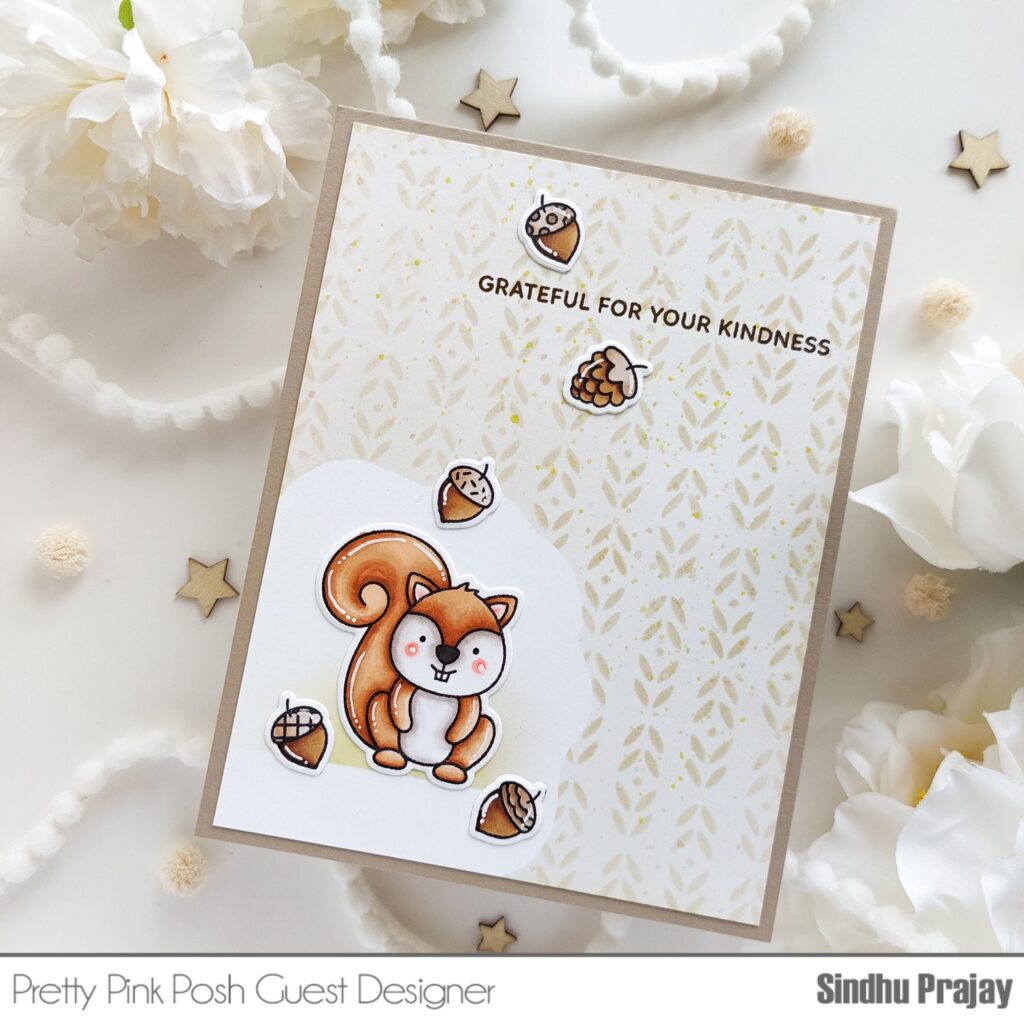
Copic colours used-
- Squirrel- E35, E33, E31, E30. For the white part- W3, W1, W00. Cheeks- R22, R20, R000.
- Acorns- E59, E57, E55 and caps of the Acorn- E41, E40.
Glued the images in place and stamped the sentiment. Glued the finished panel on a kraft card base.
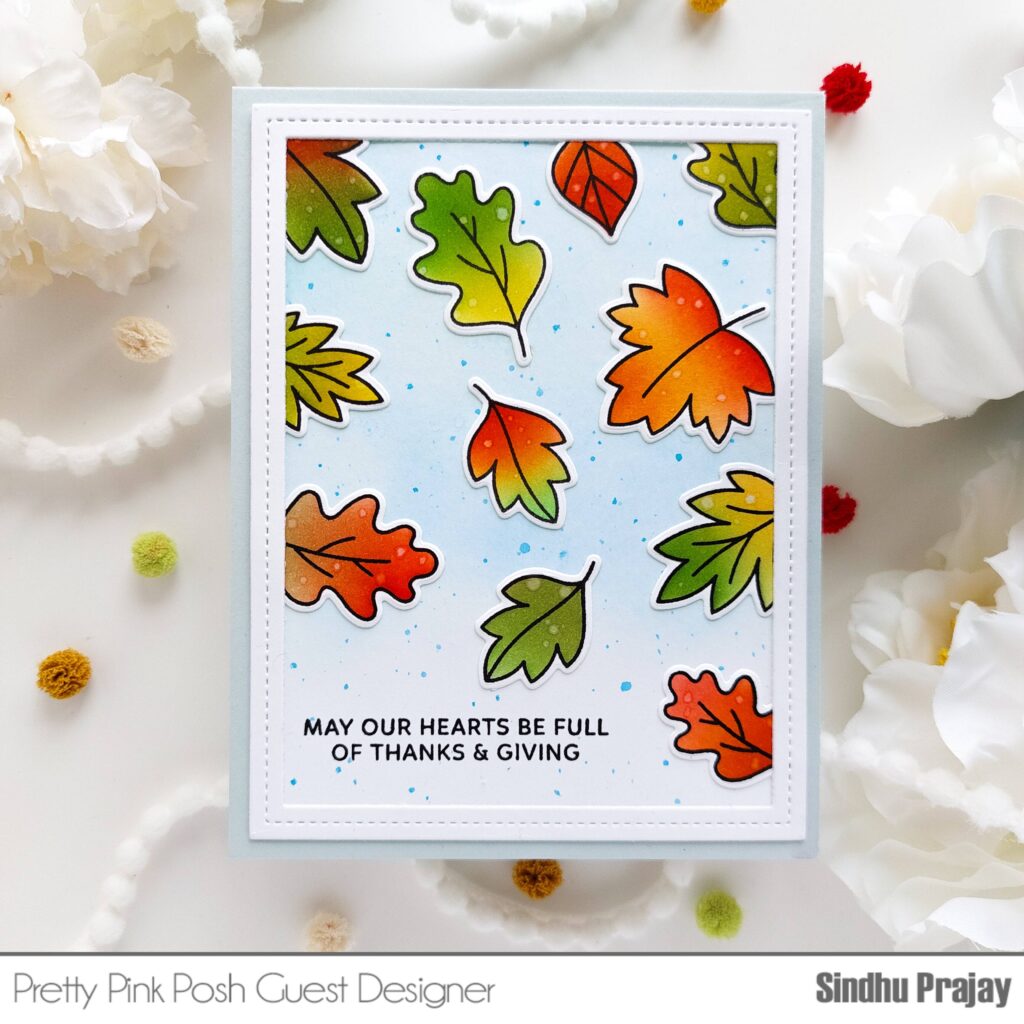
Products used for card 2-
- Falling Leaves stamp set and coordinating dies
- Falling Leaves Stencil
- Nature essentials Dies (For the stitched frame)
- Sentiments strips- Fall stamp set
To make this card, I started by stamping several leaves on a piece of Neenah Solar White 110lb cardstock and used the coordinating stencil to colour them. It was SO easy and lots of fun! I used dye inks to ink blend inside the leaves and I chose shades of green, red, orange and yellow.
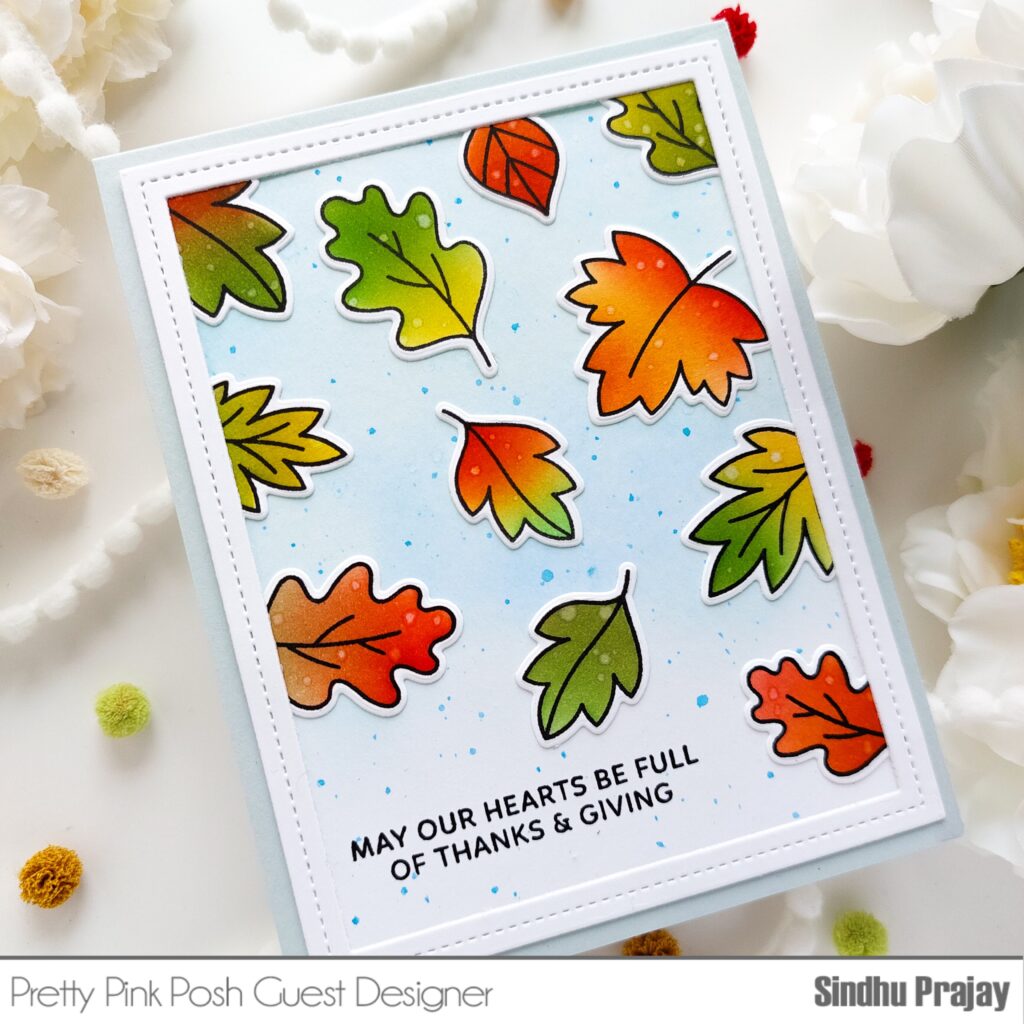
I used coordinating dies to cut them out. Then, on a piece of white cardstock measuring 4”×5.25”, I lightly ink blended a soft blue on the background. I also splattered blue ink on it. Once dry, I adhered the leaves and cut off the parts that were hanging off the edges. Then, glued the frame and finished the card with a pastel blue card base.
I hope you like the cards and are inspired to create some fall themed cards.